You can add property manager/project manager(PM) accounts and assign them to community or commercial projects.
Add PMs
Log in to the cloud platform with your account.
Click Users on the left column.
Click New PM.
Enter the PM’s name and email address.
The email is the username for the PM to log in to the SmartPlus PM Web Portal.
Select the language. All information sent to the PM will be displayed in the language.
Optionally, you can configure Monthly Password Update Reminder and Email Two-Factor Authorization for Login.
Monthly Password Update Reminder: Disabled by default. If enabled, PMs will see a prompt every month reminding them to change their SmartPlus login passwords for security when they log in to the cloud platform.
Email Two-Factor Authorization for Login: Disabled by default. If enabled, they need to fill in a verification code for logging in to the cloud platform.
Check the project(s) the PM will manage and move them to the right box.
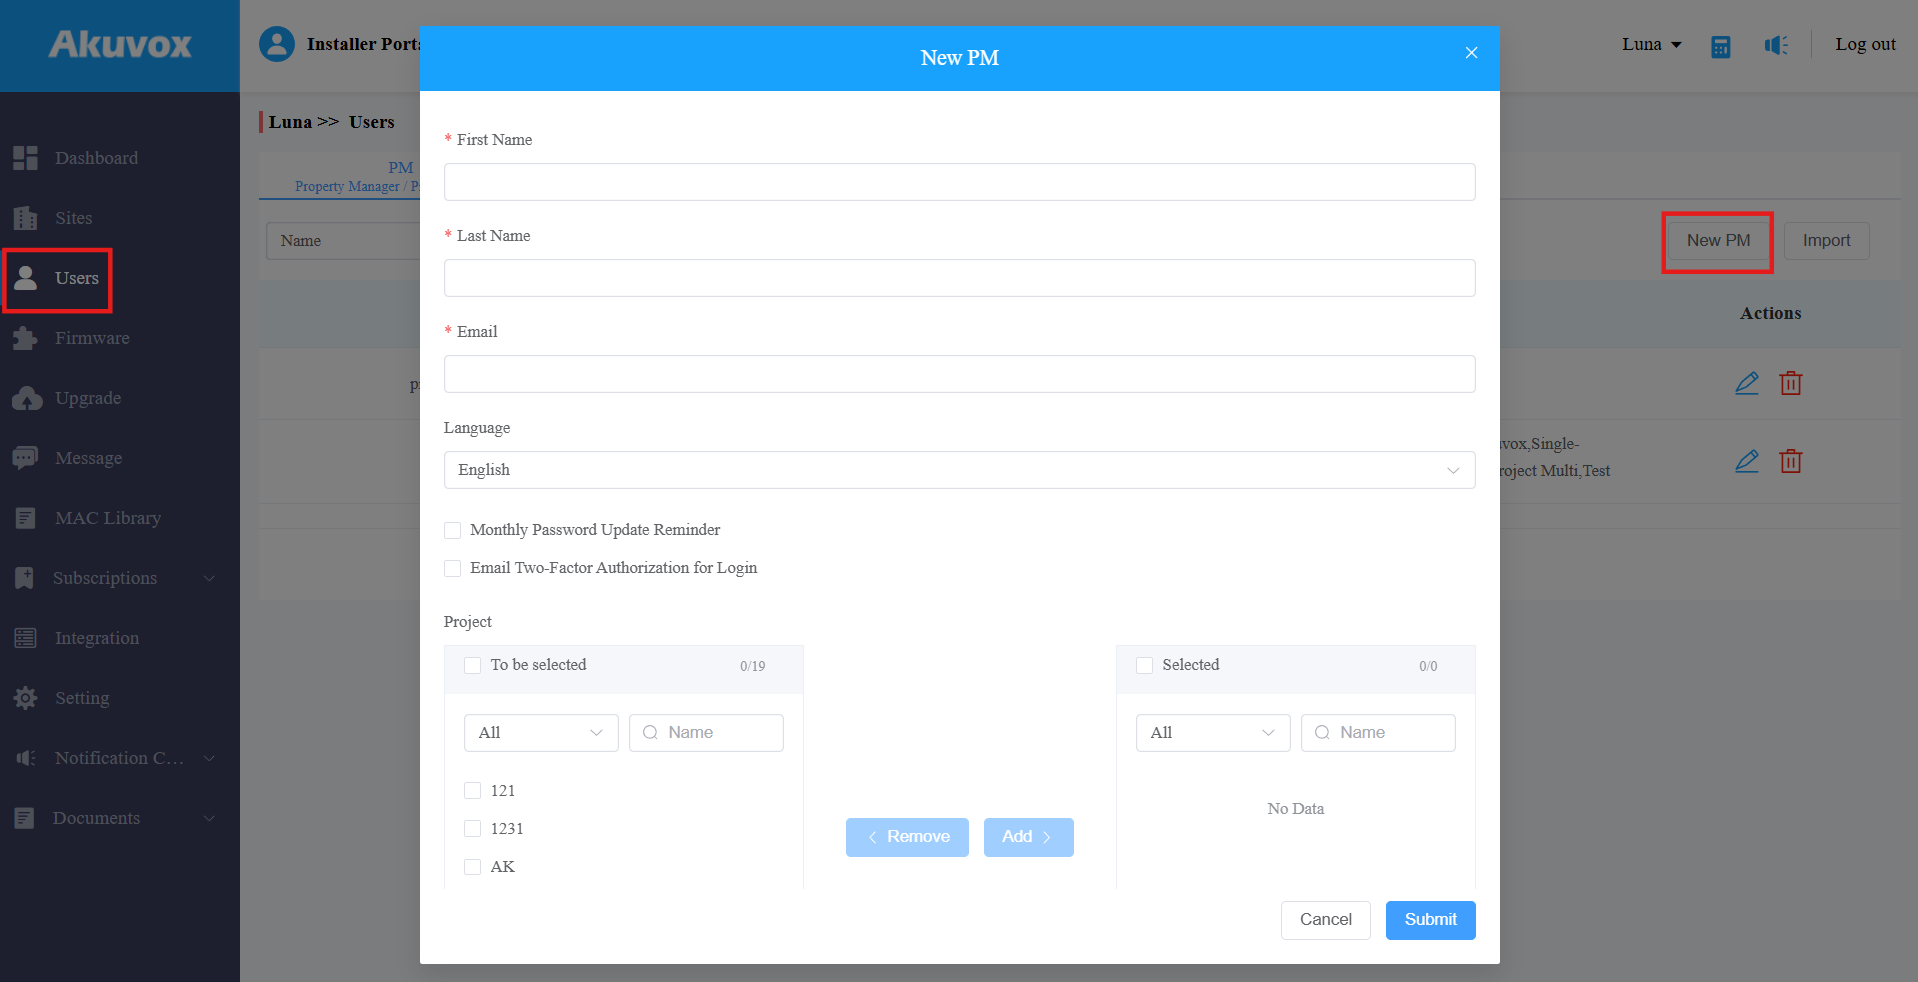
Click Submit.
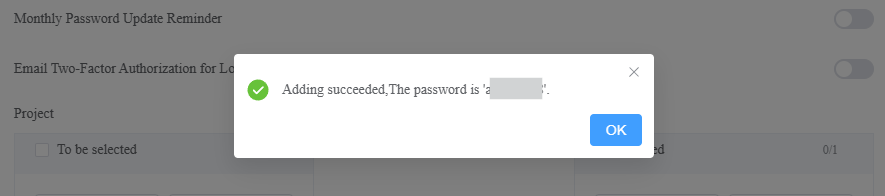
After adding the PM, you can send them their account password.
Set up PM Permissions
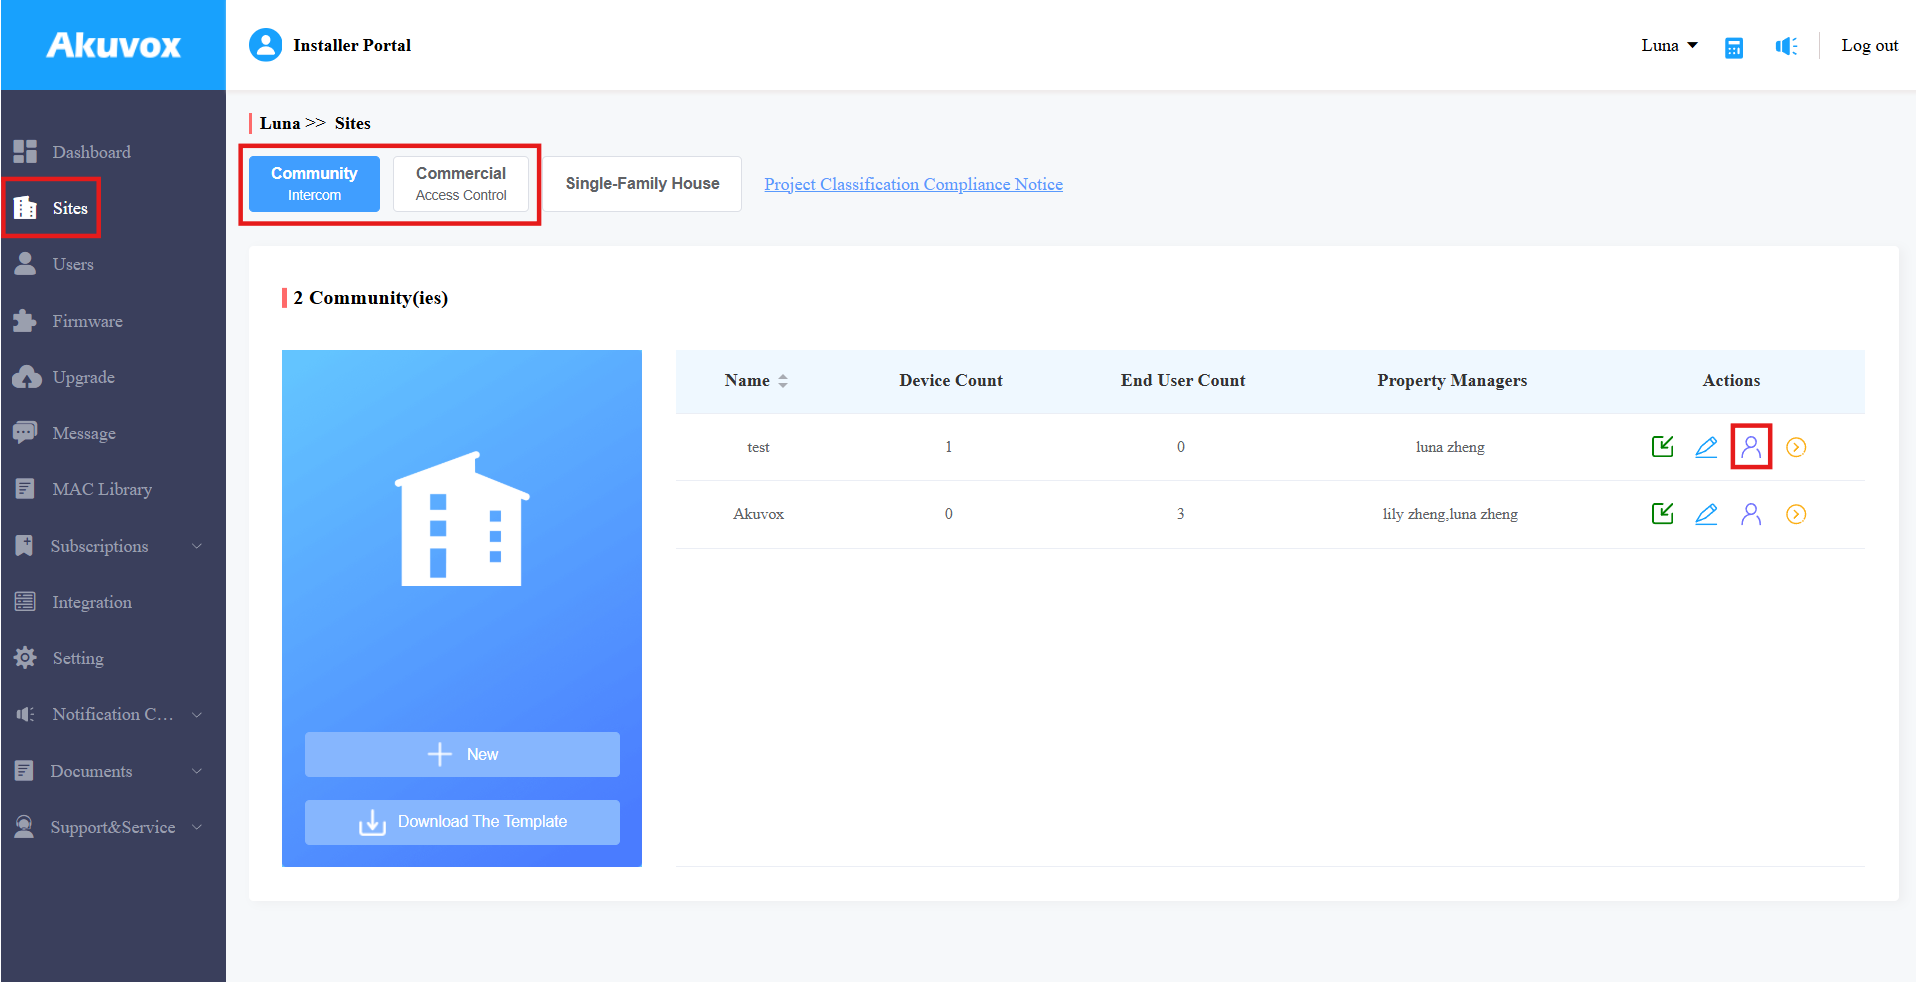
On the Sites interface, you can assign PM to specific projects and set their permissions.
For Community Projects
Click
 of the desired project.
Click Edit to add or remove PMs.
Toggle the App switch to enable/disable the PM to use the SmartPlus App(This service requires payment).
Toggle the Landline Service switch to enable/disable the PM to use the landline service(This service requires payment).
Click Reset Password to reset the SmartPlus App login password.
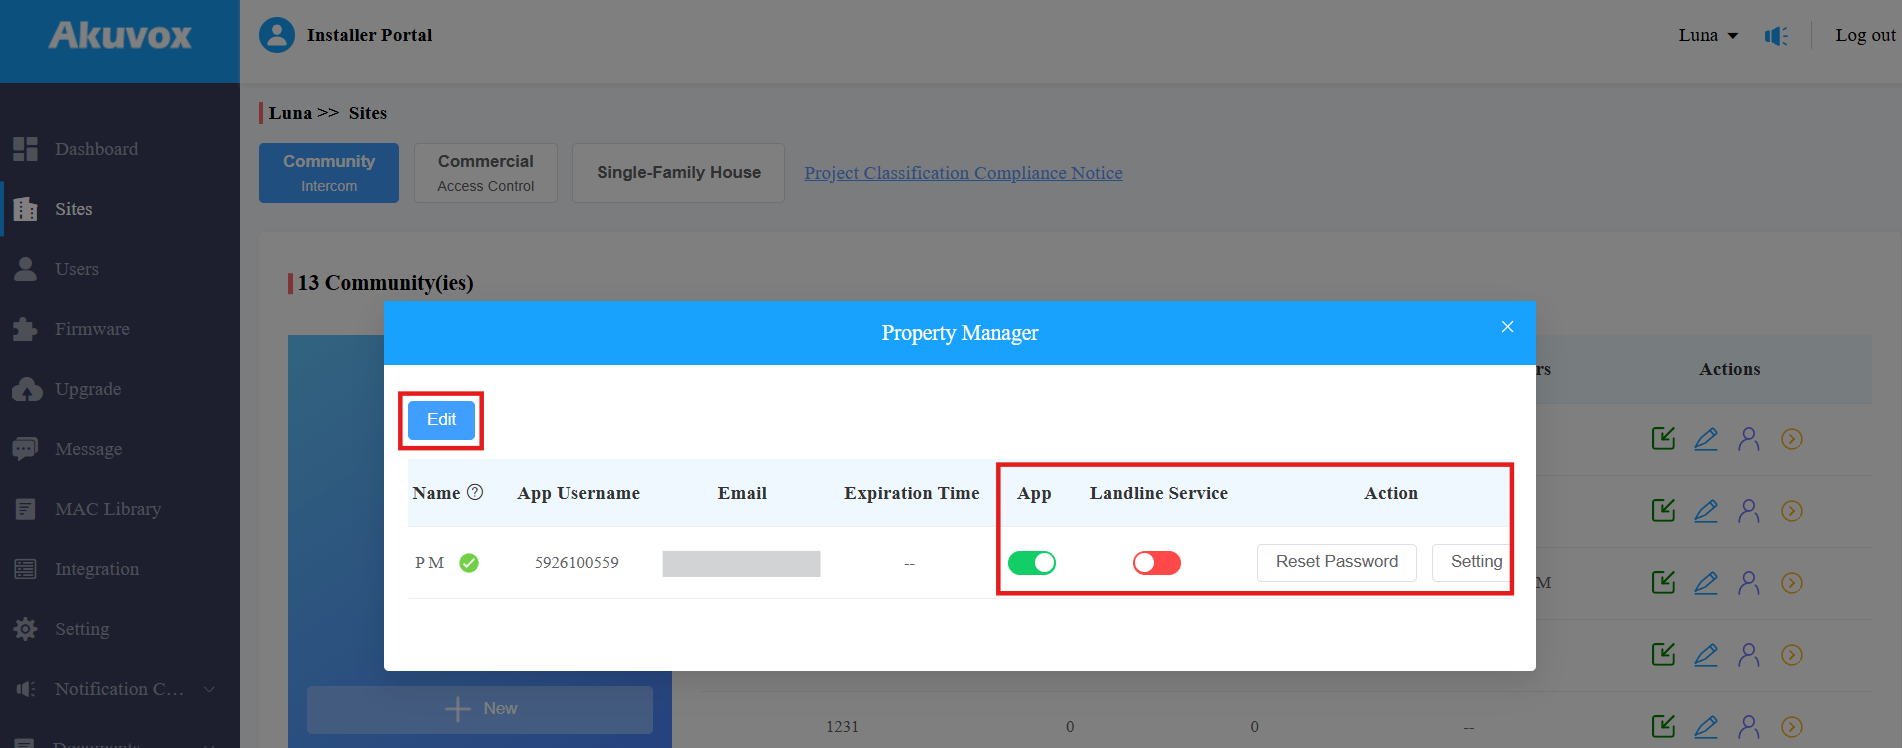
Click Setting to further set up permissions:
Delete Account Permission: Enabled by default; allows the PM to delete resident accounts on the SmartPlus platform.
Log Access Control: Enabled by default; allows access to door logs and call histories on the SmartPlus platform.
Allow PM to View Call & Door Log Images: Enabled by default; allows viewing the images captured during calls or door openings.
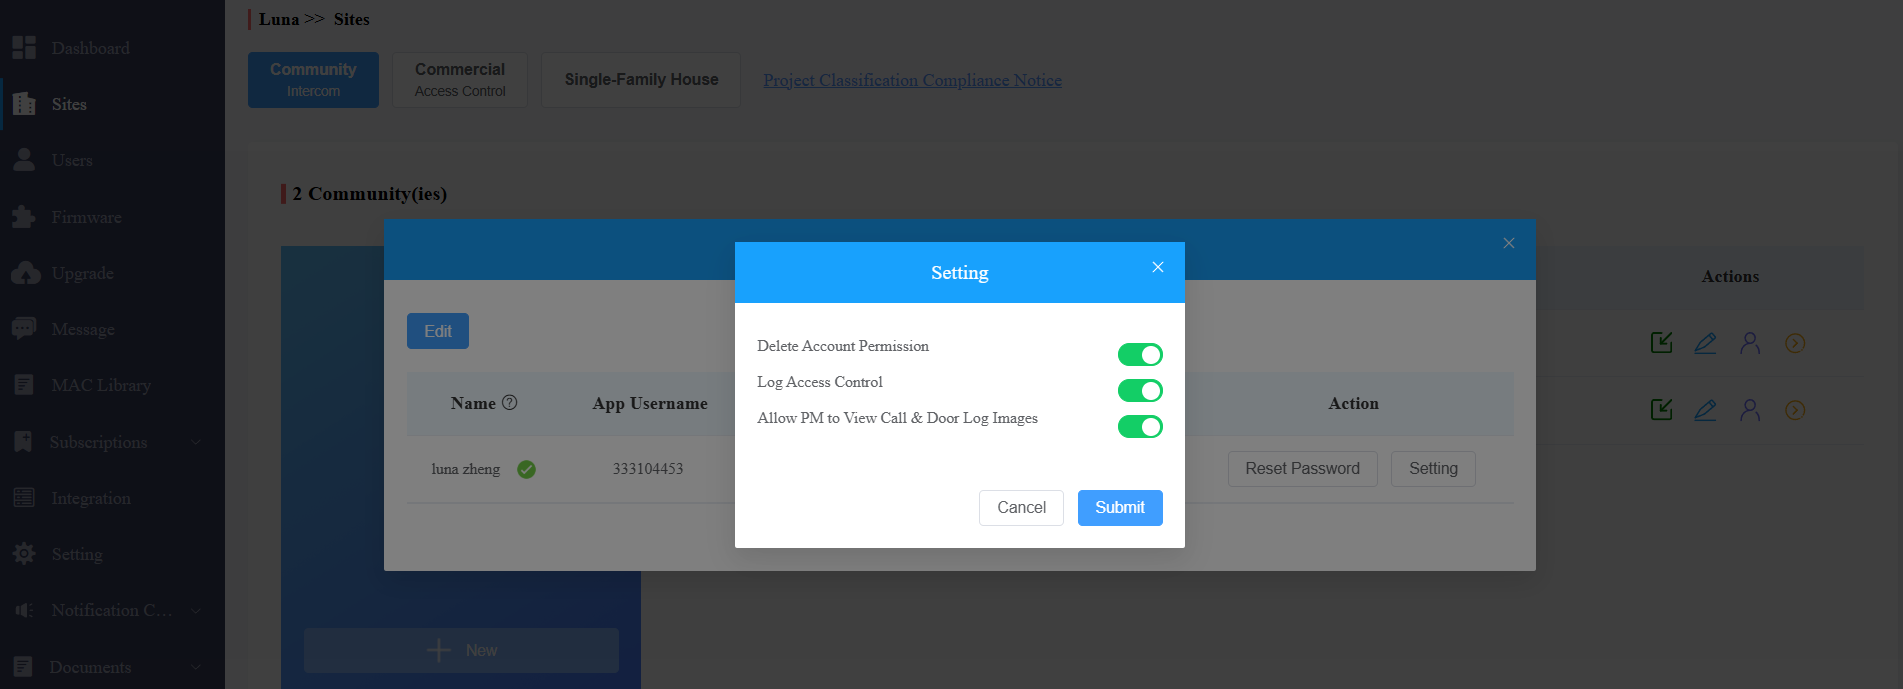
Click Submit.
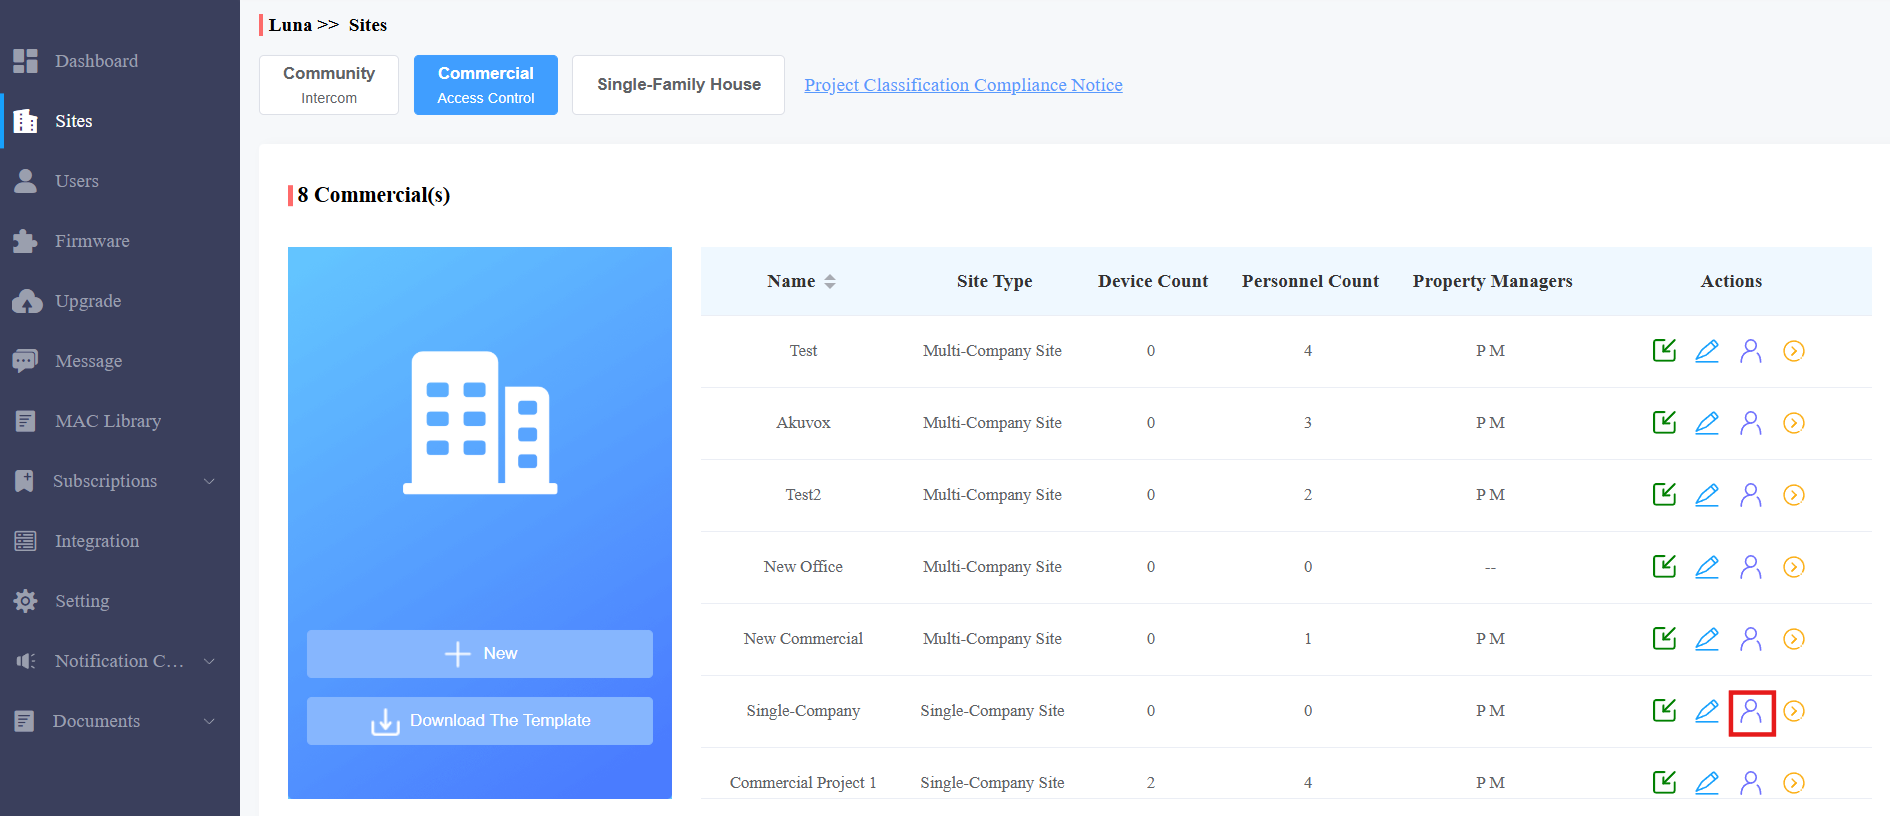
For Commercial Projects
Click
of the desired project.
2. Select PMs from the dropdown menu.
3. Set whether the PM can pay for the cloud service. This option only displays when you have permission to pay.
4. Set whether to send the service expiration and renewal emails to the PM. Disabled by default.
5. Set whether to send a notification to the PM when the device is offline.
6. Set whether to send a notification to the PM when the SIM card data of devices with LTE function exceeds a limit.
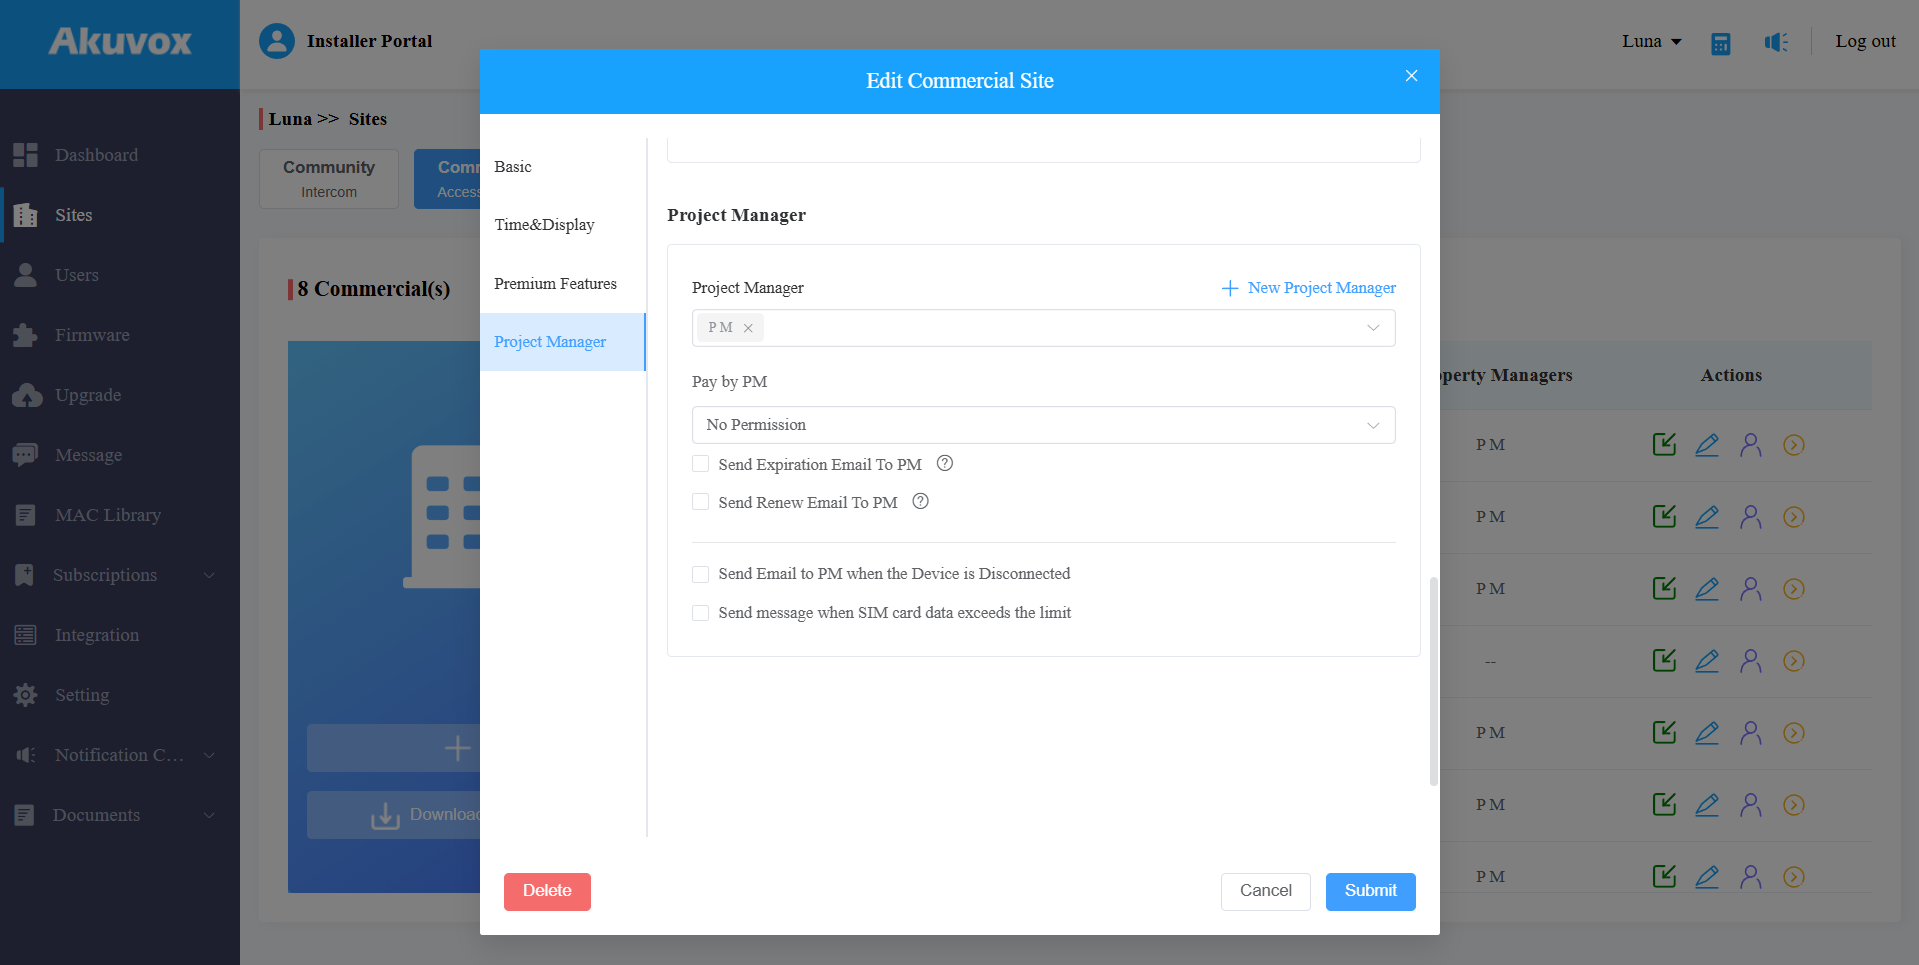
7. Submit the setting.