Akuvox SmartPlus App User Guide V5.1
- 24 Apr 2024
- Print
- DarkLight
- PDF
Akuvox SmartPlus App User Guide V5.1
- Updated on 24 Apr 2024
- Print
- DarkLight
- PDF
Article Summary
Share feedback
Thanks for sharing your feedback!
Version: 5.1 | Date: February.2024
This guide is applied to version 6.71.3 for iOS, and 6.71.0.3 for Android.
Akuvox SmartPlus is a mobile App that can work with SmartPlus Cloud service and smart intercom products. With the App, you can see and talk to visitors, open doors, monitor, and issue virtual keys from your smartphones, making door access management simpler and more convenient.
Get Started
Before You Use
To make login and setup as smooth as possible, have the following items available:
- An internet connection through a Wi-Fi network or cellular data service through a carrier.
- SmartPlus App. You can download and install this App on the Google Play Store or App Store.
- Your SmartPlus account.
To obtain an account, you need to provide an Email address and/or a phone number (if you'd like to log in or reset your password via SMS) to your service provider. You then will receive an Email from Akuvox with your username, password, and a QR code for login. Or you can enter your phone number and log in with a verification code sent via SMS.
Login
With the account, you can sign in to the SmartPlus App and access services such as receiving calls, opening doors, monitoring, checking door logs and histories, issuing virtual keys, and more, with your phone. Before logging in, select End User.

To sign in to the App, do one of the following:
- Login with username
- Choose your area in the lower-right corner
- Enter your username and password, and tap Login.

- Login via SMS
- The area code will be chosen automatically in the lower-right corner. You can also select it manually and the information can be found in the Welcome Email.
- Enter your mobile number, tap the box before Mobile Number to choose the right area code, and tap Obtain Code.
- You will soon get a text message with a verification code.
- Enter the code in the corresponding box and tap Login.

- Login with QR code
- Use your PC or other devices to open the welcome Email sent from Akuvox, and you will see a QR code.
If you open the Email with your phone, save the code to the photo album. - Open SmartPlus, tap the scan icon
 in the upper left corner, and the QR code scanner will be opened.
 - Center the QR code in the camera view and you can log into the App automatically. Or you can choose the Code picture from your album to log into.
- Use your PC or other devices to open the welcome Email sent from Akuvox, and you will see a QR code.
 in the upper left corner, and the QR code scanner will be opened.
If you forget the password, see Forgot Password.
Note
- For multi-tenant building users, there will be a PIN setting page showing up. You can set a PIN for door access, or tap Skip to set up a PIN later or whenever you need.
.jpg)
Link
You can manage multiple sites through one app account. Go to Me > [your name].

To link sites, do one of the following:
- Link with Username

- Link via SMS

- Link with QR Code
Tap the scan icon .
.

After linking sites, you can choose the desired site on the Home page by tapping .png) .
.

Note
- This function is not compatible with Home Automation. If Home Automation is enabled by your installer, Link Site option will not appear.
- One app account can link to no more than 5 sites.
- Email or mobile numbers must be filled in to link other accounts.
- Cannot link accounts under one family master account or accounts that have linked multiple sites.
- The mobile number area codes of the main account and the linked account should be the same.
- The account dis-links sites after it is removed or reset.
- The activation and expiration status of different sites are independent.
- When an account is inactivated or expires, you cannot select the site and receive messages.
Door Access
There are various access control options such as NFC, Bluetooth, PIN code, temp keys, face recognition, and remote open door. You can choose any of them based on your habits and preferences.
Check Door Status
You can check whether the door is closed or not on the App home screen in case users forget to close the door. So far, only R20A with firmware version 320.30.10.116 and above supports this feature.
.png) : Open
: Open  : Close
When multiple relays are set up, you can check them by clicking  .
.


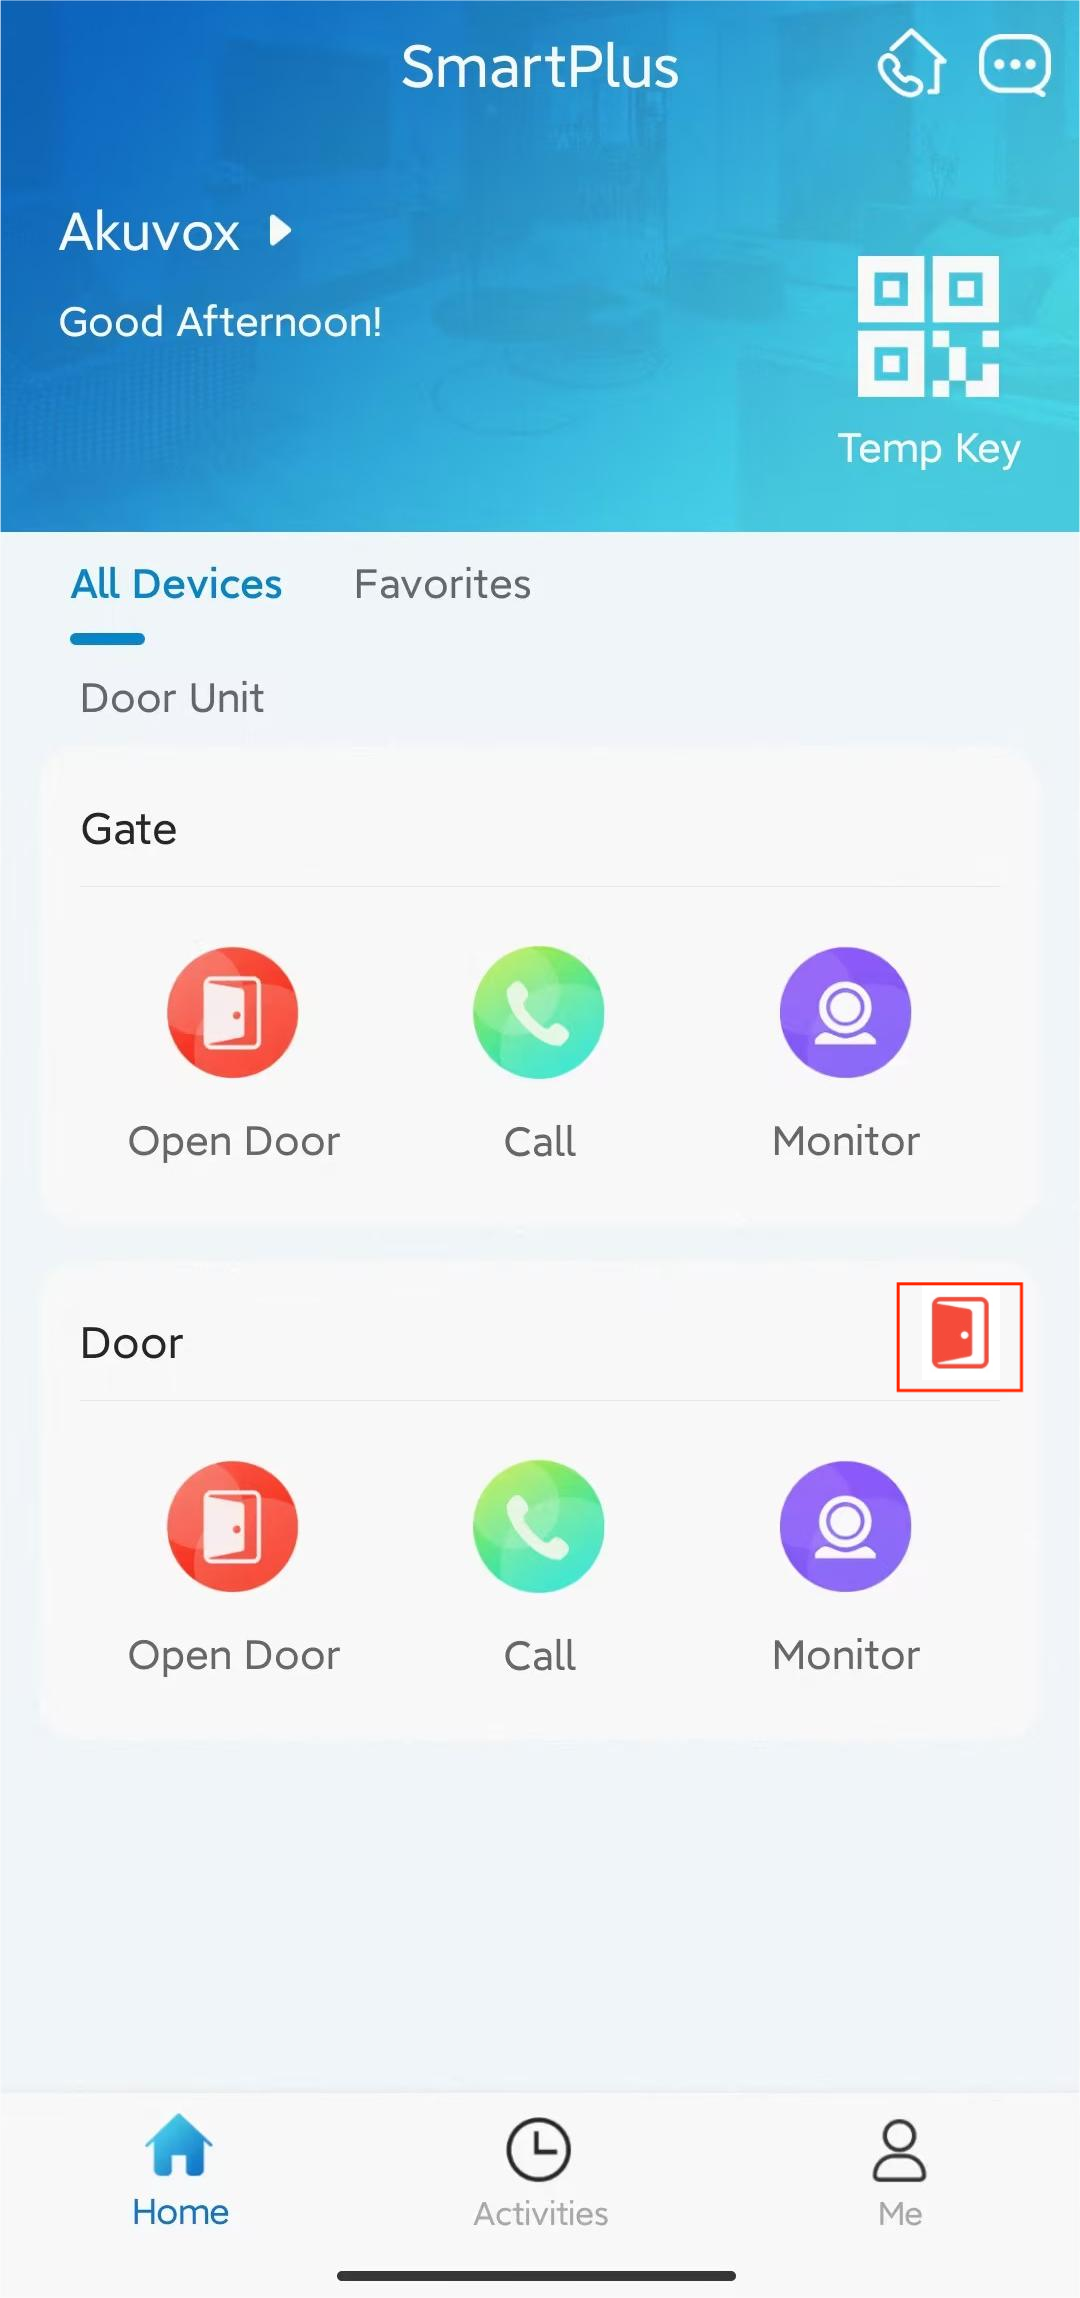
Remote Opening
You can open the door directly for your visitors just by tapping the specified button.
- Tap Home.
- Choose the device, and tap Open Door.
- Select the relay (the door) in the list.
.png)
Opening Door During a Call
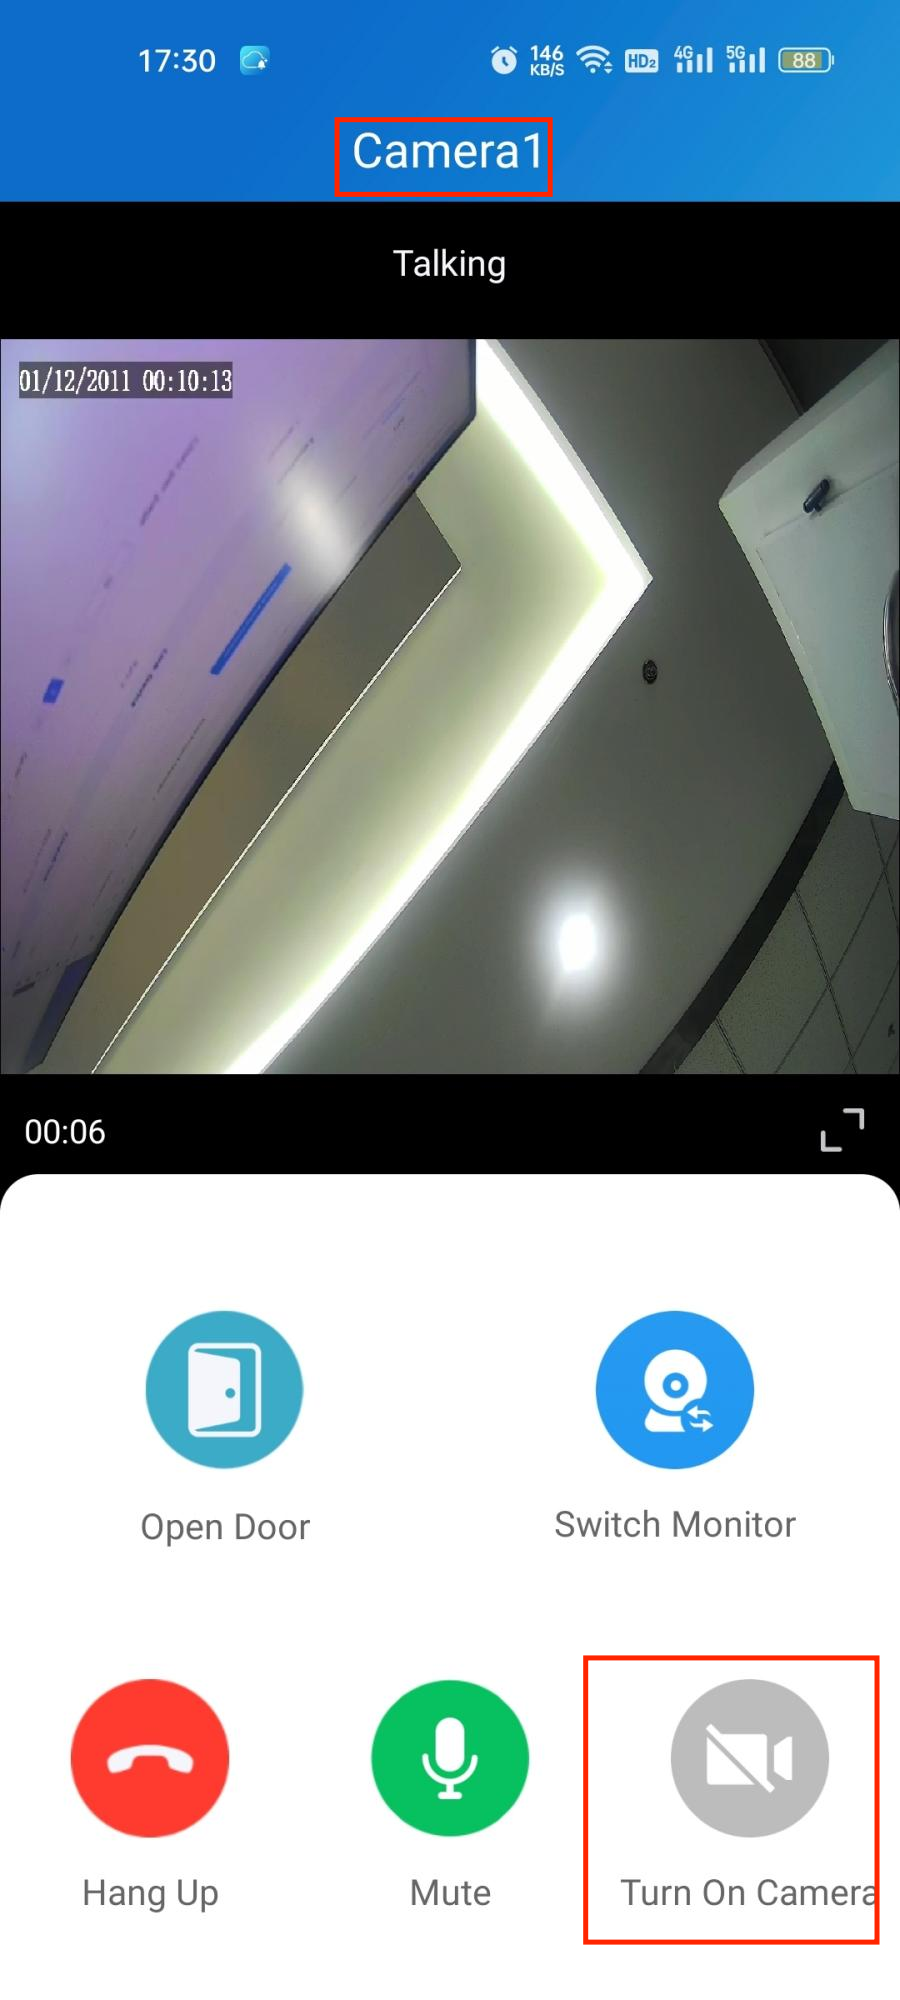
You can make or receive a call. During a call, you can open the door for visitors, mute the microphone, and hang up the call.
To open the door when answering a call, do the following:
- Tap Open Door on the talking page.
- Select the relay from the list.


What else you can do on the talking page:
- Tap Mute to silence your microphone while on the call.
- Tap Hang Up to end the call.
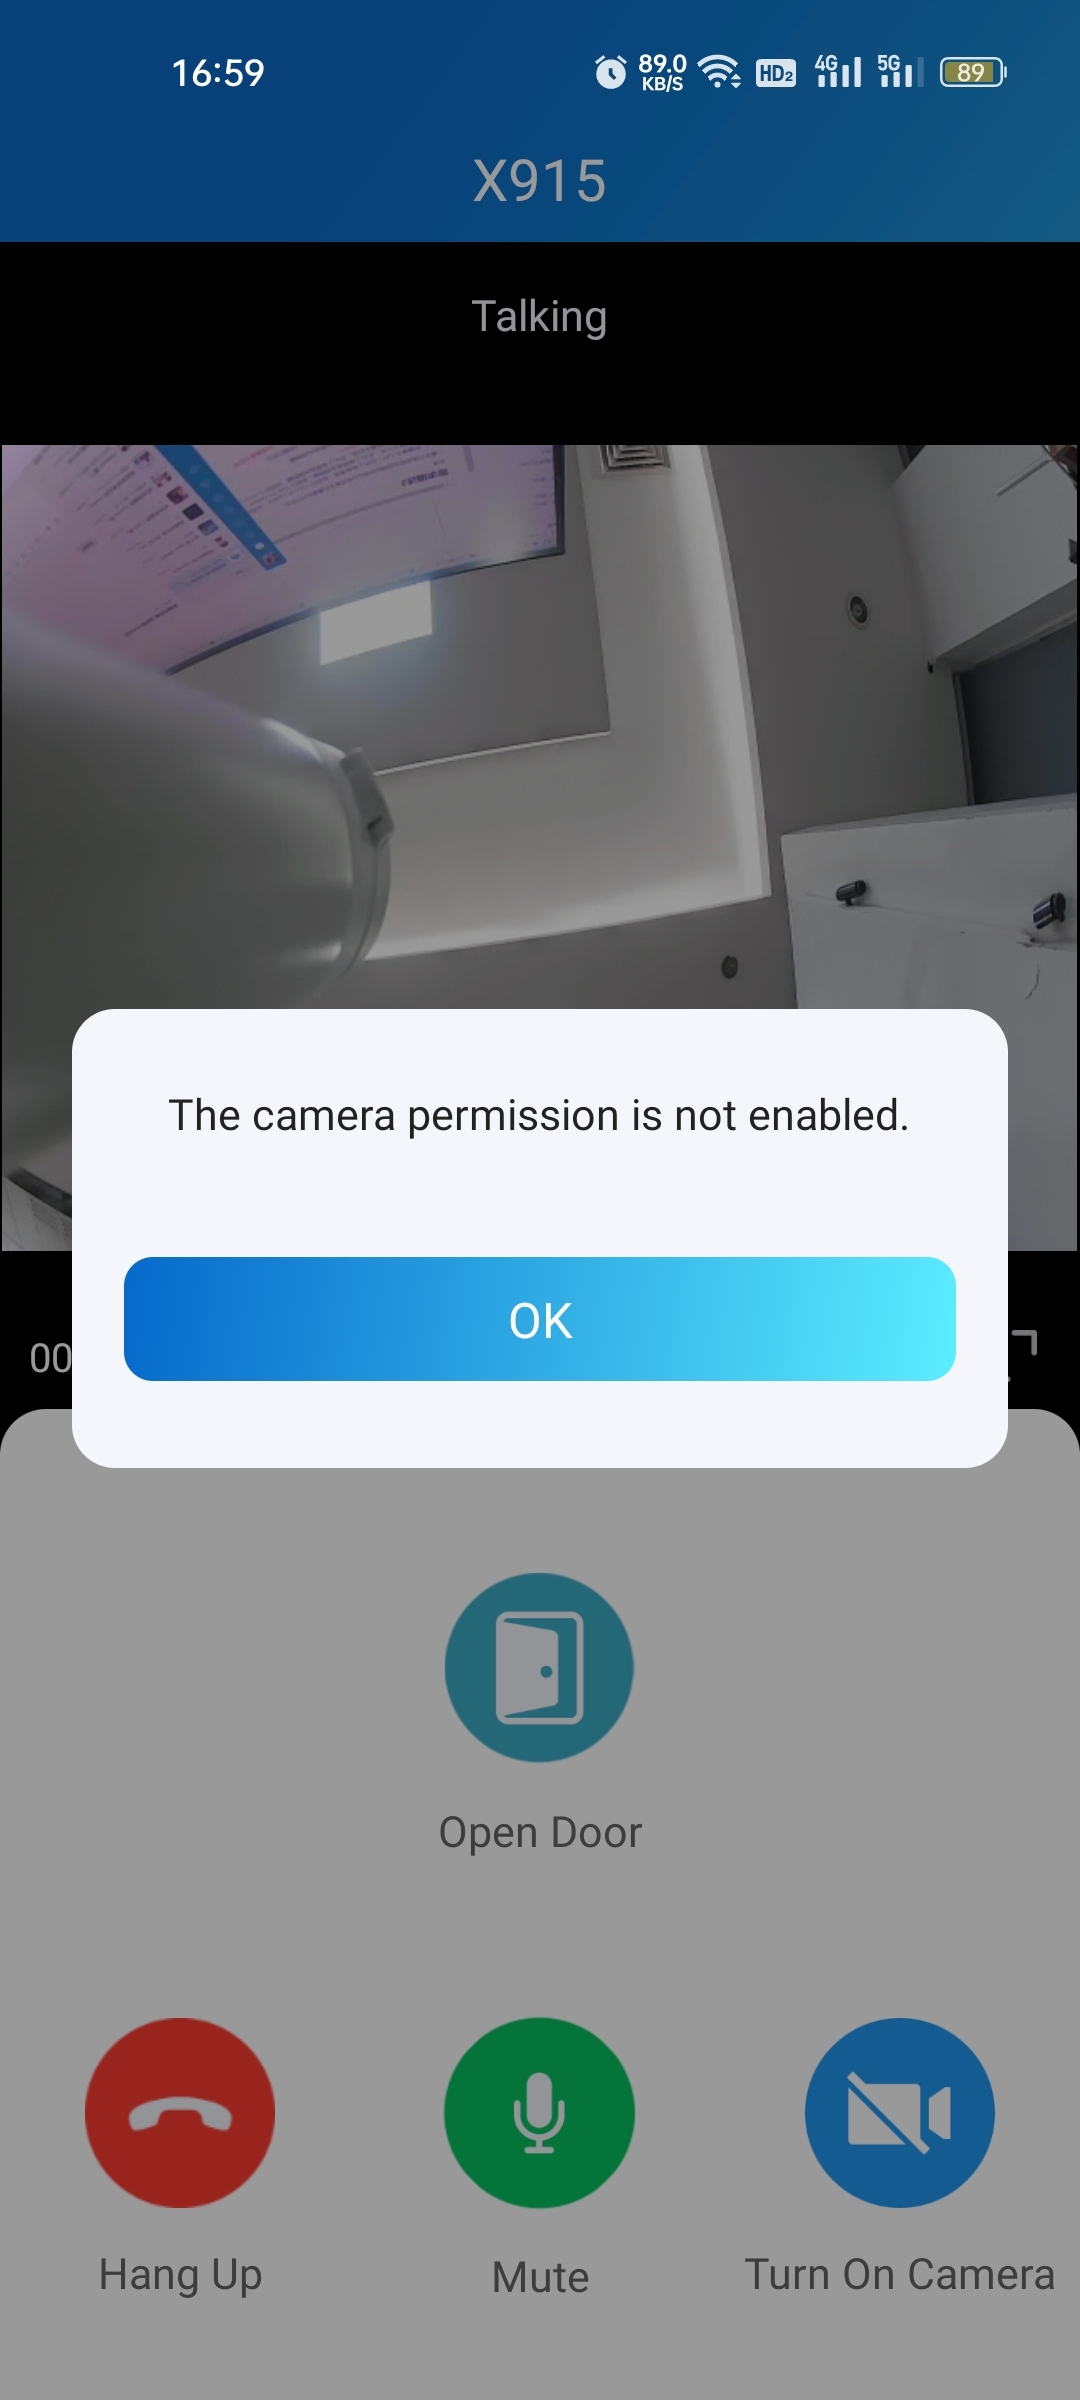
- Tap Turn On Camera/Turn Off Camera to turn your phone’s camera on/off in video calls. Your choice to turn on/off will be applied to later video calls with the device.
Note:
- To use the Turn On Camera/Turn Off Camera feature, you must allow the SmartPlus to turn on/off the cameras when using this app. Or you will see the below pop-up message.
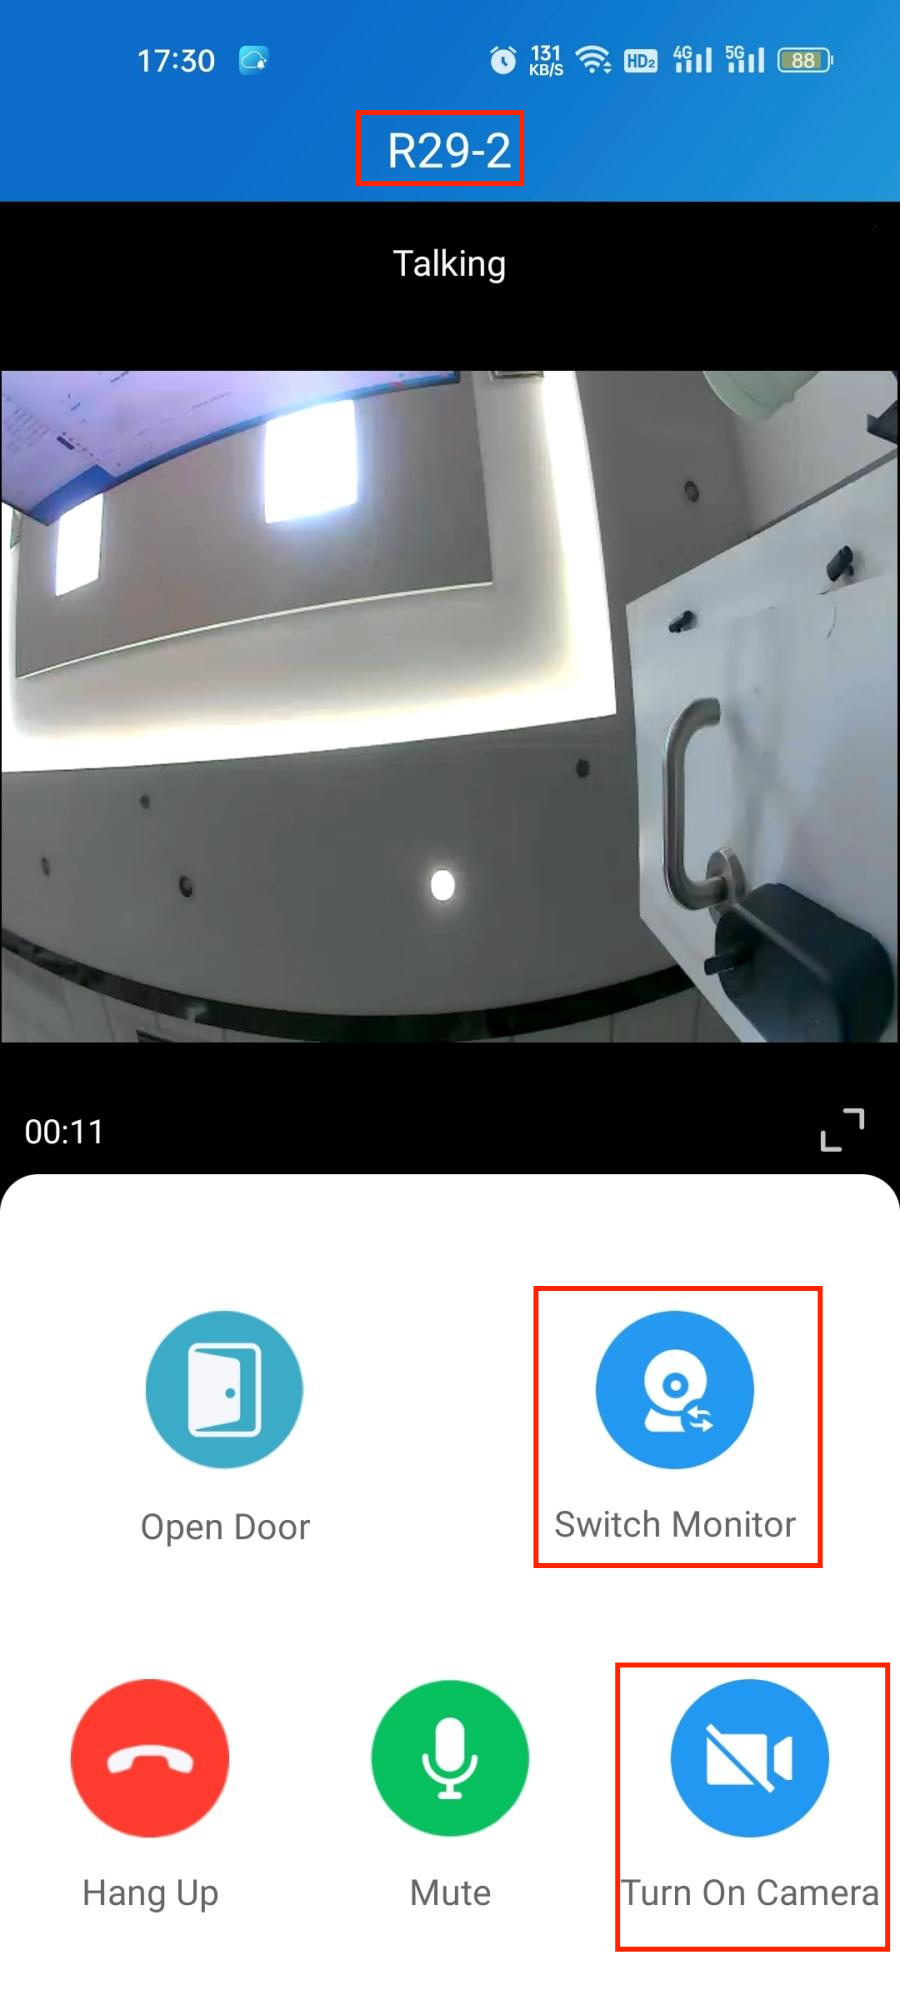
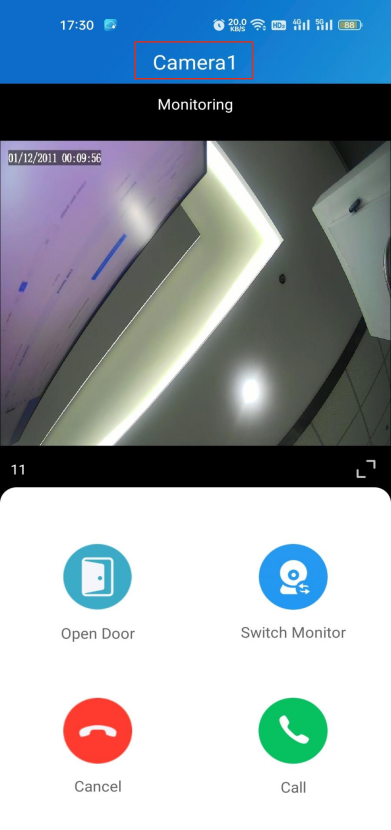
If the door phone is linked with a third-party camera, then you also are allowed to tap Switch Monitor to switch monitoring streams between the door phone and the third-party camera. However, the Turn On Camera feature is unavailable when you change to see the third-party camera’s stream.
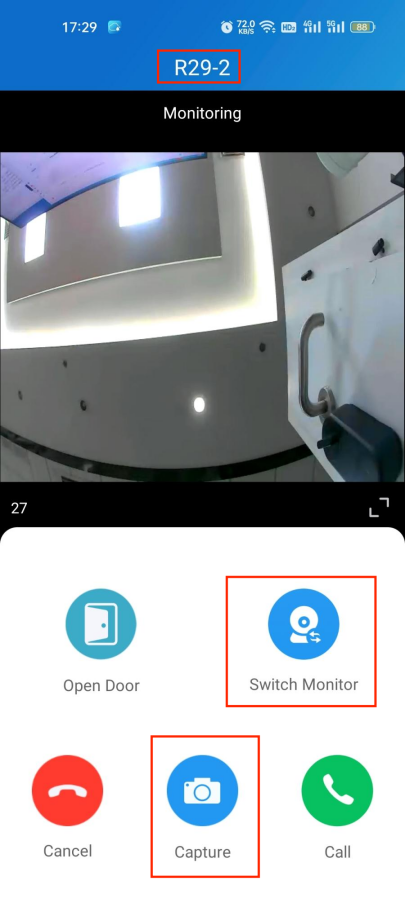
Opening the Door on the Monitoring Screen
You can watch the live video to know who is standing in front of your door, and then decide whether to open the door or not.
To open the door, do the following:
- Tap Home, and choose the device.
- Tap Monitor
 .
.
 .
.Note
- Door phones without cameras do not have a monitor button
 .
.
 .
.- To let the person enter your home, tap Open Door and select the relay.

What else you can do on the monitoring page:
- Tap Cancel to exit the current video watching a page,
- Tap Capture to make a screenshot.
- Tap Call to make a call with the visitor.
If the door phone is linked with a third-party camera, then you also are allowed to tap Switch Monitor to switch monitoring streams between the door phone and the third-party camera. However, the Capture feature is unavailable when you change to see the third-party camera’s stream.
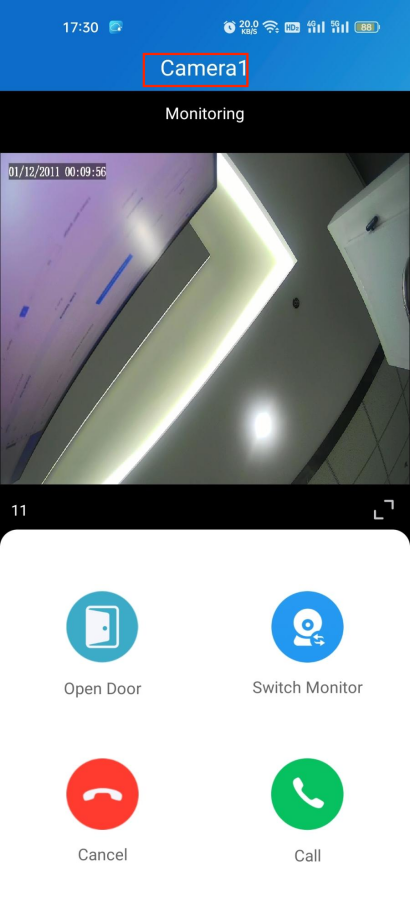
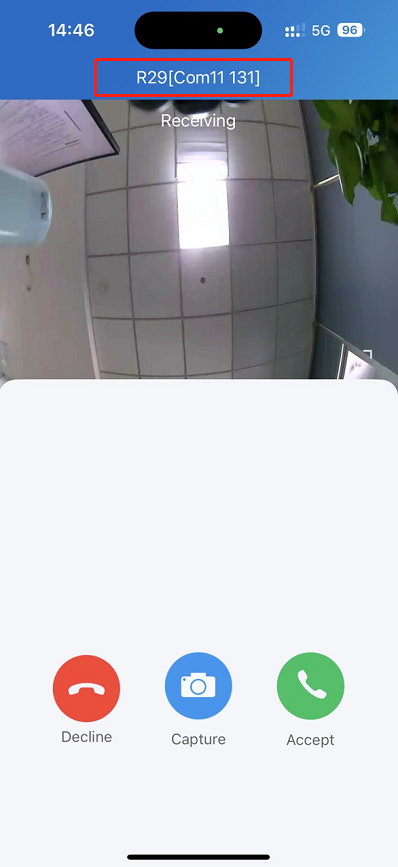
Opening the Door on the Preview Screen
When someone calls, you can preview the monitoring streams to see who it is before answering the call.
On the call receiving screen, tap Open Door if you know who the visitor is.
If the door phone is linked with a third-party camera, then you can switch the streams by switching monitors. Note that the Capture feature is unavailable after switching to the third-party camera stream screen.


Unlock Doors with Temp Keys
A Temp Key can be a QR code or an 8-bit PIN. You can customize its validity period and the times for use, and the key will be valid immediately after you create it. You can issue temp keys for your visitors, housekeepers, dogwalkers, and so on.
Create Temp Key for Visitors
To issue a Temp Key, do one of the following:
- Tap the icon of the QR code
 in the upper right corner.
 - Tap +Temp Key.
- Enter the key user's name. Depending on the Repeat Mode you choose, you may be asked to set up valid Counts and/or Time for the key.
- Tap Submit.
 in the upper right corner.
- In Me page
- Tap Me in the bottom tap bar.
- Go to Authorization > Temp Keys, and tap + Temp Key in the upper right corner.
- Enter the key user's name. Depending on the Repeat Mode you choose, you may be asked to set up valid Counts and/or Time for the key.
- Tap Submit.
You can see the key on the Temp Keys page at any time.

Note
- When the repeat mode is Never, there is a limit to the total times for use. The total times equal to Each Door Counts * the number of selected doors.
- If you want to check the selected doors, you can tap the Doors on the Temp Key Info screen.

Share a Key with the Visitor
After creating a new key, you can share it with the designated user.
- Tap the QR code icon
 on the Home page or go to Me > Authorization > Temp Keys.
 - Tap the key you created for the user, then tap Share Key.
- Share the key to a contact in your messages, email, WhatsApp, WeChat, or Telegram.
 on the Home page or go to Me > Authorization > Temp Keys.
Create a Temp Key for a Delivery Person
The delivery temp key is one-time only. Its repeat mode is Never by default. A delivery person with this key is allowed to access all public doors that you can open.
- Go to Home >
 , or go to Me > Authorization > Temp Keys.
 - Tap + Delivery Temp Key and a key will be auto-created.
- Tap
 to copy the instructions in the box to tell the delivery person how to use the key.
 , or go to Me > Authorization > Temp Keys.
 to copy the instructions in the box to tell the delivery person how to use the key.
Use a Key for Entering
All visitors with shared temp keys can enter the gate directly. You will get a push notification on your phone when they come into your house.
See the following to learn how to use the keys:
- A QR code key. Tap Temp Key on door phone's screen, and place the QR code in front of its camera. When the camera reads the code, the door will open automatically.
- A PIN code key. Tap on the PIN on door phone's screen, enter the code, and the door will open automatically.
Unlock Doors with Face ID
Using the facial recognition feature helps you to open the door fast and safely.
Set up Face ID
- Go to Me > Authorization > Face Recognition.
- Tap Get Started or Choose a photo from Album, then follow the onscreen instructions.
.jpg)


Use Face ID to Open Doors
After you set up your face ID, you can use it for door access.
- Tap doorphone to wake it
- Make sure your face is centered in the camera view, glance at the camera, then the door will open automatically.
Unlock Doors with NFC
It is convenient when using a phone with an NFC feature to open the door. You just need to put your phone onto the door phone's card reader, then the door will open.
Note
- This method does NOT work on iPhones and Android phones without the NFC feature.
Enable NFC to Unlock
Go to Me > Authorization, and turn on NFC unlock. This function will be activated immediately.
.jpg)

Use NFC to Open Doors
Ensure NFC is turned on, both on your Android phone and SmartPlus App before using this feature.
- Wake up your phone.
- Place the NFC detection areas of your phone on the doorphone's card reader area for a few seconds. Then, the door will open automatically.
Unlock Doors with Bluetooth
Alternatively, you can use a Bluetooth connection to open the door without touching it.
Enable Bluetooth Unlock
- Go to Me > Authorization, enable Bluetooth Unlock and follow the onscreen instructions.
- Select a Bluetooth Unlock Mode between Shake and Hands-free.
If you are an Android user and select Hands-free mode, follow onscreen instructions to complete Permission Settings.
.jpg)


Use Bluetooth for Contactless Door Access
Ensure Bluetooth is turned on, both on your phone and SmartPlus App before using this feature.
- Shake mode. Place your phone near the door unit, shake your phone a few times, and the door will open automatically.
- Hands-free mode. Your phone must be within about 3.3 feet (1 meter) of the door unit, and the door will open automatically.
Note
- Only the X912 and A03 door phone supports Hands-free unlocking mode.
- X916S, X915S, X912S, R29C, R29Z, E12W, E12S, E16C, E18C, and A05 support shaking phones to unlock doors.
Unlock Doors with a PIN Code
You can set a private PIN code for door entry.
In your first login, you are asked to set up a PIN code for your private use.
.jpg)
If you didn't set it up, or you want to change the code for better security, go to Me > Authorization > Door Release PIN.

Unlock Doors with an RF Card
Note
- Only family master accounts in single-tenant projects are allowed to add, edit, and delete RF cards for the family from the SmartPlus app.
- The cards added from the end user web interface will be synced to the app.
To manage RF cards, follow the steps below:
1. Go to Me > Authorization.
.png)
2. Select an RF card.

3. On the RF card screen, do any of the following:
- Tap
 to add a card.
 - Assign the RF card to the desired user by tapping
 .
.
 to add a card.

- Tap
.png) to edit the card.
to edit the card.

- Hold the desired card, and swipe to the left to delete.

Unlock Doors with Siri
Note
- The system should be IOS 12 or above.
- You can record no more than 10 voice commands.
- Commands do not interoperate between different accounts.
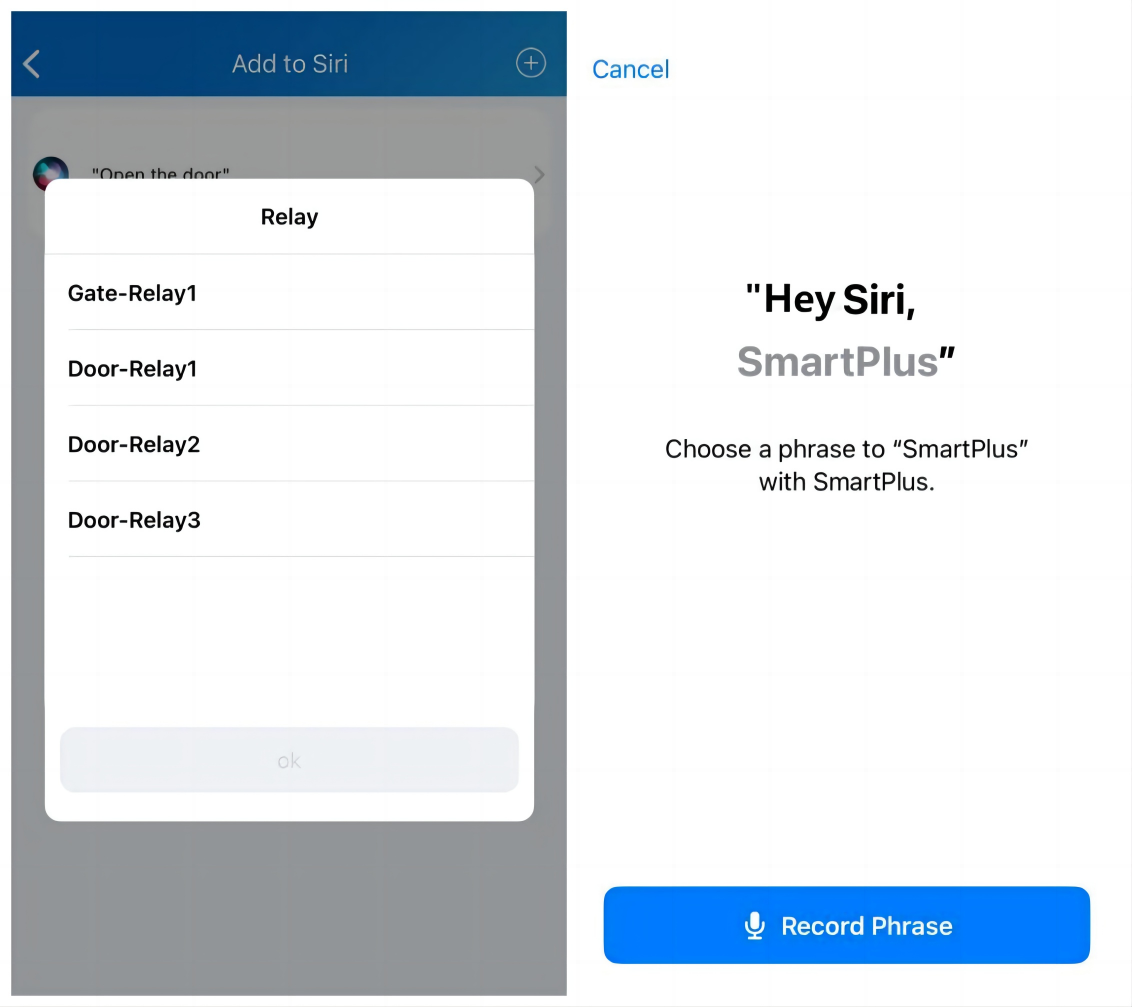
1. Go to Me > Discover > Add to Siri.
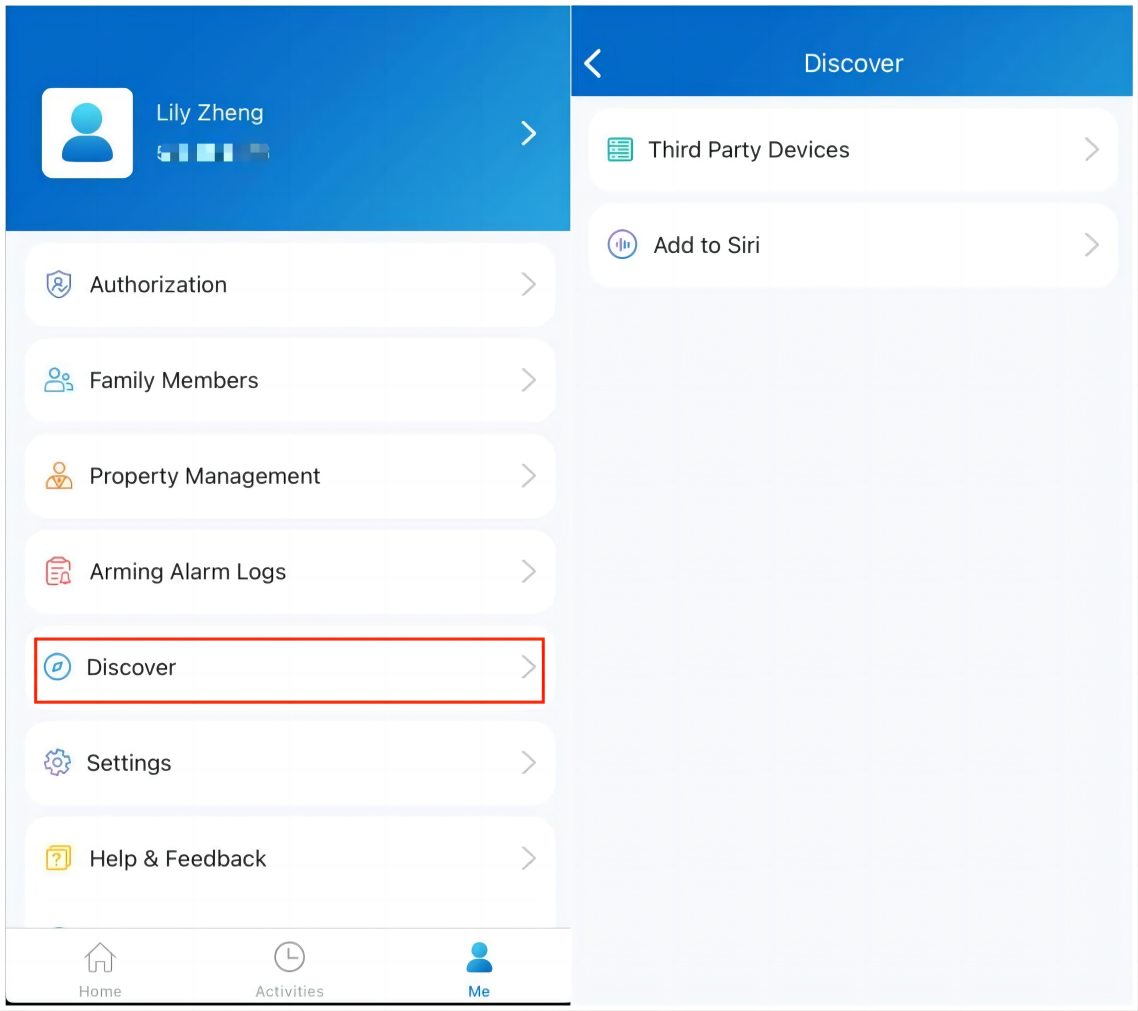
2. Tap the add icon . Select the desired door and record the command.
When you say the command to Siri, the selected door will open.
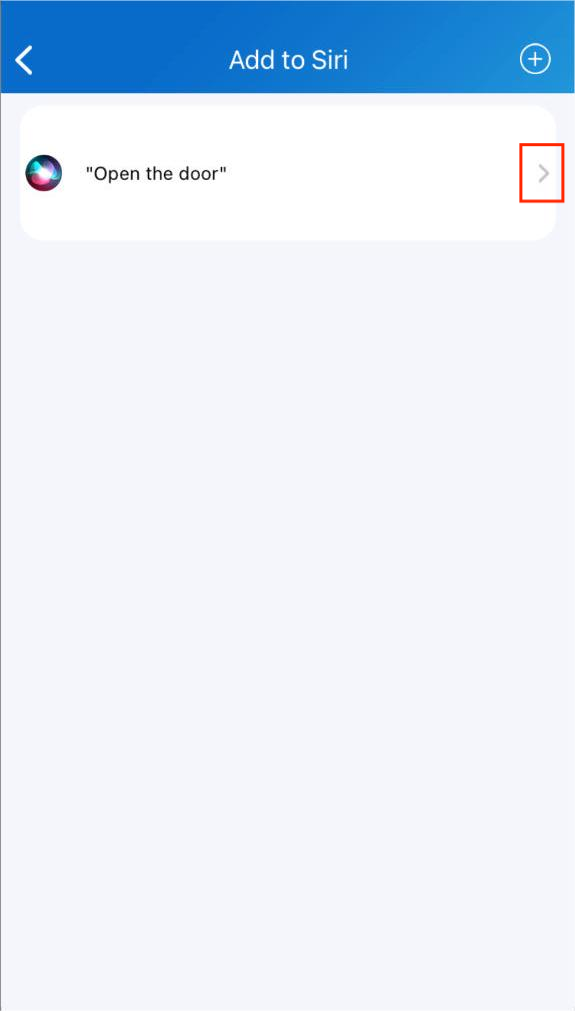
3. Tap.png) to check and edit the command.
to check and edit the command.
Unlock Doors with Alexa
Linking your account to the Alexa app, you can open the door by saying "Alexa, unlock [device location]" to the Alexa app.
1. Log into your Alexa app, go to Devices, and scroll down to the bottom. Tap Your Smart Home Skills.

2. Enter Akuvox to search.

3. Tap ENABLE TO USE and enter your SmartPlus account username and password to login.


4. Tap Next to discover devices under your SmartPlus account.

5. Tap Next and add desired devices.

6. Return to the Devices module. Tap the desired device and enable Unlock by App and Unlock by Voice.

Unlock Doors with Apple Watch
You can open doors by tapping  on SmartPlus which is installed in Apple Watch.
1. Download and install the SmartPlus App on your Apple Watch.
2. Log into your SmartPlus account on your iPhone that is linked to the Apple Watch.
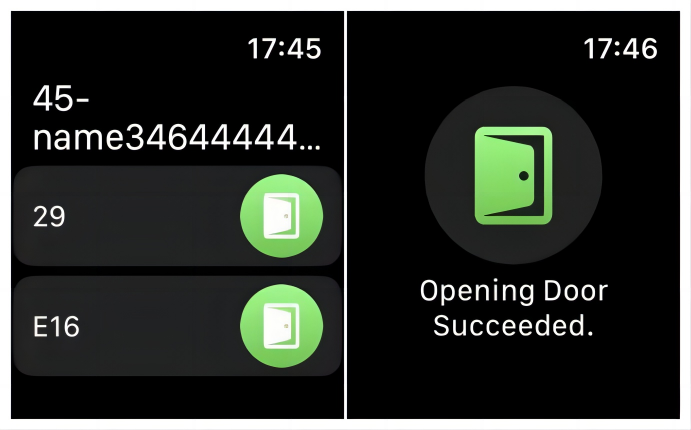 Devices with relays configured under your accounts will be synchronized to the Apple Watch.
Note
- Apple Watch cannot acquire the latest device status in real-time. Only after the data update on your iPhone, do data on your Apple Watch refresh.
Calling
Note
- When you sign in to the App with an official account that does NOT enable the calling feature, you cannot receive any calls or make calls by tapping softkey Call on the Home page. Accordingly, there are no Call Histories on the Activities page.
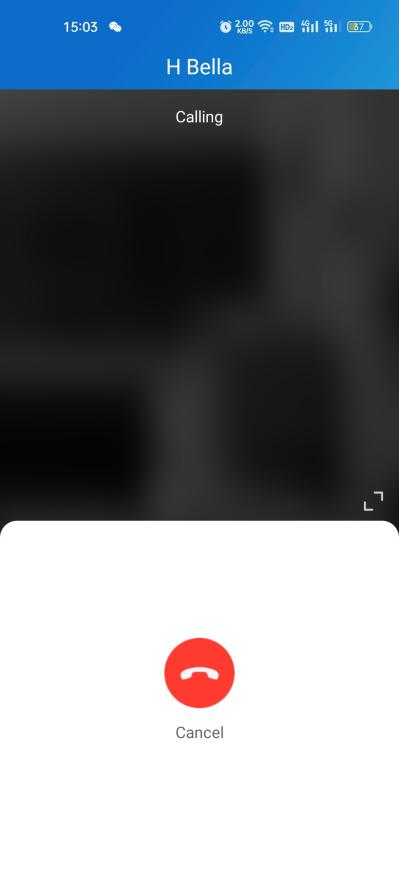
Make Outgoing Calls
To start a call, tap Call on the home page, on the monitoring page, or choose a family member.
Call a Device
- Tap Home.
- Choose a device you want to call.
- Tap Call to start a call.
- Tap Turn On Camera to turn your phone’s camera on if you want the called party to see you. You can turn off the camera at any time.
Your choice to turn on/off will be applied to later video calls with the device.
Note
- To use the Turn On Camera/Turn Off Camera feature, you must allow the SmartPlus to turn on/off the cameras when using this app. Or you will see the below pop-up message.


If the door phone is linked with a third-party camera, then you also are allowed to tap Switch Monitor to switch monitoring streams between the door phone’s and the third-party camera’s. However, the Turn On Camera feature is unavailable when you change to see the third-party camera’s stream.


Call a Family Member
- Tap Me in the lower-bottom tap bar.
- Tap Family Members, and tap the member you want to call.
Note
- Only audio calls are allowed between App users.
.png)


Call Other Families within the Community
The Community Calls feature enables you to call other families living in the same community.
Note
- This feature is only available for new communities. Besides, the community’s service provider must enable this function from his/her end.
To access the feature, do the following:
1. Tap Home, and tap the Community Calls icon  on the top right.

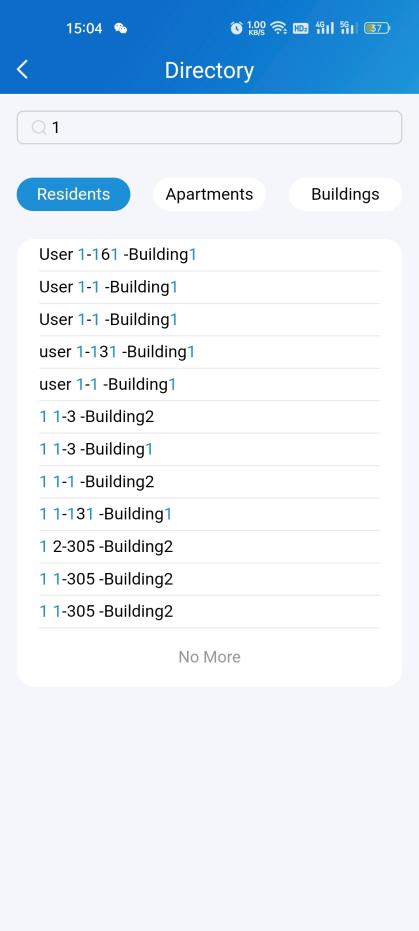
2. A directory screen opens.
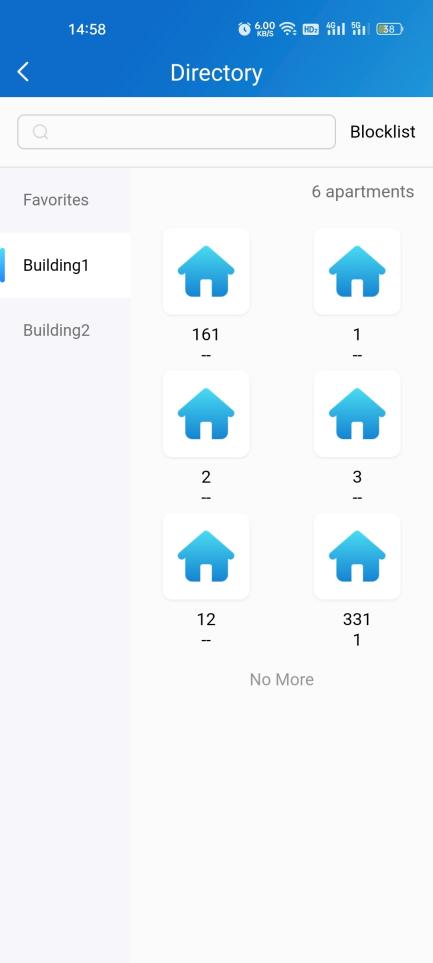
3. On the Directory screen, do any of the following:
- Tap Favorites on the left side menu to see the families you added to the Favorites.
- Tap the building name to see all apartments in the specific building.
- Tap Blocklist on the top right to see all families blocked by you. You can call them but you will not receive their calls.
- Tap the search box on the top to search for a family. The search results will be displayed in the order of Resident-Apartment-Building.
- Tap any of the apartments listed on the right side to
See its information, including the door number, apartment name, and the members and indoor monitors in this family.
Block this family. In this case, all its members and indoor monitors cannot call you while you can call them.
Add this family to the Favorites.
Tap and call a member or an indoor monitor.

Landline, Contact, and Call preference
You can answer or decline a call on the App, or you can forward a call to landline number(s).
Call Forwarded to Phone
To set up call forwarding, do the following:
- Go to Me > Settings > Call Settings.

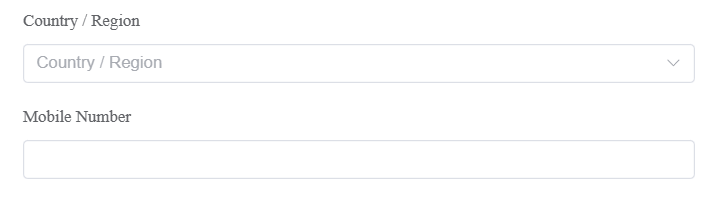
- Tap Landline, and select the country/region the phone number(s) forwarded.
- Enter the number(s) in your preferred order.
Note
- A home master can add 3 forwarded landline numbers while the added members only 1 number.


Set up Call-answered Order
Note
- Only the home master who owns the main account can set up call preference. Calls will only be forwarded to the phone number(s) added by the main account.
If you are a single-tenant user, you can choose a calling preference type between group call and sequence call.
- Go to Me > Settings > Call Settings.
- Tap Contact Preference.
- Choose a call type and follow the onscreen instructions.
- Group Call. All indoor monitors will receive the call. At the same time, family members will receive it in their Apps.
- Sequence Call. The devices, family members, and landline numbers in the same family will be called based on the preset order.


If you are a multi-tenant project user, you can choose among 3 options: SmartPlus, Phone, and SmartPlus with Phone as backup.
- Go to Me > Settings > Call Settings.
- Tap Contact Preference.
- Choose a call type.
- SmartPlus. SmartPlus and indoor monitor(s) will be called.
- Phone. Phone and indoor monitor(s) will be called.
- SmartPlus with Phone as backup. SmartPlus and indoor monitor(s) will be called first, then the forwarded phone number if the call is not answered.

Set SmartPlus as a Contact
You can set SmartPlus as a contact, in case calls from doorphones are marked as harassing ones. By doing so, you would not miss the calls.
- Go to Me > Settings > Call Settings.
- Tap Set SmartPlus as a contact, and you can find the Doorphone Call Number in your phone's contact list.

Not to Receive Calls
The app can silence all calls when you do not want to be disturbed.
- Go to Me > Settings > Notification Settings.
- Turn on Do Not Disturb.
- Set up a Time Schedule.
Call histories will still be recorded when enabling Do Not Disturb.


Receive Calls from a Different Site
You can receive calls from site 2 when you select site 1. The receiving page will display the information on site 2. The call logs will only be displayed on the call-received site.
Security
Monitor
You can check the monitoring streams from either Akuvox intercom devices or third-party cameras to see who's the visitor or what's happening at your front door.
See Door Phone Stream
- Tap Home.
- Select the device and Tap Monitor
 . The monitoring streams will be shown for 30 seconds.
 . The monitoring streams will be shown for 30 seconds.
Note
- Door phones without cameras do not have a monitor button
 .
.
 .
.What you can do on the monitoring page:
- Tap Cancel to exit the current video-watching page.
- Tap Capture to make a screenshot.
- Tap Call to make a call with the visitor.
- Tap Open to unlock the door.

See Third-party Camera Stream
If your house or your community has third-party cameras installed, you are enabled to see their streams directly on the app. Besides, these cameras can be linked with Akuvox door phones.
- When cameras are not linked with door phones
1. On the Home screen, scroll down, and find the Camera field.
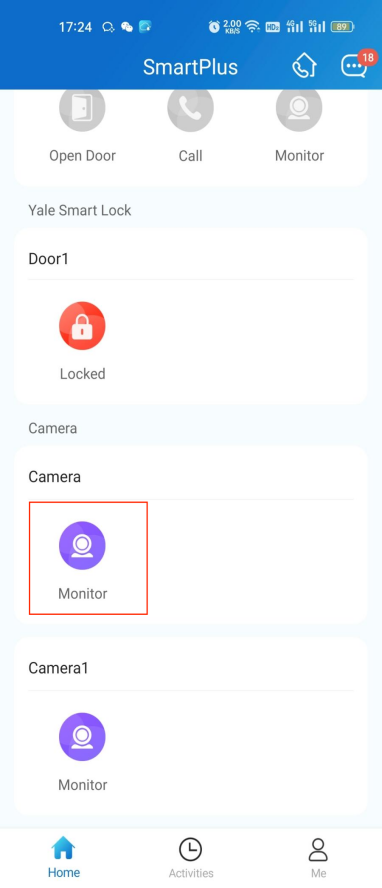
2. Tap the desired camera’s monitor icon  , then you can see the live monitoring video. Note that the screen exits automatically in 30 seconds.

- When cameras linked with door phones
If the camera is linked with a door phone, then you can switch monitoring streams between the door phone and the camera.
1. Tap Home.
2. Select the door phone and tap Monitor  .
.

3. The default shown stream is from the door phone. To switch the stream, tap  . Note that the Capture feature is not available on third-party camera screens.

You are also able to switch the streams on the calling screen and monitoring preview screen.
Alarm and SOS Warnings
Alarm and SOS warnings triggered by indoor monitors can be received on the App. You can go to Me > Arming Alarm Logs to see and deal with warnings or tap Deal on the popup notifications.
Note
- When a red dot appears in the Arming Alarm Logs bar, it means there are new warning messages to be dealt with.


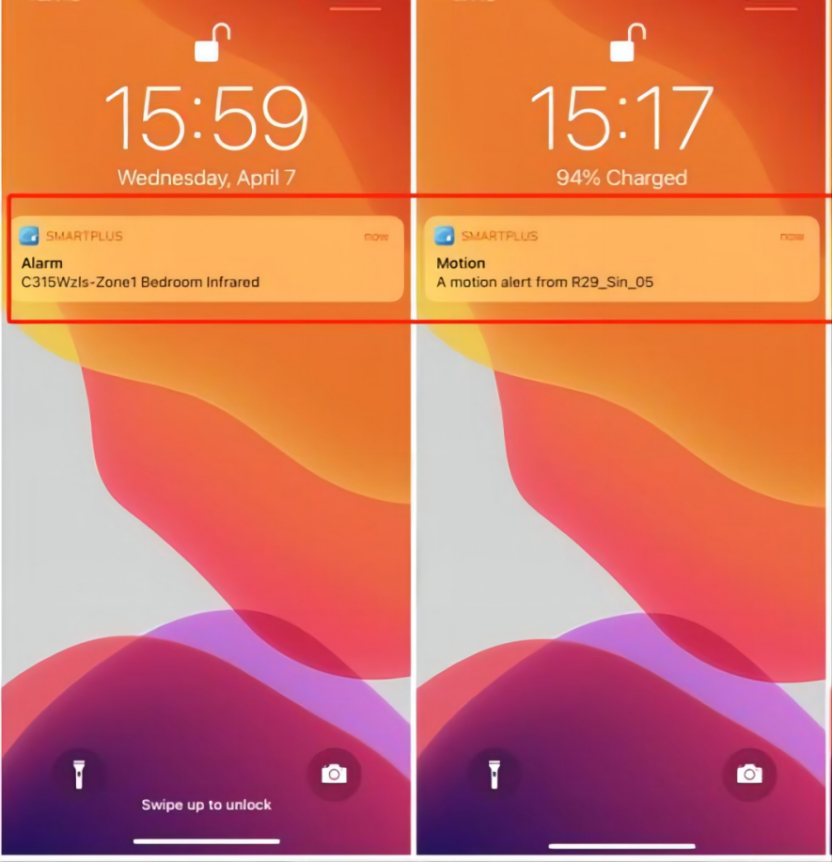
Motion Detection
Single-tenant users can turn on the motion detection function and choose its detection type.
To enable this function, do the following.
1. Go to Me > Settings > Advanced Settings > Motion Detection.

2. Select between IR and Video Detection.

3. Once selected, do any of the following:
- Set the Alert Delay Time. By default, it is 10 seconds.

- Enable or disable the Motion Alert. This option is only available when you turn on the motion detection.
Once enabled, a motion alert will be sent to you whenever an alert is triggered by a suspicious motion event.

Arm and Disarm Indoor Monitors with Alexa
Linking your account to the Alexa app, you can arm or disarm the indoor monitor by saying the following commands to Alexa.
- Check whether the device is armed: Alexa, is [device location] armed?
- Arm the device in Home mode: Alexa, arm [device location]; Alexa, Arm [device location] in Home mode.
- Arm the device in Away mode: Alexa, arm [device location] in away mode.
- Arm the device in Night mode: Alexa, arm [device location] in night mode.
- Disarm: Alexa, arm [device location] in night mode.
1. Log into your Alexa app, go to Devices, and scroll down to the bottom. Tap Your Smart Home Skills.
2. Enter Akuvox to search.
3. Tap ENABLE TO USE and enter your SmartPlus account username and password to log in.
4. Tap Next to discover devices under your SmartPlus account.
5. Tap Next and add desired devices.
6. Return to the Devices module. Tap the desired device and enable Unlock by App and Unlock by Voice.

Devices
Third-party Locks
SmartPlus app allows you to add and control third-party locks from Qrio, Yale, and BSI, making the intercom process more integrated and more convenient.
Note
- Only Turkey and Israel support adding Yale locks now.
Display Locks
Third-party locks from Qrio and Yale can now be linked with E12, E16, and E18 door phones.
The linked and not-linked locks will be displayed on different modules.
If your third-party locks do not link with any door phones, you can see them on the Home screen.

Note
- When a Yale lock is linked with a door/window sensor that has been added to the Yale app, the sensor’s on or off status will display in the top right corner.
- When a Yale lock is linked with multiple door/window sensors, their status will NOT display.

- In Relay list
If a lock is linked with a door phone, it will display in the door phone’s Relay list when tapping its Unlock button.
Add a Third-party Lock
Note
- This function is available for single-tenant projects and new communities.
- Only family master accounts are enabled to add third-party locks.
- The supported third-party lock brands include Qrio, Yale, and BSI.
To add a third-party lock, for example, a Qrio, do the following:
1. Go to Me > Discover > Third Party Devices, and tap the add icon in the top right.
2. Choose the lock brand from the list.

3. Tap Add at the bottom.
4. Follow the onscreen instructions to complete the adding process.
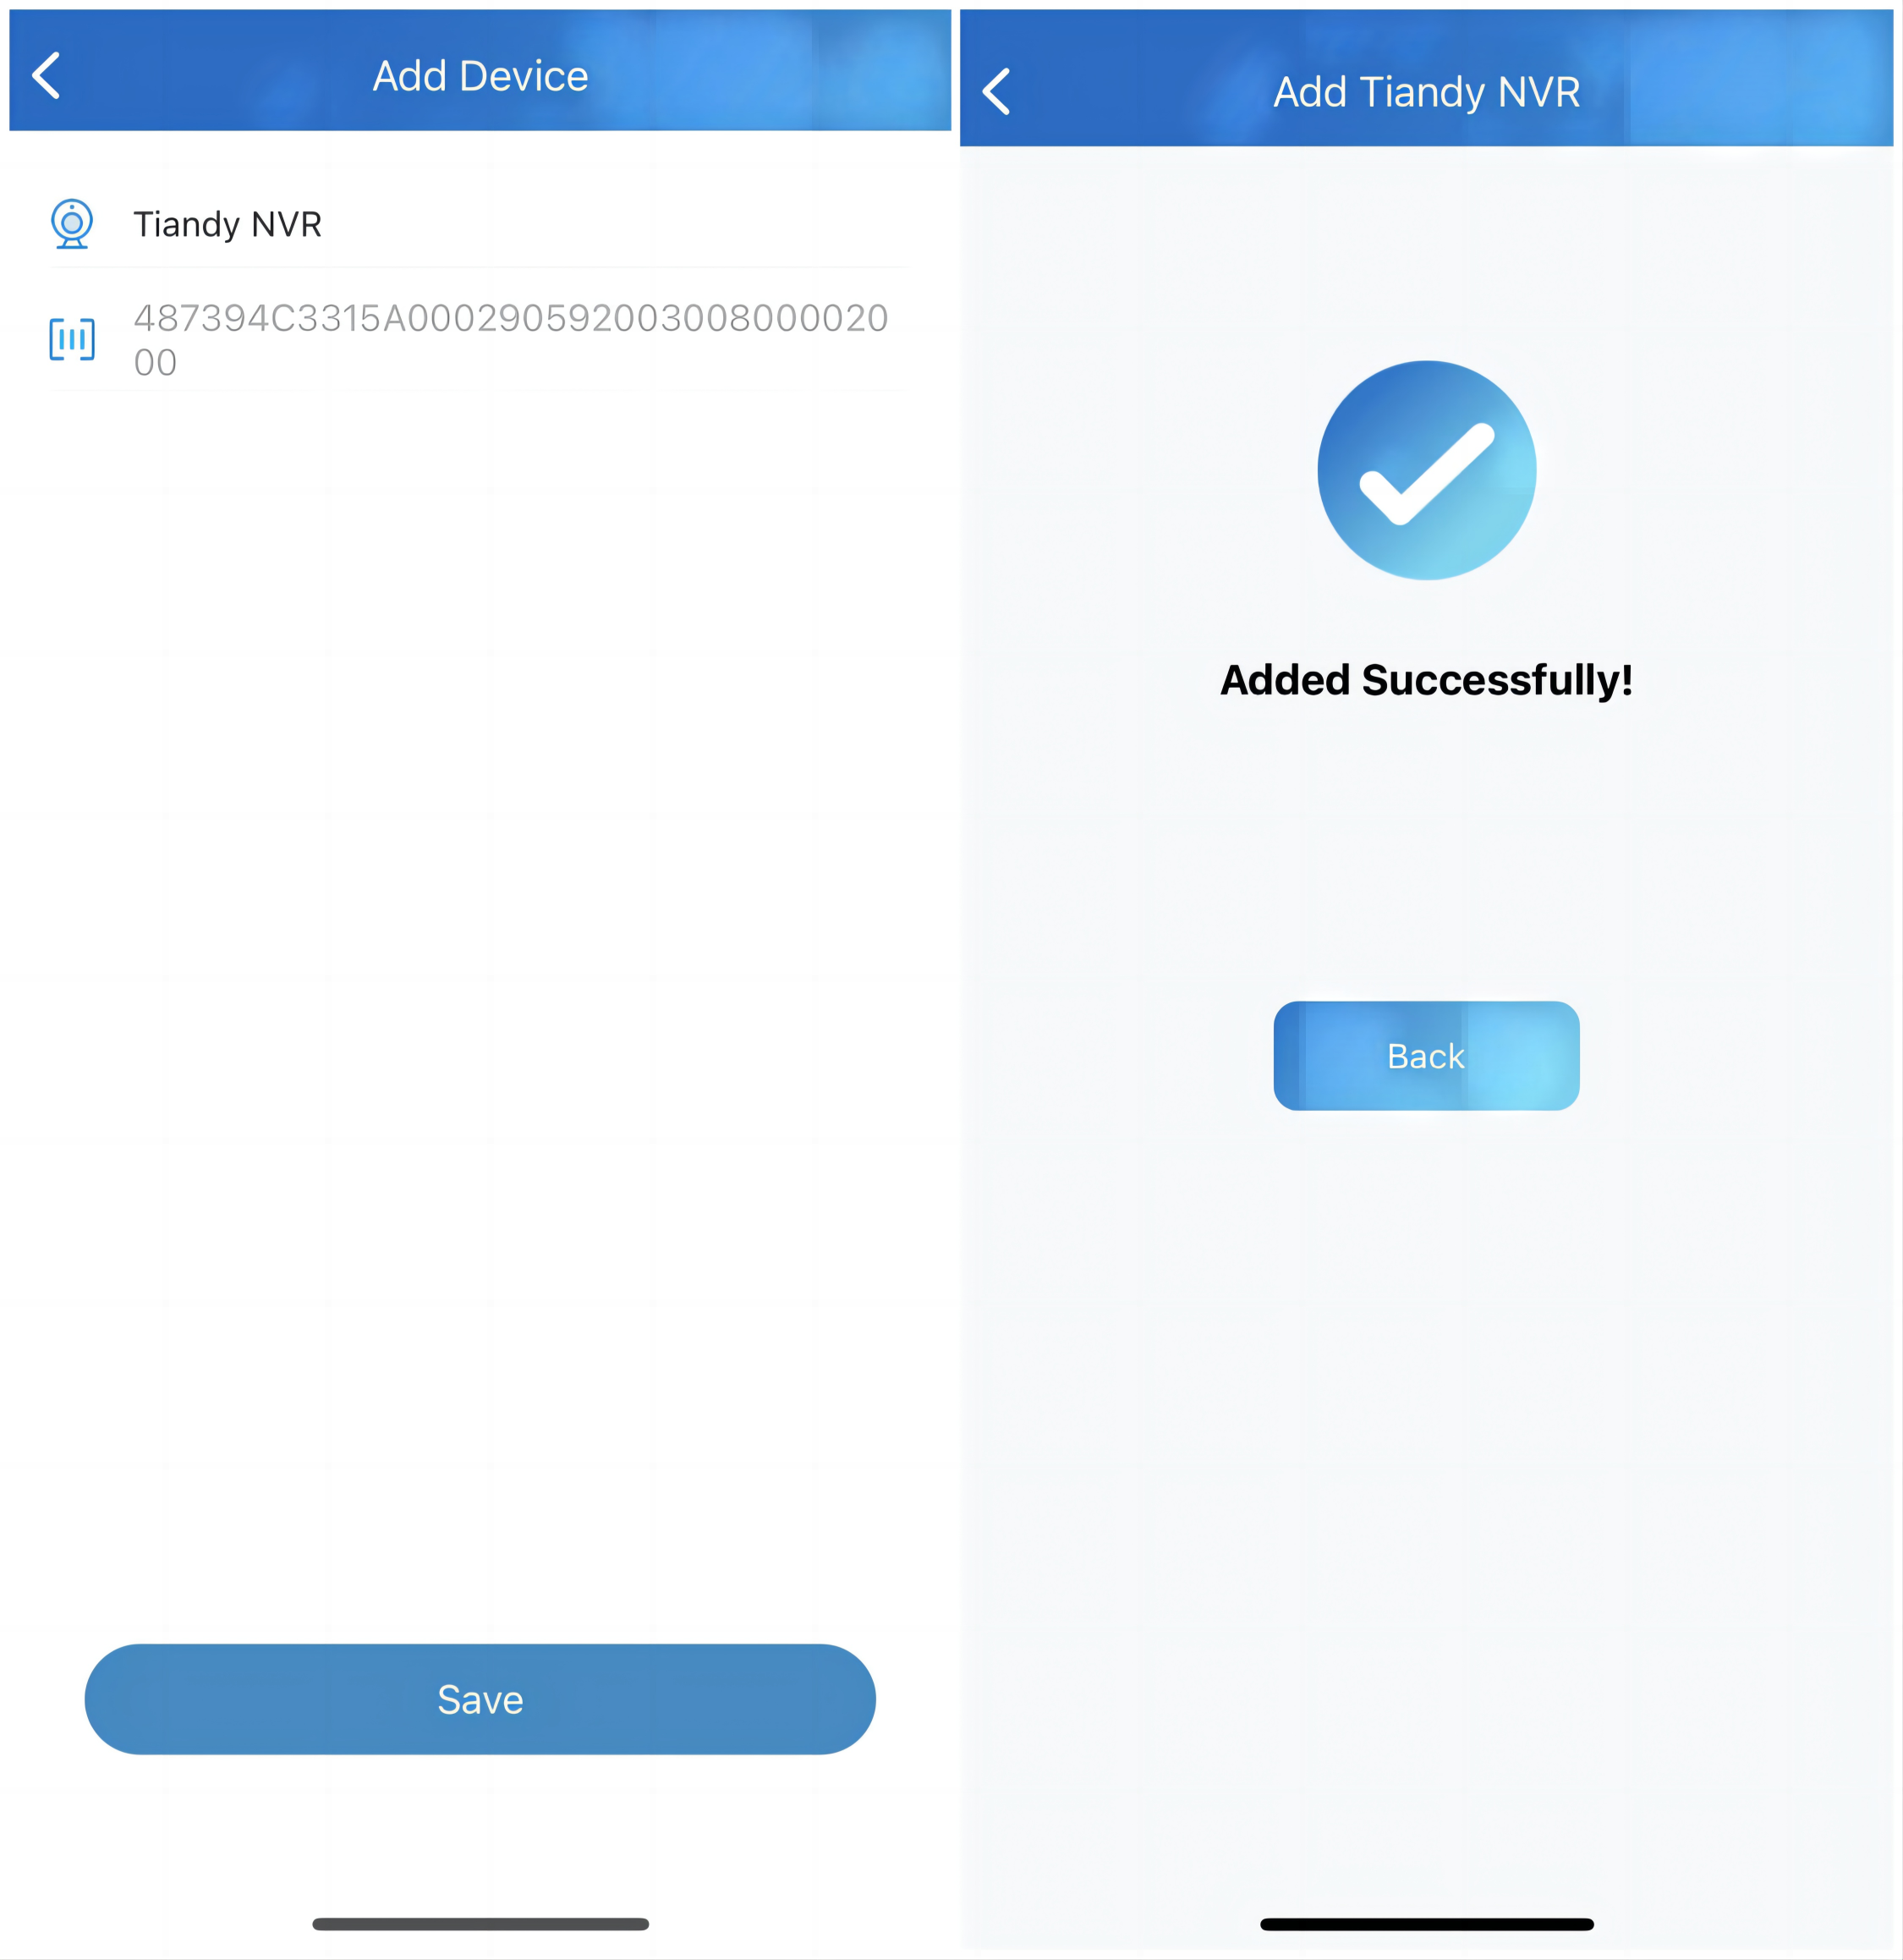
5. Tap Back on the Added Successfully screen to go back to the lock list. The newly added lock will be displayed there.


Once a third-party lock is added, all members within this family can see and control the lock on their app.
Change Lock’s Settings
1. Go to Me > Discover > Third Party Devices, and tap the Lock brand. All the added same-brand locks are listed here.

2. On the Lock list screen, do any of the following:
- Tap
 at the bottom to unbind your lock’s account.
 - Tap the specific lock on its Settings screen, and then you can
Change the lock’s name.
Enable/Disable Auto Lock in 10s feature.
Link with a door phone. Third-party locks from Qrio and Yale can now be linked with E12, E16, and E18 door phones.
 at the bottom to unbind your lock’s account.
Third-party NVR Devices
SmartPlus app allows the master account users to add third-party NVR devices from Tiandy. You can conveniently record video footage and view playback, which enhances security.
Note
Make sure your installers have selected the right Country/Region when creating an account for you, or you may not add Tiandy devices.

Add NVR Devices
1. Tap Me > Discover > Third Party Devices. You can see the added third-party devices here.
2. Tap the add icon in the upper right corner.
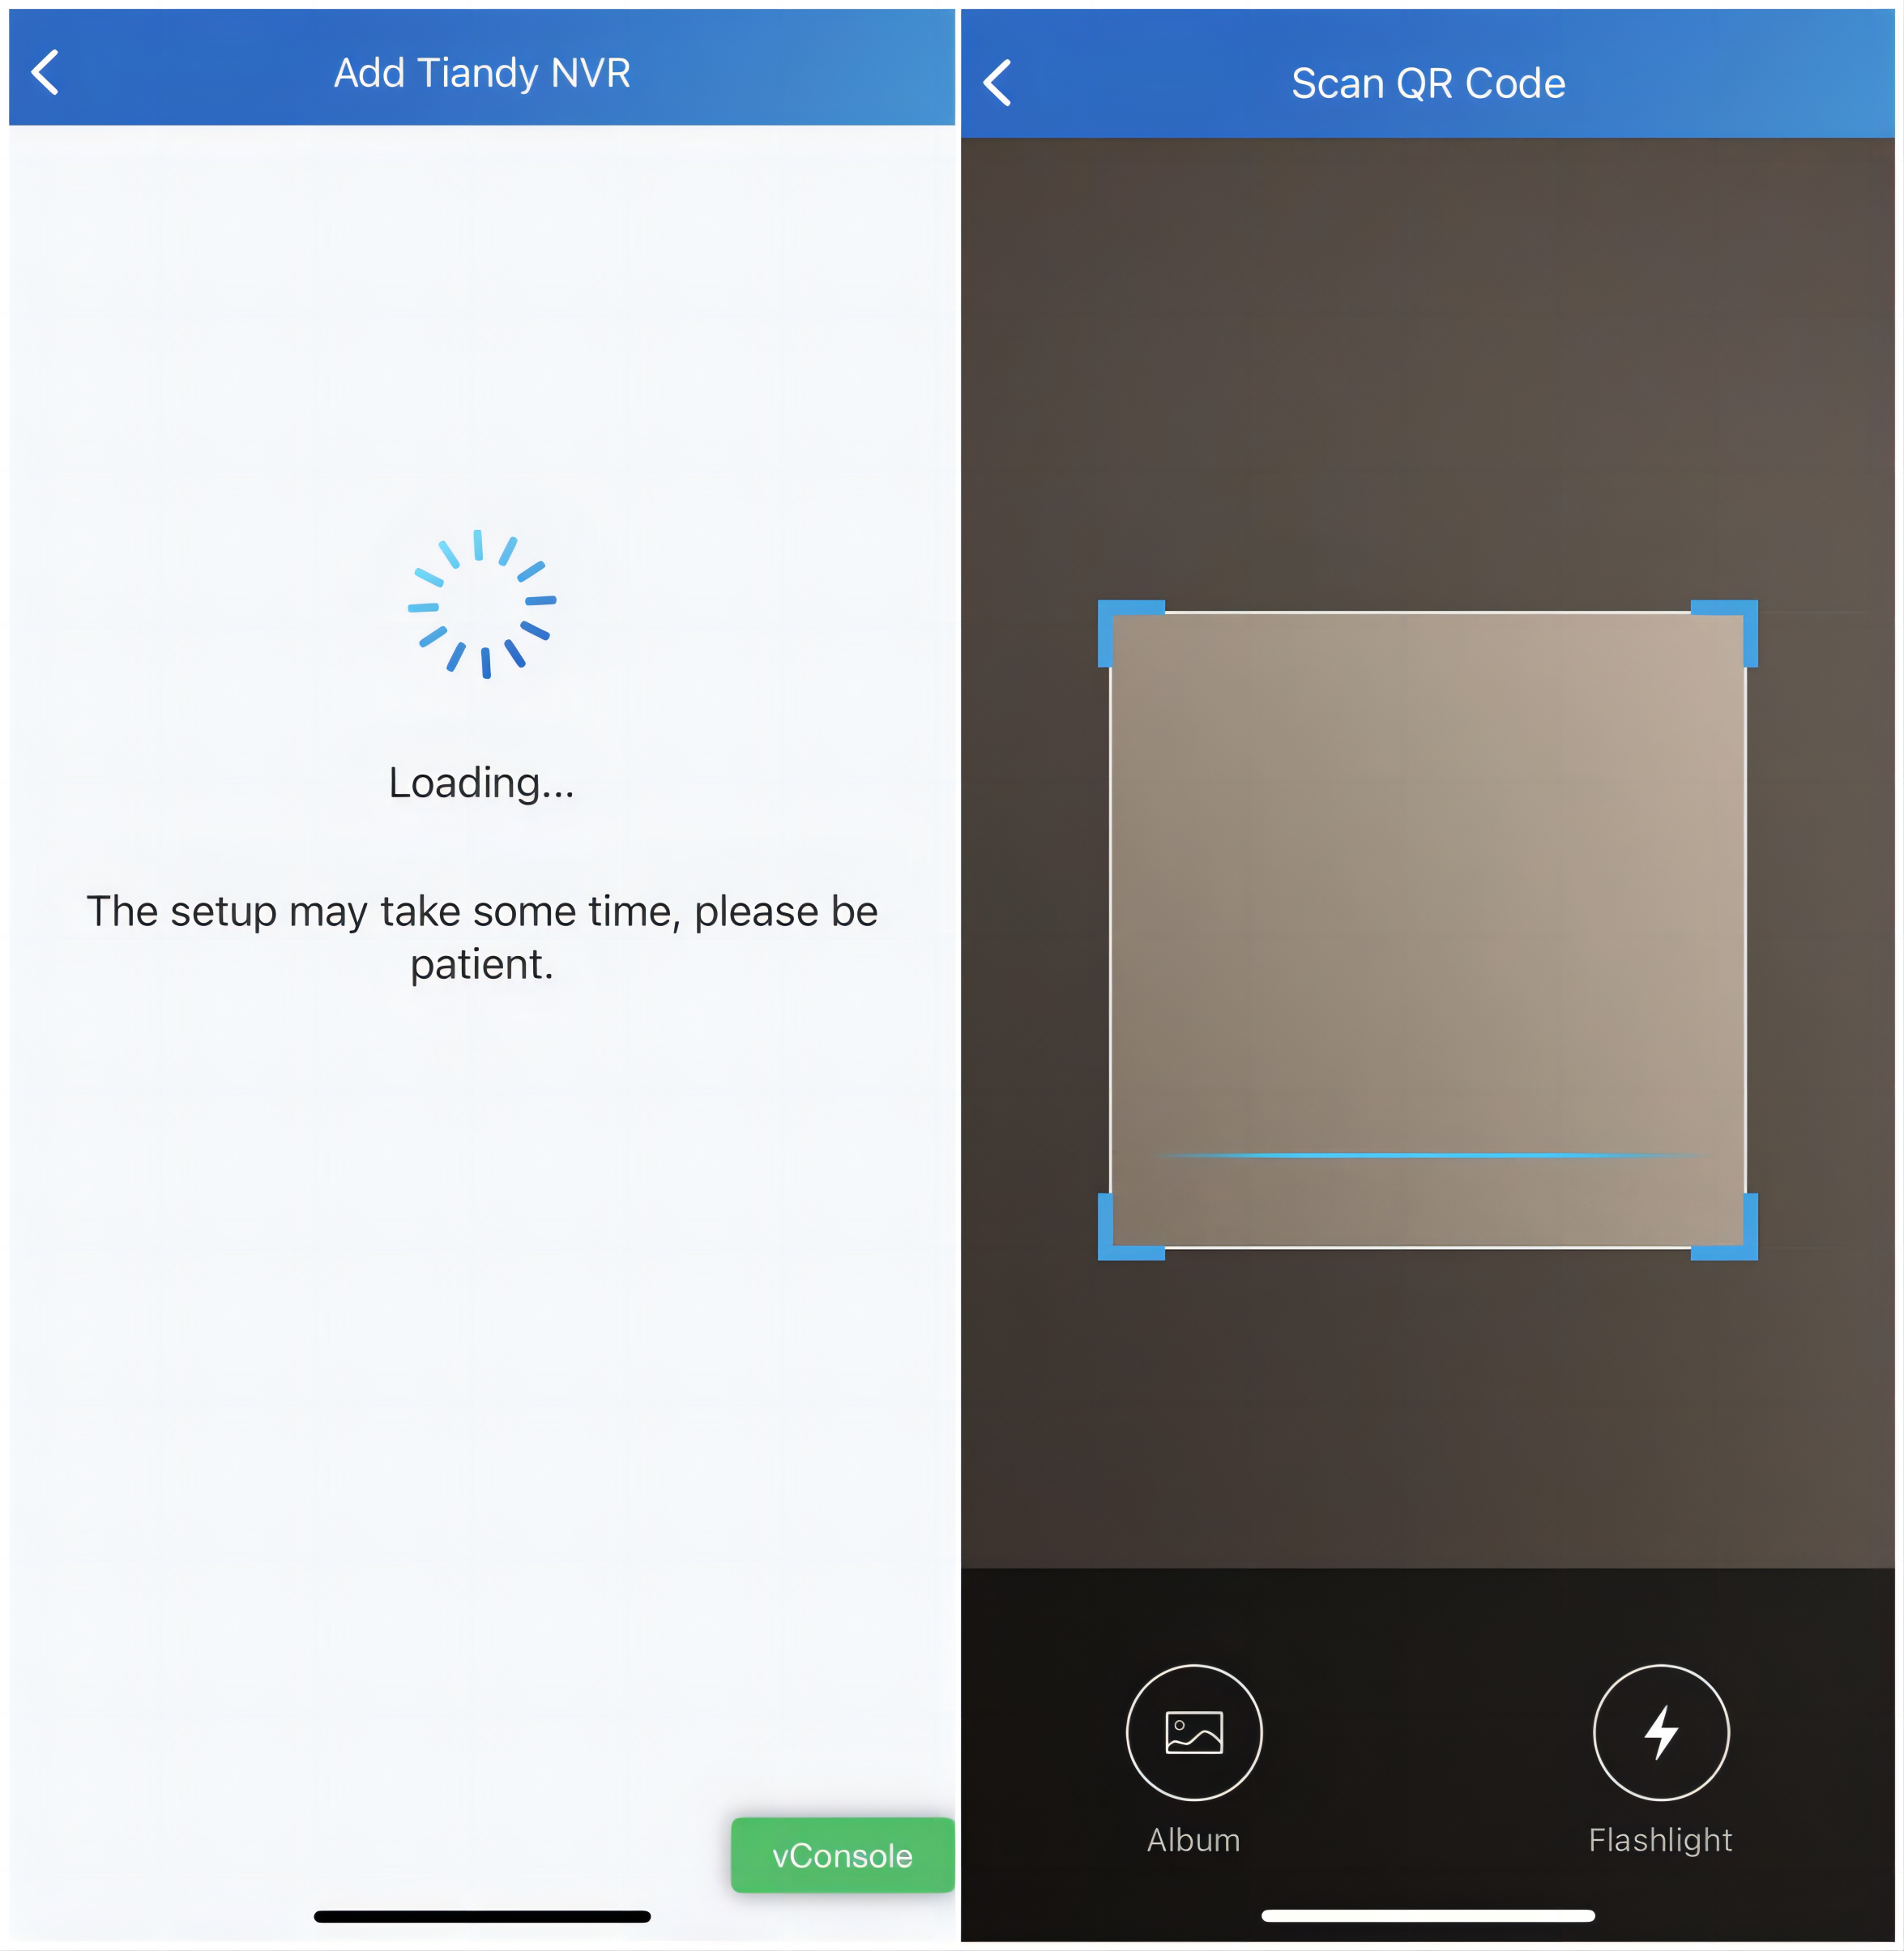
3. Tap Tiandy > Add Tiandy NVR.
- If it is your first time to add a Tiandy device, you need to register the Tiandy Cloud account. The registration will be carried out automatically and take some time.
- If you have added the Tiandy NVR before, scan the QR code on the device or upload the QR code photo from the local album.
4. Name the device(max 32 characters) and tap Save.
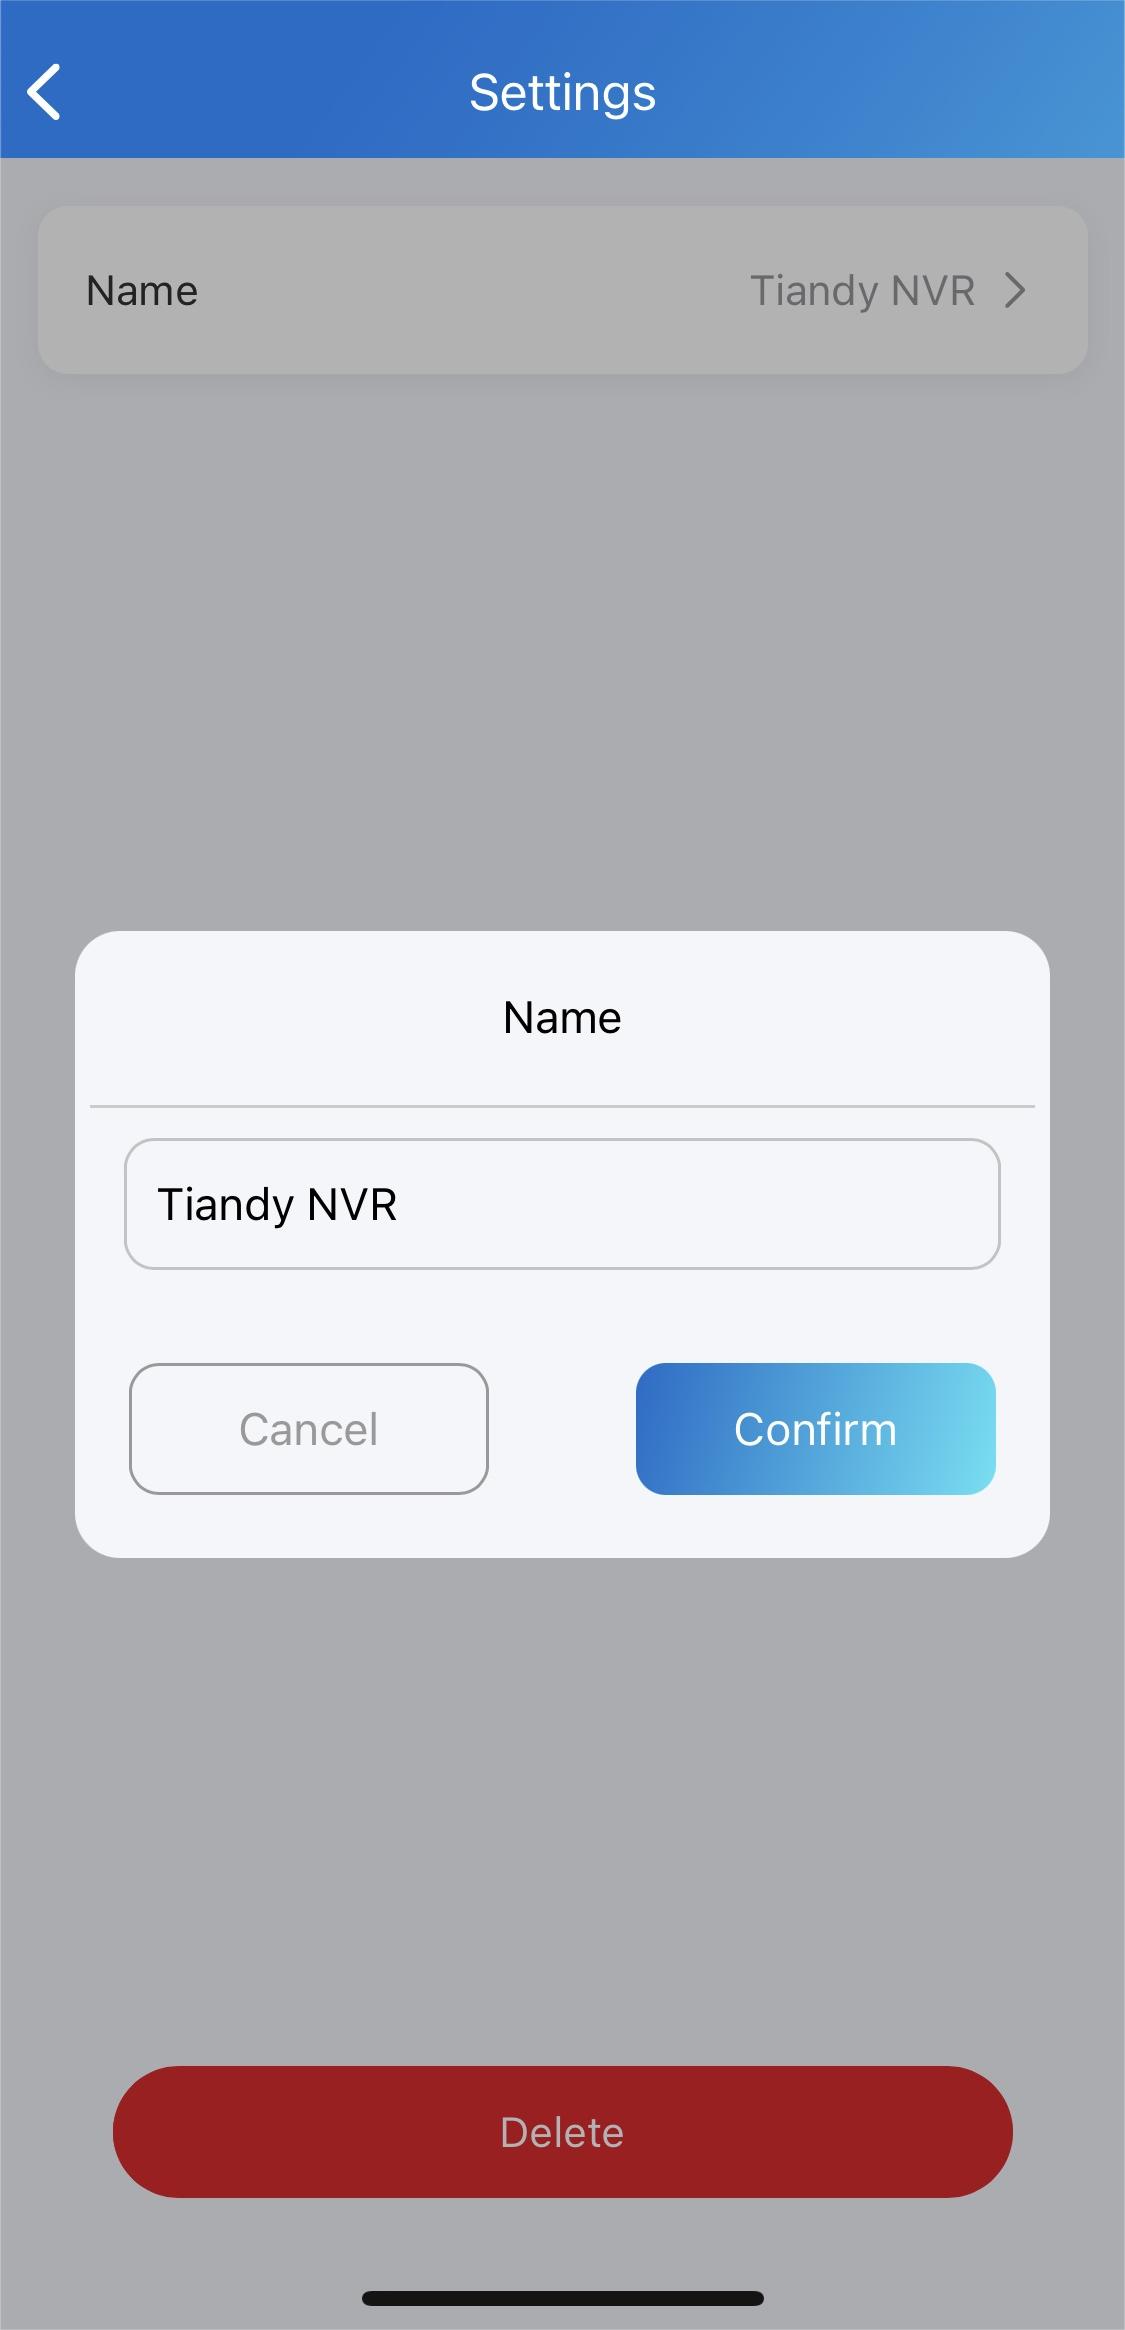
Edit and Delete NVR Devices
After adding the device, you can edit its name and delete it.
1. Tap Me > Discover > Third Party Devices > Tiandy NVR and tap the desired device.
2. On the Settings page, you can edit the device name and delete it.
Monitor and View Playback via NVR
The NVR device will display on the Home page.
Monitor
Tap Monitor to enter the real-time monitoring page where you can:
- switch to view different cameras,
- talk with the person on site,
- record the video,
- capture the image,
- zoom in or out on the lens,
- switch clarity,
- tap on the video to stop playing, and
- modify the channel name(max 32 characters) .

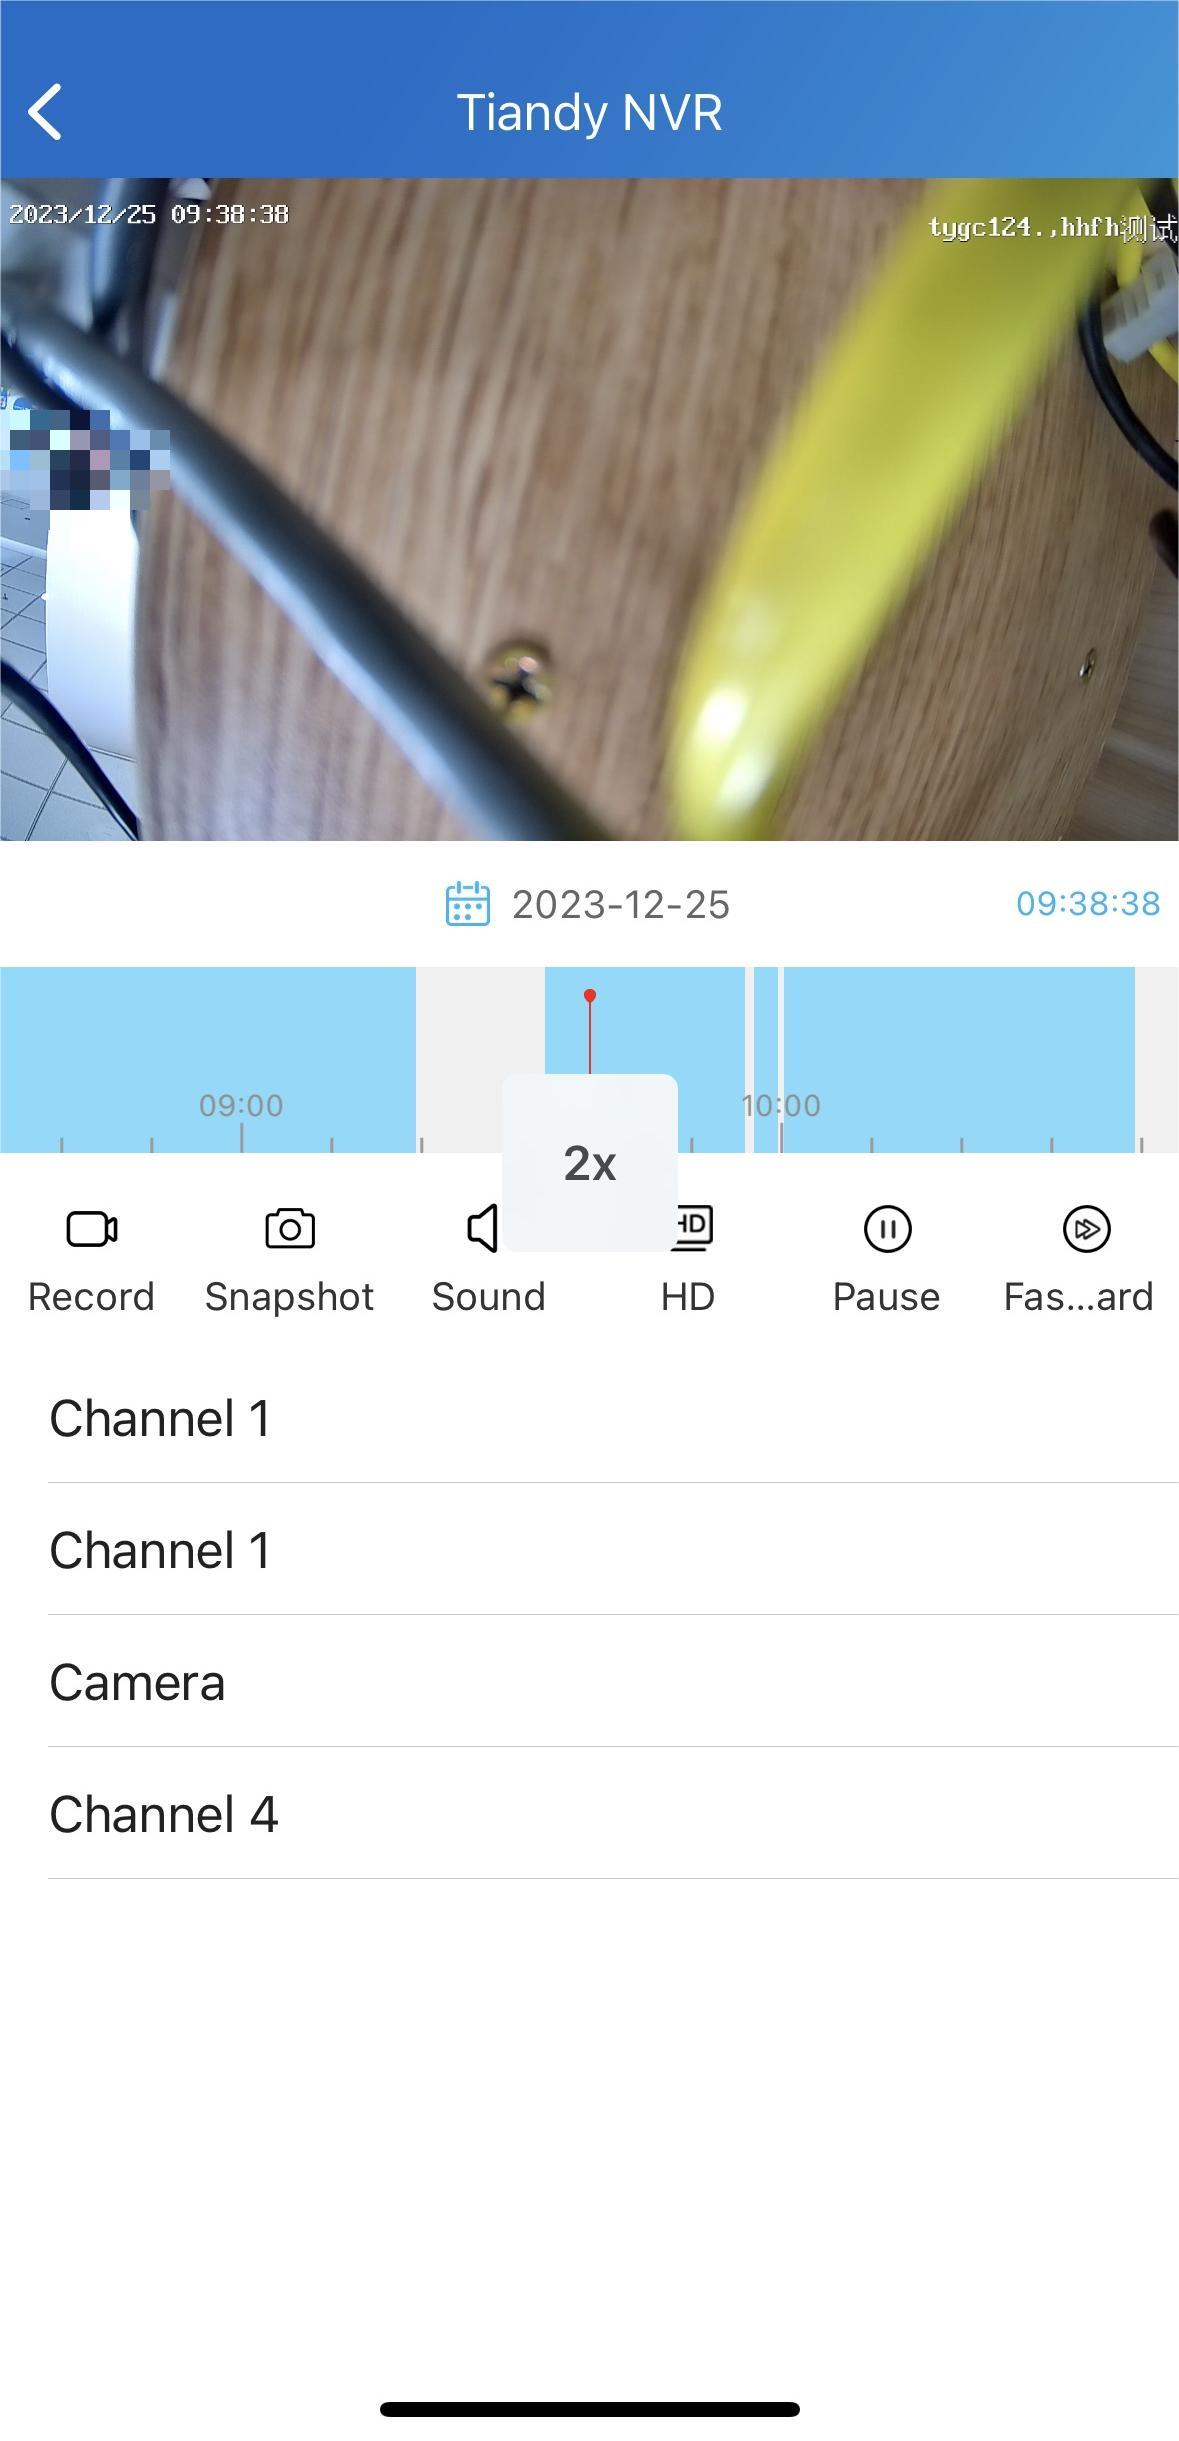
Playback
Tap Playback to enter the playback viewing page where you can:
- switch to view different cameras,
- record the video,
- capture the image,
- mute the sound,
- switch clarity, and
- pause and fast forward the video (the video is mute when fast forwarding).
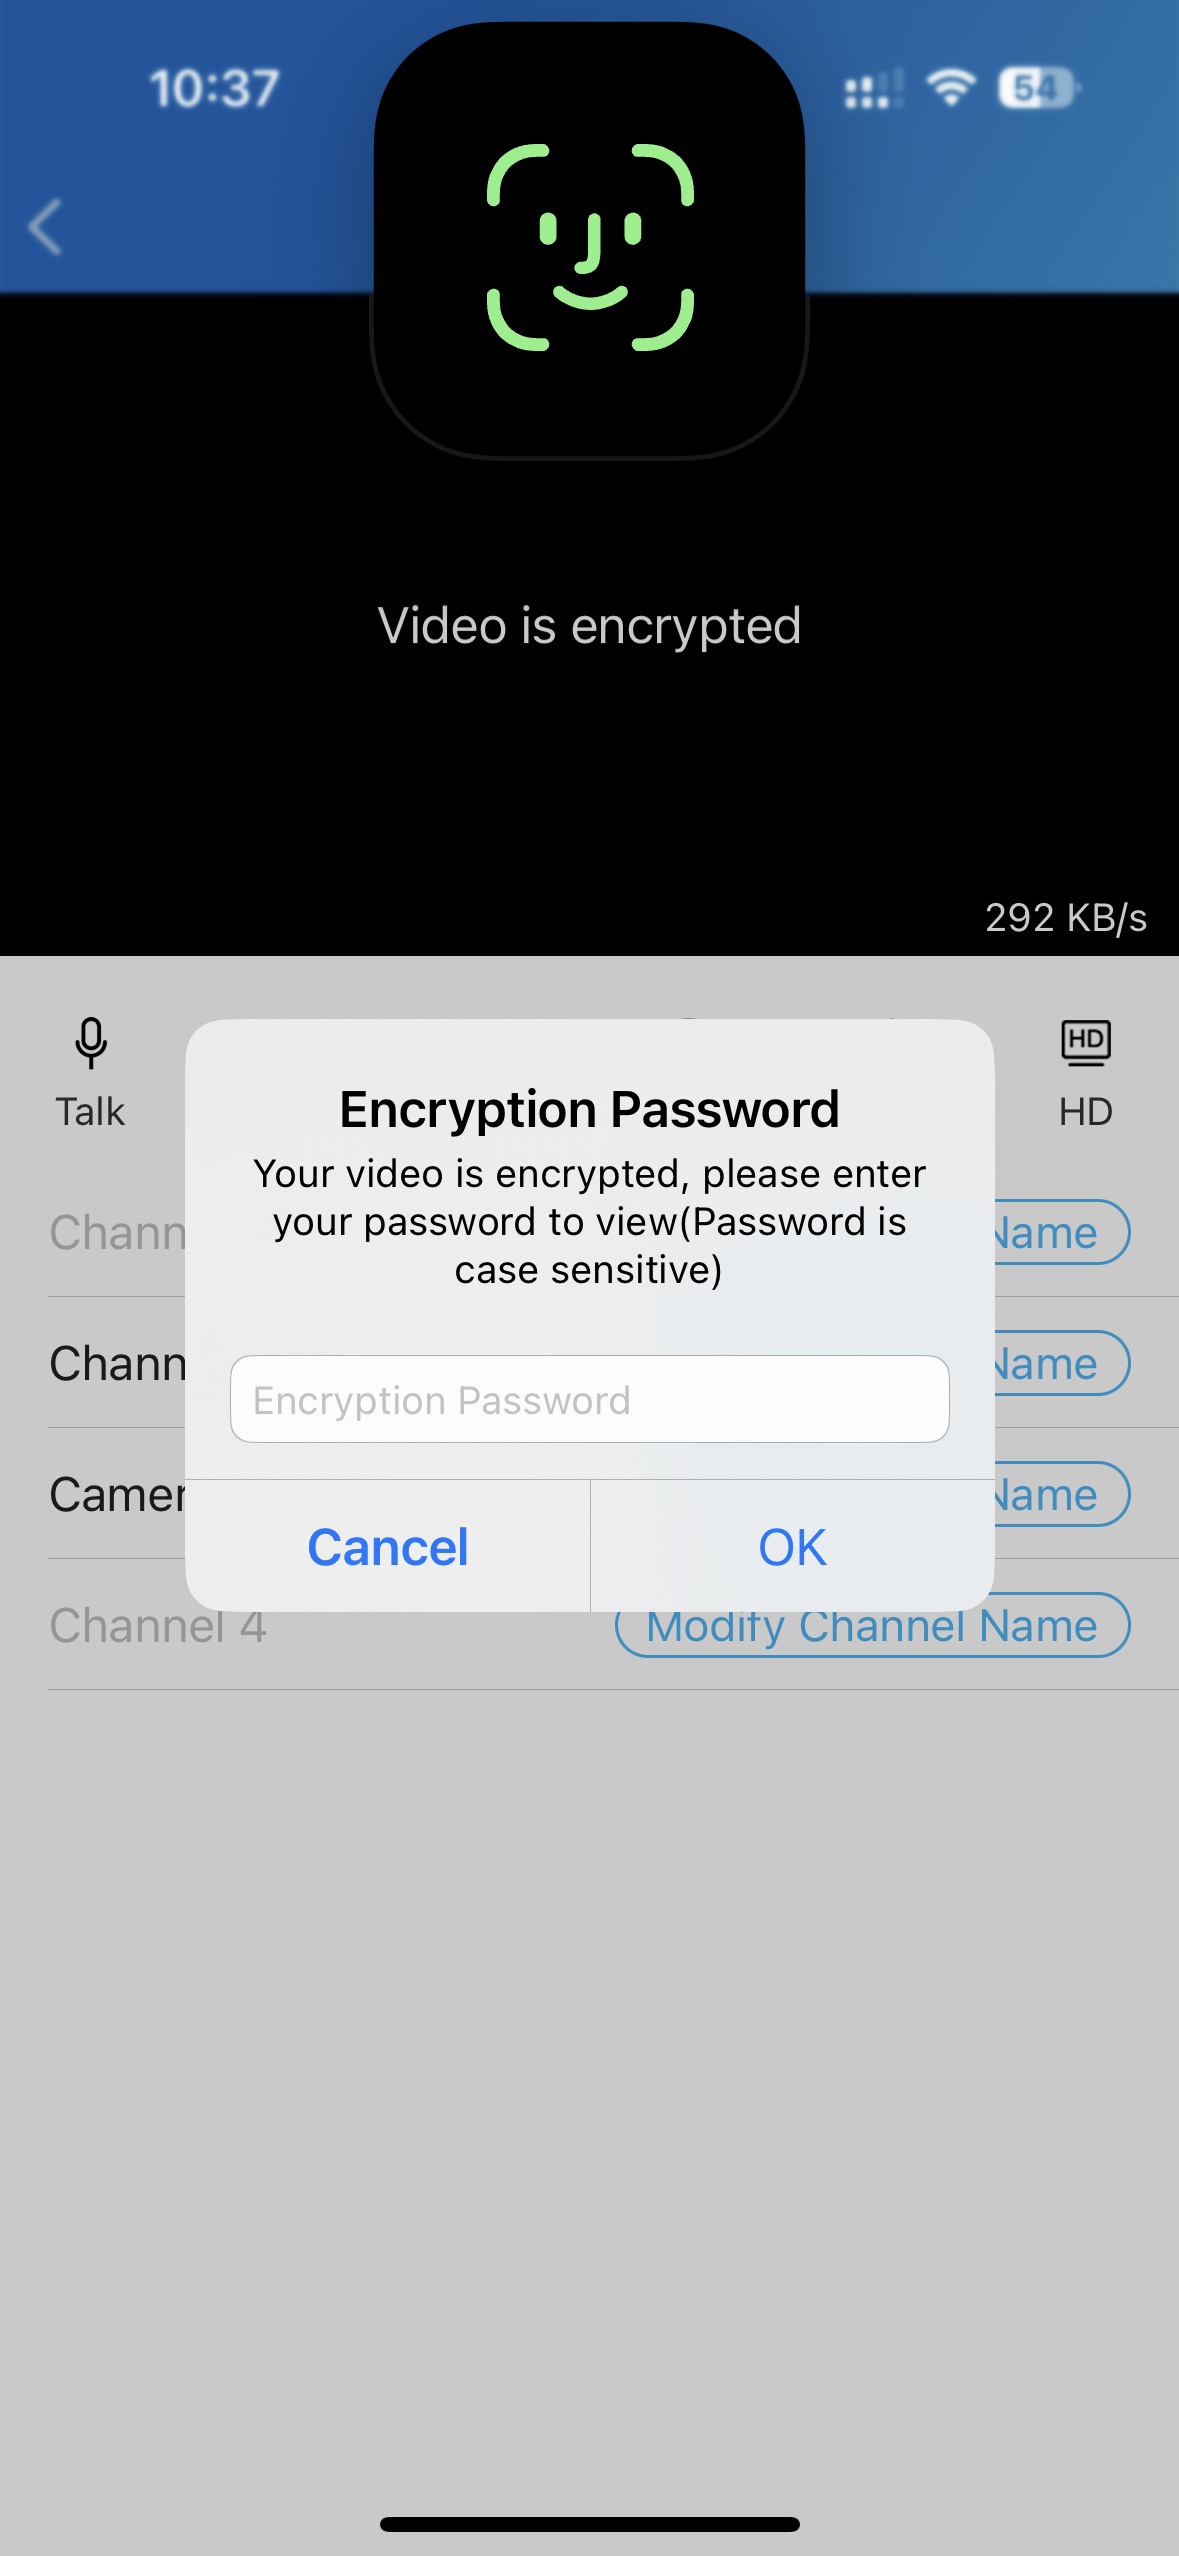
If the video is encrypted, you need to enter the password that you customize on the NVR device.
Favorite Your Devices
Note
- The Favorites feature ONLY supports community projects.
Favorite Device feature enables you to easily add or remove the devices you use most.
Follow the steps below to access, view, or modify your Favorites for devices:
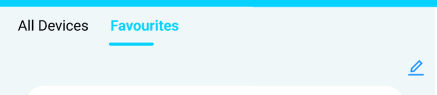
1. Tap Home > Favorites.
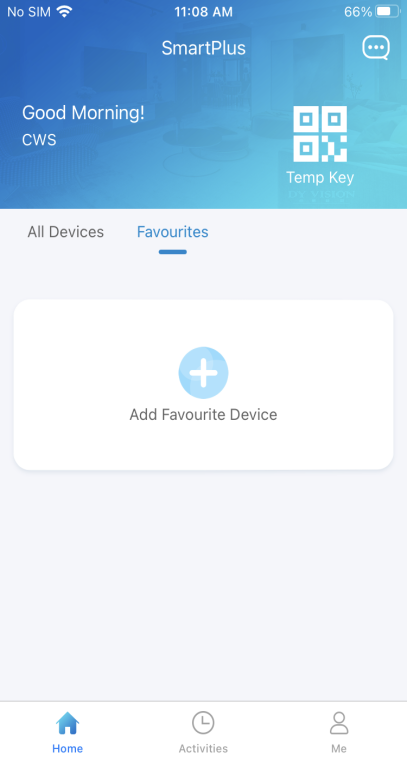
2. Tap Add to Favorites, and tick on the desired devices.
3. Tap  at the upper left corner. The favorite devices will automatically display on the Favorites list.
To reorder the favorite devices, tap  at the upper right.
Note
- Once you switch the SmartPlus account, the previous account’s Favorites will be cleared.
Messages and Notifications
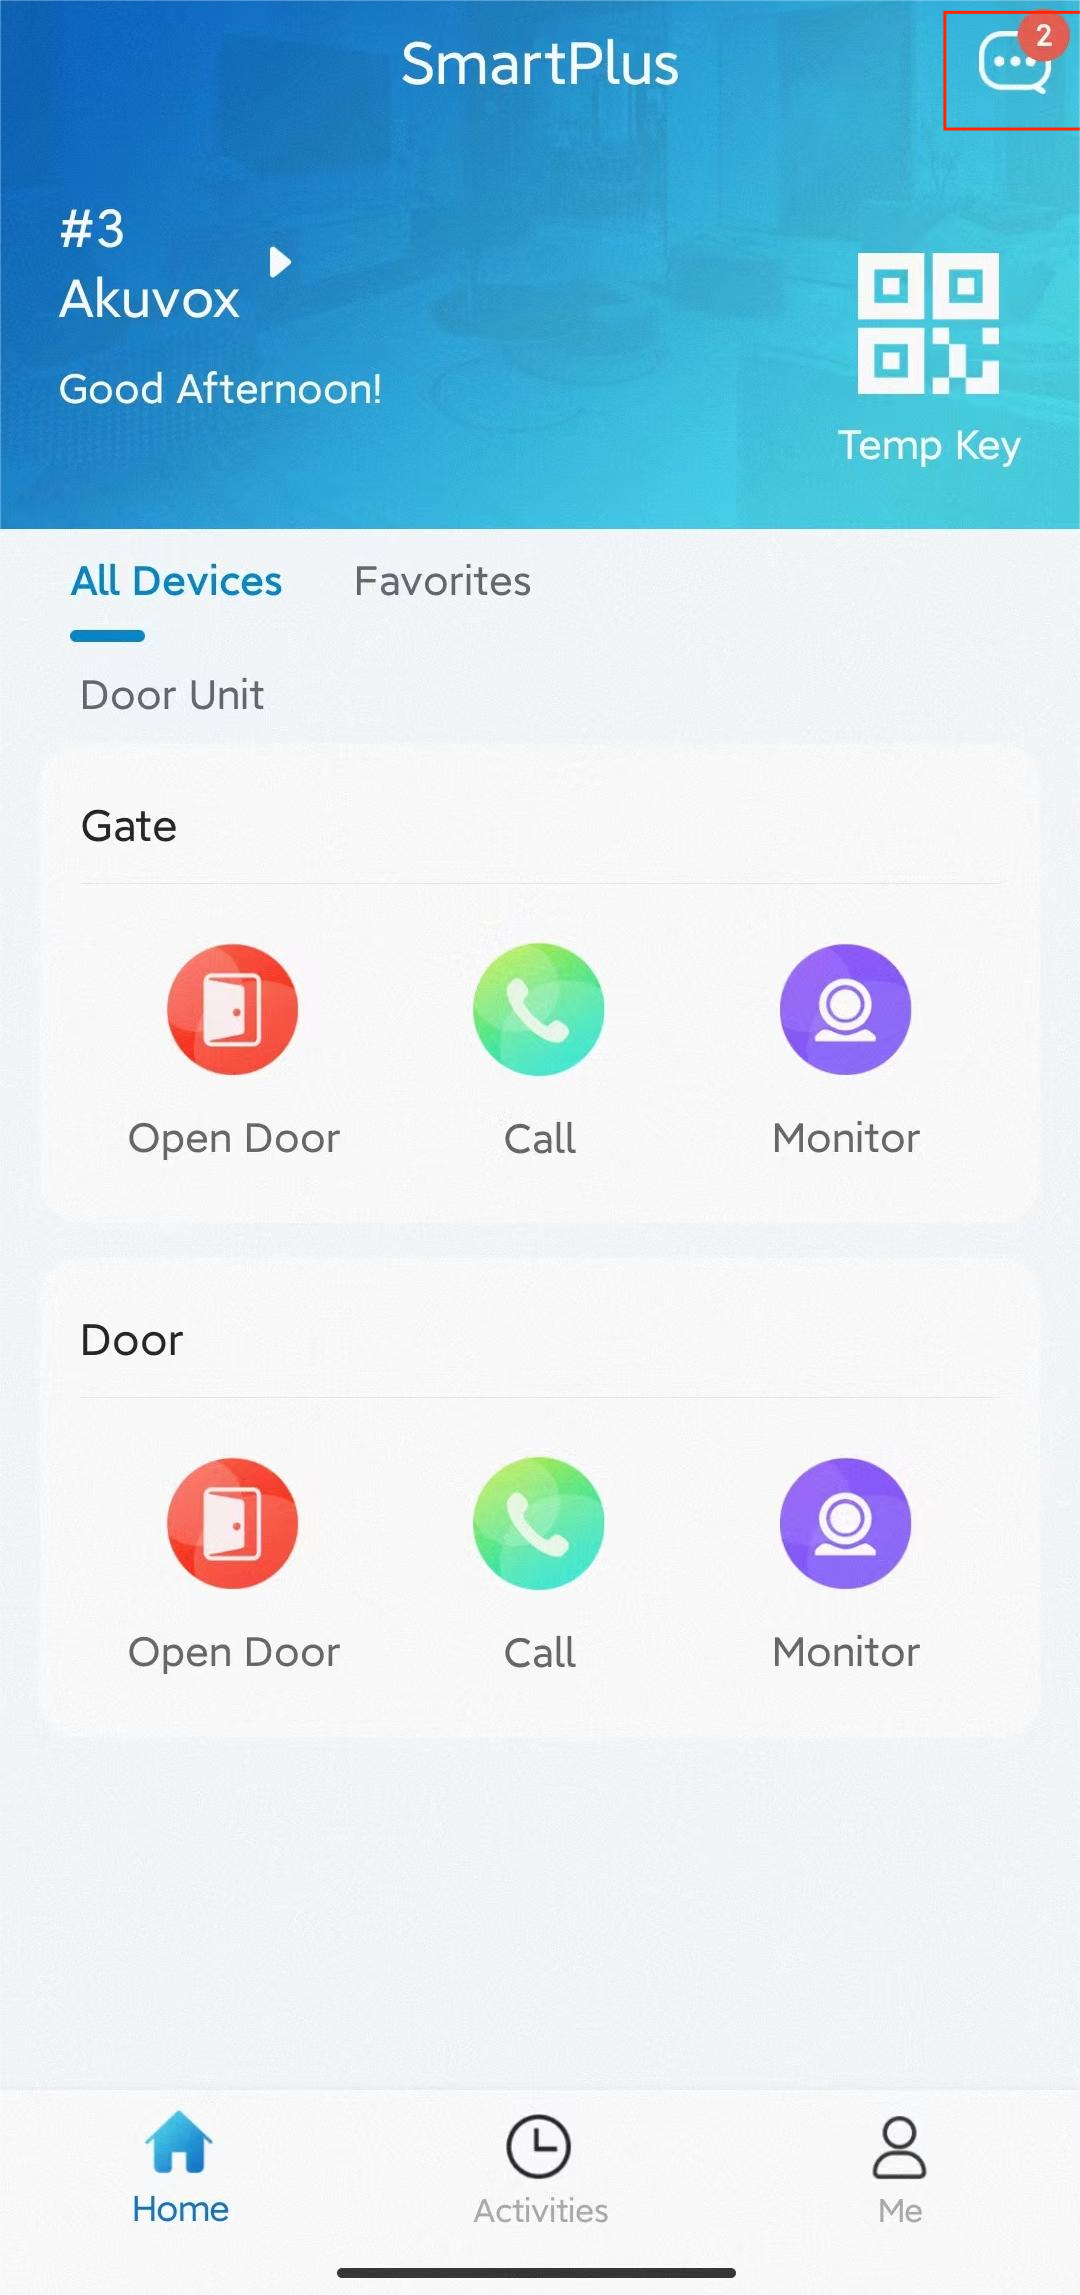
See Messages You've Received
Go to the Notification Center
To see messages you received from the Cloud, the security center, all sites, and more, do the following:
- Tap Home.
- Tap the Message icon
 in the upper right corner.
 in the upper right corner.
If there is a red dot appearing, it means that you have new or unread messages.

- If you want to remove all red dots by one tap. Tap
 and all the messages will be read automatically.
 and all the messages will be read automatically.
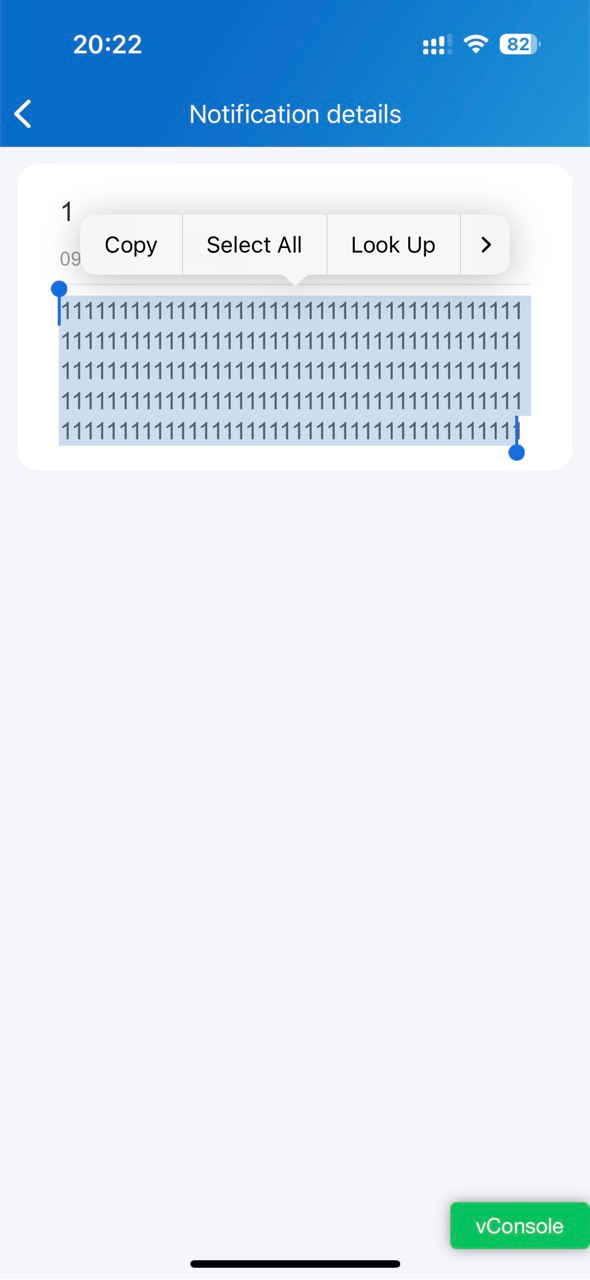
- Tap the desired message to see the details and copy the content if needed.
Note
- The home master who operates the main account can delete messages by tapping
 in the upper right corner, while the sub-accounts cannot do so.
 in the upper right corner, while the sub-accounts cannot do so.
See Package Messages
When having parcels delivered to the package room, you will receive a pop-up notification, or you can check it by tapping Home > Message icon  .
.


Note
- Only available for communities subscribing to premium feature plans.
- Only R29 door phone supports for pushing package room massages. And the previous version’s app can not receive such messages.
See Temp Key Used Messages
The user who creates a Temp key will receive a message about the key being used. For example, if the PIN key is created by you, you will receive a pop-up message when it is used by the user, or you can check it by tapping Home > Message icon  .
.


Note
- App with Cloud 6.1 or later supports for pushing this kind of message.
Check Voice Messages
When someone leaves a voice message to your app using the door phone, you will receive a notification.
To check and listen to the message, go to Home > Message icon  , and tap the desired one.


Note
- Voice messages will be kept for 1 month. In this case, you are not able to listen to the messages you received 1 month ago.
- Only the S539 door phone now supports leaving voice messages for residents.
Receive Offline Push Notifications
When the App is running backstage, it will push the following types of pop-up messages:
- Messages sent from Cloud and property managers
- Temp key used messages
- Package room massages
- Voice messages
- Yale lock’s low battery status messages
- Motion alerts
- Alarms
- SOS
Strong Arming Alarm Reminder
If this feature is enabled, the alarm ringtone will ring continuously for 30 seconds when the alarm is triggered.
- Go to Me > Settings > Notification Settings.
- Enable or disable Strong Arming Alarm Reminder.
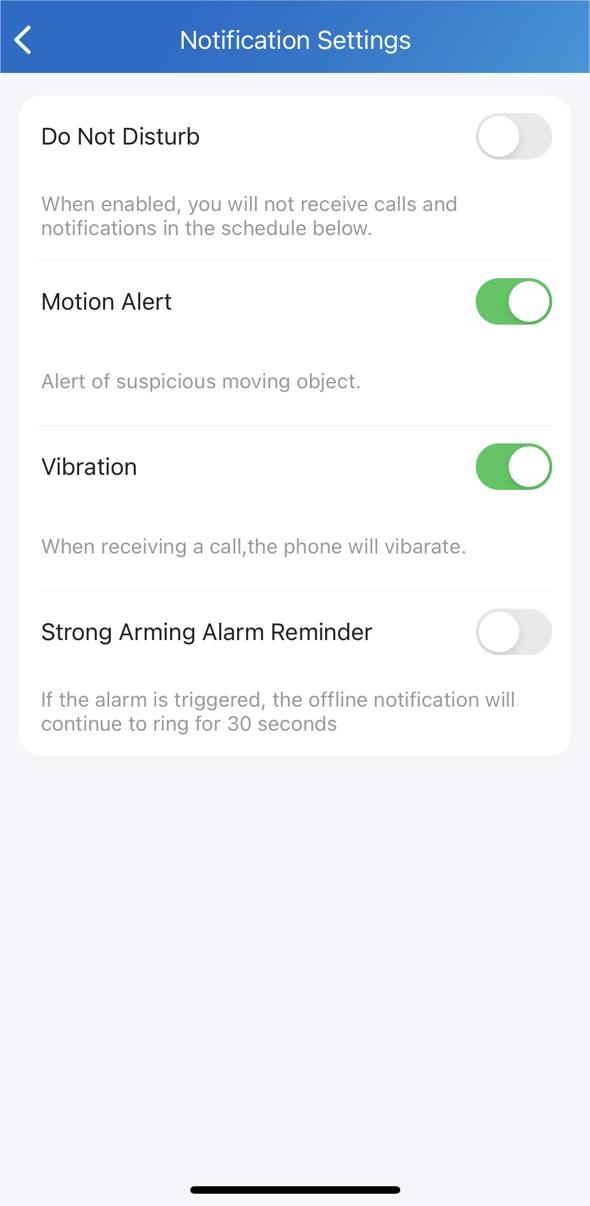
Please note that for Android mobile phones, ringing will stop when the device is disarmed.
For IOS mobile phones, ringing will continue for 30 seconds.
Not to Receive Notifications
You will not receive notifications (except Alarm warnings) if you enable the Do Not Disturb function.
- Go to Me > Settings > Notification Settings.
- Turn on Do Not Disturb.
- Set up a Time Schedule.

To see messages and notifications received when Do Not Disturb is on, go to the Home > Messages icon  .
.
Logs and Histories
All devices' logs are available, such as door logs, call history, capture logs, and motion logs. You can also set up a log level and upload it to the Cloud.
Check Door Access Histories
All the calling, opening, and monitoring-related histories are recorded. Via these logs, you can know which device at what time does what. Tap Activities at the bottom to see any of the following:
- Door logs: All the calling and door opening histories. If the door phone has relays added, the triggered relay is also displayed here.
- Call history: All the outgoing/incoming/missed calls.
- Capture log: All snapshots you made of live videos.
- Motion logs: All the detected suspicious motions triggered by door units.


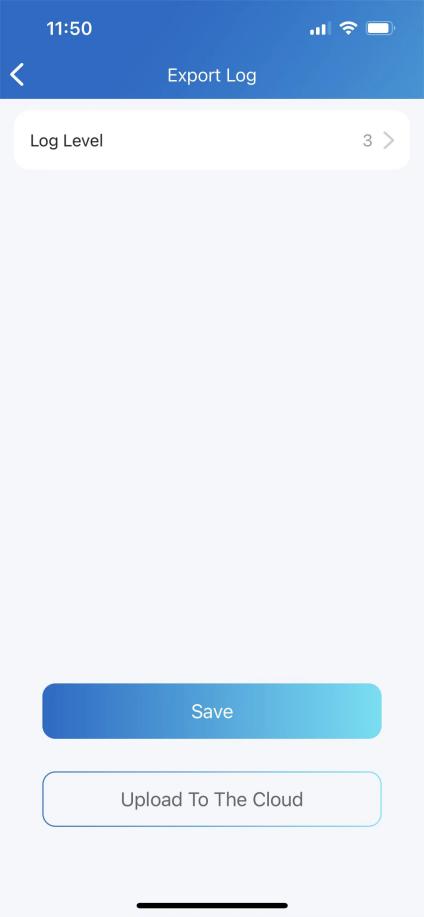
Set up, Export, and Upload Logs
The log has 7 levels. The level is 3 by default. The higher the level is, the more detailed the log content is. You can export and send detailed logs to Akuvox technical engineers to analyze problems if the device malfunctions.
- Go to Me > Settings > Advanced Settings > Export Log.
- Select a level and Tap Save. You can ask our technical engineer for detailed information on each level.
If you want to upload the current log to the cloud, tap Upload.

Advanced Settings
Check Video Communication Qualities
You can use Video Quality Diagnosis to check real-time video quality. It can be applied to video calls, live monitoring videos, and preview pages.
Go to Me > Settings > Advanced Settings, and turn on Video Quality Diagnosis, then you can see below information shown in the upper left corner of the screen:
- fps: frames per second. If the value is low, it'll give a slow-motion or motion-blur effect to your video.
- bps: bits per second. The higher the bps rate is, the faster the download or upload time will be.
- packet loss rate: The lower the rate is, the better the network will be.
- rtt: round-trip time. It’s the total time taken by a data packet as it travels from its source to the destination and back.


Enable Confirmation Prompts when Opening Doors
Unlock with confirmation check feature shows you a prompt to confirm your opening door command when you tap the unlock button of a device that links with only one door (relay). This helps prevent you from tapping the Unlock button by the incident and gives you a chance to double-check before you open the door.
To enable this feature, go to Me > Settings > Advanced Settings, and toggle on Unlock with confirmation check.


Clear Cache to Improve App Performance
After using the App for a long time, you can clear the cache to run the App better and free up storage space. Go to Me > Settings > Advanced Settings, and Tap Cache Clear.

Account Settings
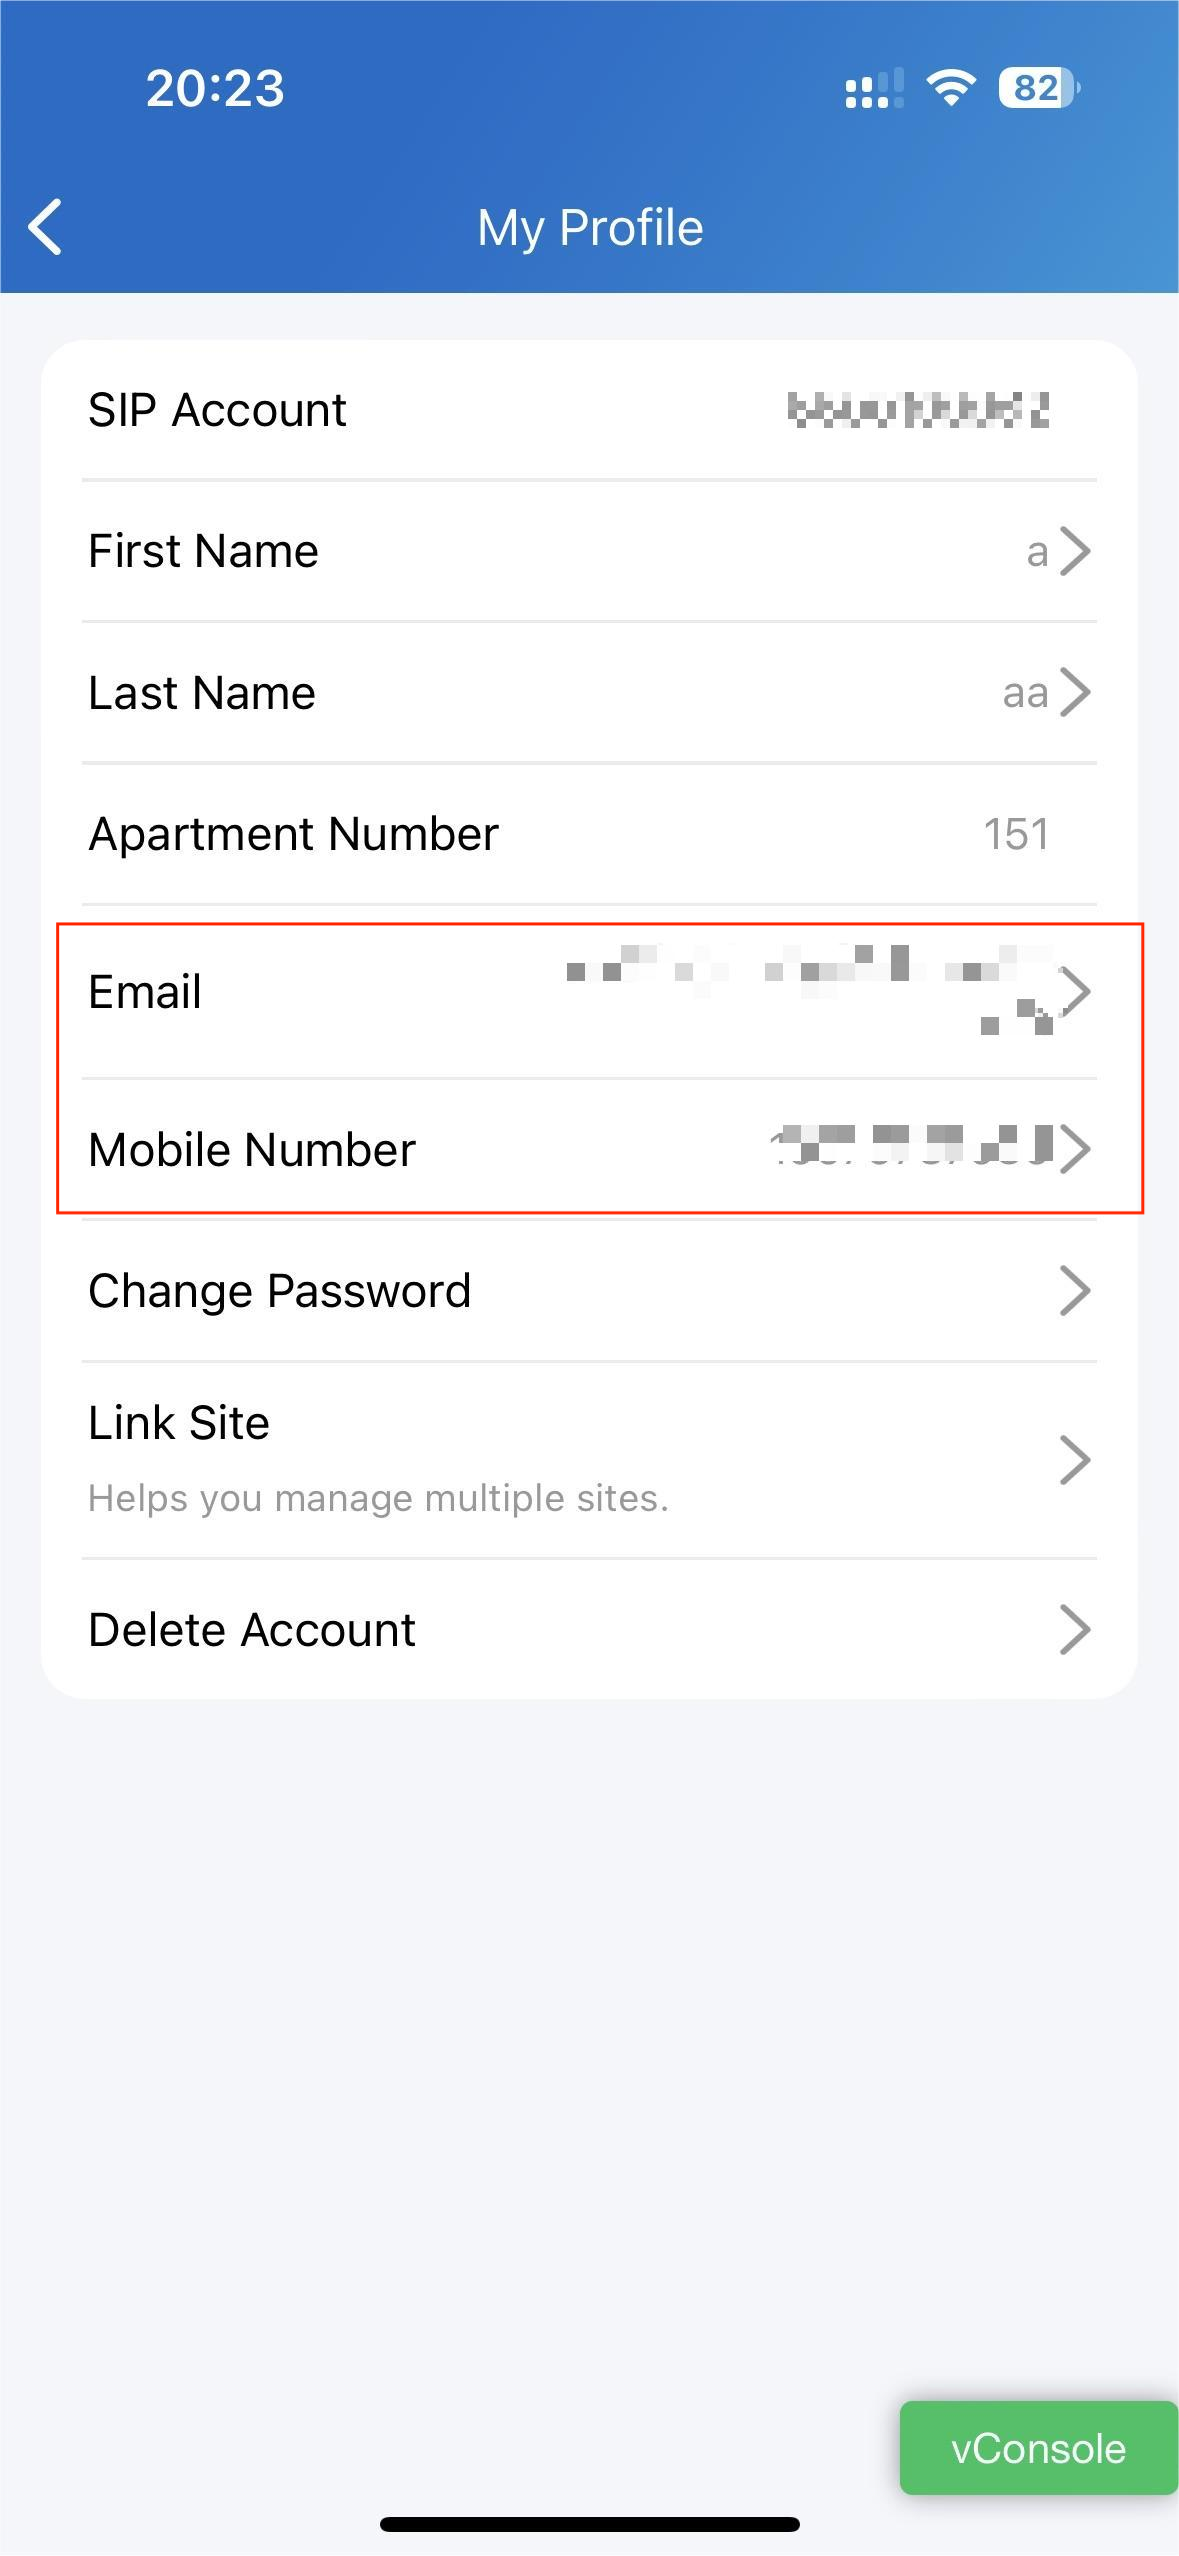
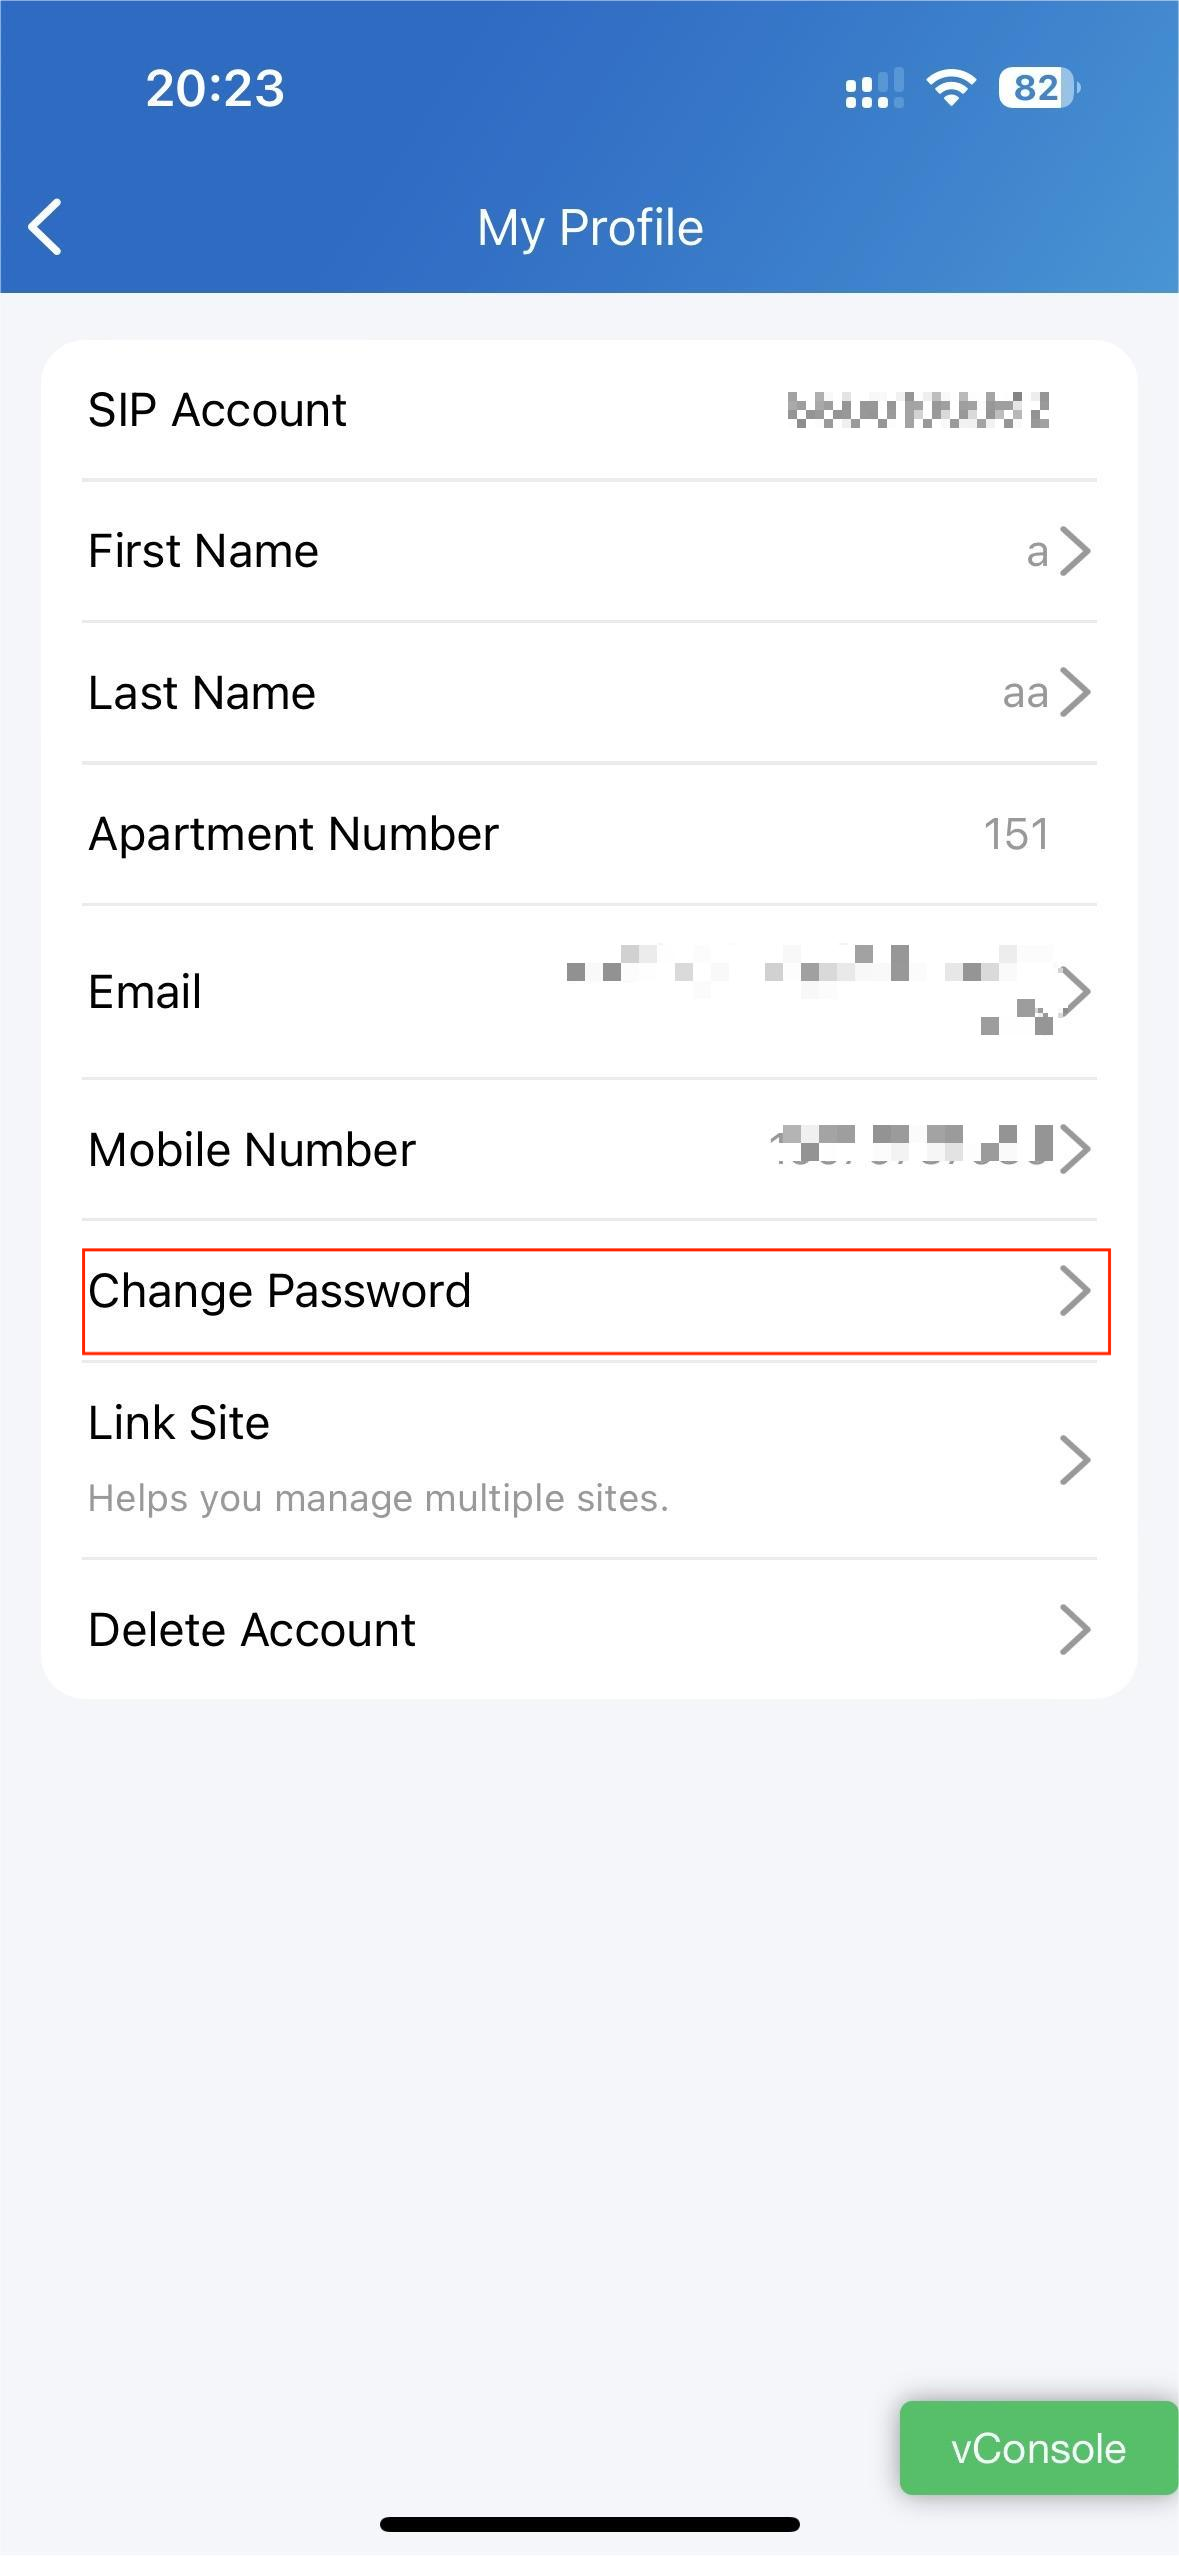
View and Change Account Information
You can check your account information, including your SIP account, username, apartment number, Email, and mobile number. For better security, you can make a change to username and login password.
Check your account information
- Tap Me on the bottom Tap bar.
- Tap [your name], and you can see the details.
.png)

Change your username
- Go to Me > [your name].
- Tap First Name and Last Name, and type in new names in the boxes.
- Tap Confirm to validate the change.
(1).png)
.png)
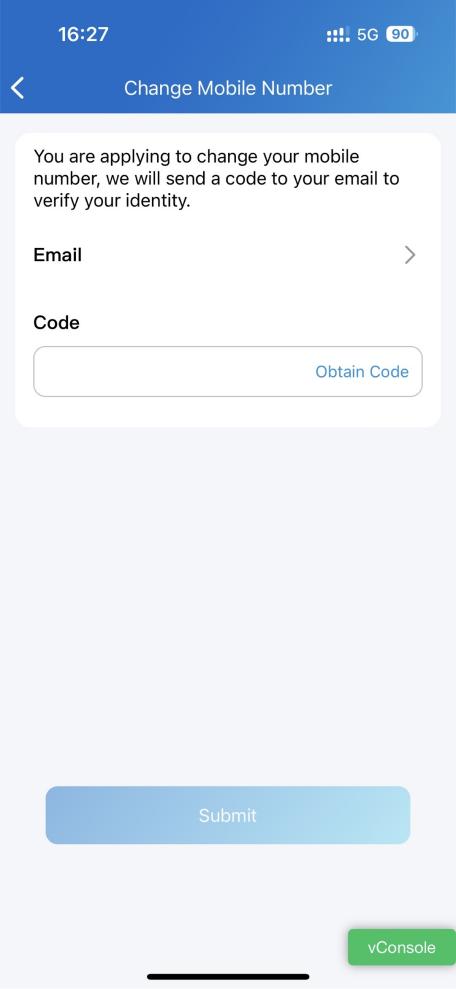
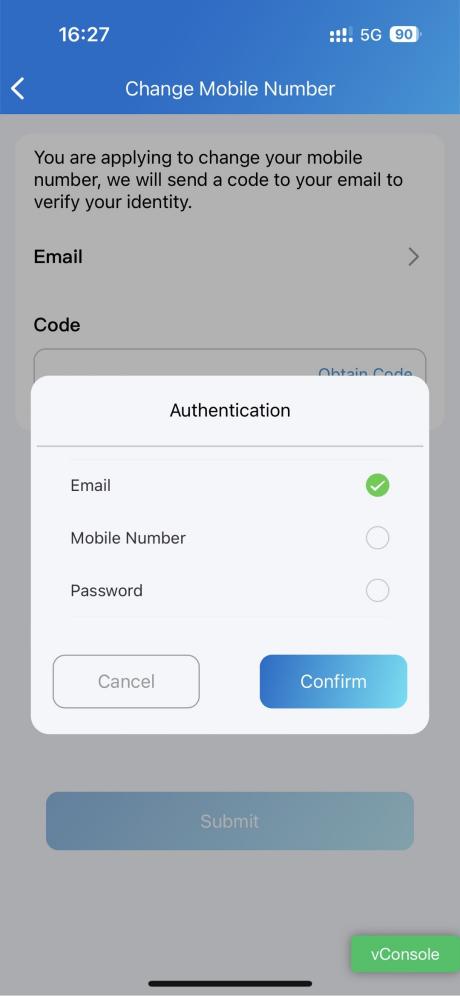
Change your mobile phone and email number
- Go to Me > [your name].
- Tap Email or Mobile Number.
- Choose the authentication mode. Enter the password or verification code you receive from your mobile phone or email.
- Tap Confirm to validate the change.
- You need to log in again after the change.
Change a weak or compromised password
You can change a compromised or weak (for example, it is easily guessed or has been used for a long time) login password, just do the following:
- Go to Me > [your name].
- Tap Password.
- Create a new password. When doing so, you are asked to enter your old password.
- Tap Submit to validate the change.
(2).png)
Forgot password
If you forget your login password, tap Forgot Password on the login page. You can reset your password using Email or message:
- Email. Select your account type and enter your email address. Then, you will receive an email containing a link that will redirect you to the reset page.
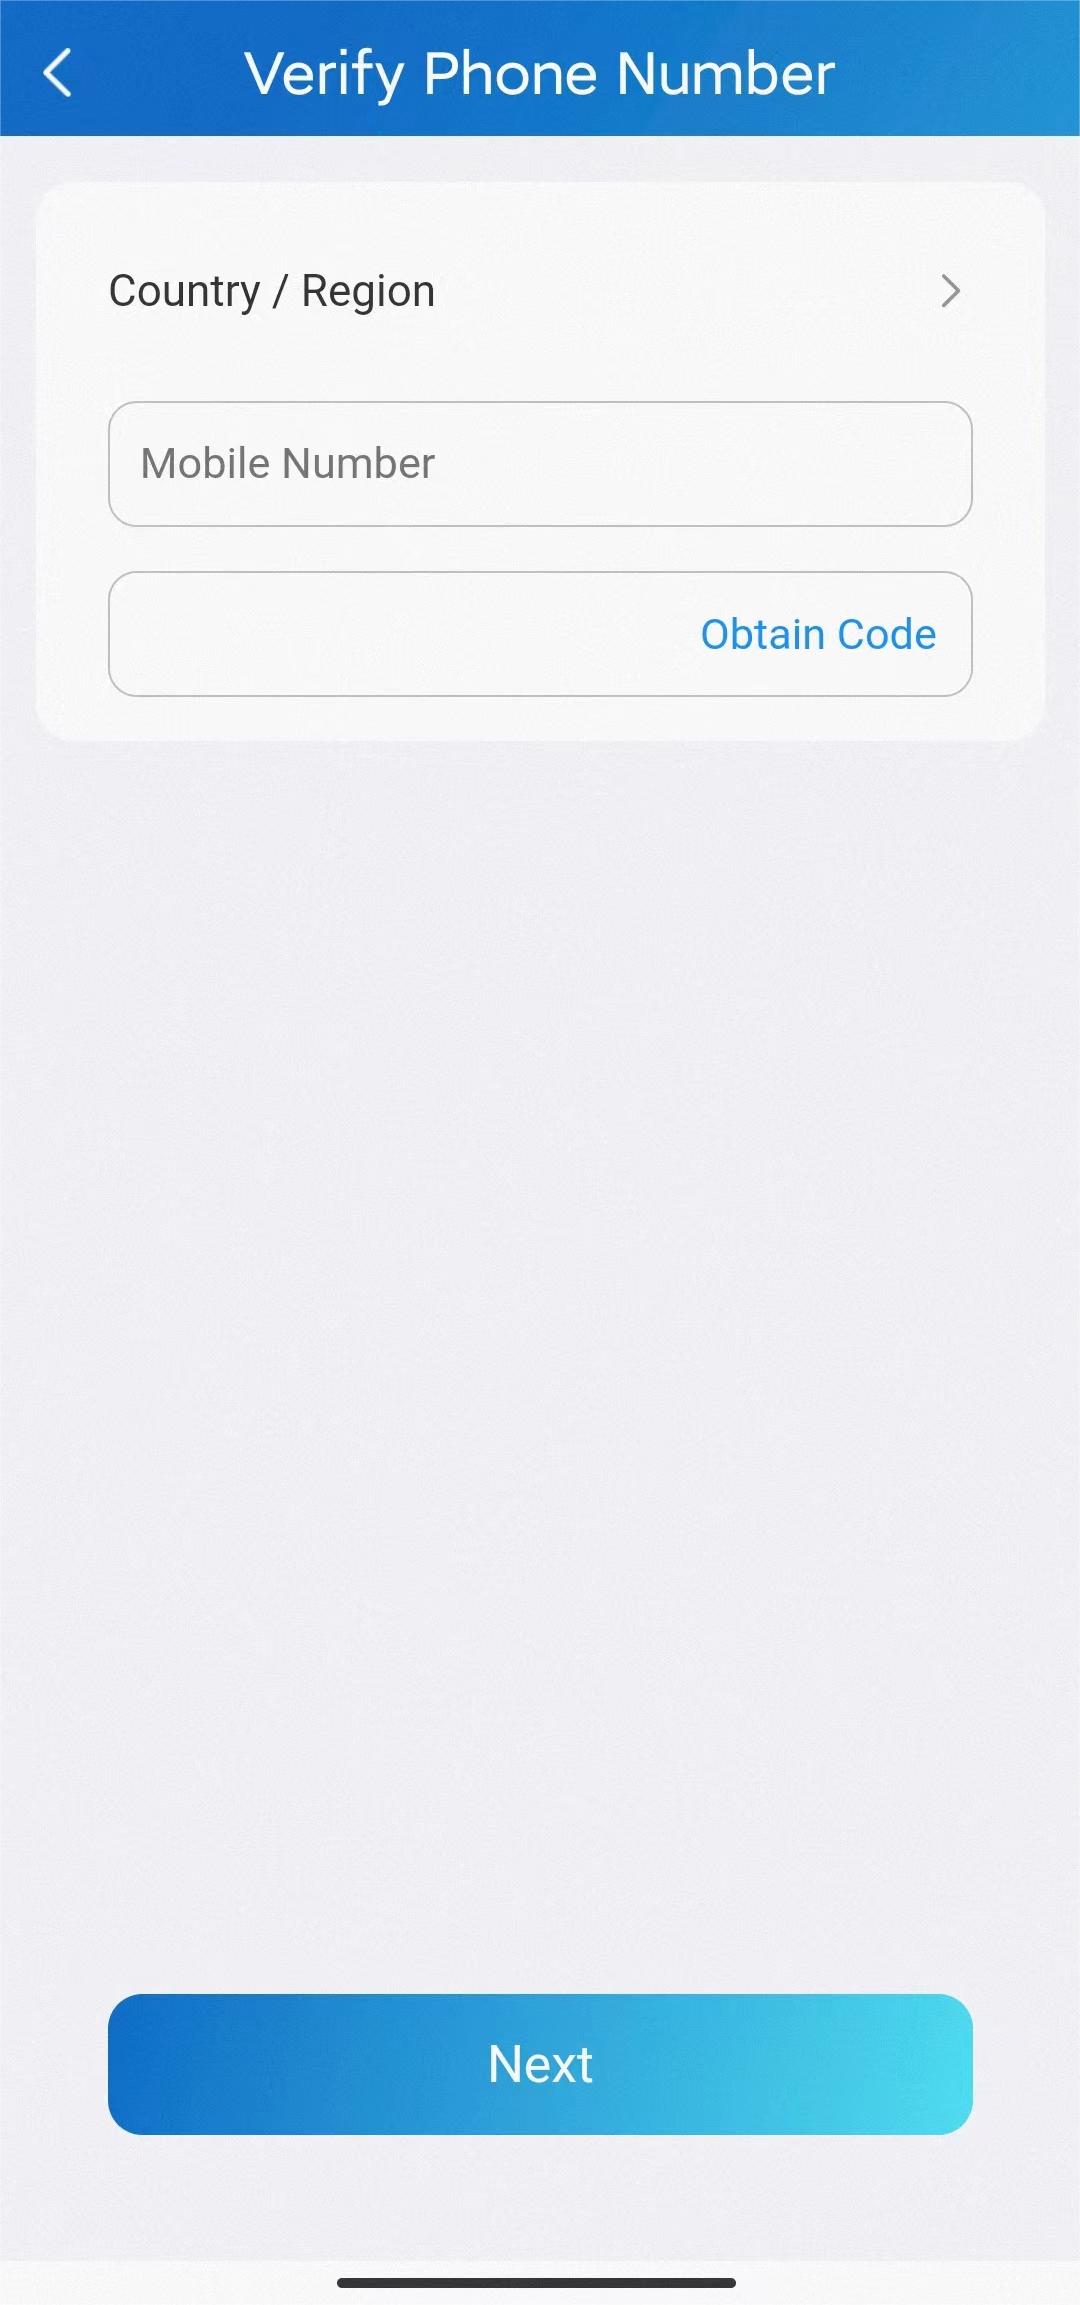
- SMS.
- Tap Try to reset via SMS.
- Select Country/Region code.
- Enter your mobile number and tap Obtain Code.
- Enter the verification code you received. Tap Next and follow the onscreen instructions.

Create an Account for a Family Member
If you are the family’s master, you are enabled to add family members and create accounts for them, so they can log in to the SmartPlus App and use Akuvox Cloud services.
1. Go to Me > Family Members.
2. Tap + New Family Member.
3. Enter username and email address. Mobile numbers and landlines are optional.
Note
The user’s information you enter matters. They decide how the member signs in and finds his/her password.
- If you entered the member’s email address
The login credentials will be sent to your (the family master’s) email, and the password reset email will be sent to the member.
- If you only entered the member’s phone number
Both the login credentials and password reset email will be sent to your (the family master’s) email.
- If you did not enter the member’s email address and phone number
He/She has to use the SIP number and password for login. The password reset email will be sent to your (the family master’s) email.
4. Tap Submit.
Once a family member is created, you can call him/her by selecting him/her from the list.
You can see, edit, and remove the members on the Family Members screen at any time.


Delete Your Account
You can cancel your account at any time.
Once your account is deleted, you will not be able to sign in to SmartPlus anymore. And it charges if you apply for a new account and use it.
To delete the account, do the following.
- Go to Me > [your name] > Delete Account.
- Tap Confirm when you're asked.
- Enter the correct verification code.
The code will be sent to:
- Your email or phone number, if you use either of them to apply for the account; Or
- The family master's email or phone, if you did not provide any of your information when applying.


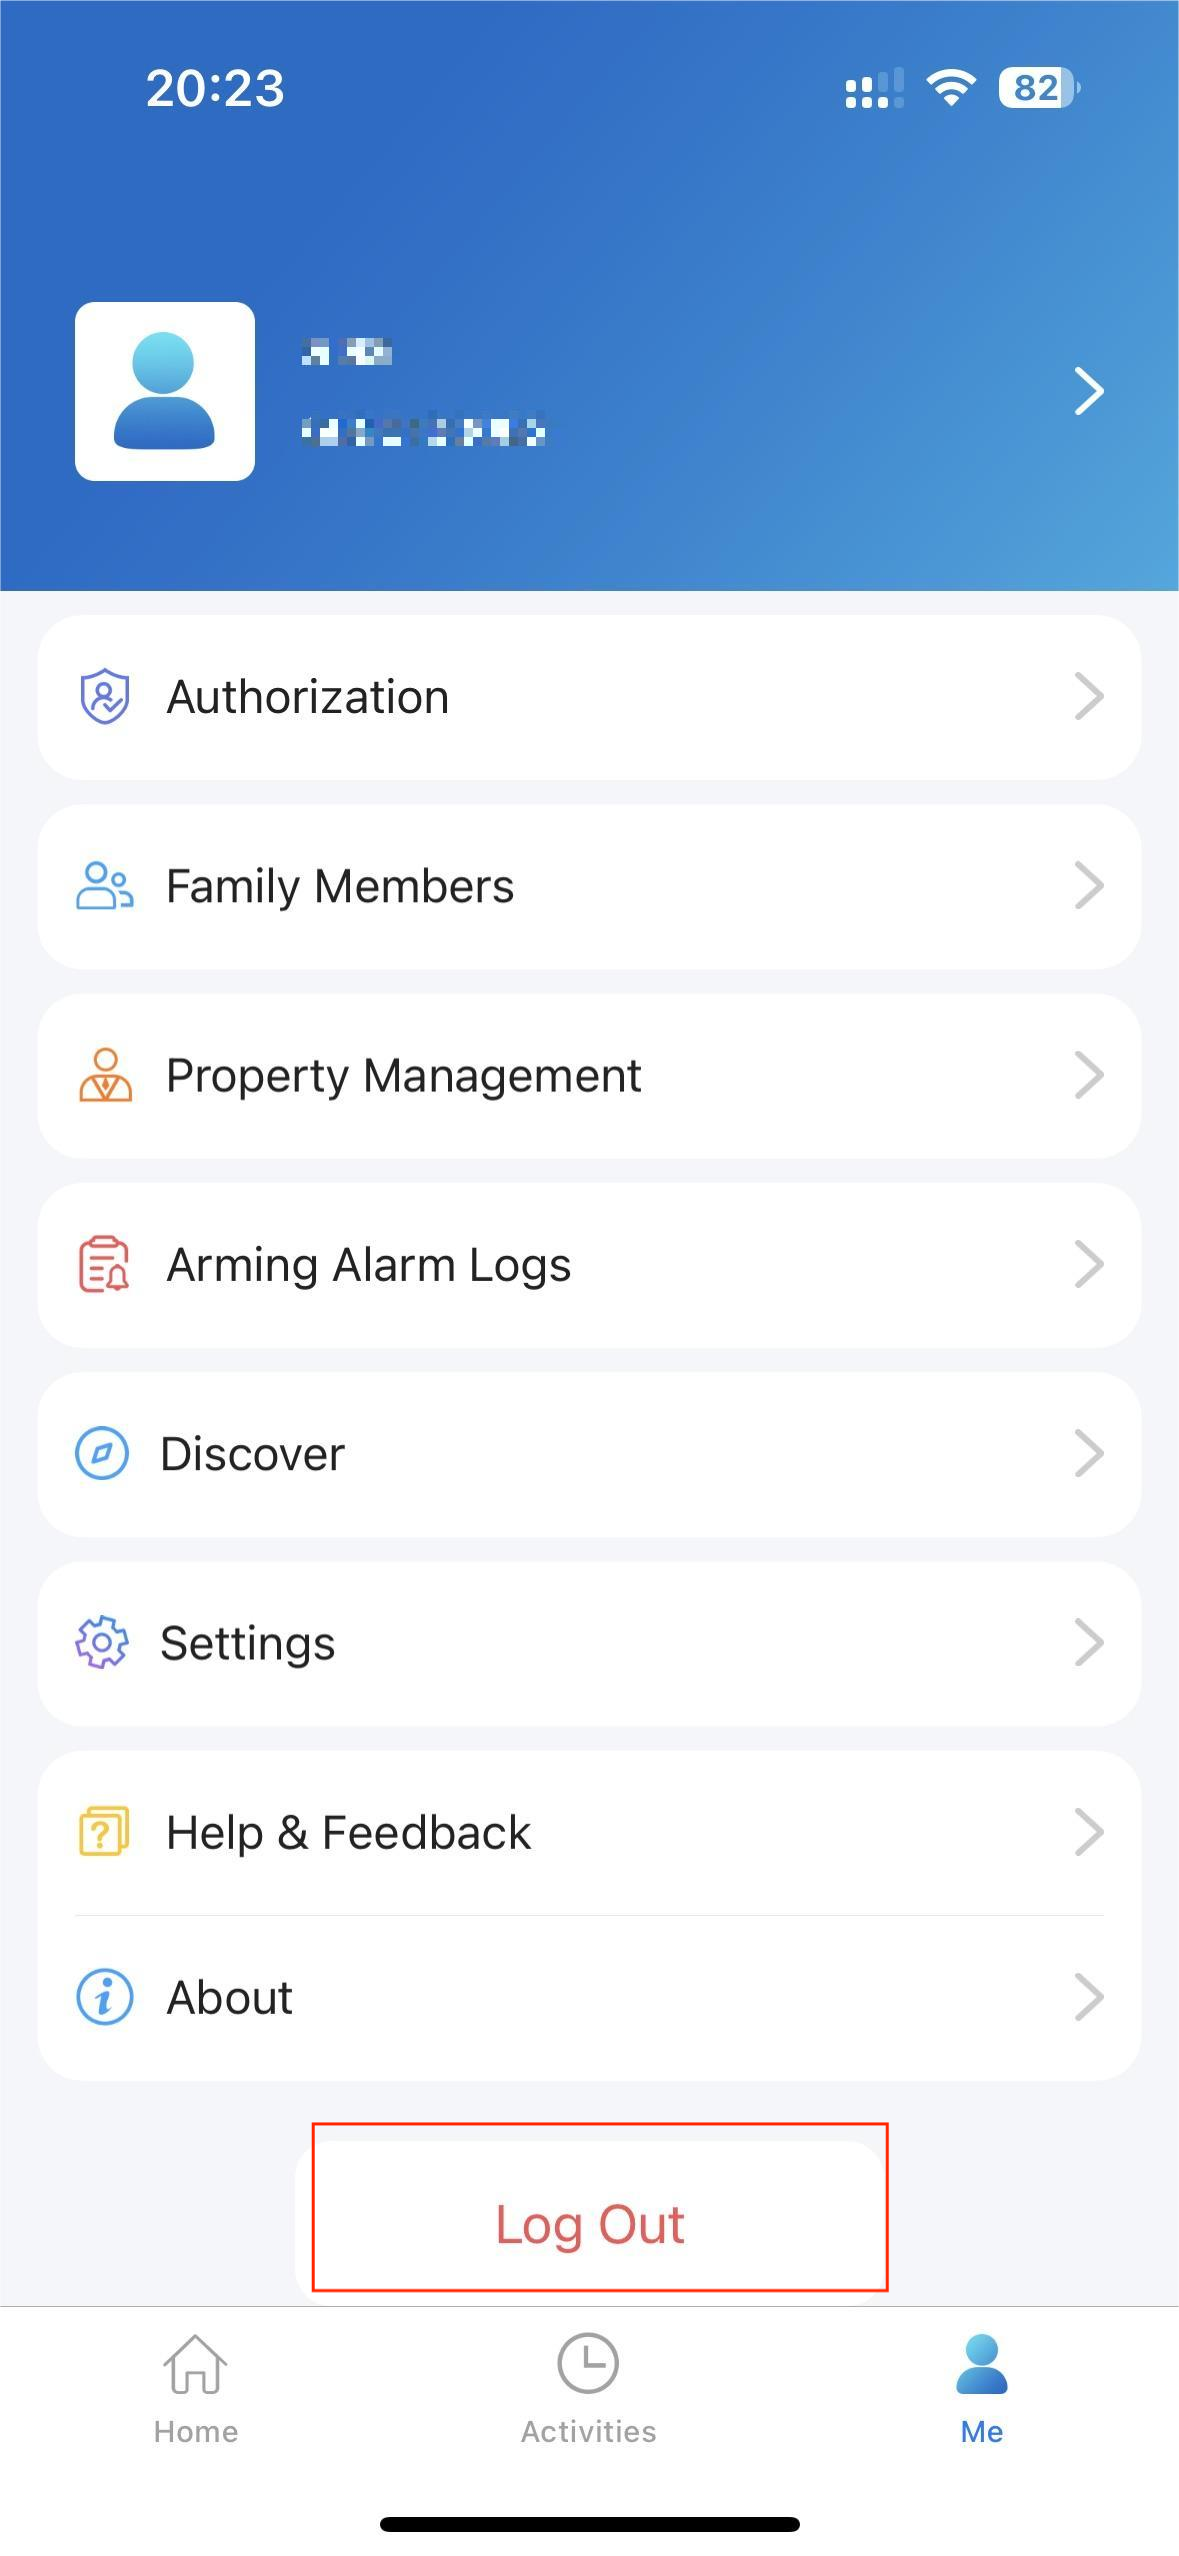
Log Out
To sign out of SamrtPlus, tap Me >Log Out.
Support
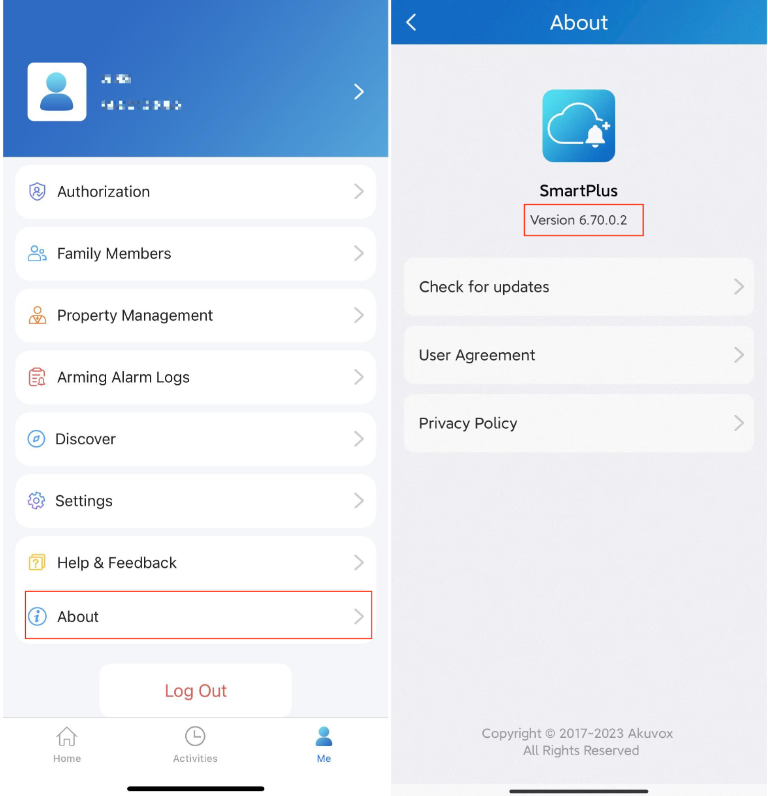
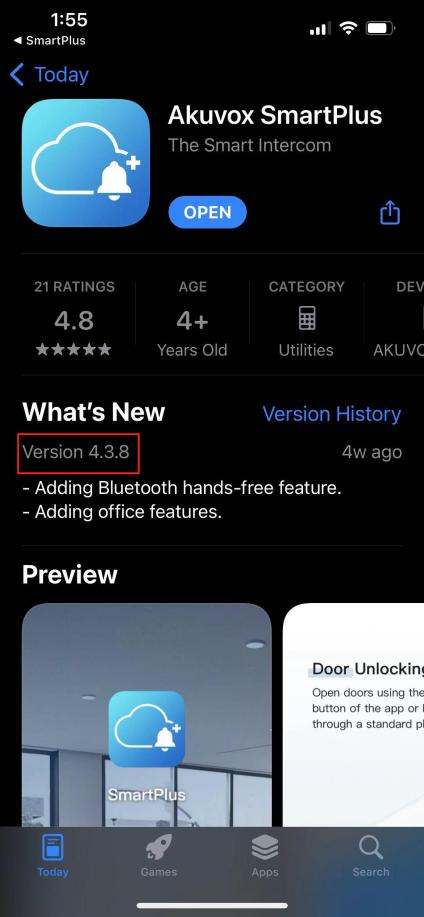
Update
You can go to Me > About to see the current software version. Tap Check for Updates, it will turn to App Store or Google Play automatically, then you can check whether it is the latest one.
Your settings and data will remain unchanged when you update the App to the latest version.
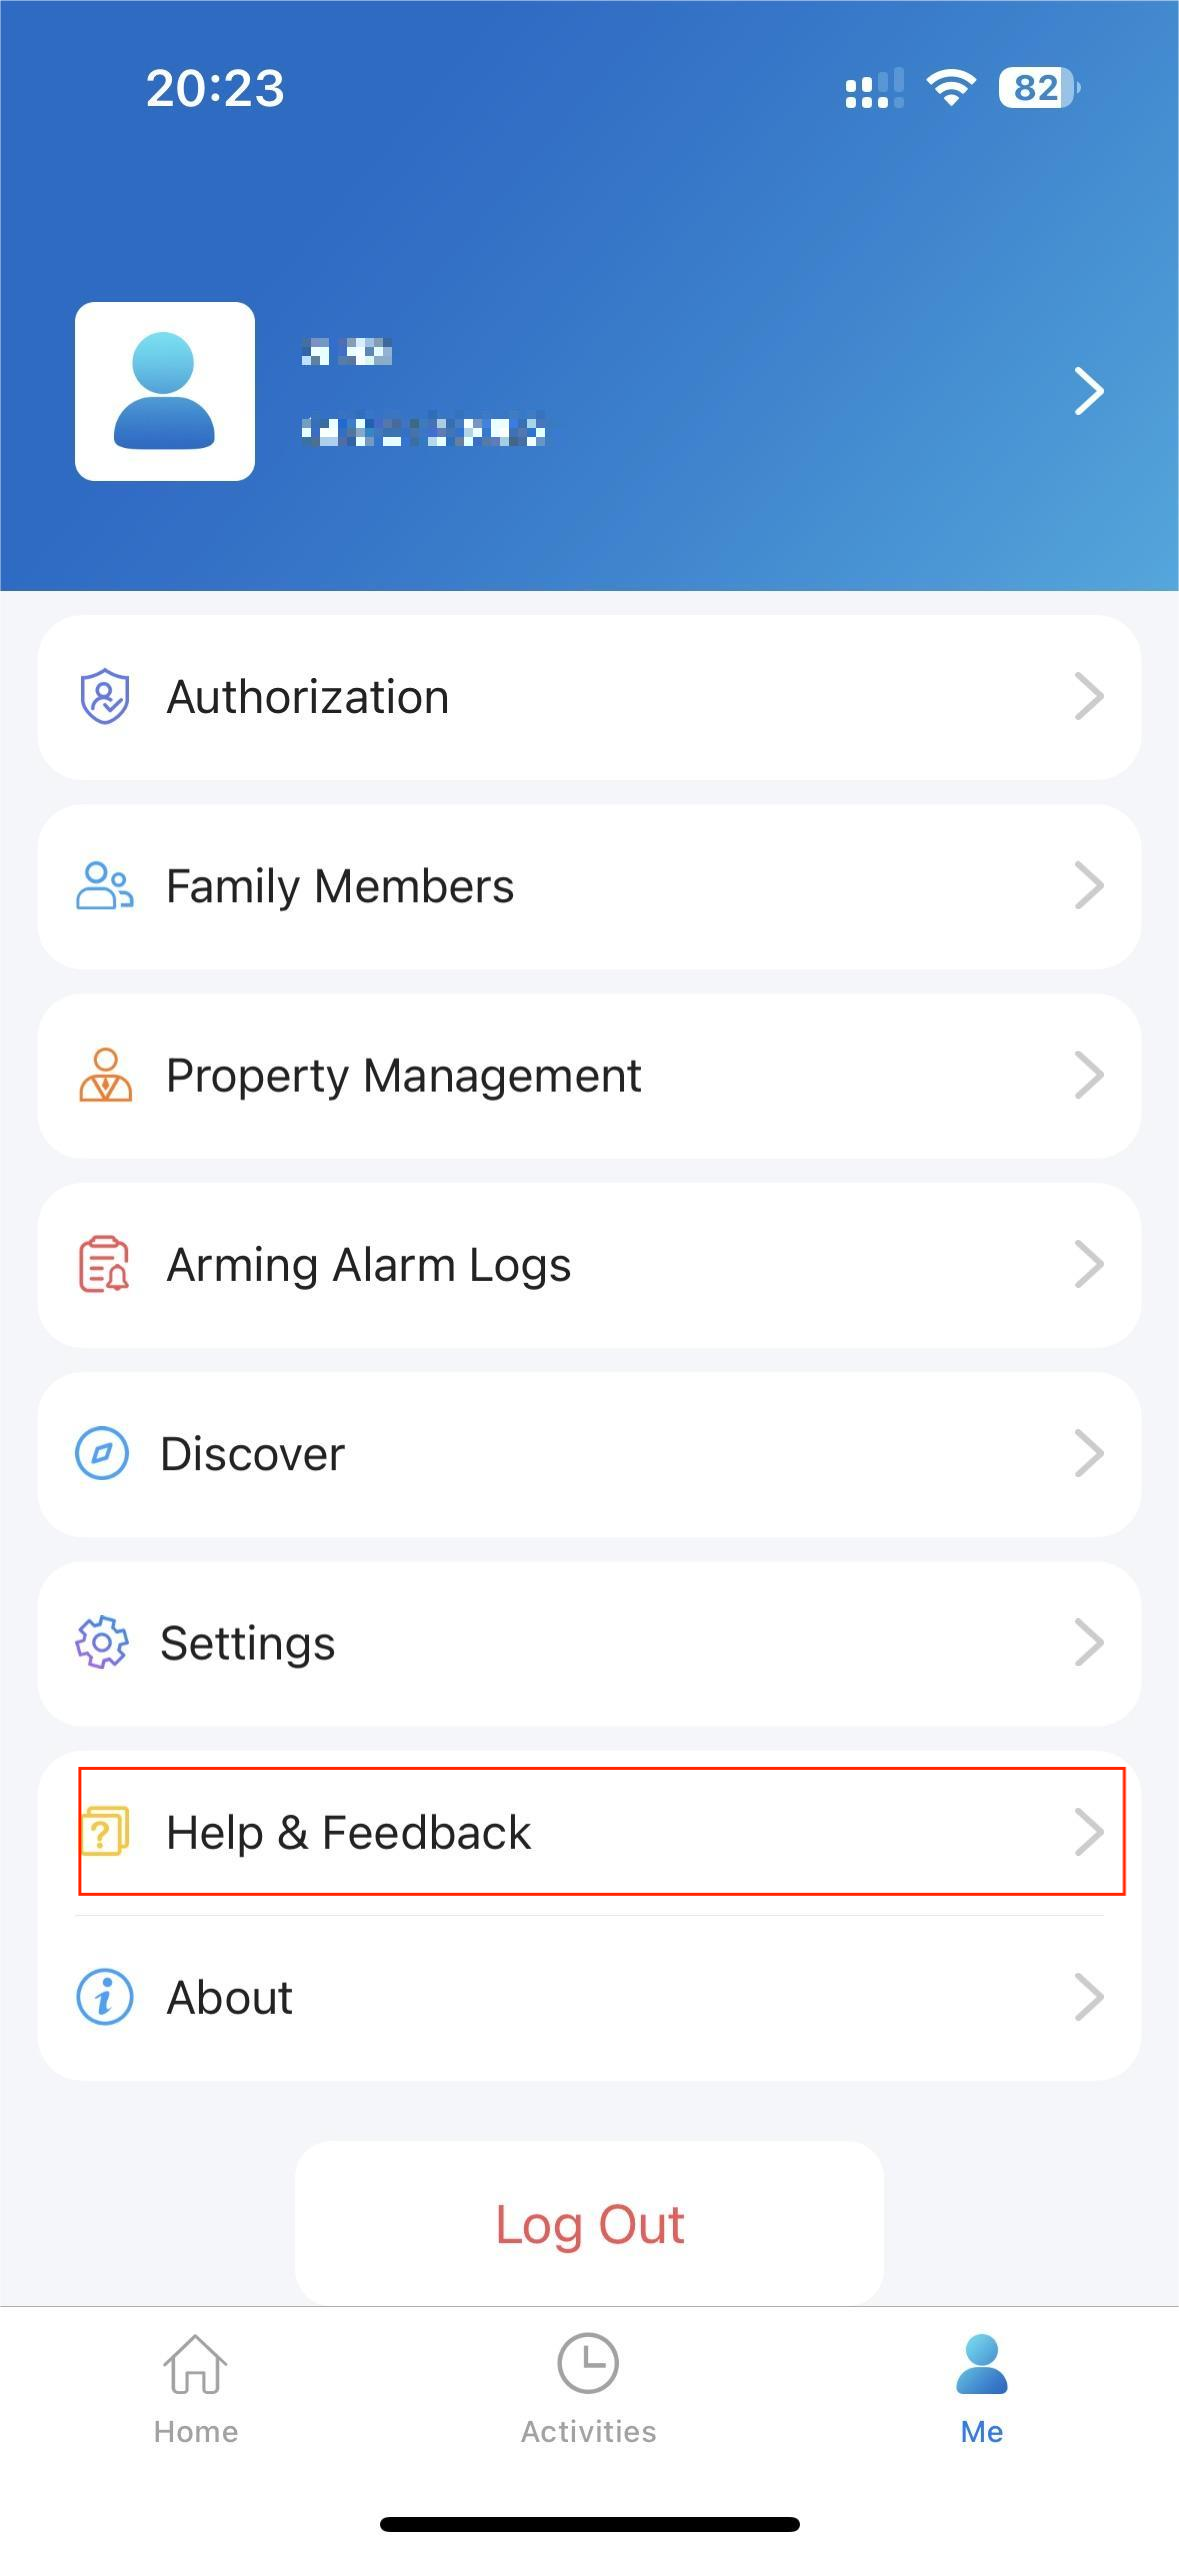
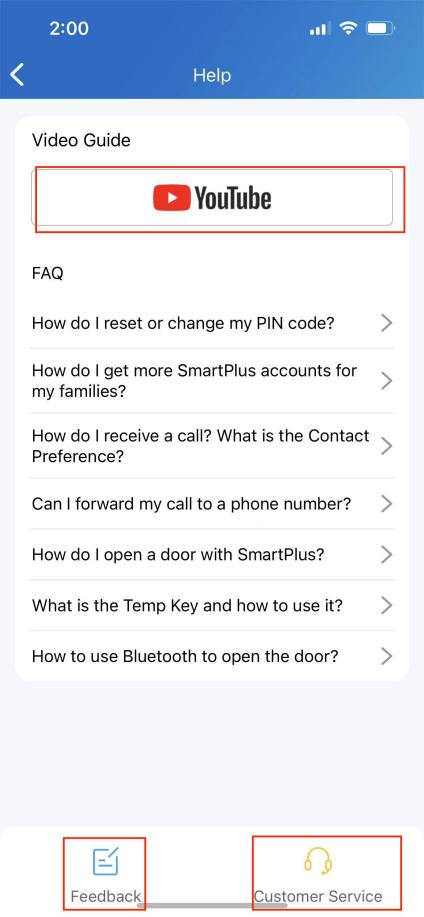
Get Help
If you need help, go to Me > Help & Feedback. You can do any of the following:
- Watch video tutorials
- Get answers to some frequently asked questions.
- Tap Customer Service to contact us for technical support.
- Tap Feedback to describe and submit your problems.
FAQ
(1) Can't call out on the App?
- Check your network is working.
- Update the App to the latest version.
- Check your account is activated and make sure you've paid the renewal fee. If not, please contact your service provider.
If the above doesn't work, please go to Me > Settings > Advanced Settings >Export Log, and send the log to Akuvox technical engineers.
(2) Can't see pictures when calling or monitoring?
- Only audio calls are supported between Apps.
- Update the App to the latest version.
- Check your account is activated and make sure you've paid the renewal fee. If not, please contact your service provider.
- Check door unit cameras are working.
If the above doesn't work, please go to Me >Advanced>Export Log, and send the log to Akuvox technical engineers.
(3) Can't log in due to password forgotten?
Go to the login page > Forgot Password. You can reset your password using Email or message:
- Email. Enter your email address, and you will receive an email with a new password.
- SMS. Tap Try to reset via SMS
- Enter your mobile number and Tap Obtain Code.
- Enter the verification code you received. tap Next and follow the onscreen instructions.
(4) How to obtain an account?
Provide your Email address and/or a phone number (if you'd like to log in or reset your password via SMS) to your service provider. You then will receive an Email from Akuvox with your username, password, and a QR code for login. Or you can enter your phone number and log in with a verification code sent via SMS.
If you want to create sub-accounts for your family members, go to Me > Family Members.
Contact Us
For more information about the product, please visit us at www.akuvox.com or feel free to contact us by
Sales email: sales@akuvox.com
Technical support email: support@akuvox.com
Telephone: +86-592-2133061 ext.7694/8162
We highly appreciate your feedback about our products.
Was this article helpful?
-20190329_%E5%89%AF%E6%9C%AC.png)