Akuvox V6.7.2 SmartPlus Distributor Guide
- 07 Mar 2024
- Print
- DarkLight
- PDF
Akuvox V6.7.2 SmartPlus Distributor Guide
- Updated on 07 Mar 2024
- Print
- DarkLight
- PDF
Article Summary
Share feedback
Thanks for sharing your feedback!
Date: February.2024
This manual is intended for the distributors who need to properly manage the installers, residents, devices, and remote maintenance on the SmartPlus platform V6.7.1 version.
For more information, please visit http://www.akuvox.com/ or consult our technical support.
What's New:
- Add Auto Renew and Auto Payment Records(Only Support Ucloud).
- Optimize Welcome Email content sent to end users.
System Overview
Akuvox SmartPlus is a cloud-based platform on which distributors can conduct integrated management of installers, users, devices, remote maintenance, SmartPlus service subscriptions, etc.
- Distributors using this platform will be able to:
- Add, delete, search, and check the installer account.
- Manage the community, office, and personal devices by searching and checking the devices’ information.
- Check and delete third-party devices.
- Add the device MAC to the device MAC library separately or use a template and remove the device MAC from the MAC library.
- Subscribe to Akuvox SmartPlus Service for the residents.
- Check SmartPlus service transactions.
- Leave your contact to the customers.
Log into SmartPlus
You can log in SmartPlus platform using the user account information you obtain from the Akuvox technical team.
- Open the web browser to enter the address (URL) of the SmartPlus server located in your area, and press Enter.
- Enter your username and password.
- Click on Login to log in to the SmartPlus platform.

Note:
- Google Chrome Browser is recommended.
- You can click on Log out to log out of the SmartPlus platform.

SmartPlus Main Interface
Akuvox SmartPlus's main interface has nine modules, which allow you to manage tenants, office staff and personnel, devices, device MAC, and so on. Moreover, you can make subscriptions for the end users of the Akuvox SmartPlus service and check for the service transaction.

Module Description
No. | Module Name | Description |
1 | Project Device | Allows you to manage the devices in community scenarios and office scenarios. Moreover, it allows you to conduct remote maintenance on the devices. |
2 | Personal Device | Allows you to check and delete the single tenant devices, moreover, it allows you to conduct remote maintenance on the devices. |
3 | Third-Party Device | Allow you to check and delete the third-party device added by installers. Currently, installers can only add third-party cameras. |
4 | User | Allows you to manage the installers and check end-user information. |
5 | Firmware | Allow you to check the device firmware available for updates. |
6 | MAC Library | Allows you to register, check, and delete the MAC. |
7 | Subscription | Allows you to pay for the SmartPlus service activation and renewal, and pay for the extra family member account. |
8 | Payments | Allows you to check for information related to transactions made and ongoing transactions. |
9 | Setting | Allows you to set up your customer service contacts. |
Device Management
You can manage the devices for single tenants, multi-tenants as well as devices deployed in the office scenario by adding device MAC, checking device information, and deleting the device(s).
Project Device Management
Project device management involves device management and provides remote maintenance for the community and office devices.
Add Device MAC to MAC Library
You can add device(s) to the MAC library separately or using a template. If you want to add a community device, then you are required to notify your installer for adding the community device. The device MAC needs to be added to the distributor’s MAC library before the installer can add the device to their project.
- Add MAC Separately
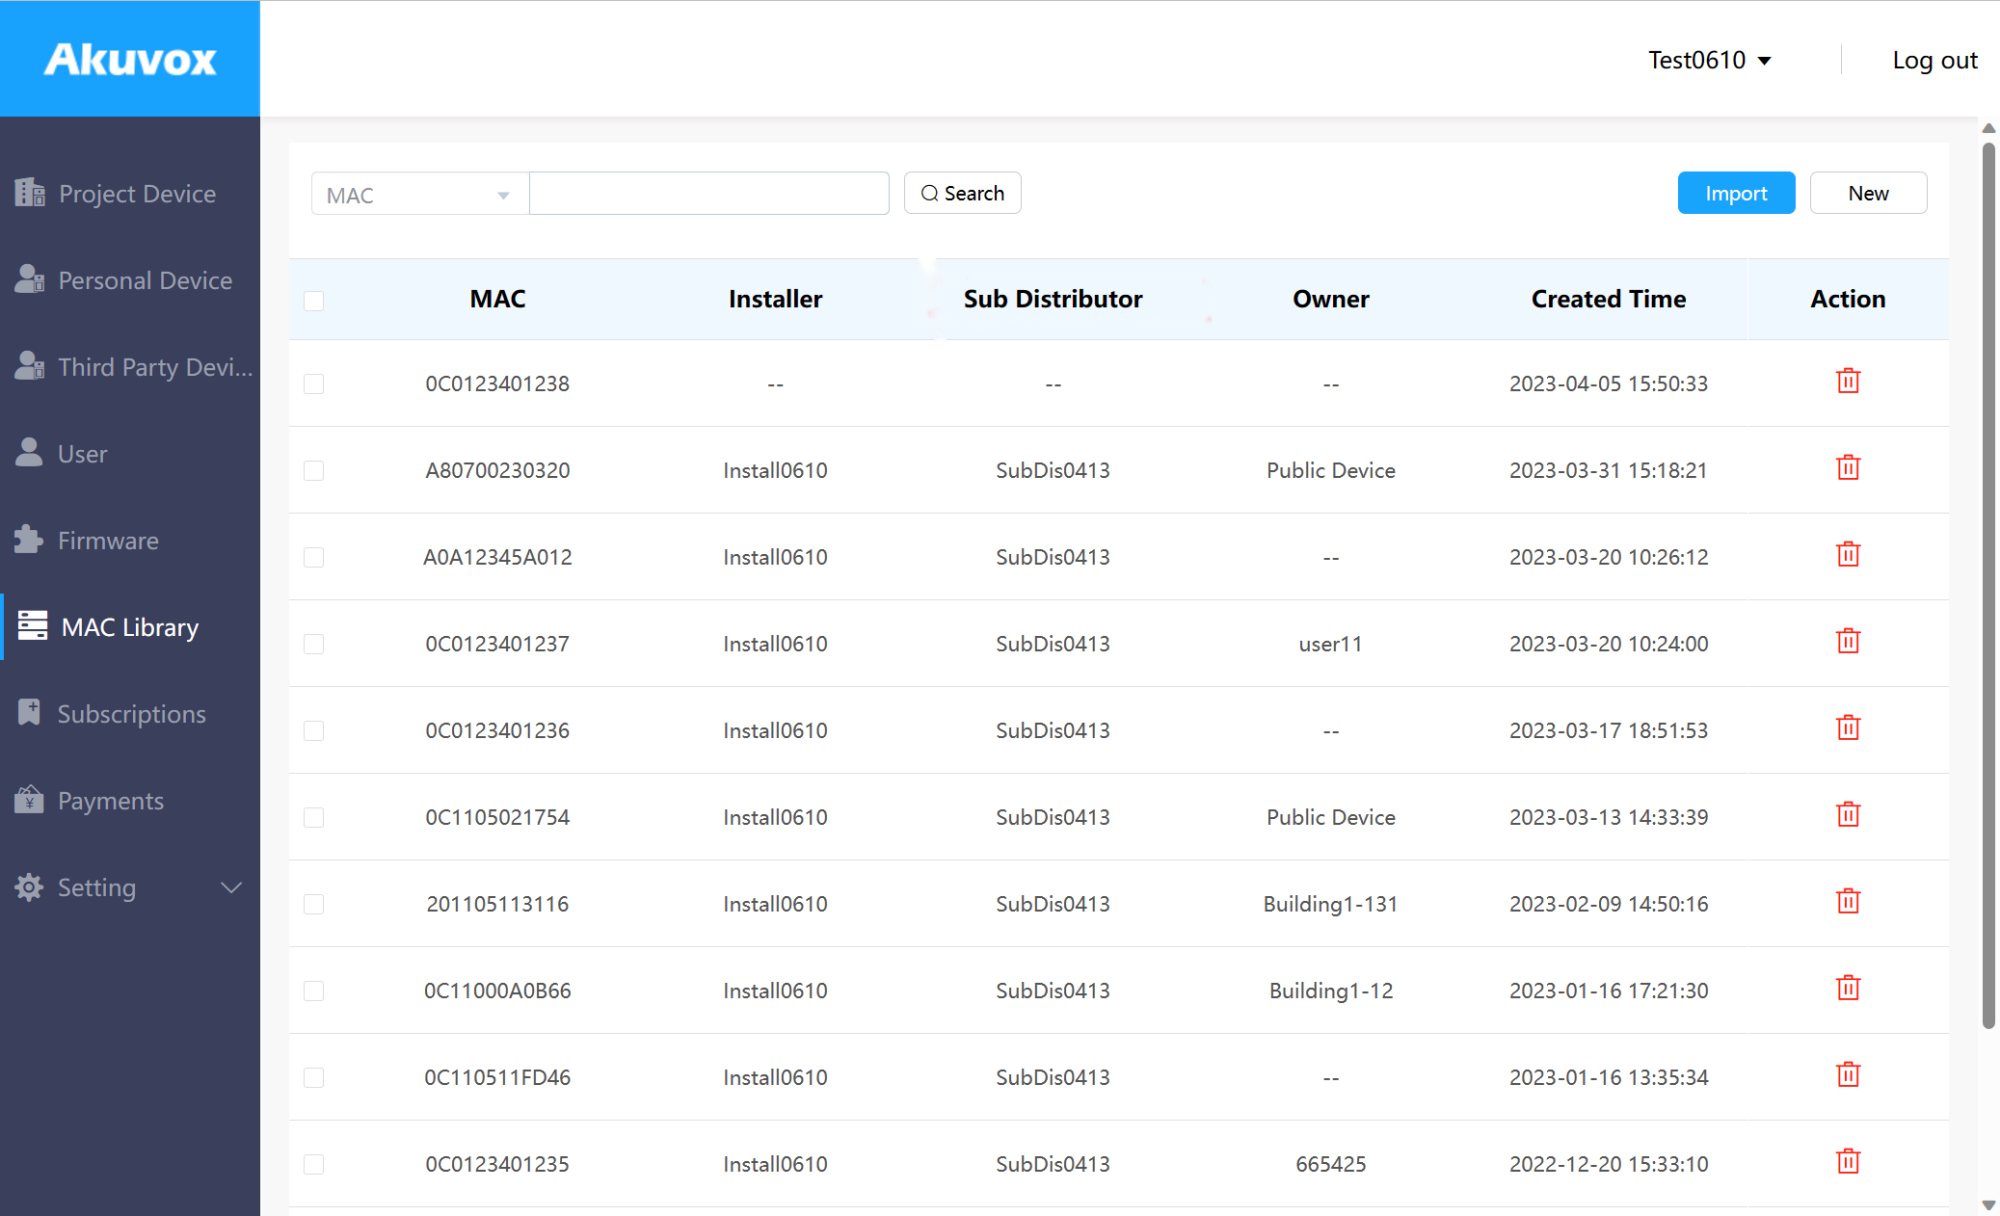
- Go to MAC Library Module.
- Click on Add and fill in the device MAC.

- Add MAC Using a Template
- Download the template and fill in MACs.
- Click Import to upload the device MAC.
- Select the MAC template from your personal computer and upload it.
- Template Sample

Check/Delete Project Device
- Go to the Project Device module.
- Select Community for the community devices or Office for office devices.
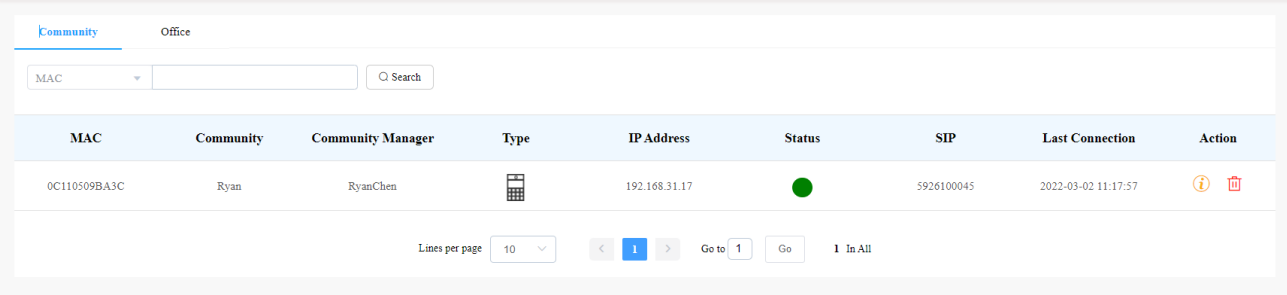
- Search and check the community devices by MAC, SIP, Community Manager, and Community.
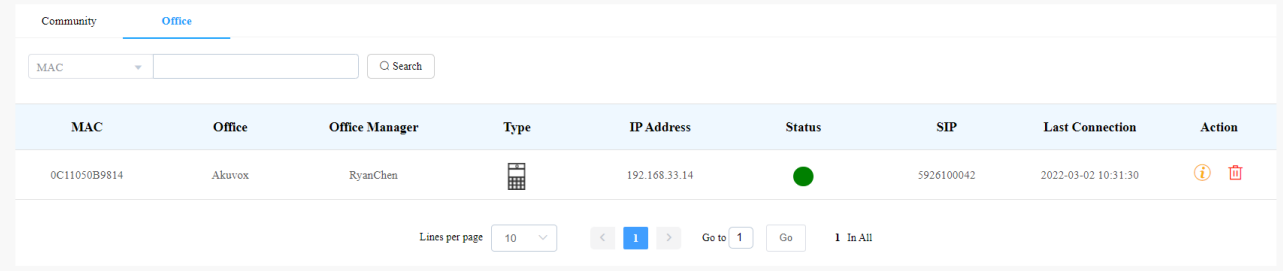
- Search and check the office devices by MAC, Office, SIP, and Office Manager.
3. Check and delete the device(s).
Community Device:

Office Device:
4. Go to the MAC Library module and remove the device MAC from the MAC Library if needed.
Note
- If the device is bound with the user, then the device should be unbound with the user before you are allowed to remove the device MAC from the MAC library.
Remote Maintenance for Project Device
You can provide end users with remote maintenance in terms of device data transmission type configuration, device reboot, device web interface remote control, device provisioning, etc.
- Click on Project Device Module.
- Select Community or Office.
- Click
 of the device which you want to provide remote maintenance for.
 of the device which you want to provide remote maintenance for.
Community Device:
Office Device:


4. Reboot, reset, or log into the device web interface remotely via Remote Control.
5. Enter the commands for the Auto-provisioning, then click on Submit.
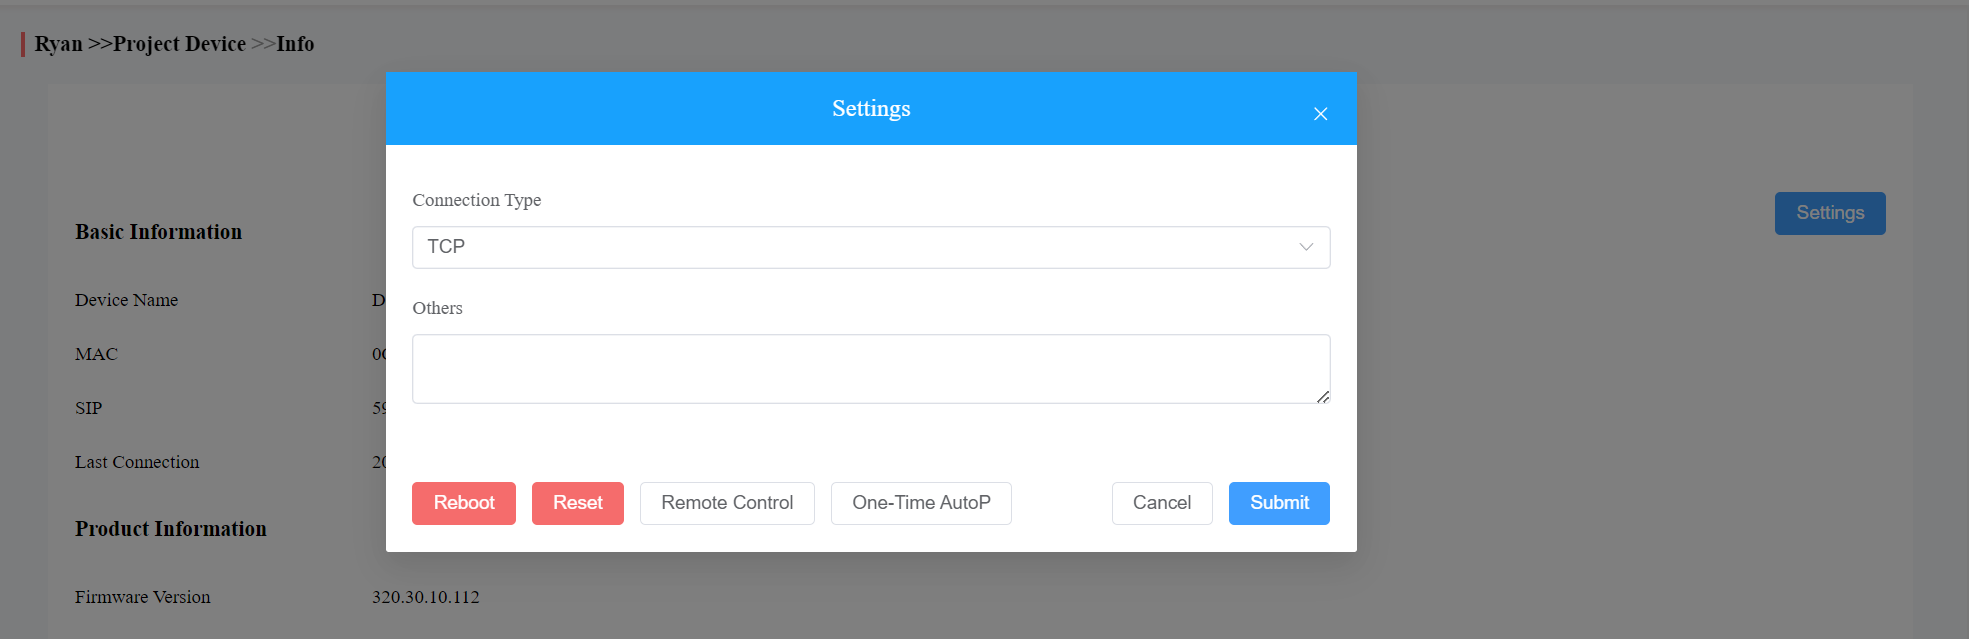
6. Click on One-Time Autop if only you want the Autop command(s) to be implemented one time.
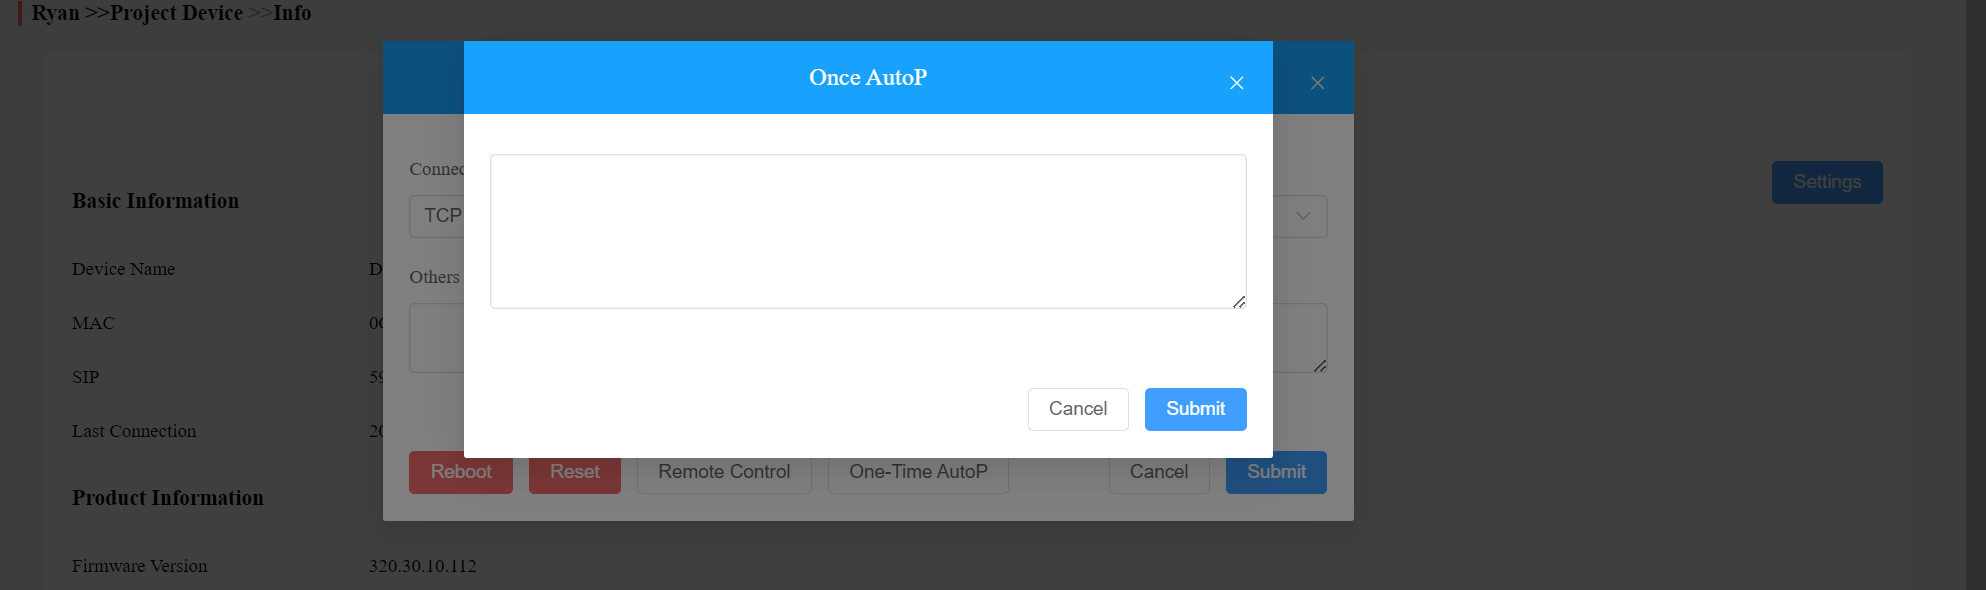
Note:
- Duplicate commands will not be retained.
- One-time Autop allows you to carry out the Autop command(s) only one time with no repetition.
Batch AutoP for Community Devices
AutoP allows you to configure the devices remotely. You can synchronize the selected configuration command to the targeted devices in your community via auto-provision. You have two AutoP options: Regular AutoP or One Time AutoP.
To conduct AutoP for the devices:
- On the navigation column, click
 .
. - On the upper right corner of the interface, click
 .
.
 .
. .
.
3. Select your AutoP type.
- If you want the configuration to be always valid, select Regular AutoP.
- If you want the configuration to be valid for one time only, select One-Time AutoP.
4. Enter the AutoP commands you need.
5. Search and select the devices to be provisioned, then click Submit. You can synchronize the commands to 500 devices maximum at a time.
Note:
- Duplicate commands will not be retained.
- One-time AutoP commands will not be valid once you reset the device(s) either for factory reset or configuration reset.

Personal Device Management
Personal device management involves device management and provides remote maintenance for personal devices.
Add Personal Device MAC to MAC Library
You can add a personal device MAC to the MAC library separately or use a template. If you want to add the personal device, then you are required to notify your installer for adding the personal device.
- Go to MAC Library Module.
- Click on New and fill in the device MAC.

Check/Delete Personal Device
- Go to the Personal Device module.
- Search and check the device by MAC, Device Name, Single-tenant Manager, and SIP.
- Check and delete the device(s).

4. Go to the MAC Library module and remove the device MAC from the device MAC if needed.

Note:
- If the device is bound with the user, then the device should be unbound with the user before you are allowed to remove the device MAC from the MAC library.
Remote Maintenance for Personal Devices
You can provide residents with remote maintenance in terms of device data transmission type configuration, device reboot, device web interface remote control, device provisioning, etc.
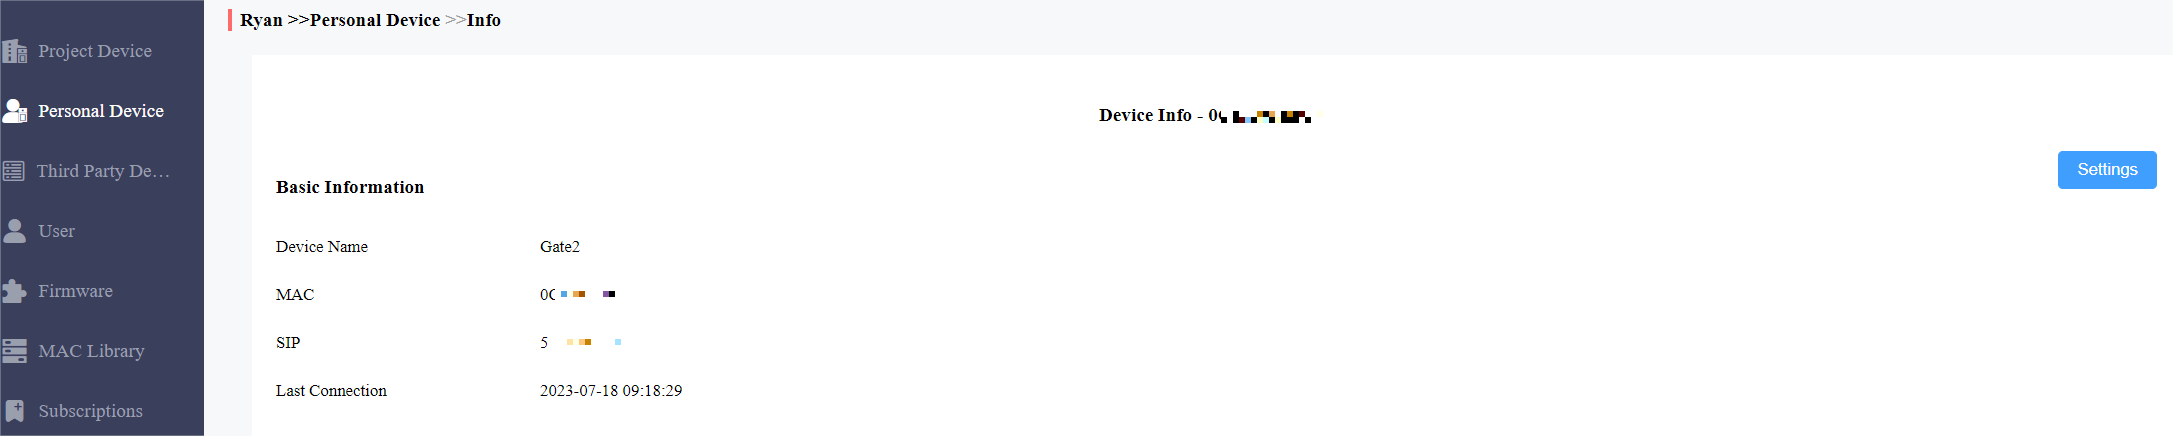
- Click Personal Device Module.
- Click the specific device for which you want to provide remote maintenance.
- Click
 , then click Settings.
 , then click Settings.
.png)
4. Reboot, reset, or log into the device web interface remotely via remote control.
5. Enter the commands for the Auto-provisioning, then click on Submit.
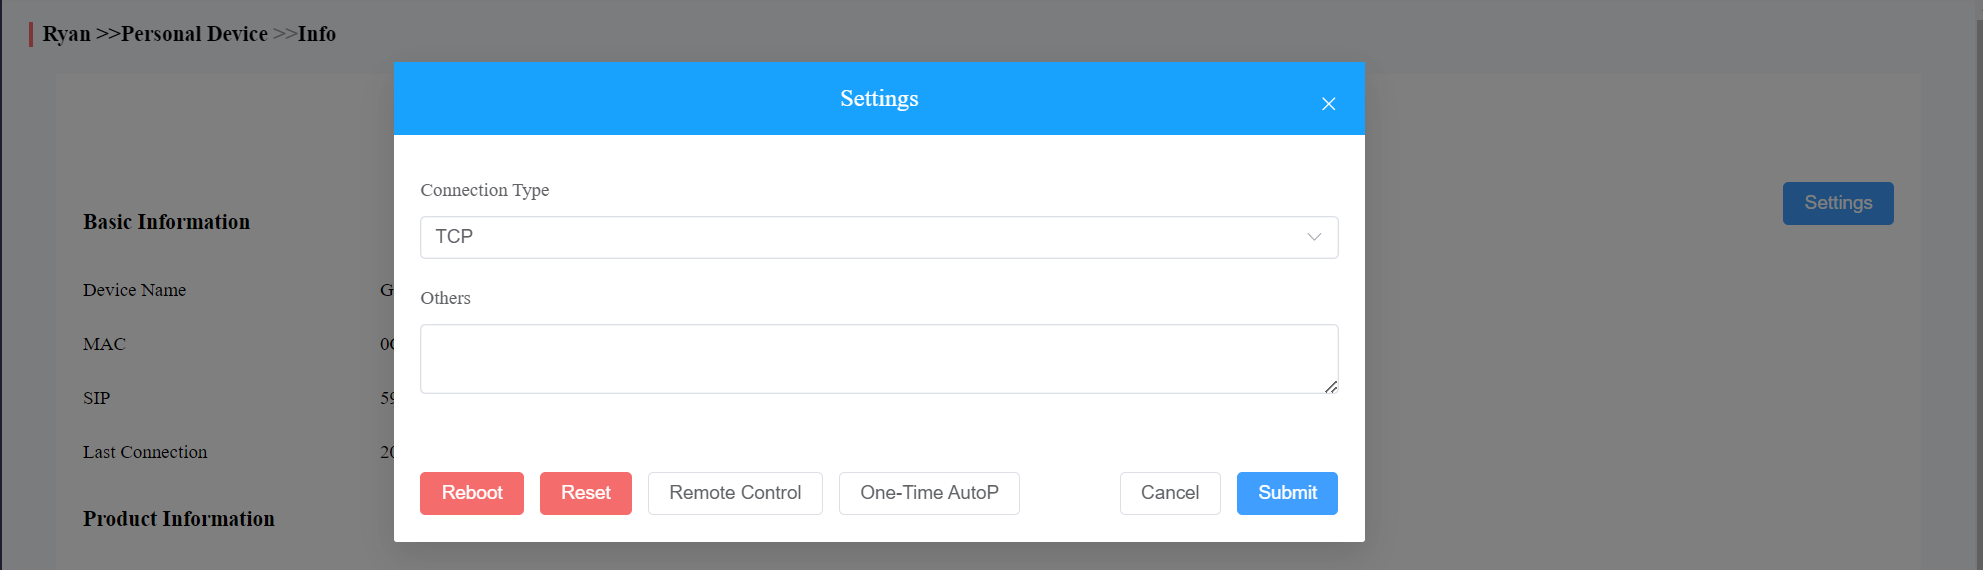
6. Click on One-Time Autop if only you want the Autop command(s) to be implemented one time.
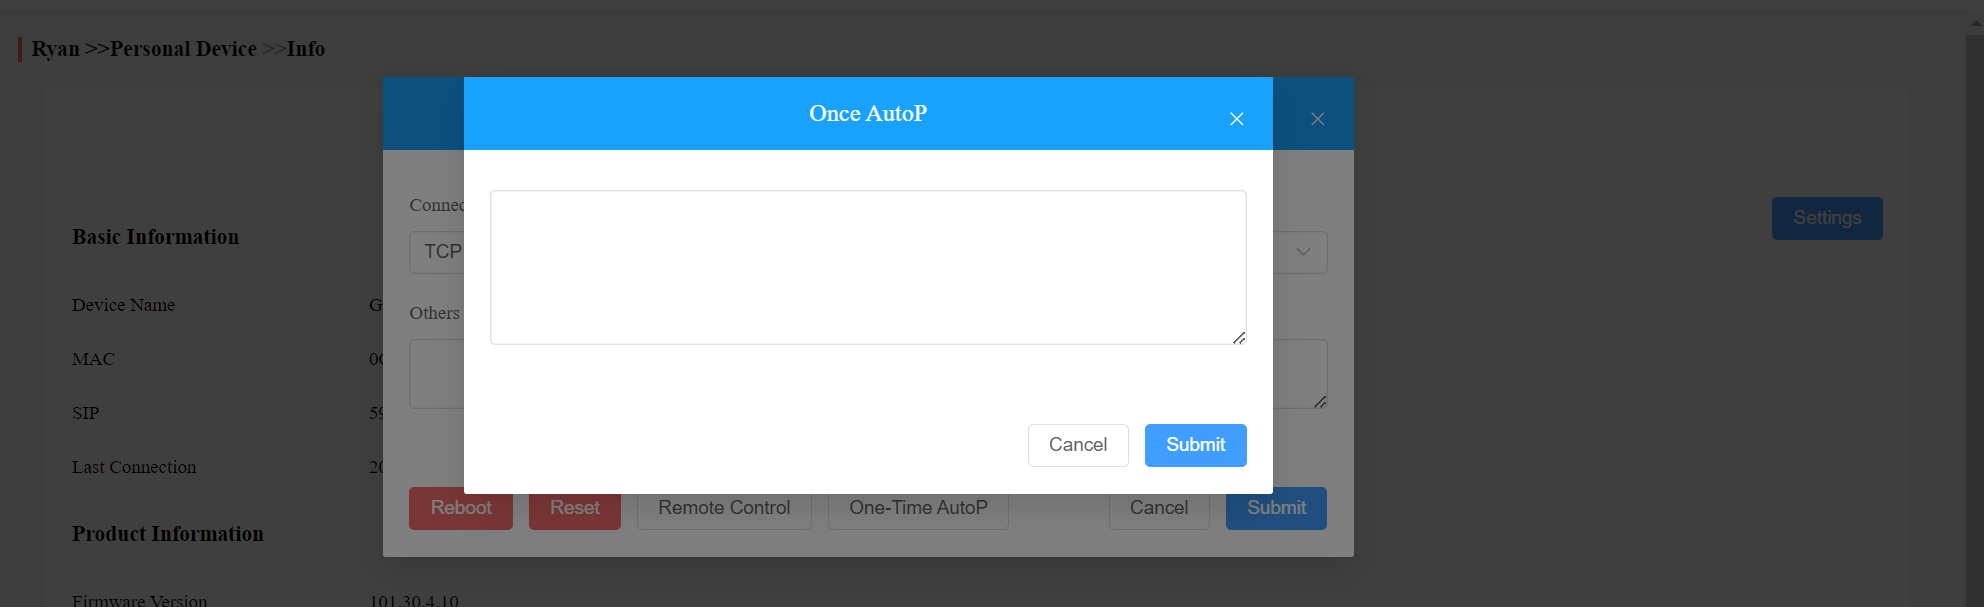
Note:
- Duplicate commands will not be retained.
- One-Time Autop allows you to carry out the Autop command(s) only one time with no repetition.
Batch AutoP for Personal Devices
AutoP allows you to configure the devices remotely. You can synchronize the selected configuration commands to the targeted personal devices via AutoP. You have two AutoP options: Regular AutoP or One Time AutoP.
To conduct AutoP to the device:
- On the navigation column, click
 .
. - On the upper right corner of the interface, click
 .
. - Select your AutoP type.
 .
. .
..png)
- If you want the configuration to be always valid, select Regular AutoP.
- If you want the configuration to be valid for one time only, select One Time AutoP.
4. Enter the AutoP commands.
5. Search and select the devices to be provisioned, then click Submit. You can synchronize the commands to 500 devices at a time.
Note:
- Duplicate AutoP commands will not be retained.
- One-Time AutoP commands will not be valid once you reset the device(s) either for factory reset or configuration reset.

User Management
User module is where you can manage the installer account and check the end user information.
Sub-Distributor Account Management
In some cases, there are secondary agents under certain distributors, and installers are under them. These sub-distributors have the authority to manage installers, but they are also under the control of their distributor. The distributor creates an account for the sub-distributor, who can then log into their web portal to create an account for the installer.
Note:
- You need to contact your service provider to grant you the authority before you can create sub-distributor accounts.
Add Sub-Distributor Account
- Go to User > Sub Distributor, and click on
 in the upper right corner.
 in the upper right corner.
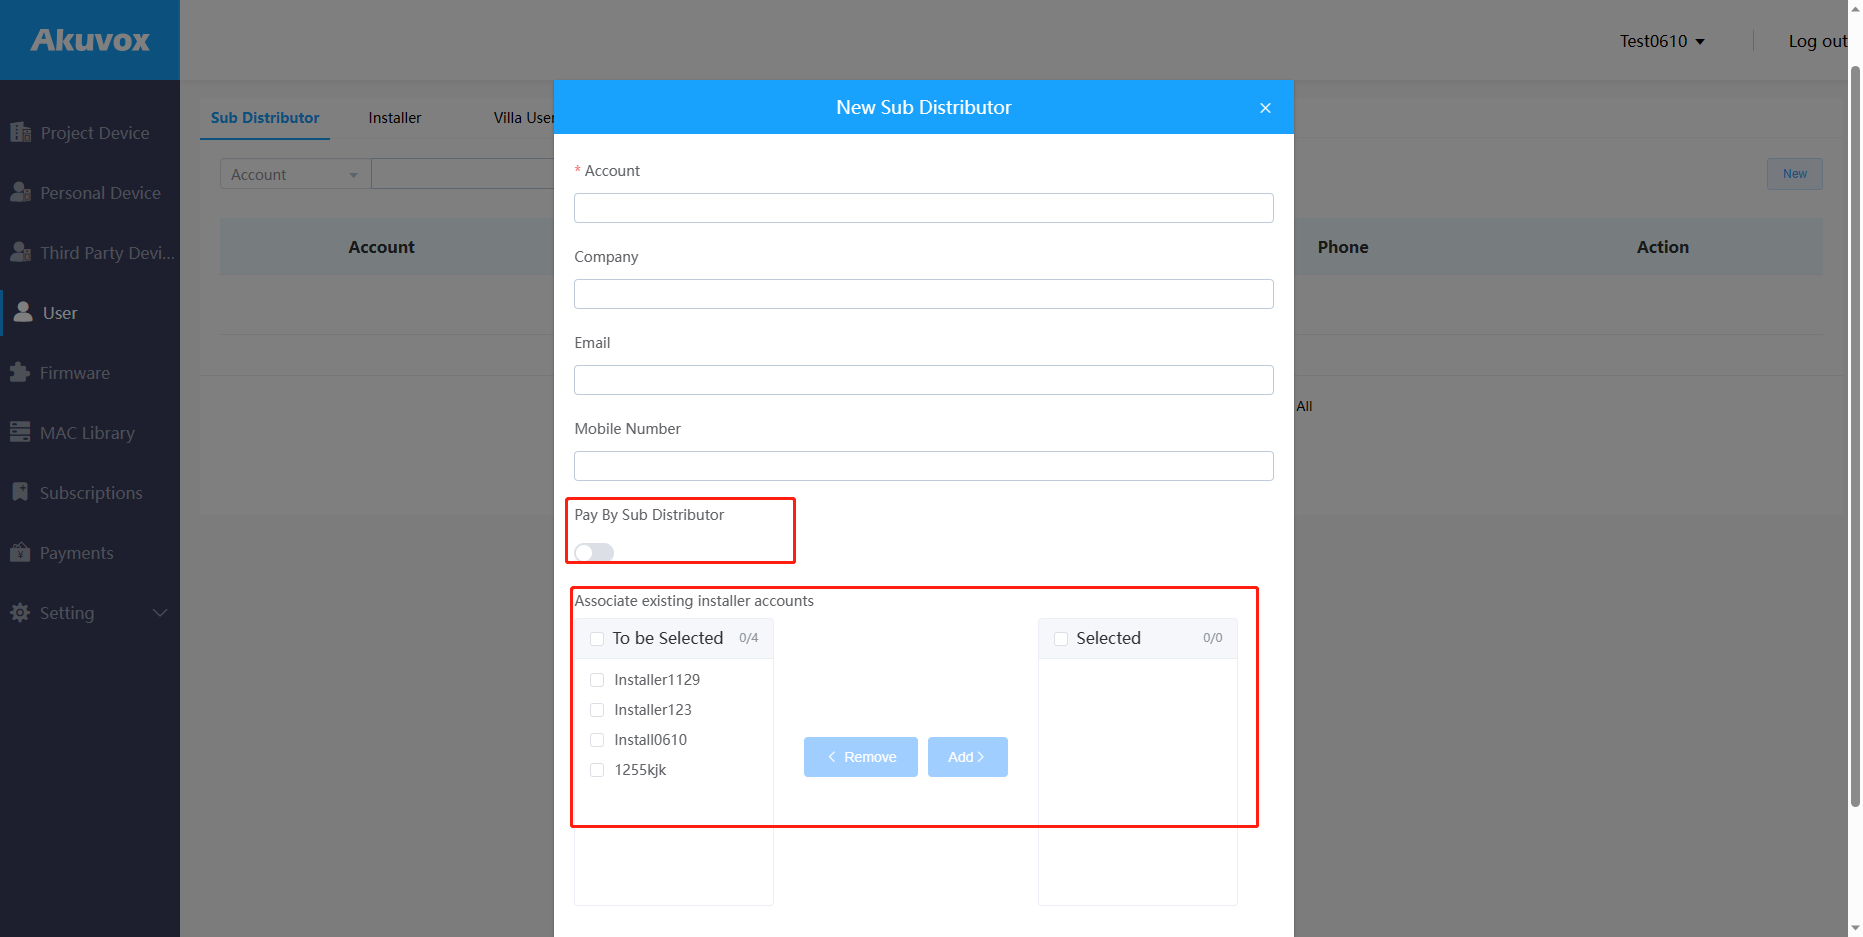
2. Enter the information and complete the settings.
No. | Field | Description |
1 | Account | (Required) Fill in the sub-distributor account name. |
2 | Company | Fill in the sub-distributor's company name. |
3 | Fill in the sub-distributor's email address to which the account expiration email of users will be sent. If it is left blank, the expiration email will be sent to the distributor's email box. | |
4 | Mobile Phone | Fill in the sub-distributor’s phone number. |
5 | Pay by Sub Distributor | By default, it is turned off. Once enabled, the sub-distributor is granted the paying authority as the distributor and can see the Subscription and Payments in the left-side menu. NOTE: The distributor is unable to see or track the payments made by sub-distributors. |
6 | Associate Existing Installer Accounts | Select which installers can be managed by the sub-distributor. Once selected, the sub-distributors will have the same level of authority as the distributor, including being able to manage the installer's account, devices, programs, and end users. |
Note:
- Currently, sub-distributors do NOT have permission for home automation. As a result, any installer accounts created by them do not have this permission either.
Check/Edit/Delete Sub-Distributor Account
You can check, edit, or delete the sub-distributor accounts at any time.
- Go to User > Sub Distributor.

2. Find the desired sub-distributor, and do any of the following:
- Click on
 to open the editing screen, so you can change the settings, or reset the password.
 to open the editing screen, so you can change the settings, or reset the password.
- Click on
 to delete this sub-distributor. Please note that you have to clear the installers associated with this sub-distributor before you can delete the account.
 to delete this sub-distributor. Please note that you have to clear the installers associated with this sub-distributor before you can delete the account.
Installer Account Management
Add Installer Account
- Click User module.
- Click Installer, then on New.
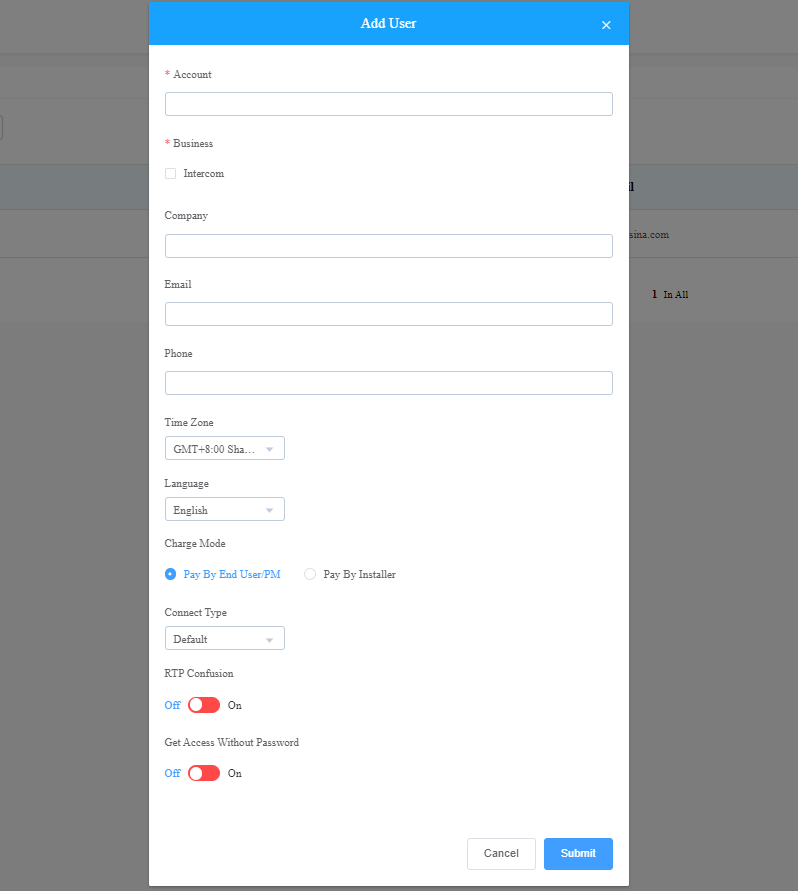
- Set up an installer account.
- Setting Description
No. | Field | Description |
1 | Account | Fill in the installer’s account name. |
2 | Business | Select the Intercom type or Smart Home service type based on your application. |
3 | Intercom | Select intercom for the Smart intercom service only. |
4 | Smart Home | Select Smart Home for both Smart intercom and smart home service. |
5 | Company | Fill in the installer’s company name. |
6 | Fill in the installer’s email address. | |
7 | Phone | Fill in the installer’s phone number. |
8 | Time Zone | Select the specific time zone, which will become the default time zone for the devices of the project created under the installer account. |
9 | Language | Select the language of the Email which will be sent to the installer when the installer account is created |
10 | Charge Mode | Select the payer for the SmartPlus service (both account activation and renewal). |
11 | Connect Type | Select the device data transmission type. Leave it default if no specific requirement or use a specific type according to the suggestions from the Akuvox technical team. |
12 | RTP Confusion | Switch on the RTP confusion to avoid RTP transmission from being blocked in certain countries or regions where RTP transmission is banned, eg. Eygpt. Note: RTP Confusion is switched off by default. |
13 | Get Access Without Password | This feature enables you to access the installer's web portal without a password when your installer needs your support or assistance. By default, this feature is turned off. Your installer must enable this function before you can log into their account. Once the function is enabled, you will see a lock icon |
 in the Action column, which you can click to be redirected to their accounts.
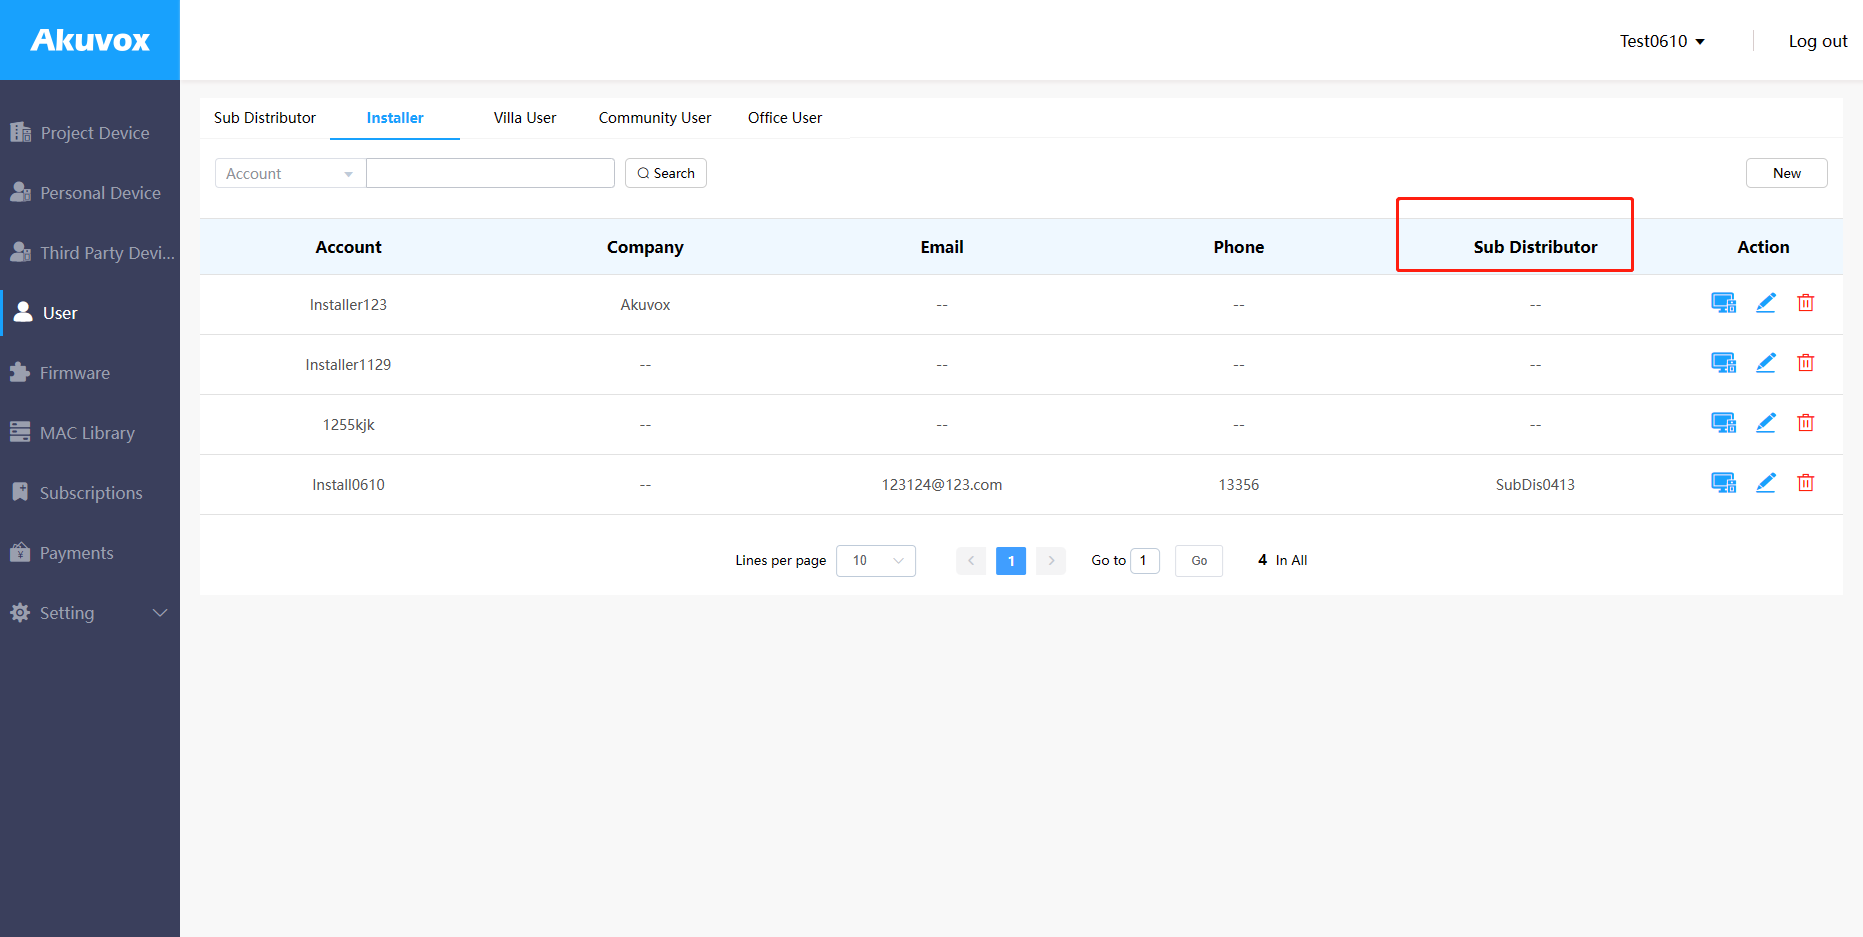
Check/Edit/Delete Installer Account
After the Installer accounts are created, you can check, edit, and delete the installer accounts if needed.
- Go to User > Installer.
Note:
- If an installer can be managed by a sub-distributor, then the agent name will display in the Sub-Distributor field.
2. Search the installer by account, email, or sub-distributor (if any).
3. Click on  to add MAC addresses for the installer’s single-tenants.
Note:
- Before a kit’s MAC addresses can be removed, the addresses must be unbound from the user account they are currently associated with.
4. Click on  to edit the installer information and password.
5. Click on  to delete the installer.

Access Installer Account
You can access the installer account without a password to help installers with management and deployment, but you will need to be authorized by the installers first before you can log in to their account from your web portal. Installers can grant or revoke the permission whenever they want.
- Click User, then select Installer.
- Select the installer account, then click
 to access the installer account.
 to access the installer account.
Note:
- The installer’s account access feature must be enabled when adding an installer before you can access the installer’s account from your web portal without passwords. See chapter: Add Installer Account for “Getting Access Without Password”.
Sub-Installer Account Management
Check Sub-Installer Account
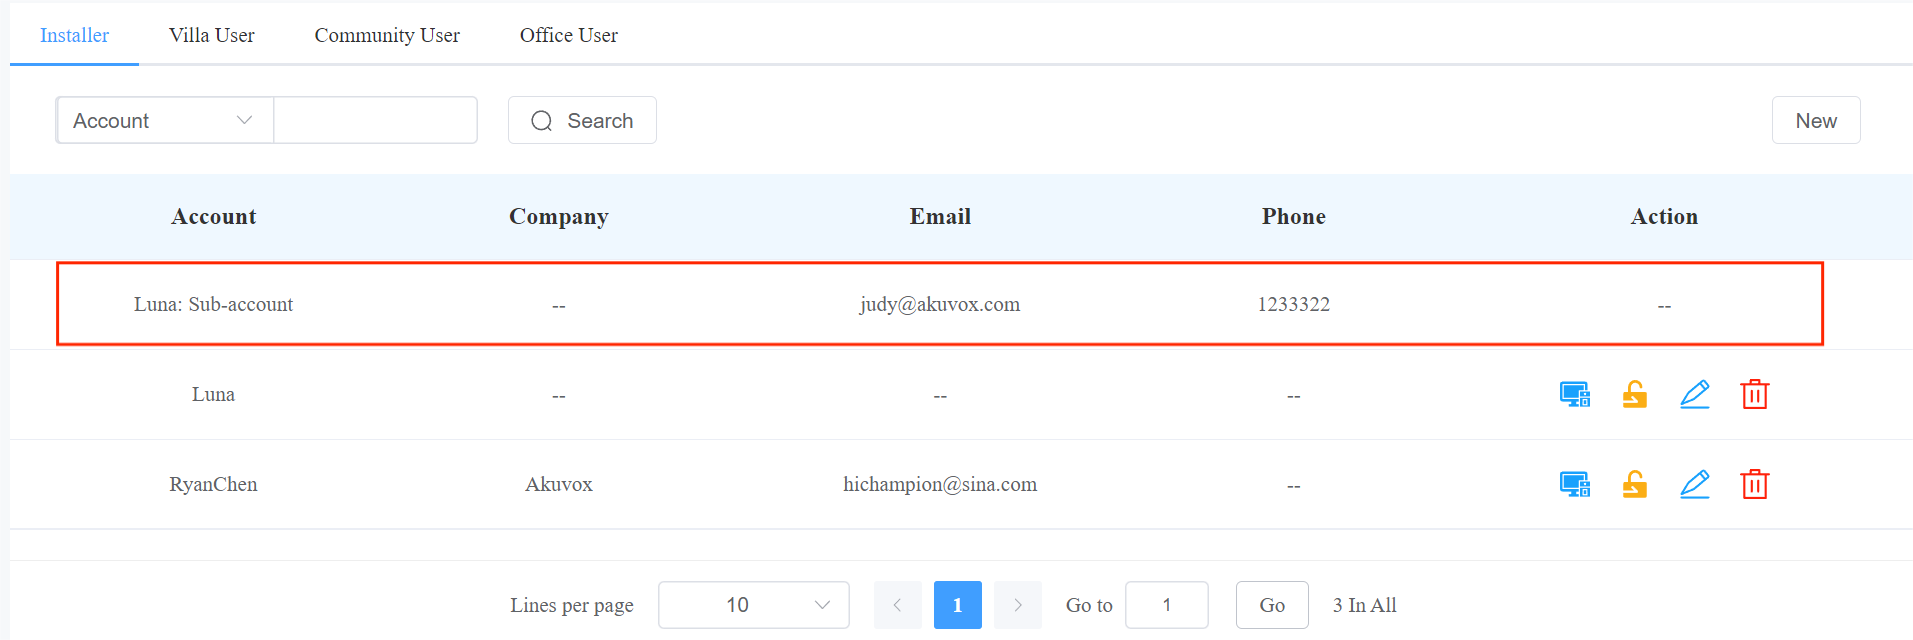
You can search and check sub-installer account information. The sub-account format is [Installer Account: Sub-account]
- Go to User > Installer.
- Search the sub-account by entering the installer account name.
- You can check the account information but not edit or delete it.
End User Account Management
End-user account management involves searching and checking the end users’ accounts. However, it will be good for you to have a general idea about how the end users can be added, edited, and deleted using the SmartPlus installer account.
Search/Check End User Account
You can also search and check the end user’s information.
- Click User Module, and select Villa User, Community User, or Office User according to your need.
- Search the residential user information by account type and search type in the Search field.
- Search the office user information by account type and search type in the Search field.
Parameter Description (Villa User and Community User)


No. | Column Name | Description |
1 | Account Type | Search end-user information by All, Family Master, and Family member according to your need. |
2 | Search Type | Select end-user information by SIP number, Email, Mobile phone number, installer, and family master. |
3 | SIP | Displays the end user’s SIP number. |
4 | Mobile Phone | Displays the end user’s mobile phone number. |
5 | Name | Display the end user’s name (both family master and family member). |
6 | Installer | Displays the name of the installer(s). |
7 | Family Master | Displays the name of the family master(s). |
8 | Community | Display resident’s community information |
9 | Address | Displays the address of the end user(s). |
10 | Phone | Displays the landline number of the end user(s). |
11 | Active | Display if the community user account is activated. |
12 | Premium Plan | Display if the premium plan for villa users is on or off. |
13 | Created Time | Displays when the account is created. |
14 | Expiration Time(App) | Displays when the community user account will be expired. |
15 | Expiration Time(Premium) | Displays when the premium plan of the villa user will expire. |
16 | Action | For checking the account details. |
Parameter Description (Office User)

No. | Column Name | Description |
1 | Search Type | Select end user information by SIP number, User’s name, Email, Mobile phone number, installer, and office name. |
2 | SIP | Displays the user’s SIP number. |
3 | Mobile Phone | Displays the user’s mobile phone number. |
4 | Name | Displays user’s name. |
5 | Displays the user’s Email address. | |
6 | Installer | Displays the name of the installer(s). |
7 | Office | Displays the user’s office name. |
8 | Phone | Displays the landline number of the end user(s). |
9 | Active | Display if the office user account is activated. |
10 | Created Time | Displays when the account is created. |
11 | Expiration Time(App) | Displays when the office user account will expire. |
12 | Action | For checking the account details. |
Check Firmware List
Firmware module is where you can check the latest firmware that is available for your installers.
- Click on Firmware module.

Firmware List Description
No. | Heading | Description |
1 | Version | Displays the firmware version number. |
2 | Model | Displays the device model. |
3 | Version Log | Generally displays remarks on the version. |
4 | Created Time | Displays when the firmware was uploaded. |
5 | Action | Click to check the detailed firmware information. |
Subscription
You can pay for the service activation and renewal for the single tenant users, multi-tenant users, and office users under a specific installer. Moreover, you can pay for adding an extra family member account as well as paying for the property manager SmartPlus app service.
Activation Service
Pay for community users and property manager
To pay for the services for the community users and property manager:
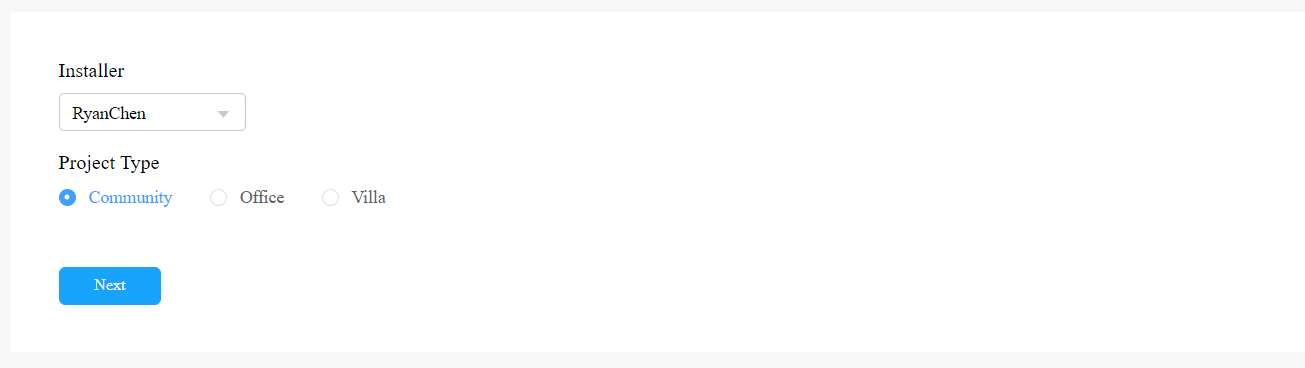
- Click on Subscription module.
- Select the installer.
- Select Community project type, then click Next.
4. Click Active .
.

5. Check off the users you need to pay for. You can filter users by selecting the communities and the service type or clicking the icon  next to the APT or APT Name to reorder the list.

6. Scroll down to click on Next.

7. Pay for the order. You can pay it by Stripe or PayPal or by Coupon.
- To pay by Stripe or PayPal, select Don’t Use Coupon.
- To pay the coupon, select All Fee.
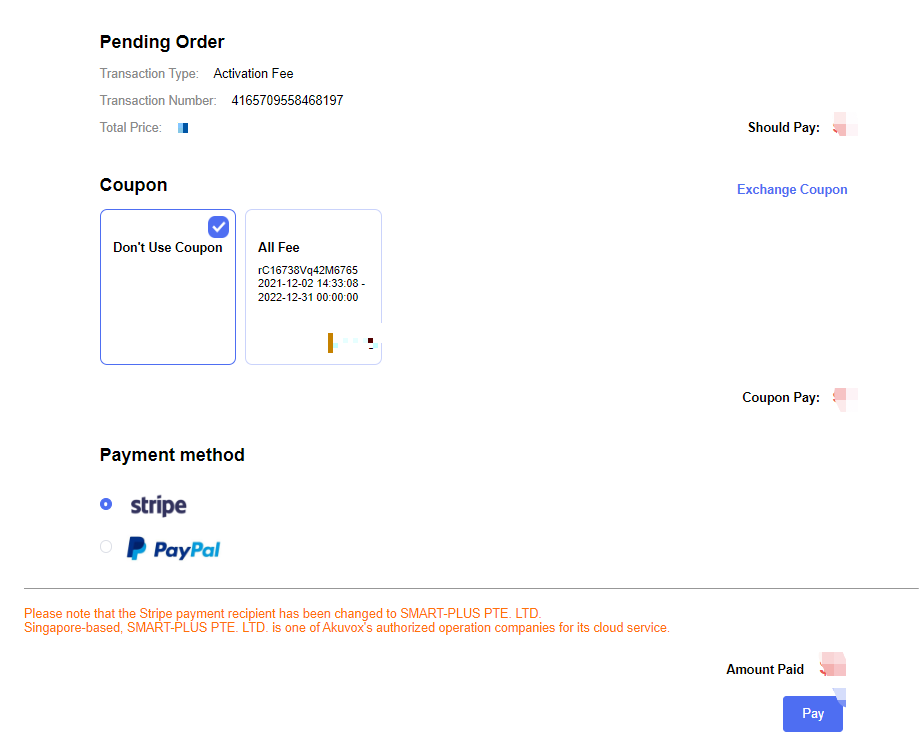
Note:
- To pay by coupon, you will need to purchase the coupon from Akuvox sales first. You can check coupon information in the upper right corner.


Coupon Description:
No. | Field Name | Description |
1 | Normal | Displays the valid coupons. |
2 | Used | Displays coupons that are used out. |
3 | Expired | Displays the expired coupons that still have value. |
Billing Information Description
No. | Field Name | Description |
1 | Company/Family | Fill in the distributor company. |
2 | ATTN | Fill in the name of the distributor. |
3 | Address | Fill in the address of the distributor. |
4 | TEL | Fill in the telephone number of the installer. |
5 | Fax | Fill in the Fax number of the installer. |
6 | Fill in the mail of the distributor. |
Note:
- You can pay for an extra family member account for the single tenant in the same way.
Pay for single-tenant users
To pay for the service activation for the single tenant users:
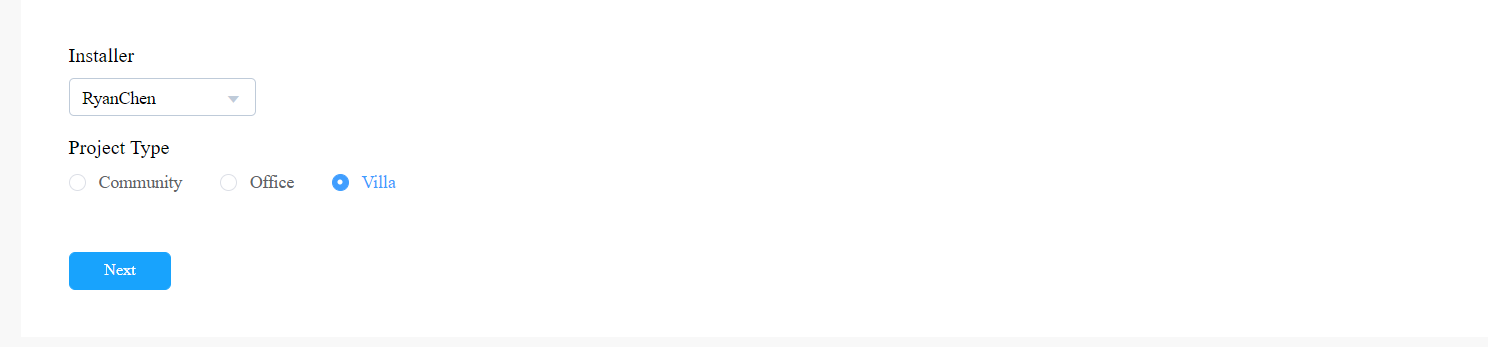
- Click on Subscription module.
- Select the installer.
- Select Villa project type, then click Next.
4. Click Active . Then select the users you want to

Pay for office users
To pay for the service activation for office users.
- Click on Subscription module.
- Select the installer.
- Select Office project type, and select the specific office, then click Next.
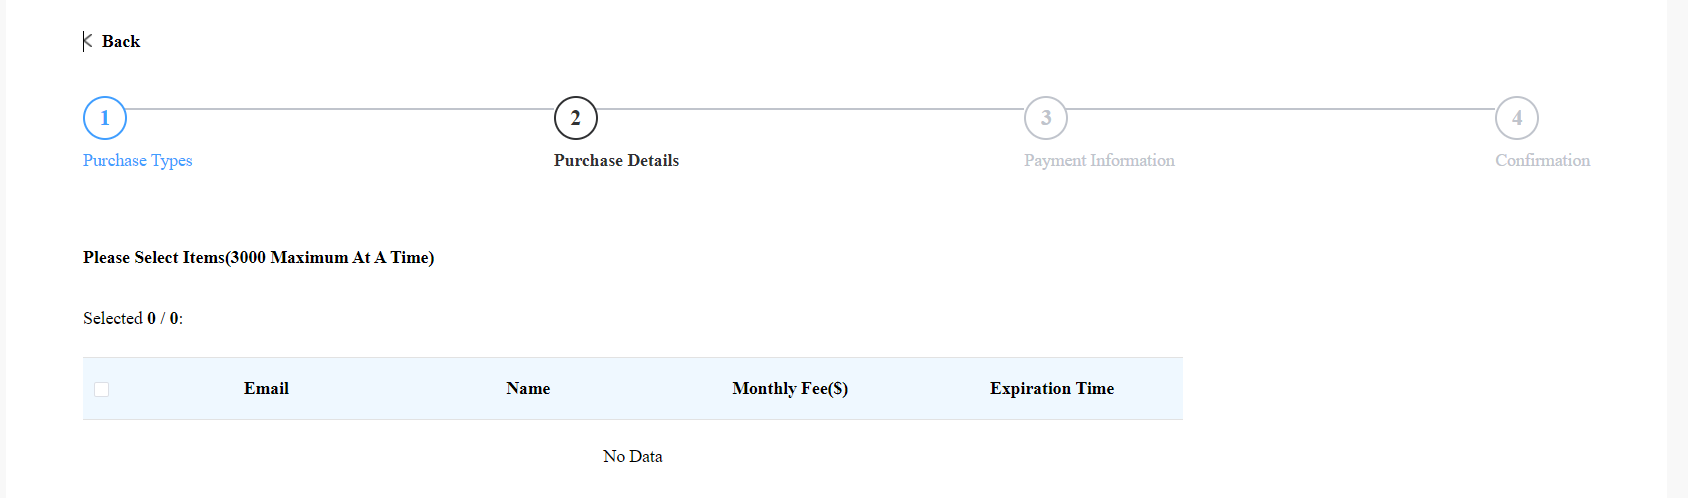
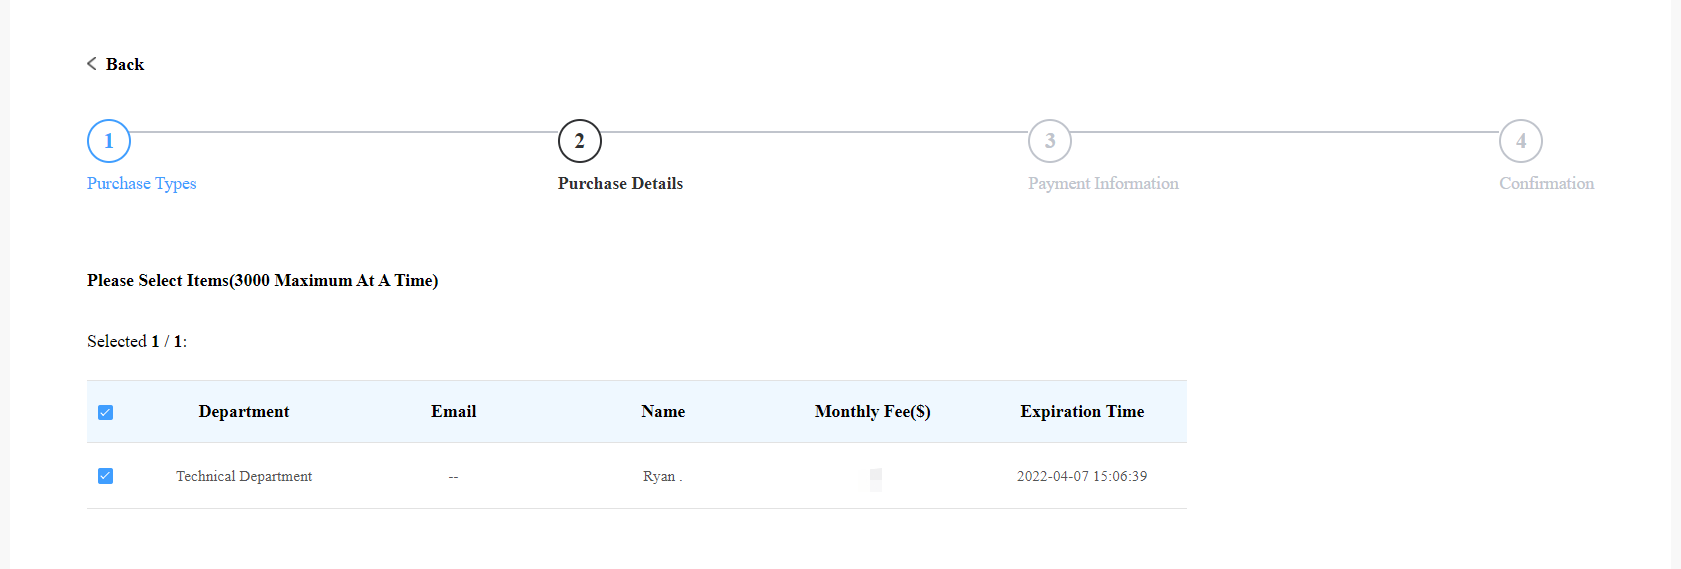
- Select the specific department you want to pay for the service.


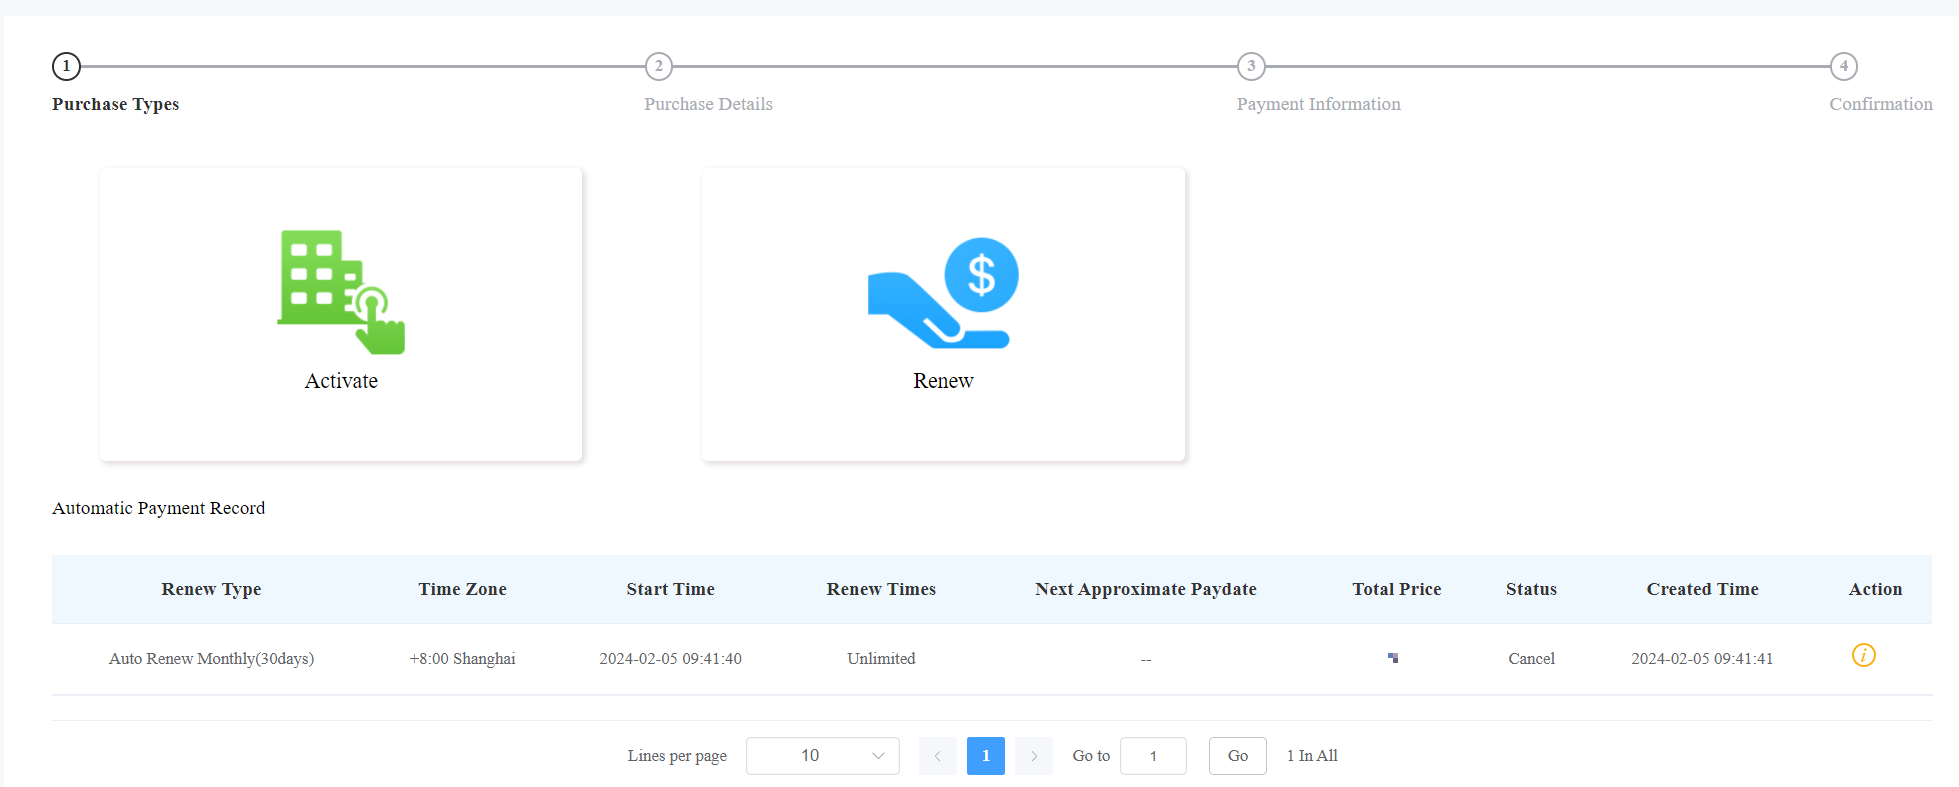
Renew Service
Pay for community users and property manager
To renew services for community users and property managers.
1. Click on the Subscription module.
2. Select the installer.
3. Select project type.
- Select Community to renew the services for community users and property managers.
- Select Villa to renew the service for the single tenant users.
- Select Office to renew the service for the office users.
4. Click Renew
To renew services for community users and property managers.
a. Select the communities and the service type you want to renew. Then search for the service that is expired or is expiring by the expiration date.

b. Choose to renew manually or automatically.
- Renew Manually:
Select Manual and the renewal period with a maximum of 5 years.
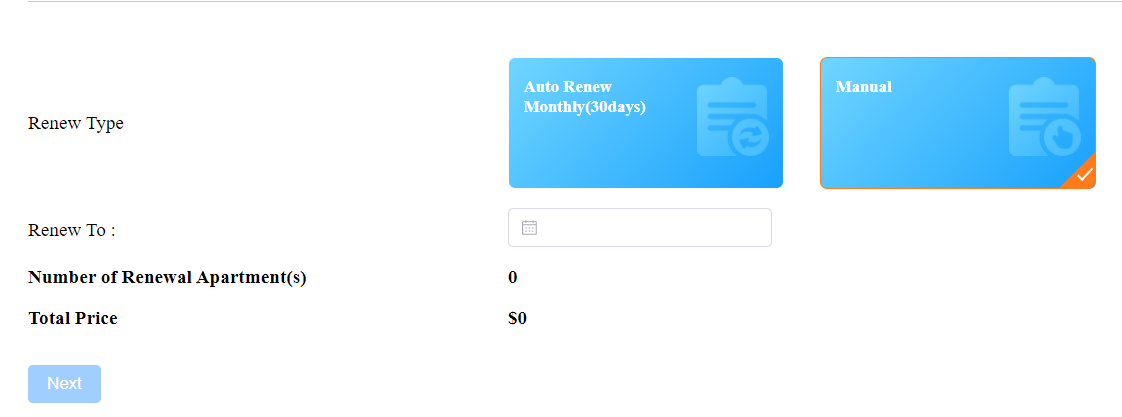
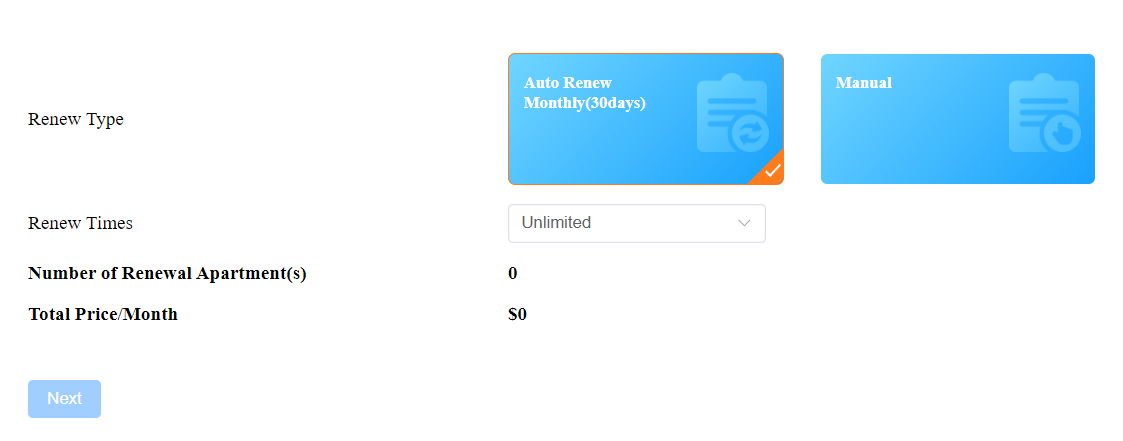
- Renew Automatically: Renewal occurs every 30 days and extends the account's upcoming expiration date by 30 days.
Note
Auto Renew is ONLY available for some installer accounts of Ucloud. If you want to use this feature, please contact the Akuvox tech team.
Select Auto Renew Monthly(30 days) and the Renew Times that decide how many months the renewal lasts.
c. Click Next to pay for the bill.
Note:
- Coupons are not supported for Auto Renew.
- After two consecutive failed charges, the automatic renewal will be deactivated, and you will be notified by email.
- The expiration email will not be sent to the property managers and end users when the Auto Renew service is activated for their apartments.
Pay for single-tenant users
To renew services for single-tenant users.
- Select the user you want to renew the service for.
- Select the renew method and the renewal period with a maximum of 60 months.
- Pay the renewal order on the order page.
Pay for office users
To renew services for office users.
- Select the specific office, then click Next.
- Select the renew method and renewal period with a maximum of 60 months.
- Select the specific department you want to pay for the service.
Automatic Payment Records
On the Subscription module, you can check the automatic payment records including Auto Renew settings, total prices, etc.
Transaction History
Payments module allows you to search, check, and delete the transaction history following the user account activation and renewal. You can also download the invoice if needed.
Check Transaction History
After the payment is made, you can check the details of the transaction if needed.
- Check the transactions by the Created Time, Type, Installer, Status, and Order number.
- Delete, or cancel the order if needed.
- Click
 to pay for the order if the order is not paid yet.
 to pay for the order if the order is not paid yet.
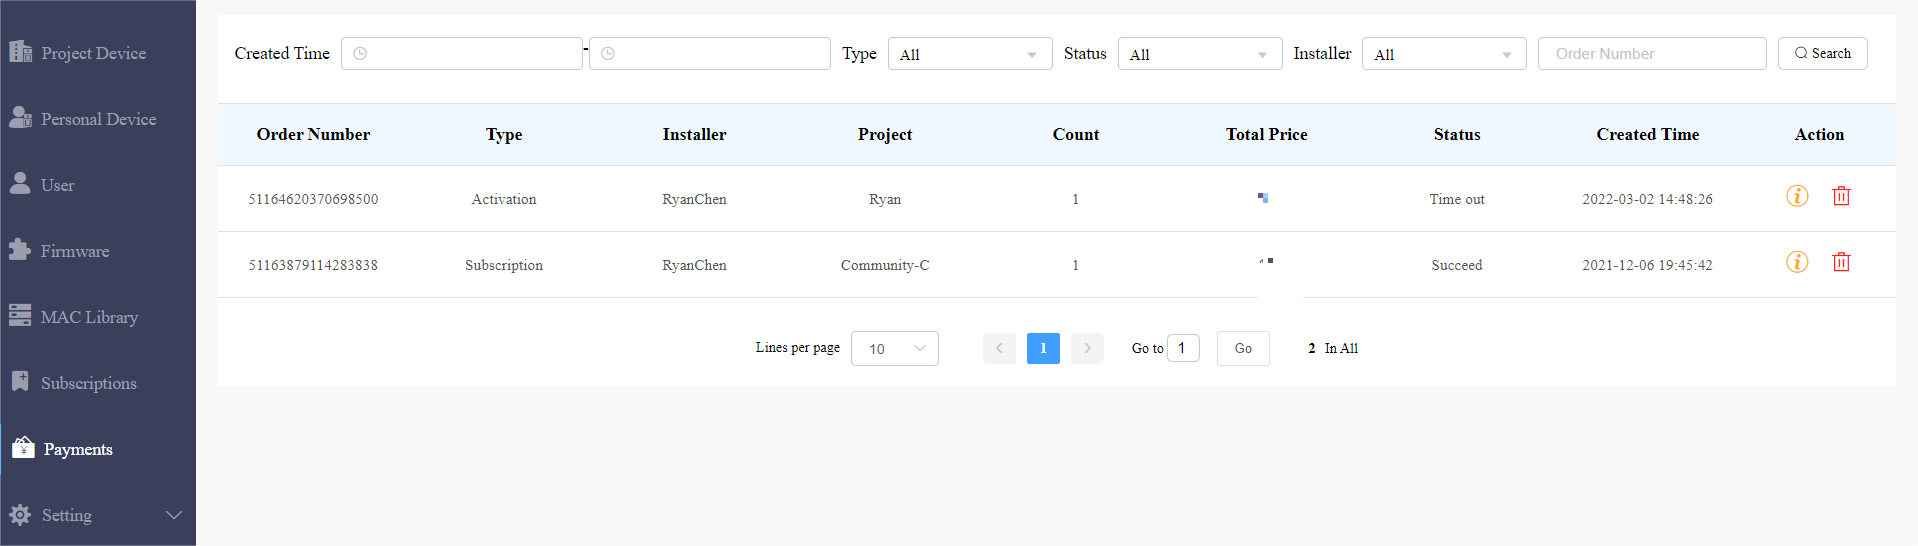
Description
No. | Column Name | Description |
1 | Order Number | Displays the order numbers. |
2 | Type | Four types:
|
3 | Installer | Displays installer name. |
4 | Project | Displays the community name, and office name, while the single tenant project is displayed as “-”. |
5 | Count | Displays the number of transactions. |
6 | Total Price | Display the total price of the transaction. |
7 | Status | Seven types of status: All, Succeed, Processing, Failed, Time out, Cancel, System Processing.
|
8 | Created Time | Display when the order is created. |
9 | Action | Click |
 to check the order details, or click
 to remove the order from the list.
4. Click on of the transaction you want to check and download the invoice if needed.
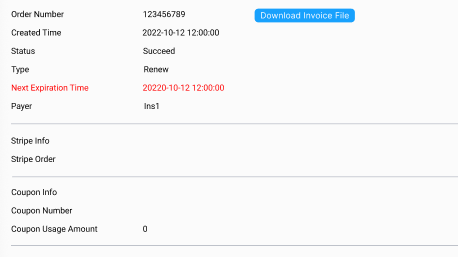
Note:
- Only orders that are renewed daily will display the Next Expiration Date.
5. Click on to delete the specific transaction order if needed.
Customer Service
You can leave your contact for the installers and end users in the Setting module so that they can contact you using the contact information.
Enable Receive Feedback if needed, and then installers' and end users' feedback will be sent to the email address that you fill in.

Contact Us
For more information about the product, please visit us at www.akuvox.com or feel free to contact us by
Sales email: sales@akuvox.com
Technical support email: support@akuvox.com
Telephone: +86-592-2133061 ext.7694/8162
We highly appreciate your feedback about our products.

Was this article helpful?
-20190329_%E5%89%AF%E6%9C%AC.png)