About This Manual
This manual is intended for the administrators who need to properly manage personnel, devices, access control configurations, personnel attendance and shift schedules on Akuvox ACMS (Access Control Management System).
This manual applies to version 2.2.0.4 of ACMS. For new information or the latest software version, please consult our technical support.
Product Overview
ACMS (Access Control Management System) is designed with the idea that personnel, devices, access control, personnel attendance and shift schedule etc. are separated in their configurations which can later be conveniently incorporated to form a complete and integrated access control and attendance management.
Users using ACMS will be able to:
- Achieve the data synchronization between the ACMS and device(s).
- Manage the personnel and department information of the access control.
- Customize your access control schedule and authority group for the door access, and check and monitor the logs for security purpose.
- Manage personnel attendance, shift schedule.
- Search, check and export the attendance report.
- Import and export system data for the convenience of data sharing and system configuration.
Compatible models and versions:
ACMS currently applies to A01/A02/A03/A05/A08 access control terminals, E16, E18, X915S, and R29 door phones, A094 access controllers.
ACMS Installation
Installation Requirements
Prior to the installation of the ACMS software, you are required to make sure that the following installation requirements are met:
- Windows 7 operating system or above.
- Only one ACMS is allowed in the same LAN (Local area network).
- No SDMC and ACMS software are turned on your personal computer or on other personal computers in the same network.
- No device is connected to the Akuvox SmartPlus.
- The Firewall on your computer is turned off.
- Anti-virus software is turned off.
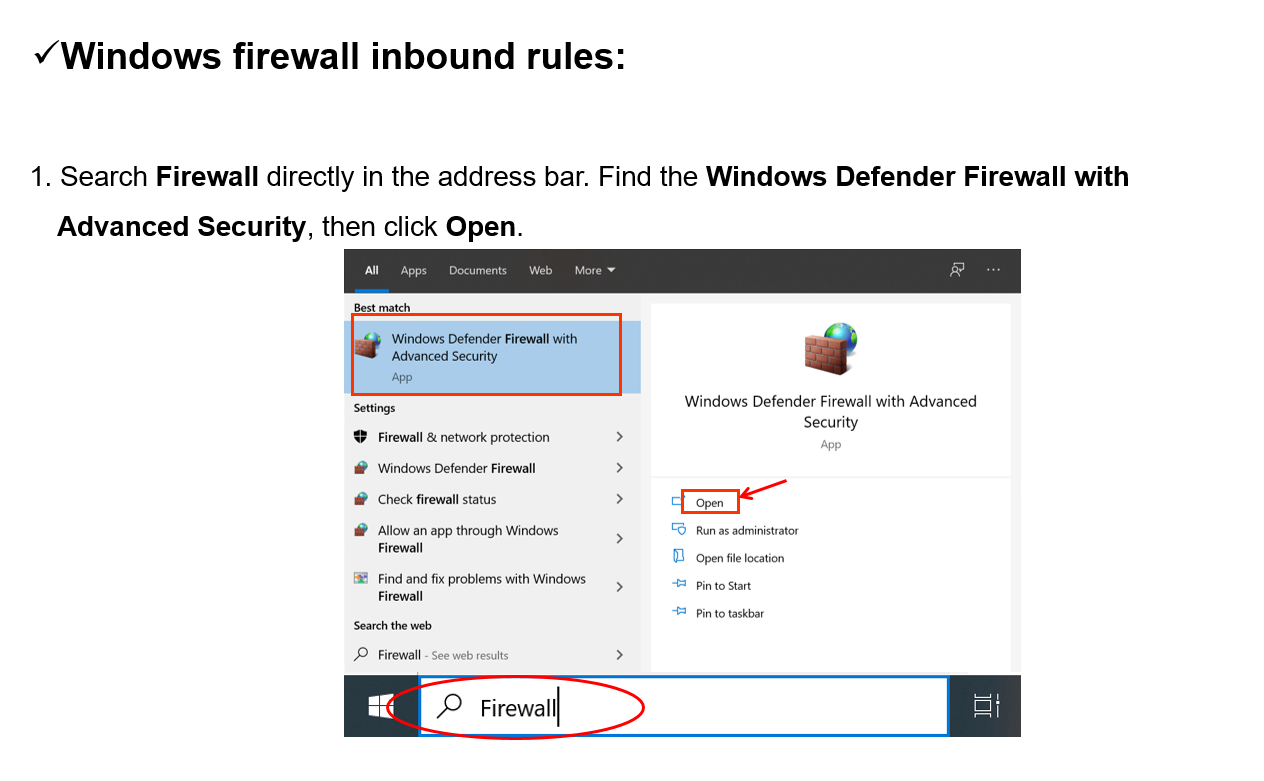
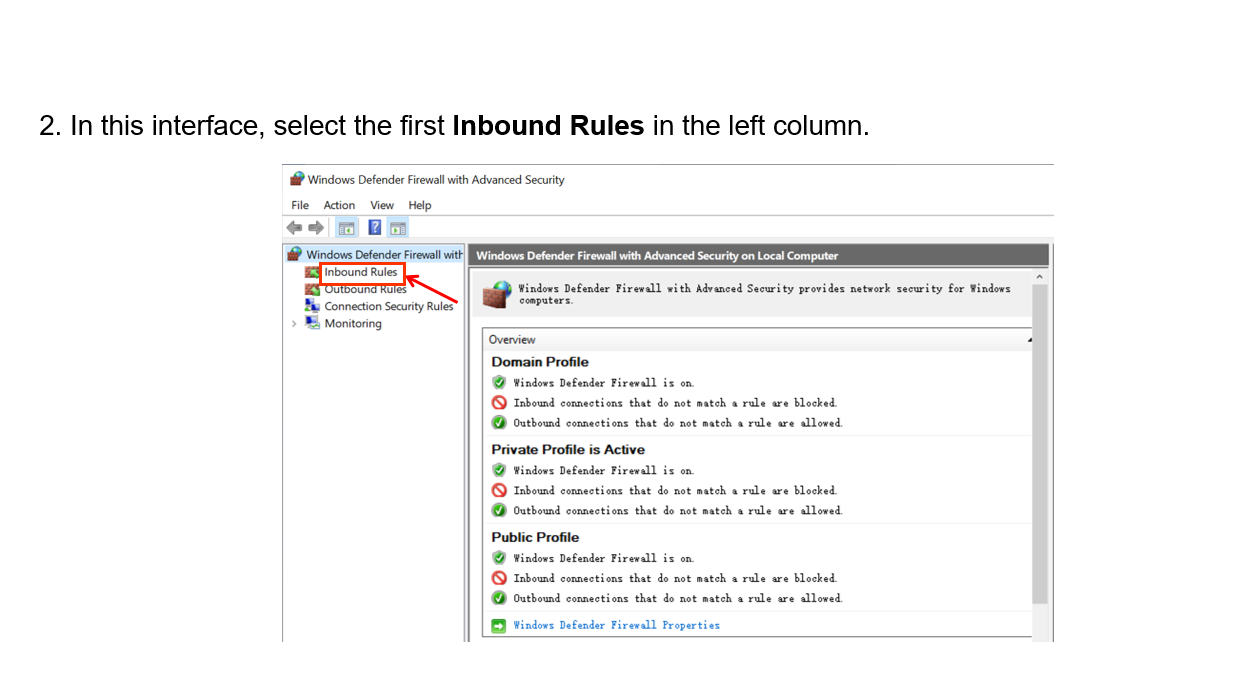
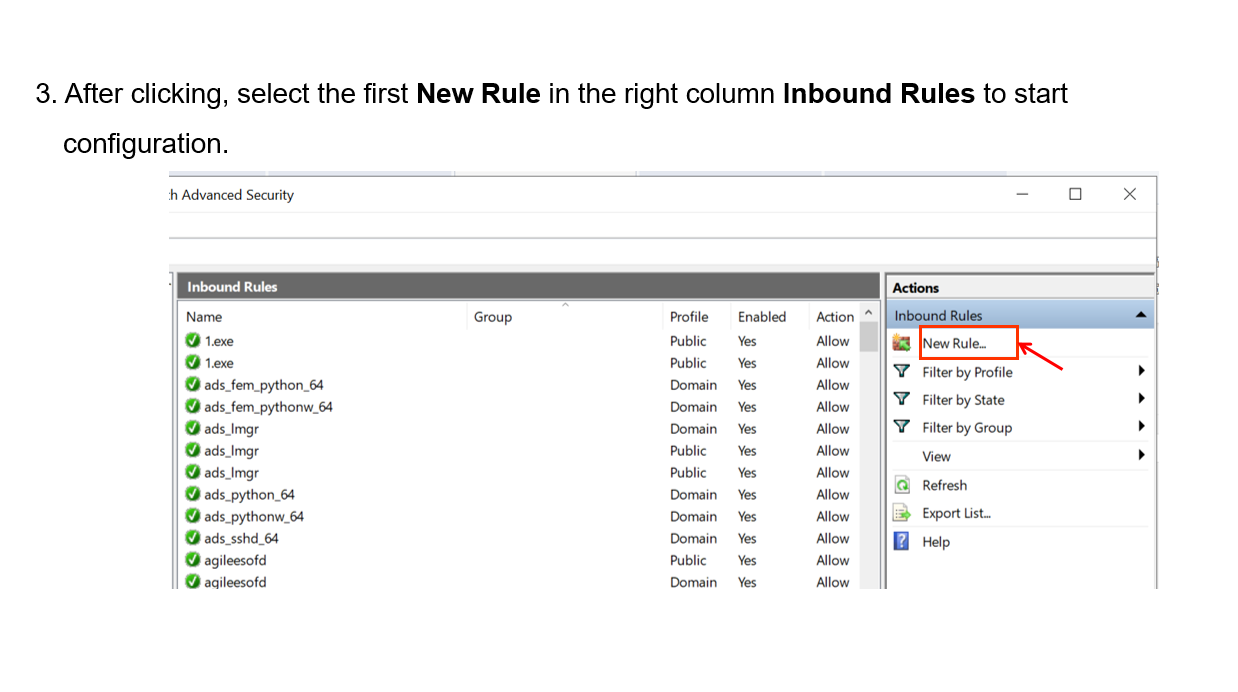
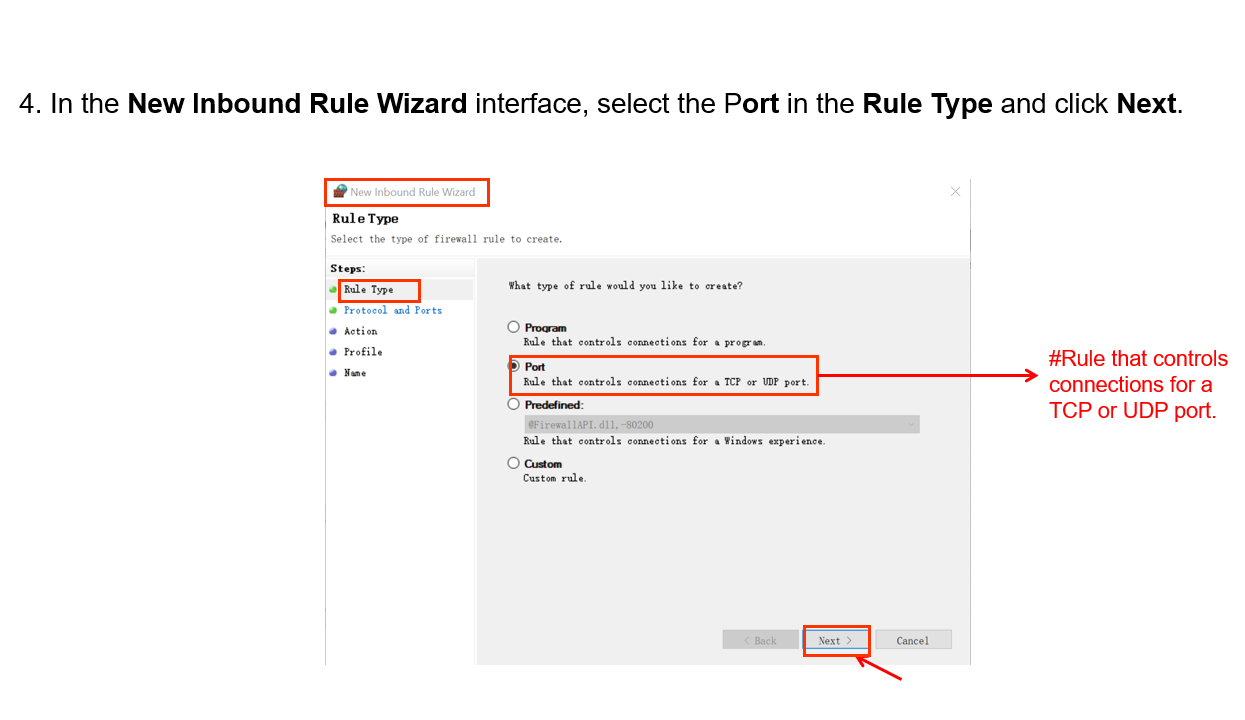
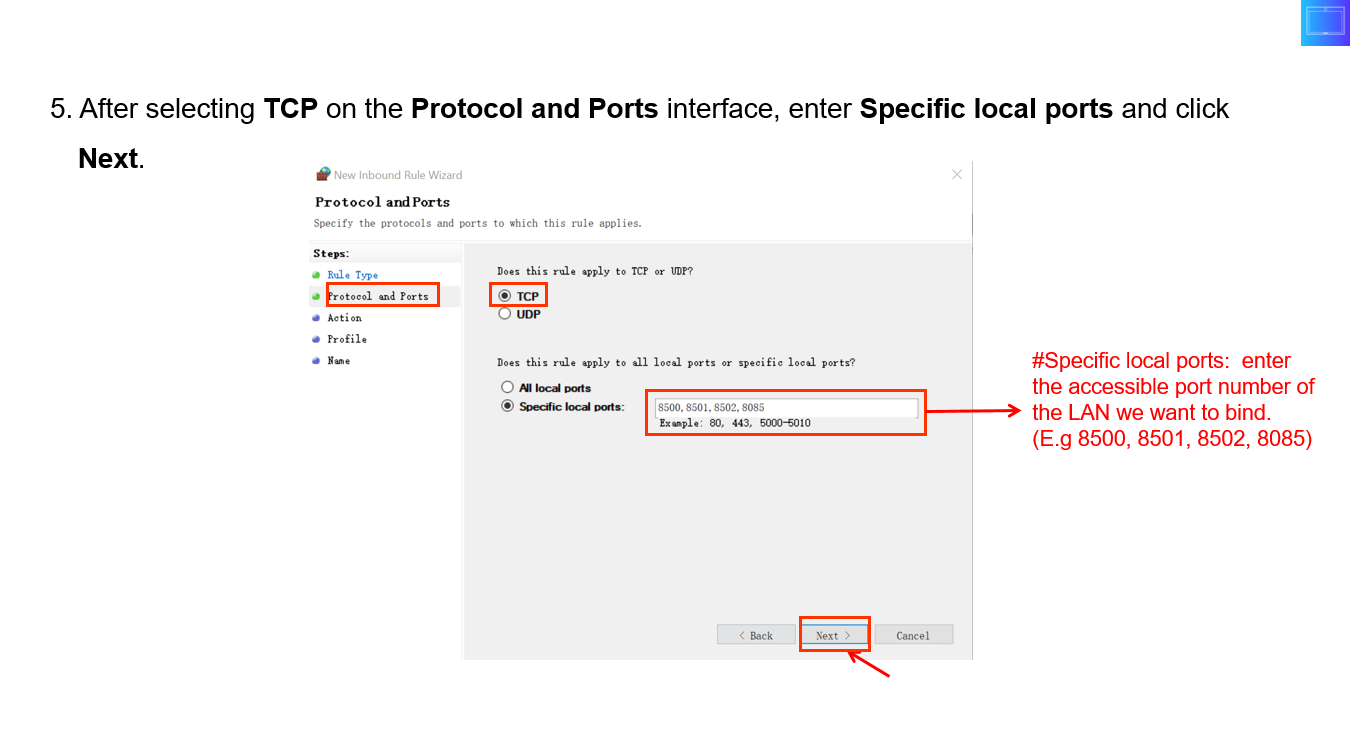
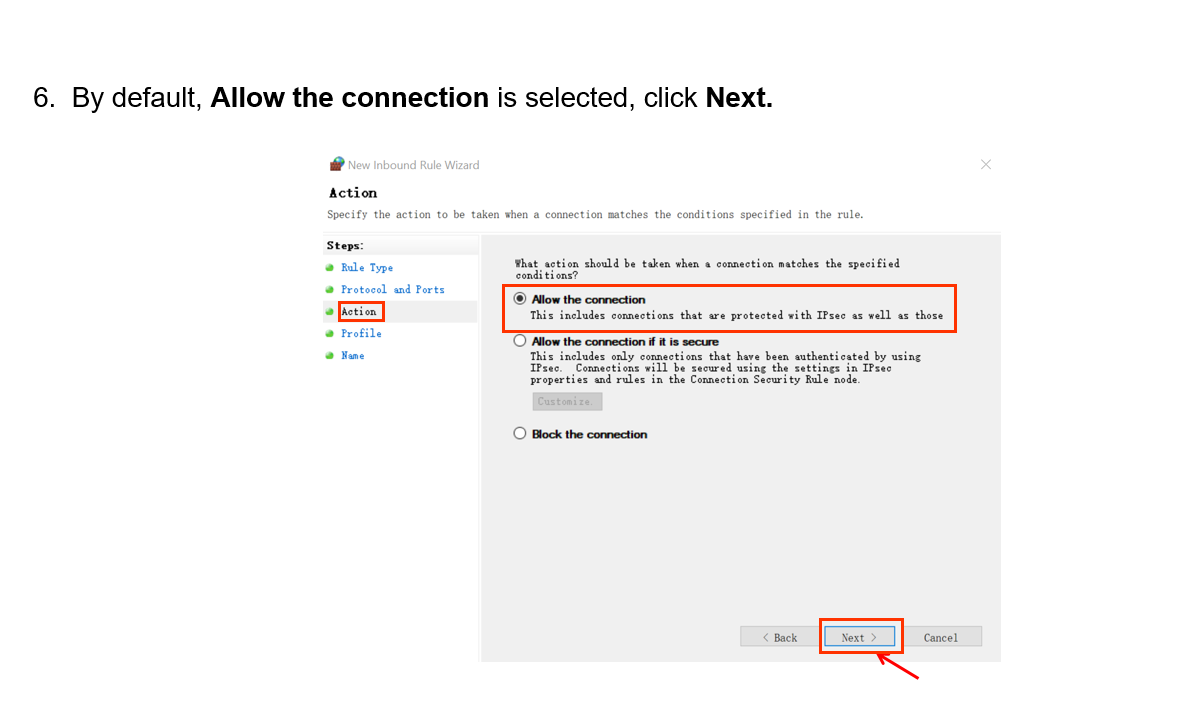
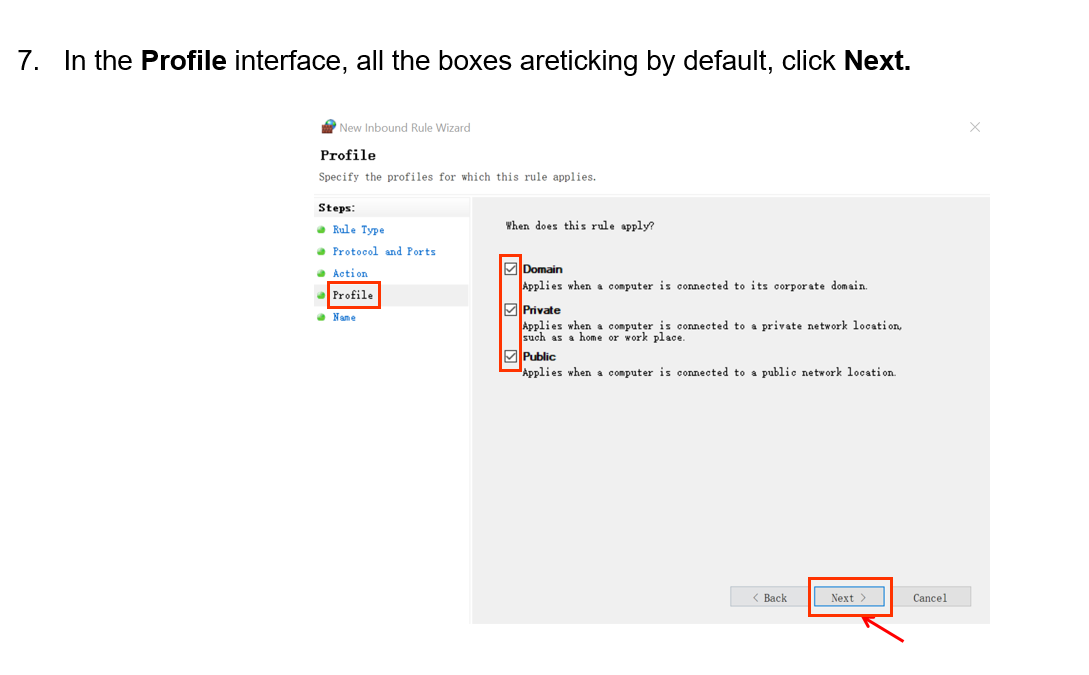
If the Firewall is not turned off, please add the following ports to the whitelist.
- 8500 --- Multicast receive port (UDP)
- 8501 --- TCP listening port
- 69 --- TFTP service port (UDP)
Steps
Install ACMS
ACMS is to be installed on your computer using compressed files.
- Decompress the zip file ACMS.AK.2.0.1.7.
- Click the ACMS setup.exe file.
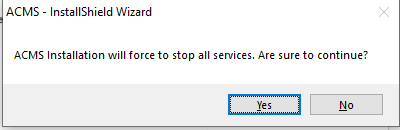
- Click "Yes" in the pop-out window to continue the installation.
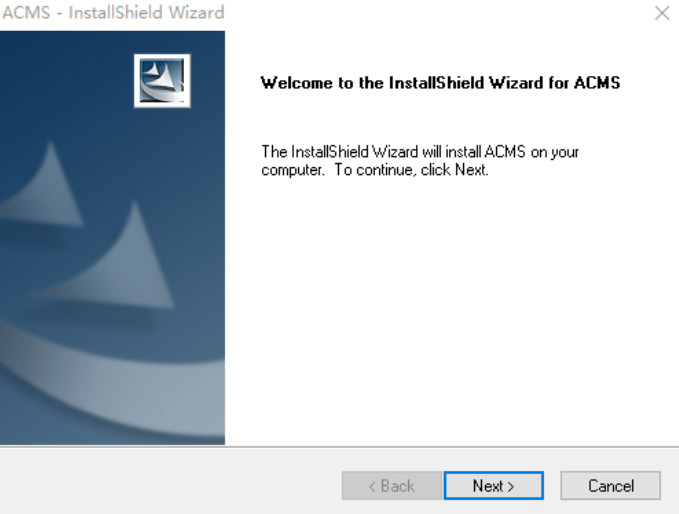
4. Click Next to go to the next step.
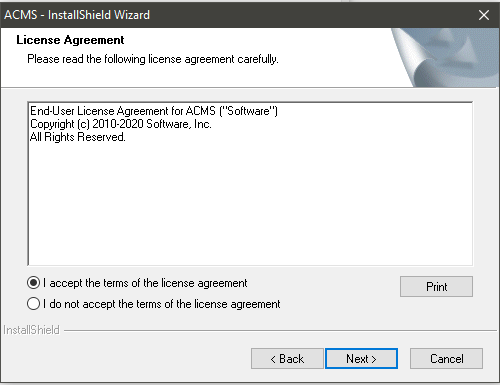
5. Click on Next to accept the agreement.
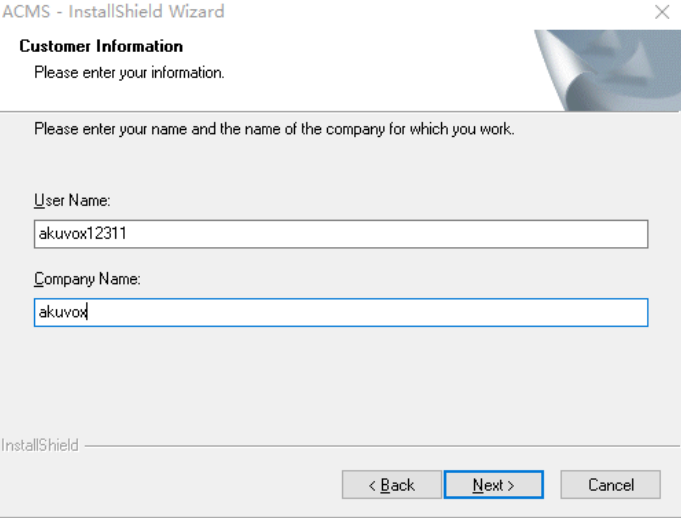
6. Enter the User Name and Company Name and click Next.
7. Select the installation path by default or the other path to your preference and click Next.
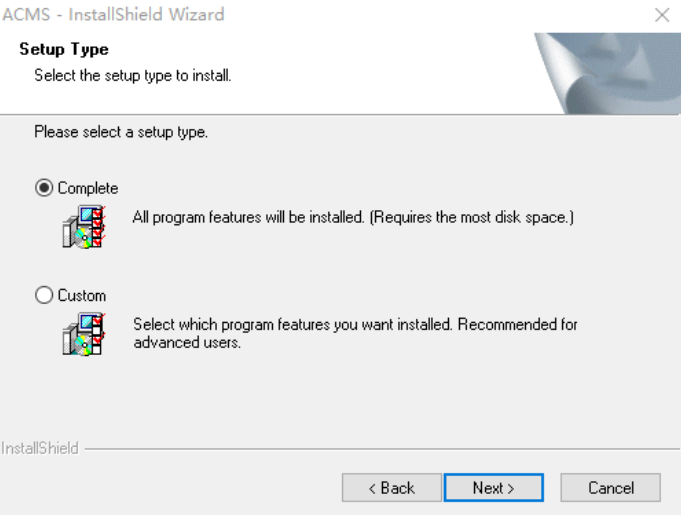
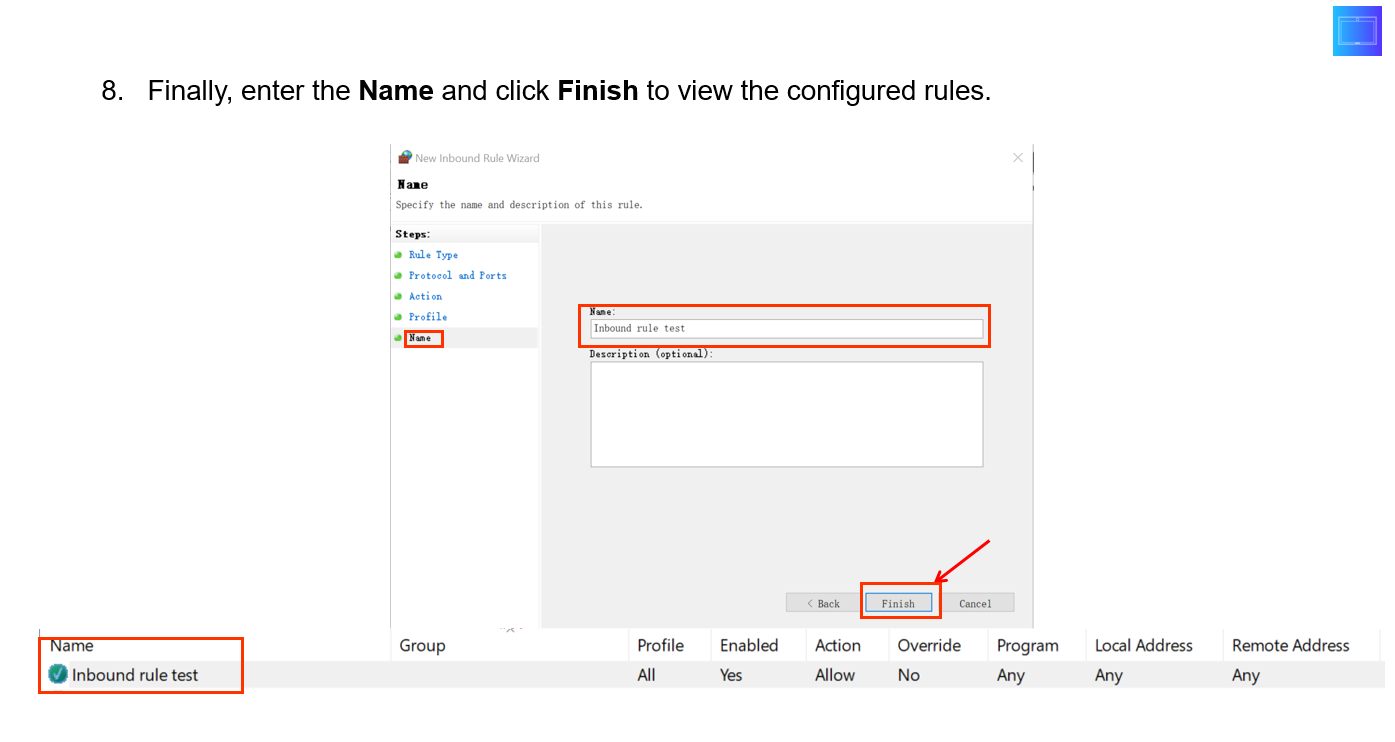
8. Click on Install to finish the installation.

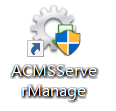
- After the installation is completed, you will see the ACMS icon along with ACMSSeverManage icon on your desktop.

- The ACMS installation path should be English characters.
Set up ACMSServer Manage Software
ACMSServer Manage is software that is installed along with the ACMS. The software is designed to provide two types of services called ACMSService, and WatchdogService.
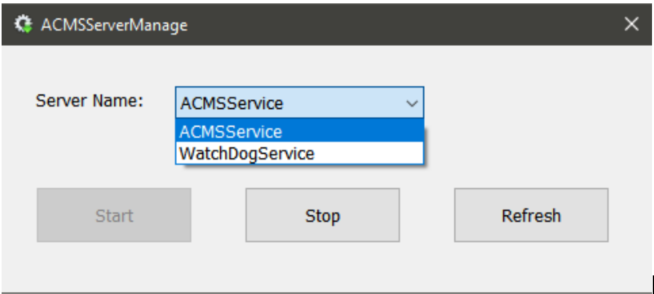
- ACMSService: this service is used to facilitate the two-way communication between the ACMS and the devices for the data transmission, therefore the service must be turned on to ensure the smooth running of ACMS.
- WatchdogService: Watchdog will be running automatically upon the completion of its installation by default. WatchdogService is responsible for monitoring the ACMSSevice status. To be more specific, Watchdog will turn on ACMSService automatically whenever it finds ACMSService is not running, which means ACMSServicewill be running nonstop or will be up and running again on the condition that the Watchdog is on.
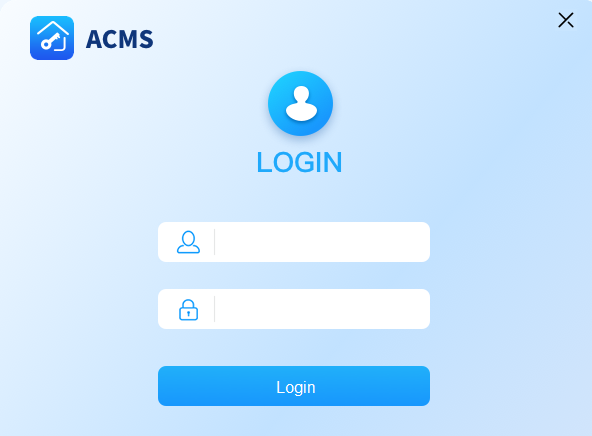
Log in ACMS
To log in to ACMS, you are required to enter the username admin, and the password admin by default.
To log out, just click  on the upper right corner of the screen.
Configure Network Connection
In order to achieve normal data transmission and interaction with other devices, you are required to select one network adapter that will come with a corresponding IP address so that a sole data transmission port between the ACMS and devices can be established.
- We recommend enabling only one network adapter on your PC.
- Click on
 on the upper right corner and select System Setting, then select Network.
 - Select your network adapter with its corresponding IP address.

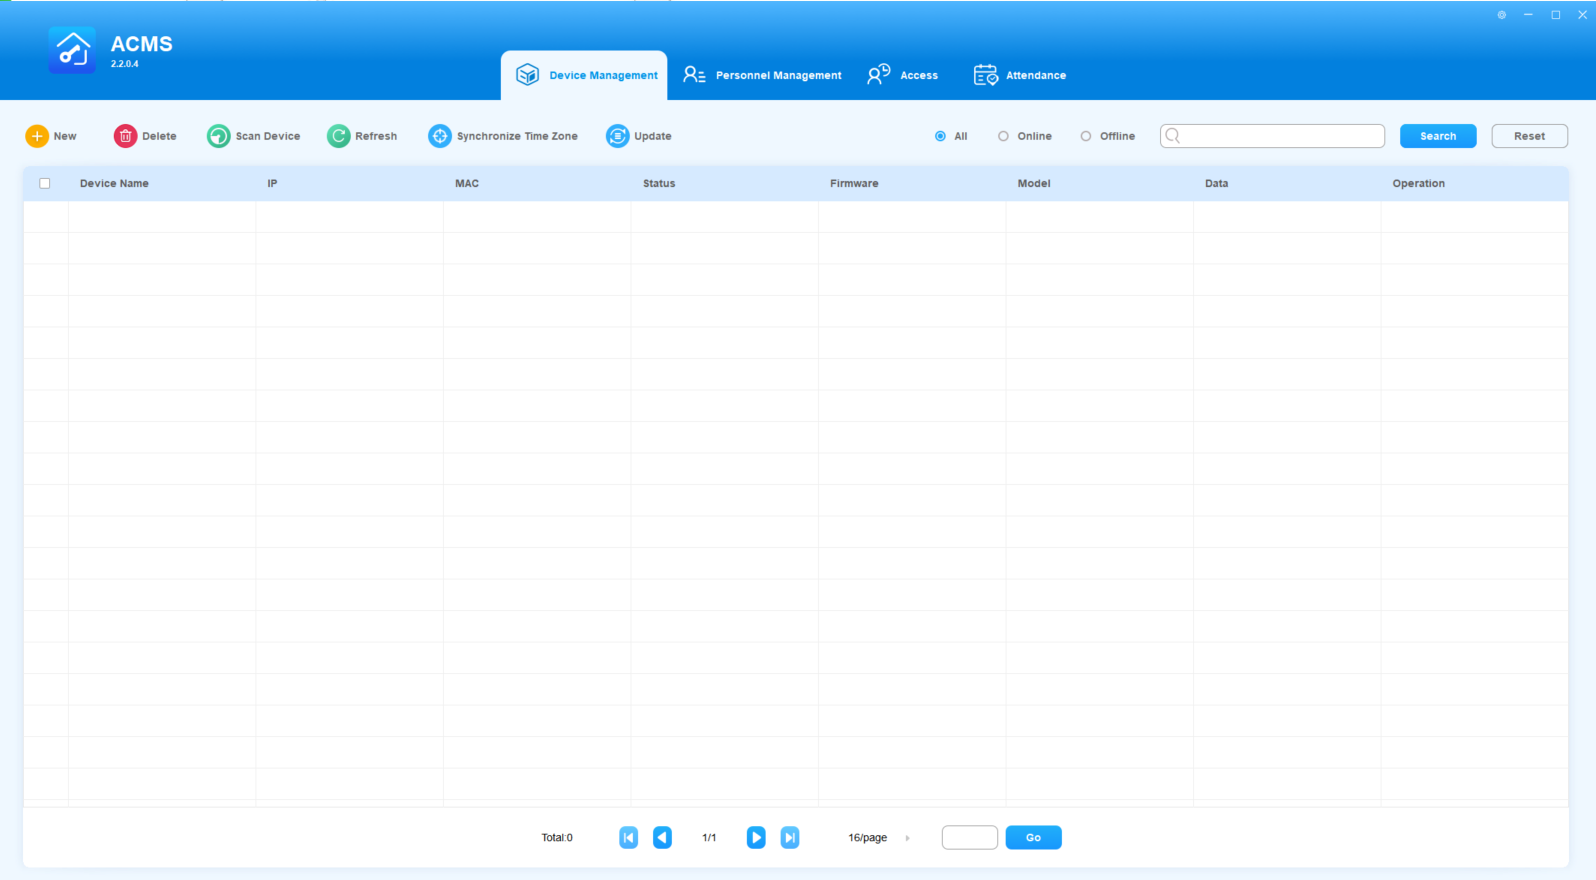
ACMS Main Interface Introduction
ACMS main interface mainly consists of four modules, namely the Device Management module, Personnel Management module, Access module, and Attendance module.

- Device Management Module: used to add, delete and search the devices as well as synchronize the data and time zone to the device.
- Personal Management Module: used to manage the department-based personnel data in terms of creating department(s), managing the personnel information, and assigning configured PIN and Card numbers to personnel or personnel within a selected access authority group.
- Access Module: used to create and manage an inventory of access control time schedules, and it serves as a platform on which you can manage and deploy the access control by establishing a corresponding relation among device, department, personnel, and access control schedule, forming an authority group. In addition, you can manage the door log, temperature log, and log data import and export.
- Attendance Module: used to manage the holidays, attendance points, employee shift schedule, attendance records, and reports, etc.
Device Management
In the device management module, you can manage the device in terms of adding, editing, deleting the device(s) individually or in batch, and synchronizing the time zone to the corresponding device(s) you selected. You can also search the data.
Add Device
Adding a device in ACMS can be done manually or by scanning.
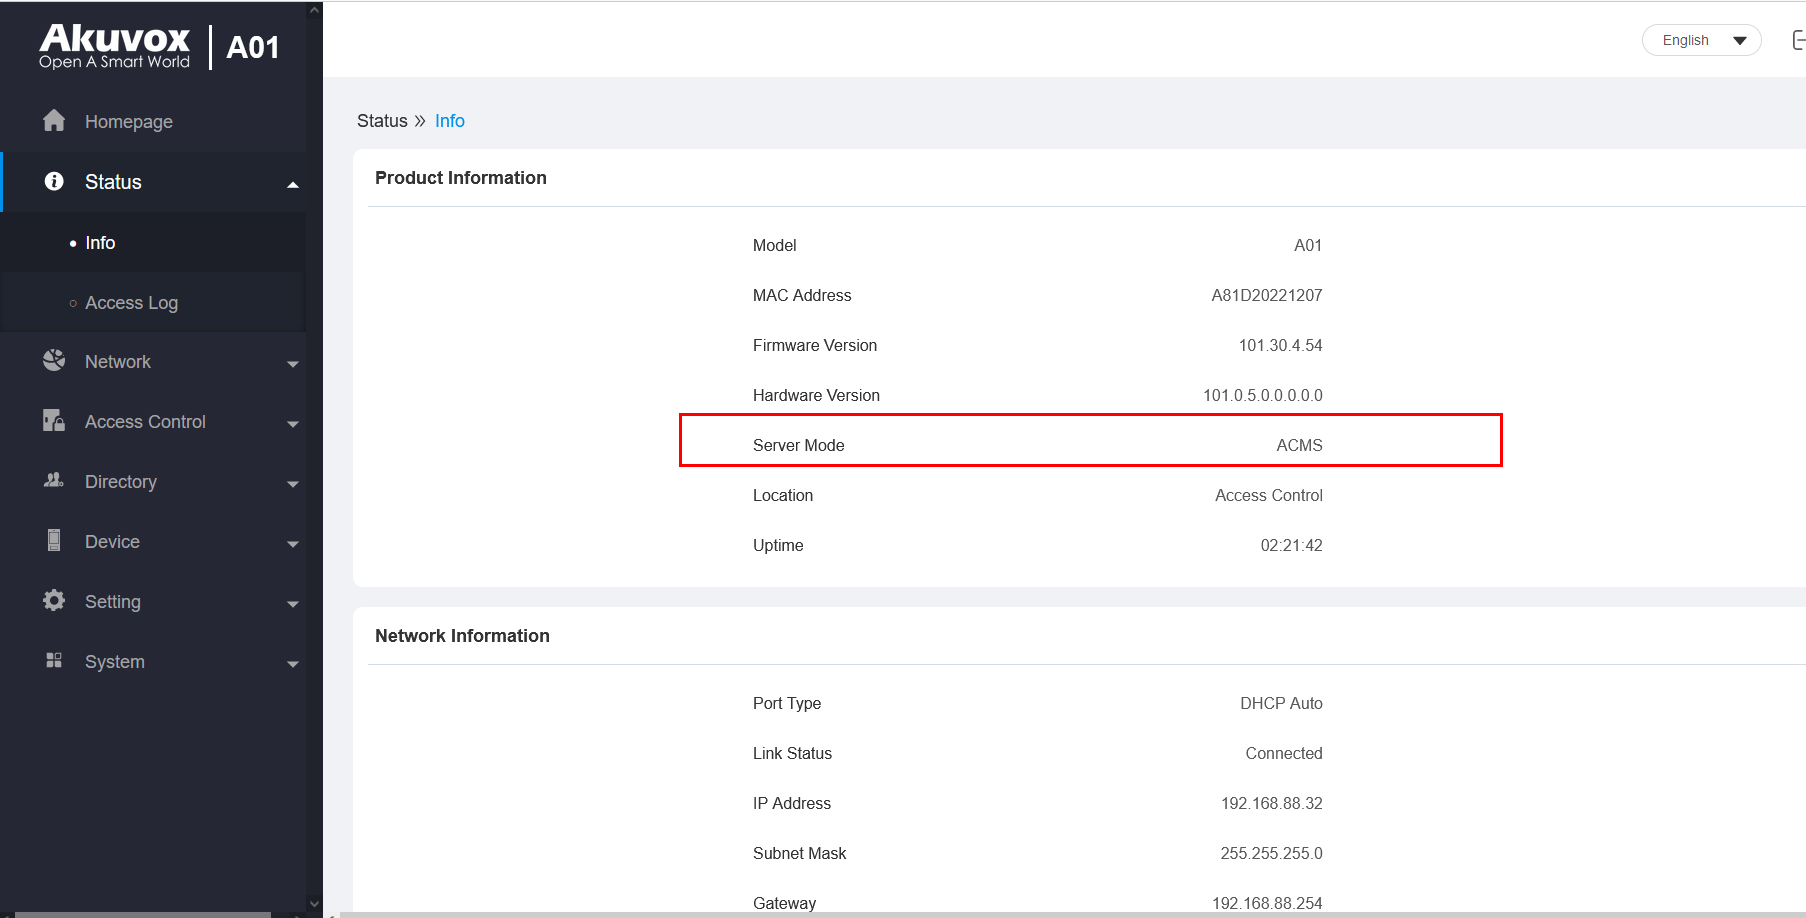
When a device is in self-configuration mode and is added to ACMS, it will automatically switch to ACMS mode. This mode can be confirmed by accessing the device web interface and going to Status > Info > Product Information.
- To scan and add devices successfully, the devices cannot be connected to the SmartPlus Cloud.
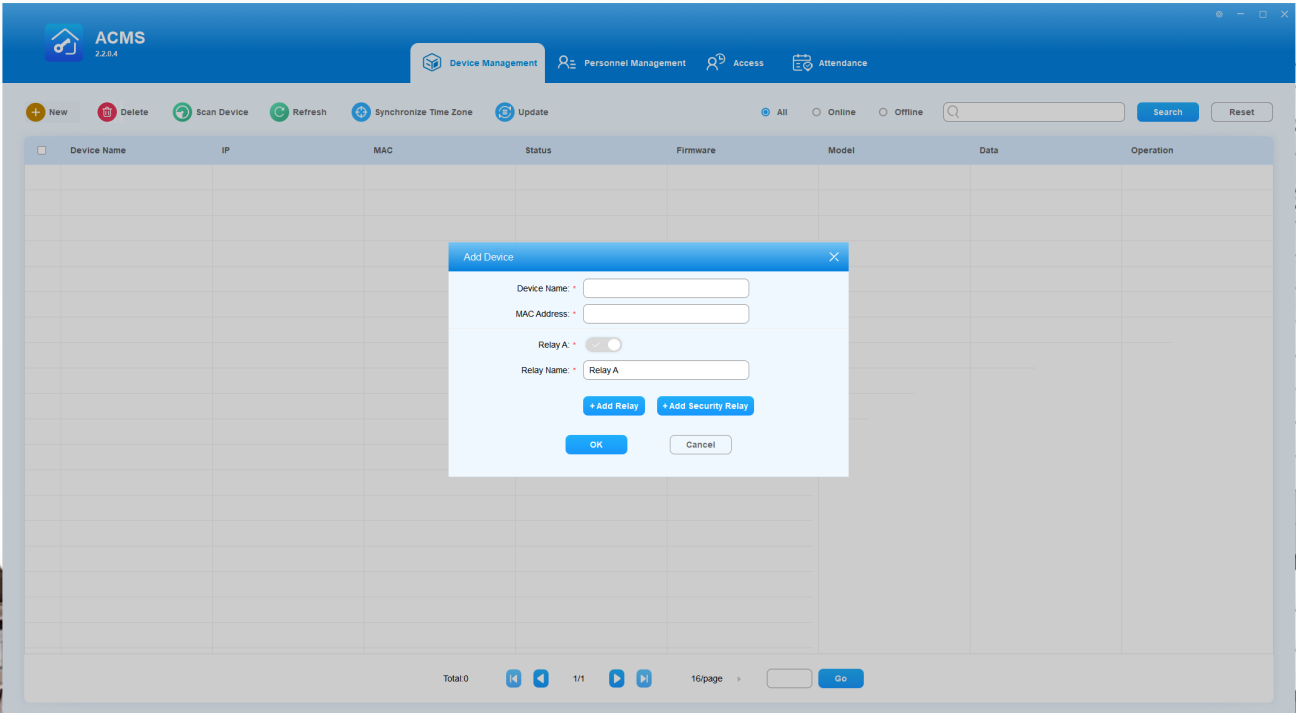
Add Device Manually
- Click New
 in the upper left to open the Add Device page.
 - Do as the following:
- Enter the device name and its MAC address.
- Click Add Relay or Add Security Relay to add additional relays if needed.
- You can open 4 relays and 2 security relays at the maximum, with at least one relay or security relay being required. The relay name can be modified.
3. Click OK. The added device and its information will be displayed on the Device Management screen.
Add Device by Scanning
- Click Scanning Device
 to discover all the devices in the same LAN network.
 - Click Refresh
 to refresh the device list if needed.
 - Check off the desired devices and add click Add
 .
. - Click Yes when you are asked.
- If a device is added through scanning or already exists in ACMS, and ACMS is subsequently upgraded to the latest version, the device will, by default, have four relays (although some devices may not actually have four relays, the interface may still show four relay options) and two security relays enabled.

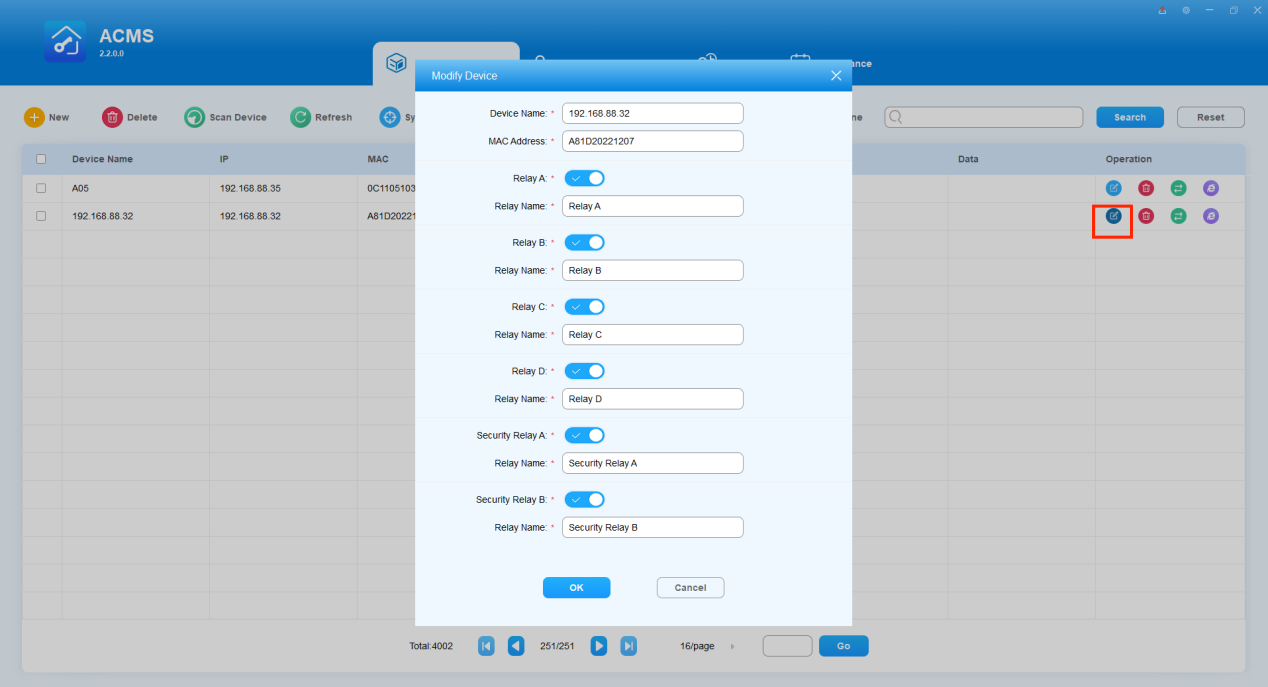
Edit Device
You can edit the device if needed.
- Click
 of the desired device.
 - Edit the device name, MAC address, or add or disable relays according to your need.
- Click OK.
Delete Device
To remove a device, do as the following.
- Tick the check box of the specific device(s)you want to delete.
- Click the
 of the specific device to delete the device or you can delete multiple devices by clicking the
  to delete the device in batch at one time.
 - Click Yes.

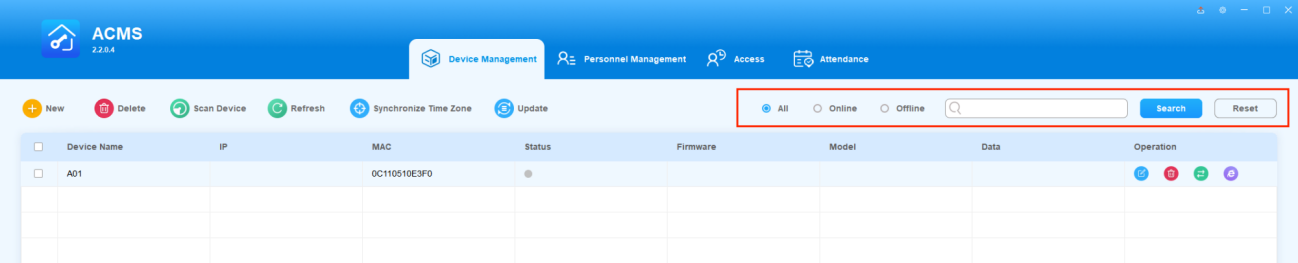
Search Devices
The device search can be done by first filtering the device status as indicated by All, Online, and Offline before entering the search information for the targeted device search.
- Click to select the filtering conditions among All, Online, and Offline.
- Enter the information such as Device Name, MAC, IP, and Firmware and click on Search. You can click on Reset to clear the information in the Search field.
Refresh Device Information
When any changes are made to the device information displayed on the Device Management screen, such as IP address, MAC, status, firmware, mode and more, you can update such information by clicking  in the upper tab bar.

Go to Device Web Interface by One-Click
You can go to any ONLINE device’s web interface by clicking on its  icon in the Operation column.
- An online device is indicated by a green dot in the Status column, while an offline device is a gray dot. You can only access the web interface of an online device by clicking on it.

Sync Between ACMS and Devices
Sync Access Authentication Data
ACMS is able to facilitate the synchronization of door access authentication data, e.g., fingerprint and face data, between ACMS and the device(s).
Obtain Data from Devices
The Data column displays the identifiers for door access authentication data, such as fingerprints, obtained from each device. When a new device is added, this column will initially be blank until data is retrieved from the device.
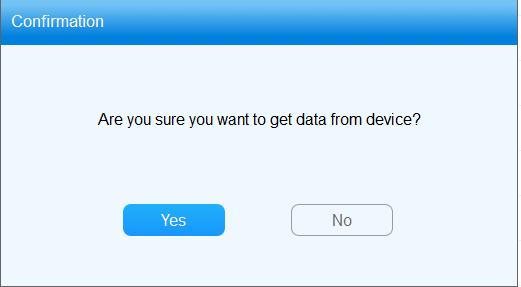
To request data from a device, do as the following.
 in its Operation column.
2. Clicks Yes on the confirmation window, the system will start to retrieve data from the device.
3. The corresponding data identifier will then display in the Data column.
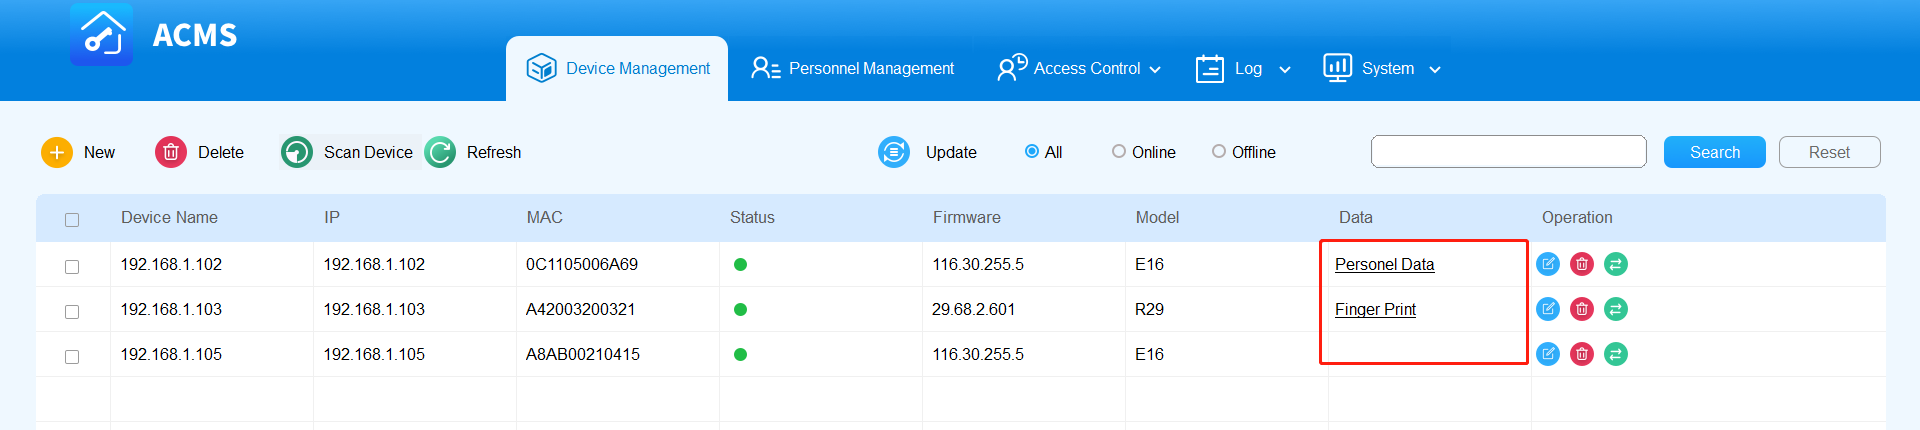
Send Data to Devices
To transfer door access authentication data between devices, you can synchronize the data obtained from one device to another. For instance, if you have fingerprint data for users 1, 2, and 3 on device A, you can sync this data to device B. This will enable users 1, 2, and 3 to use their fingerprints to access device B.
1. Find the device that you need its door access data, and click the data type in the Data column.

2. The Sync Data to Device screen opens. Check off the device that you want to apply the data to.
- If the data to be synced is fingerprints, then the device list only displays available R29.
- If it is Personnel Data to be synced, then the device list only displays available access control devices.
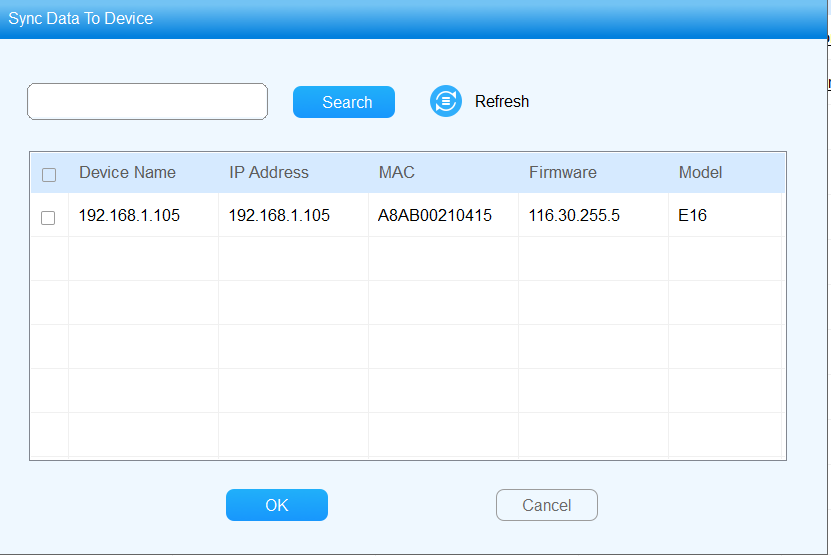
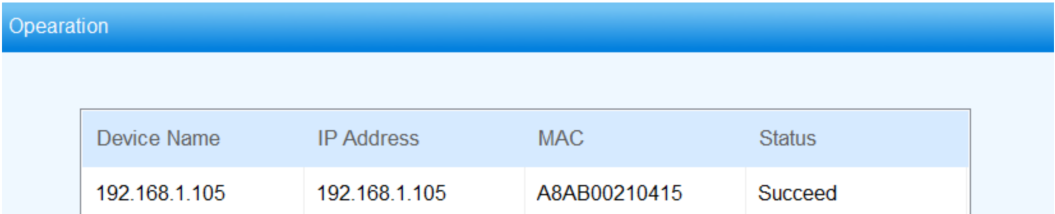
3. Click OK. Wait until the device’s status changes to be Succeed.
Sync Time Zone to Devices
In Version 2.2 and later, upon connecting to ACMS, the device will receive an update with the computer's time zone file and current time zone. This ensures consistent times on both ends and avoid the time inconsistency due to daylight saving time.
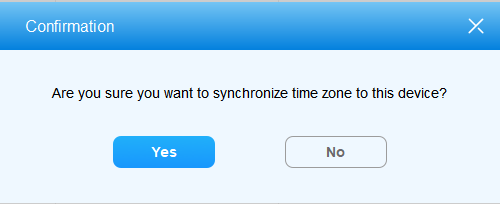
If the computer’s time zone changes, to sync it for selected devices, do as the following.
- Check off the desired device(s), and click Synchronize Time Zone on the upper tab bar.

2. Confirm the operation by clicking Yes.
Update Access Control Changes to Devices
To apply access control configurations and changes, including both personnel and access group, to corresponding devices, you need to sync them manually.
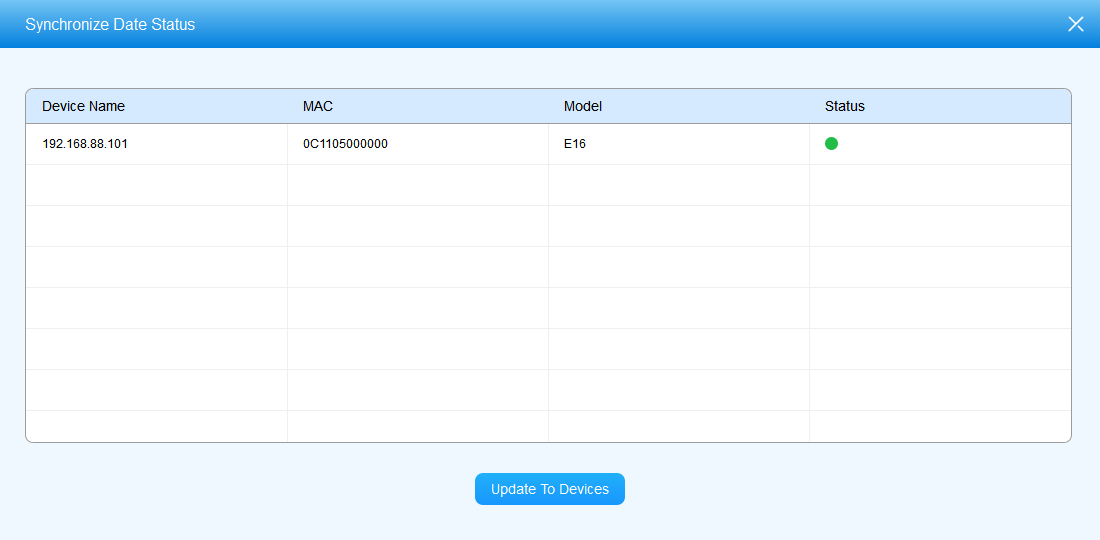
Update Authority Group
The Update Authority function allows for the synchronization of changes made to the Authority Group associated with devices. If any changes are made to the authority group, the Update Authority button appears in the upper right corner  . Clicking the button will take you to a page that displays all the related devices. To send the updates, just click Update to Devices. Once the changes are successfully sent, the button will disappear.
Update Personnel and Authority Group
If you make any changes to on the Personnel or Authority Group screens, you need to go to the Device Management page, select the relevant devices, and click  to send the changes to the devices.
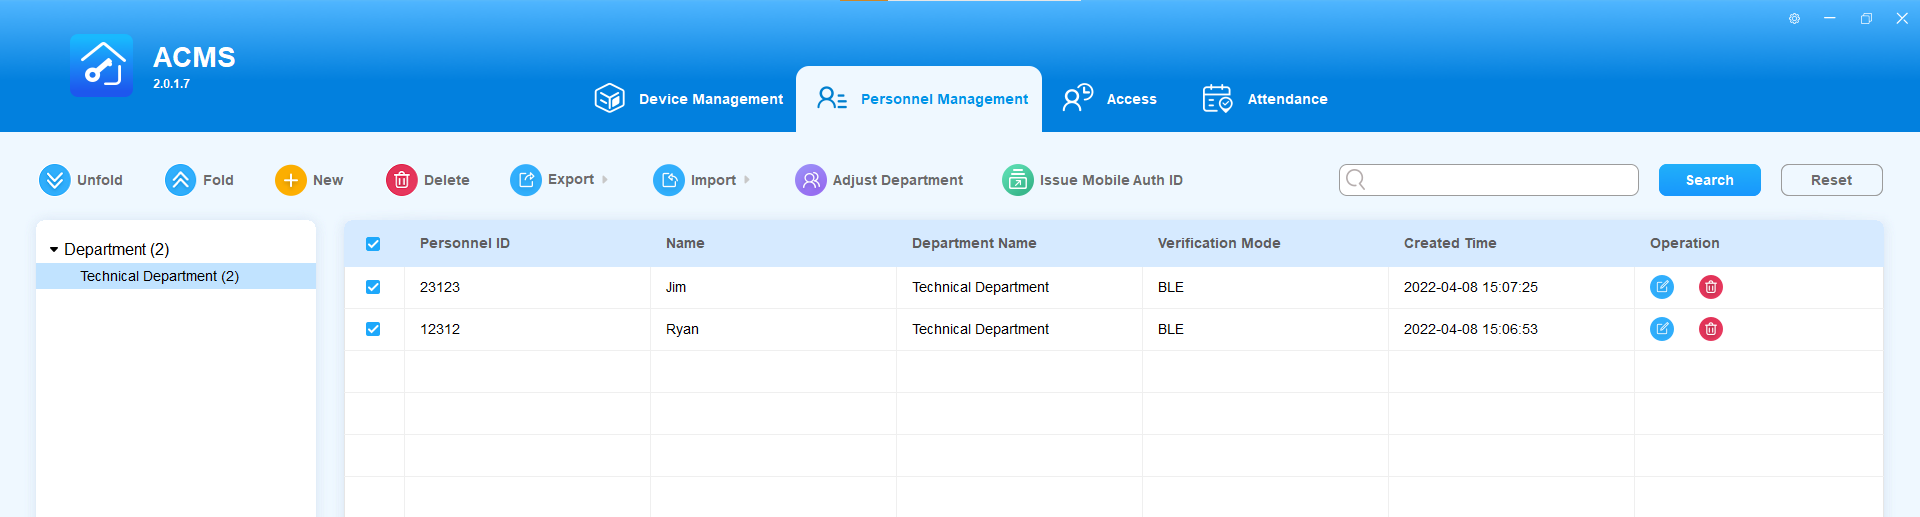
Personnel Access Management
The Personnel Management module is primarily designed to manage department and personnel in terms of adding, deleting, editing personnel and department, importing, and exporting the personnel data and photos, and adjusting the department for personnel. You can also search the personnel to find the information needed.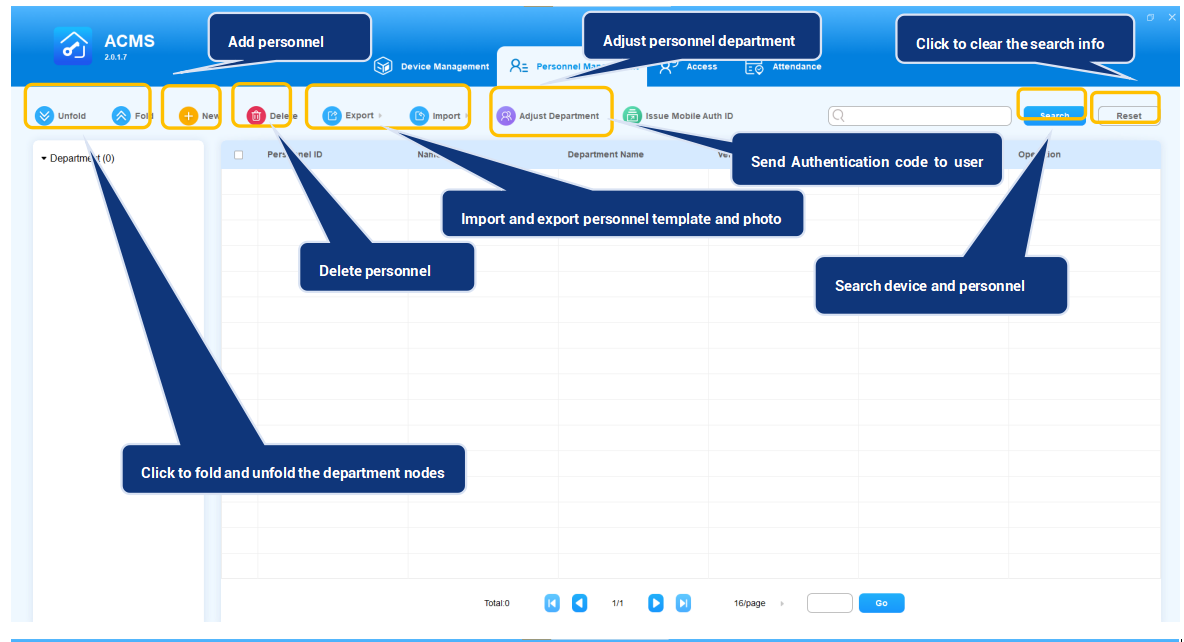
Add Department
Departments are structured in nodes. Each level of the node can be further extended to the nigh level of subordinating nodes in descending order, however, there is no limitation on the number of paralleled subordinating nodes. You can manage and add the personnel to the designated department at different levels of nodes.
- Click on
 at the root node.
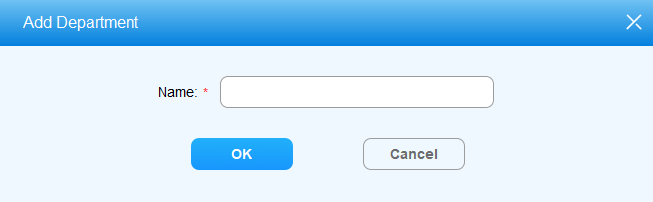
 - Enter the department name to add a department.
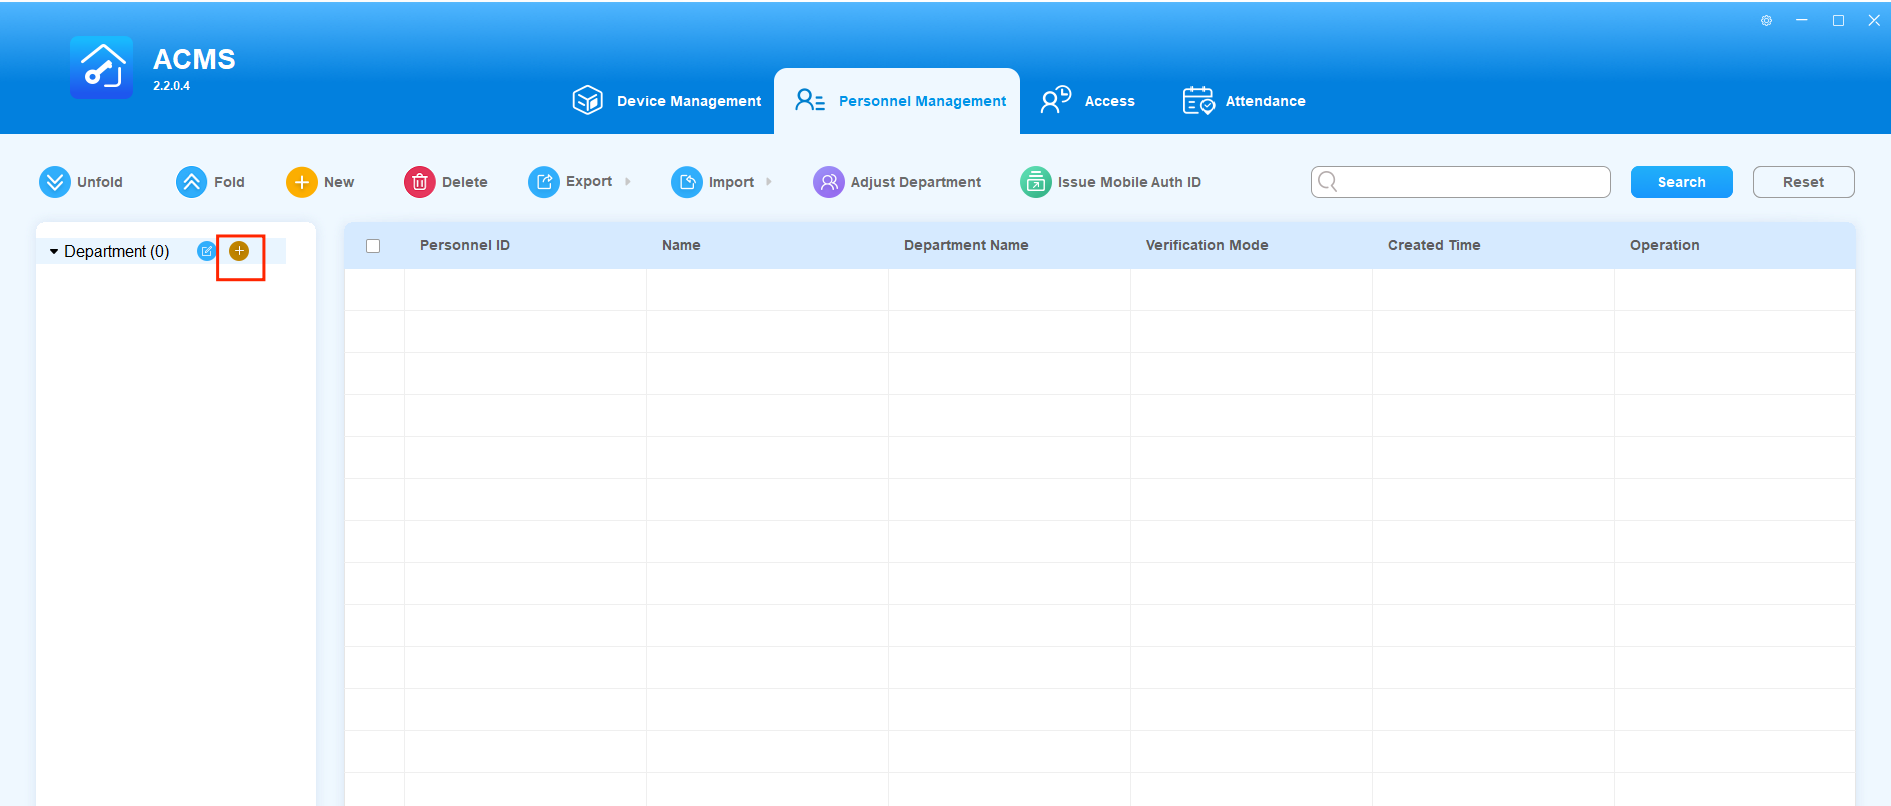
3. Click OK for confirmation.
If there are several departments, you cam click on  to quickly display all of them.
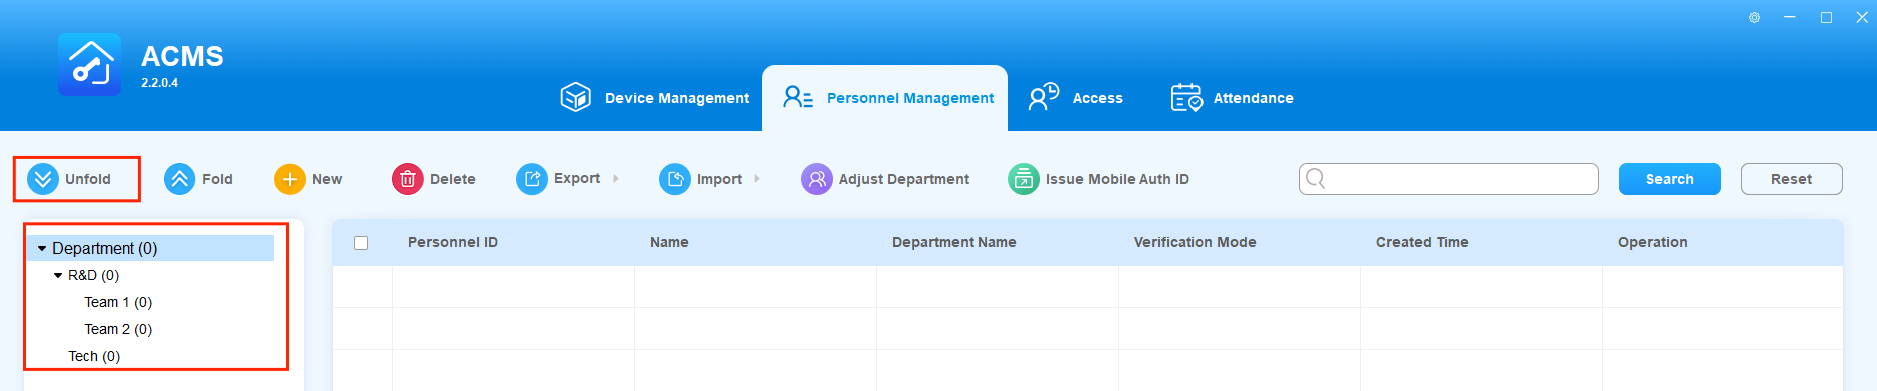
You can also click  to collapse the list.

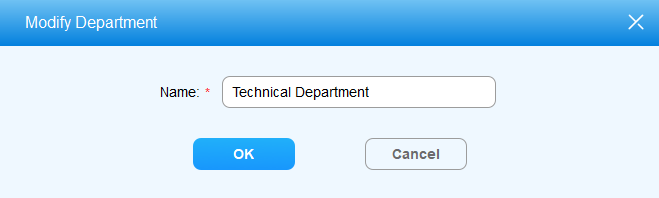
Edit Department Name
- Click on
 of the department for which you want to change the name.

2. Change the department name according to your need, and click OK for confirmation.
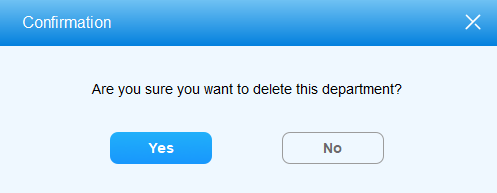
Delete Department
You can delete the department you created if needed.
- Click on
 of the department you want to delete.
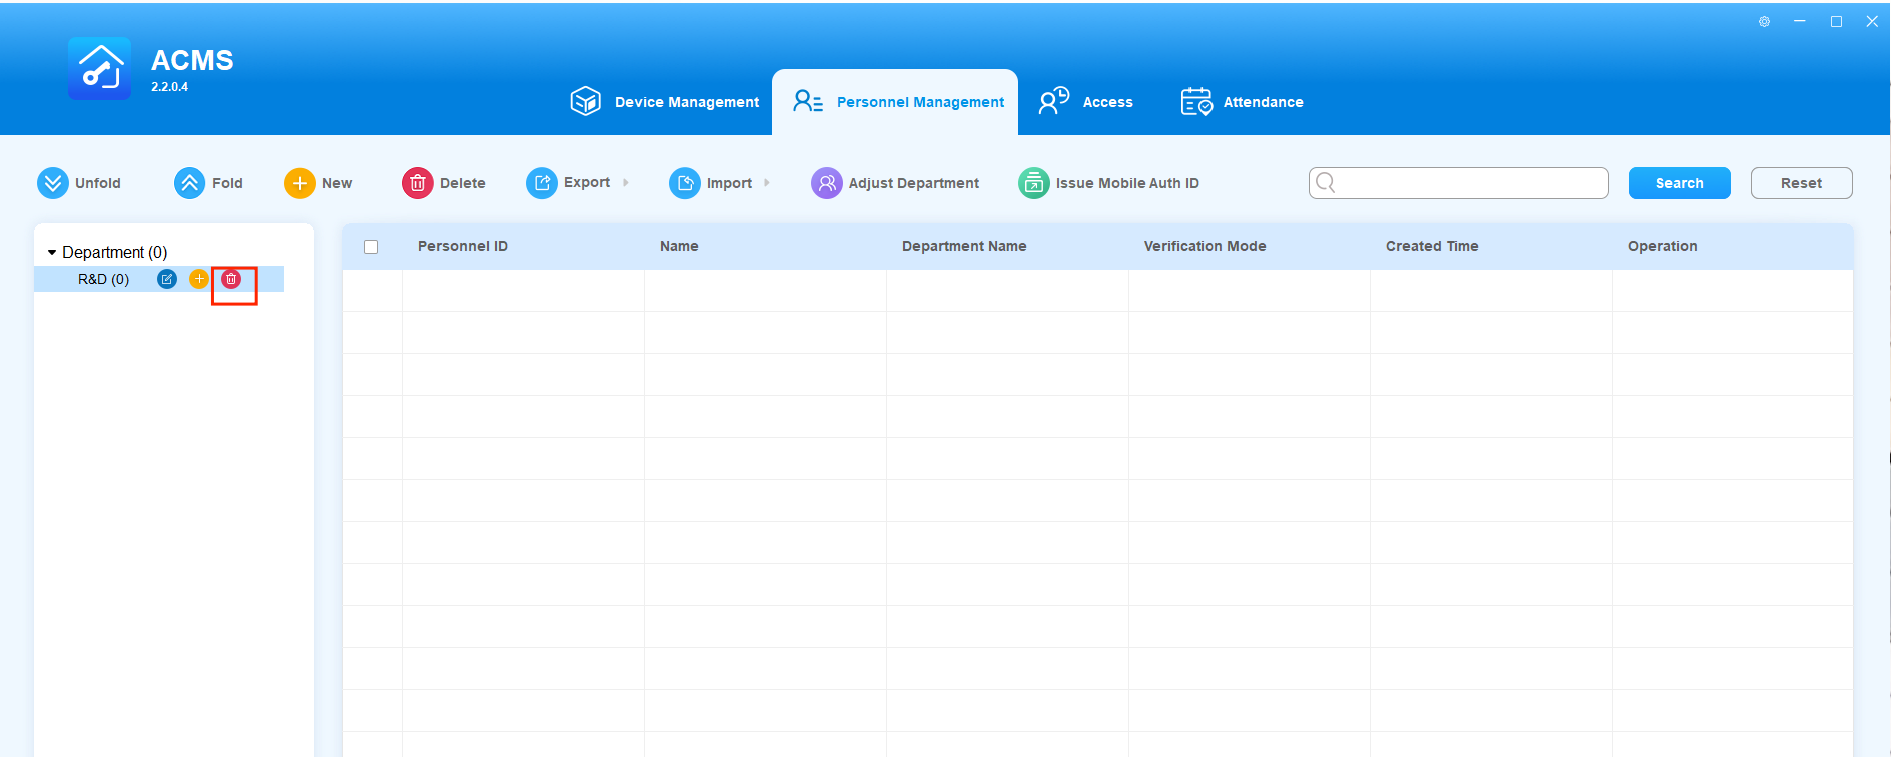
2. Click Yes for confirmation.
- The Department by default can not be deleted.
- Only when the department (Except for the Department by default) has no other subs or personnel can it be deleted.
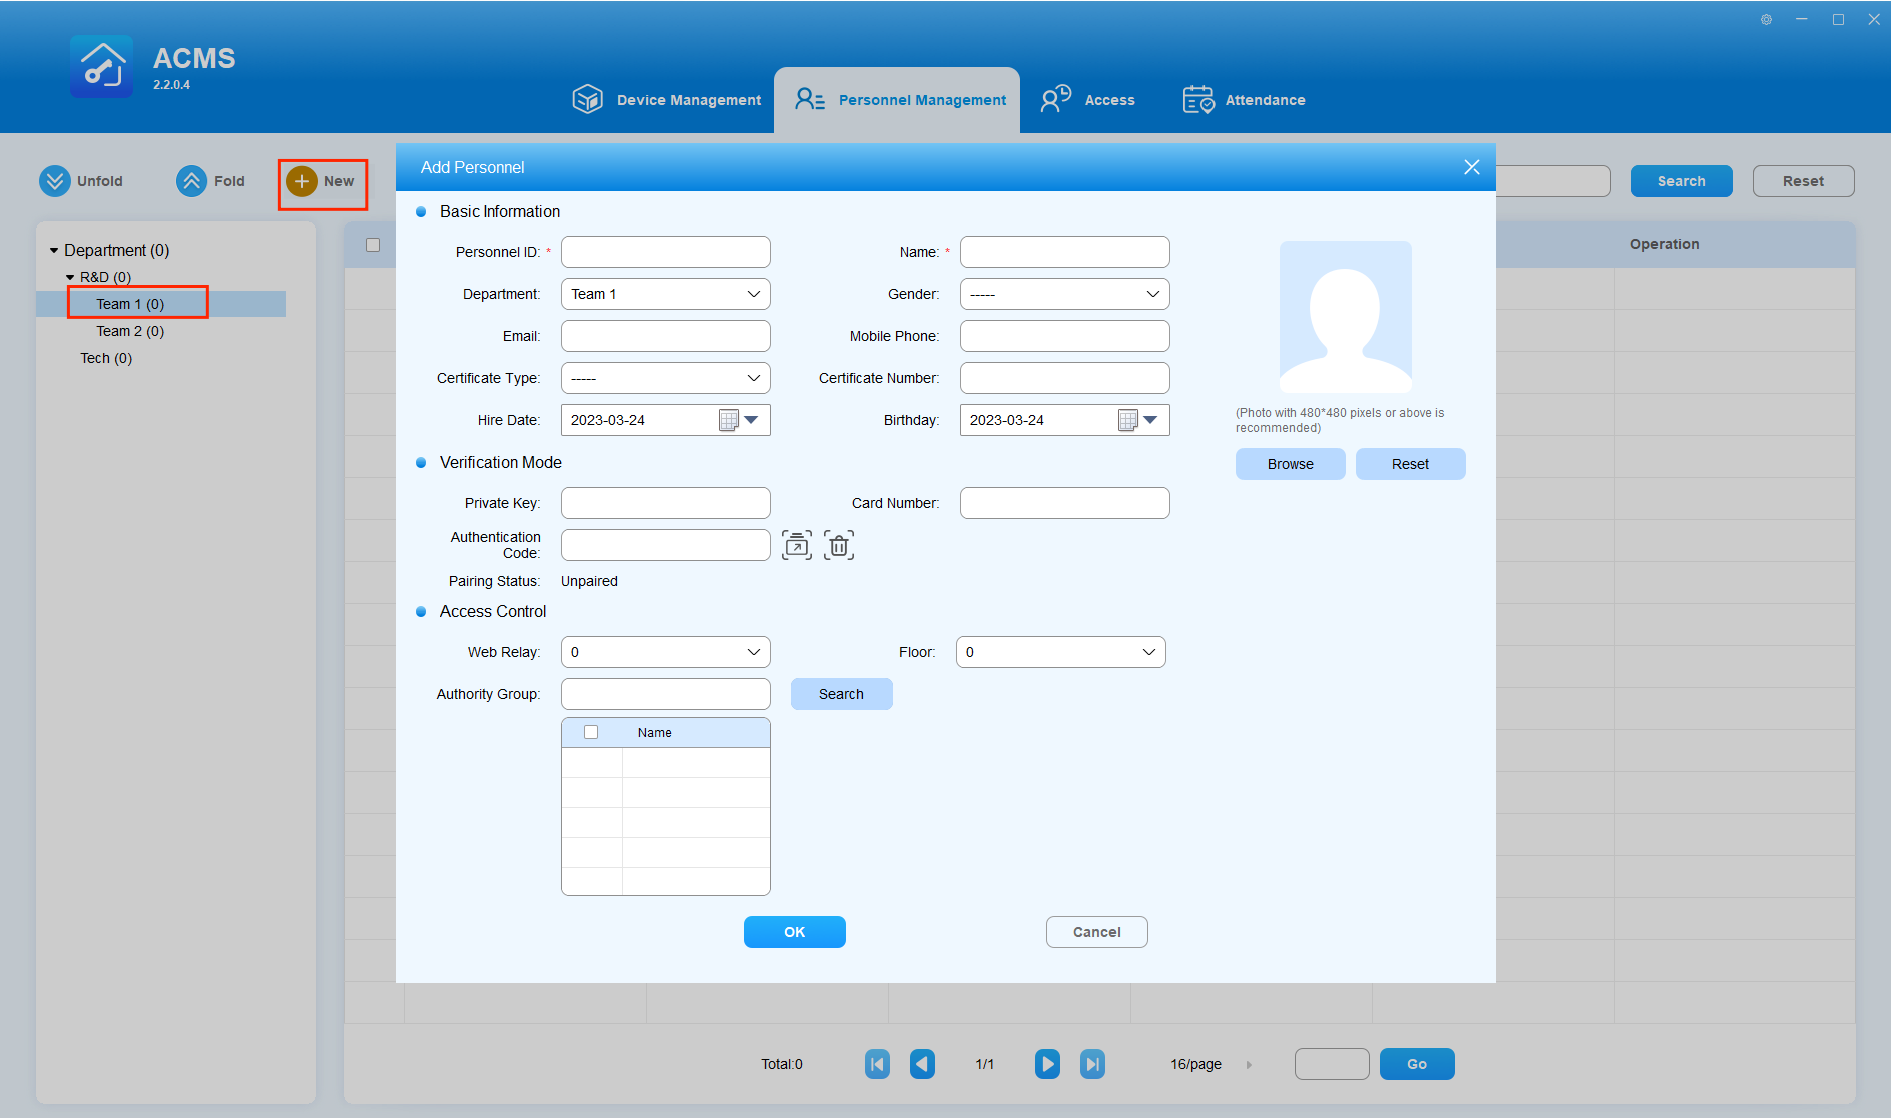
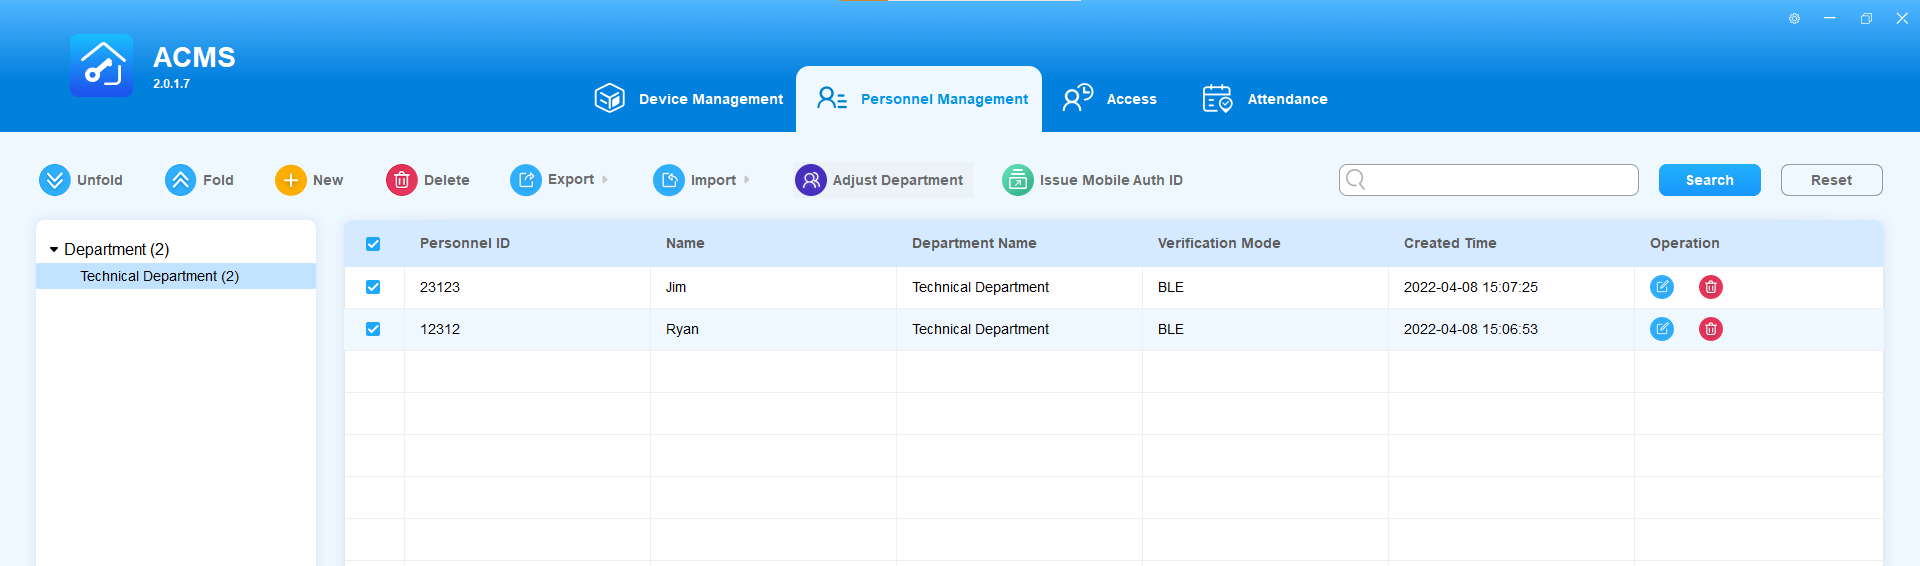
Add Personnel
You can add personnel in the designated department in which you enter the personnel information such as personnel name, ID, photo, etc. While assigning the personnel with the PIN code and card number for the door access.
- Click on the department in which you want to add personnel.
- Click
 to go to Add Personnel interface.
 - Enter the personnel information.
- Click on Browser to upload the personnel photo and click on Reset if you want to clear the photo.
- Tick the check box to select the authority group you created in Access Control module, or you can search the authority group in the field.
- Click OK for confirmation.
Key information for adding personnel
No. | Information | Description |
1 | Personnel ID* | Personnel ID number (employee number) is the required information that can only be consisted of alphabets or numbers with 23 characters maximum. |
2 | Name* | Personnel name is the required information with 63 characters maximum. |
3 | Department | The department field automatically displays the node (sub-department) that is immediately subordinated to the exact department you selected. If the department you select has no nodes (sub-department) under it, then the node for the department selected will be displayed. For example: if you click and select the node "Technical Training" under the parent node "Technical Department", then the node information for the "Technical Training" will be displayed. |
4 | Gender | Gender is "---" by default, you can select "Male" or "Female". |
5 | Email is left blank by default with a maximum of 127 characters. | |
6 | Mobile Phone | Mobile Phone is left blank by default, you can enter the mobile phone number that should be no more than 63 characters. |
7 | Certificate Type | You can select the Certificate type (ID type) from the pull-down list according to your need. |
8 | Certificate Number | You can enter the specific ID number needed for the personnel with 63 characters maximum. |
9 | Hire Date | Hire day refers to the employee start date. |
10 | Birthday | Birthday refers to the data of birth of the employee. |
11 | Private Key | Enter the configured PIN code for the door access. The PIN code can only be consisted of numbers (2-8 characters in combination) and should not be duplicated. |
12 | Card Number | You can enter multiple ID card numbers separated by ";" with no more than 63 characters. And the ID number should not be duplicated. |
13 | Authentication Code | An authentication code is used for door opening via My MobileKey app. Click Note:
|
14 | Pairing Status | It will display “Paired” if the authentication code you obtained has already been set up in My MobileKey. It will display “Unpaired” if the code you obtained has not been set up in the app. |
15 | Web Relay | Select the Web Relay associated with the personnel. The default is 0. After syncing to the device, you can check this info by going to the device web interface User > Web Relay page. |
16 | Floor | Select the floor number(s) that the personnel is allowed to access. |
17 | Authority Group | Search and select the authority group that incorporates a designated set of door access control schedules, devices and personnel for the door access. |
 to obtain the code, or click
  to delete the code.
- The personnel photo(s) to be uploaded for the facial recognition can be in .jpg, .jpeg or .png format with less than 10 MB.
- Multiple door access types such as Face, PIN code, and ID card number, Authentication codes can be supported at the same time depending on your need. Authority group (group, name, and device) must be assigned to the person before the above-mentioned access type can be valid. However, all these data have to be synchronized to the designated device on the device management module first.
 icon will appear on the upper right corner of the screen whenever there are any changes occurred to the authority group setting, you are required to click on the icon so synchronize the changes to the device(s).
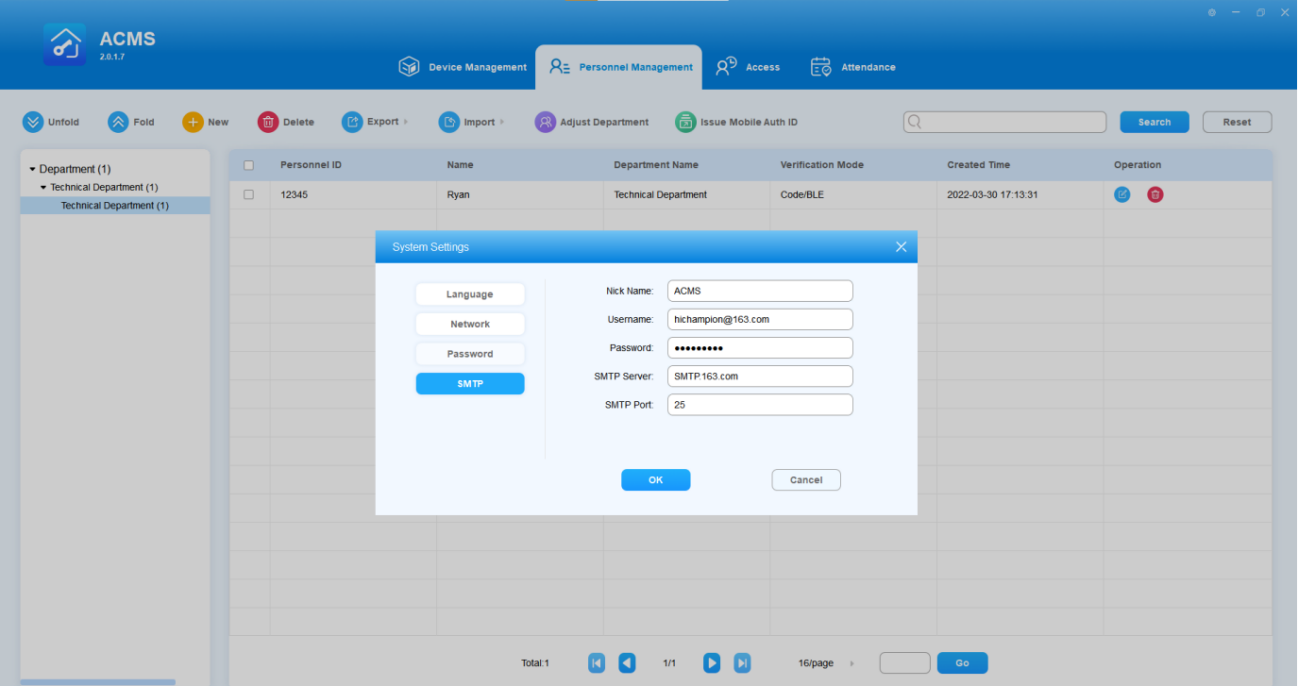
Send Authentication Code
Authentication code can be sent to your targeted users for the My MobileKey application. You will need to set up your STMP server first, then select the users you want to send the code to.
- Click on
 on the upper right corner, and select System Setting in the pull-down list, then select SMTP.
 - Fill in, for example, your name or company name for identification, then enter your email and email password.
- Fill in the SMTP server, and the SMTP port of your email.
After all are set up, the authentication code can be sent to the user's account from your Email.
To send the authentication code to the selected users, do as follows:
- Select Personnel Management Module, then select
 .
. - Select users you want to send the authentication code to. You can search to find the personnel if needed.
- Click OK for the confirmation.
Edit Personnel
After adding personnel, you can edit the personnel information if needed.
- Click on
 or double click on the specific line of the personnel to be edited.

2. Change the personnel information you want to change.
3. Click OK for the confirmation.
- The personnel ID can not be edited or changed.
Delete Personnel
Personnel can be deleted separately or in batch.
- Delete personnel separately
- Click
 of the specific personnel to be deleted.
 - Click YES for confirmation.
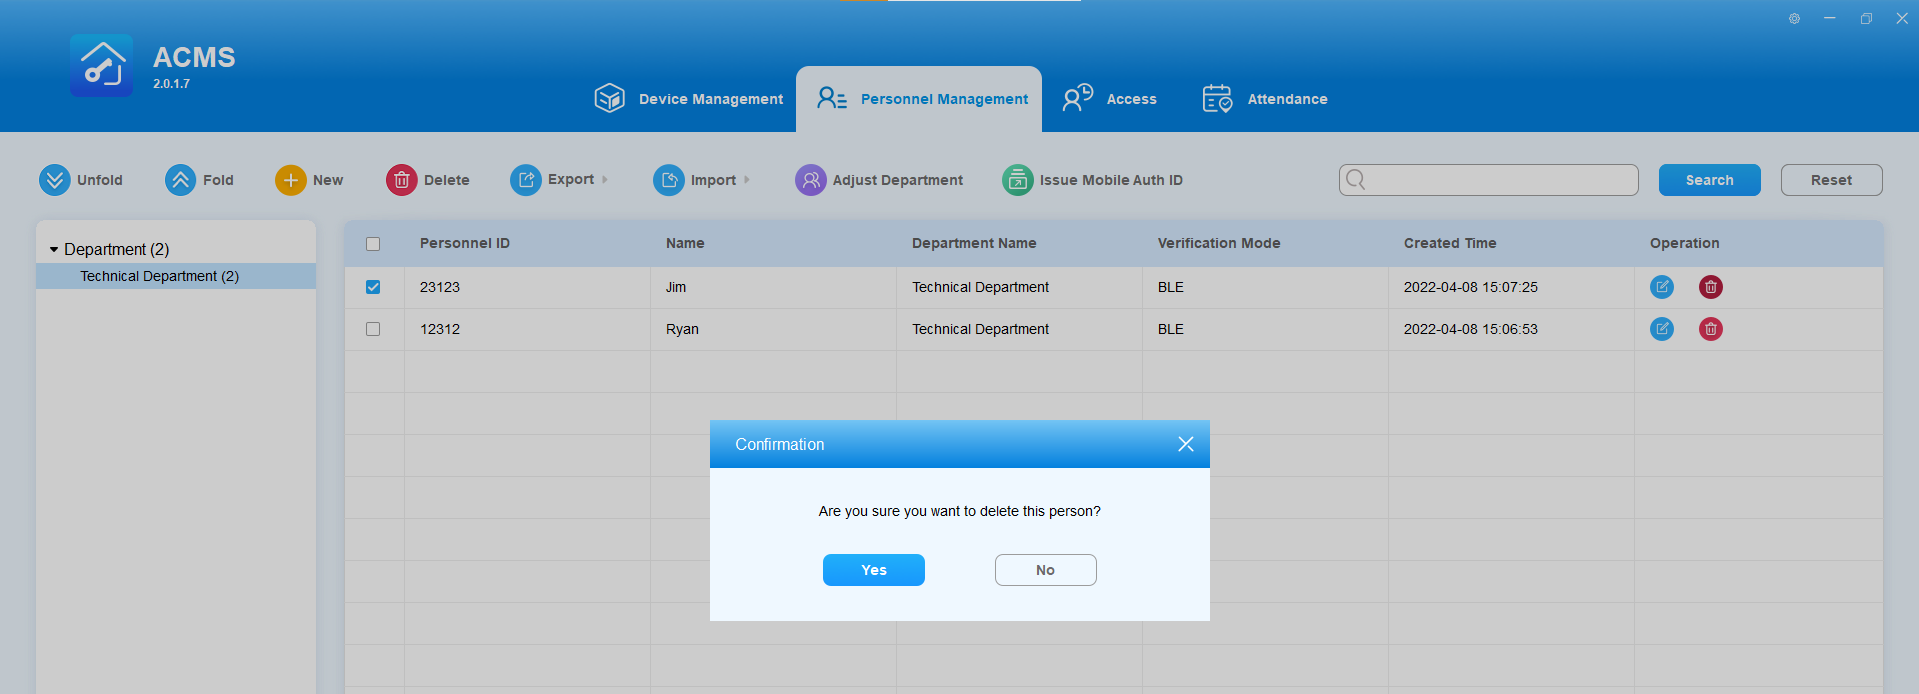
- Delete personnel in batch
- Tick the check box of the personnel to be deleted.
- Click
 to deleted the ticked personnel.
 - Click Yes for confirmation.

Import and Export Personnel Data
ACMS allows you to import and export personnel data inclusive of personnel information and personnel photo for the convenience of the personnel management.
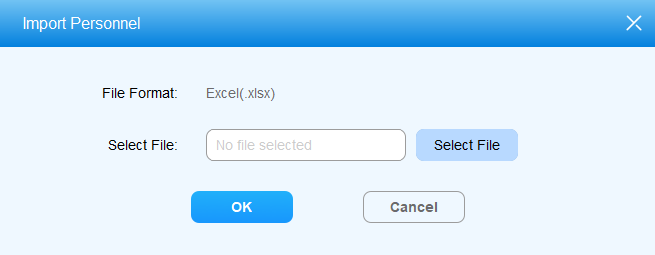
Import Personal Data
- Import Personnel Information
- Click
 and click "Import Personnel" in the pull-down list.

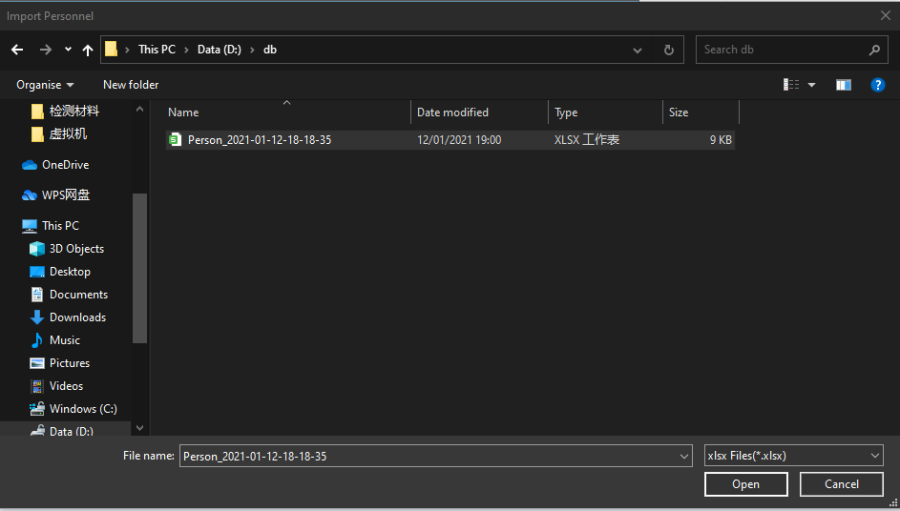
2. Click Select File to find the file to be uploaded.
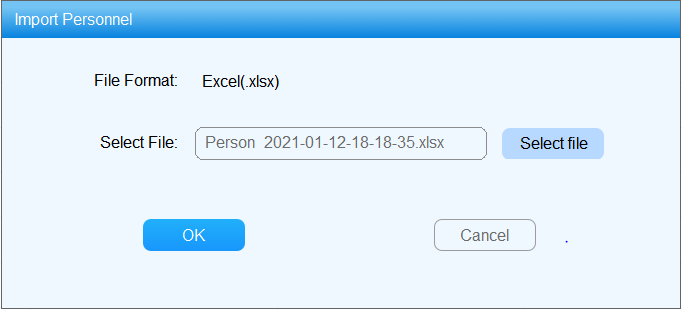
3. Click to select the .xlsx personnel data file and click Open to upload the file.
4. Click OK for confirmation.
- Personal data must be filed into the personal data file template without changing the template spreadsheet.
- ACMS supports up to 20000 personnel.
- Import Personnel Photo
- Select the .jpg or .jpeg photo that are named by "personnel ID + name" and right- click to compress them into .zip file directly (for example T1234+Jim).
- Click
 and click "Import Personnel Photo" in the pull-down list.
3. Click Select file and find the .zip photo file.
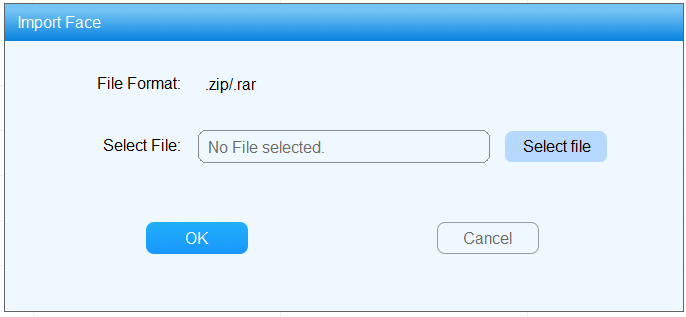
4. Click and select the .zip file and click Open to upload the file.
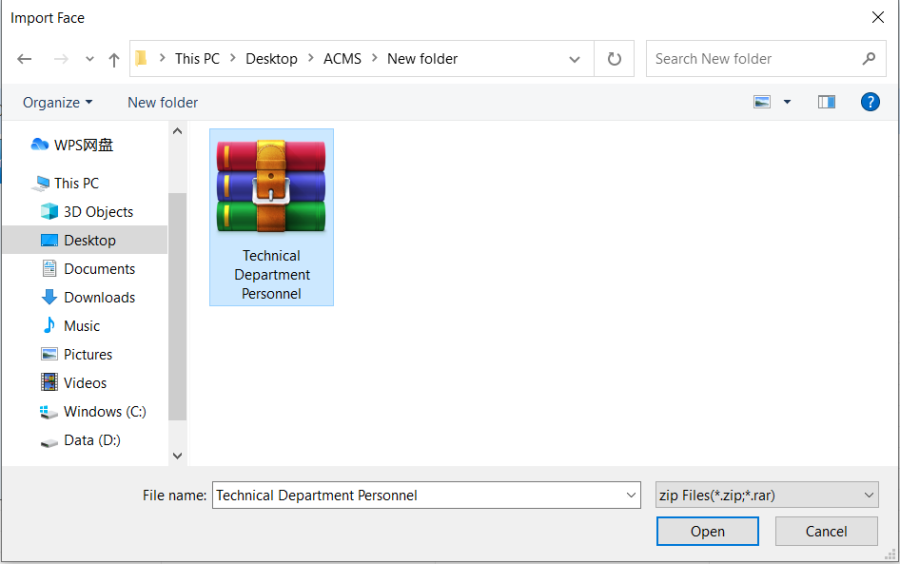
5. Click OK for confirmation.

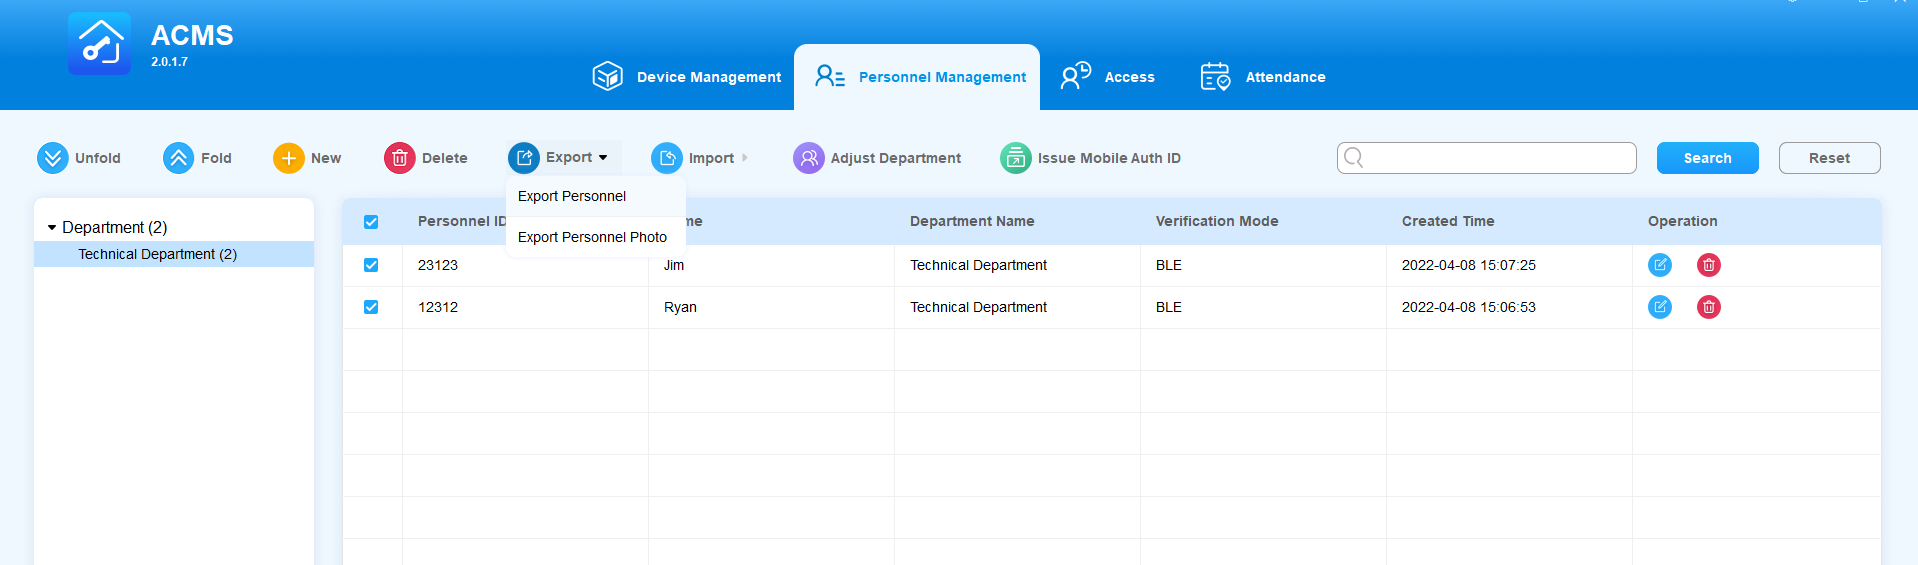
Export Personnel Data
- Export Personnel Information
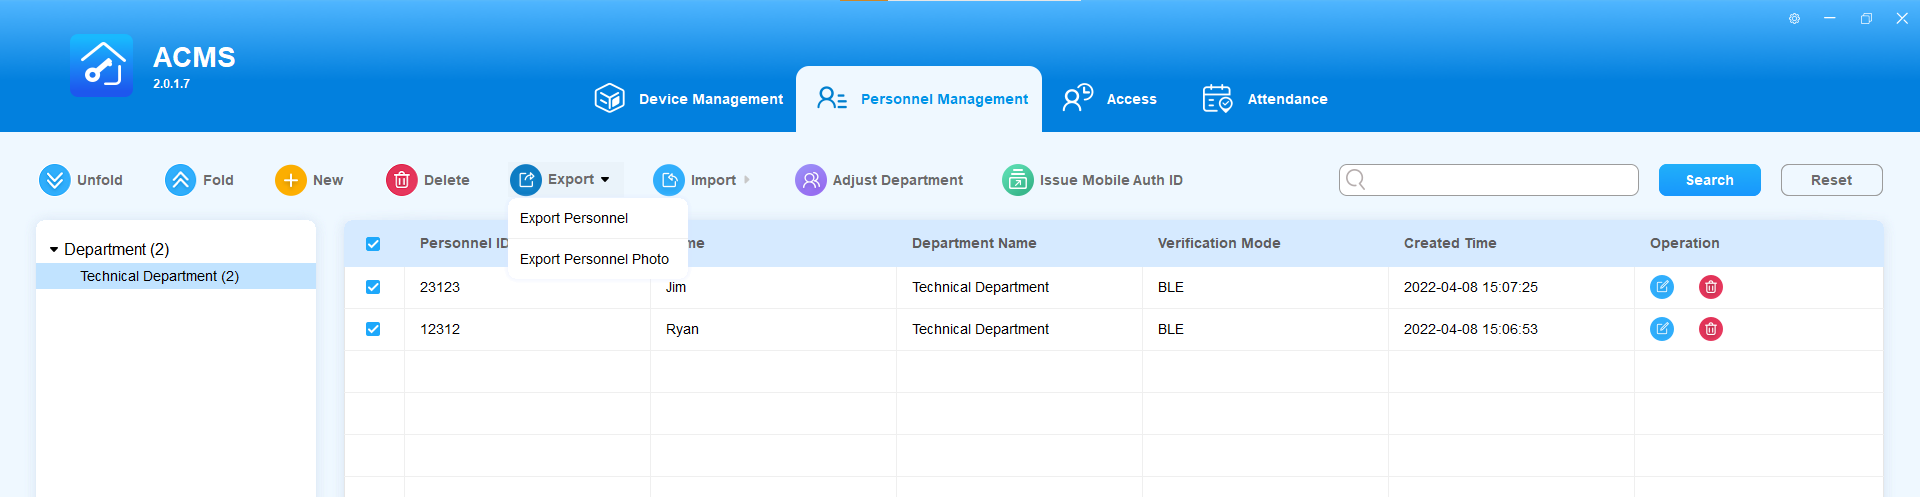
- Click
 and click on Export Personnel in the pull-down list.
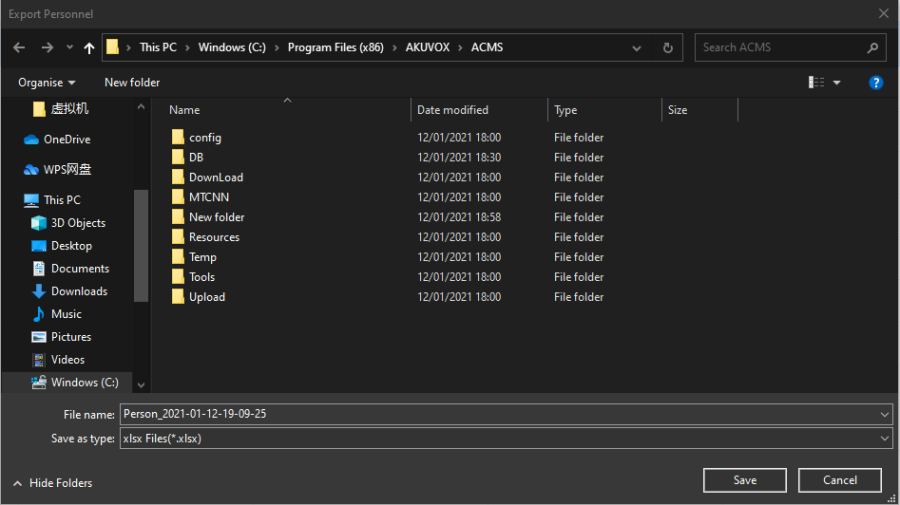
2. Select the path in your local PC to export the personnel .xlsx file.
3. Click Save to export the file to the designated path on your computer.
Personnel Information File Template:

Key Field Format:
Field Name | Field Format Requirement |
Personnel ID | This is the required field with 23 characters maximum (a~z, A~Z, 0~9). |
Name | This is the required field with 63 characters maximum. |
Department | This is the required field with 127 characters maximum. NOTE: If the department you filled in does not exist in ACMS, the system will not import this employee’s info. |
Gender | Fill in Male or Female. |
Certification Type | Fill in 1."Passport" 2."Driving License" 3."ID Card" 4."Other". |
Hire Date | Fill in data format: Y/M/D. |
Birthday | Fill in data format: Y/M/D. |
Private Key | If there are several same Private Keys for different imported person, only one person can keep the key, and the Private Key filed of other persons will be left empty. |
Card Number | If there are several same Card Number for different imported person, only one person can keep the card, and the Card Number filed of other persons will be left empty. |
Web Relay | If the value you filled in is out of the valid range or is empty, the info will not be imported. |
Floor | If the value you filled in is out of the valid range or is empty, the info will not be imported. |
- When using the template, please edit the parameters according to the editing format in the template. If you change the template format at will, it may cause errors.
- Export Personnel Photo
- Click
 and click on "Export Personnel Photo" in the pull-down list.
2. Select the path on your local PC to export the personnel photo .zip file.
3. Click on Save to export the file to the designated path on your computer.
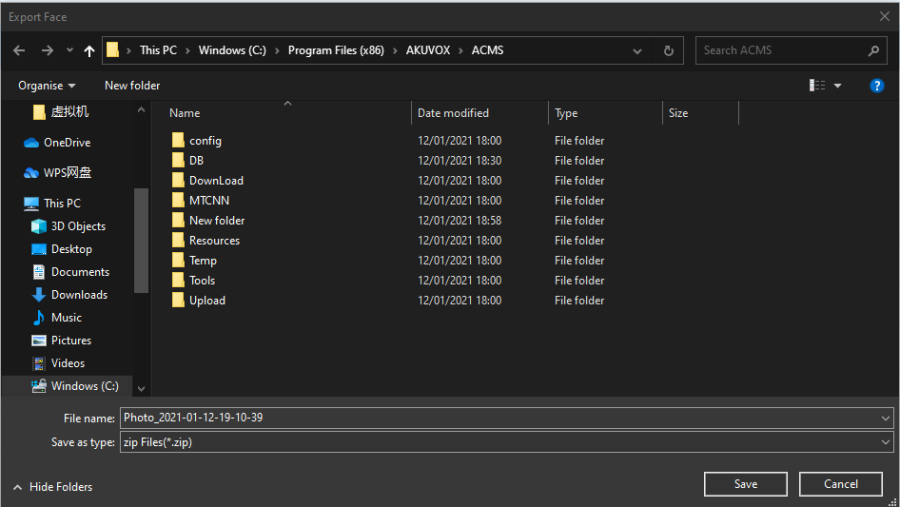
- Personnel Photo File:

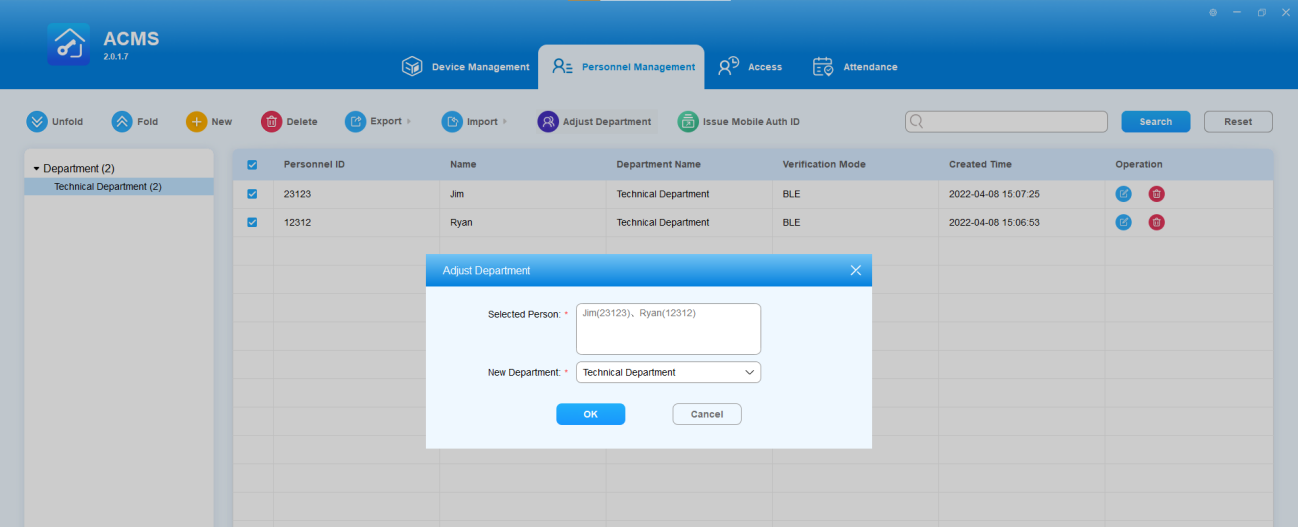
Adjust Department for Personnel
You can make personnel adjustments by moving the person to a different department if needed.
- Tick the check box of the personnel for whom you want to adjust the department.
- Click
 and select the department to which you want to move the personnel.
 - Click “OK" for confirmation.
Search Department and Personnel
You can enter the personnel ID, Name, and department name in the search field to find the information related to specific personnel or department if needed.
- Enter the personnel ID, name, and department name in the search field.
- Click Search or click Reset the clear the search information.
Access Control and Logs
In the access module, you can create an inventory of access control schedules that can be readily pulled out to be incorporated with the specific device(s) and authority group as a whole for integrated access control. In addition, the access module allows you to open and close doors with one click, set up anti-passback and see door access logs.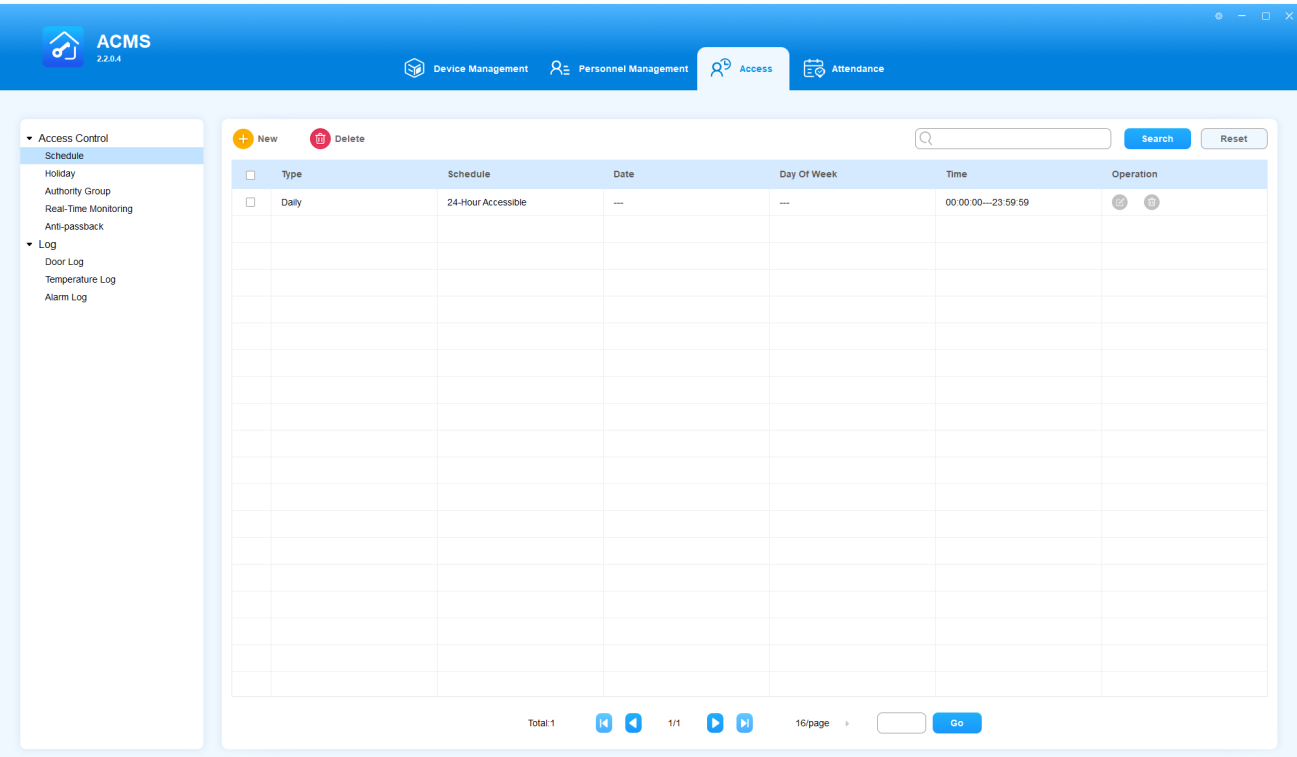
Click to delete the items in the list below
Manage Access Control Schedule and Holidays
ACMS allows you to create, edit, and delete the access control schedules and holidays.
Set the Access Control Schedule
Create a schedule
A complete access control schedule includes schedule type, schedule name and time schedule.
- Click
 to go to Schedule Setting.
 - Select the schedule type among Daily, Weekly, and Normal).
- Create a proper schedule name.
- Set the time schedule for the validity of the door access.
- Click OK for confirmation.
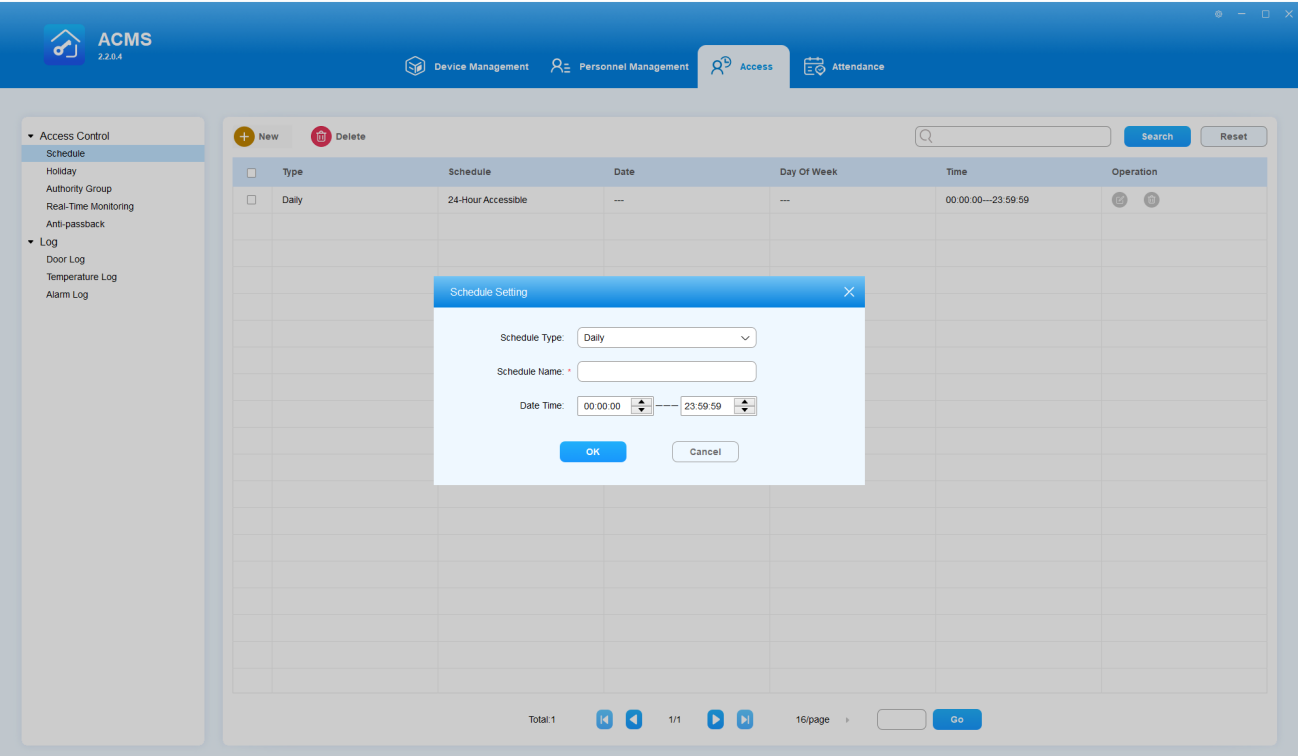
- Normal as a schedule type is selected when you want to create an access control schedule with a longer period of time rather than on a daily or weekly basis.
Edit Access Control Schedule
To change the schedule settings such as type, time and date, do as the following:
- Click
 or double-click on the specific line of schedule type to be edited.
 - Change the schedule related settings according to your need.
- Click OK.
- The default daily schedule named 24-HourAccessbile is not editable.
Delete Access Control Schedule
Access control schedule can be deleted separately or in batches.
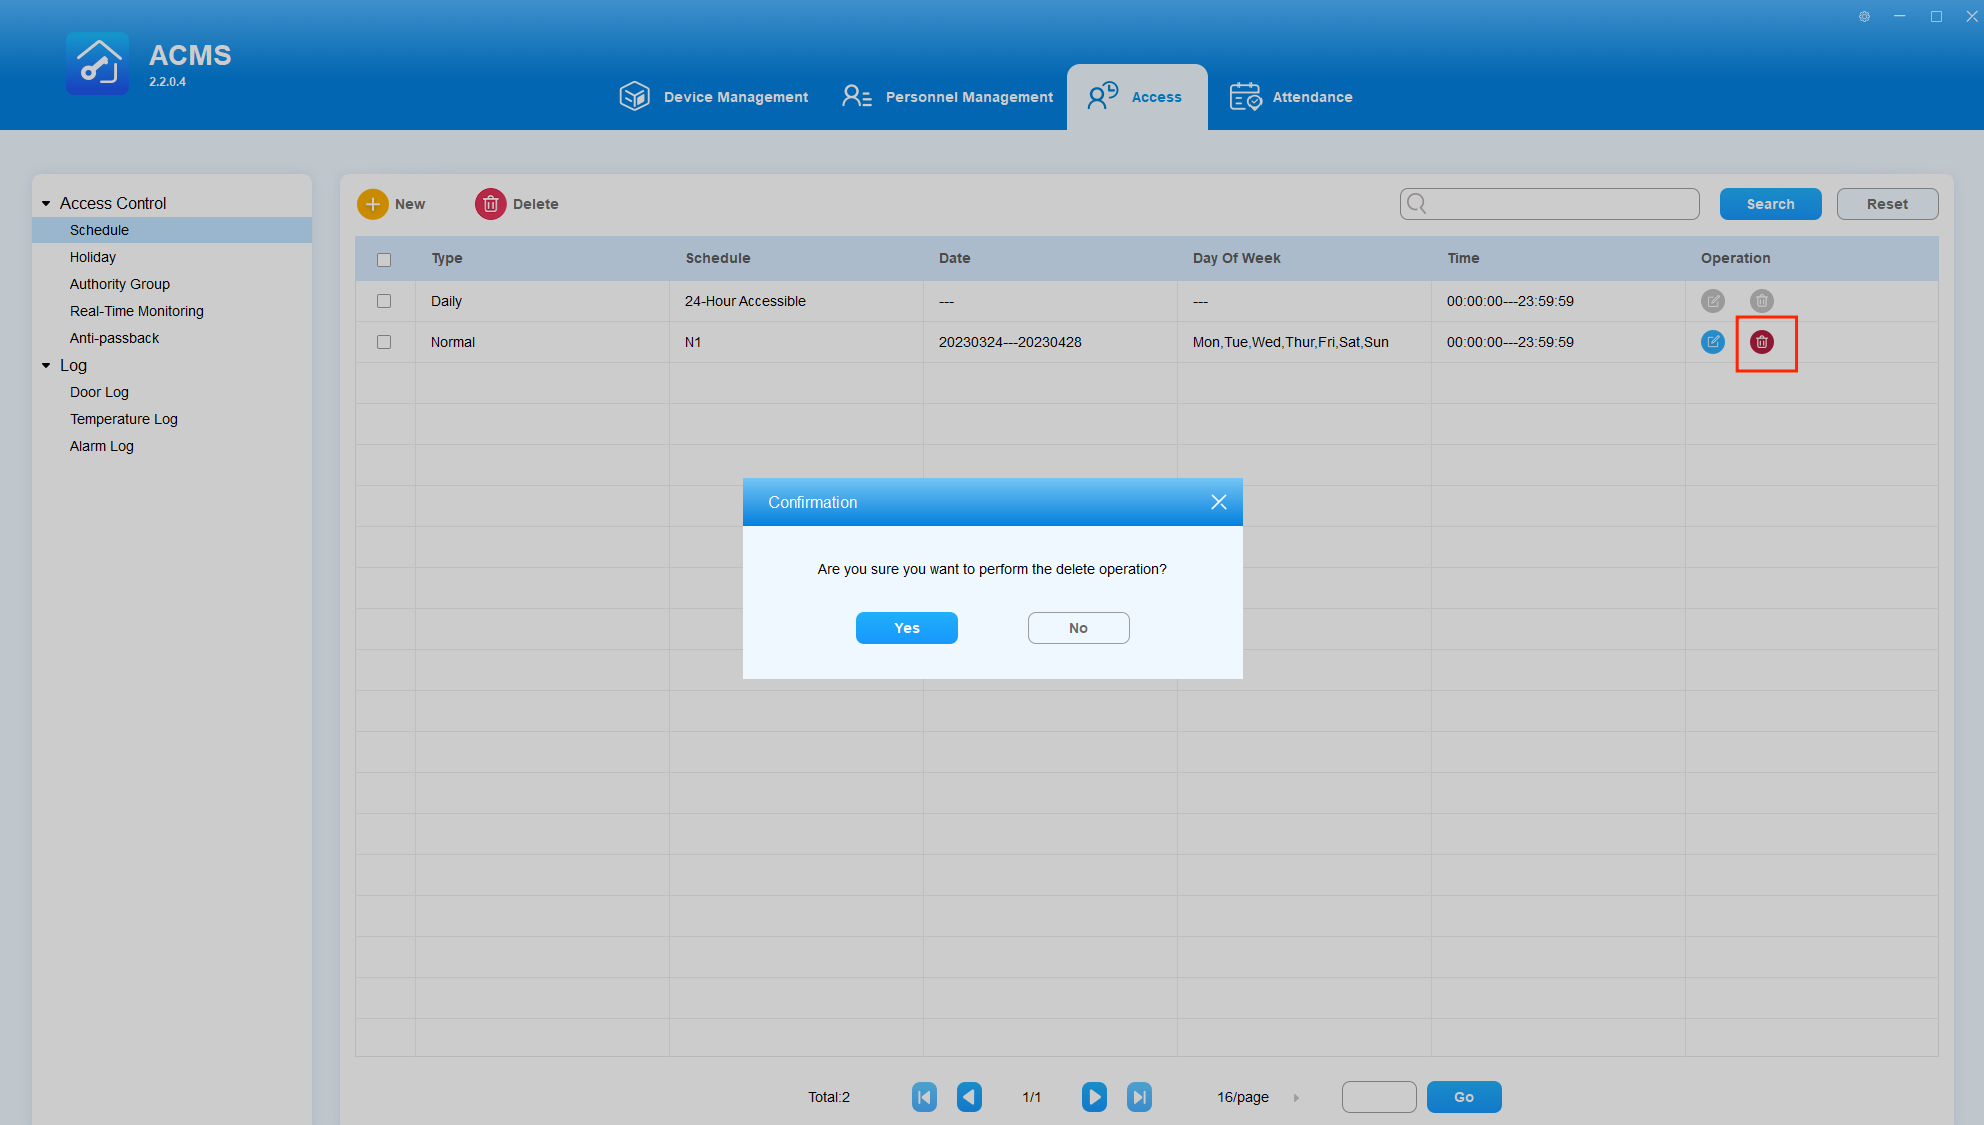
- Delete the schedule separately
- Find the access control schedule you want to delete, and click
 in the Operation column.
 - Click Yes for confirmation.
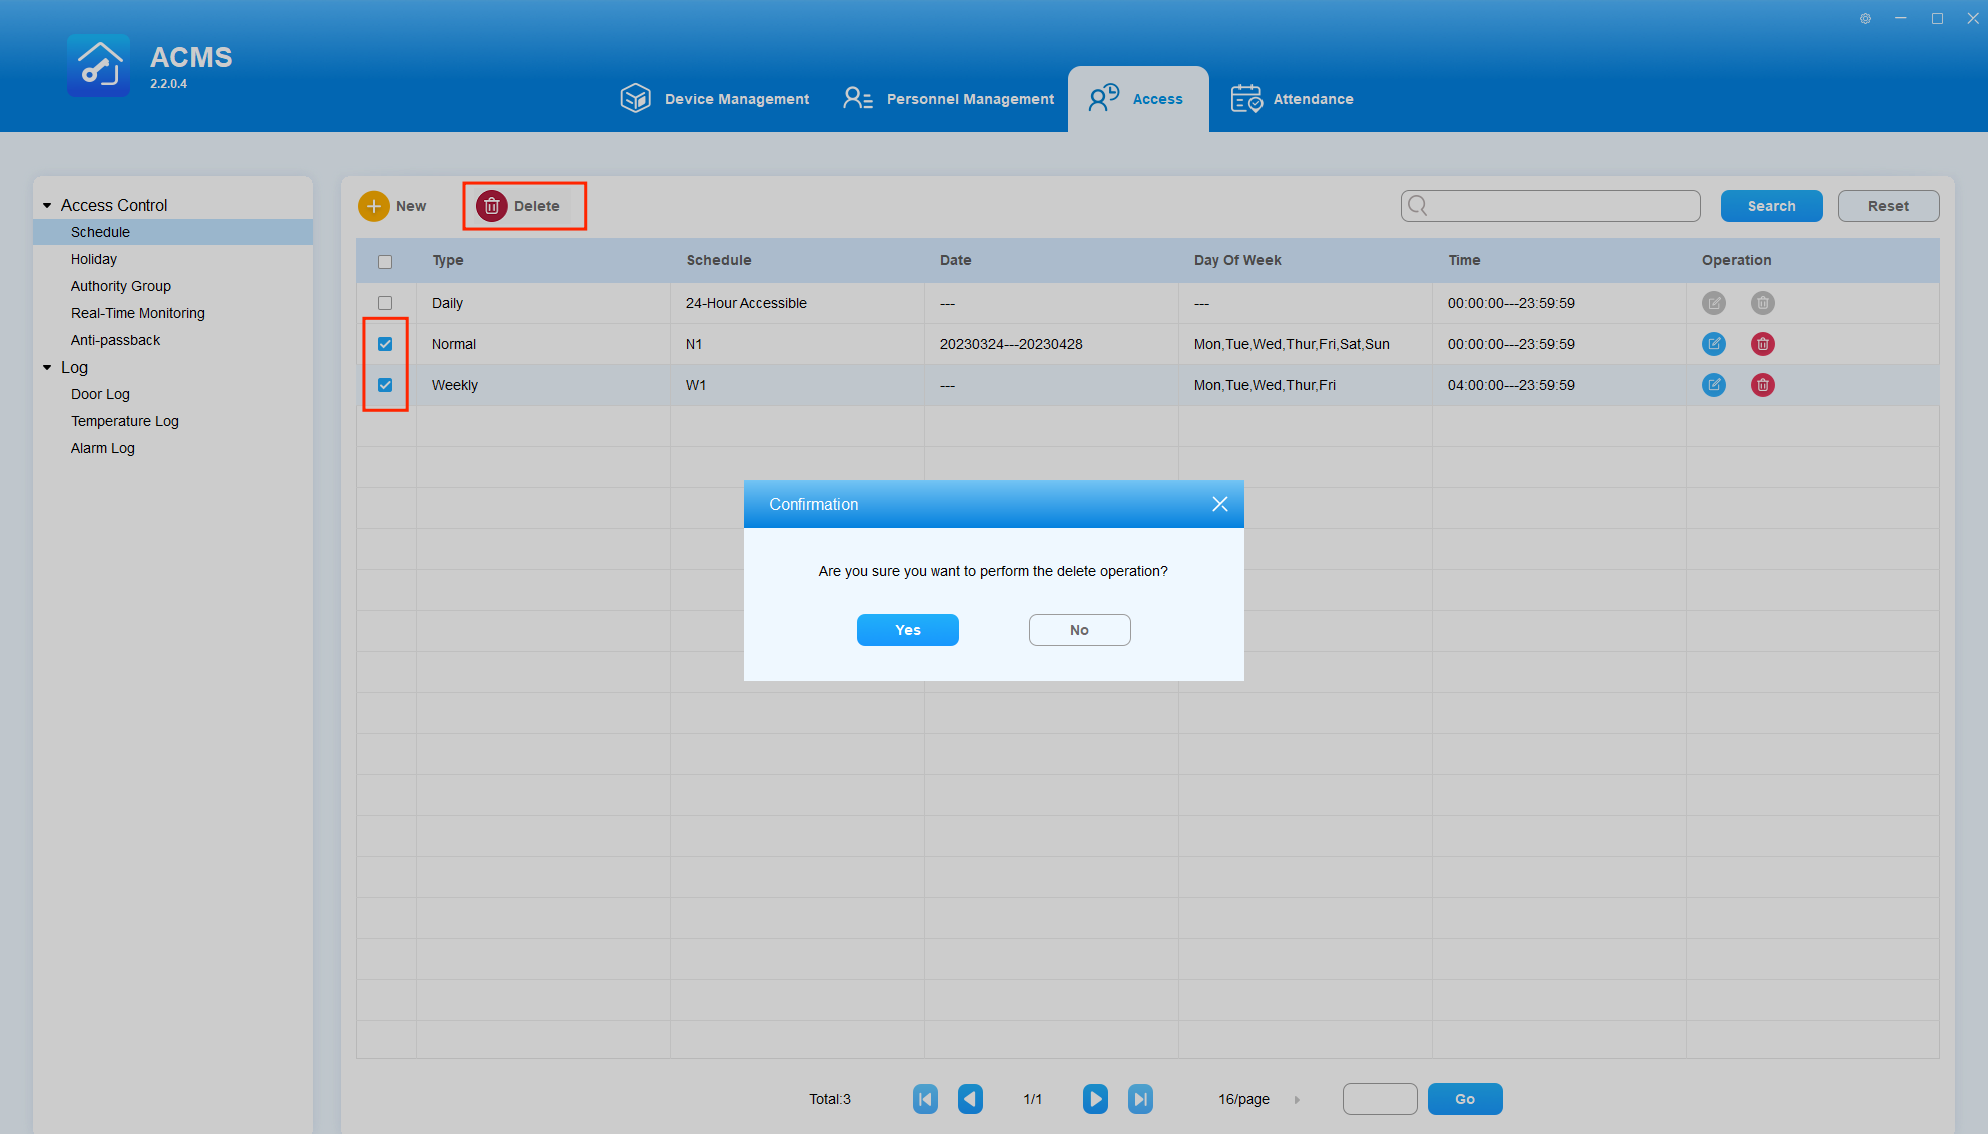
- Delete schedules in batch
- Check off the access schedule to be deleted.
- Click
 to delete all the schedules that are ticked.
 - Click Yes for confirmation.
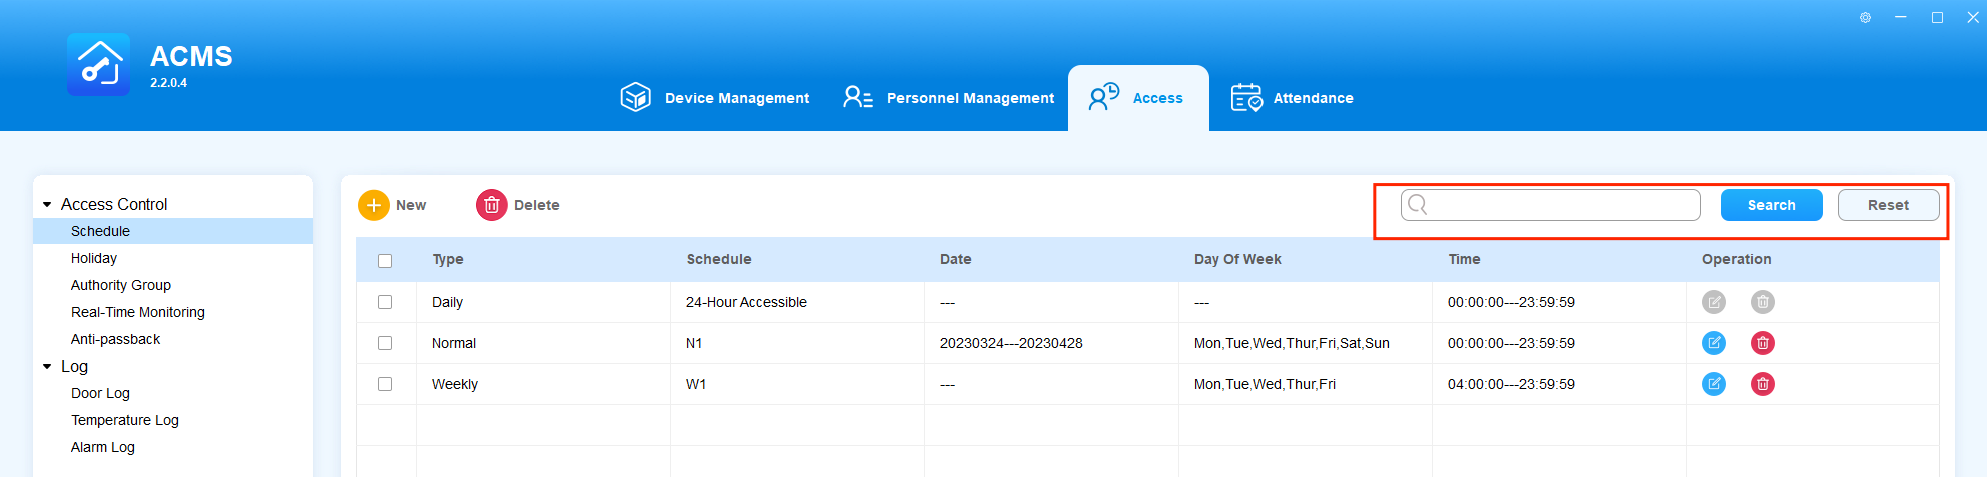
Search Access Control Schedule
You can search for a specific access control schedule by entering the keyword in the search field.
Set Holidays
The Holiday function is used to control access to the office area during the set holiday periods. This feature allows you to add, edit, and delete holidays, and apply them to the Authority Group.
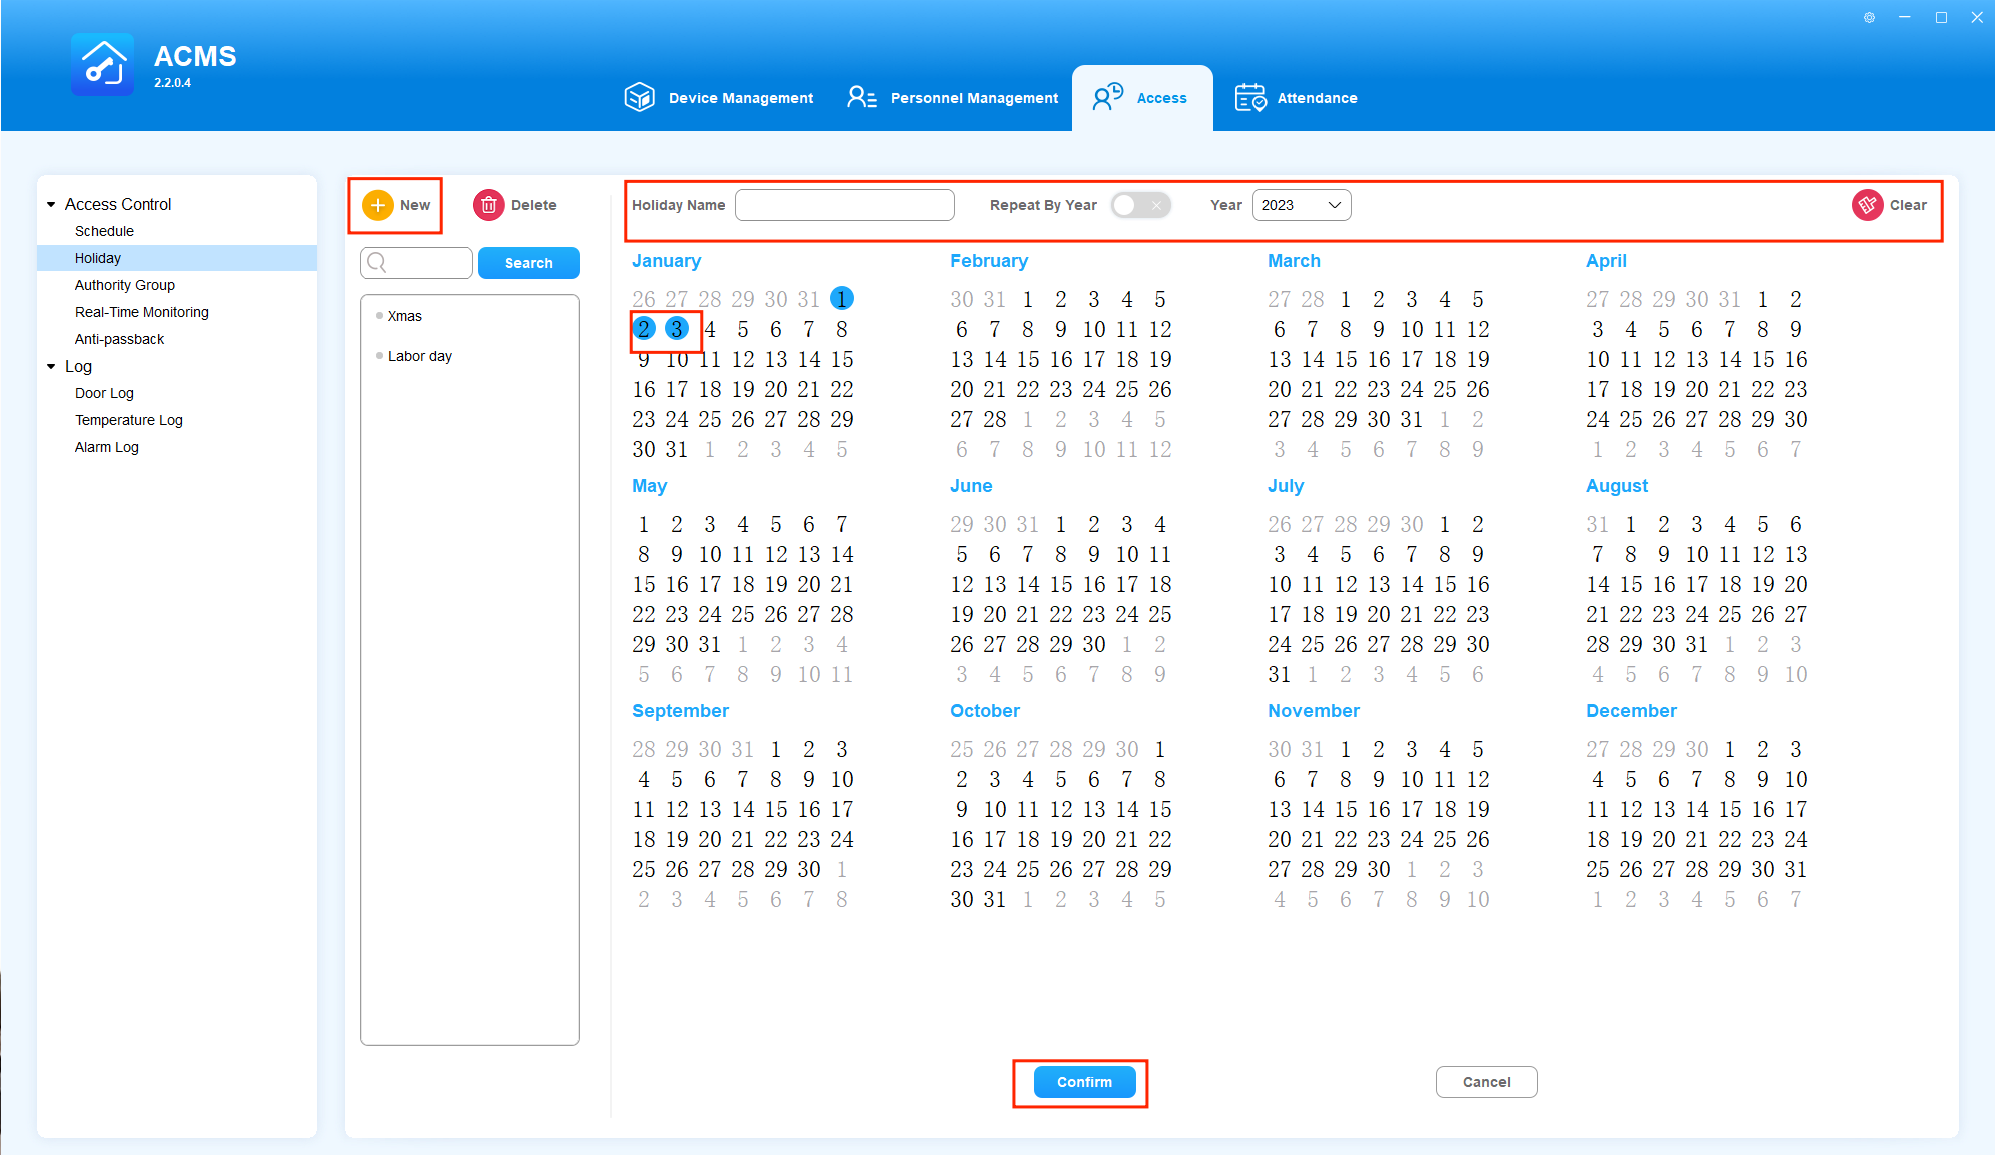
Add a Holiday
To add a new holiday, do as the following:
- Click on
 on the left side of the screen.
 - Select the desired dates by clicking on them, and they will be marked with a blue circle. To re-select the dates, click
 on the upper right.
 - Enter the holiday’s name on the upper Holiday Name box. Please note that the name cannot be the same as others.
- If needed, you can set the holidays to repeat every year by turning on
 or change the year
  .
. - Click Confirm.
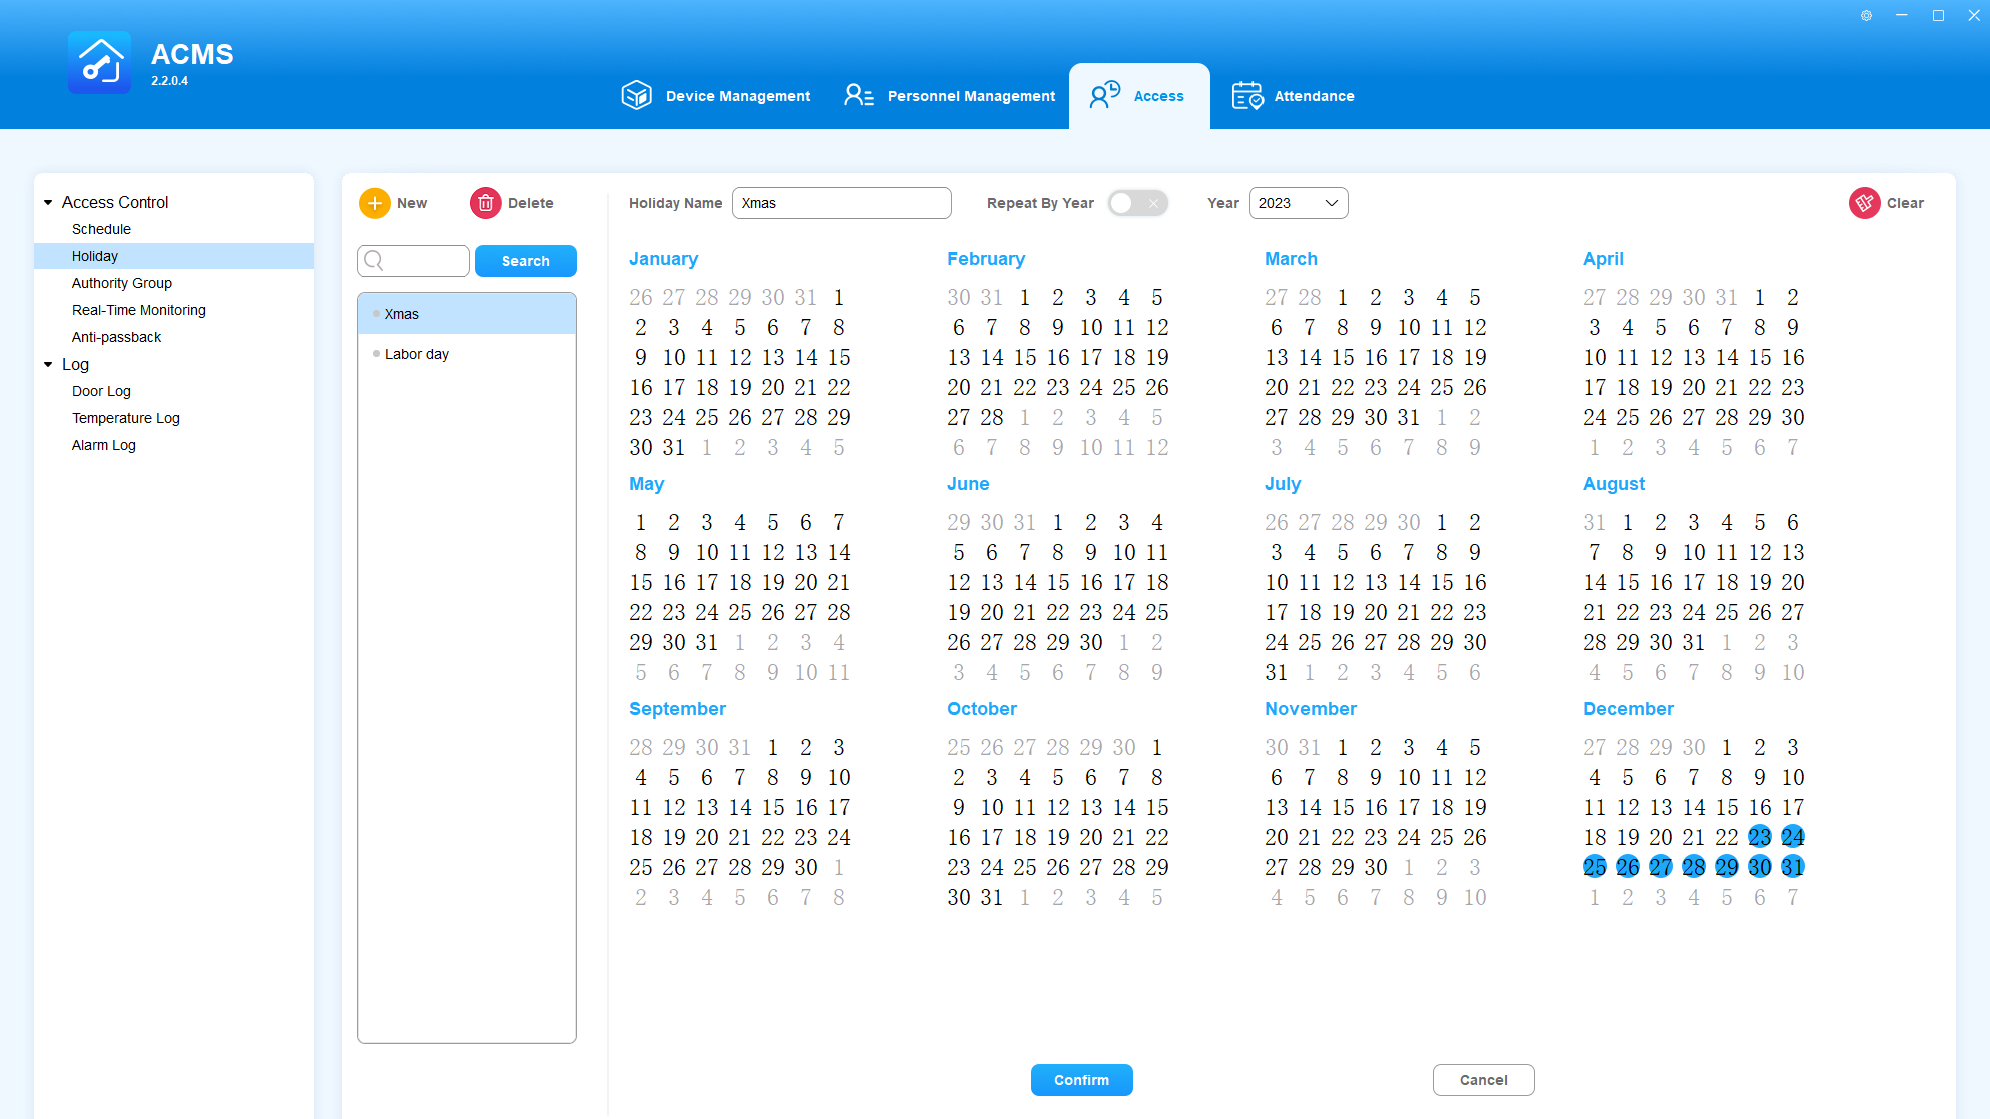
Once created, the holiday will be displayed on the left side of the screen.
Edit a Holiday
You can edit a set holiday, such as its name, dates, year and more. To do so, just select the desired holiday from left side of the screen, and change the setting.
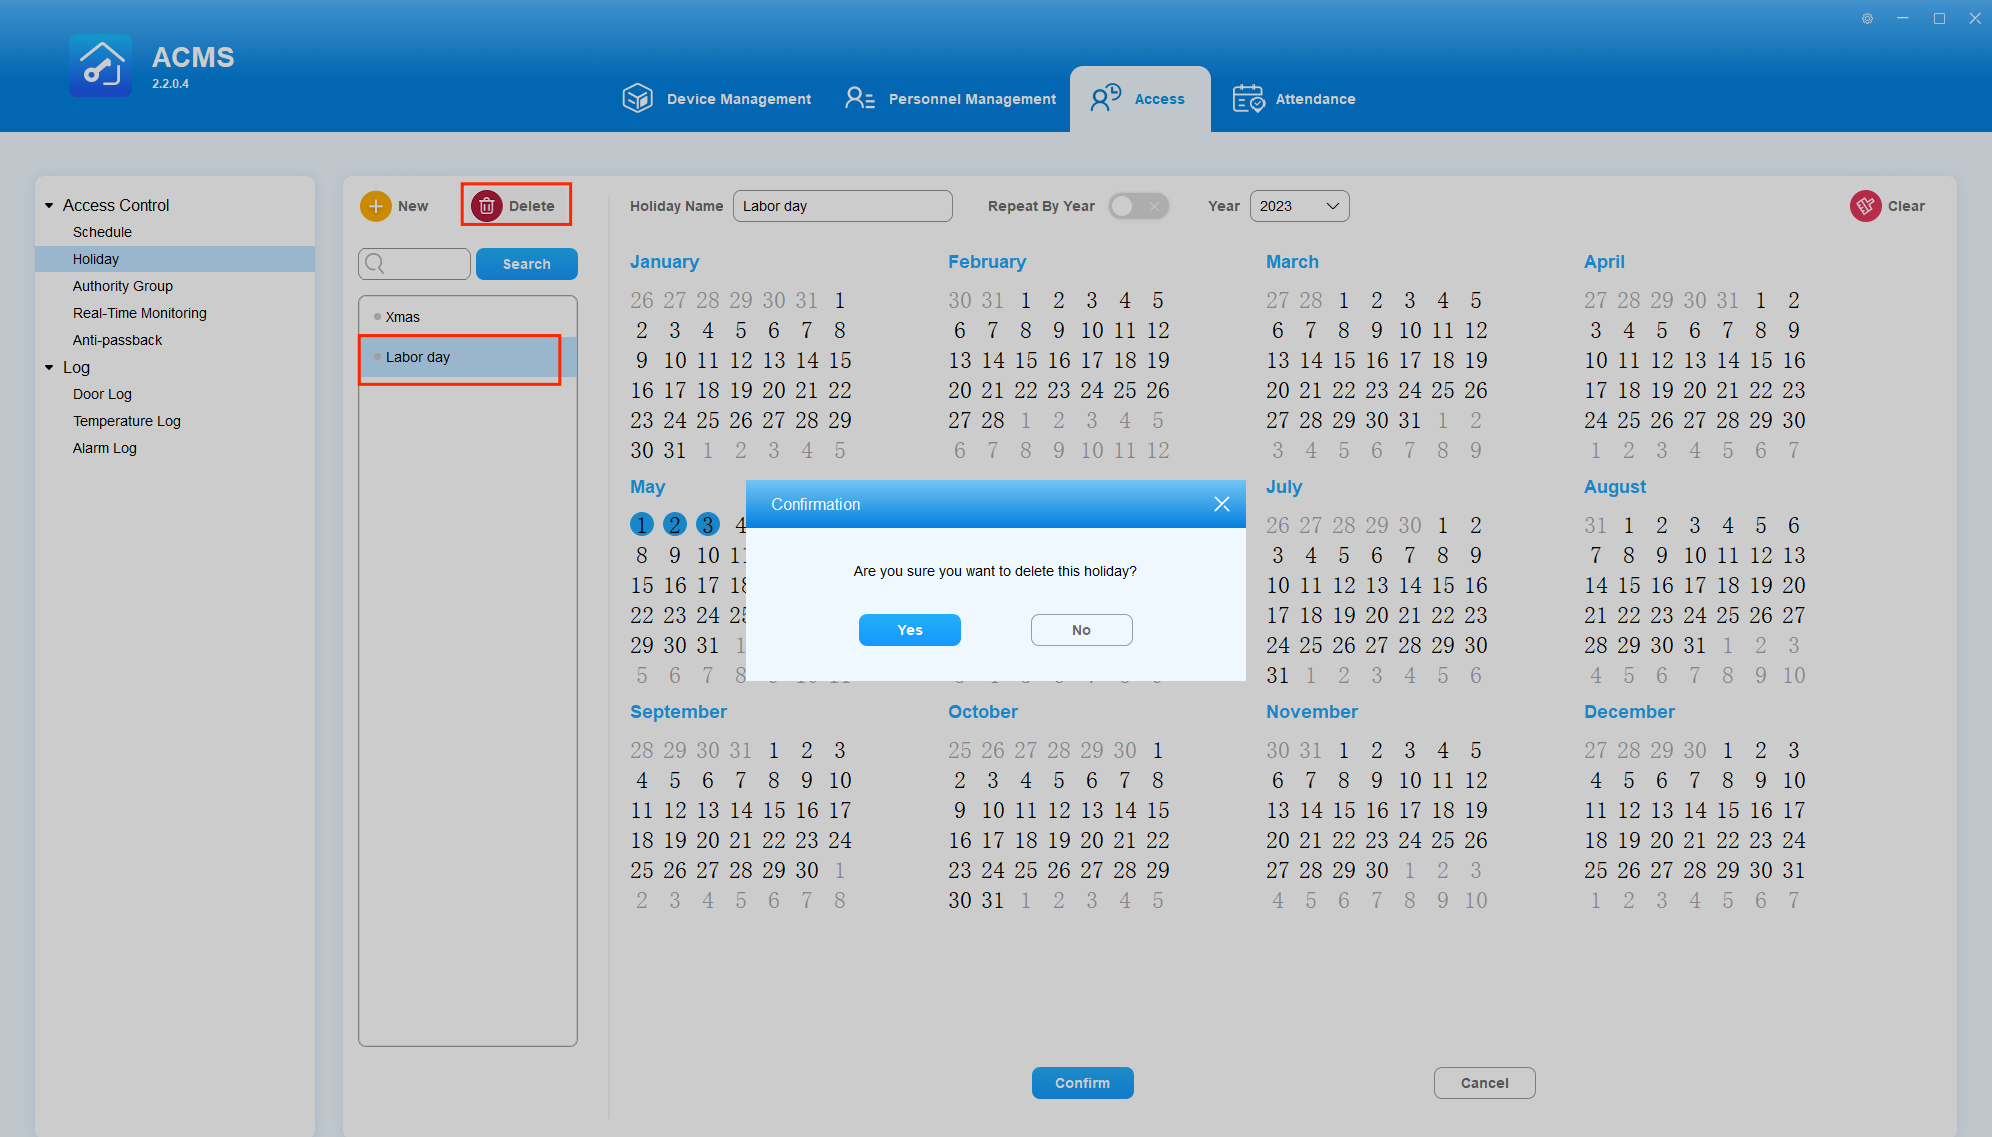
Delete a Holiday
To delete a holiday, select it from the left side of the screen, and click  .
.
Manage Access Control
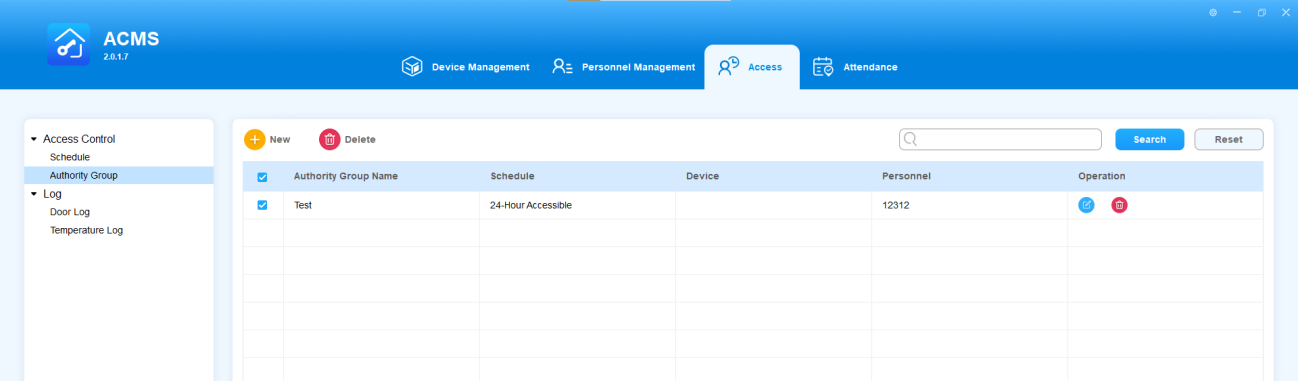
Authority Group
Create an Authority Group
You can create an inventory of authority groups that can be applied to the specific person(s), device(s), and access time schedule included in the access control group.
- Select Authority Group in the Access Control module.
- Click
 to create an access authority group.
 - Enter the group name.
- Select the schedule type and the device(s) together with its relays to be included in the authority group.
- If needed, select the holidays you want to apply to the group. Once added, the users cannot access preset devices in the holiday period.
- Add the department and person to be bound with the group.
- Click OK.
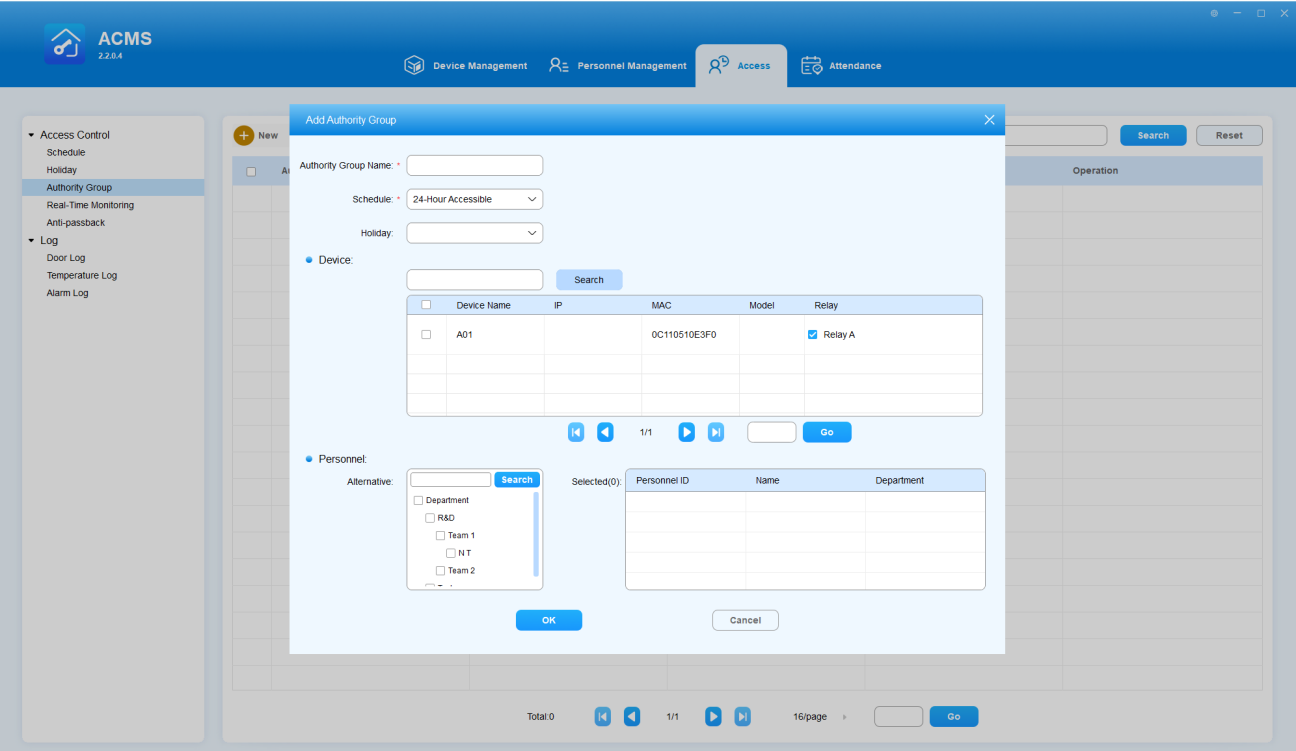
- Once an authority group is added, you need to go to the Device Management module to sync it to relevant device(s). For detailed instructions, see here.
Edit Authority Group
You can edit the authority group in terms of the authority group name, schedule type, device, and personnel.
- Click
 or double click on the specific line of authority group you want to edit.
 - Edit the settings in the authority group according to your need.
- Click OK for confirmation.
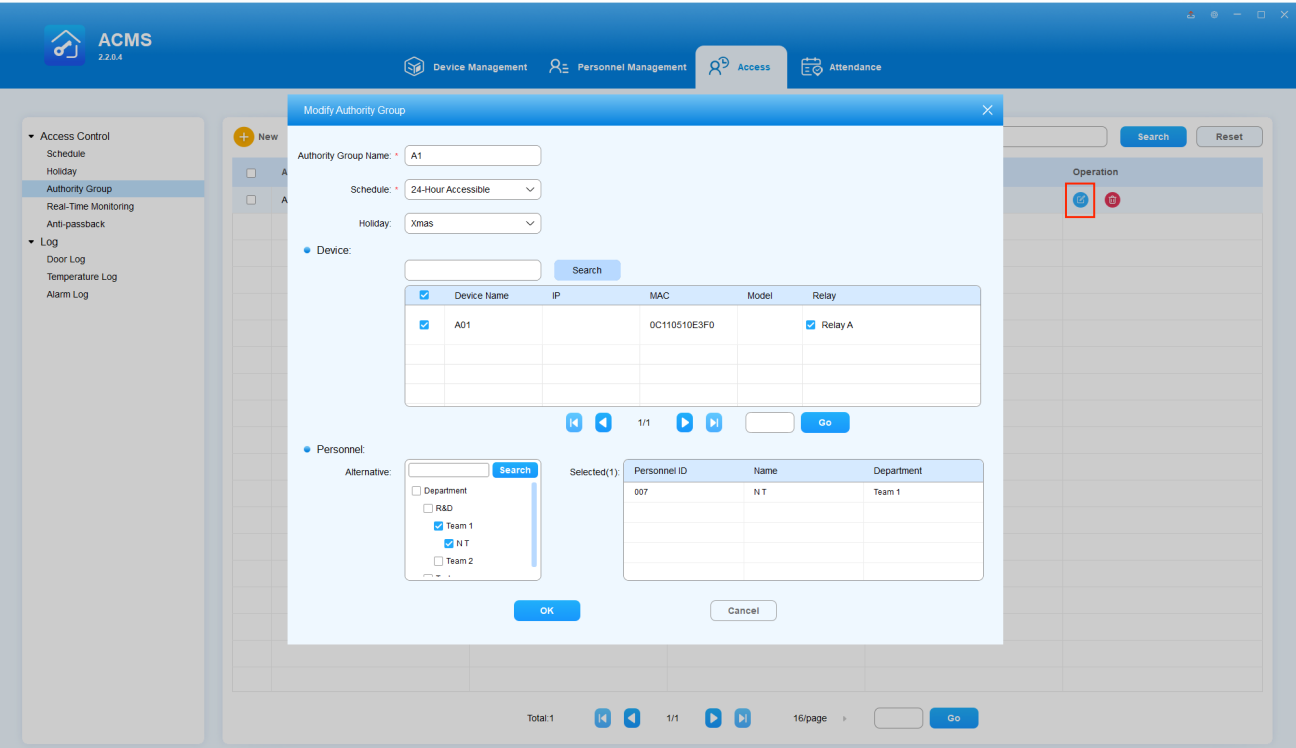
- Once an authority group is edited, you need to go to the Device Management module to update the changes to relevant device(s). For detailed instructions, see here.
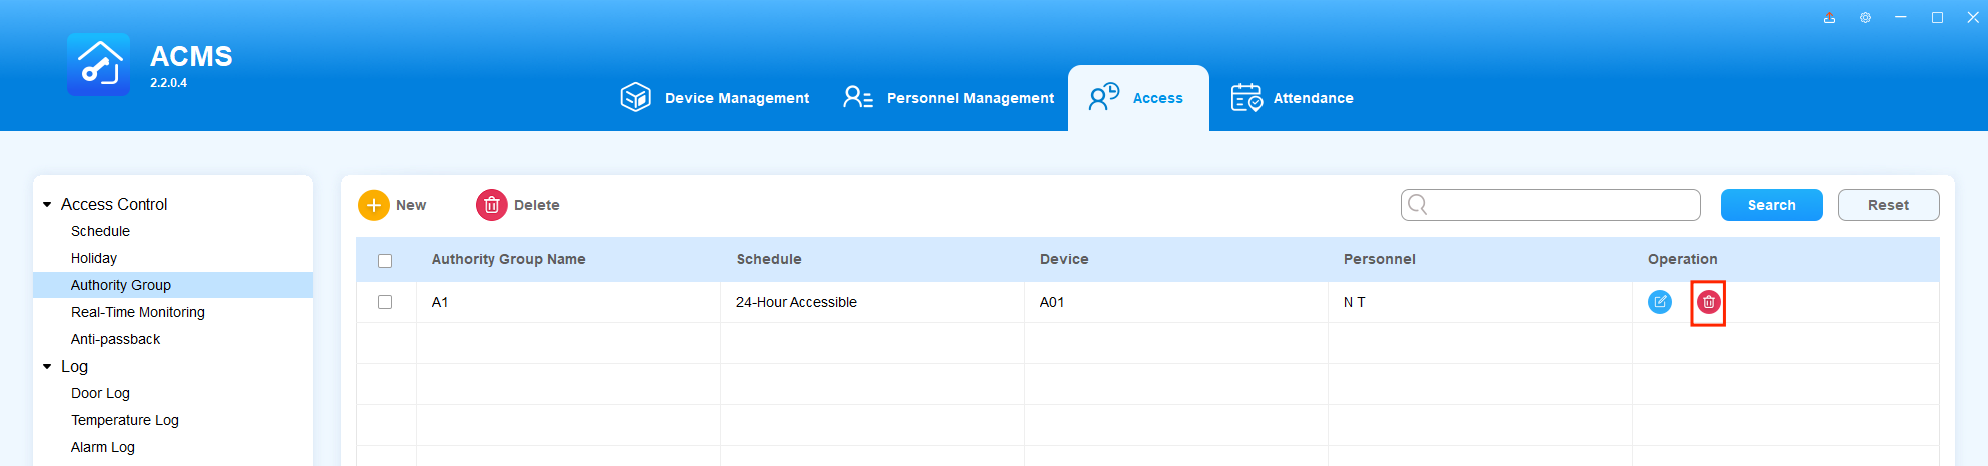
Delete Authority Group
You can delete the authority group separately or in batches.
- Delete authority group separately
- Click on
 of the specific line of the authority group you want to delete.
 - Click Yes for confirmation.
- Delete authority group in batch
- Check off the specific line of the authority group(s) you want to delete.
- Click
 and click Yes for confirmation.

Search Authority Group
You can search the specific authority group by entering the authority group name in the search field.
- Enter the authority group name in the Search field.
- Double click the authority group if you want to see the details.
Unlock Doors by One-Click
The Real-Time Monitoring function allows you to take immediate action in emergency situations by either unlocking or locking all doors with a single click.
On the Real-Time Monitoring screen, you can:
- Open or close all doors with a single click in case of an emergency.
- Open or close individual or multiple devices.
- Check the status of devices’ door magnets in real-time.
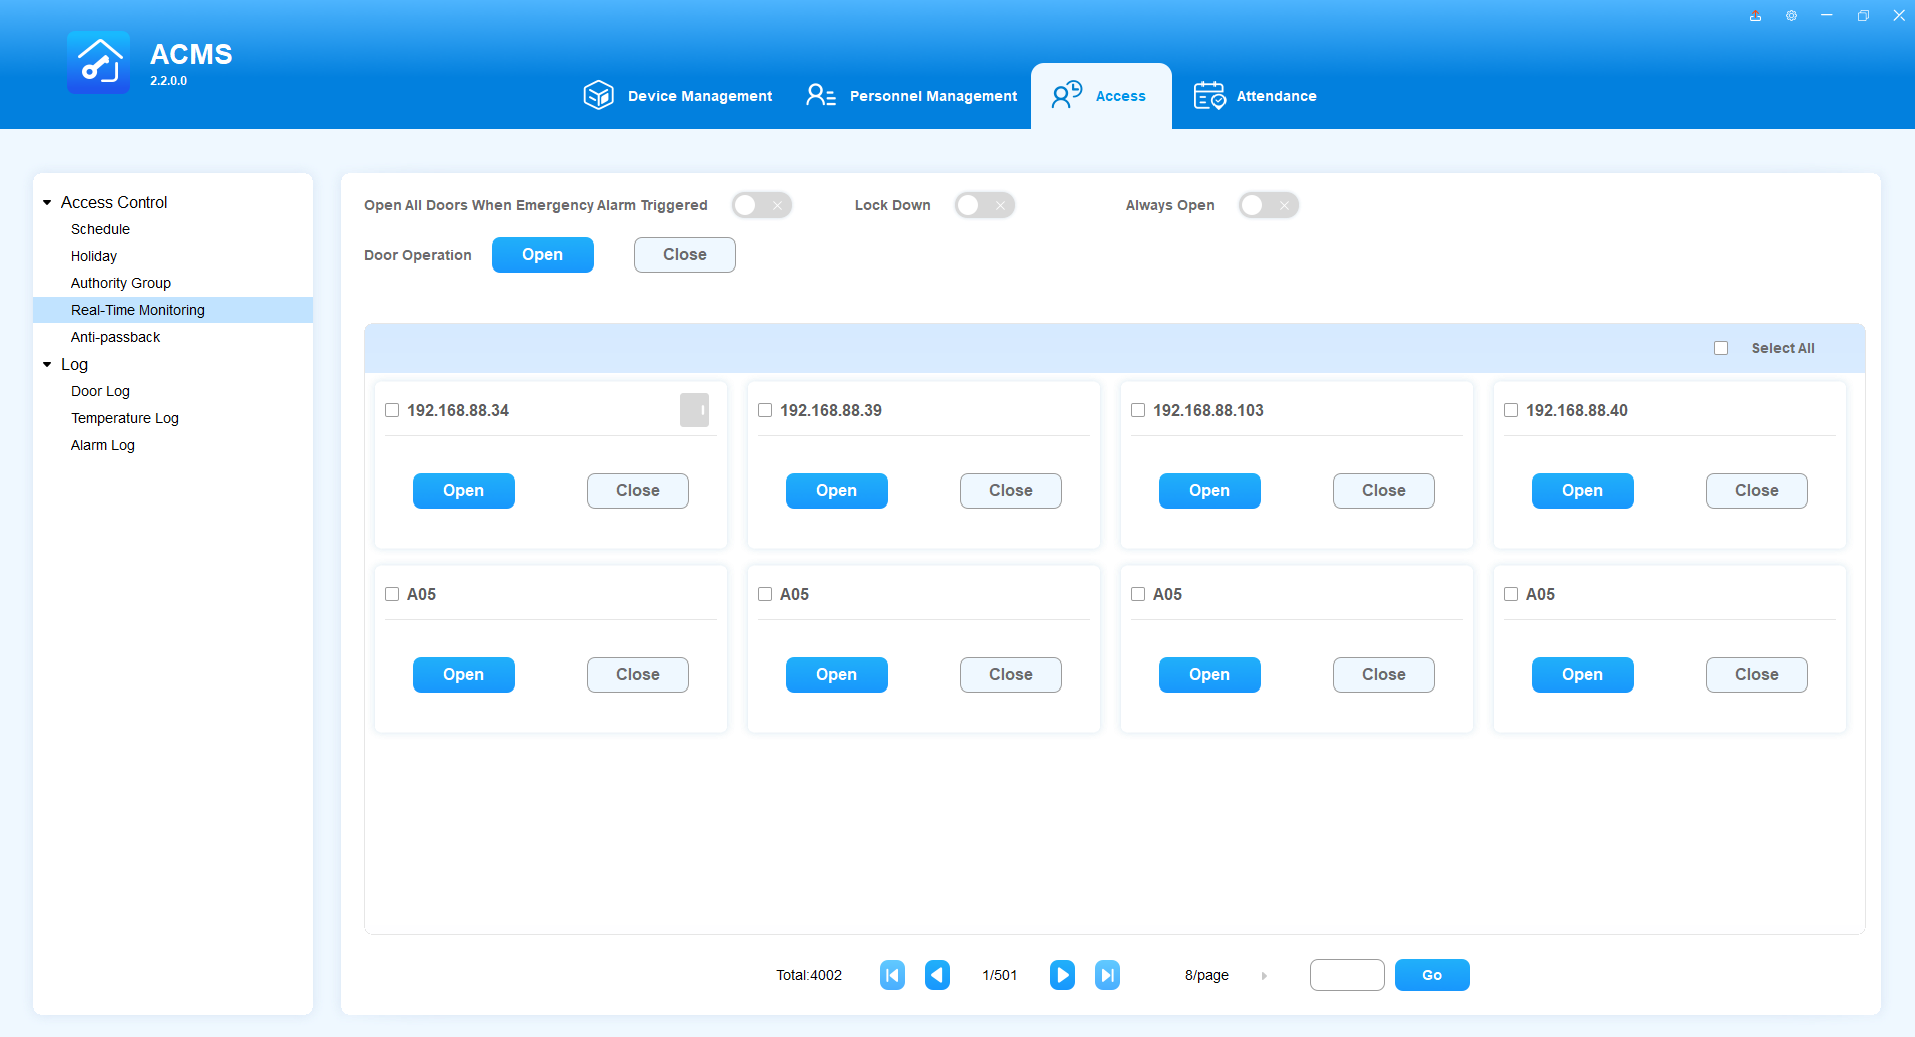
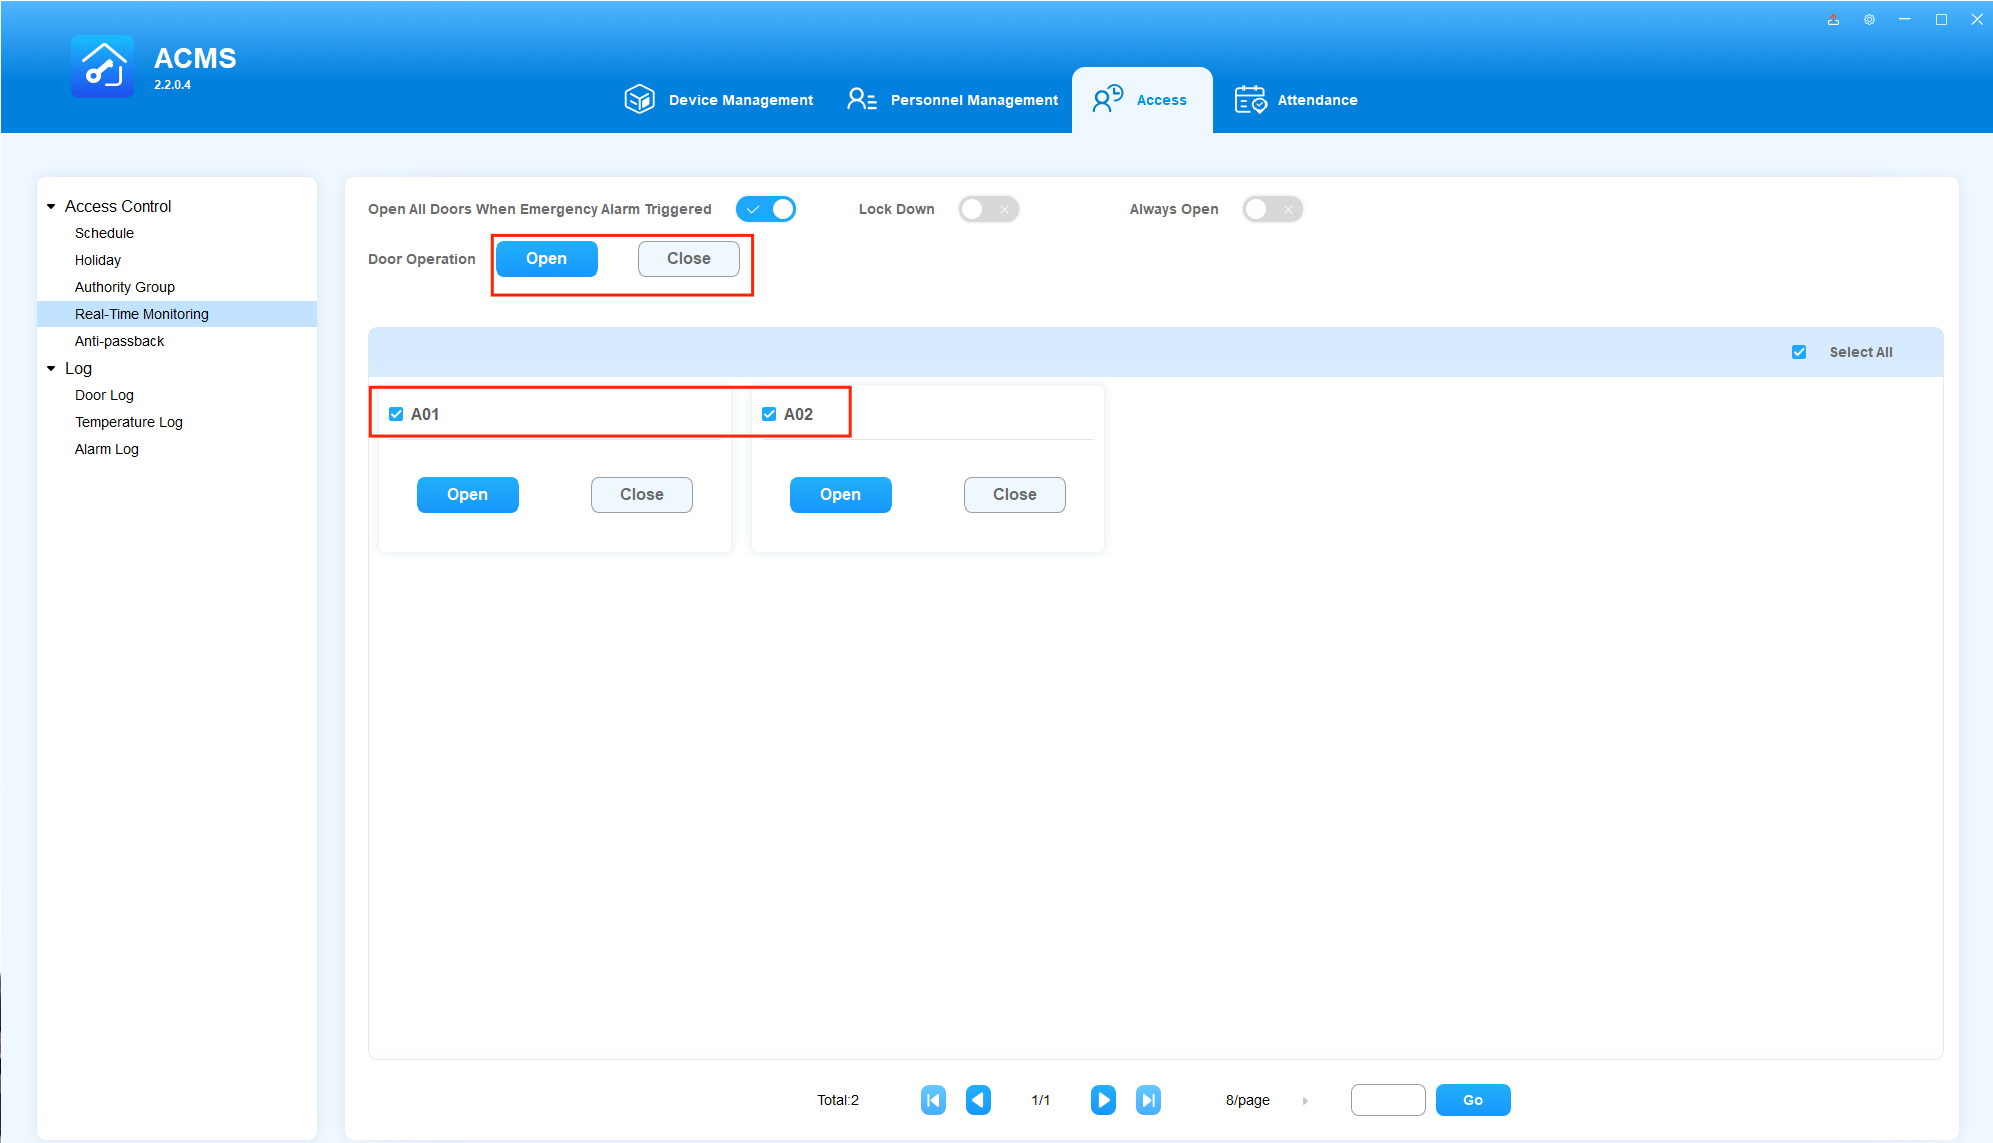
Auto-Open Doors When an Emergency Alarm Triggers
When this feature is turned on, an Open All Doors command will be automatically sent to all devices from the ACMS when an emergency alarm is received. By default, this feature is turned off.
To enable this feature, move the toggle marked in the below picture to be ON.

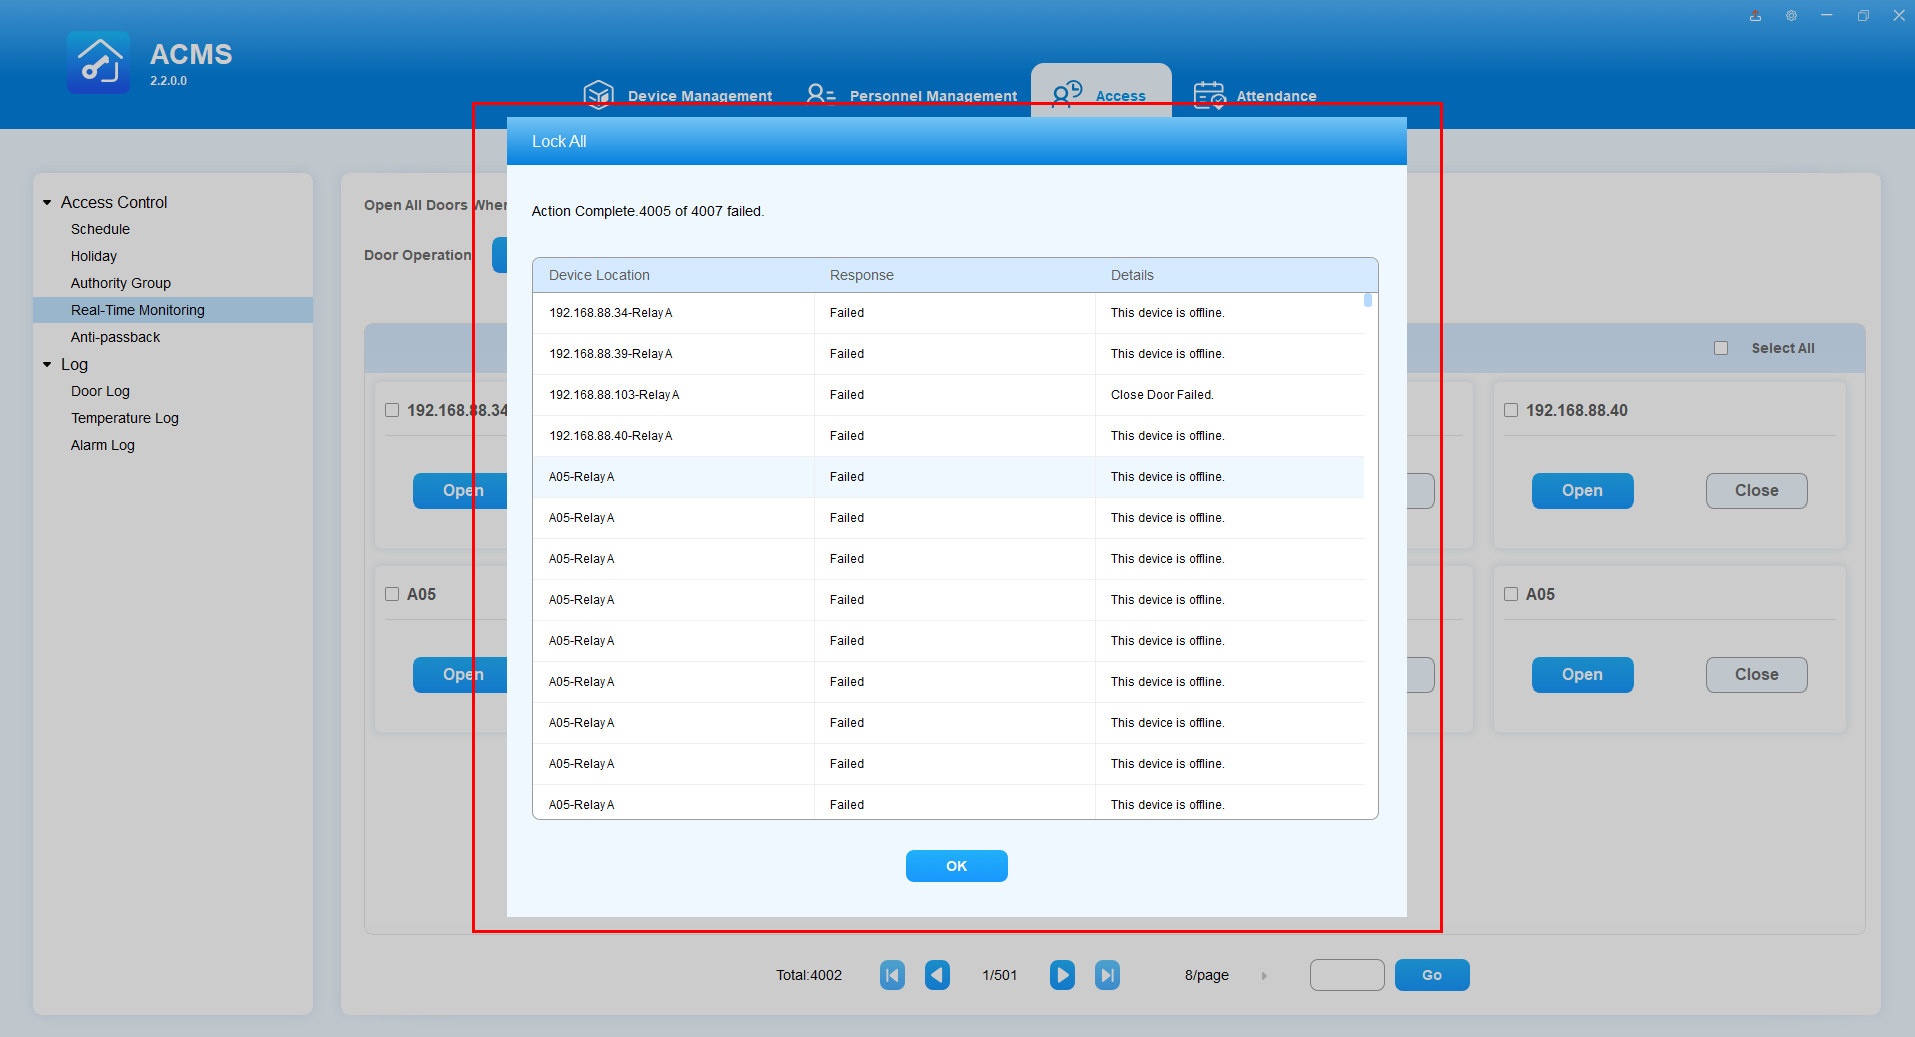
Lock or Open Doors by One-Click
The Lock Down feature allows you to quickly and easily lock online relays and security relays of the devices added on ACMS with a single click.
When the Always Open feature is enabled, the relays and security relays will keep open until they are manually closed.

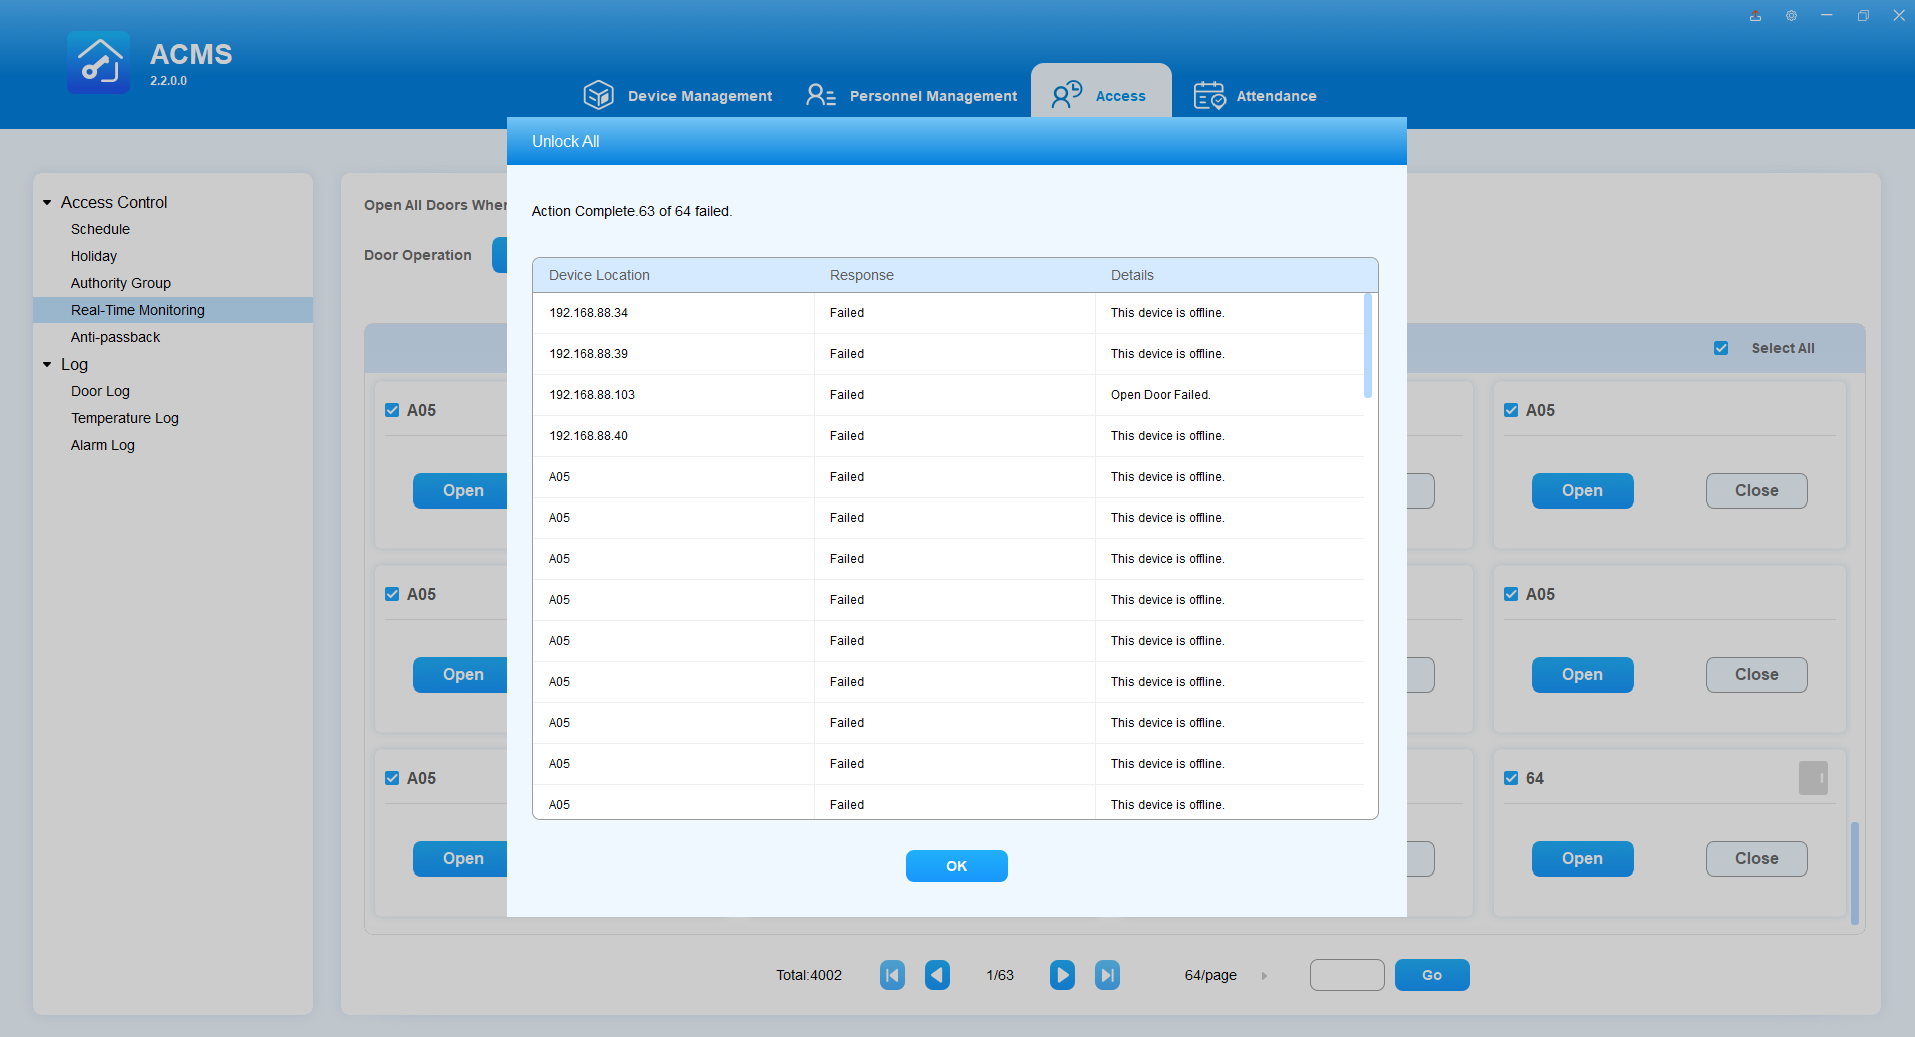
The system will returns the results after you perform Lock Down or Always Open.
Open or Close Specific Doors
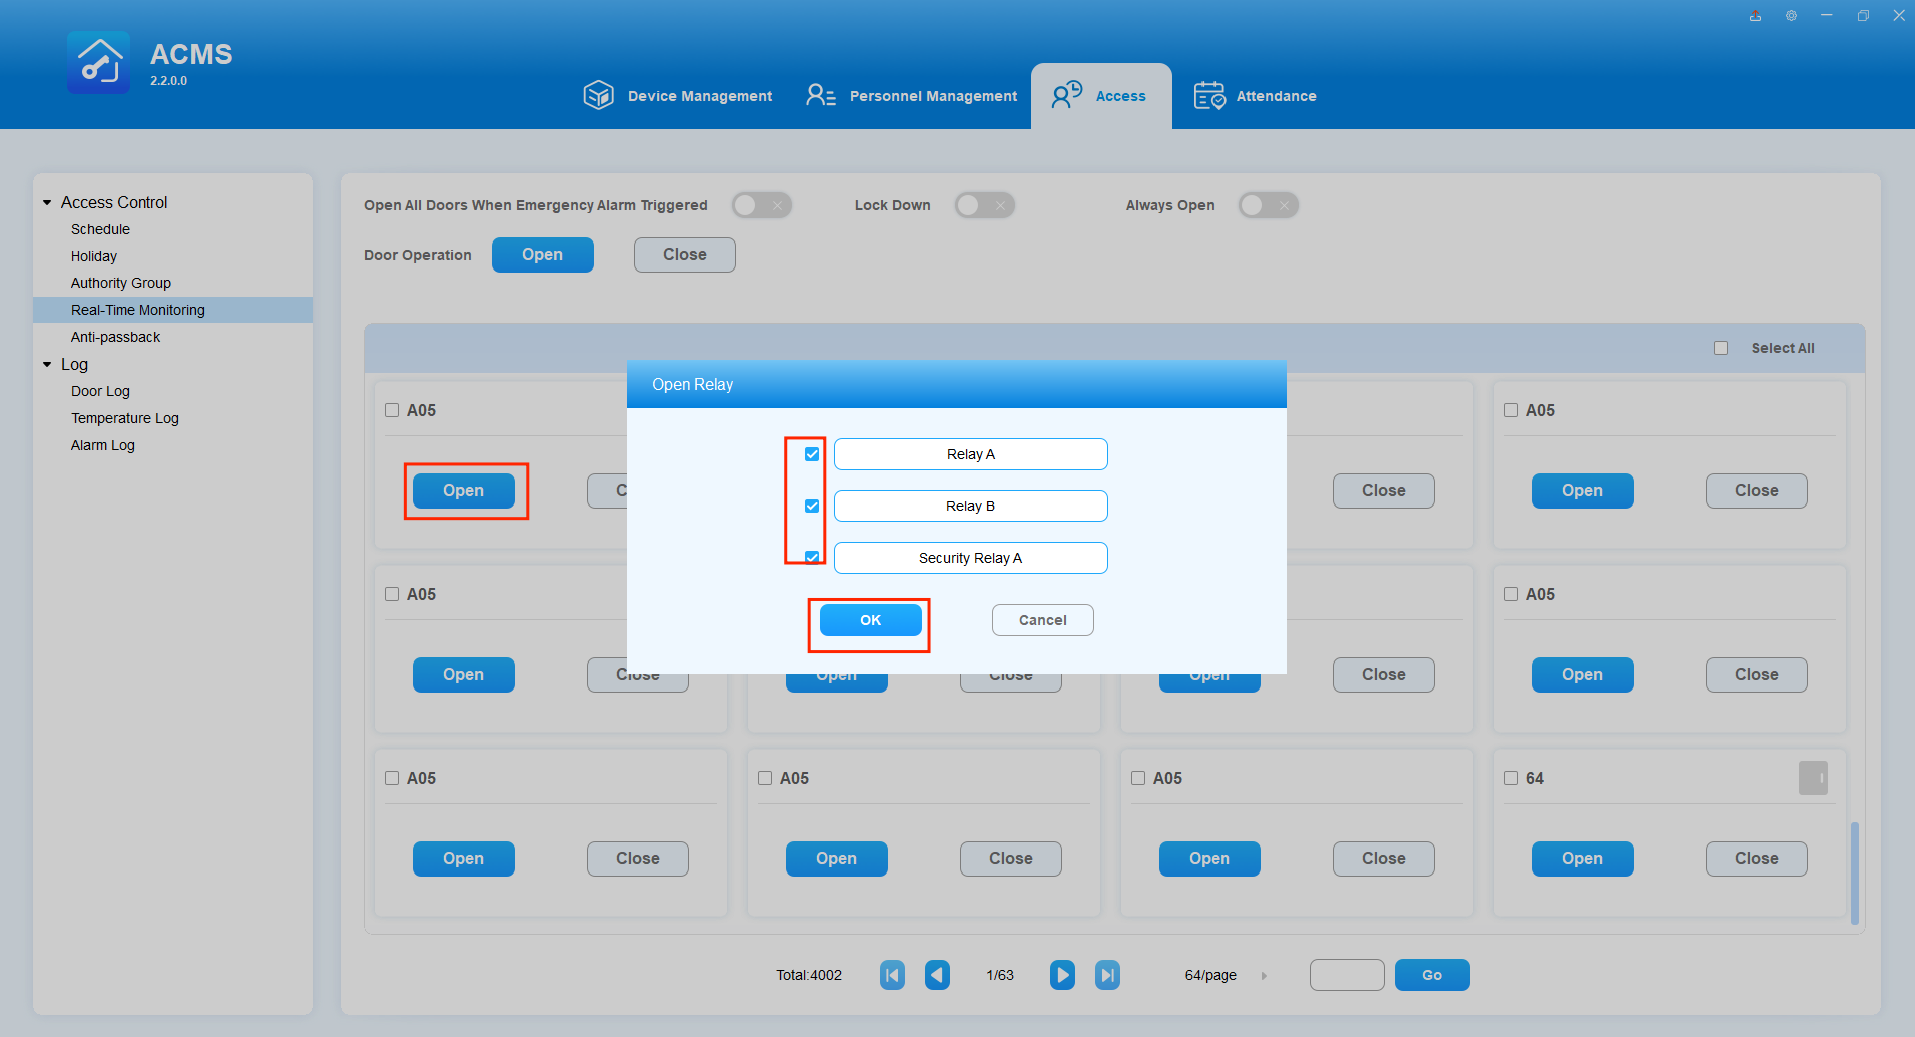
You can also open or close doors on individual or multiple specific online devices. On this screen, you can see all devices added to the ACMS and can then click the Open or Close button to operate.
- Select the desired device, and click Open or Close button.
- Select the relays if the device has several relays that have been set to Open when adding it.
- Click OK to allow for one-time door opening or closing.
- Check off the desired devices.
- Click on Open or Close button on the top. All relays and security relays that have been set to Open will be triggered.
If at least one relay or security relay of a device is successfully opened or closed, the system will display a success message. While if all relays of a device fail to open or close, the system will display a failure message.
Check Door Magnets Status
Door magnet status is display next to the device name. The gray icon indicates that it is closed, and the blue icon is for open status.

Anti-Passback
Anti-passback is a security mechanism preventing an access card or similar device from being used to enter an area a second time without first leaving it. In this case, each entry must be followed by the exit for the next successful entry.
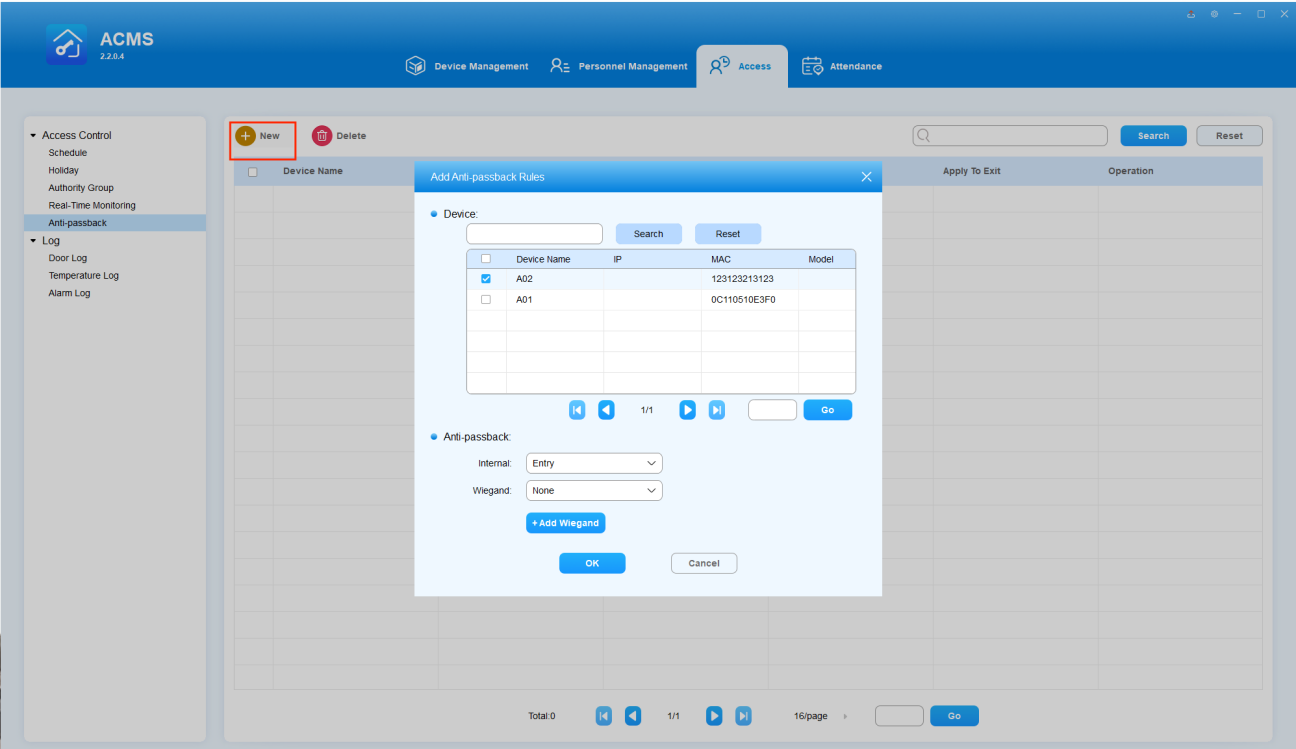
Add Anti-Passback Devices
ACMS needs to add devices and set up its anti-passback methods for both the device and Wiegand. To enable this function, do as the following:
- On the Anti-Passback screen, click
 .
. - Check off at least one device to proceed.
- Select the Internal and Wiegand Anti-passback methods among None, Entry, and Exit.
- Add additional Wiegand if needed.
- Click OK.
- Once Anti-passback devices are added, you have to update the settings to devices on the Device Management module. See here for detailed instructions.
Edit Anti-Passback Devices
When editing, you cannot change the device that is set as an anti-passback device.
- Double-click the desired device or click on its
 in the Operation column.
 - Change its anti-passback methods or add new Wiegand.
- Any changes made to anti-passback devices must be updated to the associated devices. See here to know how to update the changes.

Delete Anti-Passback Devices
To delete single device, click on  in the Operation column.
To delete multiple devices, check off the desired devices and click on the upper delete button  .
.

- Deleting device will not change the Anti-passback mode that has already been sent to the device. In the Mode column on Door log screen, the mode will still be Entry or Exit even after the anti-passback device is deleted.
Logs
In the sub-module Log you can check the door access records, temperature records, and alarm records.
Daily Door Logs
On the door log screen and select Daily Log on the upper left, you can check and search door access records in terms of what access types are used, and who in which department have been granted or denied the door access during a certain time range.

See and Search Door Log
- See Door Logs
- Select the time range for the door log.
- Select filtering range among All, Open Door Succeed, and Open Door Failed.
- Click Snapshot
 to see photo captured by the device.
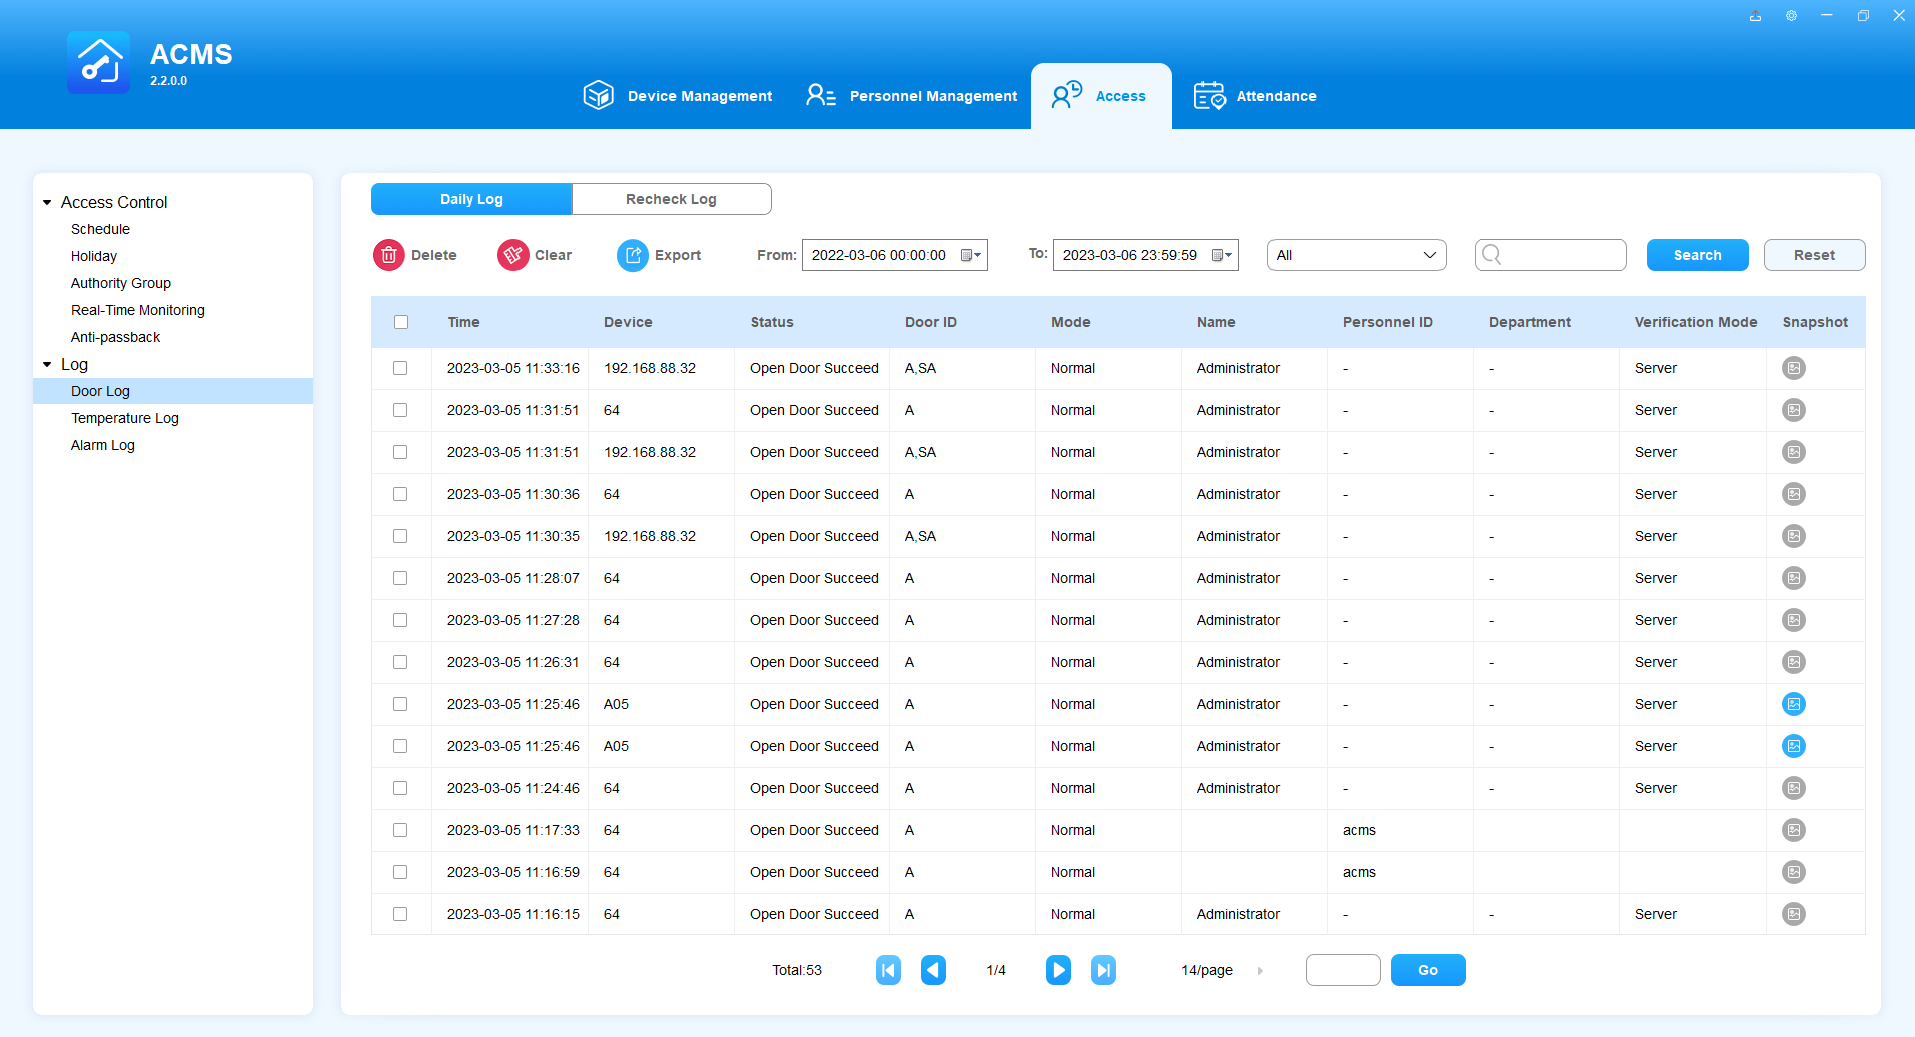
- Search Door Logs
- Enter information, such as Device, Name, Personnel ID, and Department, in the Search field.
- Click Search to find the specific log.
- The personnel ID field will be displayed as Unknown and the Name field and Department field will be left blank for the unregistered personnel seeking the door access.
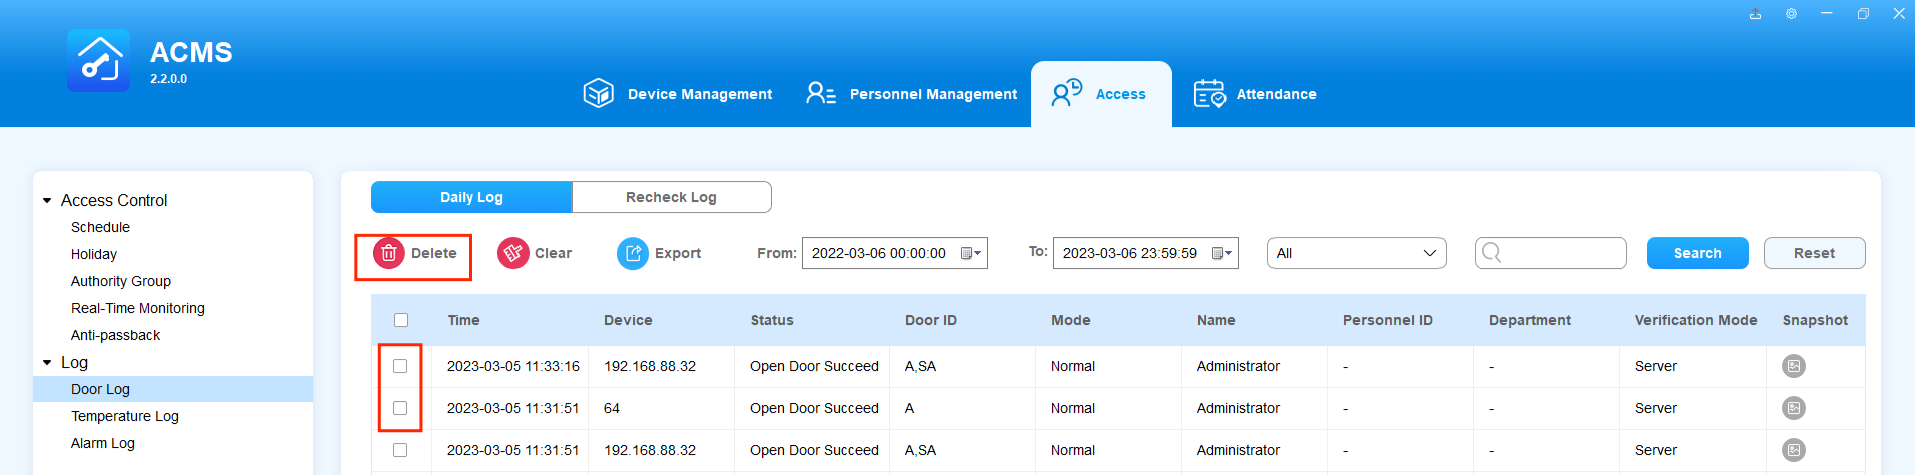
Delete and Clear Door Log
- Delete Door Log
- Tick the check box of the specific door log.
- Click
 to delete the ticked door log.
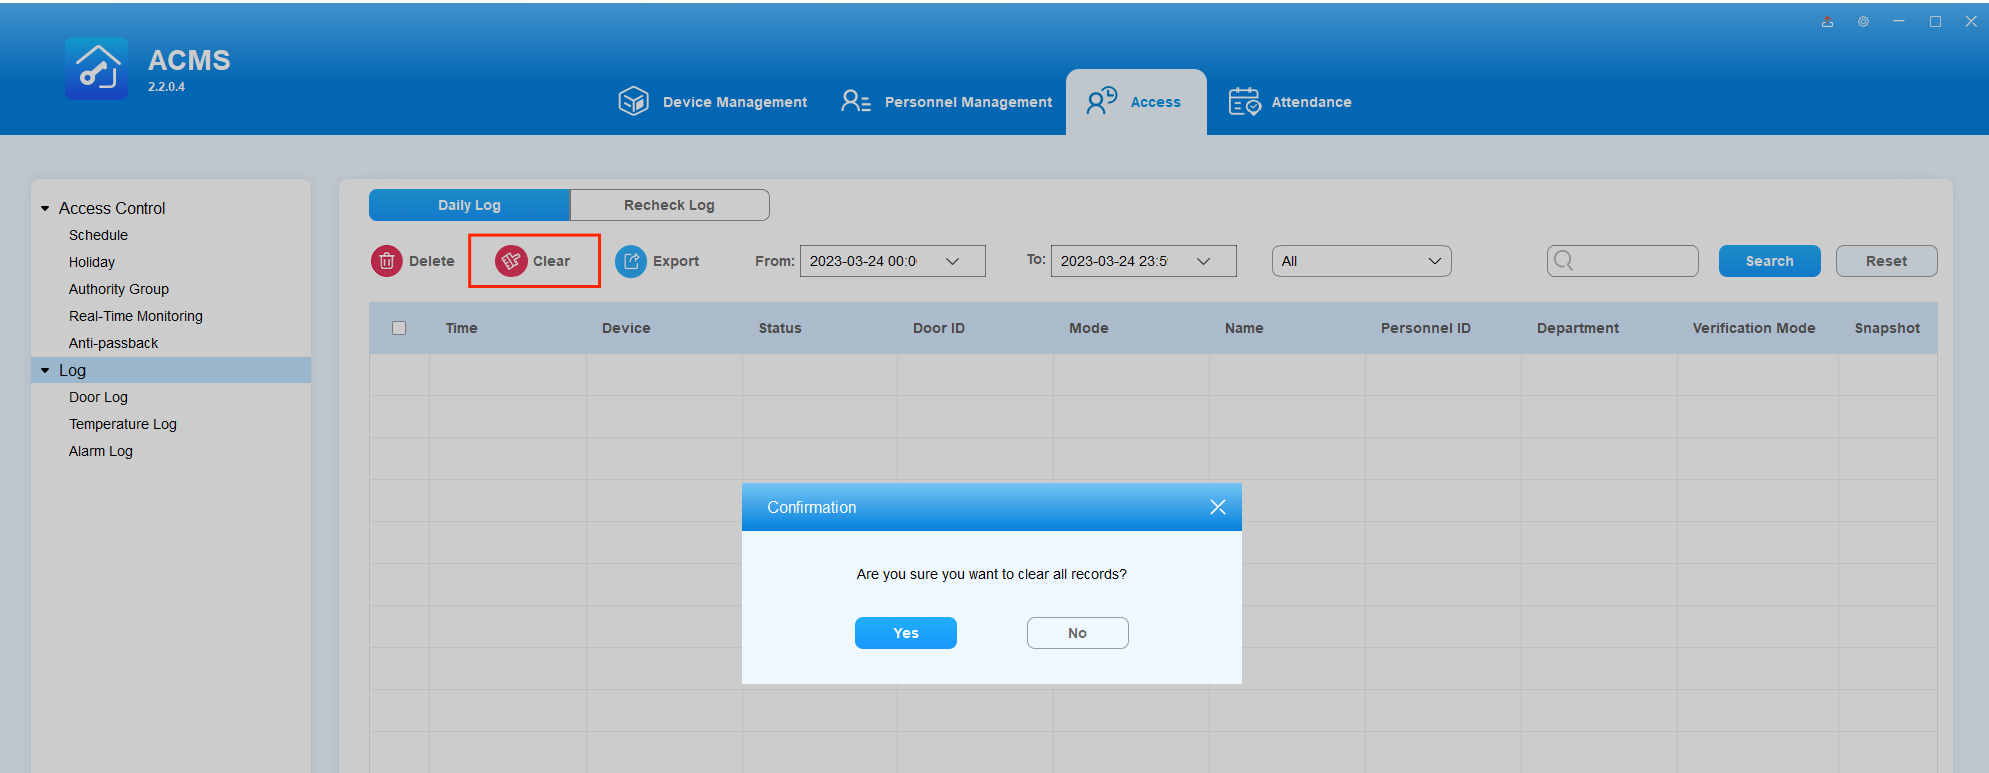
- Clear Door Log
- Click
 to delete all the logs.
 - Click Yes for confirmation.
Export Door Log
The door log can be exported to a designated path on your computer in .xlsx format.
- Click
 and select the path to which you want to export the file to your local PC.
 - Click Save.

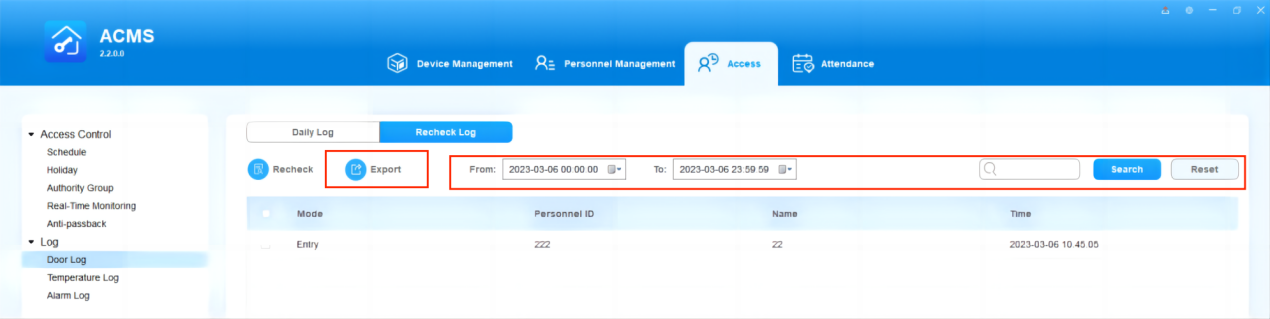
Recheck Log
Recheck Log is a feature that can work in conjunction with the Anti-passback function. It facilitates the situation where a person is unable to enter or exit due to reasons such as being lost or forgetting to swipe a card. You can use this feature to perform recheck operations for the user, thereby relieving the abnormal situation and ensuring that the user can enter or exit normally the next time.
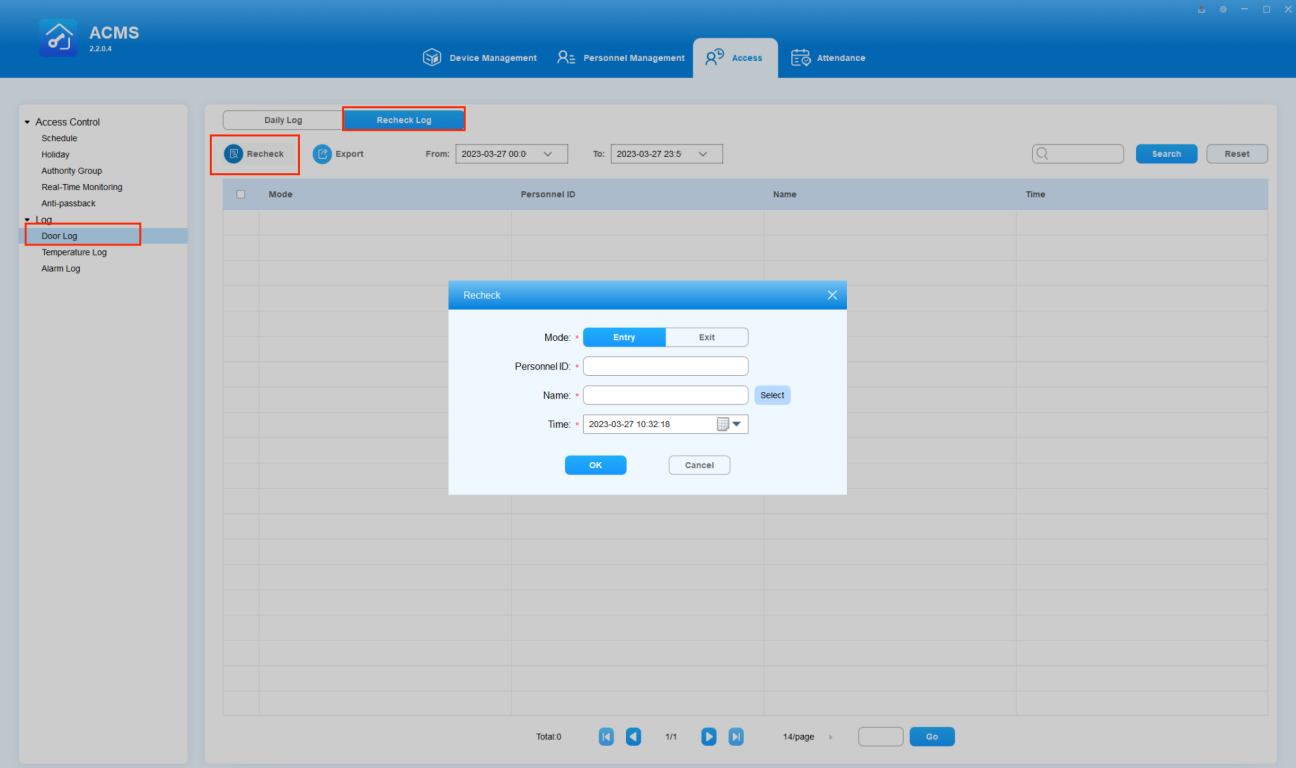
Perform the Recheck Operation
To recheck for an user, do as the following.
- On the Access screen, select Door log on the left-side menu, and click on Recheck button to start rechecking.
- Select the entry or exit option based on the actual situation of the user.
- Select the user from the list of ACMS or enter the user's name and ID directly.
- Choose the time and date.
- Click OK.
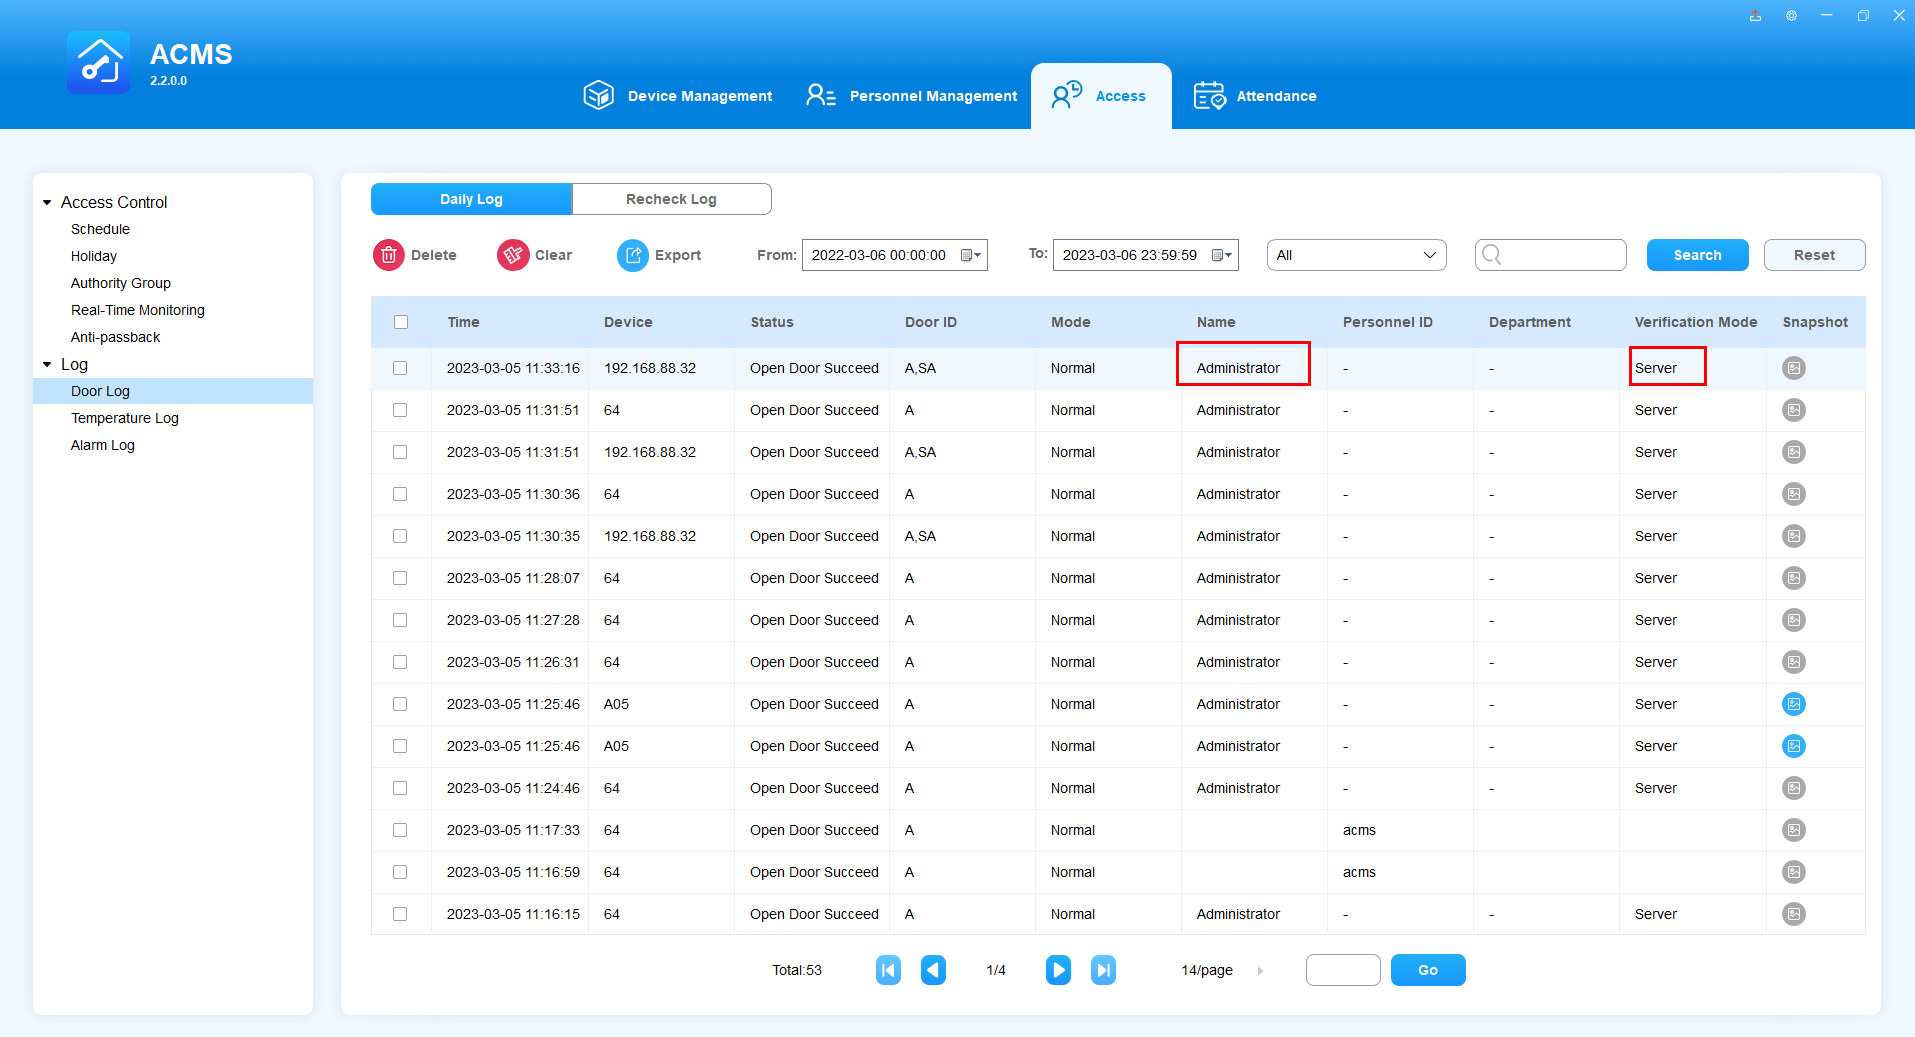
Once the recheck operation is complete, a new door log will be generated. The name of the record will display as Administrator and the verification mode will be Server.
Search and Export Recheck Logs
You can filter the logs by specifying time, Personnel ID and name. You are also allowed to export the filtered logs with one click.
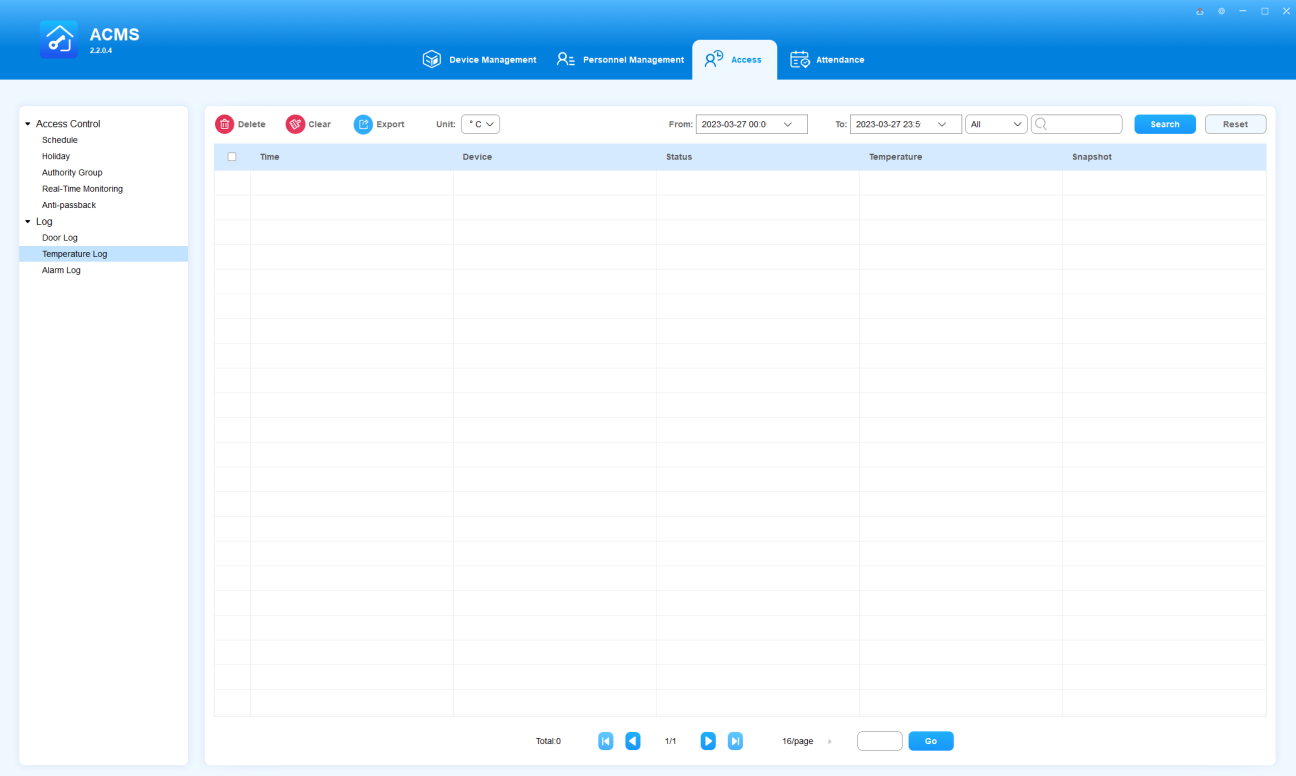
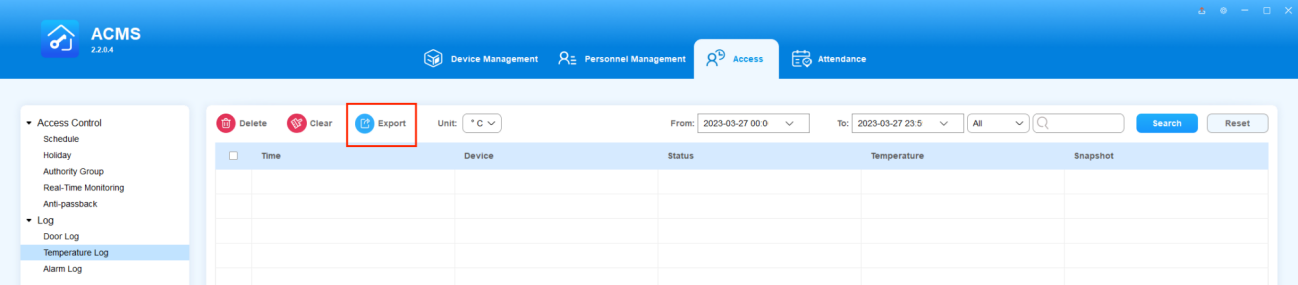
Temperature Log
In the temperature sub-module, you can check and search temperature records collected in the device that is equipped with Akuvox digital temperature detector during a certain time range.
See/Search Temperature Log
- See Temperature Log
- Select the time range for the temperature log.
- Switch the temperature scale (Celsius or Fahrenheit) if needed.
- Select filtering range among All, Normal Temperature, Abnormal Temperatur, and Low Temperature.
- SearchTemperature Log
- Enter the device name in the Search field.
- Click Search to find the specific temperature record.
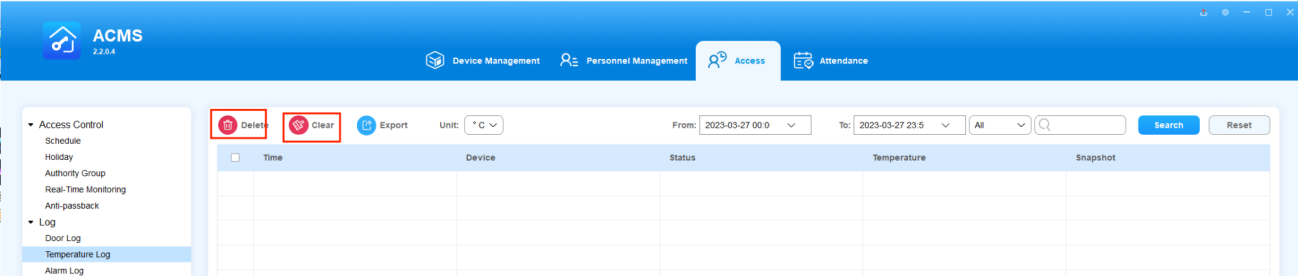
Delete/Clear Temperature Log
- Delete Temperature Log
- Tick the checkbox of the specific temperature log.
- Click
 to delete the ticked temperature log.
- Clear Temperature Log
- Click
 to delete all the temperature logs.
 - Click Yes for confirmation.
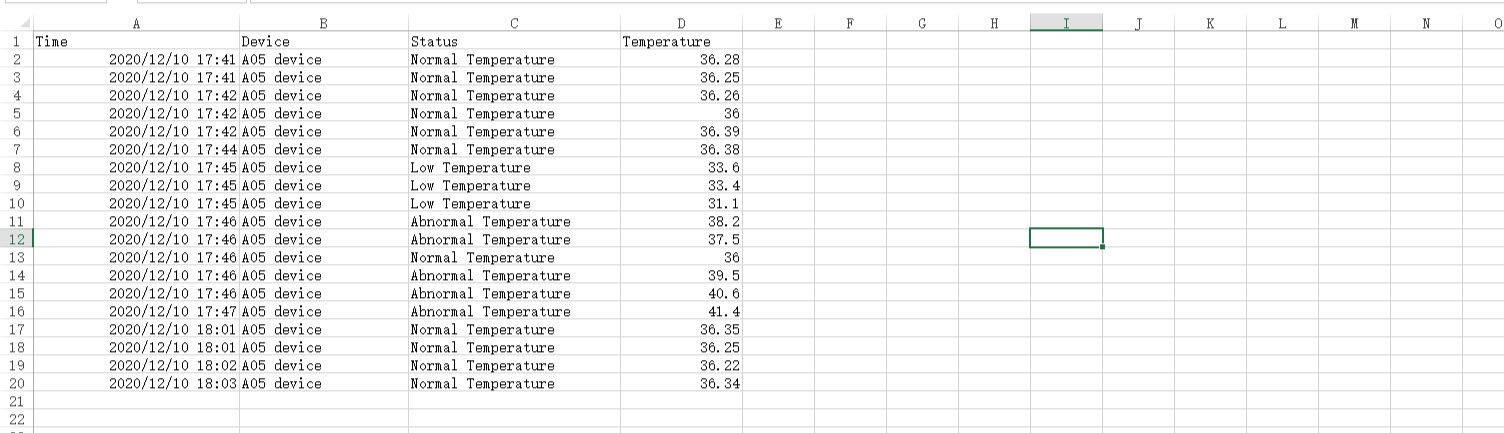
- Export Temperature Log
Temperature log can be exported in .xlsx format. to the designated path on your computer.
- Click
 and select the path to which you want to export the file in your local PC.
 - Click Save.
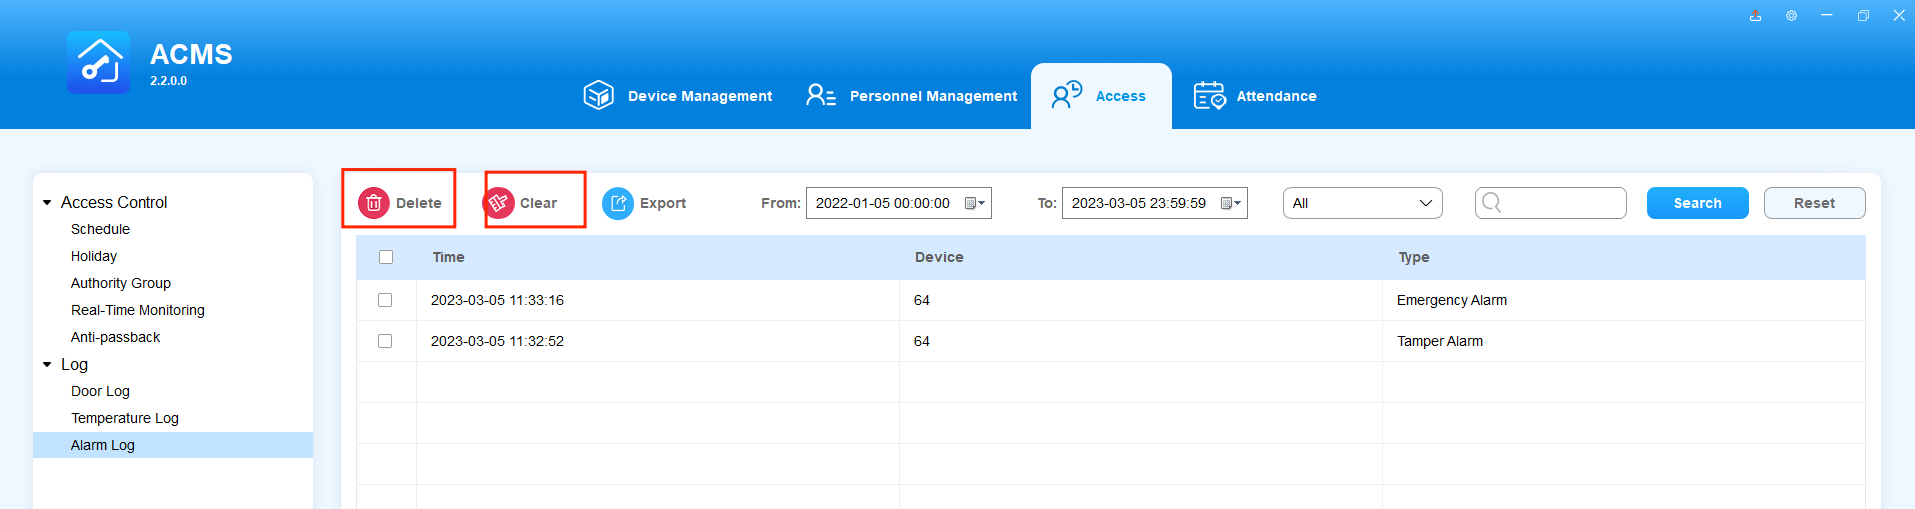
Alarm Log
The Alarm Log screen displays all alarm histories reported by devices such as tamper alarm, alarm door opened, break-in intrusion, and emergency alarm. All logs can be deleted, cleared, and exported.
Search Alarm Logs
You can filter the logs by specifying date and time, entering the device, and selecting the log type.

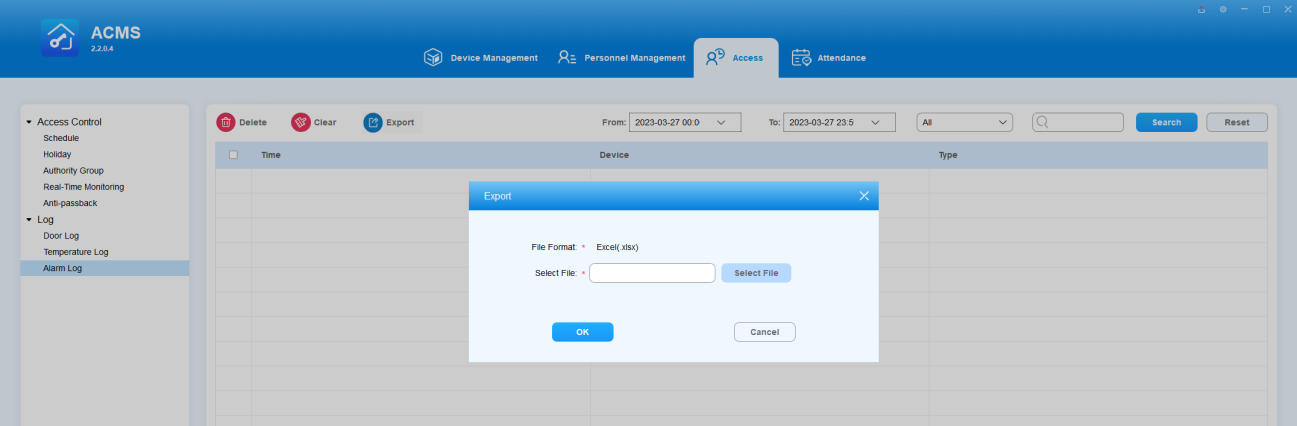
Export Alarm Logs
Alarm logs can be exported in .xlsx format. to your computer.
- Click
 and select the path to which you want to save the file in your local PC.
 - Click Save.
Delete/Clear Alarm Logs
You are able to delete certain logs or clear all logs.
- Delete Certain Logs
- Check off the specific logs.
- Click
 to delete the selected.
- Clear All Logs
- Click
 on the top.
 - Click Yes for confirmation.
Attendance Management
The attendance module allows you to set up holidays, attendance device locations, and work timetables, and manage employee shifts, leave, and attendance.
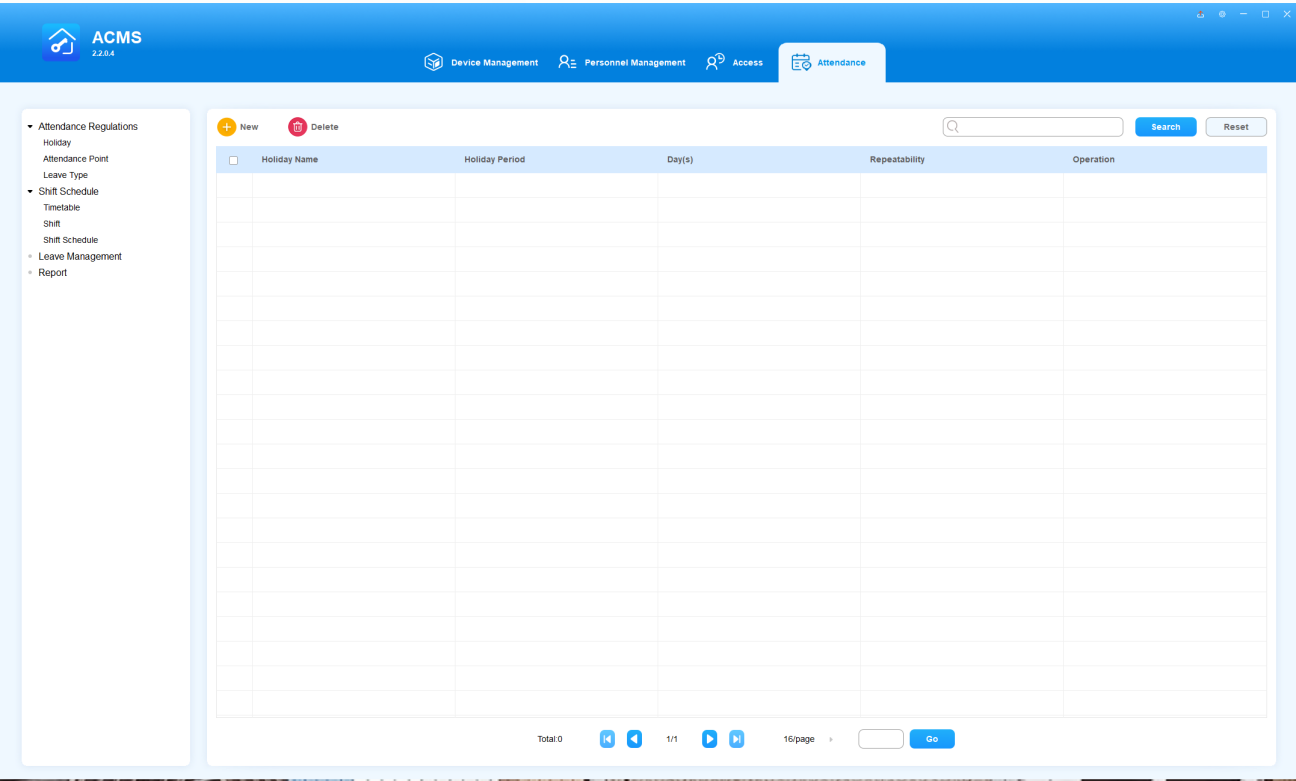
Holidays
You can set up holidays that can be automatically integrated into your work schedule and attendance.
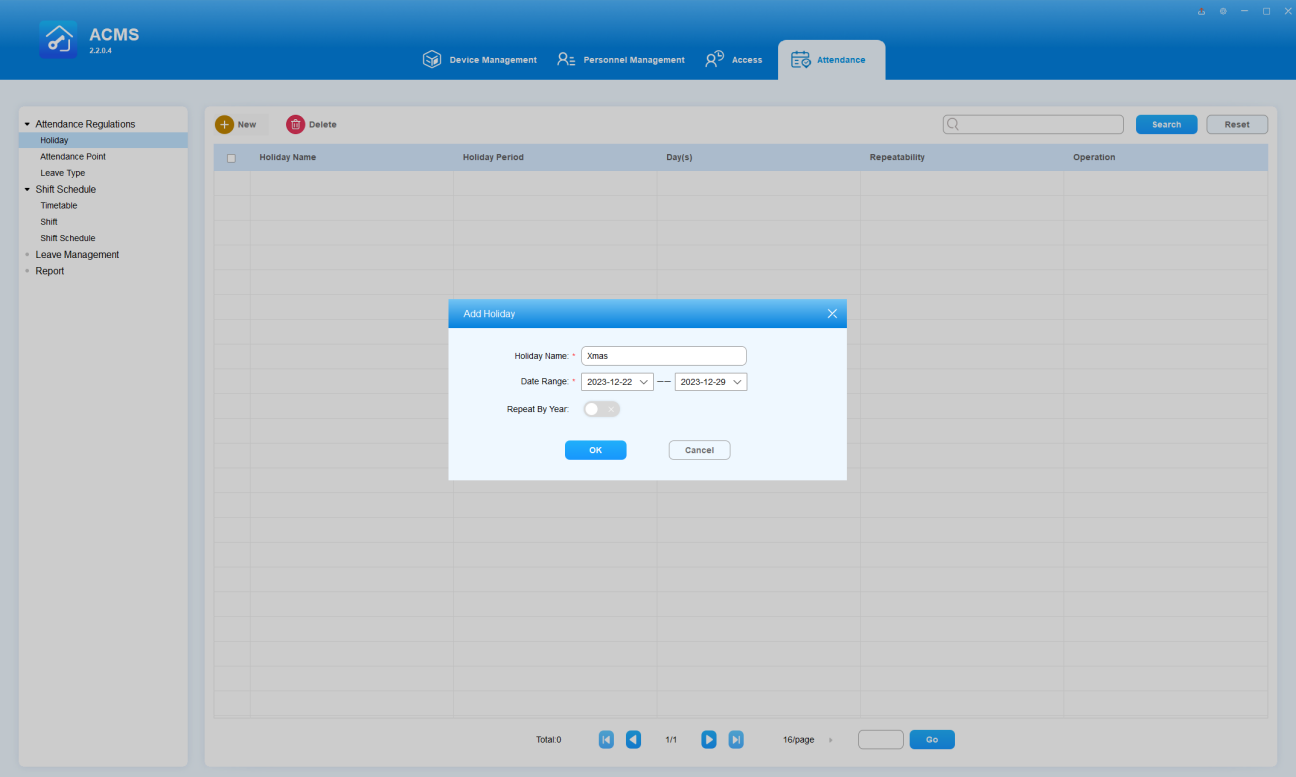
Add a Holiday
- Enter the holiday name.
- Set up the holiday time range.
- Move the toggle switch to the right if you want the holiday to be repetitive every year.
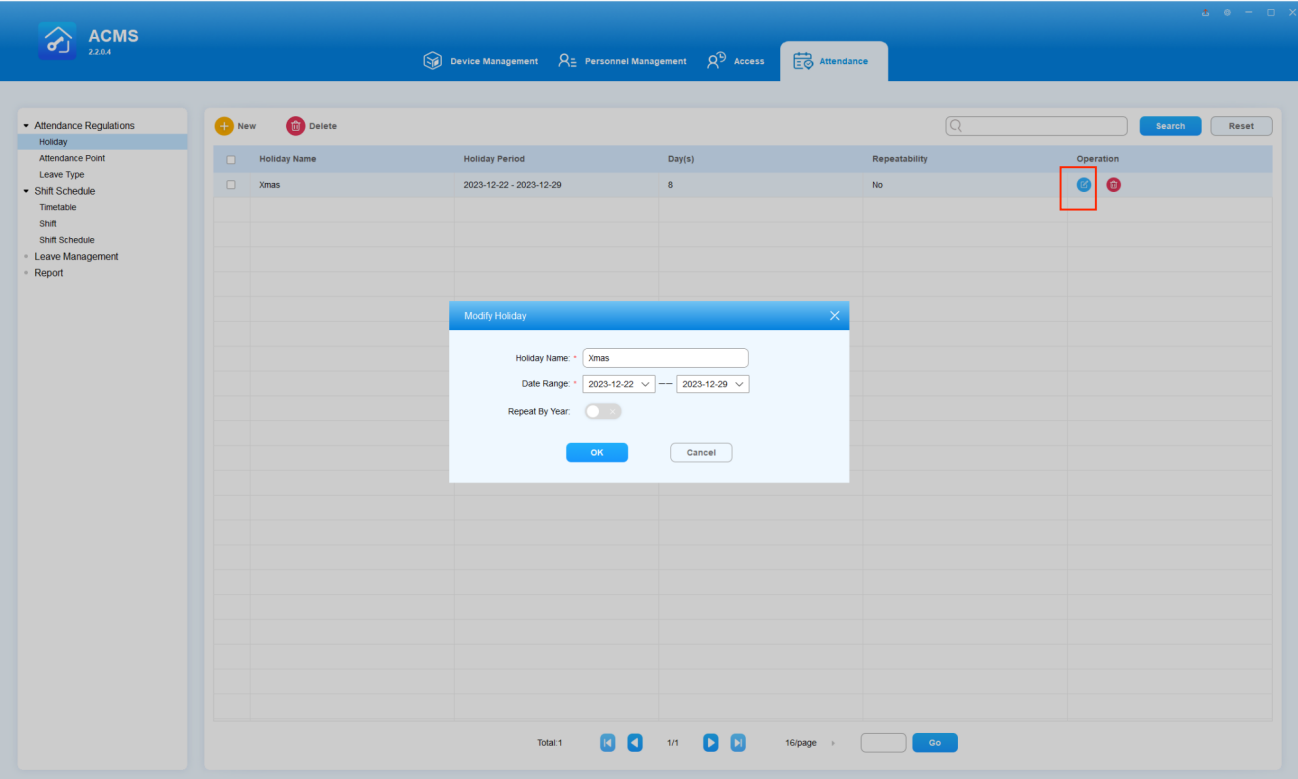
Edit a Holiday
- Double click the desired holiday or click on
 in its Operation column.
 - Edit the holiday information according to your need.
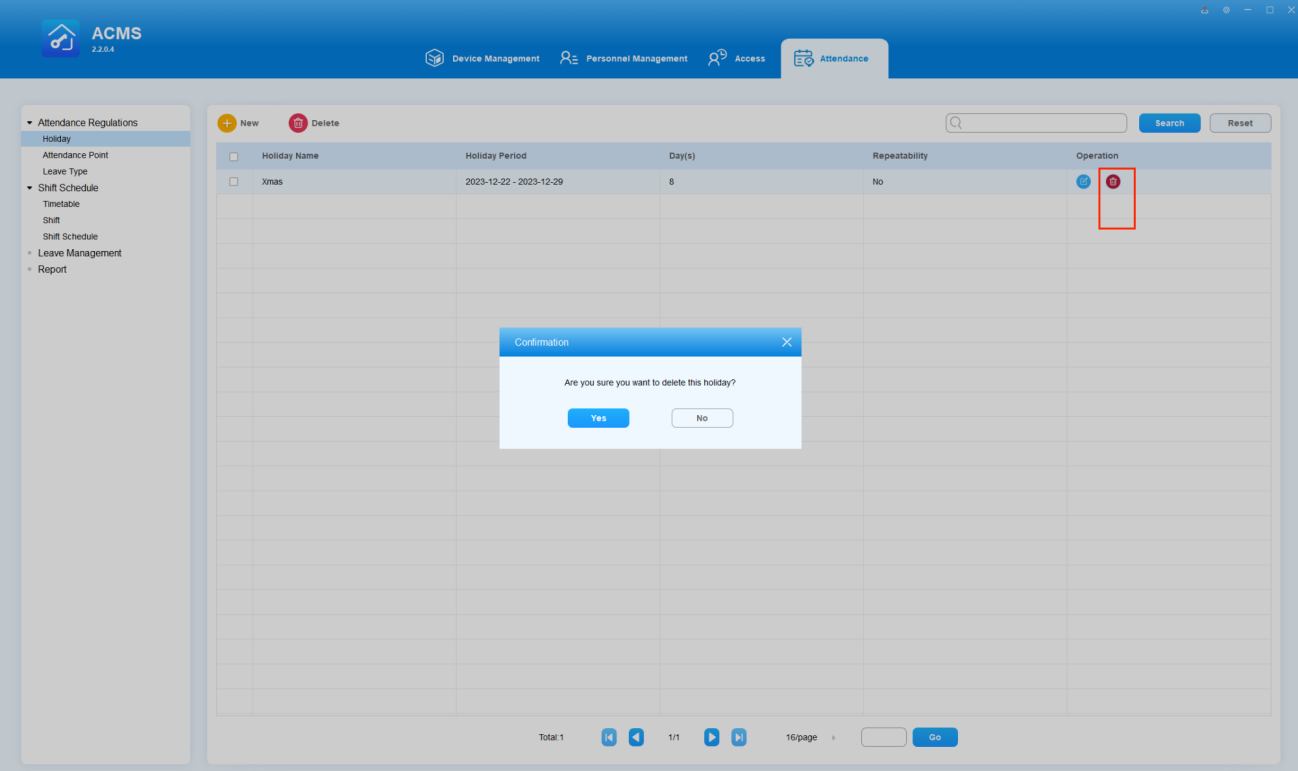
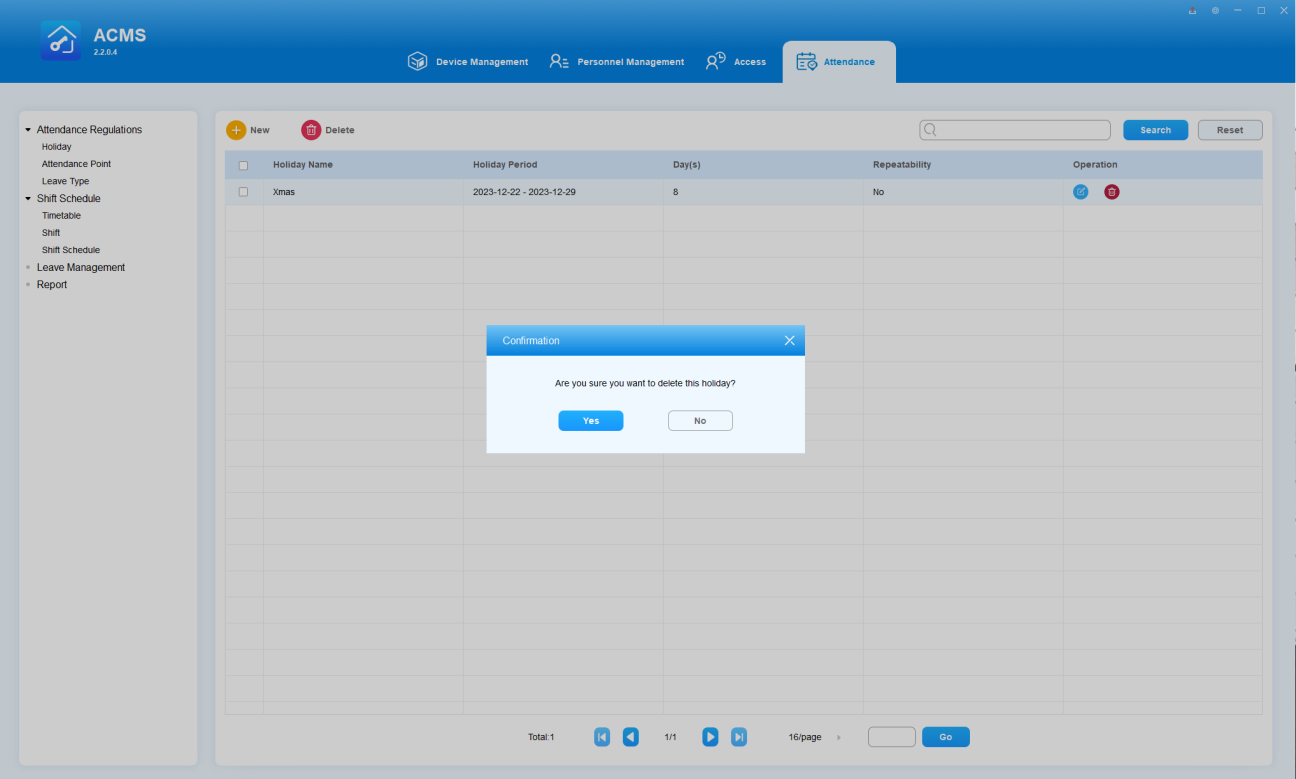
Delete Holiday
You can delete holiday(s) one by one or in batch.
- Delete Holiday(s) One by One
- Click on
 of the specific holiday you want to delete.
 - Click Yes.
- Delete holiday(s) in Batch
- Check off the desired holidays, or the box next to Holiday Name
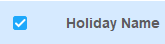 to select all.
 - Click Yes.
Attendance Point
There can be more than one device for personnel's punch-in and punch-out, therefore you might need to name the devices based on their locations (location point) so that attendance records of the specific attendance device(s) can be obtained.
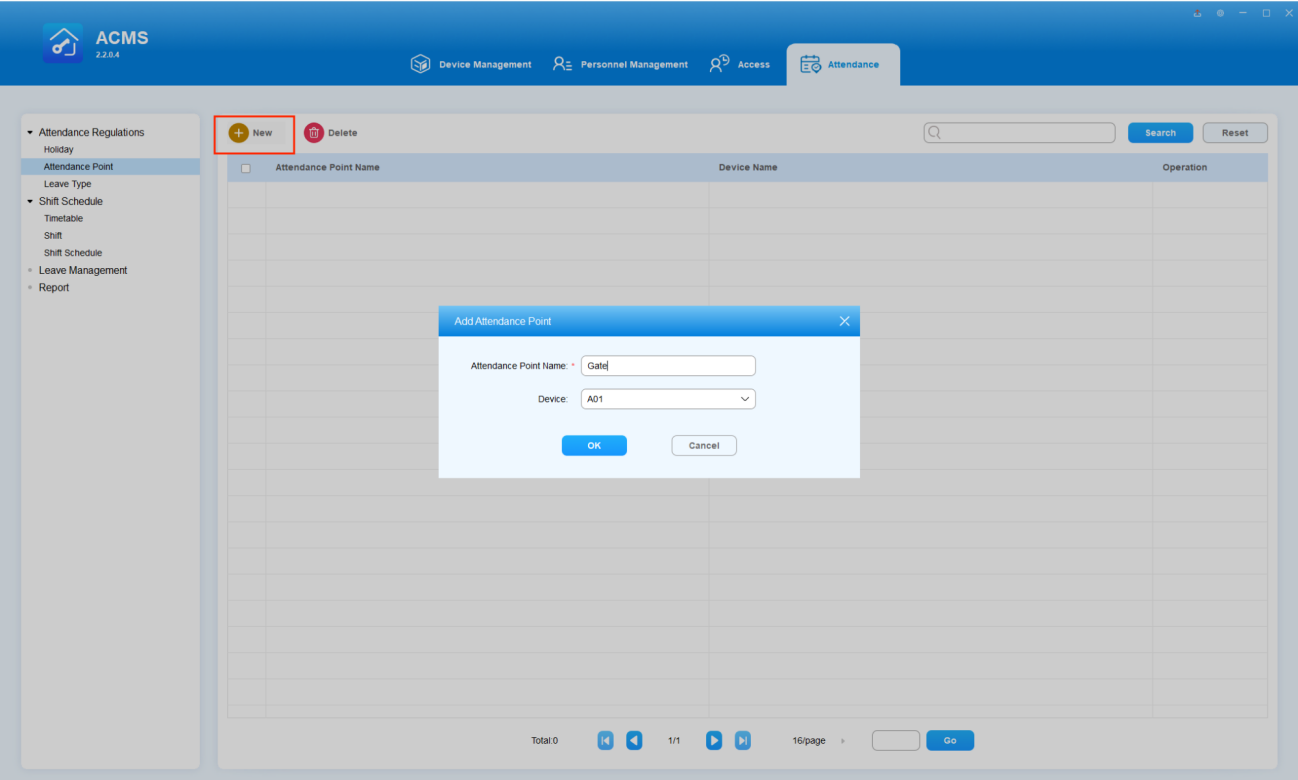
Create Attendance Point
- Click on
 .
. - Fill in the attendance location name and select a device for it.
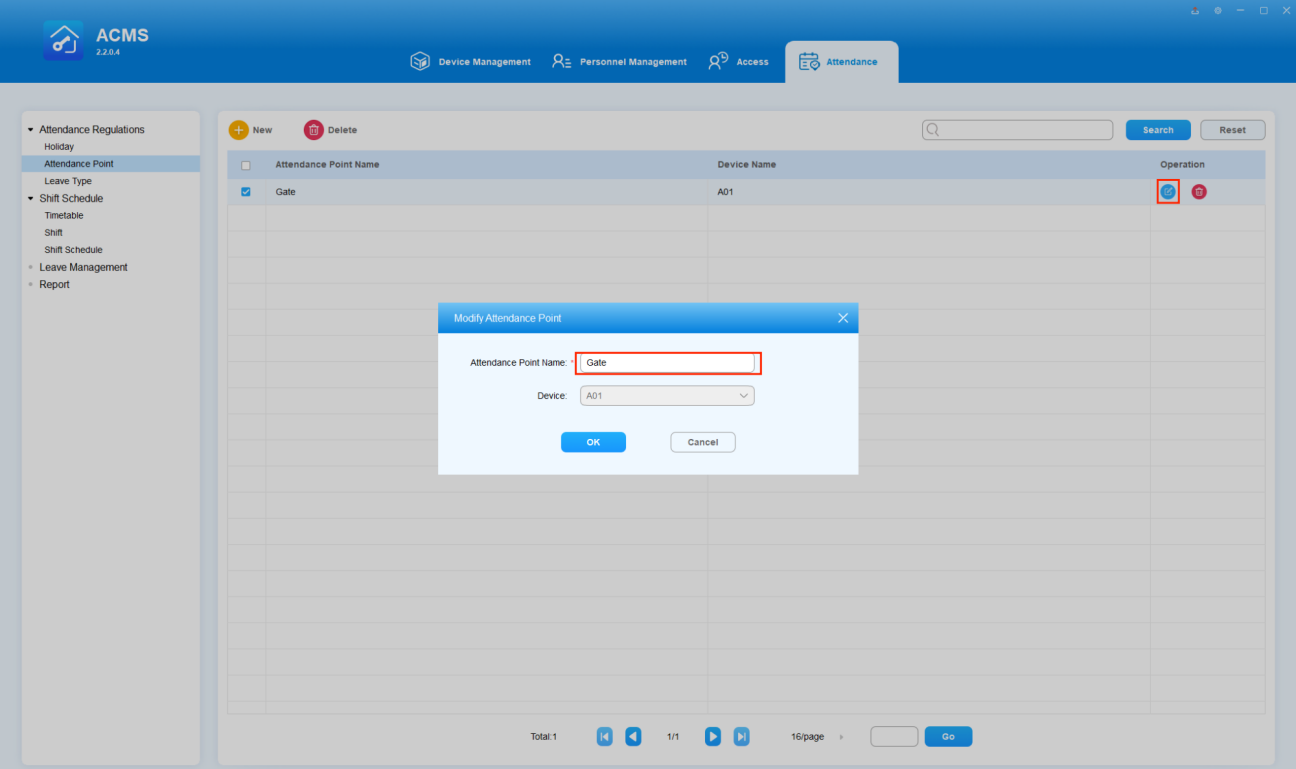
Modify Attendance Point
You can modify the point’s name, while the device selected cannot be changed.
- Double click the desired point or click on
 in its Operation column.
 - Change the point’s name.
- Click OK.
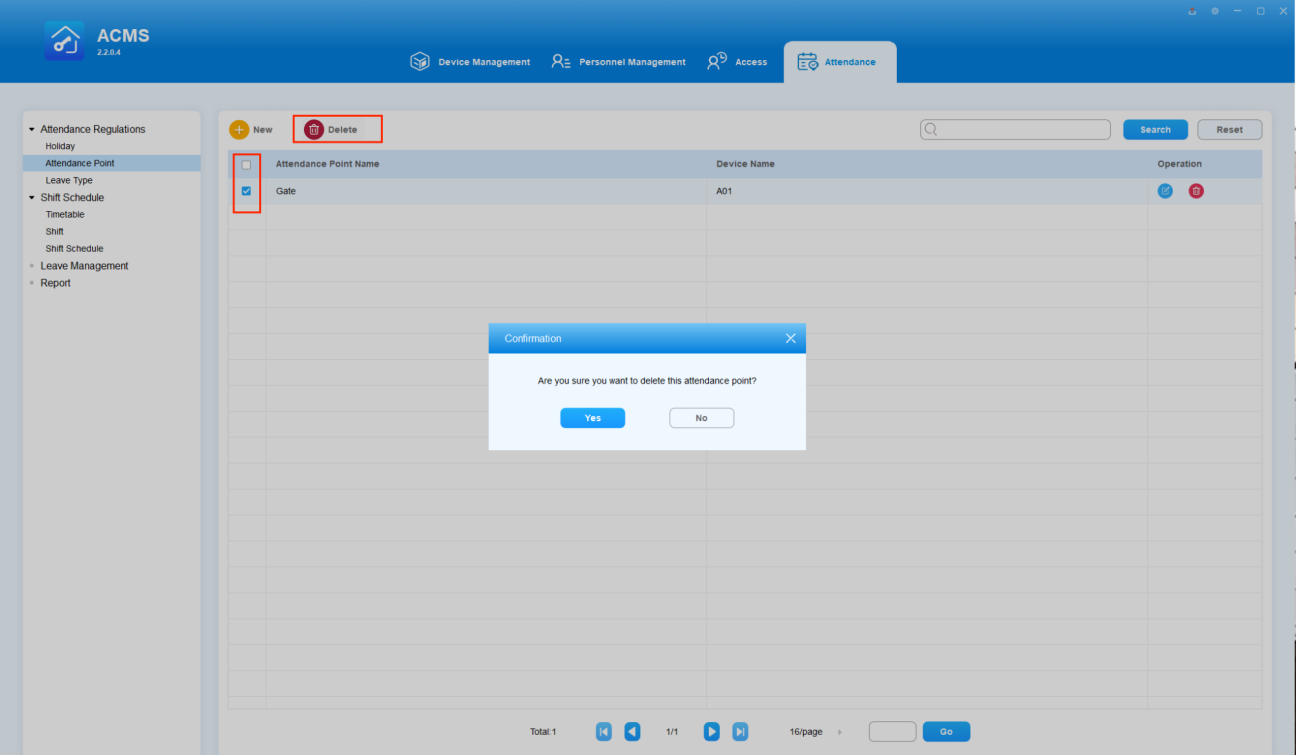
Delete Attendance Point
You can delete the attendance device point separately or in batch.
- Delete attendance device point separately
- Click on
 in the desired point’s Operation column.
 - Click YES.

- Delete attendance device point in a batch
- Tick the checkbox
 of the attendance points you want to delete.
 - Tick the checkbox if you want to delete all the existing attendance points.
Shift Schedule
The Shift Schedule sub-module allows you to plan for the work shift timetables, shift management, shift adjustment, and manage the attendance record and leave the report for the employees.
Timetables
Create Timetable
You can create an inventory of shift timetable templates that can be later conveniently pulled out and applied to the specific work shift(s) for the specific employee(s). You can define time table setting in terms of setting up timetable names, types, as well as work hours and attendance time to be applied to the timetable.
- Go to Attendance module and navigate to Shift Schedule > Shift.
- Click
 to add a timetable.
 - Set up timetable names and types, and attendance time in the timetable.
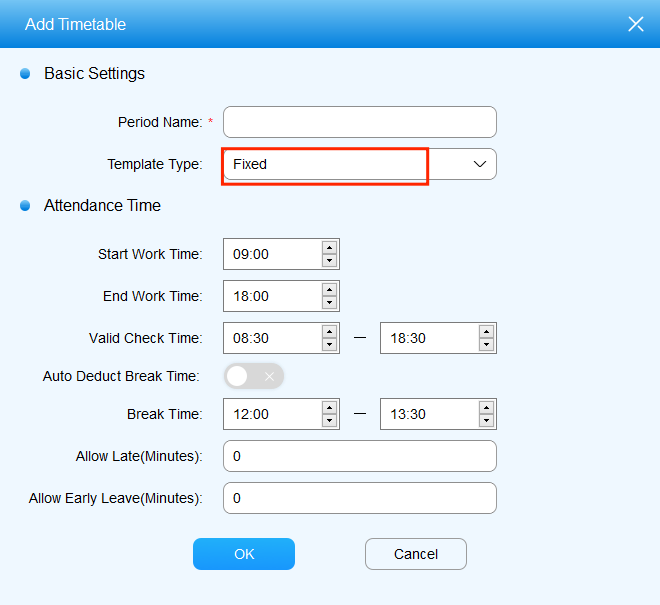
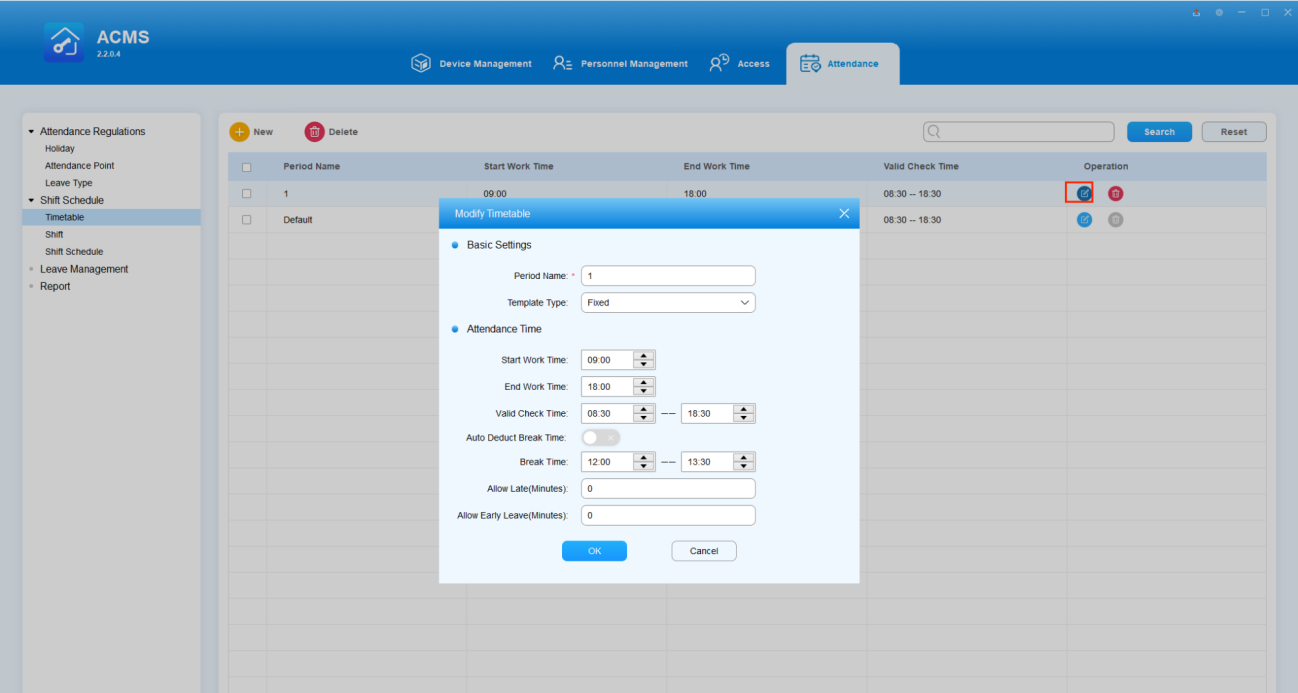
Parameters Setup
No. | Field Name | Description |
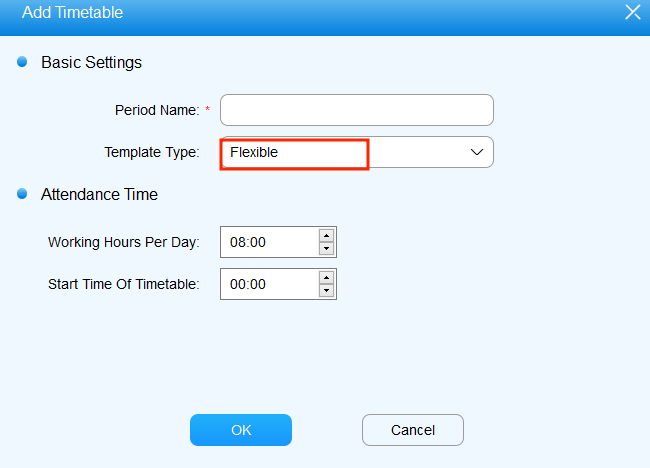
1 | Period Name | Enter the name of the work timetable, which is required. Period name is mainly used for identification and search purpose. |
2 | Template Type | Select the timetable type between Flexible and Fixed. The type is Fixed by default.
|
3 | Start Work Time | Set up work start-time. The default start time is 09:00. |
4 | End work Time | Set up work end-time. The default end time is 18:00. |
5 | Valid Check Time | Set up a valid punch-in time range for Fixed timetable. The default valid punch-in time range is from 08:30-18:30. If an employee clocked multiple times, the earliest recorded time will be considered the clock-in time and the latest will be considered the clock-out time. |
6 | Auto Deduct Break Time | Enables automatic deduction of break time. When this option is turned on, the system will deduct the specified break time from the total work time when calculating work hours. |
7 | Break Time | The period of time designated as break time. |
8 | Allow Late (Minutes) | The amount of time allowed for being late, ranging from 0 to 1440 minutes. When set to 0, no late arrival is allowed. When set to a value other than 0, the specified number of minutes is allowed for being late, but the attendance record will not be marked as late. For example, if the work start time is set at 9:00 and Allow Late is set to 5, any record before 9:05 will be considered normal and will not be marked as late. |
9 | Allow Early Leave (Minutes) | The amount of time allowed for early departure, ranging from 0 to 1440 minutes. Setting it to 0 means no early departure is allowed. If set to a non-zero value, the specified number of minutes is allowed for early departure, but the attendance record will not be marked as early departure. For instance, with work end time set to 18:00 and Allow Early Leave set to 5, any record after 17:55 is considered normal. |
10 | Working Hours Per Day | (For Flexible type only) Set up the total work hour required of employees per day. The total work hour shall not be more than 24 hours. The default work hour is 8 hours . |
11 | Start Time Of Timetable | (For Flexible type only) Set up the work start time for the flexible type timetable. For example, if you set the start-time as 09:00, then the end time will automatically be 09:00 the next day (24 hours a cycle), requiring employees to punch in and punch out during the 24 hours ( In this example, the valid punch-in time will start at 09:00, while the valid punch-out time will end at 08:59 the next day). The default start-time is 00:00. |
Edit Timetable Template
After timetables are created, you are allowed to edit the timetables if needed.
- Click on
 of the specific timetable you want to edit.
 - Edit the timetable according to your need.
- If a timetable has been assigned to a shift, any changes to it will be updated to the relevant shifts and shift schedules.
Delete Timetables
You can delete the existing timetables separately or in batch if needed.
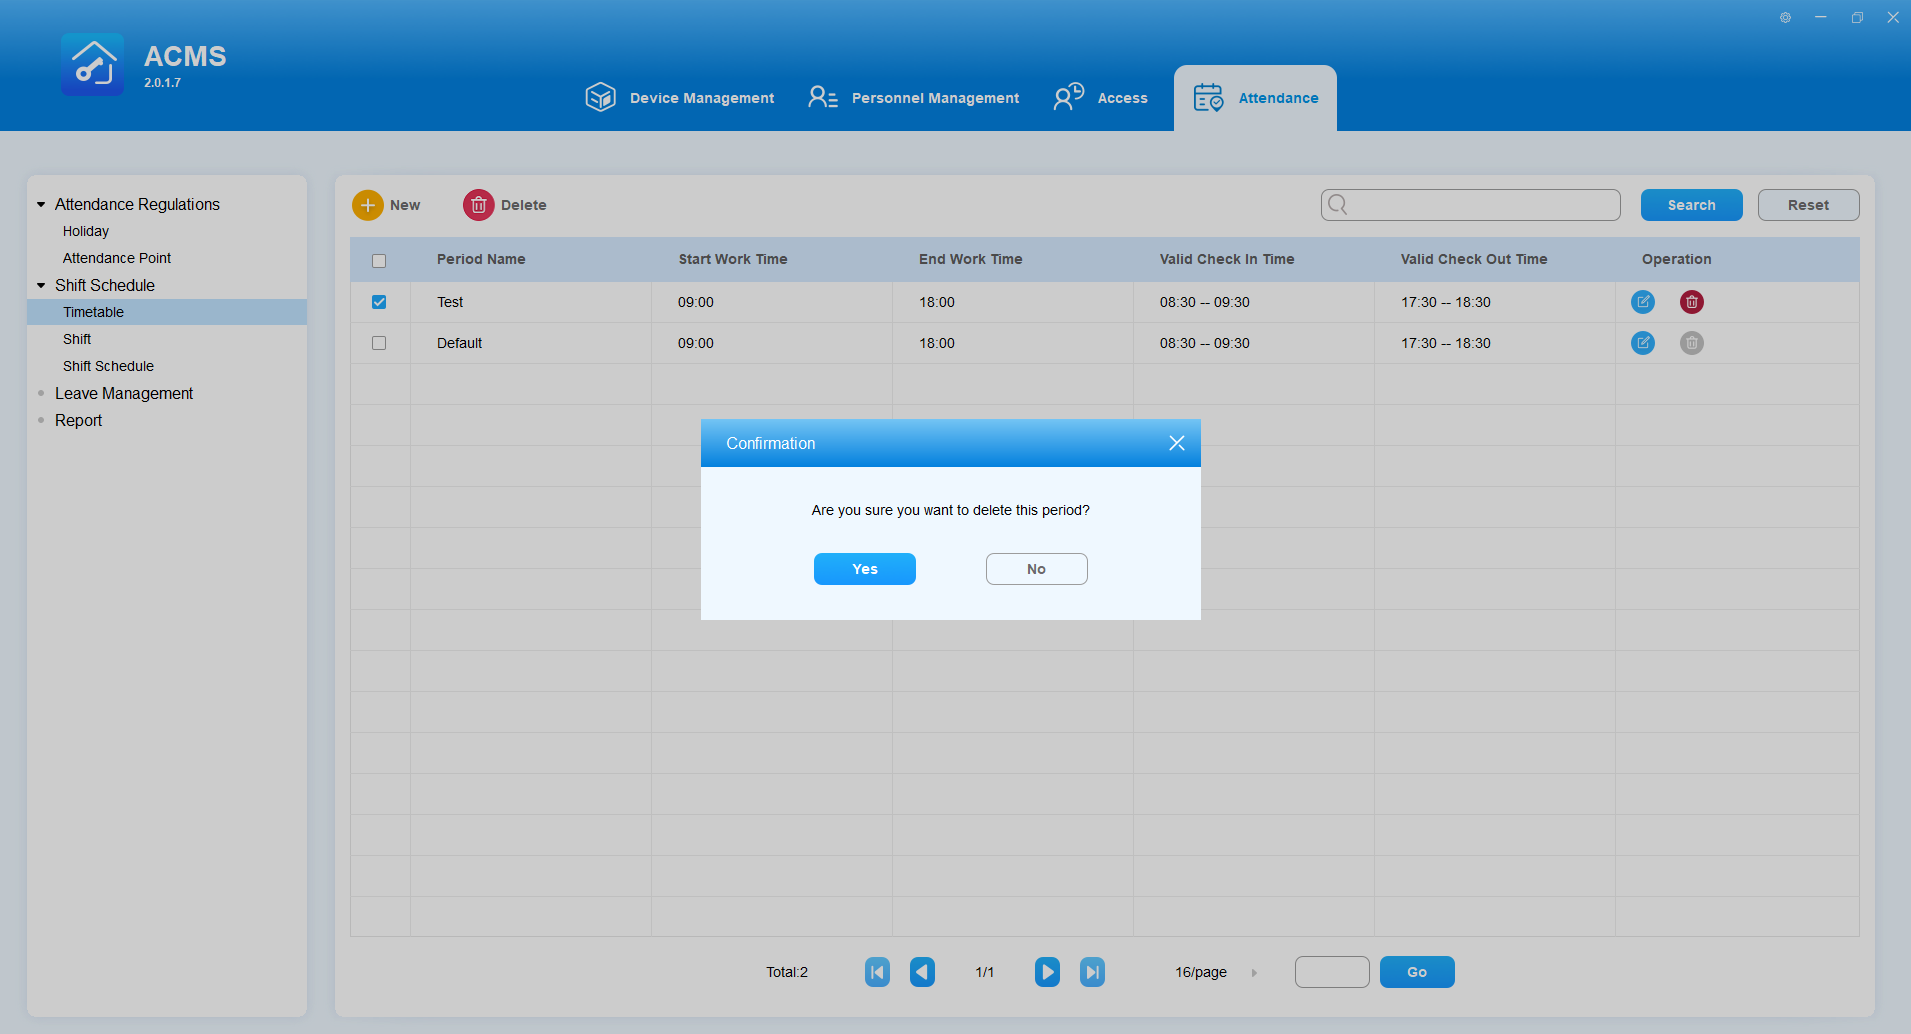
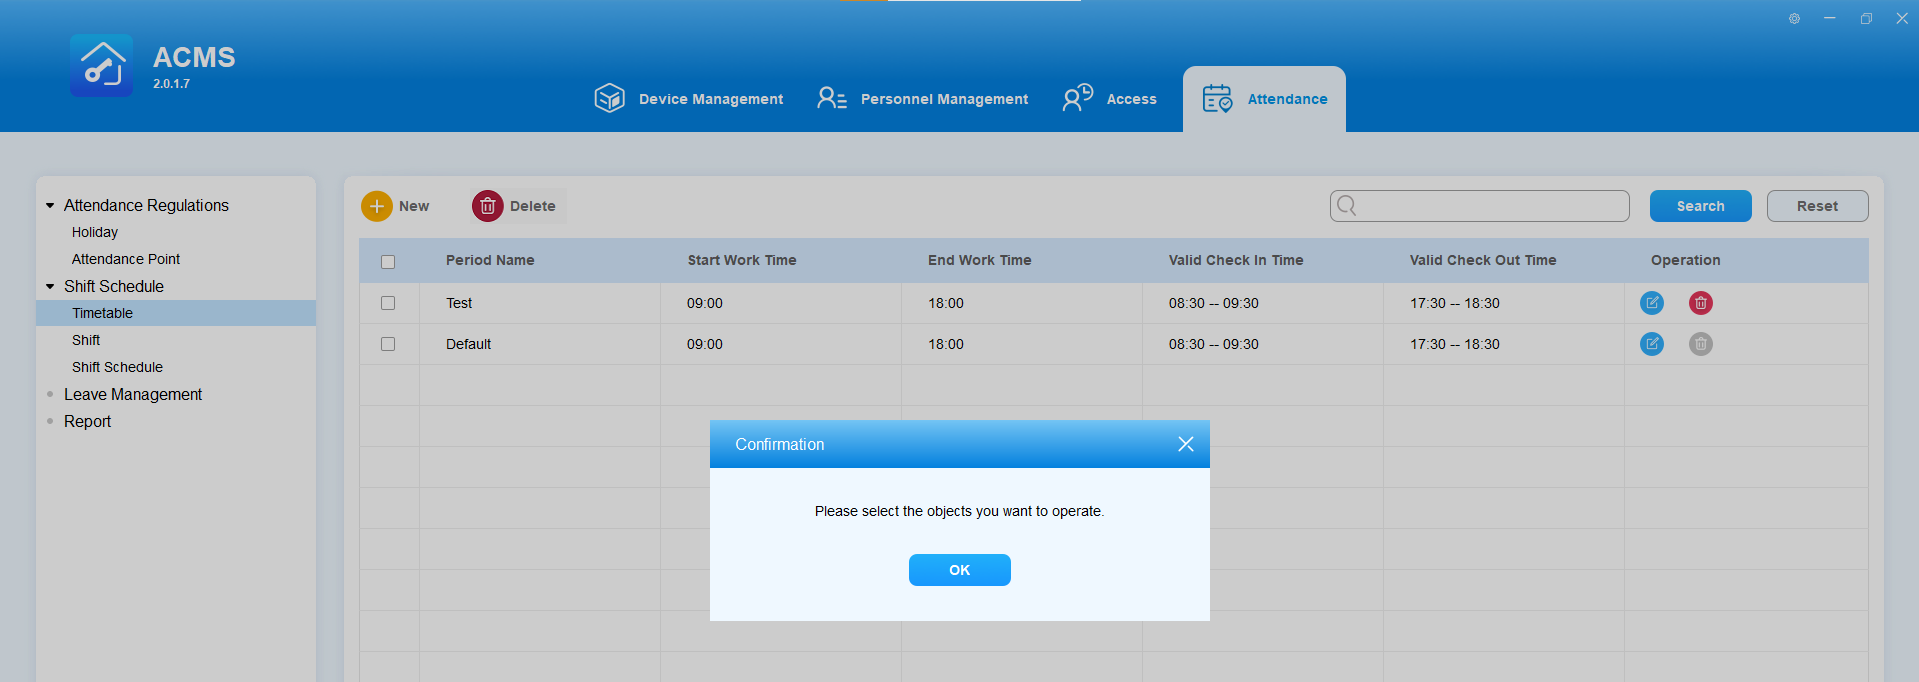
- Delete timetable separately
- Tick the checkbox of the specific timetable you want to delete.
- Click Yes for the confirmation.
- Delete timetable in batch
- Tick the checkbox
 of the timetables you want to delete.
 - Tick the checkbox if you want to delete the existing timetables.
- The default timetable CANNOT be deleted.
- Timetables that have been assigned to shifts CANNOT be deleted.
Shifts
You can create shift templates and assign them to employees.
Create a shift
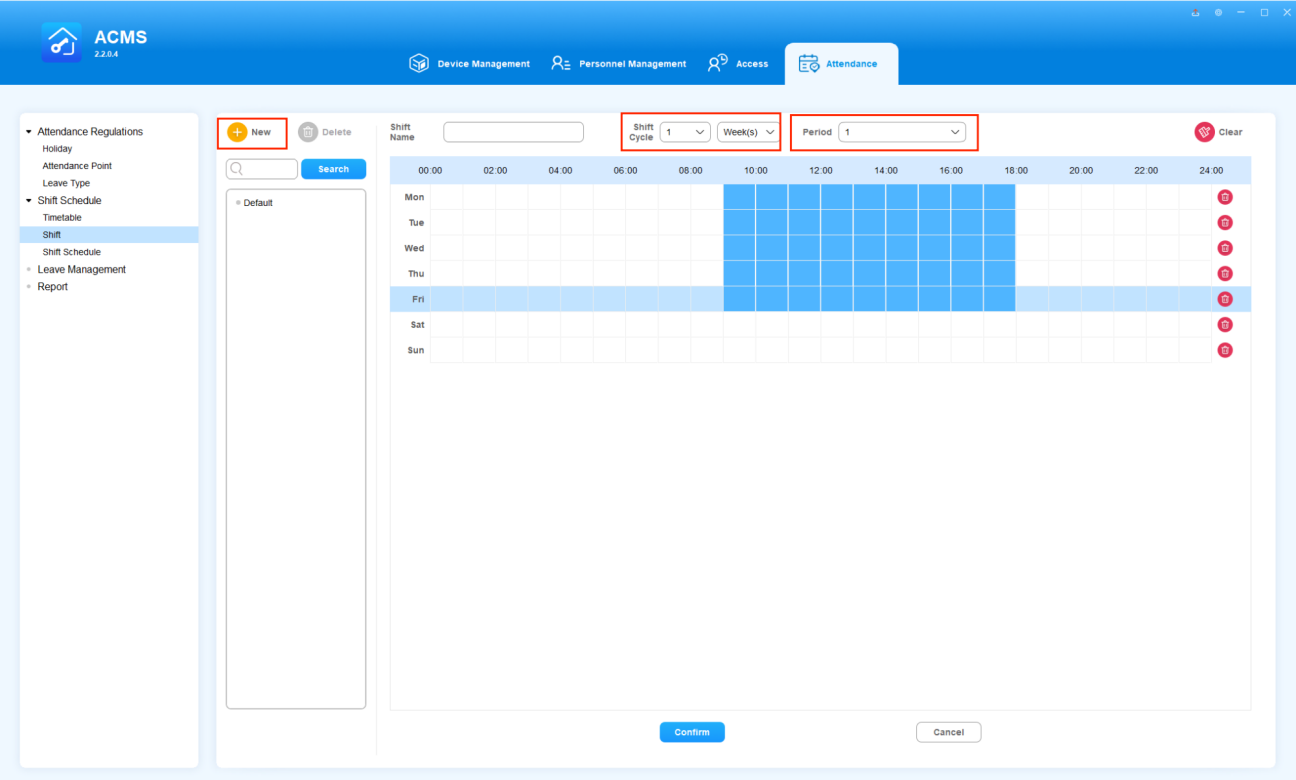
To create a shift template, do as the following.
- Click on
 to start creating shift schedules.
 - Select the created timetable template(s) for the shift schedule in the Period field.
- Setting up the shift schedule to be carried out by day, week, or by month as well as the shift cycle times.
- Click on and blue high-light days you want to implement the shift and click
 if you want to clear the day(s) high-lighted.
Parameters Setup
No. | Field Name | Description |
1 | Period | Select the timetable template to be applied to the shift to be created. You can select multiple timetable templates for the shift on a weekly and monthly basis if needed. |
2 | Shift Cycle | Select the shift to be carried out on a daily, weekly, or monthly basis and the shift cycle times. For example, if you set the shift by month and shift cycle as three times, then you will be getting a total of 9-month shifts with a three-month cycle, meaning the following two "three-month" shifts will be carried out in the same way as the first three-month shift. |
3 | Shift Name | Name the shift according to your need. |
Search a Shift
You can search the needed shift when there are multiple shifts.
- Enter the shift name in the search box.
- Click on Search.

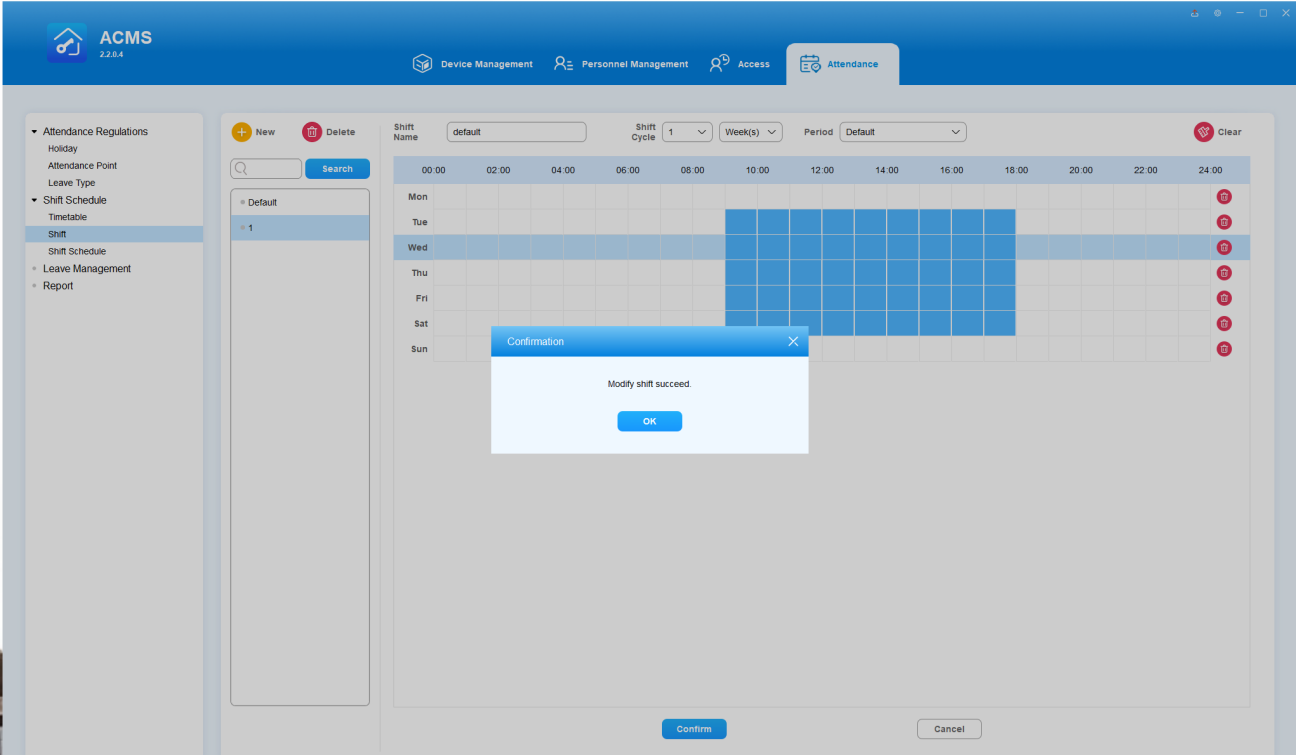
Edit a Shift
You can edit the shift templates in terms of changing the shift name, shift cycle, and shift timetable (Period).
- Click on the shift template you want to edit in the shift column.
- Change the shift name, shift cycle, and shift timetable (Period) according to your need.
- Click on Confirm.
Delete a Shift
- Click on the shift template you want to delete in the shift column on the left.
- Click on
 to delete the shift.
 - Click on Confirm, and then Yes.
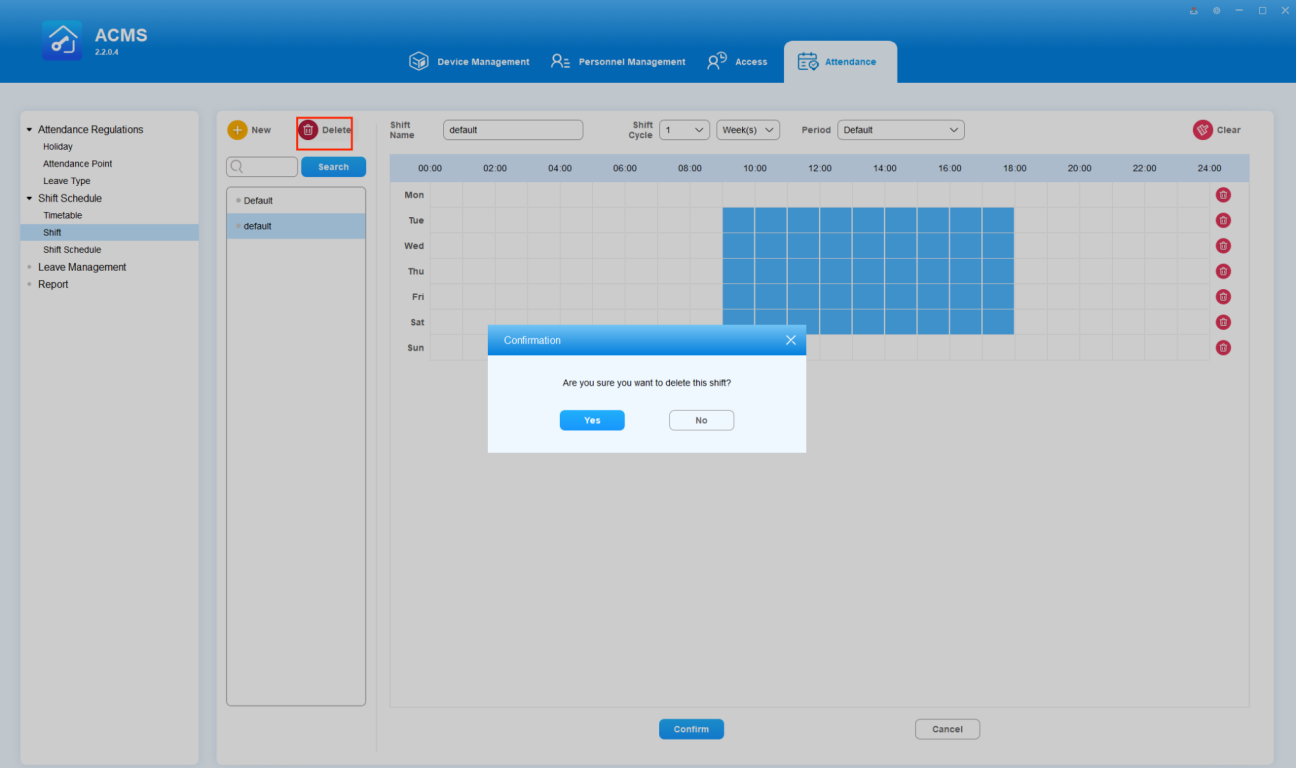
- A shift template cannot be deleted if the shift template is being applied to any employees.
Shift Management
After you created shift template(s) you can select the specific shift template from the shift inventory and applied it to the employees' regular shift and temporary shift schedule while defining how long a shift should last, and to which department(s) and employee(s) the shift is to be assigned. And you can search, check, and delete shift(s) afterward if needed.
Assign Regular Shift to Employees
You can assign a regular shift template to the specific department(s)and employee(s).
- Click on
 .
. - Select the shift schedule template and the time range you want to apply.
- Select the department(s) and employee(s) you want the shift to be applied to.
- An employee can only be assigned one regular shift schedule, therefore the previous one will be replaced automatically by the new one if you insist on the replacement.
- A shift cannot be deleted if the shift is being applied to a specific employee.
Assign Temporary Shift to Employees
You can assign a temporary shift schedule to the specific employees of the specific department when a temporary change or adjustment of shift for the employee is needed.
- Click on
 .
. - Select the shift and the time range you want the shift to be applied.
- Select the department(s) and employee(s) you want the shift to be applied to.

- An employee can only be assigned with one temporary shift schedule, therefore the previous one will be replaced by the new one if you insist on the replacement.
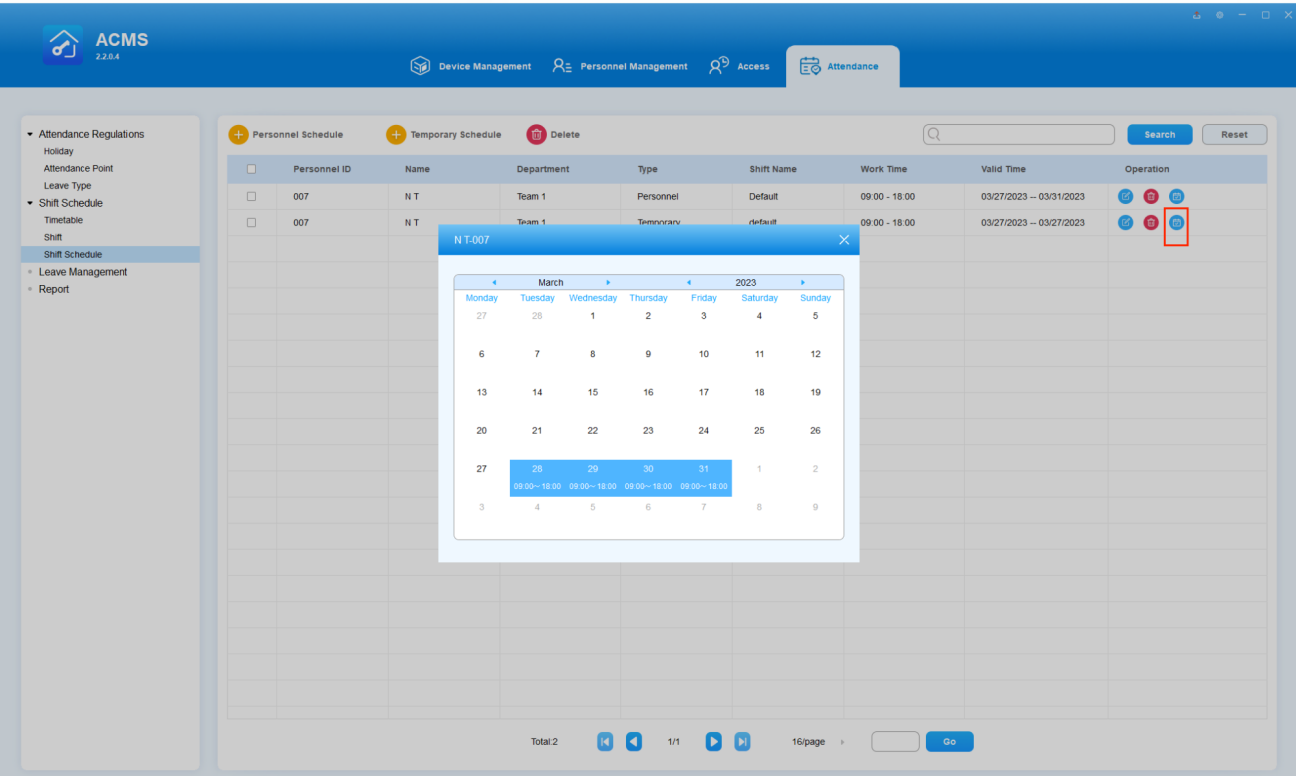
Search/Check the Assigned shift
You can search the regular and temporary shifts that are assigned to the employees. You can also check the work calendar of the employee for the details.
- Search the employees' shift by entering the employee's name and ID number in the search field. Click on Reset to quickly clear the search field if needed.
- Click on
 of the specific employee if you want to check the employee's work calendar.
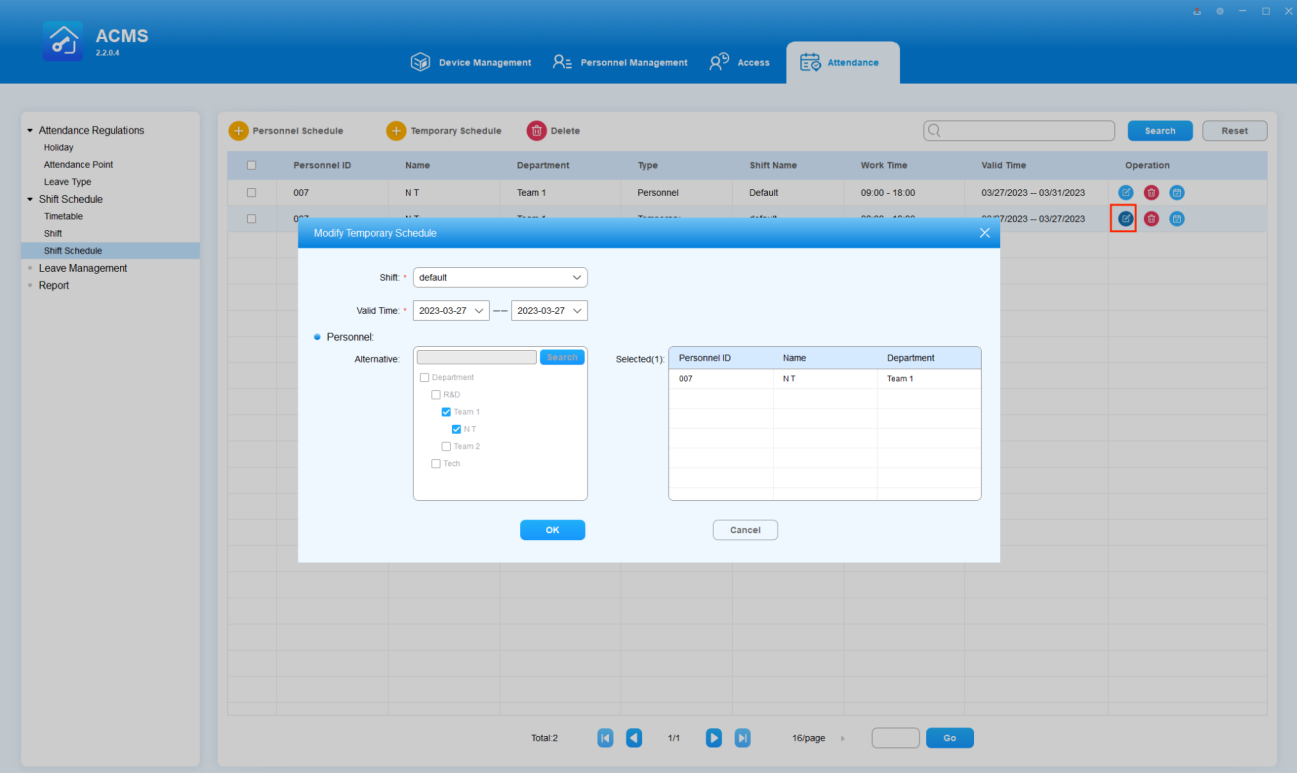
Edit the Assigned Shift
You can edit the assigned shift in terms of changing the shift and shift valid time range for the specific employee if needed.
- Click on
 of the specific assigned shift you want to edit
 - Change the shift and shift valid time range for the assigned shift.
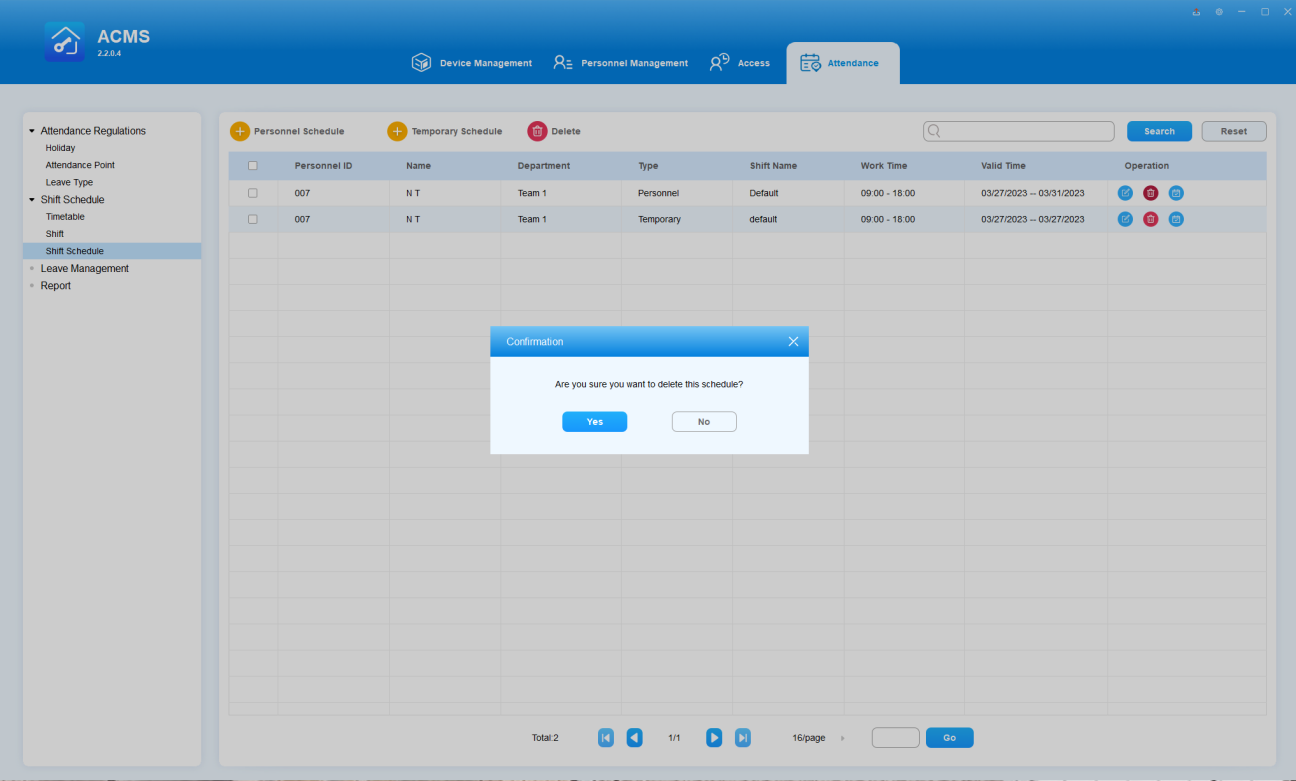
Delete the Assigned Shift
You can delete the assigned shift(s) if needed.
- Click on the
 of the specific assigned shift if you want to delete it separately.
 - Tick the checkbox(s) of the assigned shift(s) and click
 to delete all of the shifts.
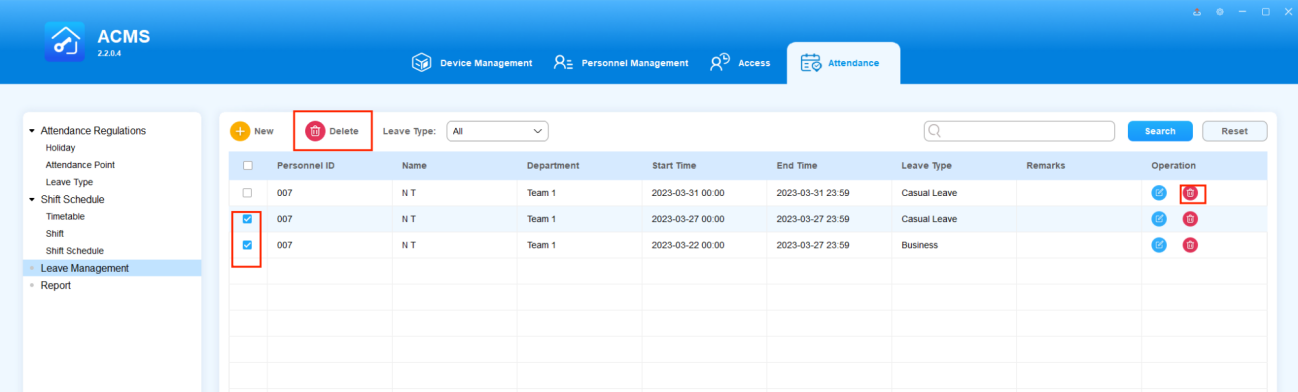
Leave Management
You can create, search, edit and delete employee leaves.
Customize Leave Types
AMCS allows you to add additional leave types if the default ones cannot meet the actual needs. This feature is used in conjunction with the Leave Management.
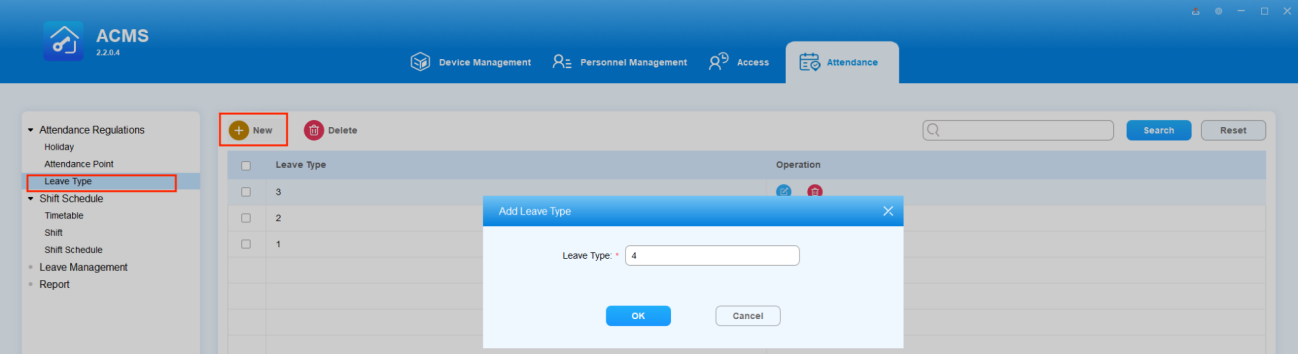
Add a new leave type
- On the Attendance Regulations > Leave Type, click on
 .
. - Name the leave type. Note that the name must not be empty or duplicate with existing types.
- Click OK.
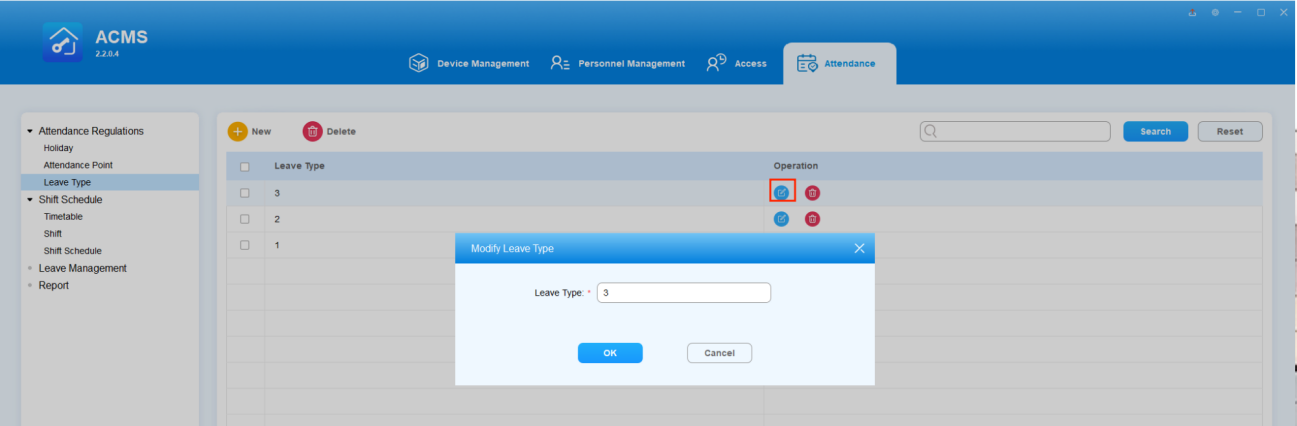
Edit a Leave Type
When editing a leave type, the new name will be synchronized in real-time with the Leave Management module.
- However, the leave type that has already been used cannot be modified.
To edit a leave type, just double click it or click on  in its Operation column.
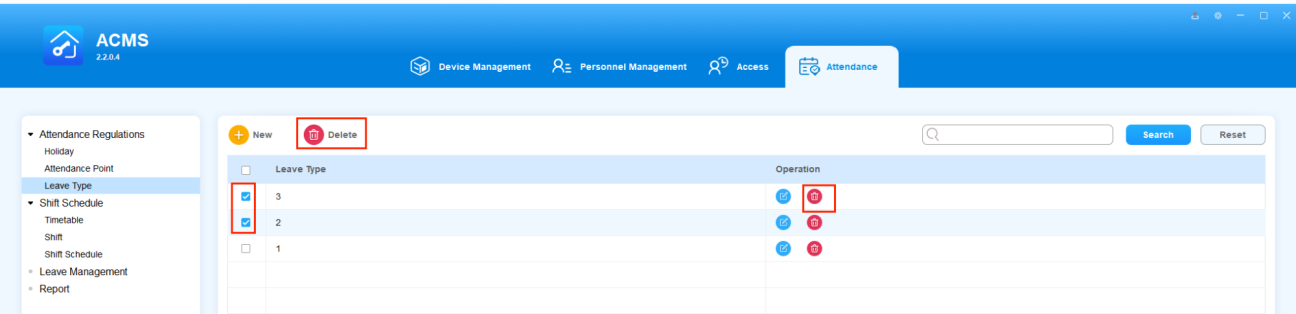
Delete the Leave Type
You can delete a leave type if it is no longer needed. Once a leave type is deleted, it will no longer be displayed on Leave Management module.
- The used leave type cannot be removed unless all associated leave applications are first deleted.
To delete single leave type, just click on  in its Operation column. If you want to delete more than one of them, check off the desired types and click on
  .
.
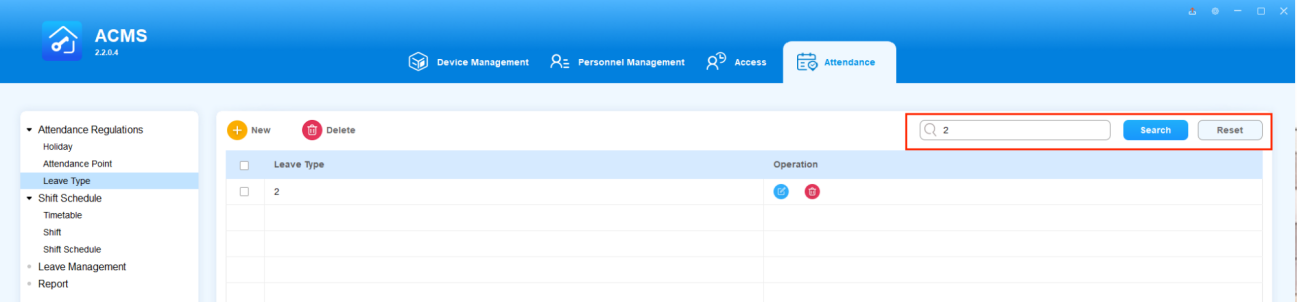
Search a Leave Type
The Leave Type interface allows you to search for leave types by entering the name of the type.
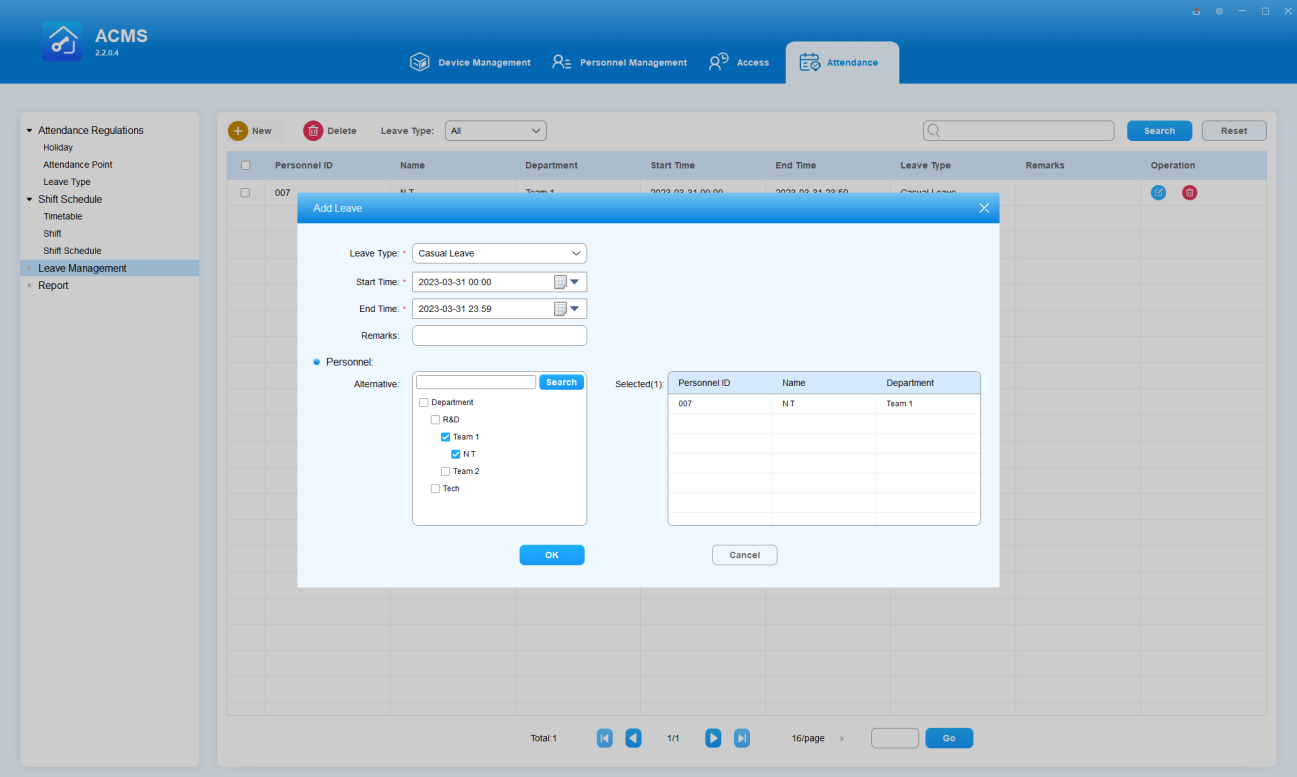
Add a Leave
You can create leaves for the employees by defining what the leave types are, when the leave starts and ends, to which employee the leave is to be applied, etc.
- Enter the leave information.
- Select the employee(s) to whom the leave is to be applied.
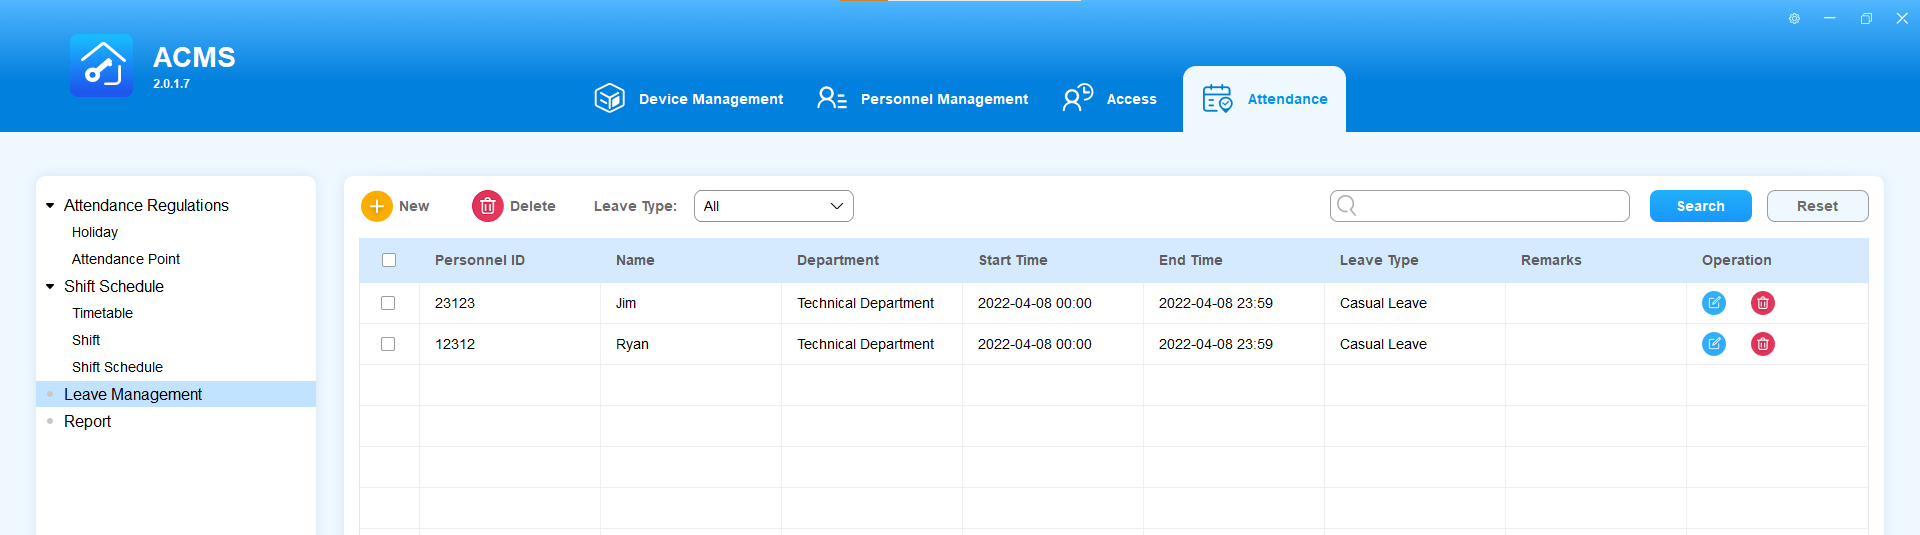
Search a Leave
- Select the leave type to narrow down the search range if needed.
- Search leaves by entering the employee ID or name in the search field.
Edit a Leave
You can edit leave in terms of changing the leave type, leave start time, and end time.
- Click on
 of the specific leave you want to edit.
 - Change the leave information.

Delete a Leave
You can delete leave separately or in batch.
- Click on
 of the specific leave you want to delete.
 - Tick the checkbox
 of the leaves you want to edit or tick to delete all the leaves.
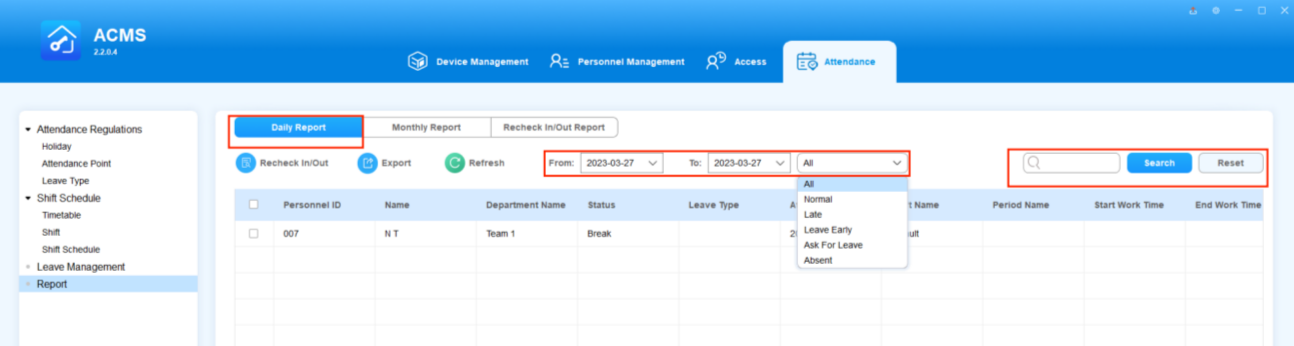
Attendance Report
Search/Check/Export Daily Attendance Report
You can manage your attendance report in terms of searching, checking, and exporting your attendance report on a daily basis.
Click on  , you can see all employees daily attendance reports. Do any of the following if needed:
- Search specific reports by
- Entering employee’s name or ID number,
- Selecting a certain attendance type from the pull-down list; Or
- Choosing a time range.
- Export an xls. format reports by clicking on
 and selecting the information display on the reports.
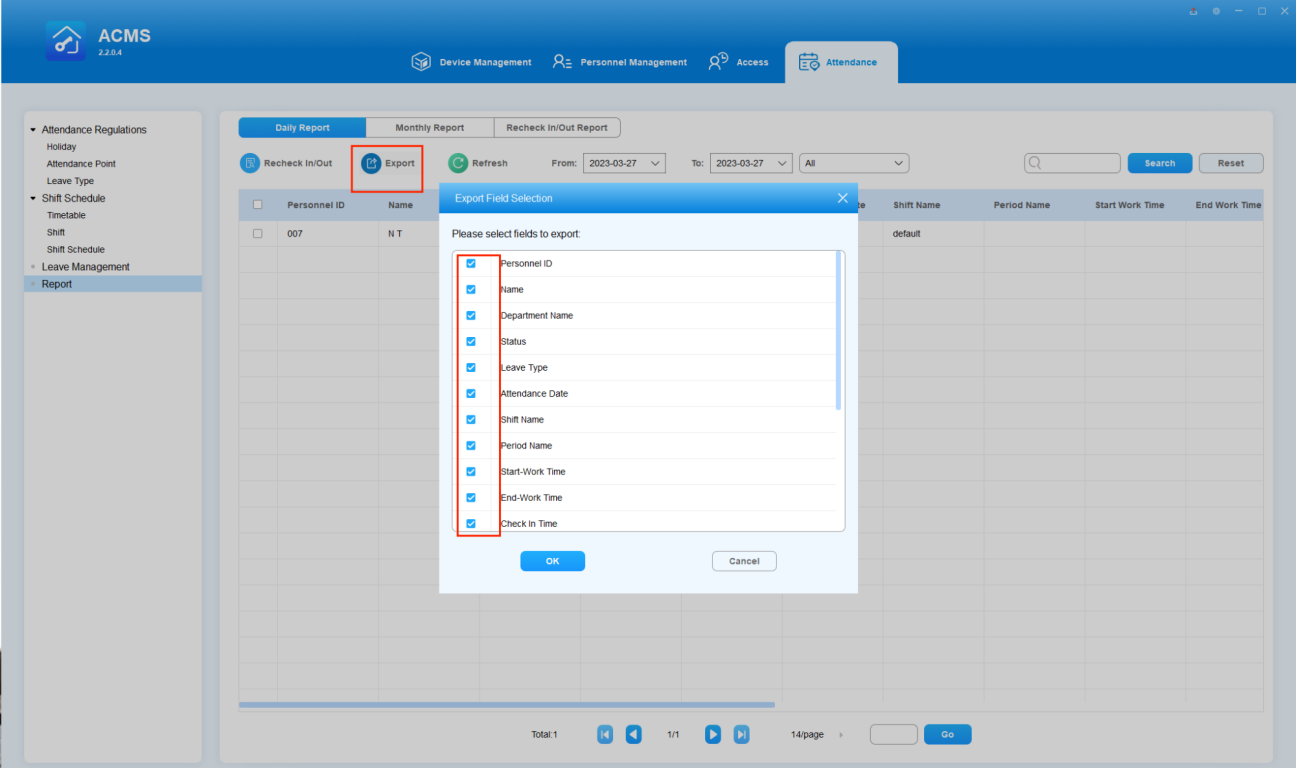
The following is a daily attendance report example.

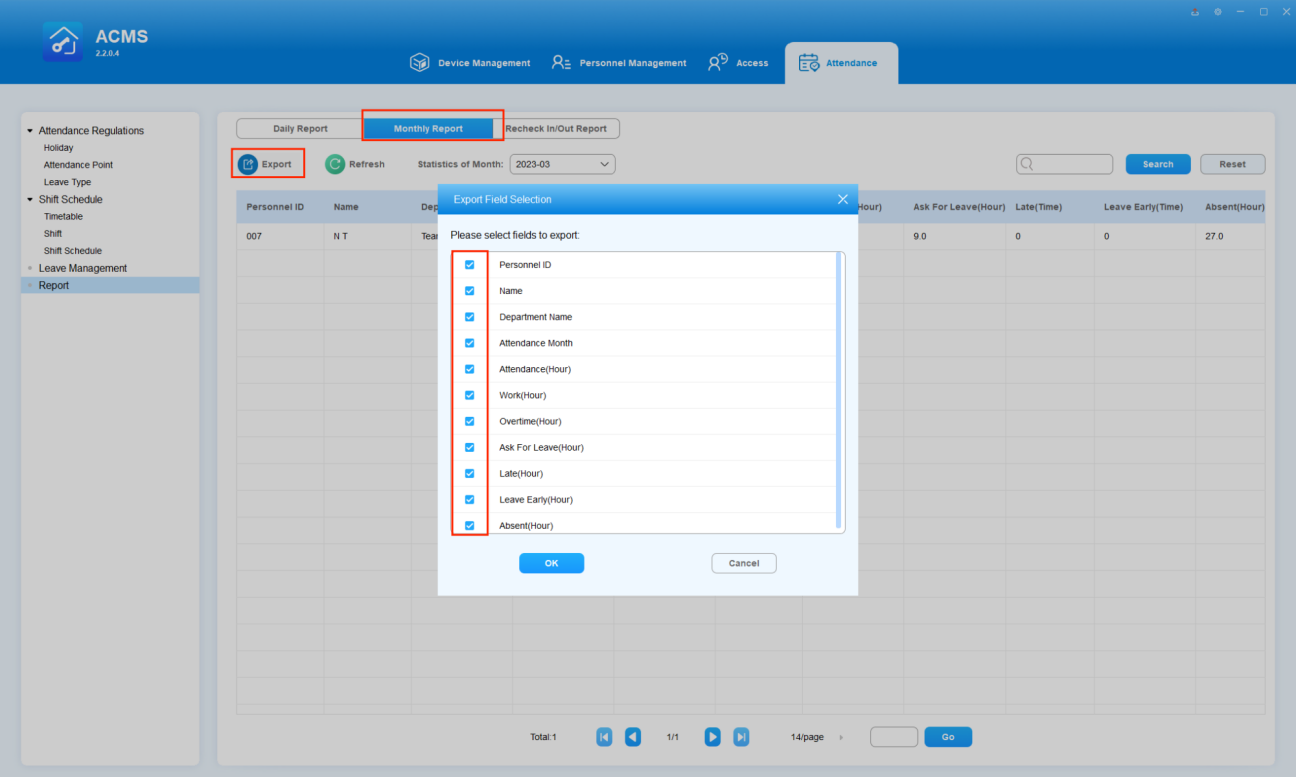
Search/Check/Export Monthly Attendance Report
Click on  , you can see all employees monthly attendance reports. Do any of the following if needed:
- Search specific monthly report by
- Entering employee’s name or ID number.
- Select a certain month.
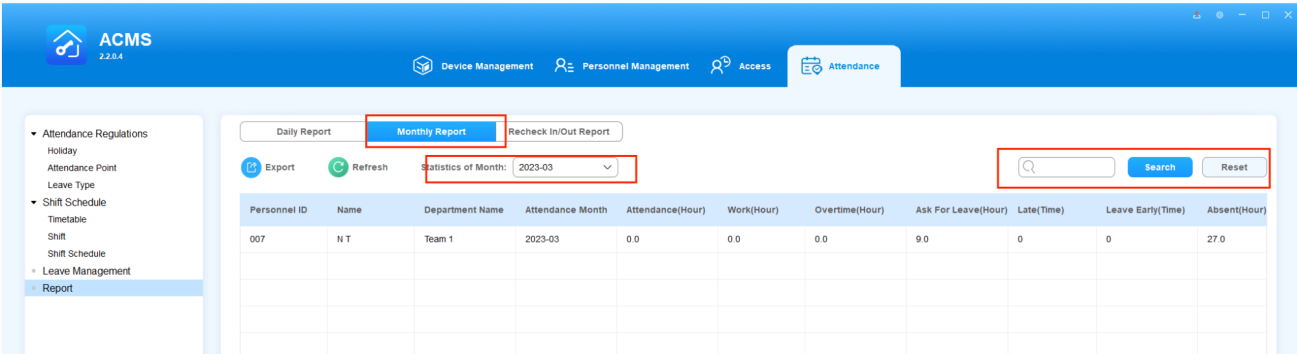
- Export an xls. format reports by clicking on
 and selecting the information display on the reports.
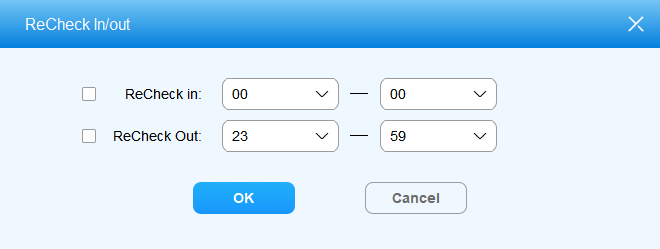
Correct Check-In/Out Time
You can correct employee's clock in/out time by performing a rechecking. You can also fix the missed punch if employees forgot to clock in or out.
- Click on
 .
. - Check off the record(s) that you want to fix the check-in/out time.
- Click on
 .
.
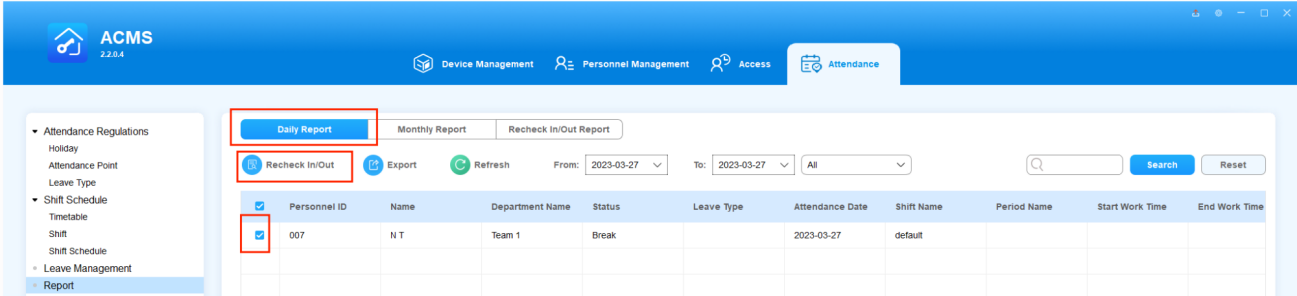
4. Tick the checkbox of the missing check-in or check-out, and click OK. The employee's attendance record will be updated accordingly.
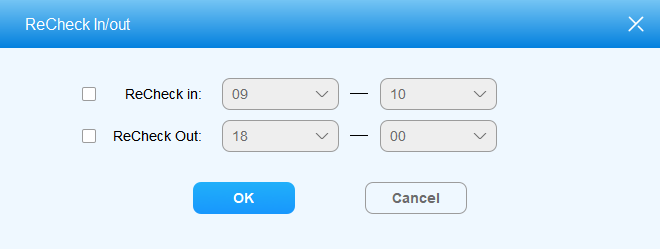
- The time for the re-clock must be within the employee's designated working hours, otherwise the re-clock will fail.
- If you need to recheck for multiple employees at one time, they must be assigned with the same shift.
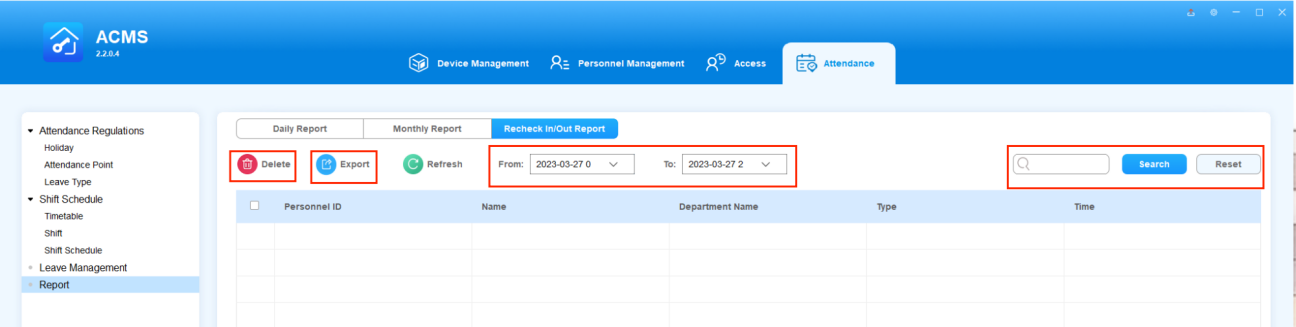
Check/Export/Delete the Recheck-In/Out Record
Click on  , then you can see all employees rechecking reports. Do any of the following if needed:
- Search specific rechecking report by
- Entering employee’s name or ID number.
- Select a certain time range.
- Export an xls. format reports by clicking on
 .
. - Delete reports by checking off the specific reports and clicking
 .
.
System Settings
ACMS allows you to export the system data to your PC as a backup in advance, which can be later imported back to the ACMS in case missing data occurs. In addition, you can also create and modify the password.
Set a System Language
ACMS now supports 4 languages: English, Chinese, Russian, and Turkish.
To set your preferred language, click on  in the upper right corner, and select System Settings > Language.

Import and Export System Data
- Export System Data
- Click on
 in the upper right corner and select Database from the pull-down list.
 - Click
 and select the path to which you want to export the data to your computer.
 - Click on
 in your computer to confirm the path.
 - Click OK for confirmation.
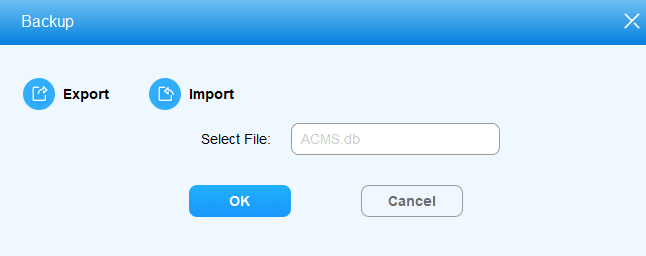
- Import System Data
- Click on
 in the upper right corner and select Database from the list.
 - Click on
 to select the data file to be imported to the ACMS.
 - Click Open to upload the file, then click Yes for confirmation.
- The data file to be imported into ACMS should be in .db format.
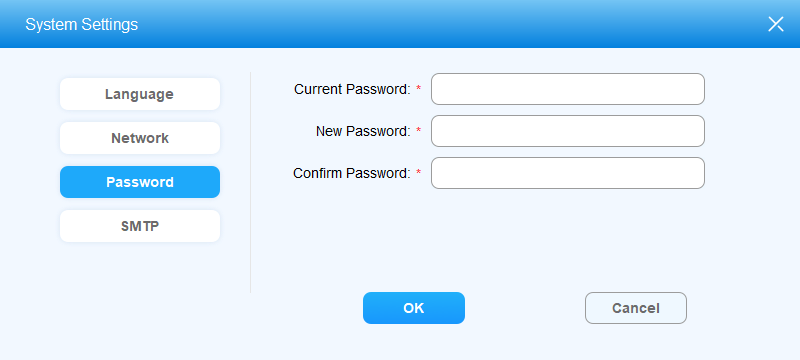
Modify Login Password
- Click on
 in the upper right corner and select System Setting in the pull-down list.
 - Click on Password.
- Change the password.
- Click on OK.
SMTP Configuration for Emails
SMTP is used for sending employees PIN codes when creating authentication codes. To set this up, click on  in the upper right corner, and select System Settings > SMTP.
- Some email servers require enabling the SMTP service before sending and receiving emails successfully.
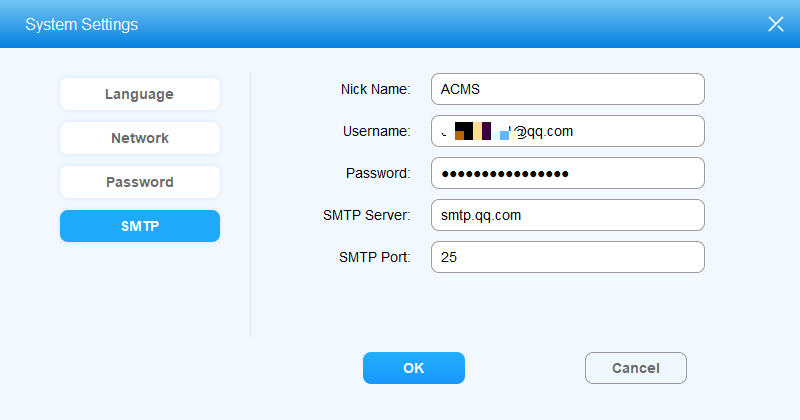
Parameters Setup:
- Nick Name: To customize the sender’s name.
- Username: The email address used for sending emails.
- Password: The password of the email that you used for sending emails.
- SMTP Server: The address of the SMTP server.
- SMTP Port: The port number of the SMTP server.
Employees will receive such a PIN code email:

Lock/Unlock ACMS
You can lock the ACMS interface using the Login password when you are managing the ACMS for security purpose.
To lock the software, click on  in the upper right corner, and select Lock from the pull-down list.
To unlock, you have to enter the login password.
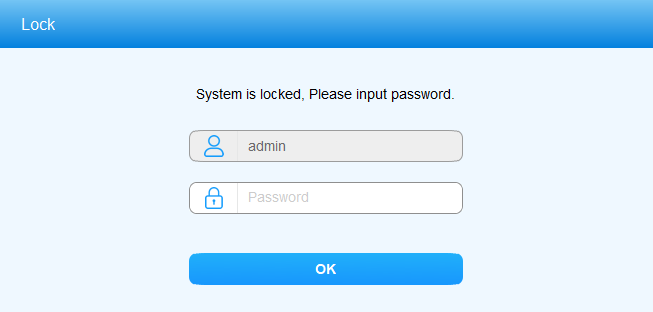
- The default unlock password is admin.
Contact Us
For more information, please visit us at www.akuvox.com or feel free to contact us by
Sales email: sales@akuvox.com
Technical support email: support@akuvox.com
Telephone: +86-592-2133061 ext.7694/8162
We highly appreciate your feedback about our products.