Philips Hue
Before You Start
Power your light.
Plug your bridge in and power it up.
Connect the bridge to the same local network as your home center device.
Add a Philips Hue light
Tap
 on the bottom tab bar, and tap
 at the upper right.
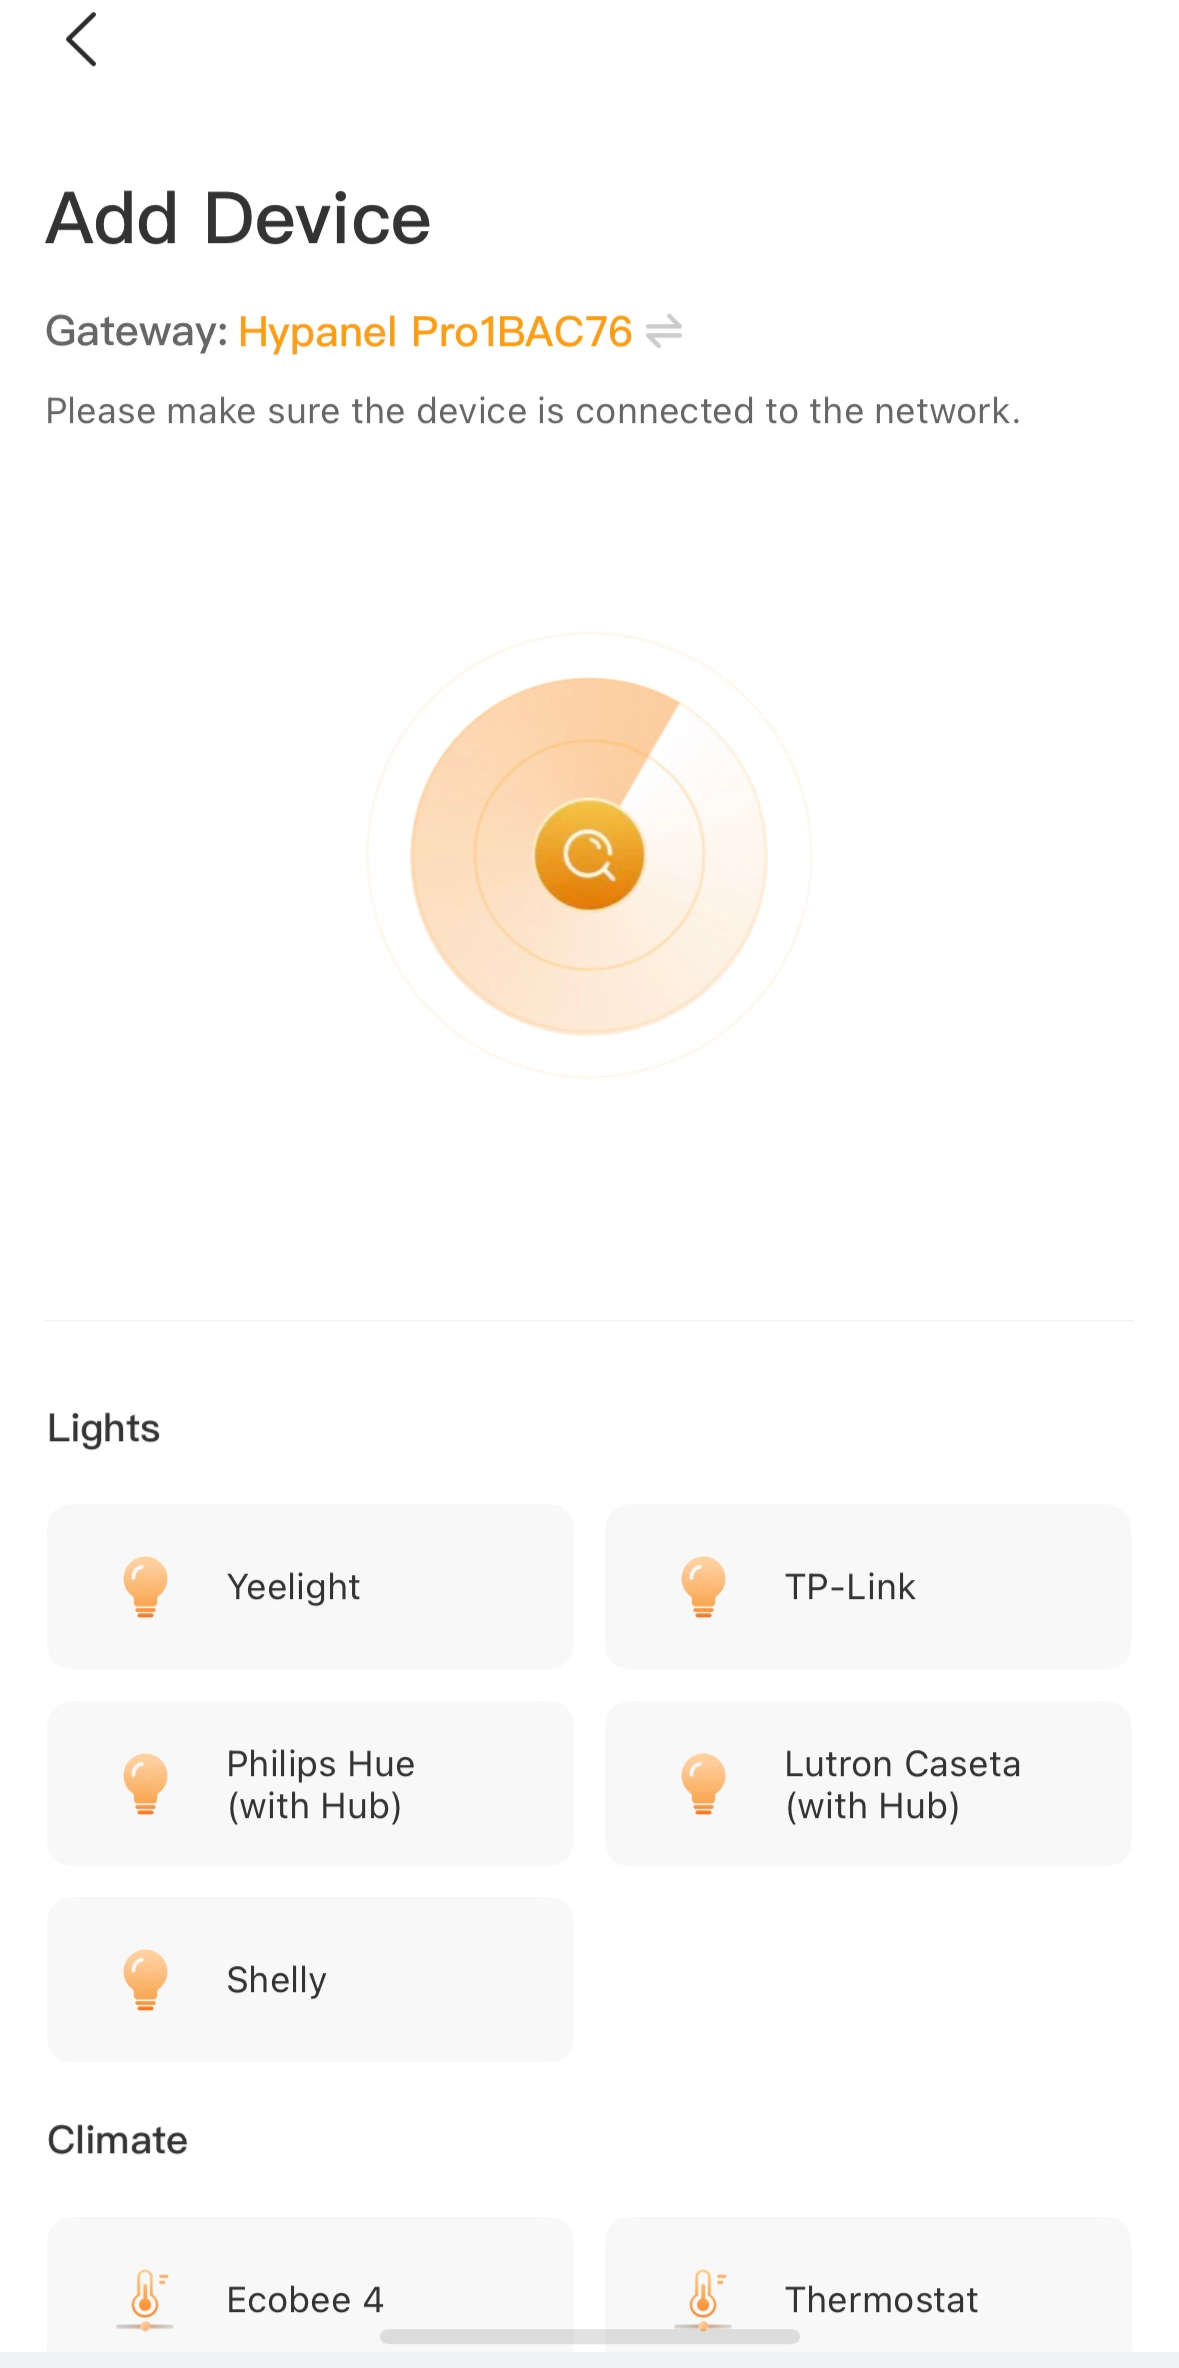
 The selected panel will automatically search the nearby devices.
Select Philips Hue from the device list.
Confirm the device is connected to the same network as the panel, then tap Next.
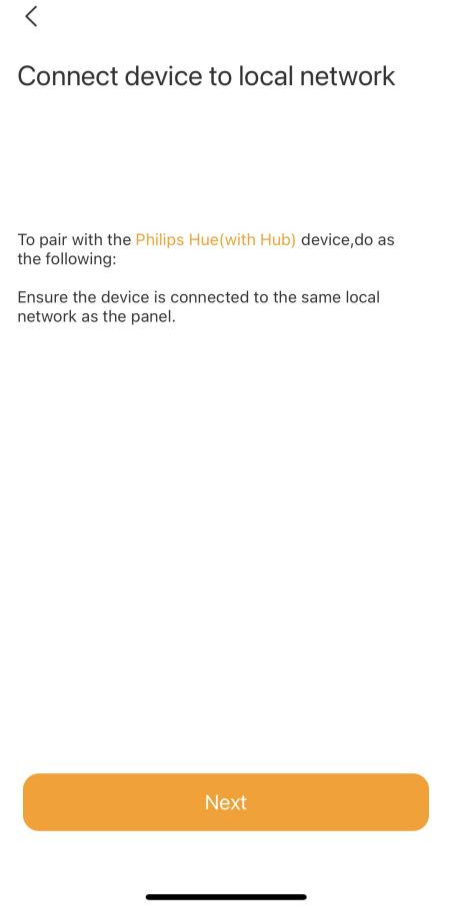
Follow the onscreen instructions to complete the settings.
TP-Link Kasa
Before You Start
Power your TP-Link Kasa device.
Set up your TP-Link Kasa device in Kasa Smart app.
Connect your TP-Link Kasa device to the same local network as your home center device.
Add a TP-Link Kasa
Tap
 on the bottom tab bar, and tap
 at the upper right.
 The selected panel will automatically search the nearby devices.
Select TP-Link kasa from the device list.
Confirm the device is connected to the same network as the panel, then tap Next.
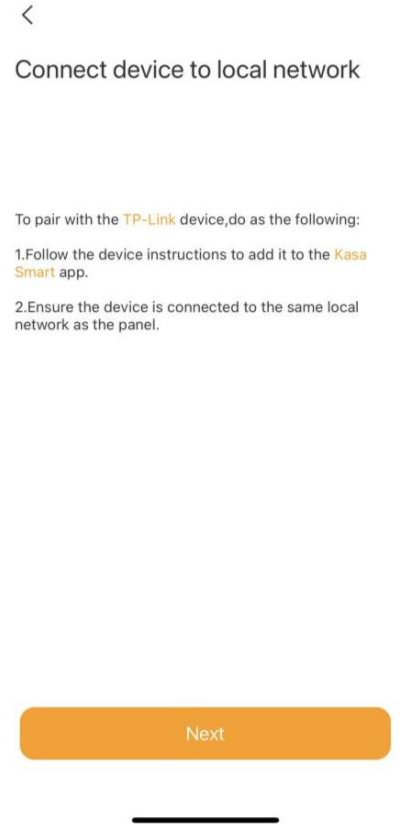
Follow the onscreen instructions to complete the settings.
Lutron Caseta
Before You Start
Make sure your Lutron Caseta switch is installed for the lights you want to control. Power the switch on.
Use an Ethernet cable connect your Lutron Smart Bridge to an open LAN port on your router. The bridge should be in the same local network as your home center device.
Add and set up your Lutron Smart Bridge and Lutron Caseta switch in Lutron app.
Add a Lutron Caseta Switch
Tap
on the bottom tab bar, and tapat the upper right. The selected panel will automatically search the nearby devices.
Select Lutron Caseta from the device list.
Confirm the device is connected to the same network as the panel, then tap Next.
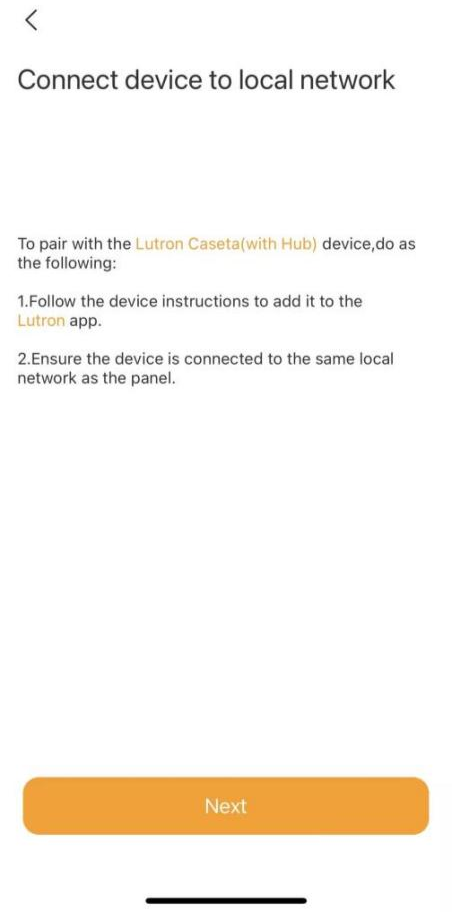
Follow the onscreen instructions to complete the settings.
Sonos
Before You Start
Power up your Sonos speaker.
Add and set up the speaker in Sonos app.
Connect the speaker to the same local network as your home center device.
Add a Sonos Speaker
Tap
on the bottom tab bar, and tapat the upper right. The selected panel will automatically search the nearby devices.
Select SONOS from the device list.
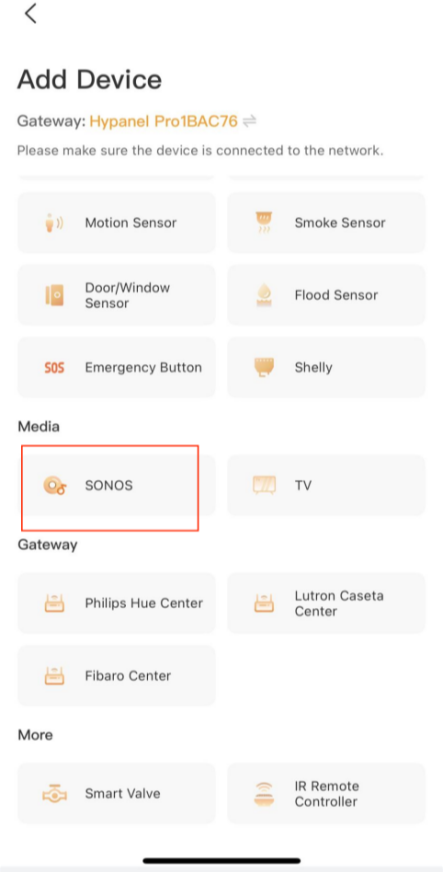
Confirm the device is connected to the same network as the panel, then tap Next.
Follow the onscreen instructions to complete the settings.
Yale Locks
Before You Start
Connect your Yale lock to power.
Put the lock to pairing mode.
Add a Yale Lock
Tap
on the bottom tab bar, and tapat the upper right. The selected panel will automatically search the nearby devices.
Select Yale from the device list.
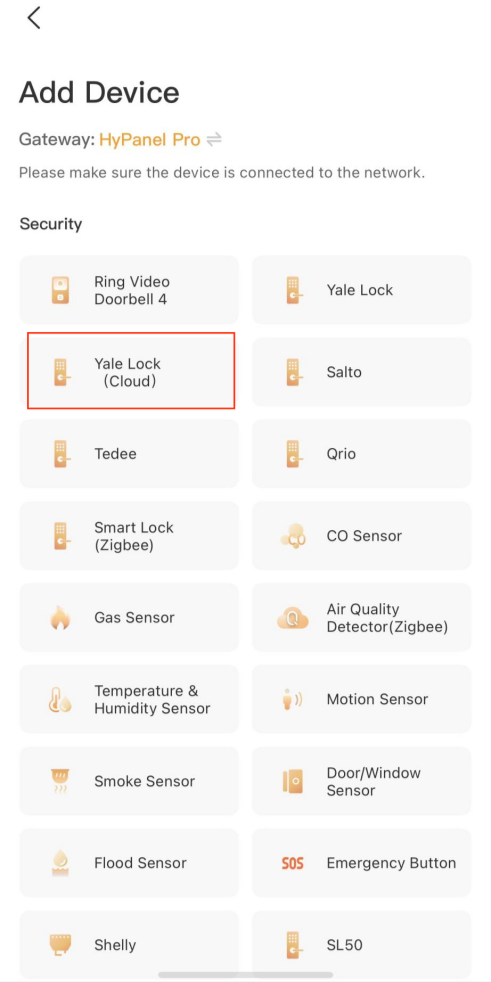
Follow the onscreen instructions to complete the settings.
Ring Video Doorbell
Before You Start
Connect your Ring video doorbell to power.
Add and set up the Ring doorbell in Ring app.
Connect the doorbell to the same local network as your home center device.
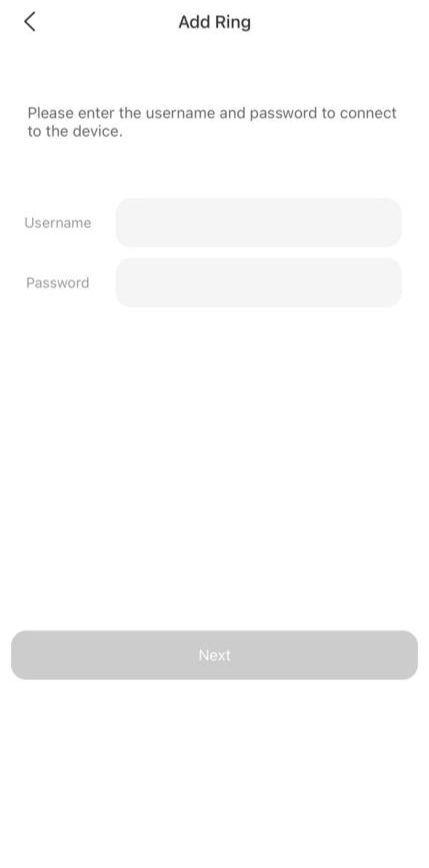
Add a Ring Video Doorbell
Tap
on the bottom tab bar, and tapat the upper right. The selected panel will automatically search the nearby devices.
Select Ring Video Doorbell 4 from the device list.

On the followed screen, enter the username and password of your Ring app. Tap Next. The system will send a verification email to the associated email address.
Enter the verification code you received. Tap Next.

Wait for the adding result, and tap Next.
Specify the device’s location, name it, and tap Finish.
Ecobee
Before You Start
Power up your Ecobee4.
Add and set up Ecobee4 in Ecobee app.
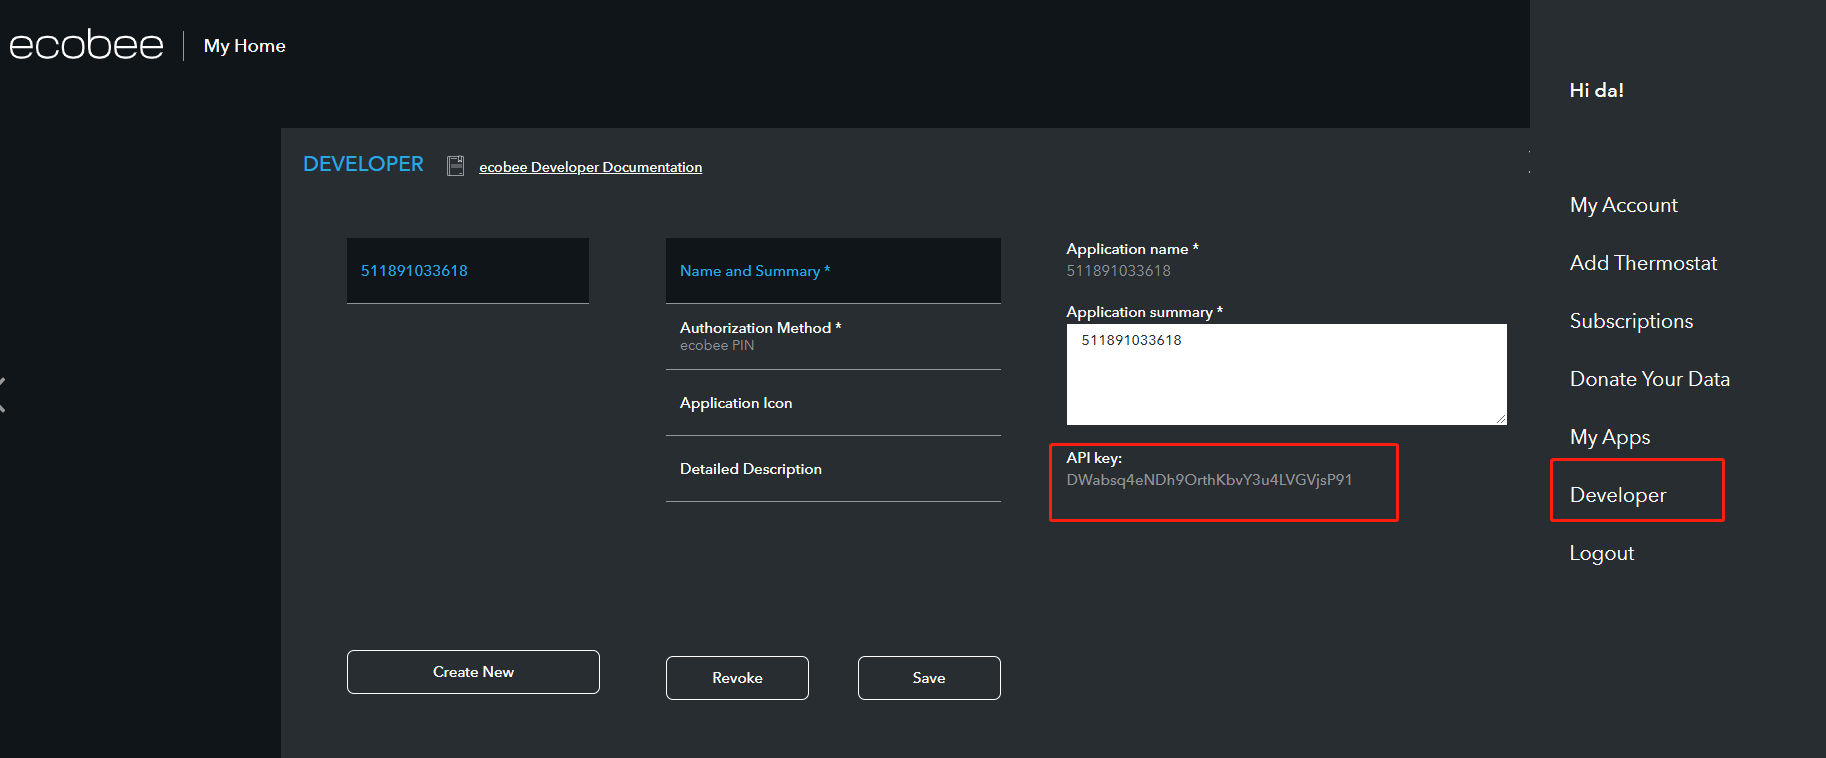
Obtain an API key from ecobee’s developer site:
Log at ecobee.com, and click
 at the upper right.
Select Developer. On the followed page, you can see the API key. Copy the key.
NOTE:
Do NOT leave or close the website. You will need it in the adding process.
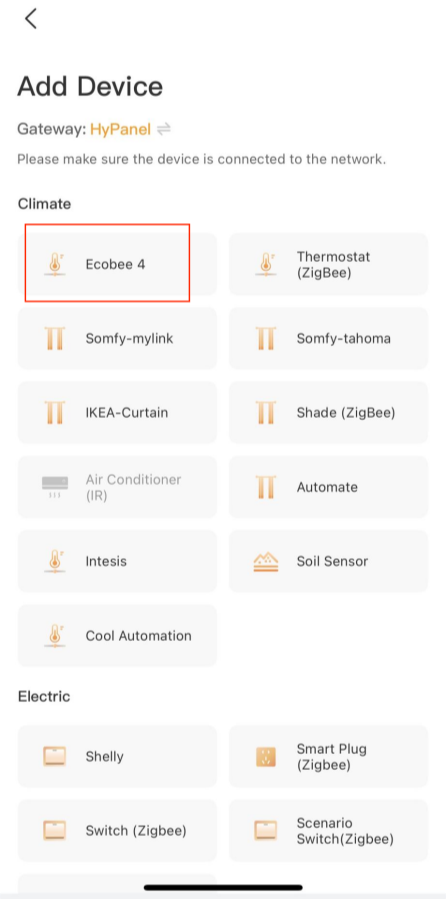
Add a Ecobee4
Tap
on the bottom tab bar, and tapat the upper right. The selected panel will automatically search the nearby devices.
Select Ecobee 4 from the device list.
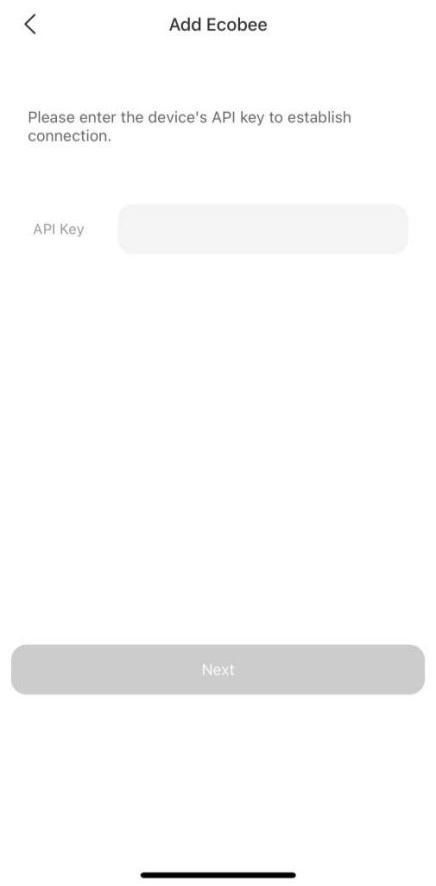
Click the discovered Ecobee device. On the followed screen paste its API key to the box, and tap Next.
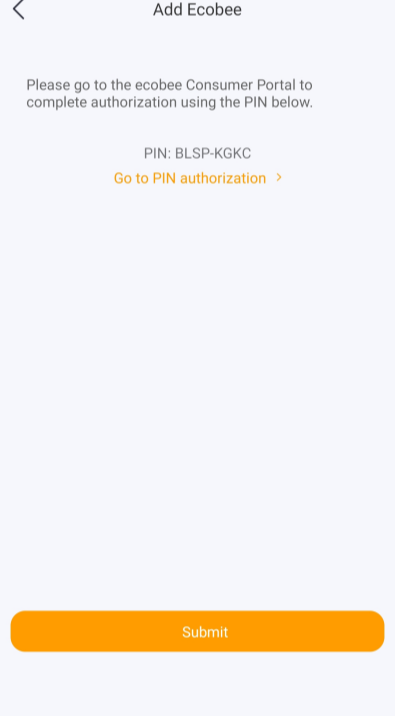
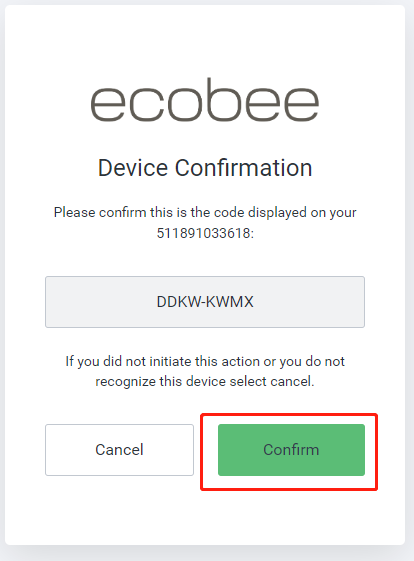
The followed screen displays a PIN code. Copy the PIN, tap Go to PIN authorization, and login with your Ecobee username and password.
Turn to Ecobee web portal, navigate to
 > My Apps > Add Application. Paste the PIN code into the box, and click Validate.
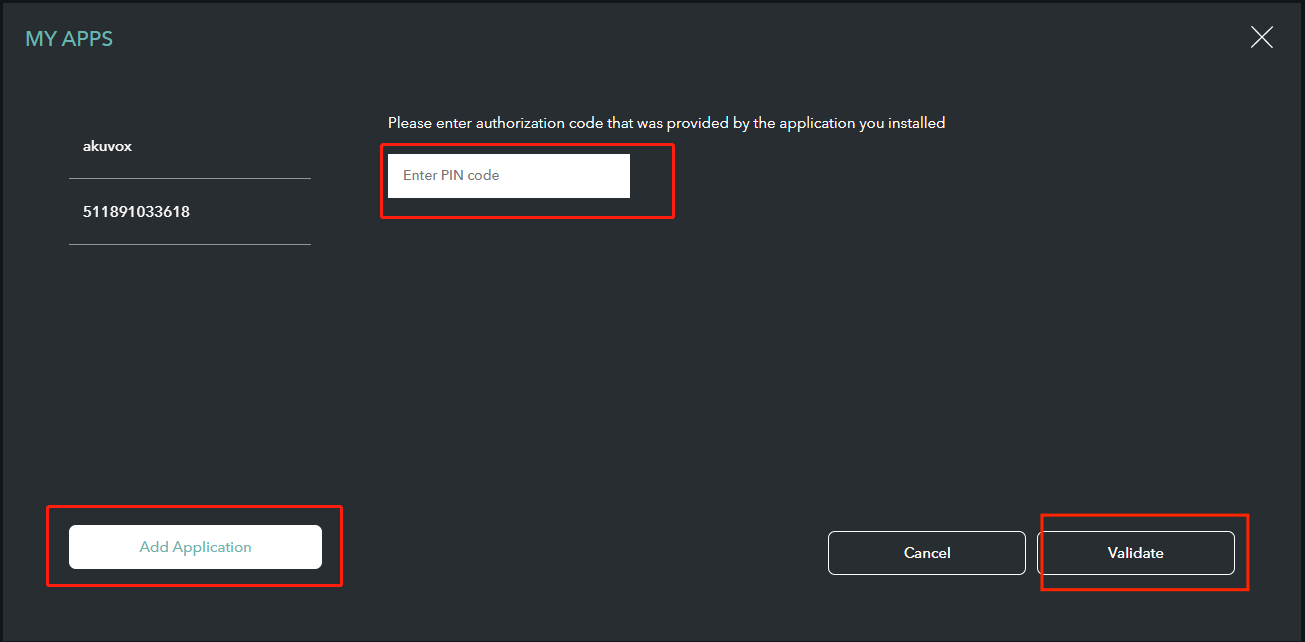
Tap Confirm on the next page.
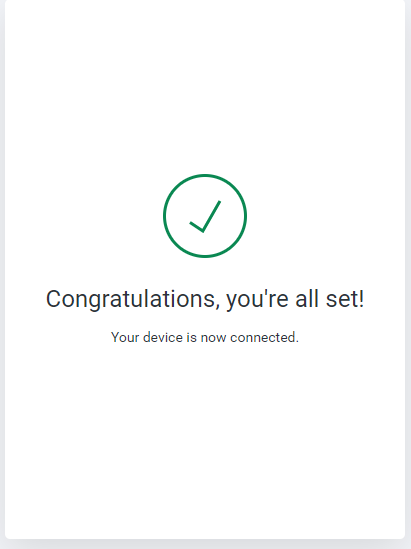
Go back to BelaHome, and tap Next on the adding result screen.
Specify the device’s location, name it, and tap Finish.
Shelly Switches
Before You Start
Connect your Shelly device to power.
Add the Shelly device in Shelly app.
Connect Shelly to the same local network as your home center device.
Add a Shelly switch
Tap
 on the bottom tab bar, and tap
 at the upper right.
 The selected panel will automatically search the nearby devices.
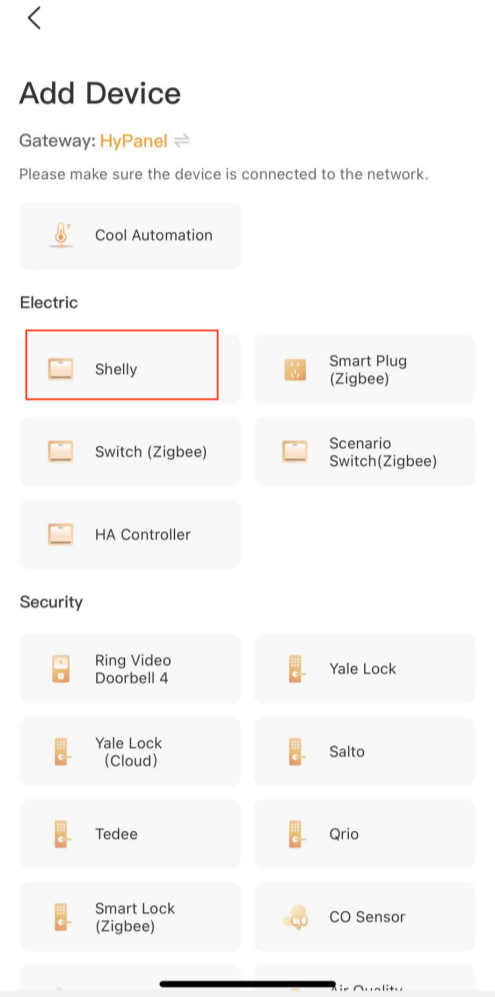
Select Shelly from the device list.
Confirm the device is connected to the same network as the panel, then tap Next.
Follow the onscreen instructions to complete the settings.
Yeelight
Before You Start
Connect your Yeelight to power.
Add the Yeelight device in Yeelight app.
Connect Yeelight to the same local network as your home center device.
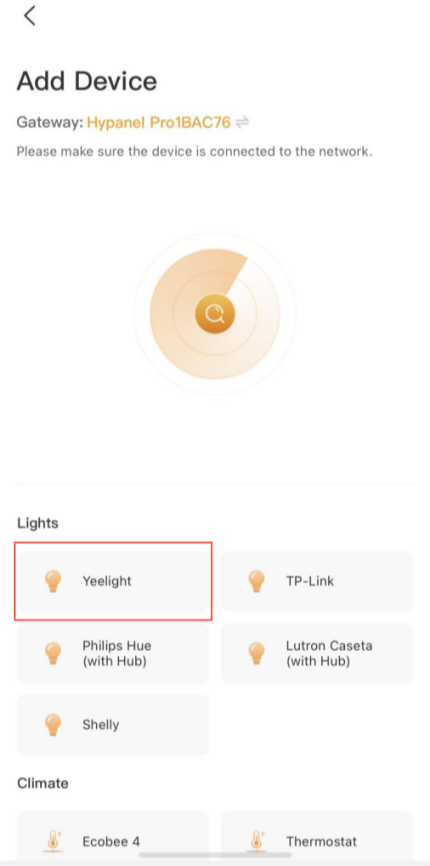
Add a Yeelight device
Tap
on the bottom tab bar, and tapat the upper right. The selected panel will automatically search the nearby devices.
Select Yeelight from the device list.
Confirm the device is connected to the same network as the panel, then tap Next.
Follow the onscreen instructions to complete the settings.
Somfy Shades
Before You Start
Connect your Somfy hub to power.
Add the Somfy shade motor to its hub.
Connect Somfy hub to the same local network as your home center device.
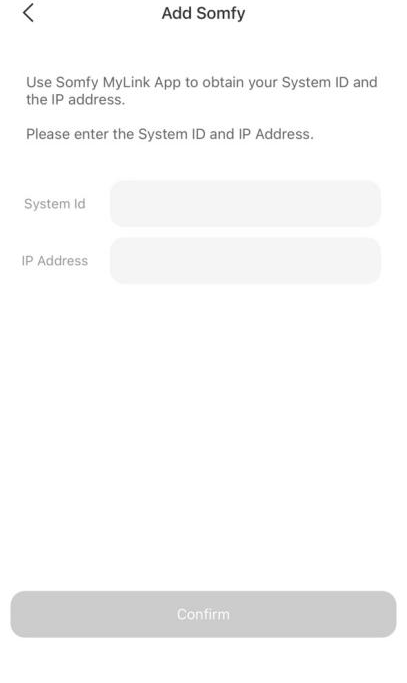
Have the Somfy’s system ID and IP address available. To get the required information, do as the following.
In Somfy App, tap the menu at the top left, select Integration, tap any ecosystems’ icon, and find the Current System ID.
In Somfy App, tap the menu at the top left, and go to Info > IP Address;
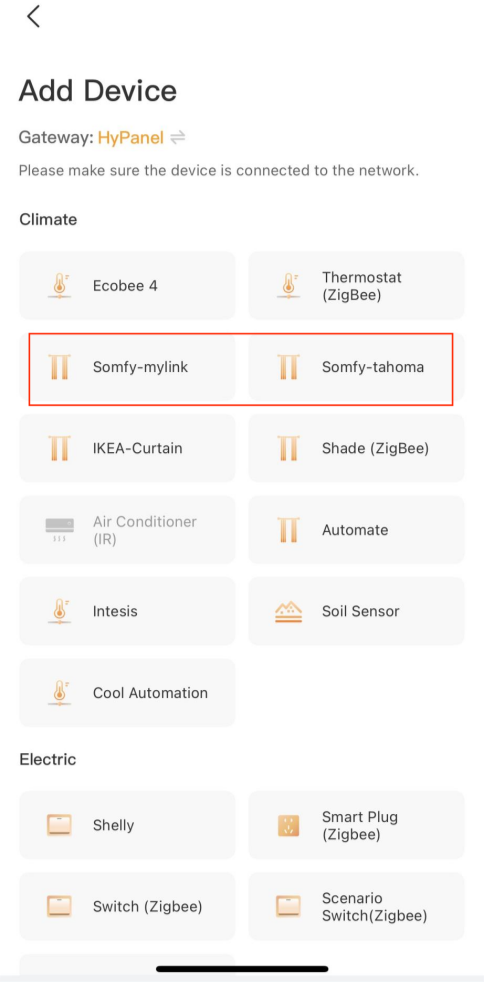
Add a Somfy Shade
Tap
on the bottom tab bar, and tapat the upper right. The selected panel will automatically search the nearby devices.
Select the desired Somfy device from the device list.
Enter the system ID and IP address you get in the Somfy app, and tap Next.
Wait for the adding result, and tap Next.
Specify the device’s location, name it, and tap Finish.
IKEA Shades
Before You Start
Make sure the battery of IKEA shade is fully charged.
Put the shade into paring mode. You can refer to its guide for detailed instructions.
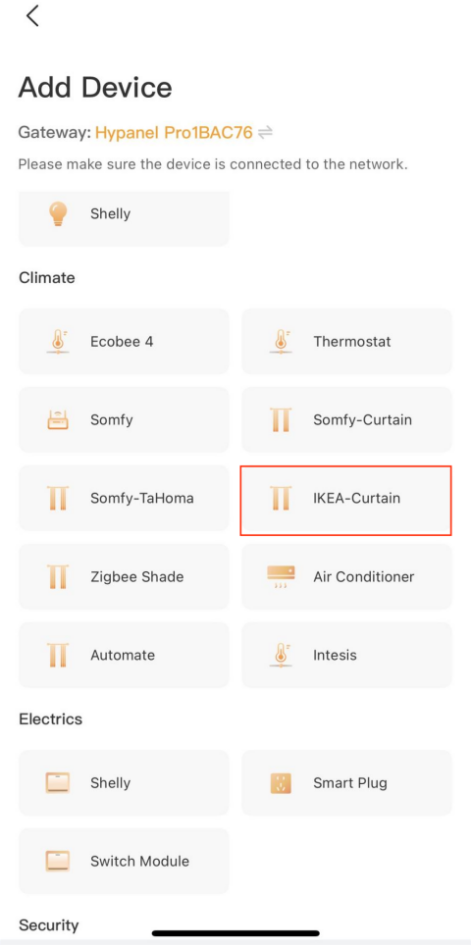
Add a IKEA Shade
Tap
on the bottom tab bar, and tapat the upper right. The selected panel will automatically search the nearby devices.
Select IKEA-Curtain from the device list.
Wait for the adding result, and tap Next.
Specify the device’s location, name it, and tap Finish.
Fibaro Hubs
Before You Start
Connect your Fibaro hub to power.
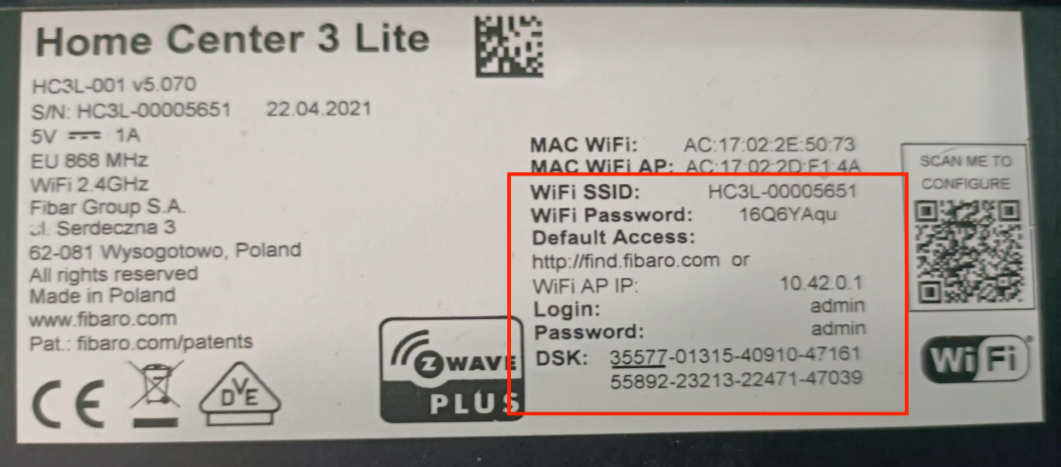
Check the login credentials for Fibaro hub web interface. The default account and password can be found on the back of the hub.
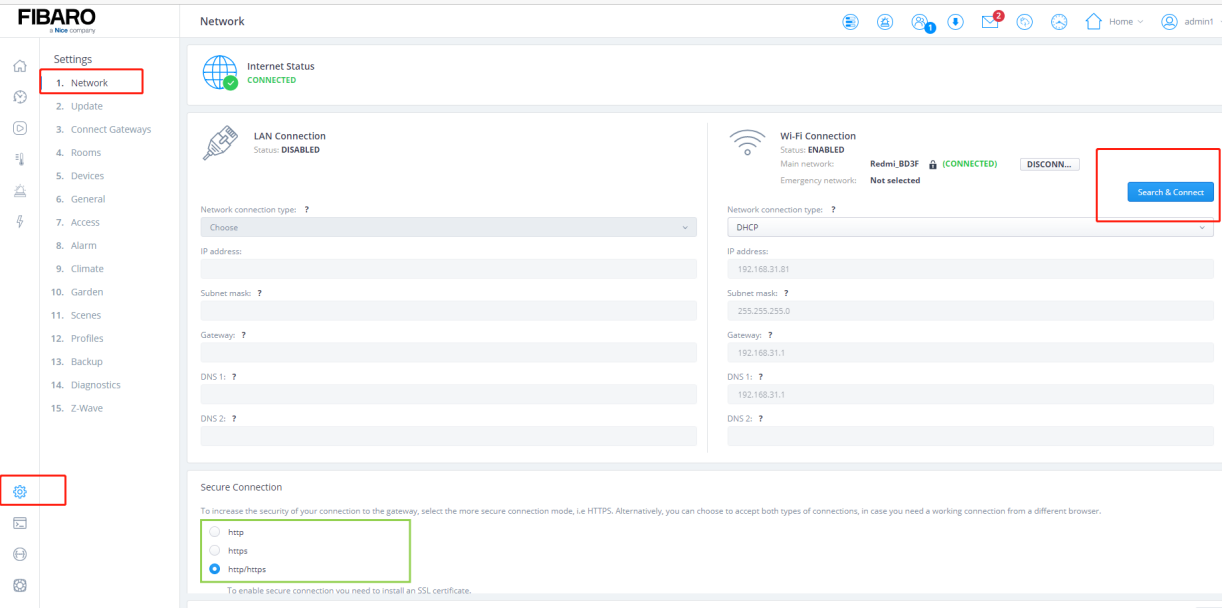
Connect Fibaro hub to the same local network as your home center device. You can go to
 > Network on the Fibaro hub web interface to check and change the connected network.
 On the Fibaro hub web interface’s Network screen, select http or http/https.
Add a Fibaro Hub
Tap
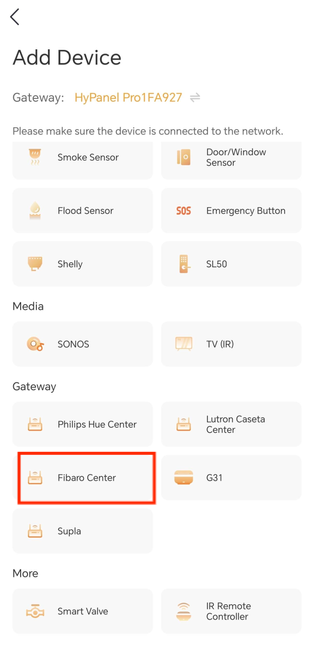
on the bottom tab bar, and tapat the upper right. The selected panel will automatically search the nearby devices.
Select Fibaro Center from the device list.
Confirm the device is connected to the same network as the panel, then tap Next.
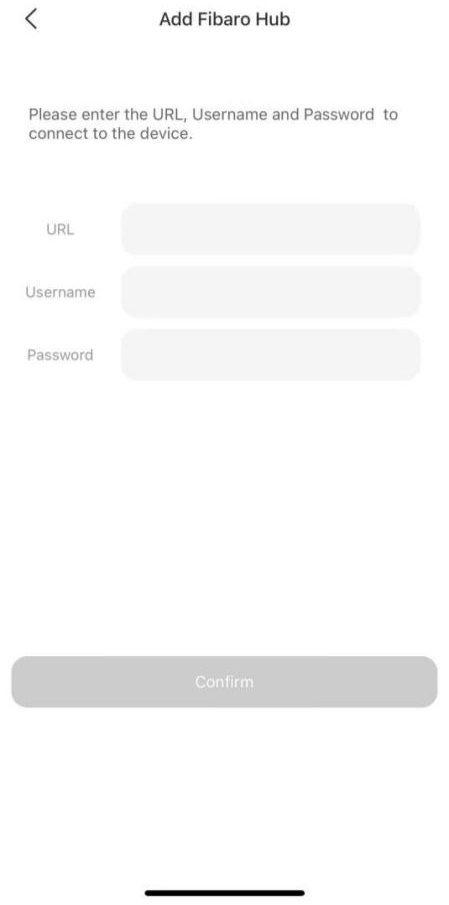
Enter the required information on the followed screen.
NOTE:
The URL format is http://IP/api/, e.g., http://192.168.1.102/api/. The IP is Fibaro hub’s current IP address.
The username and password are the login credentials for Fibaro hub web interface.
Wait for the adding result.
Specify the device’s location, name it, and tap Finish.