This manual provides instructions on setting up single-house projects on the SmartPlus Cloud platform.
Create the Resident Account
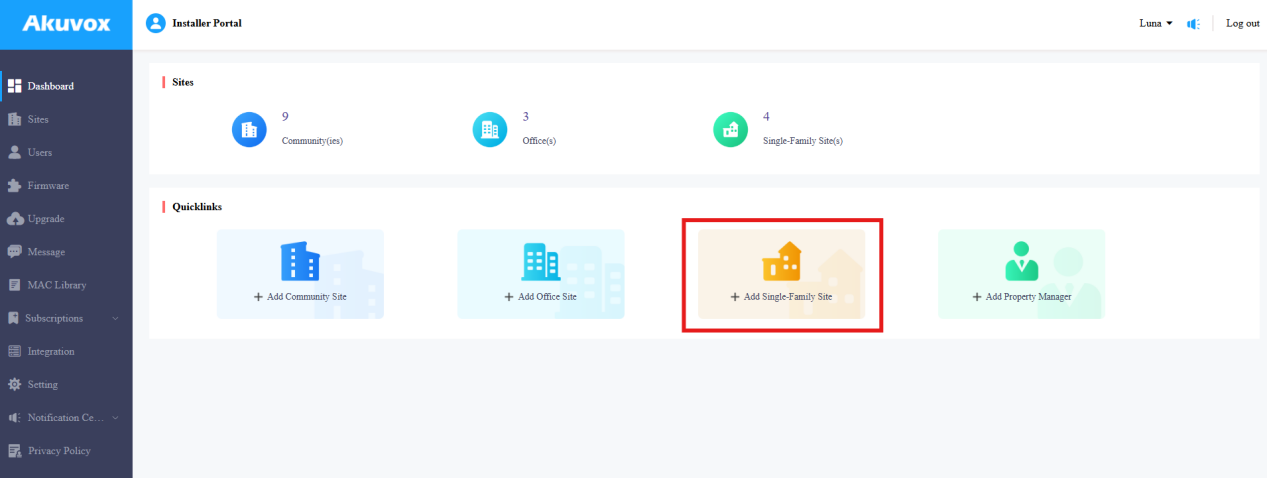
Log into the SmartPlus Cloud platform with your installer account.
Click +Add Single-Family Site on the dashboard.
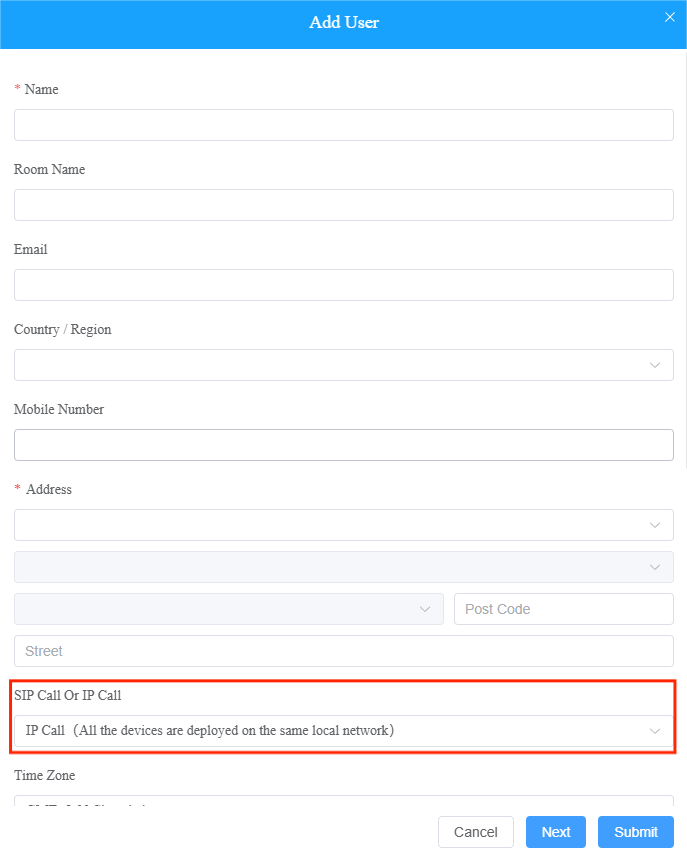
Fill in the resident’s information. The email address is used to receive the SmartPlus App account password.
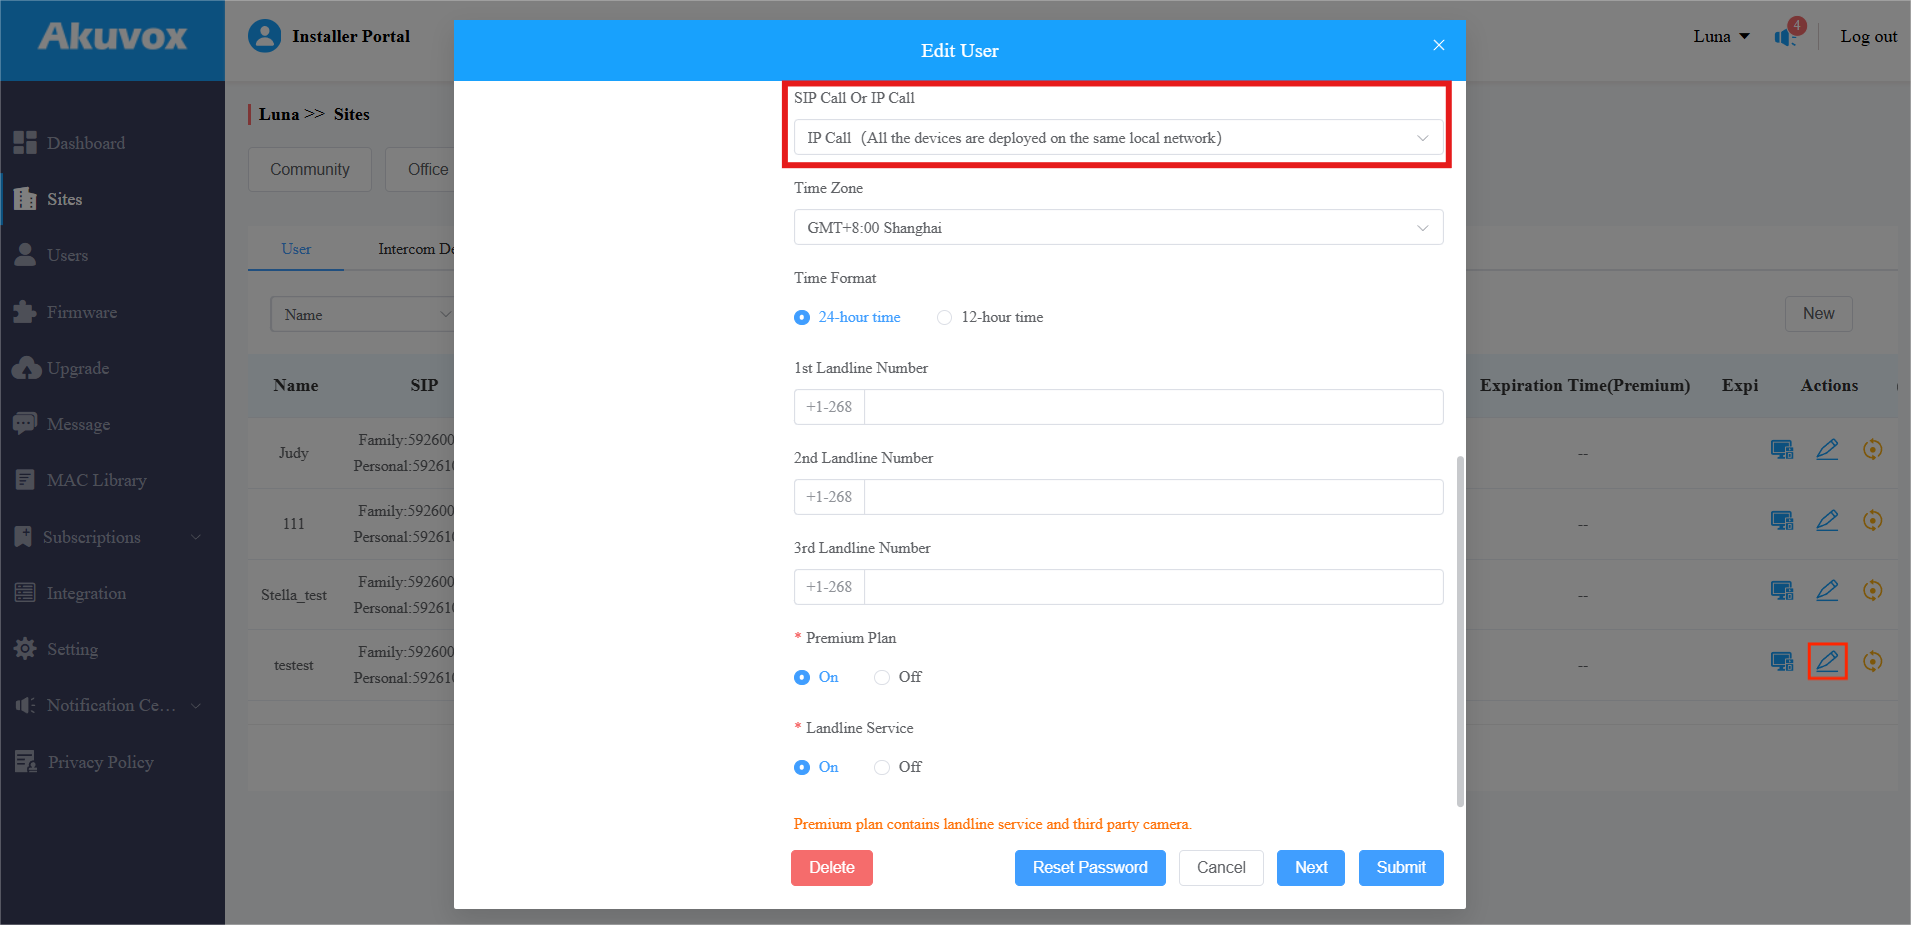
Select SIP Call or IP Call for communication between door phones and indoor monitors.
If devices are on the same local network, select IP Call.
On the different networks, select SIP Call.
Select the feature plan. The Premium Plan contains third-party camera and landline services, which require extra payment.
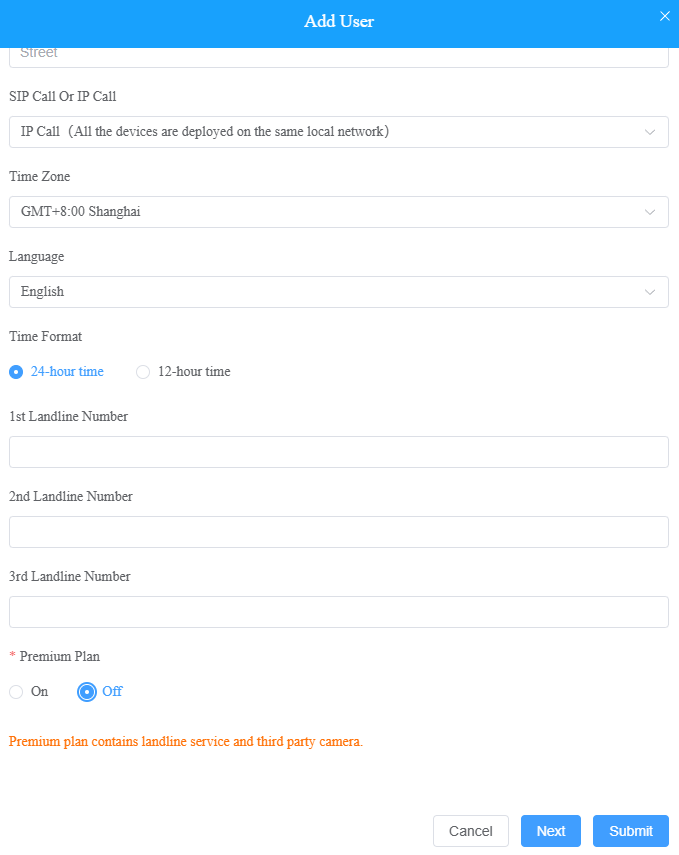
Click Submit.
Add Devices
Click
 of the resident.
Click New on the right.
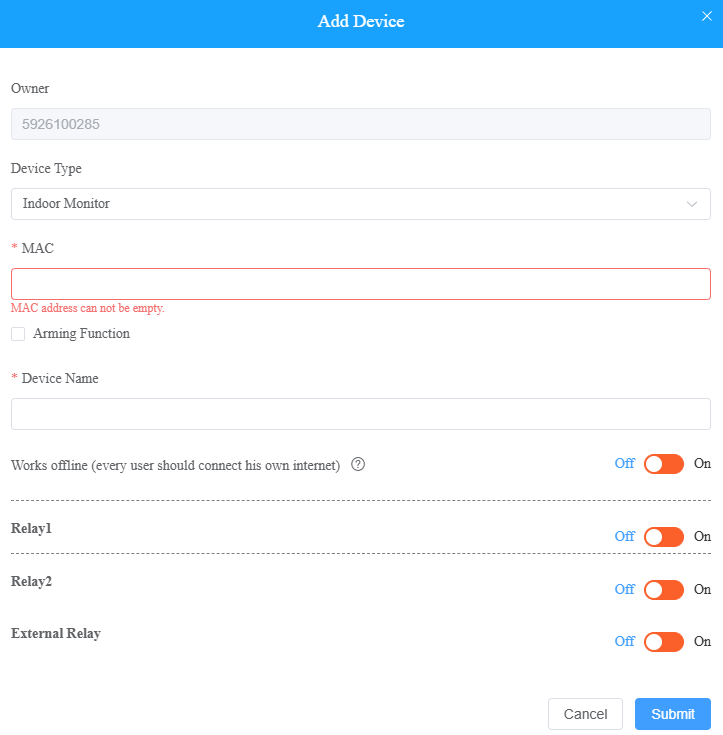
Select the Device Type and enter the device MAC address.
Set the device name.
Indoor Monitor:
Door Phone:
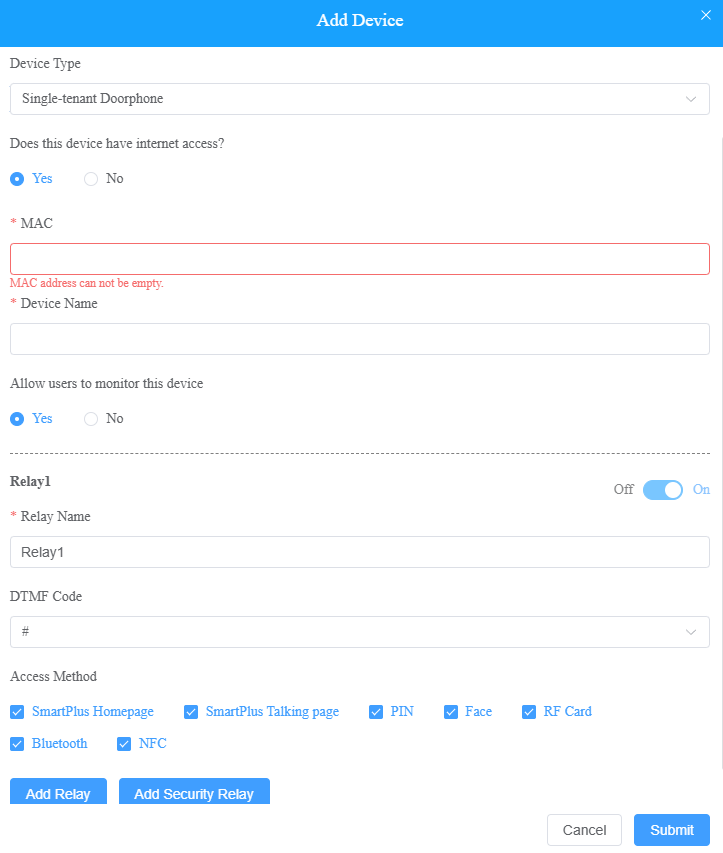
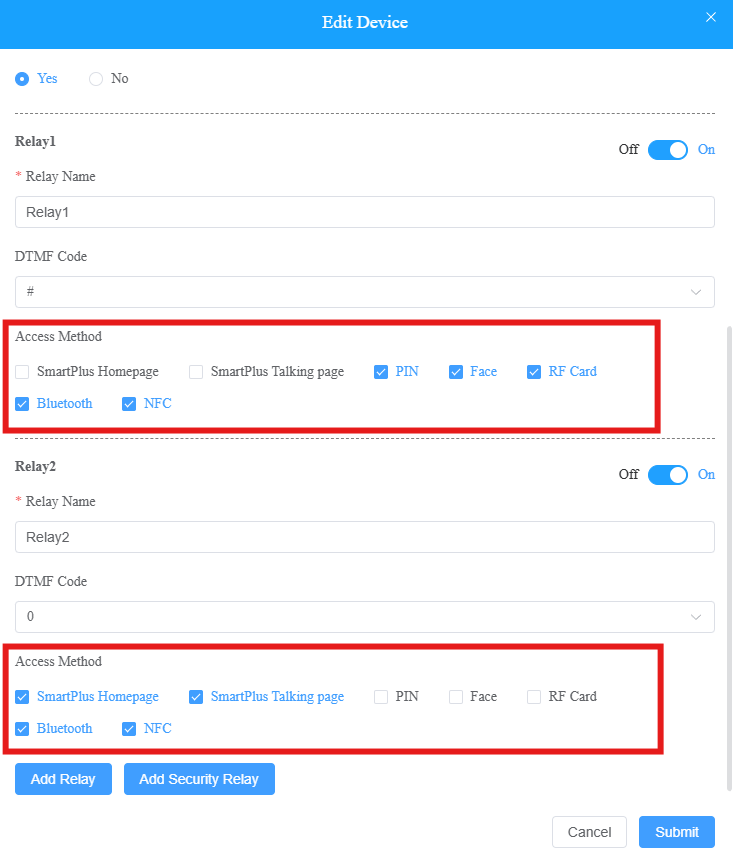
You can enable desired access methods for different relays if multiple relays are enabled.
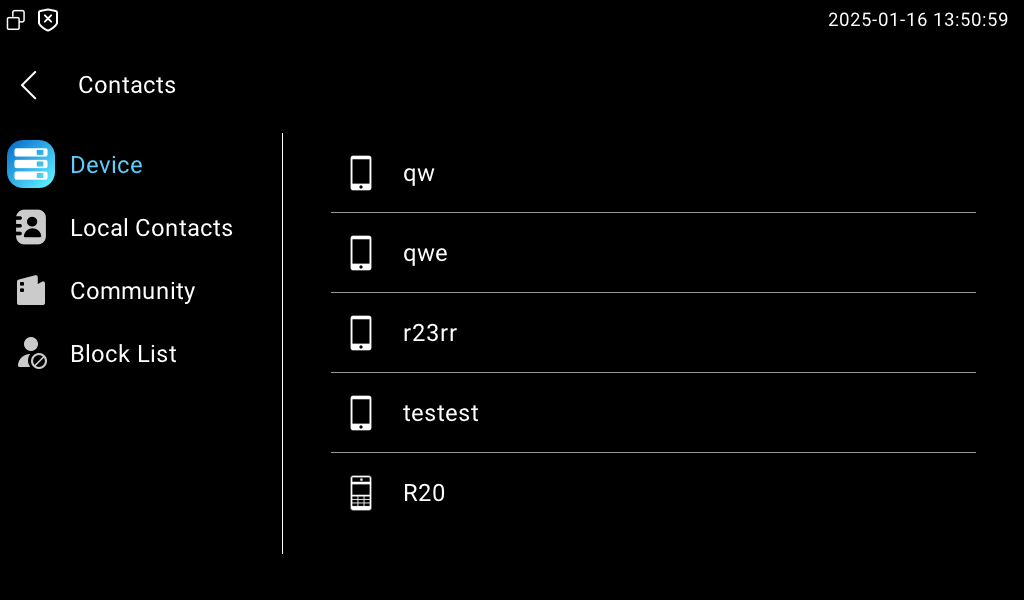
The door phone and resident account will be displayed on the indoor monitor’s Contacts screen.
Residents can tap the name to make a call.
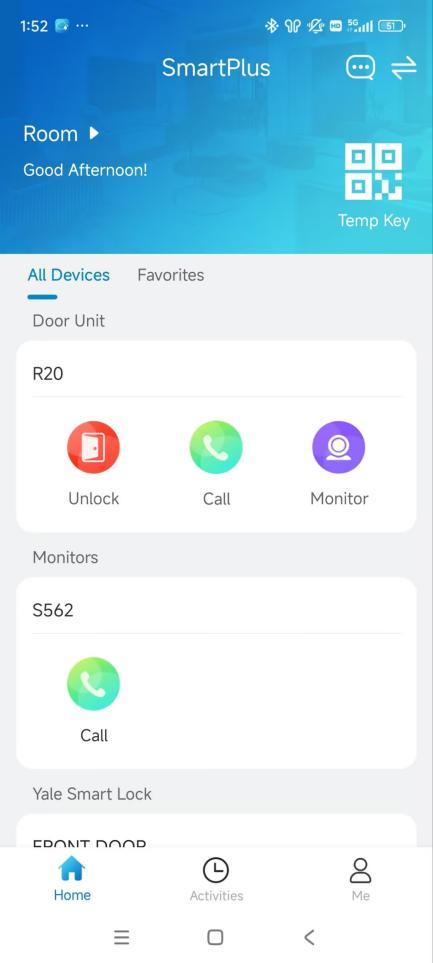
Residents can also use the SmartPlus App to open doors and make calls.
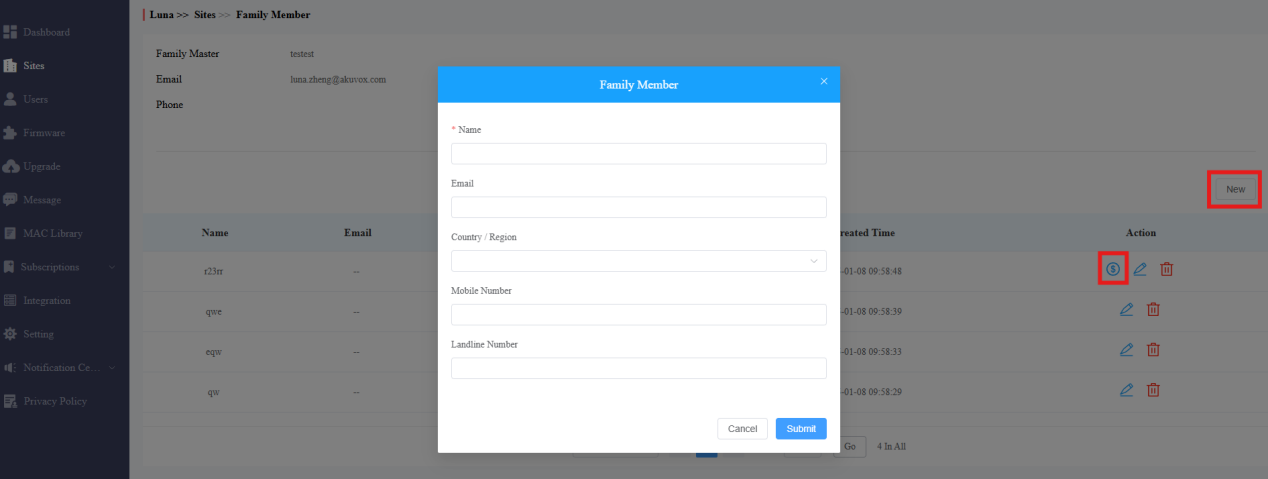
Add Family Member Accounts
Click
 of the target master account.

Click New on the right.
Fill in the family member account’s information.
Note
Residents can use three family member accounts for free. Using more requires an extra payment.
FAQs
A. How do residents create access methods by themselves?
Residents can create access methods with their SmartPlus App.
Tap Me > Authorization. Set up the device-supported access methods.
Please click the following links to view how to set up specific access methods:
B. Why can’t a resident’s SmartPlus App receive calls?
The failure may result from:
Poor network condition;
The SmartPlus App account connection or registration fails;
Permissions in the SmartPlus App are disabled.
Please click here to view the solutions to these problems.
C. Why can’t indoor monitors receive calls?
Check whether the devices are assigned to the right network groups.
Click
 of the target user.
Find the SIP Call or IP Call part. If the devices are on the same local network, they should be assigned to the same network group. If not, the different groups.
D. How to deal with the SmartPlus App prompting “Please contact your service provider” when logging in?
The failure may result from the following factors.
The account is not activated;
Solution: Please contact the Akuvox tech team to check the user's account.
The indoor monitor is offline added when creating the project;
Solution: Please reboot the indoor monitor or check its network. Try replacing the network cable or using a different port to see if it is still offline.
The device type of the indoor monitor is wrong.
Solution: Change the device type to Indoor Monitor on the SmartPlus Cloud.
E. How to deal with the SmartPlus App prompting “Invalid username and password” when logging in?
Please reset the password of the SmartPlus App account and see if the problem still occurs.
Click here to view how to reset the password.
F. How to open two doors through an action URL?
We can use the action URL to open two doors at the same time. Suppose that when door phone A’s relay(Door A) is opened, door phone B’s(Door B) is also opened.
Door phone A’s IP is 192.168.31.122; door phone B is 192.168.31.123.
Take door phone E12 and indoor monitor C313 as examples.
Set Door Phones
The Open Relay via HTTP feature of both door phones A and B should be enabled.
1. Use the door phone’s username and password to log in to its web interface. The initial username and password are both admin.
2. Go to Access Control > Relay > Open Relay Via HTTP.
Enable the door-opening via HTTP command feature and customize the username and password as parts of the command.

Set Door Phone A
Log in to door phone A’s web interface.
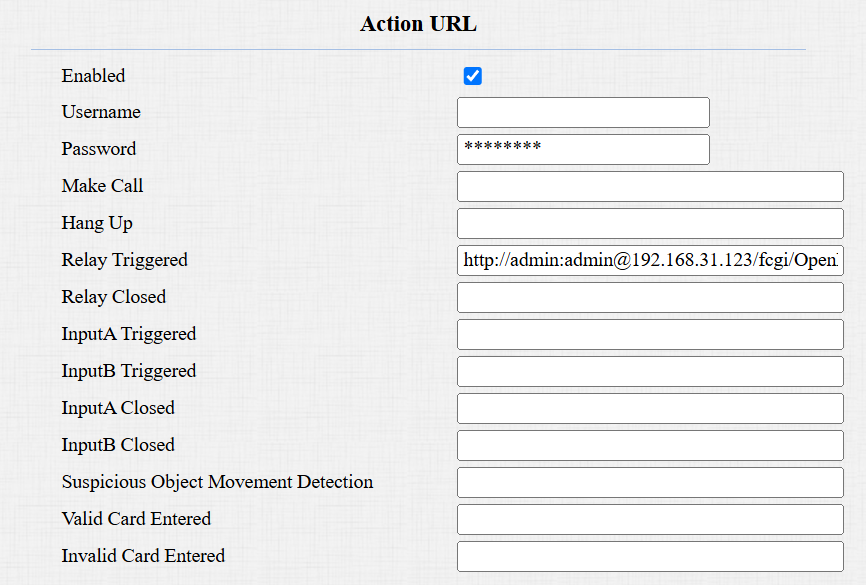
Go to Setting > Action URL interface and enable Action URL.
Fill in the HTTP command for door opening.
Example: http://admin:admin@192.168.31.123/fcgi/OpenDoor?action=OpenDoor&DoorNum=1
Note
The high security mode of the device affects the HTTP command format. Please click here to view how to select the format.
Set the Indoor Monitor
Use the device IP to log in to its web interface. The initial username and password are both admin.
Go to Device > Relay > Remote Relay By HTTP.
Fill in the IP address of door phone A, enter the HTTP command for door opening, and enter the username and password set on door phone A.
Note
The high security mode of the device affects the HTTP command format. Please click here to view how to select the format.
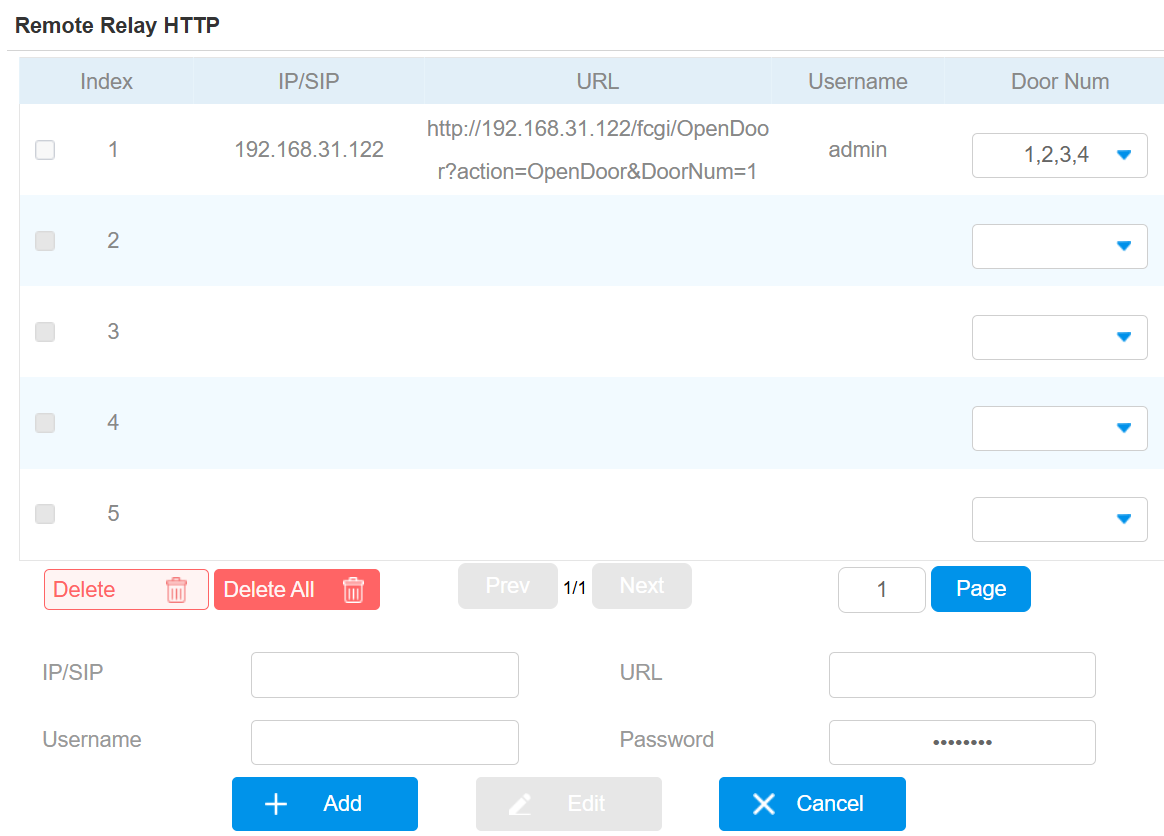
Click +Add.
Scroll to the Key Setting part. Enable the desired key and set its type to Remote Relay HTTP.
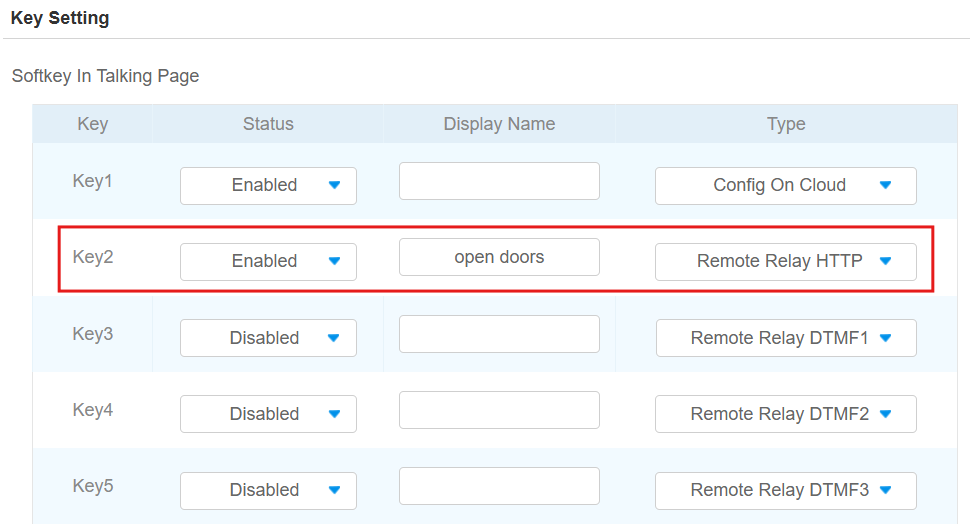
Click Submit.
Tap the unlock button on the indoor monitor in a call with a door phone, both doors will be opened.
When users swipe cards on door phone A, both doors will be opened.
G. How to set up single calls and group calls?
End users can set single call and group call with their SmartPlus Apps.
Tap Me > Settings > Call Settings.
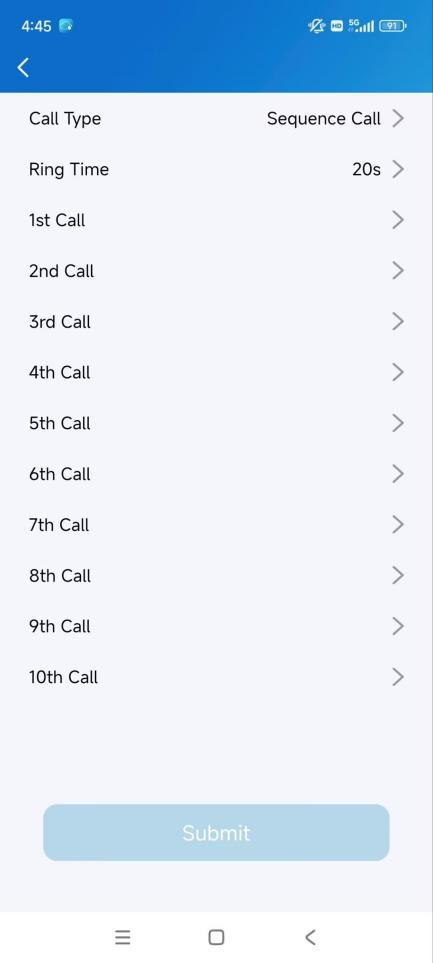
Select Group Call or Sequence Call.
Group Call: When visitors press the push button of the door phone, both the indoor monitor and SmartPlus App will receive the call.
Sequence Call: Specify the order of receiving the call.
Note
Only the master account has permission to set this feature up.