After creating a KNX project and adding devices to it, you can configure the parameters of all devices to set up their functionalities.
Here, we’ll use a blind actuator and a dimmer actuator as examples. Please note that the configuration requirements and steps for KNX devices may vary by manufacturer.
Set basic functions of KNX devices
Note
The parameters of KNX devices from various manufacturers differ. For instructions on configuring other products, please contact the respective manufacturer's technical support.
Dimmer actuator
Select the dimmer, click its Parameters tab, and activate the Channel A.
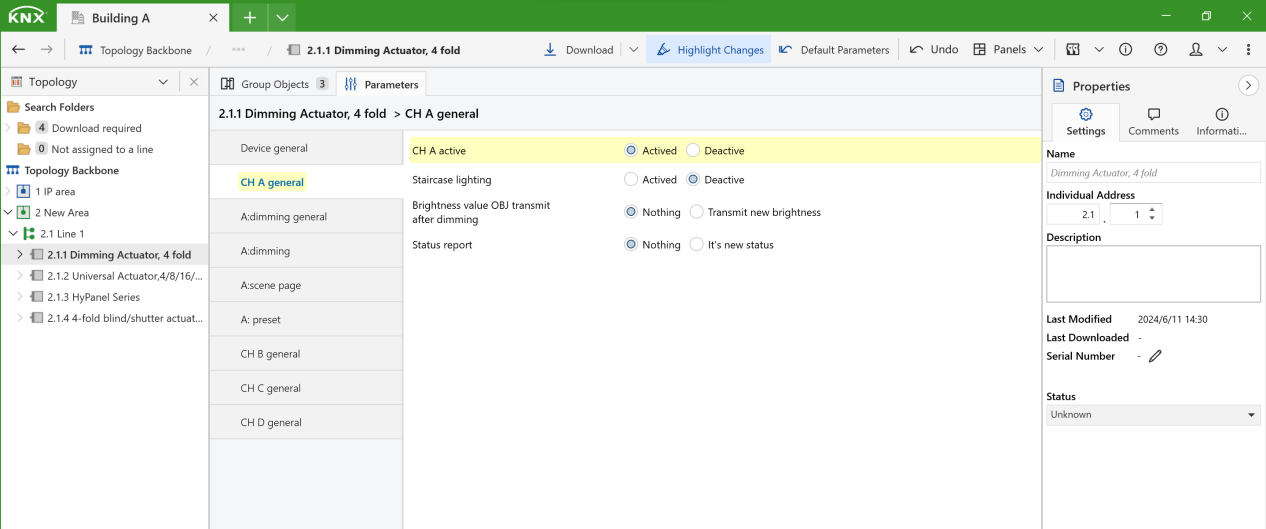
Enable the sync of brightness value and switch status with other devices.
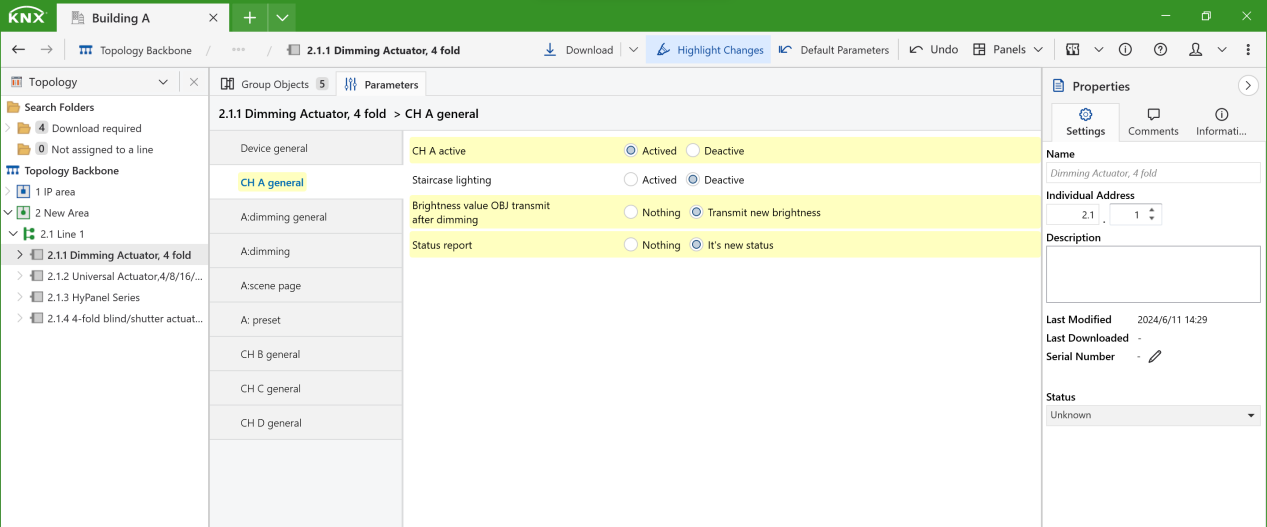
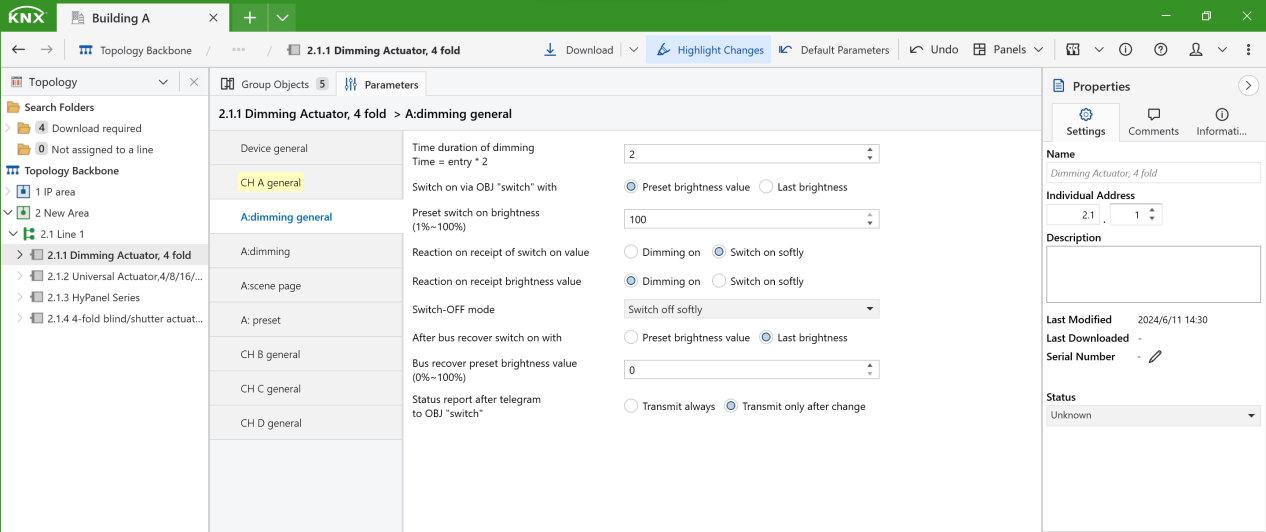
For other settings such as brightness value and so on, go to A: dimming general or A: dimming section.
Repeat the previous steps until you complete the settings for your desired channels.
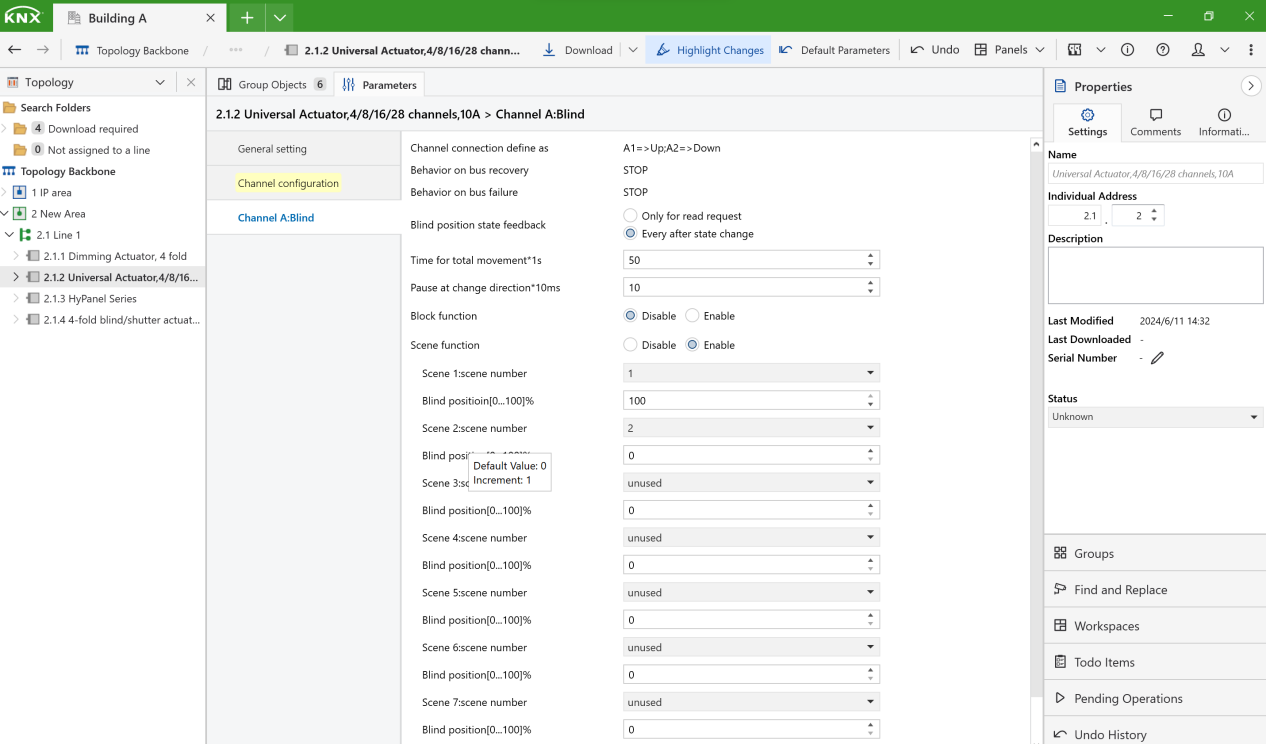
Blind actuator
Select the actuator, click its Parameters tab, and set channel A as Blind.
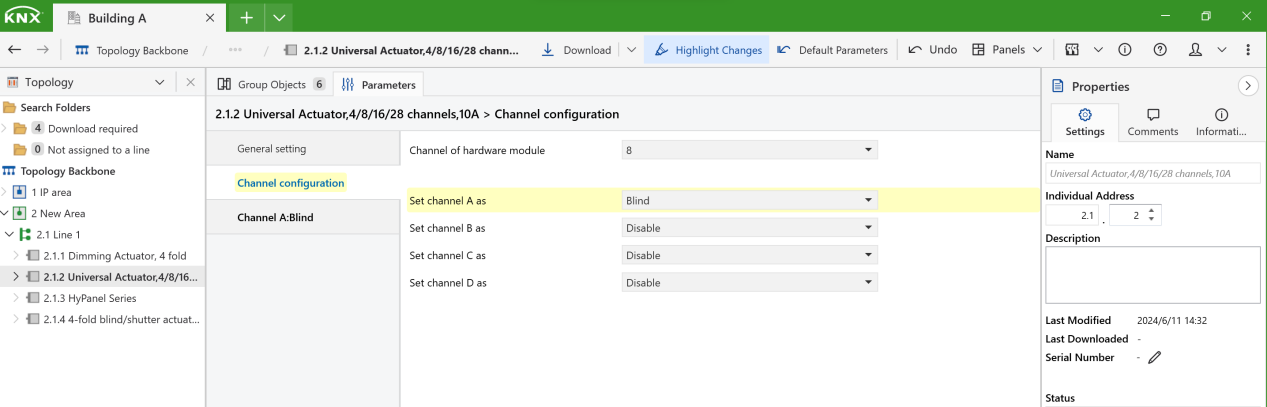
For other settings, go to Channel A: Blind section.
Repeat the previous steps until you complete the settings for your desired channels.
Configure device tasks in scenes
We’ll create a scene called “Welcome” that turns on the dimmer and opens the curtain, and set a “Leave” scene that turns off the dimmer and closes the curtain.
To do so, we need to configure the scene parameters, which are the tasks, of the respective devices.
Dimmer actuator
Click the dimmer’s Parameters tab > A: scene page, and enable the Scene function.

To configure the dimmer to be on in the scene 1, do as the following:
Select the 1st Scene in the Scene select field.
Set the dimmer’s brightness as any value other than 0 ( > 0 means it is on).
Assign the settings to scene 1.

To configure the dimmer to be off in the scene 2, do as the following:
Change the scene number to 2nd.
Set the dimmer’s brightness value to be 0 (which means it is off).
Assign the settings to scene 2.

Blind actuator
Click the blind actuator’s Parameters tab > Channel A: Blind, and enable the Scene function.
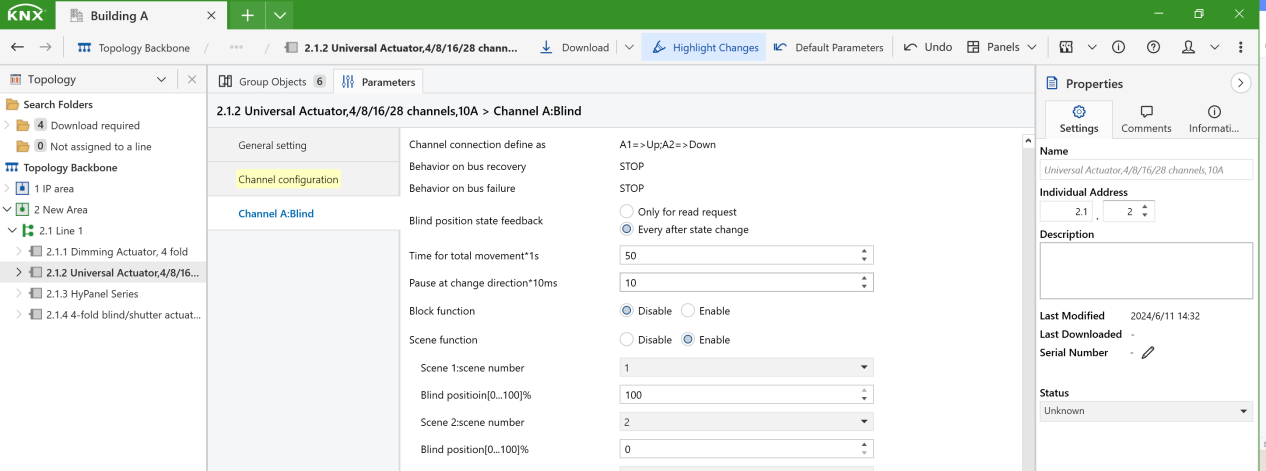
Set the Blind position value to 0 (which means the blind is on) in Scene 1 settings.
Set the Blind position value to 100 (which means the blind is off) in Scene 2 settings.

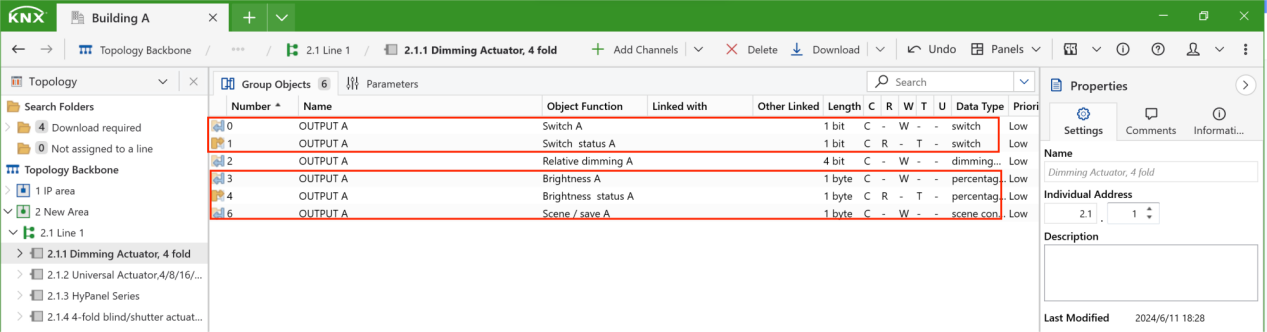
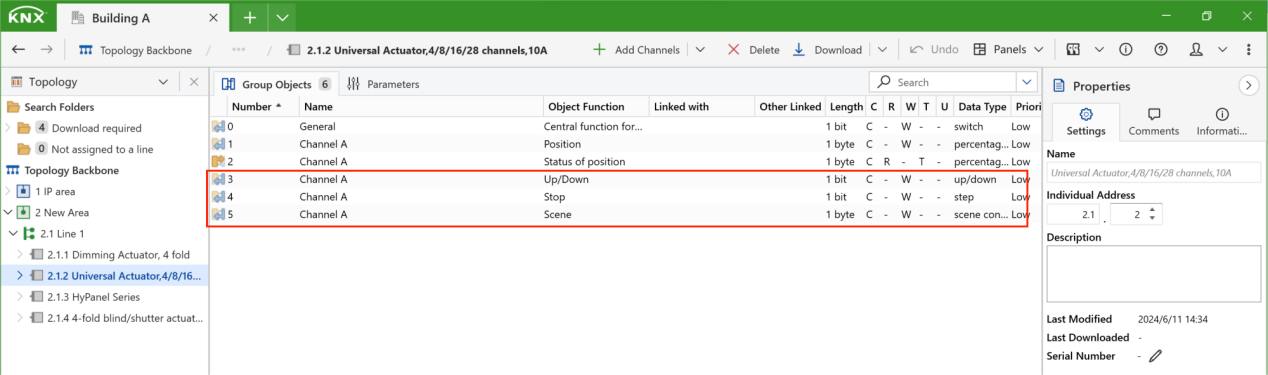
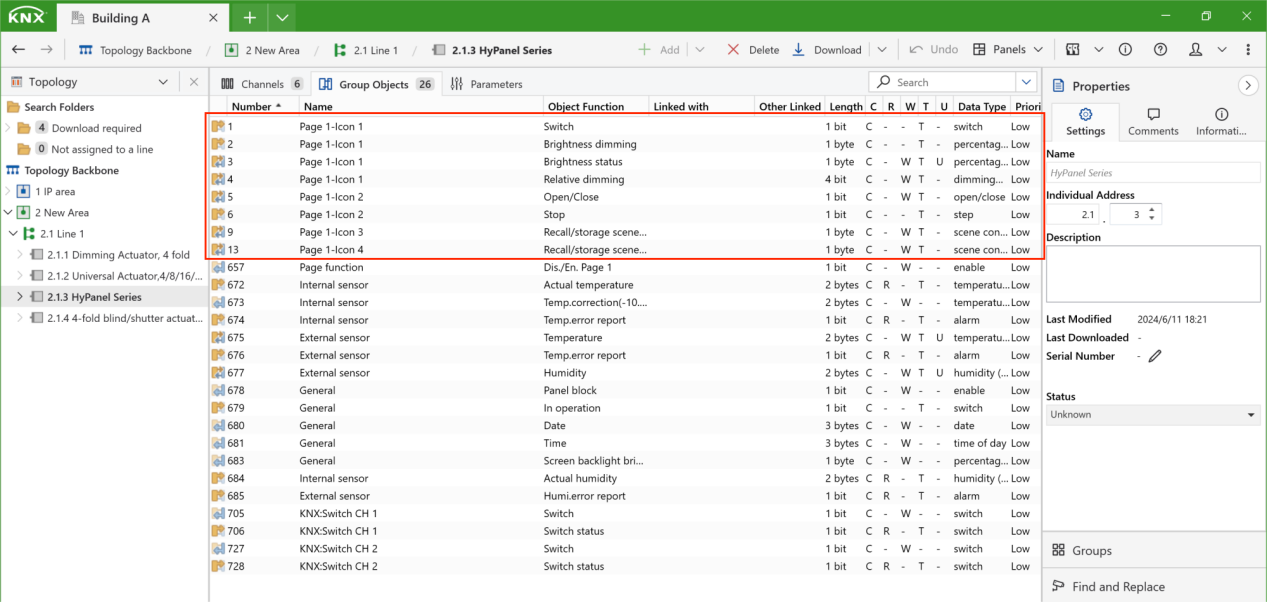
After the basic and scene configurations, the required group objects for the dimmer and blind are available. They can be found on the device’s Group Objects tab:
Dimmer
Blind
Configure parameters of HyPanel
Tip
For more and detailed HyPanel parameters explanation, please see akubela Programming Guide - HyPanel Series.
Home page buttons
The Home page in ETS refers to the HyPanel’s Button Control screen (as shown in the figures below). You can configure buttons for quick control of KNX devices and scenes.
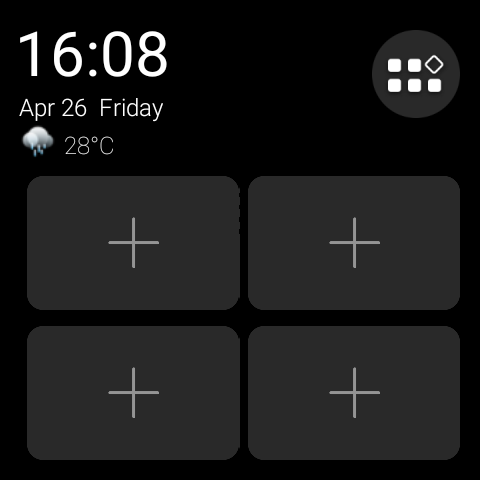
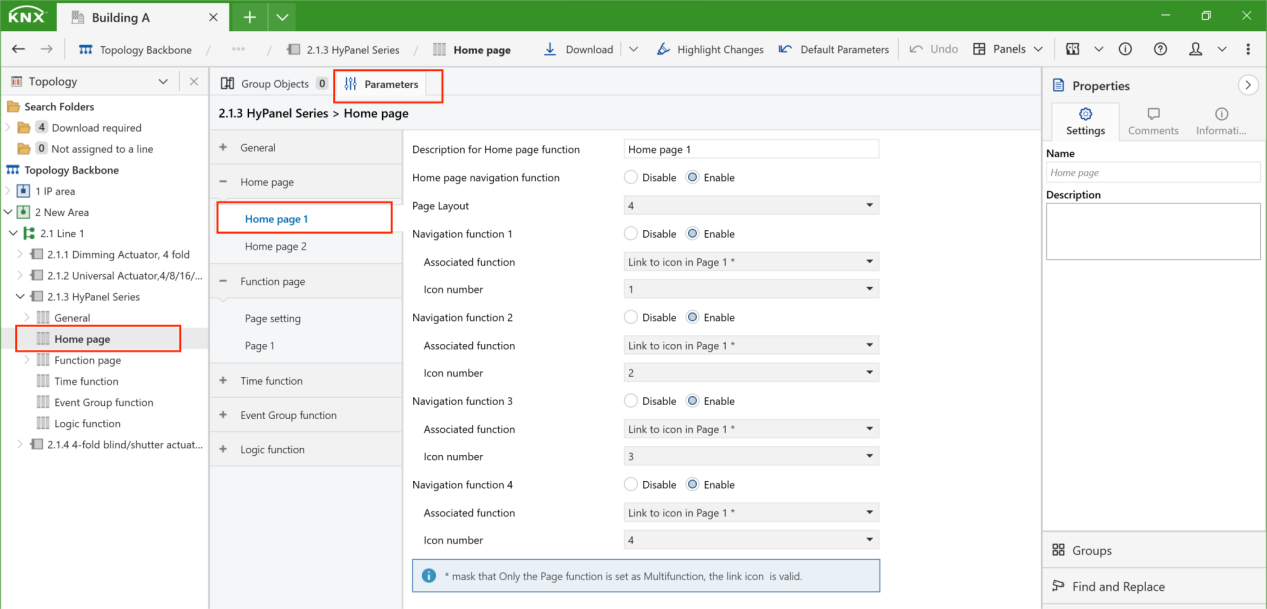
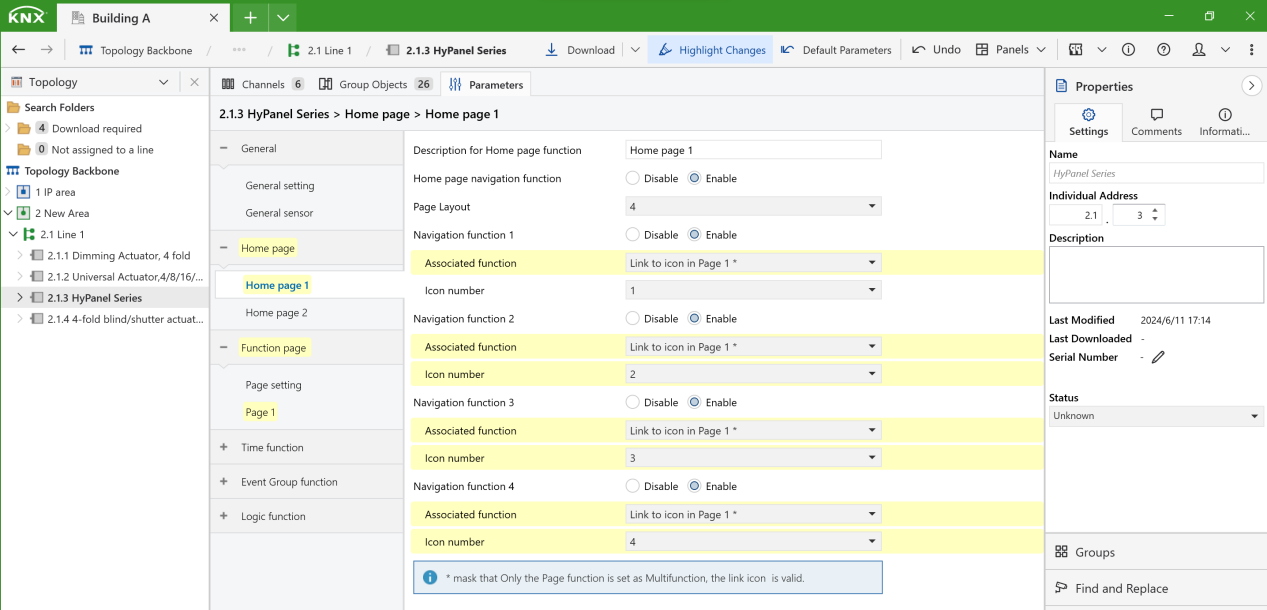
In ETS, select HyPanel’s Parameter tab and click Home page > Home page 1, ensure the Home page navigation function is enabled. Once enabled, you can add control shortcuts of KNX devices onto Home page 1.
Set the number of buttons by selecting an option in the Page Layout field.
Tip
Home page 1 supports up to 4 buttons, while Home page 2 supports 6 buttons at most.

Ensure the Navigation function of each icon is enabled.
Select “Link to icon in Function page 1*” in Associated function field.
Link to icon in Function page X*: When selected, pressing this button on the HyPanel will control a specific feature on Function page X.
Link to Page X: When selected, pressing this button on the HyPanel will navigate to the preset Function page.
5. Set the icon number. Note that this parameter is only available when “Link to icon in Function page 1*” is selected.
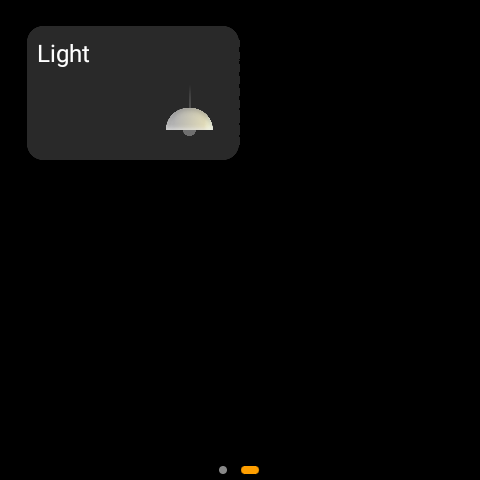
Function page
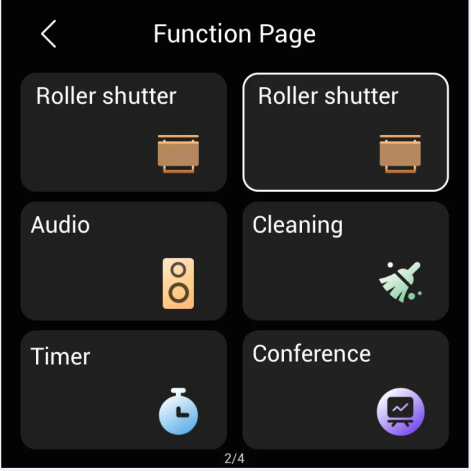
Function pages of the HyPanel are the screens accessed by pressing a quick control button. There are two types: Multi-function page and Single-function page.
In this guide, we only need to configure a multi-function page.
Tip
For HyPanel, the first 5 function pages are multi-function ones as the below figure shown.
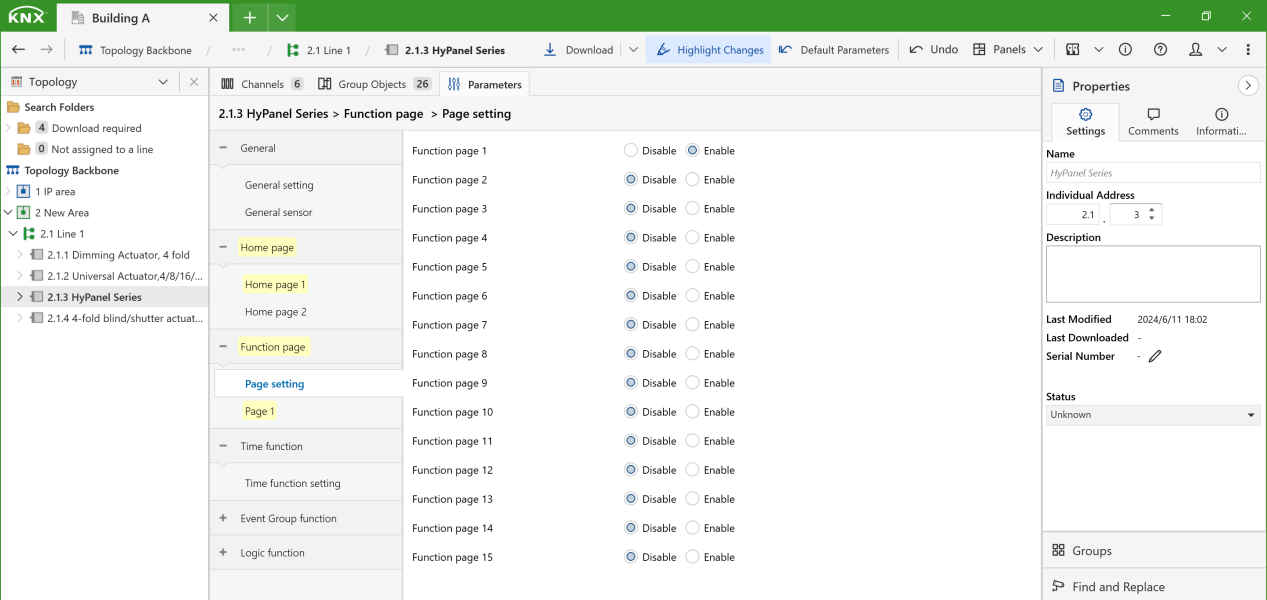
Go to Function page > Page setting, and enable the desired page(1-5).
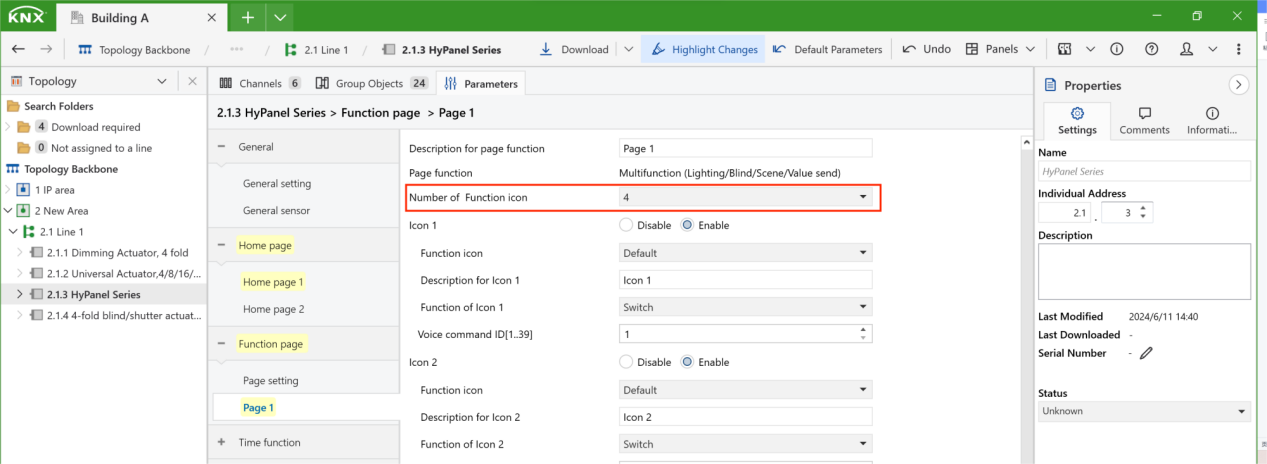
Go to the specific page, and set the number of function icons, which can be up to 6.
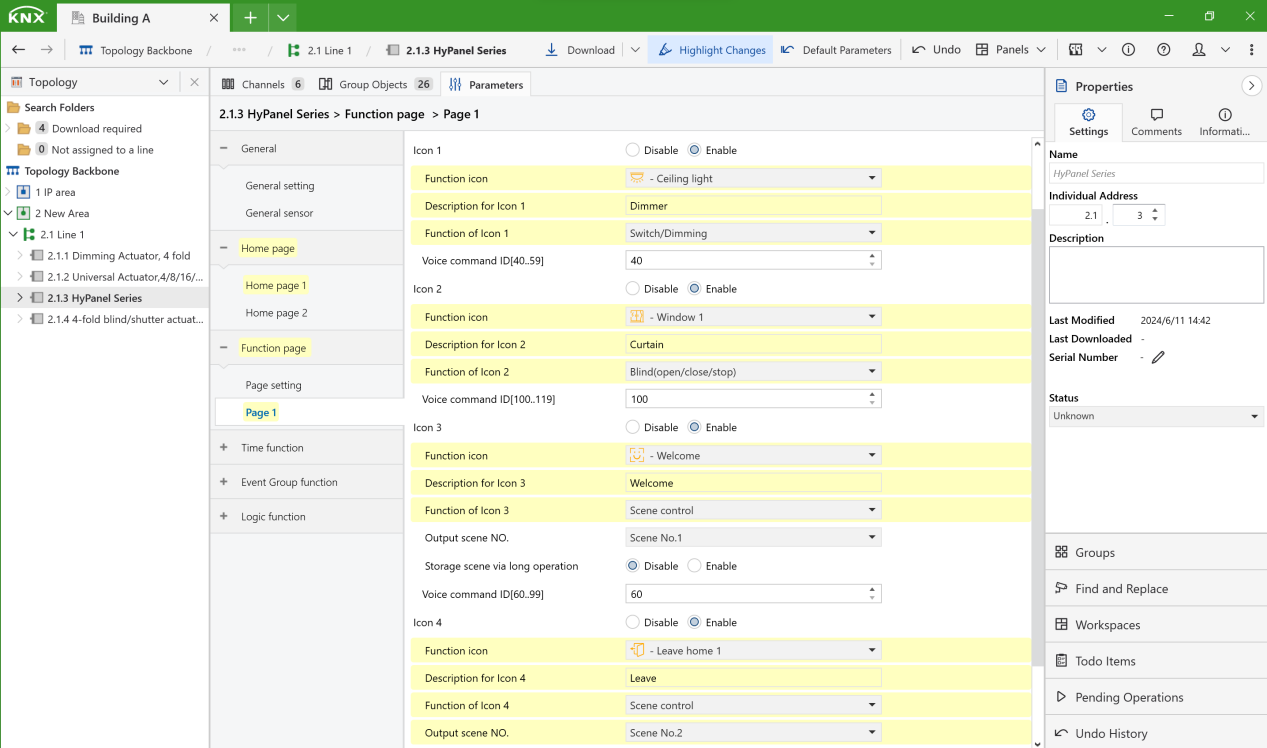
Set up the preset 4 buttons’ displayed names, icons and their functionalities as the below figure shown.
Tip
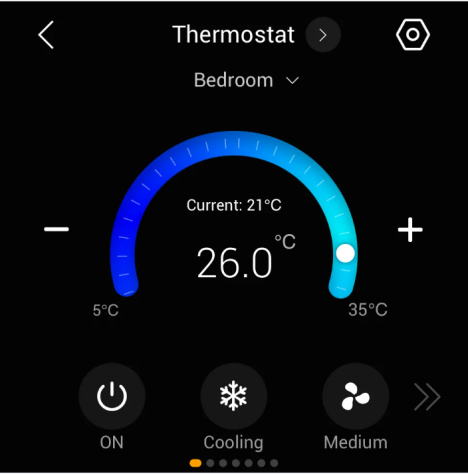
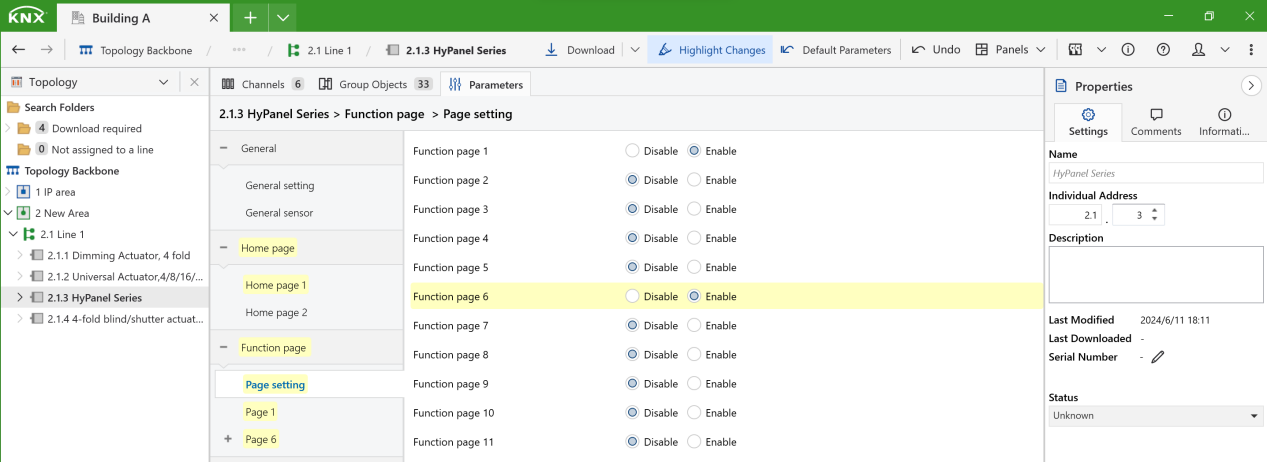
For HyPanel, the sixth function page and later are single-function ones(as the picture shown). If you want to configure single-function pages, do as the following:
Go to Function page > Page setting, and enable the desired page(6-15).
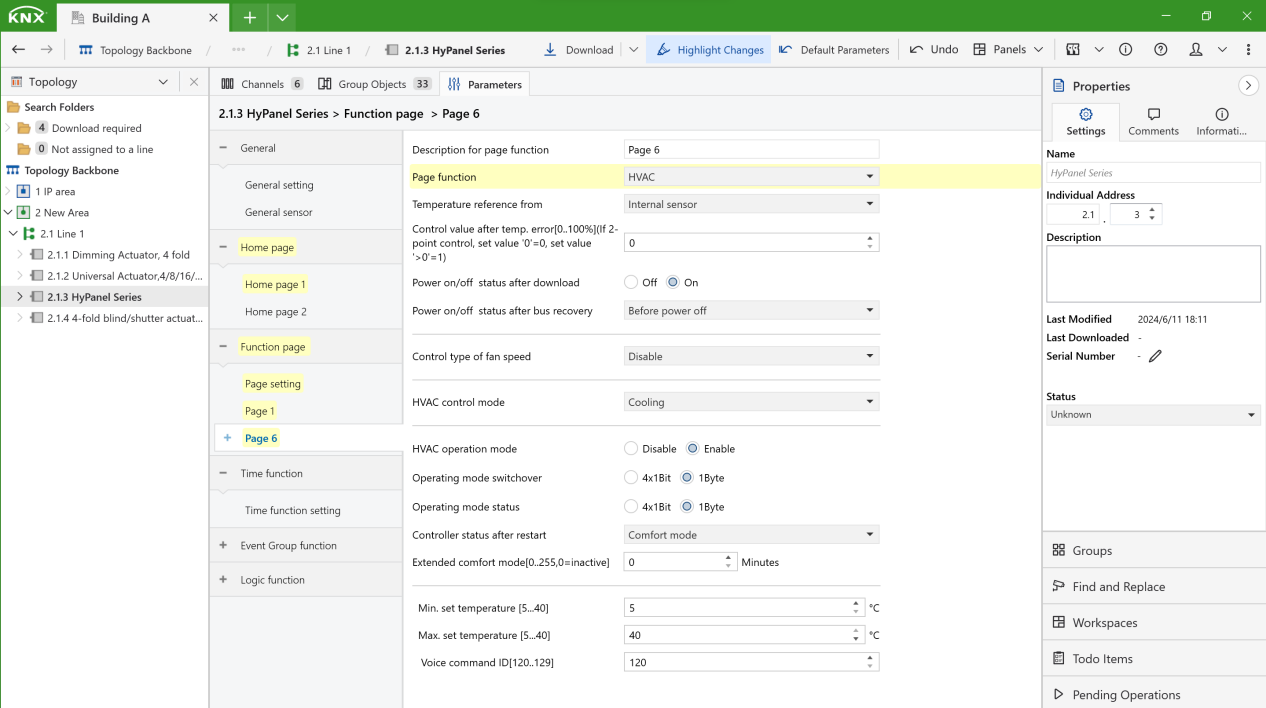
Go to the specific page, and select the Page function, and configure the settings.
Once the configurations of the Multi-function page completed, all necessary group objects are available.
Tip
You can proceed to refer to this guide for linking group addresses and group objects.