The Akuvox EC33 elevator control device allows residents to access their designated floors seamlessly by using their credentials, such as scanning their faces or swiping RF cards inside the elevator.
Key Scenarios
Scenario 1: Direct Access to Target Floor After Authentication
In this configuration, users are authenticated (via face scan, RF card, or PIN) and immediately gain access to their designated floor without needing to press any elevator buttons. This is ideal for situations where seamless, direct access is desired, such as high-traffic or high-security areas.
Scenario 2: Authentication Releases Elevator Button for Floor Selection
In this setup, after the user is authenticated, the elevator button is released, allowing the user to select the desired floor. This is suitable for buildings with multiple floors, where users need to choose from available floors after authentication, providing flexibility in floor access.
Device Compatibility
Except for A094 and E20, all Akuvox door phones and access control terminals support integration with EC33.
This article takes the access control terminal A05 and the elevator control EC33 as examples.
Wiring Options
Before proceeding with the web configuration, first choose the appropriate wiring setup based on the configuration scenario you wish to implement.
Scenario 1: Direct Access to Target Floor After Authentication
Wiring Description: In this case, once the user is authenticated, the elevator will directly take them to their designated floor.
Use Case: Suitable for systems where users should directly access the designated floor without needing to press any buttons.
Hardware Connections: The EC33 relay should be connected in parallel with the elevator button circuit.

Scenario 2: Authentication Releases Elevator Button for Floor Selection
Wiring Description: In this configuration, once the user is authenticated, the elevator button is released, allowing the user to select the desired floor.
Use Case: Ideal for multi-floor buildings where flexibility in floor selection is needed after authentication.
Hardware Connections: The EC33 relay should be connected in series with the elevator button common line or authorization control line.
.png)
Configuration for Cloud Projects
Installers need to configure relevant parameters on the SmartPlus Cloud.
Property managers or end users need to set up the access methods.
For Installers
Click here to view the configuration steps.
For Property Managers: Set up Access Methods
The property managers can set up access methods for residents.
Log in to the SmartPlus platform with a property manager account.
Go to the Resident interface and click
 of the desired user.
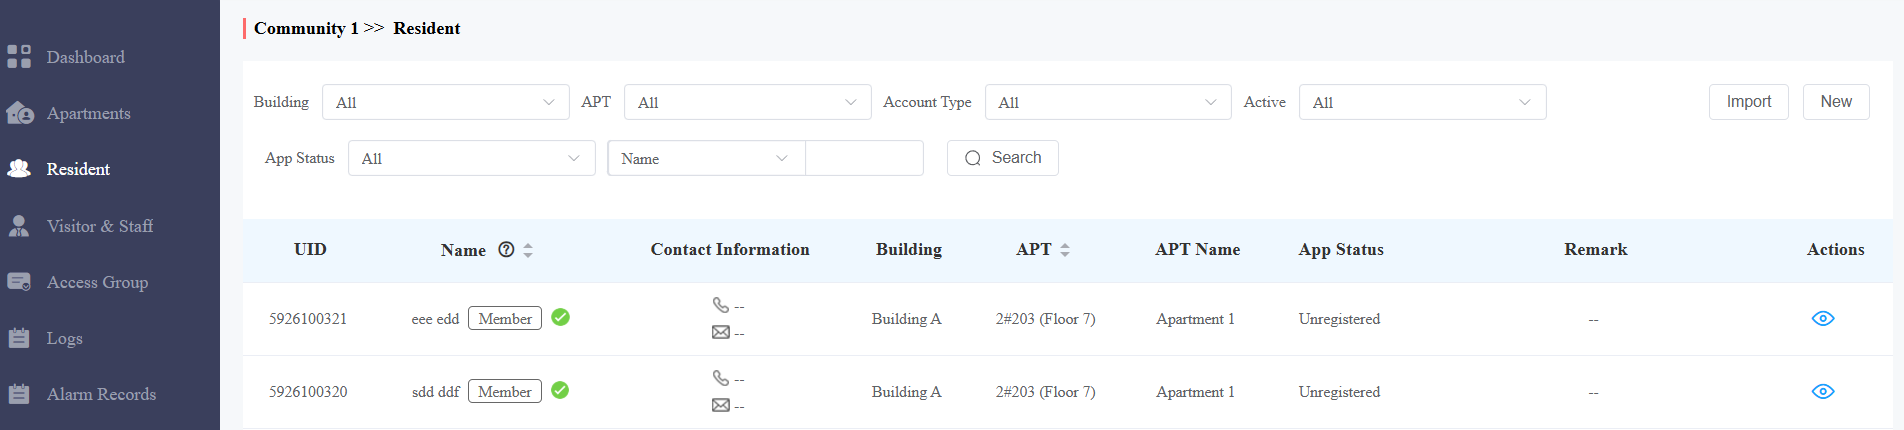
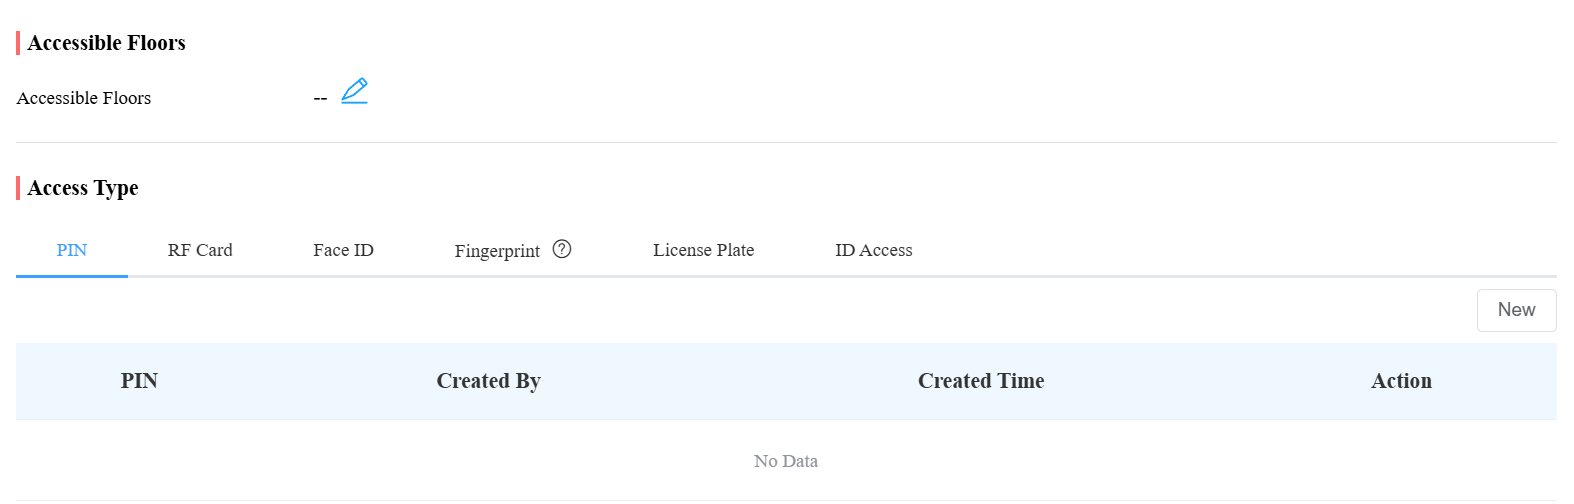
Scroll to Access Type and configure the desired access method. Here you can change the accessible floors for the resident.
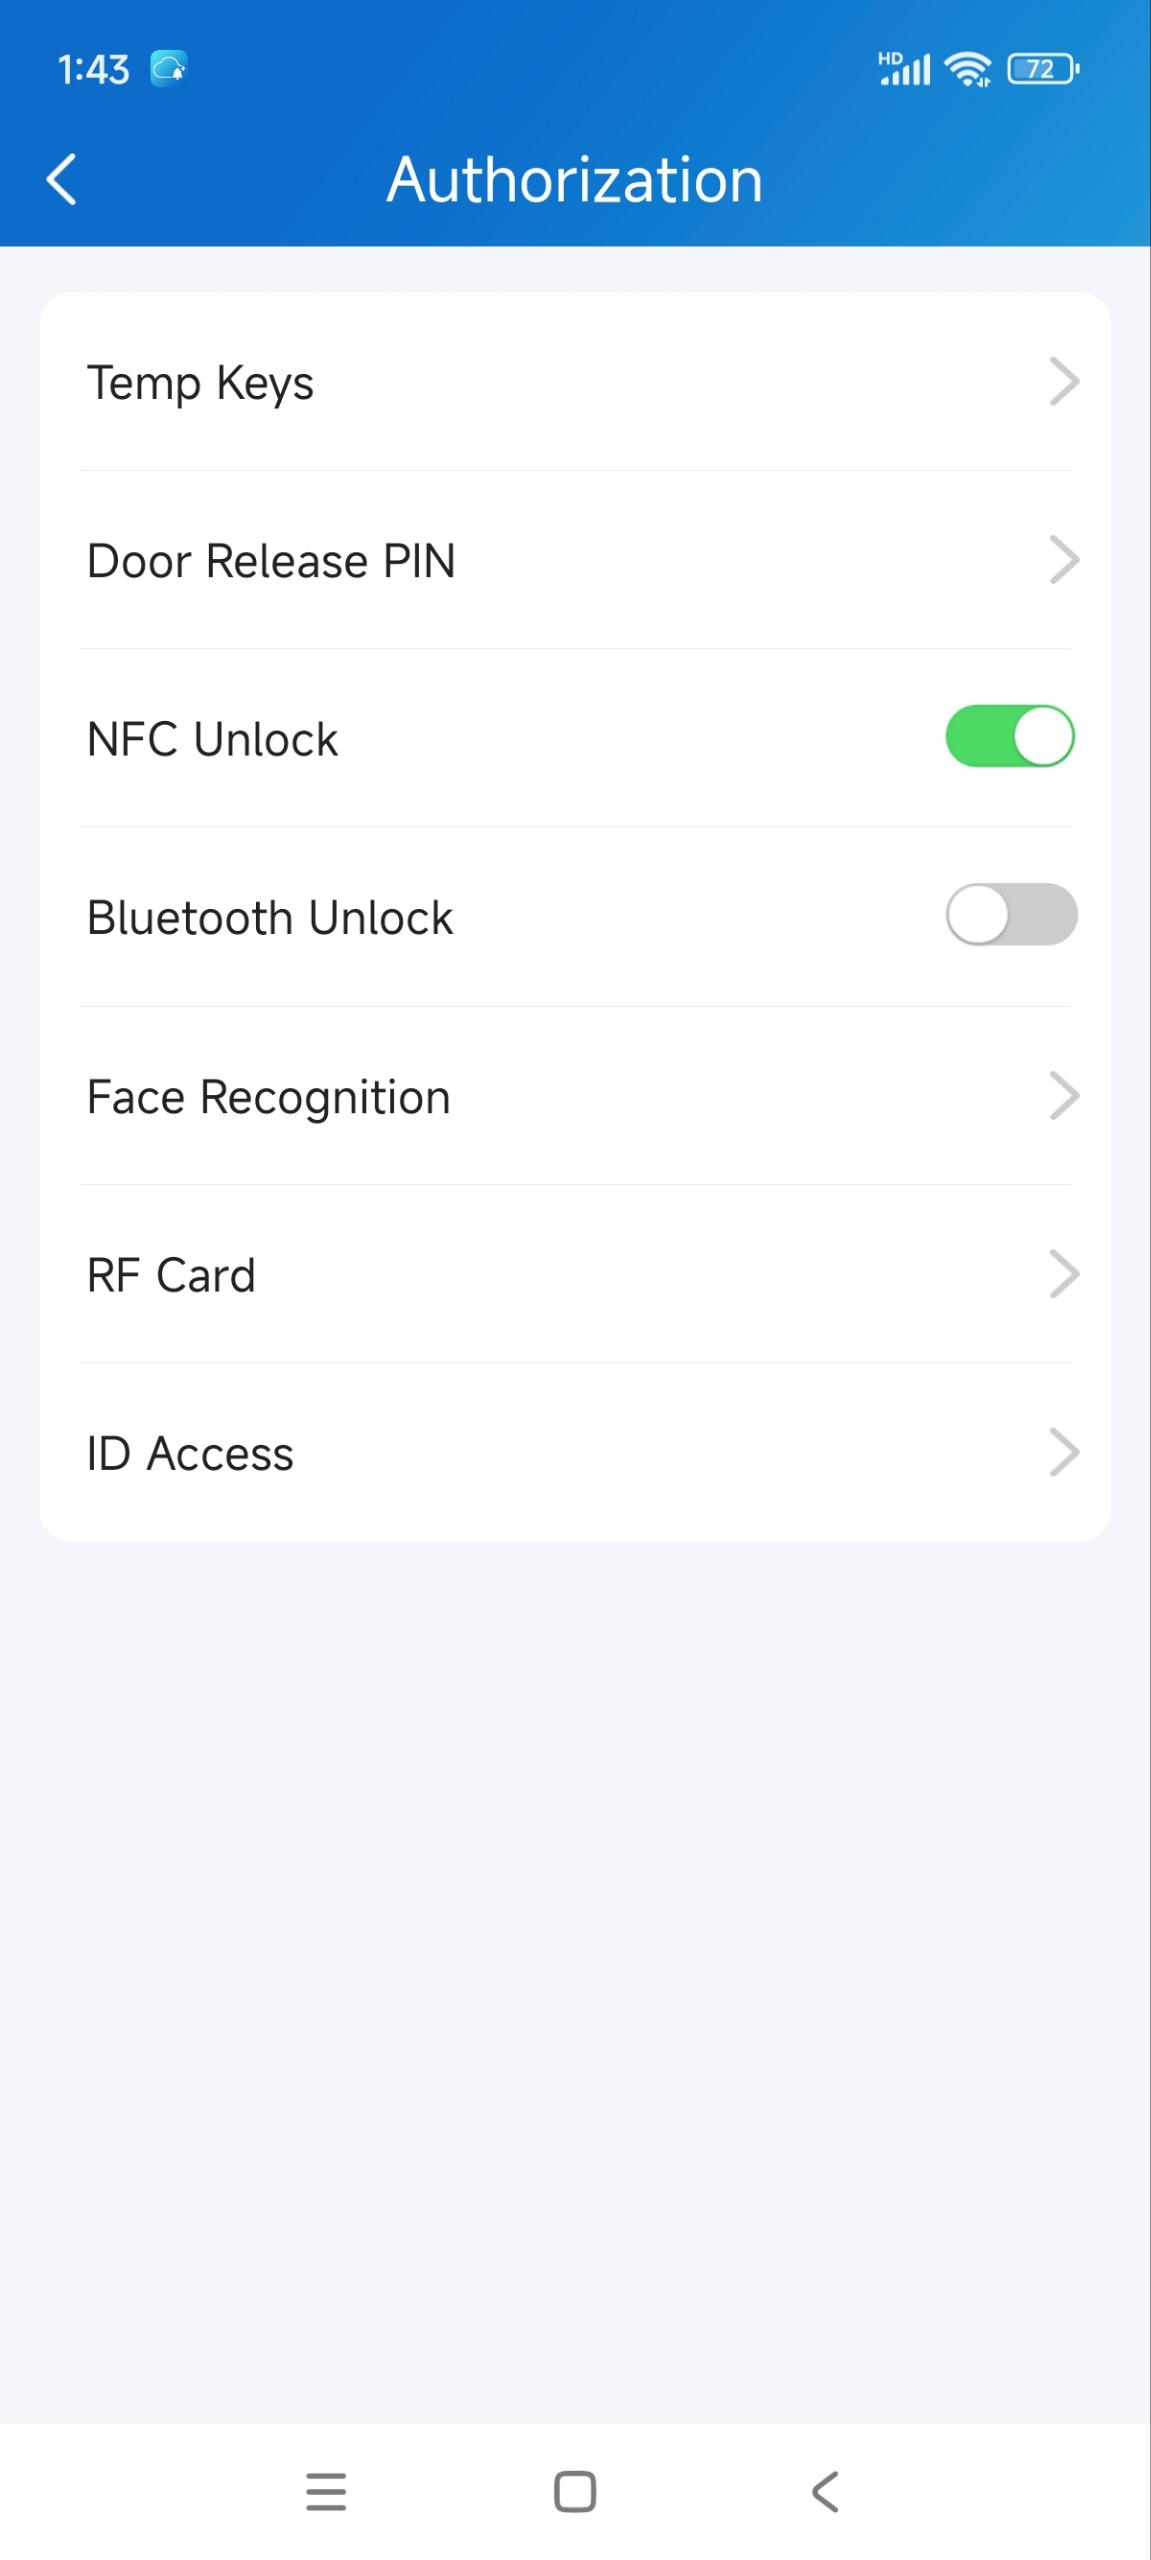
For End Users: Set up Access Methods
On the SmartPlus App, tap Me > Authorization and set up the device-supported access methods.
Note
ONLY Android mobile phones support the NFC door-opening feature.
For detailed configuration, please refer to Akuvox SmartPlus App User Guide.
Configuration for On-Premise Projects
Configure relevant parameters on the elevator control and access control’s web interfaces.
Set up the Elevator Control
Use the device’s IP to log in to the device’s web interface. The initial username and password are admin.
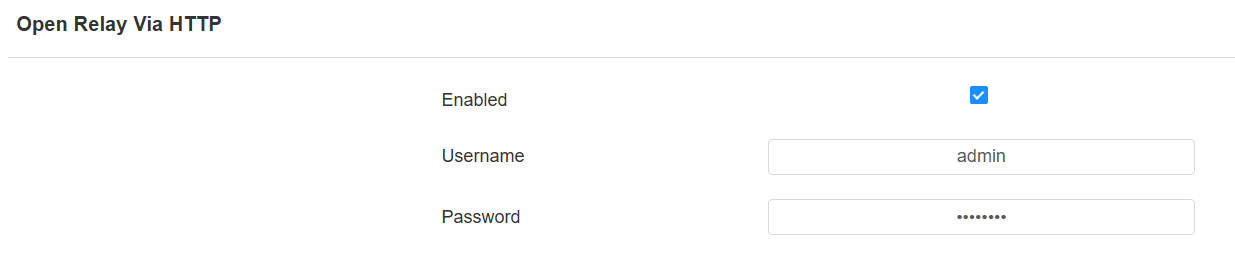
Navigate to the Device > Relay interface and enable Open Relay via HTTP.
Customize the username and password for HTTP authentication.
[Optional]Scroll to Relay Setting to configure the relay trigger and delay time.
Trigger Delay(Sec): The elevator relay will be triggered in the specified time after using the access method.
Hold Delay(Sec): The elevator relay will last for the specified time after it is triggered.
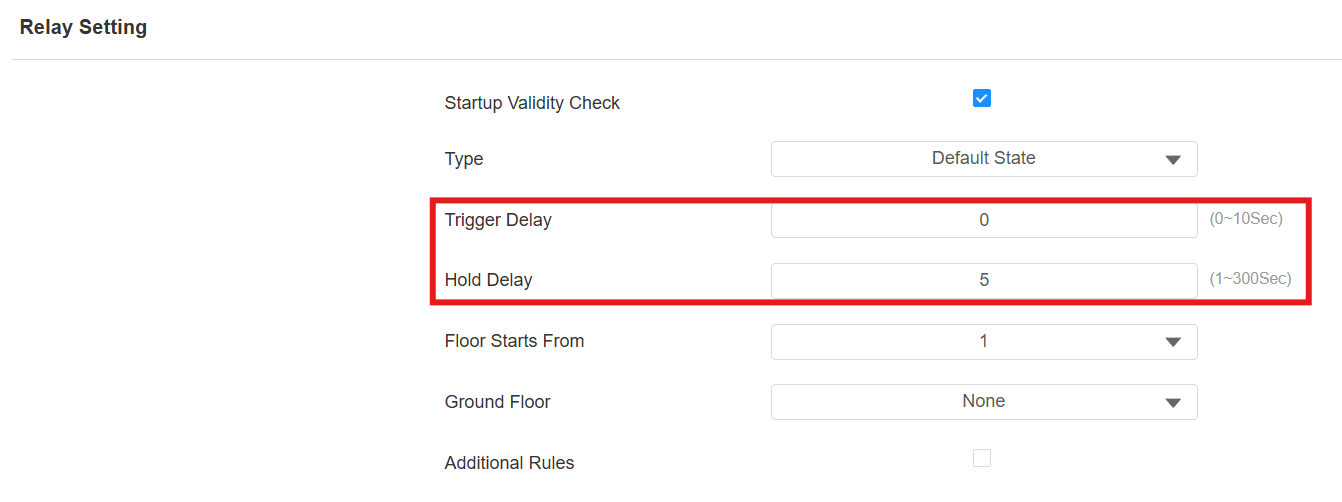
Submit the setting.
Set up the Access Control
Use the device’s IP to log in to the device’s web interface. The initial username and password are admin.
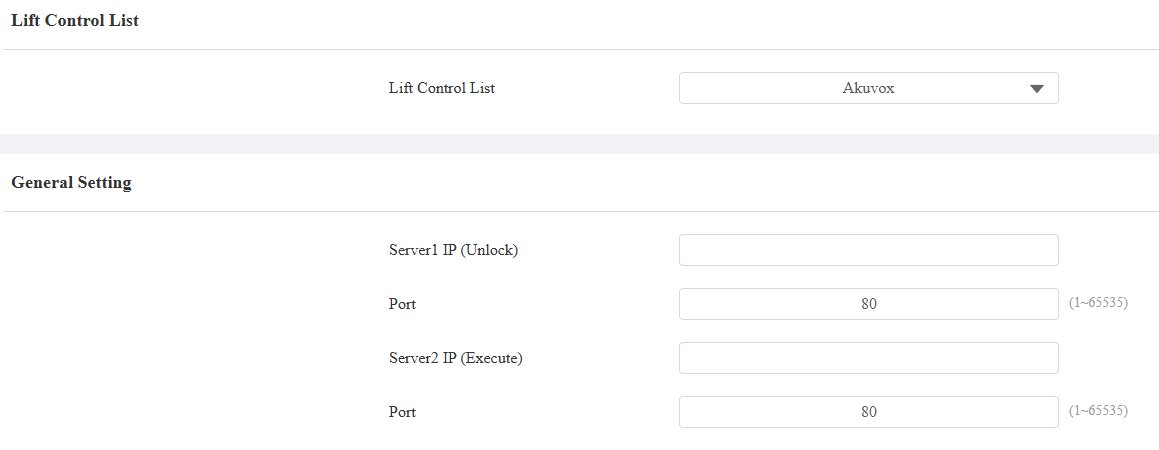
Navigate to the Device > Lift Control interface and select Akuvox in the Lift Control List.
Enter the EC33’s IP address and port.
In some elevator integrations, the elevator call control and floor access control are handled by separate controllers. To support this architecture, the device allows configuration of two EC33s.
If only one elevator controller is installed, configure only Server 1 IP.
Server 1(Unlock) – Floor Access Controller: Used to unlock floor buttons after authentication.
Server 2(Execute) – Elevator Call Controller: Used to trigger elevator dispatch.
Enter the username and password that have been set up on the EC33(Server1)’s web interface.
Set the Floor Starts From. For example, if you select -3, then the 3rd floor in the basement will be considered as the first floor.
Select the Ground Floor. If there are ground floors between the -1 and 1 floors, configure this option.
Select the Device Location where the access control device is installed.
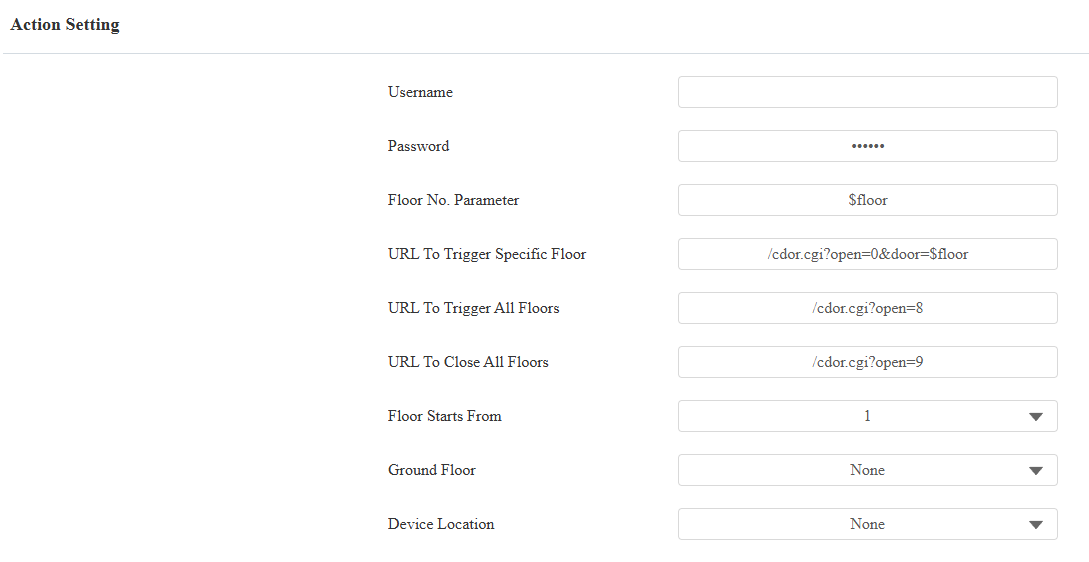
Submit the setting.
Control Logic
When a user is authorized to access one floor:
The system sends the Device Location command to both Server 1 and Server 2 to call the elevator.
The system sends the User Floor command to both Server 1 and Server 2 to unlock the authorized floor button.
When a user is authorized to access multiple floors:
The system sends the Device Location command to both Server 1 and Server 2 to call the elevator.
The system sends the User Floor command only to Server 1 to unlock all authorized floors.
Server 2 is not involved in floor authorization.
Then, configure the user credential.
Go to the Directory > User interface and click +Add.

Enter the user information and configure the desired access method.
.png "image-BA5O64RH(1).png")
.png "image-DG3CMLBC(1).png")
.png "image-8IAT6PQS(1).png")
Select the accessible floors.

Submit the setting.