Akuvox door phone S539 supports integration with Hitachi Elevator Control through an RS485 connection. This integration allows residents to access their authorized floor after entering the building and summon the elevator from an indoor monitor.
How It Works
In a typical deployment, an S539 door phone is connected directly to the Hitachi elevator control system through RS485.
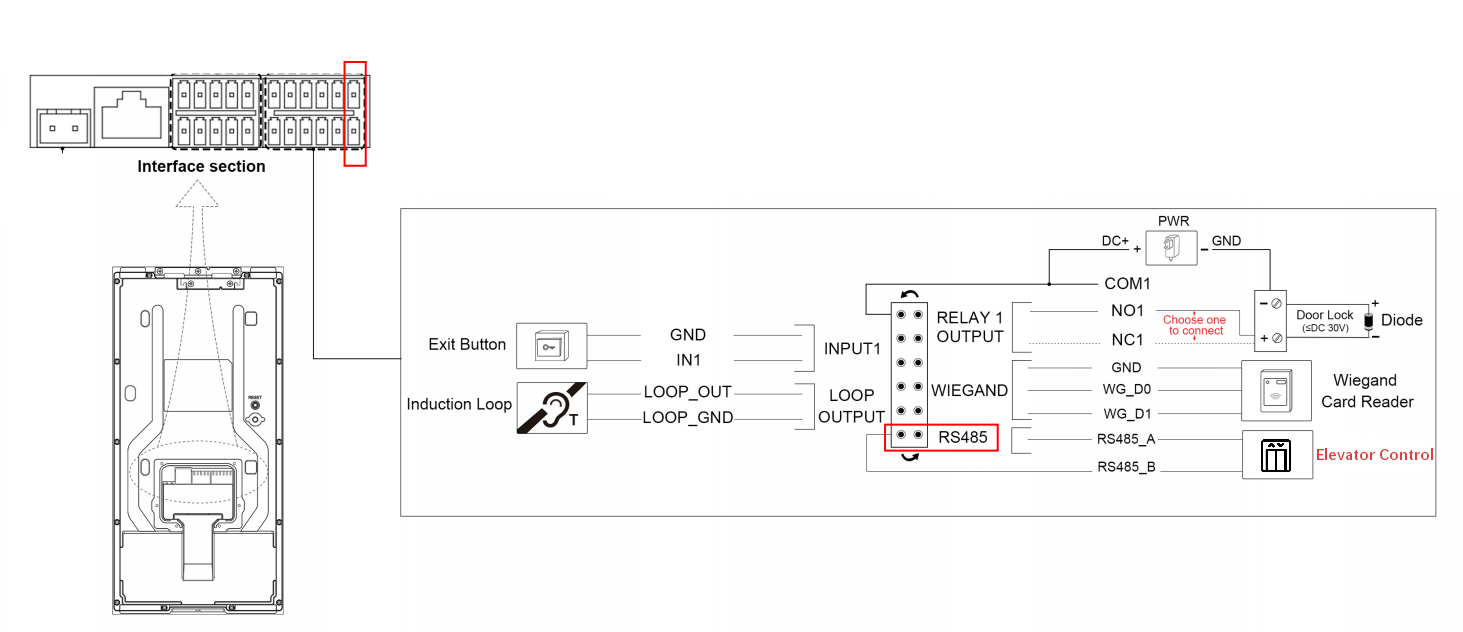
The S539 can be deployed as a first-floor unit or on another floor, depending on the project requirements.
For elevator control scenarios, the first-floor S539 and other Akuvox devices, such as indoor monitors, communicate over the same local network.
The integration supports the following scenarios:
Access the building and authorize the resident's floor: A resident authenticates at the first-floor S539 using a face, password, or card. After successful authentication, the door is unlocked, the elevator is summoned, and the resident's authorized floor is enabled according to the configured Room Number.
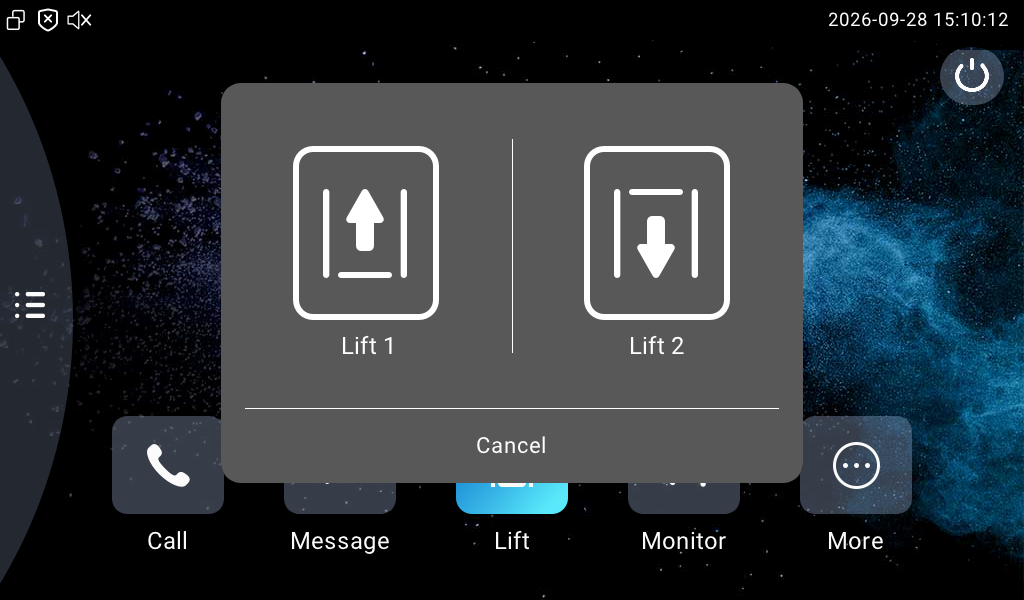
Summon the elevator from an indoor monitor: A resident can tap the lift icon on an indoor monitor to summon the elevator. The indoor monitor sends the request to the first-floor S539 over the local network, and the S539 communicates with the Hitachi elevator control system through RS485.
Note
The destination floor is determined by the resident's configured Room Number. This integration does not provide a floor-selection function for residents. The resident is authorized to access the floor associated with their Room Number.
Before You Start
Before configuring the integration, make sure:
The S539 and Hitachi elevator control system are connected through RS485.
The S539 and indoor monitors are connected to the same local network.
The S539 firmware is 539.30.10.710 or later.
The Hitachi elevator integration uses a generally applicable communication protocol and is not limited to a specific elevator controller model. Compatibility should be confirmed with the elevator system used in your project.
Step 1: Configure Hitachi Elevator Control on the S539
Note
Since the S539 communicates with the elevator control system through an RS485 connection, make sure the RS485 mode is set to Disabled on the Device > RS485 interface before configuring the elevator integration.
Navigate to the door phone’s IP address in a browser. Log in with the username and password(admin/admin by default).
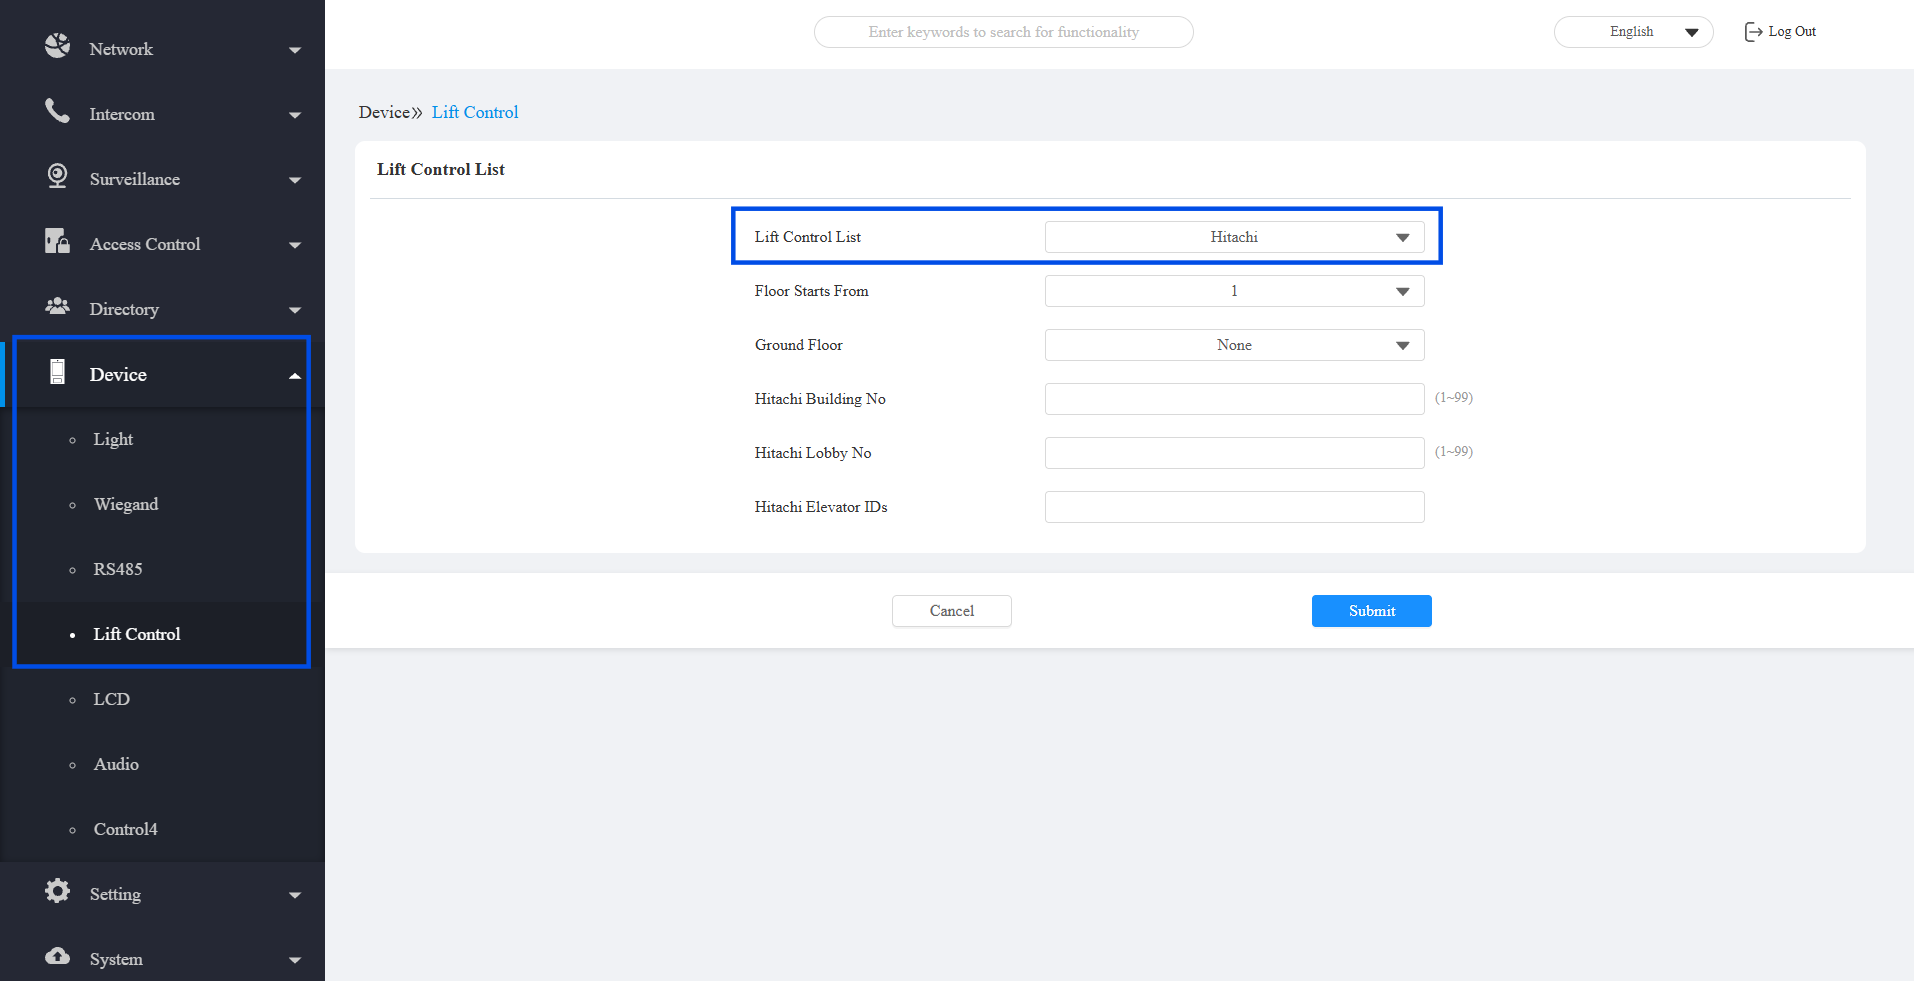
Go to Device > Lift Control.
Select Hitachi from the Lift Control list.
Configure Floor Starts From according to the project's floor numbering.
This setting determines where the floor count starts.
For example, if -3 is selected, the 3rd basement floor is treated as the first floor in the floor numbering.
Select Ground Floor if the project has a ground floor between floors -1 and 1.
Configure the following parameters according to the actual project installation:
Building No.: Enter the building number. The value can be set according to the project requirements.
Lobby No.: Enter the floor number where the S539 is installed. This value must match the actual installation location.
Elevator IDs: Enter the IDs of the elevator cars to be controlled, separated by semicolons (
;). For example, enter1;2;3if the project has three elevator cars. Up to 4 elevator IDs can be entered.
Click Submit.
Step 2: Configure the Resident's Room Number
The resident's Room Number determines the floor that the elevator will authorize after the resident is authenticated.
The Room Number must contain four digits. The first two digits identify the resident's floor.
For example:
2001→ Floor 200223→ Floor 2
Note
Make sure the Room Number accurately reflects the resident's actual apartment and floor. The elevator destination is determined automatically from this information; residents do not select a destination floor manually.
For On-Premise Projects
Go to Directory > User.
Click +Add to add a new user; click
 to modify a current one.
 Enter the username.
Configure the user's access method, such as face, password, or card.
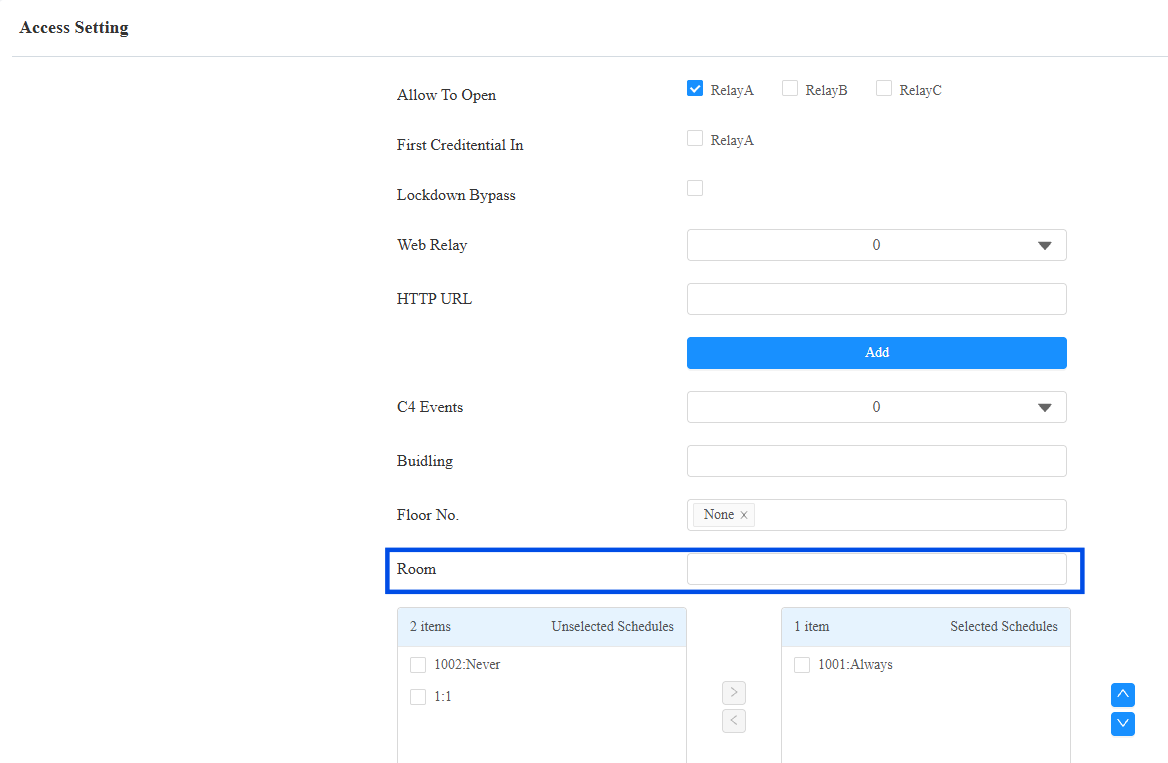
Scroll down to Access Setting.
Enter the resident’s 4-digit room number.
Click Submit.
For Cloud Projects
When the door phone is deployed on the SmartPlus Cloud, configure the resident’s apartment number(room number) on the cloud.
Log in to the cloud with your installer account.
Navigate to the target community on the Sites module.
Select the target building.
Click New to add a new apartment; click
to modify a current one. In the APT field, enter the 4-digit apartment number.
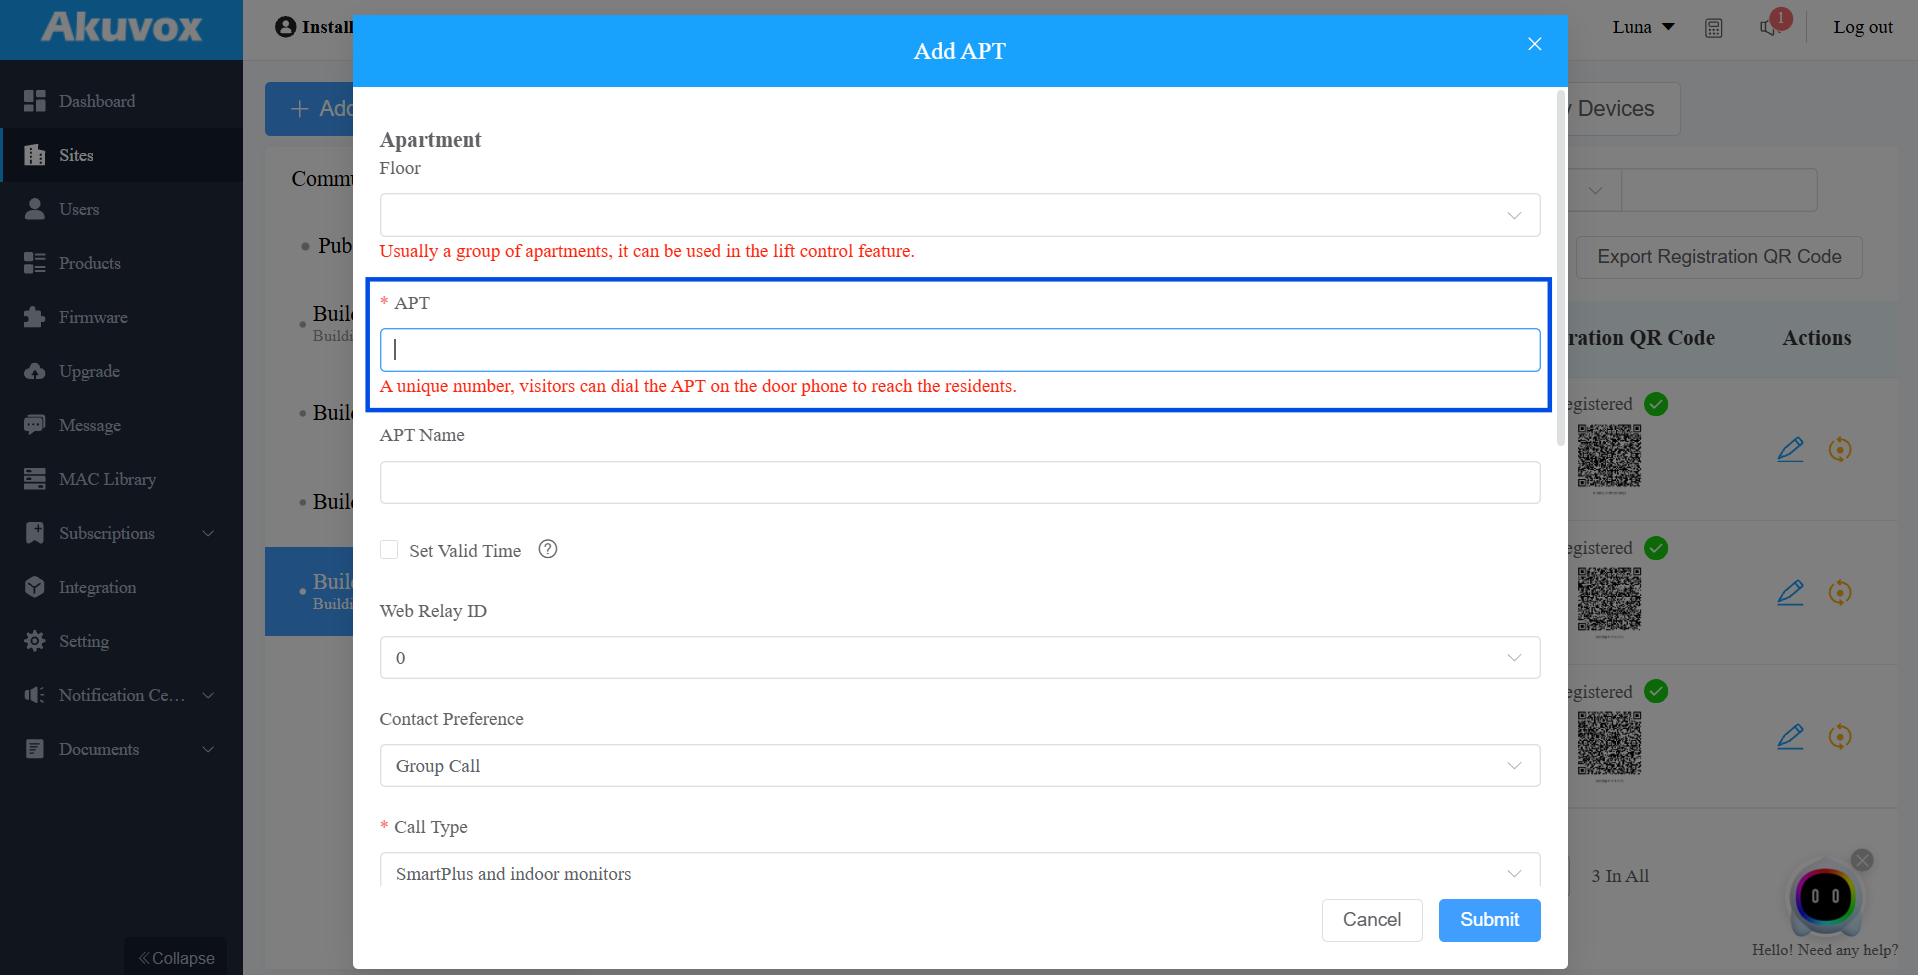
Click Submit.
Step 3: Configure the Indoor Monitor
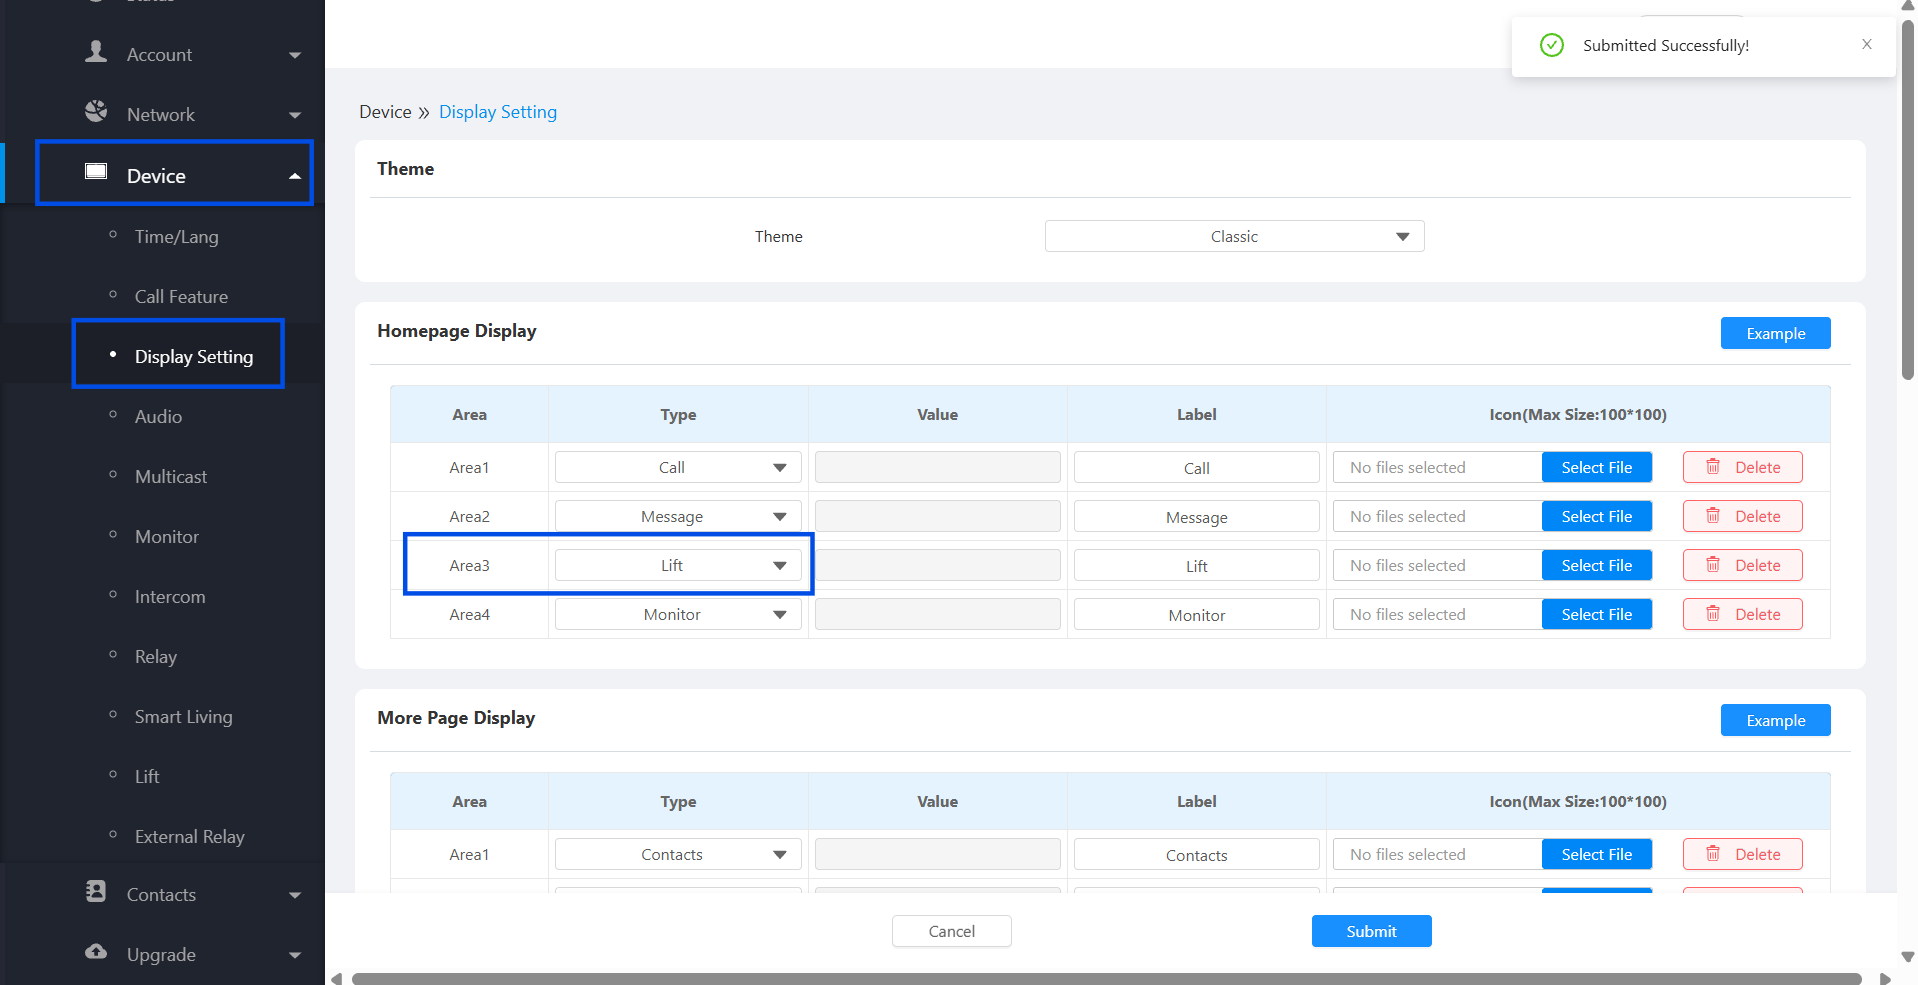
Residents can summon or send the lift by tapping the lift icon on Akuvox indoor monitors.
In this deployment, the indoor monitor sends an HTTP command to the door phone. The door phone then communicates with the connected elevator control system to summon the lift or authorize the destination floor.
Take S562 as an example.
Navigate to the indoor monitor’s IP address in a browser. Log in with the username and password(admin/admin by default).
Go to Device > Display Setting interface. Set the Lift icon to be displayed on the desired area on the indoor monitor’s screen.
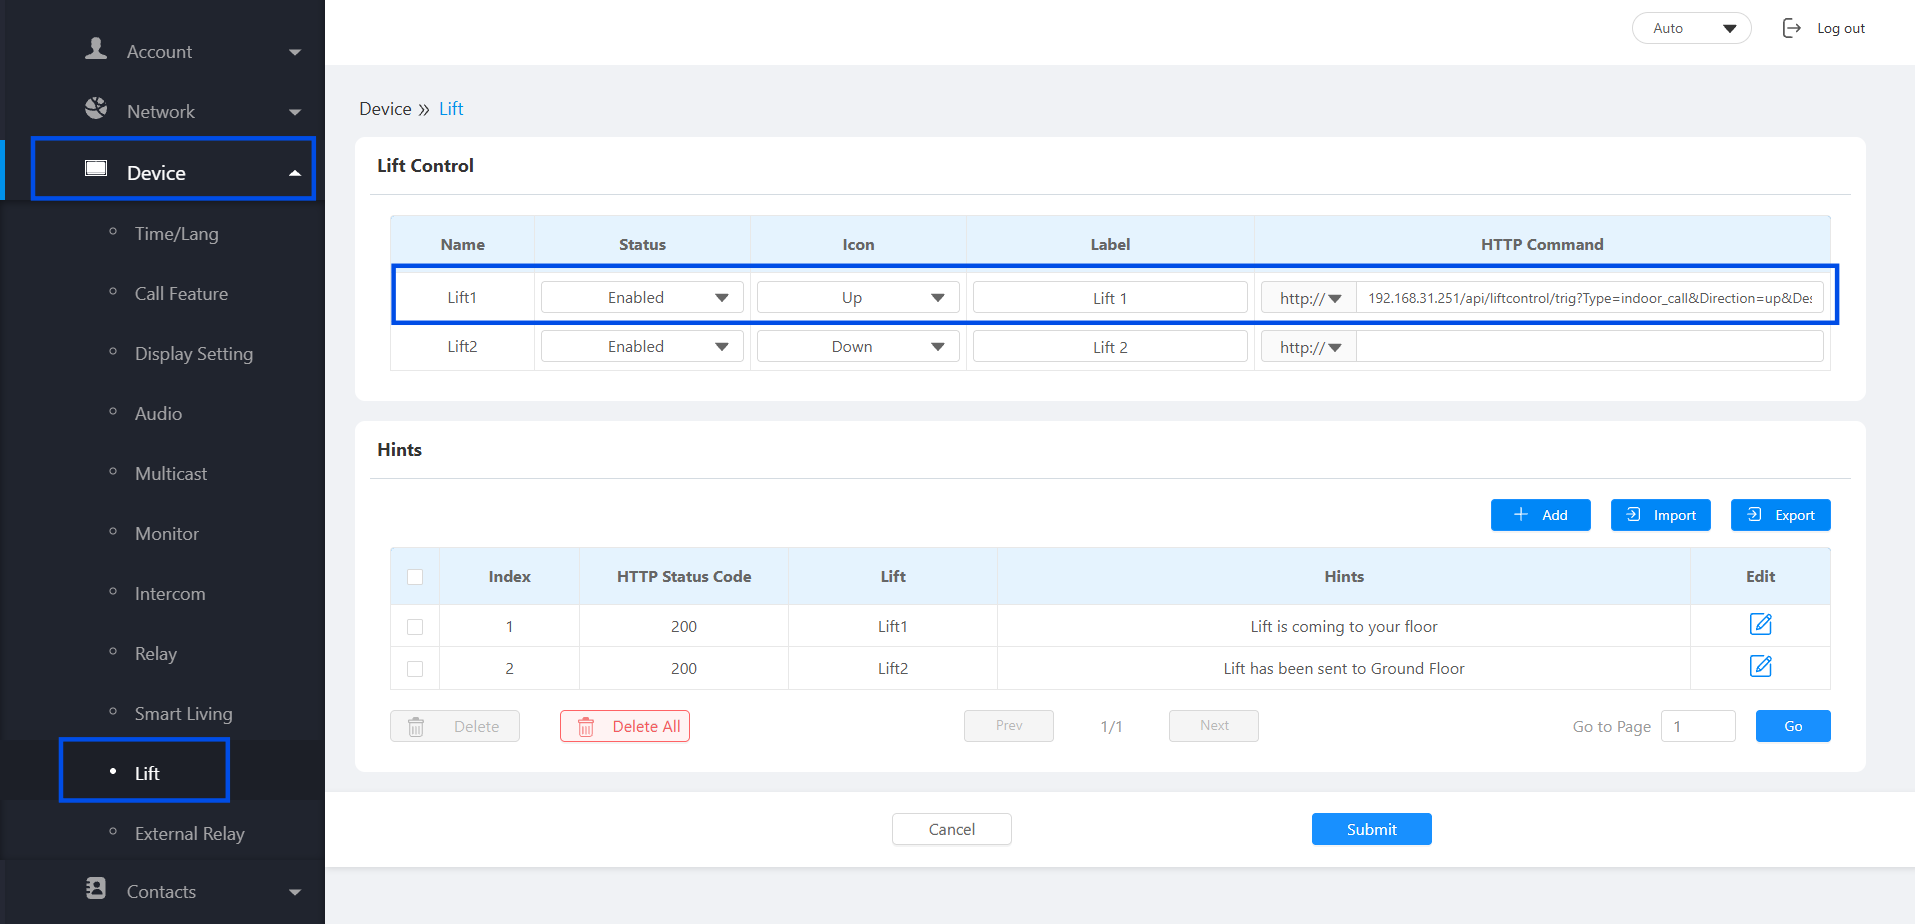
Go to Device > Lift interface.
Enable Lift1 and/or Lift2.
Choose the Icon Type: Up, Down, or General.
Enter the HTTP Command in the following format:
https://{Door Phone IP}/api/liftcontrol/trig?Type=indoor_call&Direction={up/down}&DestinationFloor={floornumber}&DestinationRoom={roomnumber}
For example:
https://192.168.31.123/api/liftcontrol/trig?Type=indoor_call&Direction=up&DestinationFloor=2&DestinationRoom=2001
Parameter | Description |
|---|---|
Type | Specify the request type. |
Direction | Specify the elevator direction, such as |
DestinationFloor | Specify the installation floor of the door phone. |
DestinationRoom | Specify the resident room number associated with the request. This determines the floor that the elevator will authorize. |
Click Submit.
Result Verification
After completing the configuration, verify the integration using the following scenarios.
Verify Access-Based Elevator Authorization
Go to the first-floor S539.
Authenticate as a configured resident using a face, password, or card.
Check that the elevator is summoned.
Check that the resident's authorized floor is enabled according to the configured Room Number.
For example, if the resident's Room Number is 2001, the elevator should authorize access to Floor 20.
Verify Elevator Control from an Indoor Monitor
Go to the indoor monitor.
Tap the configured Lift icon.
Verify that the elevator is summoned as expected.