Door Access Control Configuration
- 07 Mar 2024
- Print
- DarkLight
- PDF
Door Access Control Configuration
- Updated on 07 Mar 2024
- Print
- DarkLight
- PDF
Article Summary
Share feedback
Thanks for sharing your feedback!
Relay Switch Setting
You can configure the relay switch(es) for the door access on the web Intercom > Relay > Relay interface.

Relay ID: The specific relay for door access. Please note that R29Z/R29ZL has only one relay available.
Type: Determine the interpretation of the Relay Status regarding the state of the door:
- Default State: A “Low” status in the Relay Status field indicates that the door is closed, while “High” indicates that it is opened.
- Invert State: A “Low” status in the Relay Status field indicates an opened door, while “High” indicates a closed one.
Mode: Specify the conditions for automatically resetting the relay status.
- Monostable: The relay status resets automatically within the relay delay time after activation.
- Bistable: The relay status resets upon triggering the relay again.
Trigger Delay (Sec): Set the delay time before the relay triggers. For example, if set to 5 seconds, the relay activates 5 seconds after pressing the Unlock button.
Hold Delay (Sec): Determine how long the relay stays activated. For example, if set to 5 seconds, the relay remains to be opened for 5 seconds before closing.
DTMF Mode: Set the digits of the DTMF code.
1 Digit DTMF: Define the 1-digit DTMF code within the range(0-9 and *,#) when the DTMF Mode is set to 1-Digit.
2-4 Digit DTMF: Set the DTMF code based on the number of digits selected in the DTMF Mode.
Relay Status: Indicate the states of the relay, which are normally opened and closed. By default, it shows low for normally closed(NC) and high for Normally Open(NO).
Relay Name: Assign a distinct name for identification purposes.
Note
External devices connected to the relay require separate power adapters.
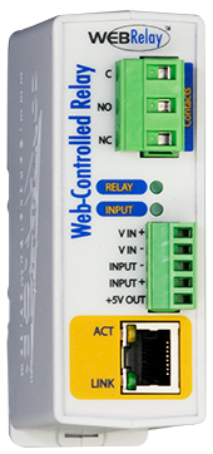
Web Relay Setting
A web relay has a built-in web server and can be controlled via the Internet or a local network. The device can use a web relay to either control a local relay, or a remote relay somewhere else on the network.
To set up a web relay, go to Phone > Web Relay interface.

Type: Determine the type of relay activated when employing door access methods for entry.
- Disabled: Only activate the local relay.
- WebRelay: Only activate the web relay.
- Both: Activate both the local relay and web relay. Typically, the local relay is triggered first, followed by the web relay to execute their pre-configured actions.
IP Address: The web relay IP address provided by the web relay manufacturer.
User Name: The user name provided by the web relay manufacturer.
Password: The manufacturer-provided authentication key for the web relay. Authentication occurs via HTTP. Leaving the Password field blank indicates non-use of HTTP authentication. You can define the password using HTTP GET in the Web Relay Action field.
Web Relay Action: Configure the actions to be performed by the web relay upon triggering. Enter the manufacturer-provided URLs for various actions, with up to 50 commands.
NOTE
If the URL includes full HTTP content (e.g., http://admin:admin@192.168.1.2/state.xml?relayState=2), it doesn't rely on the IP address that you entered above. However, if the URL is simpler (e.g., "state.xml?relayState=2"), the relay uses the entered IP address.
Web Relay Key: Determine the methods to activate the web relay based on whether the DTMF code is filled.
- Filling with the configured DTMF code restricts activation to card swiping and DTMF.
- Leaving it blank enables all door-opening methods.
Web Relay Extension: Specify the intercom device and the methods it can use to activate the web relay during calls.
- When an intercom device’s IP/SIP is specified, only that device can trigger the web relay (except for via card swiping or DTMF) during calls.
- If left blank, all devices can trigger the relay during calls.
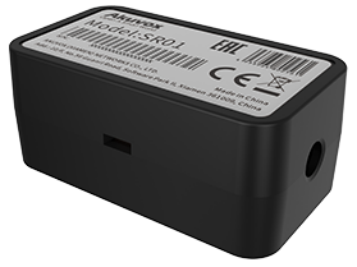
Security Relay Setting
The Security Relay, known as Akuvox SR01, is a product designed to bolster access security by preventing unauthorized forced entry attempts. Installed inside the door, it directly governs the door opening mechanism, ensuring that the door remains secure even in the event of damage to the device.
To set up the security relay, navigate to Intercom > Relay > Security Relay.

Connect Type: The security relay connects to the door phone using RS485 by default.
Trigger Delay (Sec): Set the delay time before the relay triggers. For example, if set to 5 seconds, the relay activates 5 seconds after pressing the Unlock button.
Hold Delay (Sec): Determine how long the relay stays activated. For example, if set to 5 seconds, the relay remains to be opened for 5 seconds before closing.
1 Digit DTMF: Define the 1-digit DTMF code within the range(0-9 and *,#) when the DTMF Mode in the Relay section above is set to 1-Digit.
2~4 Digits DTMF: Set the DTMF code based on the number of digits selected in the DTMF Mode.
Relay Name: Name the security relay. The name can be displayed in door opening logs. When connecting to the SmartPlus Cloud, the Cloud server will automatically assign the relay name.
Door Access Schedule Management
Manage Relay Schedule
The relay schedule allows you to set a specific relay to always open at a certain time. This is helpful for situations like keeping the gate open after school or keeping the door open during work hours.
To configure a relay schedule, go to Intercom > Relay > Relay Schedule interface.

Relay ID: Specify the relay you need to set up.
Schedule Enabled: Assign particular door access schedules to the chosen relay. Simply move them to the Enabled Schedules box.
For instructions on creating schedules, kindly consult the next chapter.
Configure Door Access Schedule
A door access schedule lets you decide who can open the door and when. It applies to both individuals and groups, ensuring that users within the schedule can only open the door using the authorized method during designated time periods.
You can manage the door access schedule on the device and the device’s web interface.
Create Door Access Schedule on the Web Interface
You can create door access schedules for daily, weekly, or custom time periods.
To set up the schedule, navigate to the Intercom > Schedule > Schedule Setting interface.
To create a daily schedule:

To create a weekly schedule: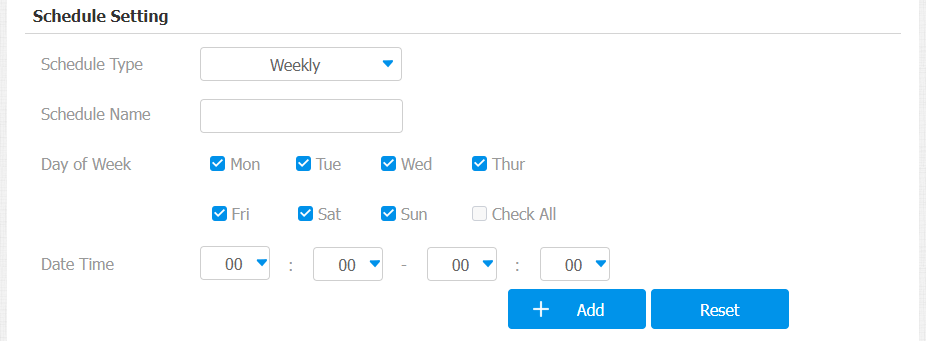
To create a longer period schedule:
After the access control schedule is set up, you can assign the schedule on the Intercom > Relay > Relay Schedule interface.
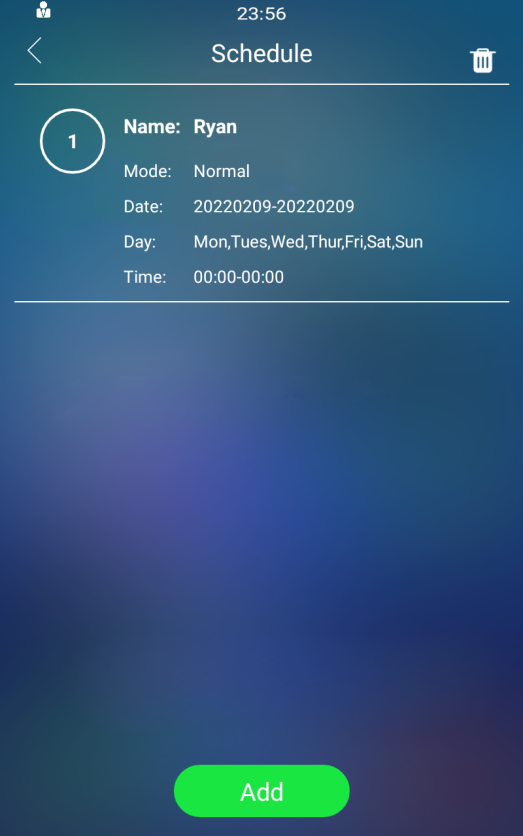
Create Door Access Schedule on the Device
You can create door access schedules for daily, weekly, or custom time periods.
You can also create a door access schedule on the device Schedule > Add Schedule screen.

Edit the Door Access Schedule
Edit the Door Access Schedule on the Web Interface
To edit the schedule, go to the Intercom > Schedule > Schedule Management interface.

Edit the Door Access Schedule on the Device
To edit the schedule, go to the device Schedule > Schedule screen.
Import and Export Door Access Schedule
You can create door access schedules one by one or in bulk. You can export the current schedule file, edit it or add more schedules following the format, and import the new file to the desired devices. This helps you manage your door access schedules easily.
To import or export the schedule, go to the Intercom > Schedule > Import/Export Schedule(.xml) interface.

Was this article helpful?
-20190329_%E5%89%AF%E6%9C%AC.png)