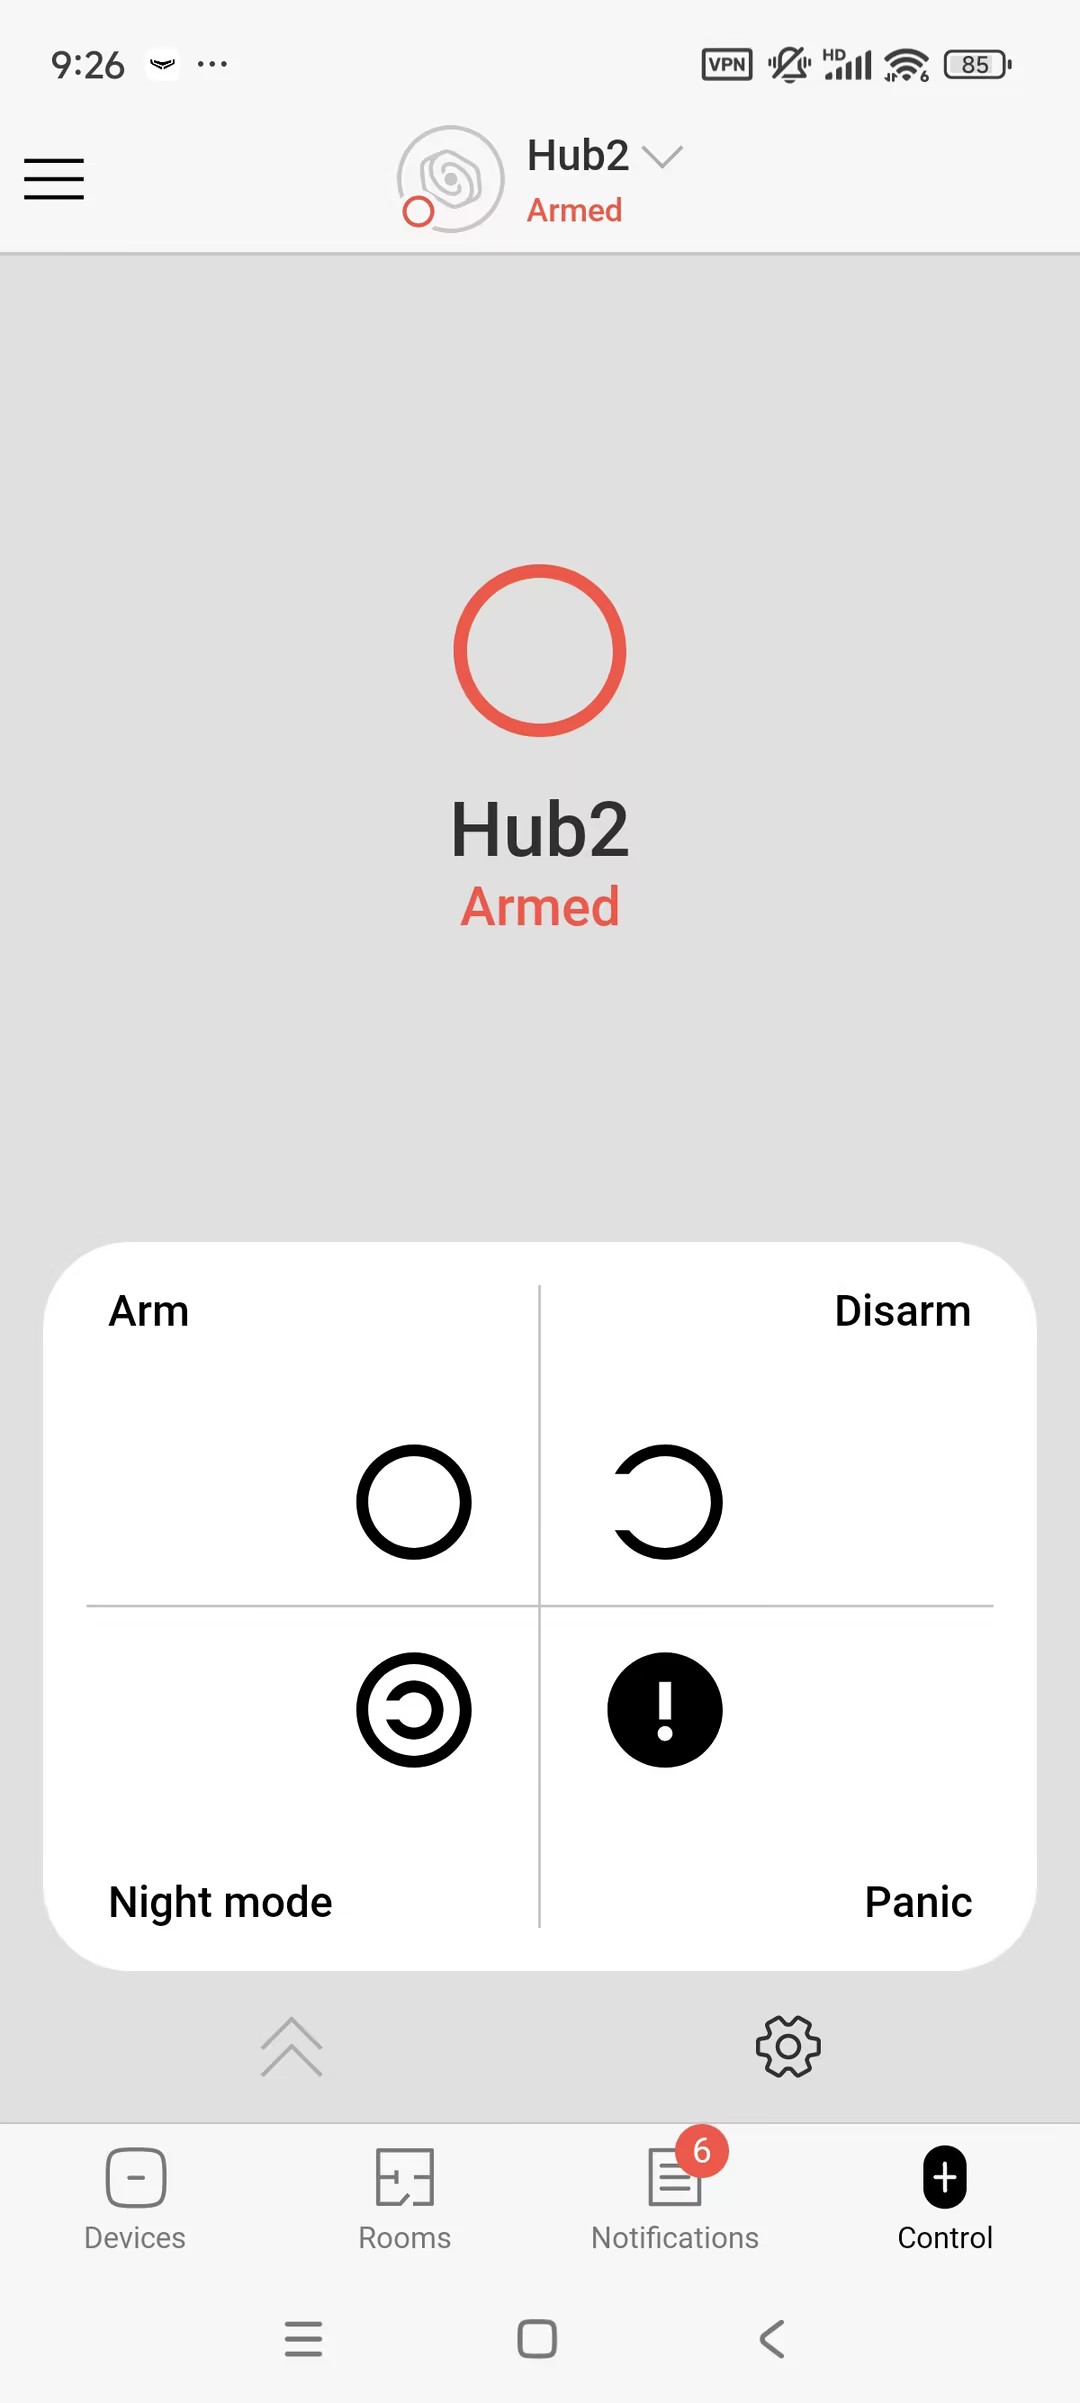
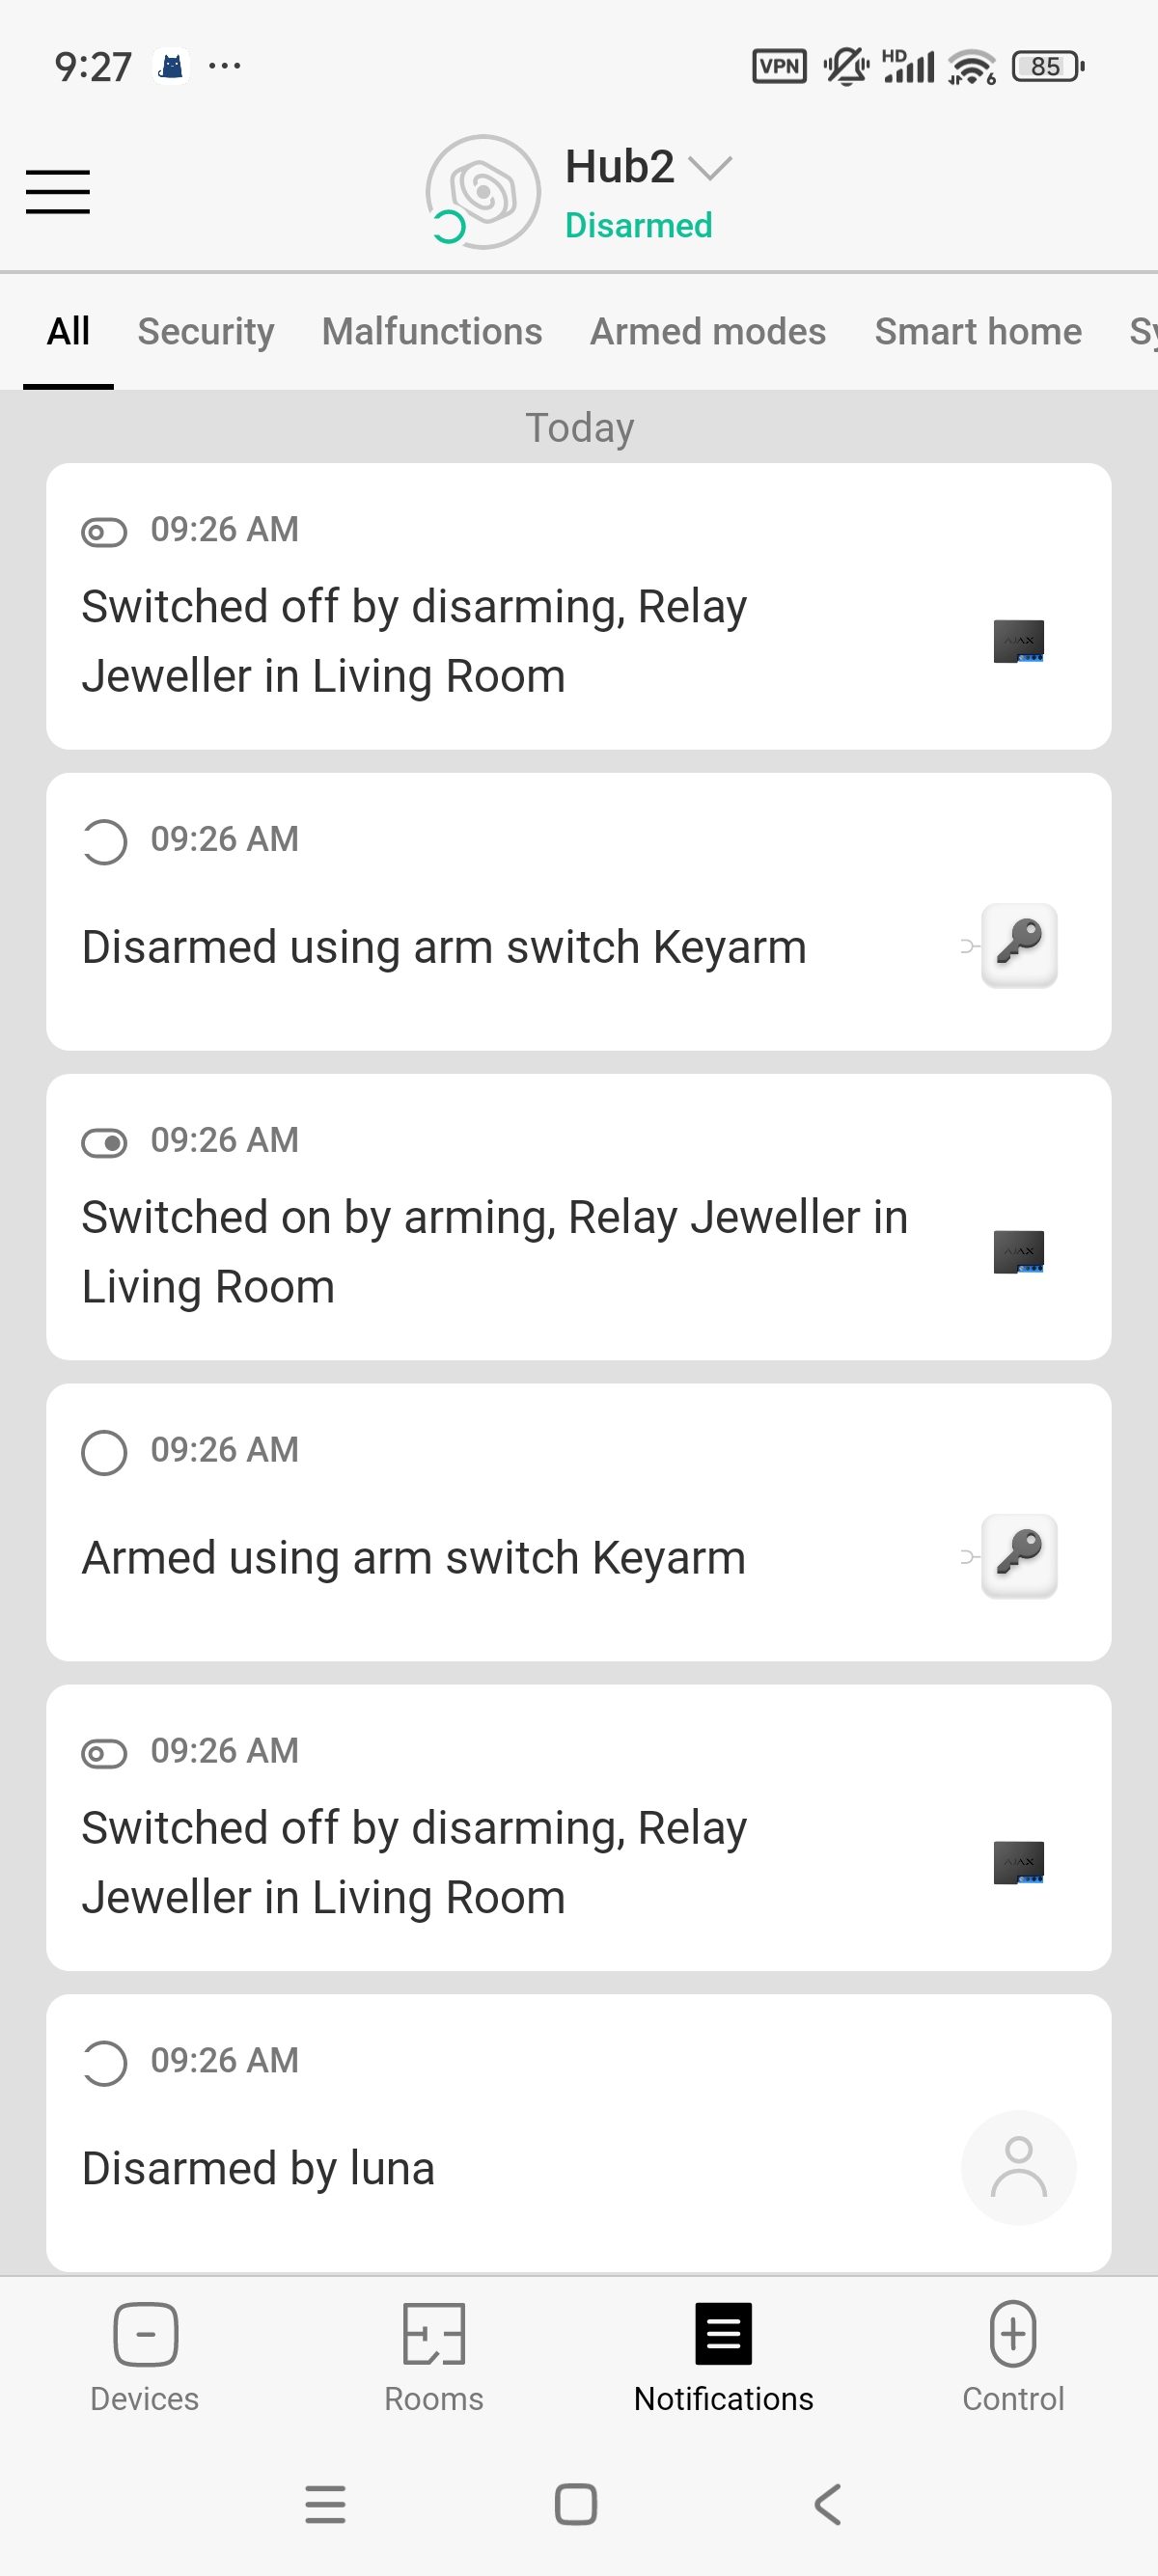
The Akuvox indoor monitors and door phone R20 can be integrated with the AJAX security system. The arming status and alarms can be synchronized between the indoor monitor, door phone, SmartPlus App, and the AJAX App.
Note
The following models with specific firmware versions or higher support this feature:
S567: 567.30.13.203;
X937: 937.30.13.122;
R20: 320.30.10.246.
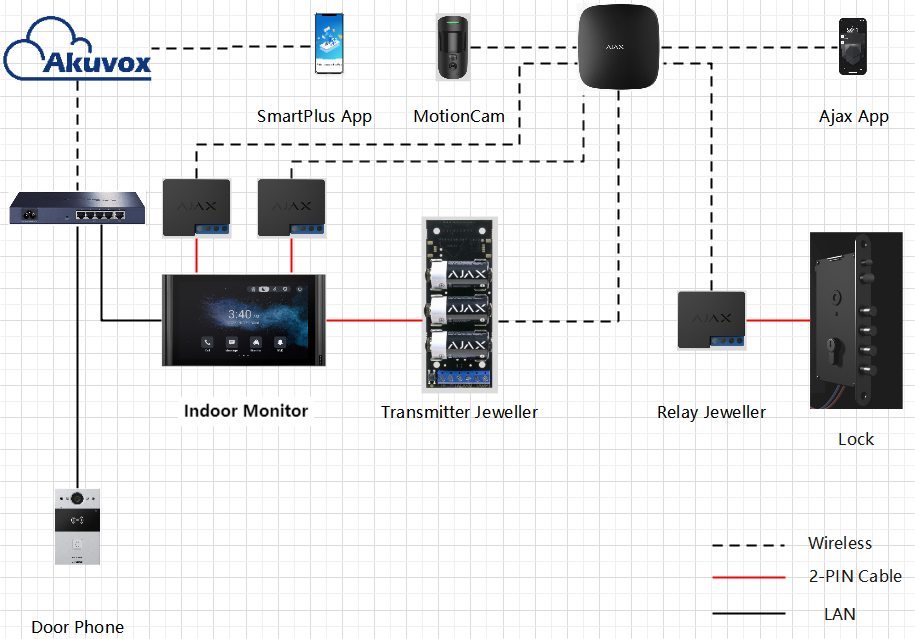
Topology
The AJAX hub should be on the same network as the Akuvox devices.
Wirings
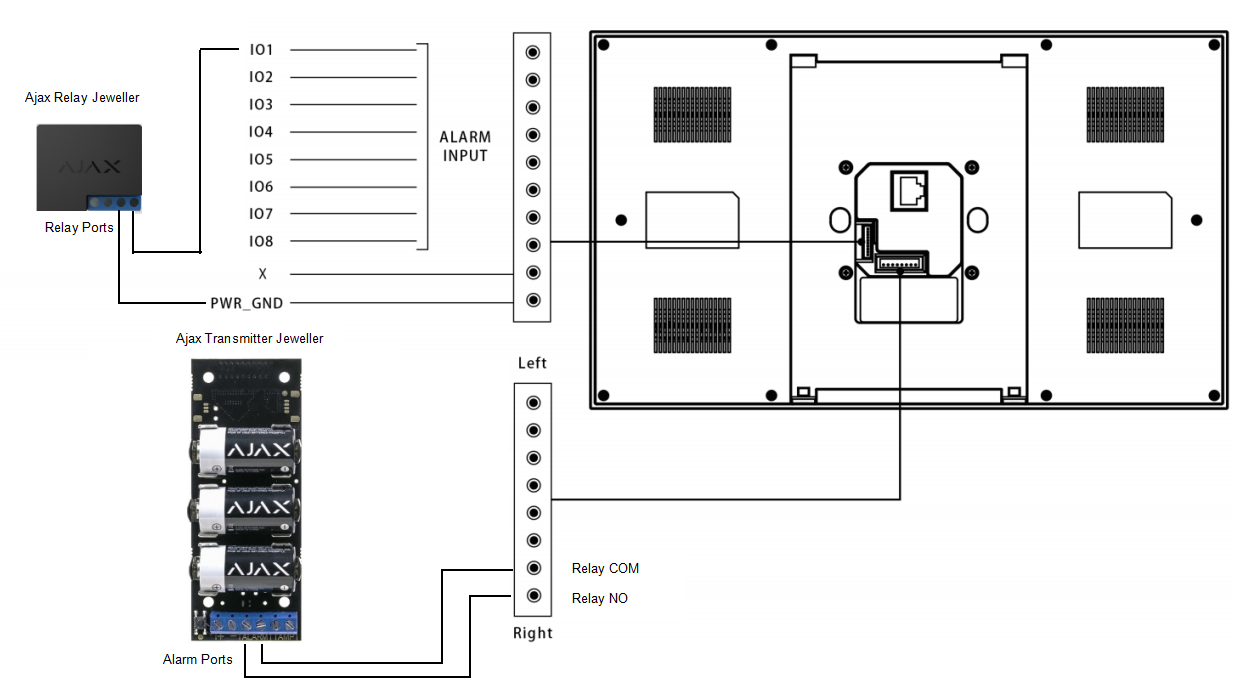
To transmit AJAX arming/disarming or alarm signal to the indoor monitor, connect the AJAX Relay Jeweller’s relays to the indoor monitor’s IO and GND. You can connect more than one relay jeweller to the indoor monitor.
To transmit the indoor monitor’s arming/disarming or alarm signal to the AJAX, connect the AJAX Transmitter Jeweller’s alarms to the indoor monitor’s relay NO and COM.
Configuration
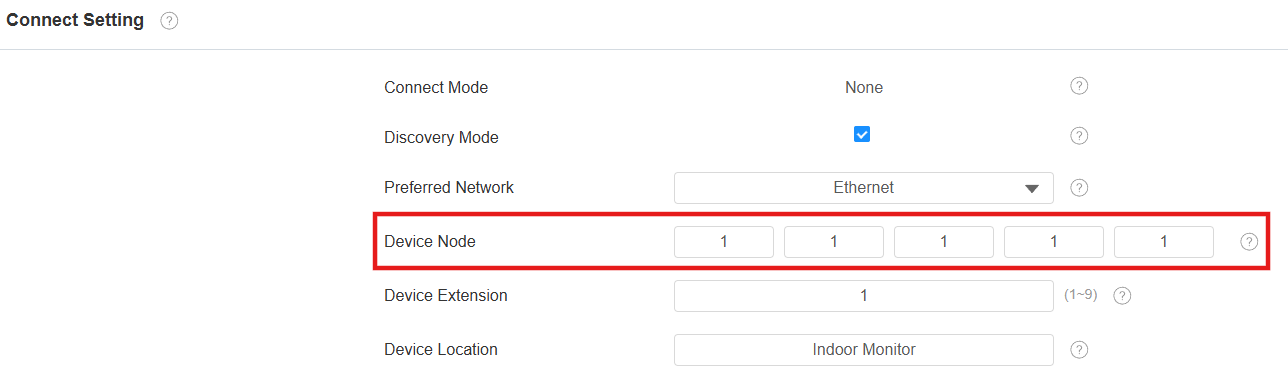
If the Akuvox devices are deployed locally, ensure they are installed under the same node.
If the Akuvox devices are deployed on the SmartPlus Cloud, ensure they are installed in the same room.
You can set the device node on its Network > Advanced > Connect Setting interface.
Specify the device address by entering device location information from the left to the right: Community, Building, Unit, Floor, and Room in sequence.
Set the Indoor Monitor
You need to set up the arming function on the indoor monitor’s web interface.
Zone Setting
Log into the device’s web interface with its IP address. The initial username and password are both admin.
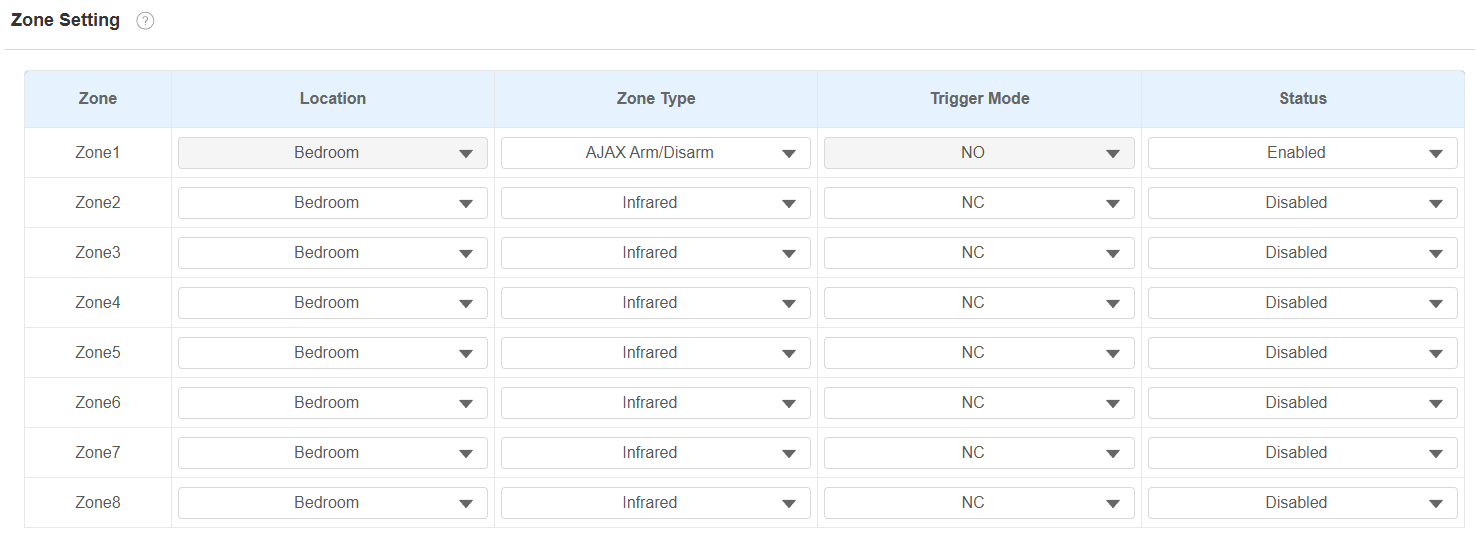
Go to Arming > Zone Setting interface. Set the zone based on which IO is connected to the AJAX Relay Jeweller. For example, Zone 1 corresponds to IO1.
Set the Location. The Trigger Mode is NO by default.
Set the Zone Type to AJAX Arm/Disarm or AJAX Alarm. After this setup, the location and trigger mode cannot be changed.
Set the Status to Enabled.
Click Submit.
You can also set up the feature on the Setting > Advance > Arming screen.
.png)
Arming Mode Setup
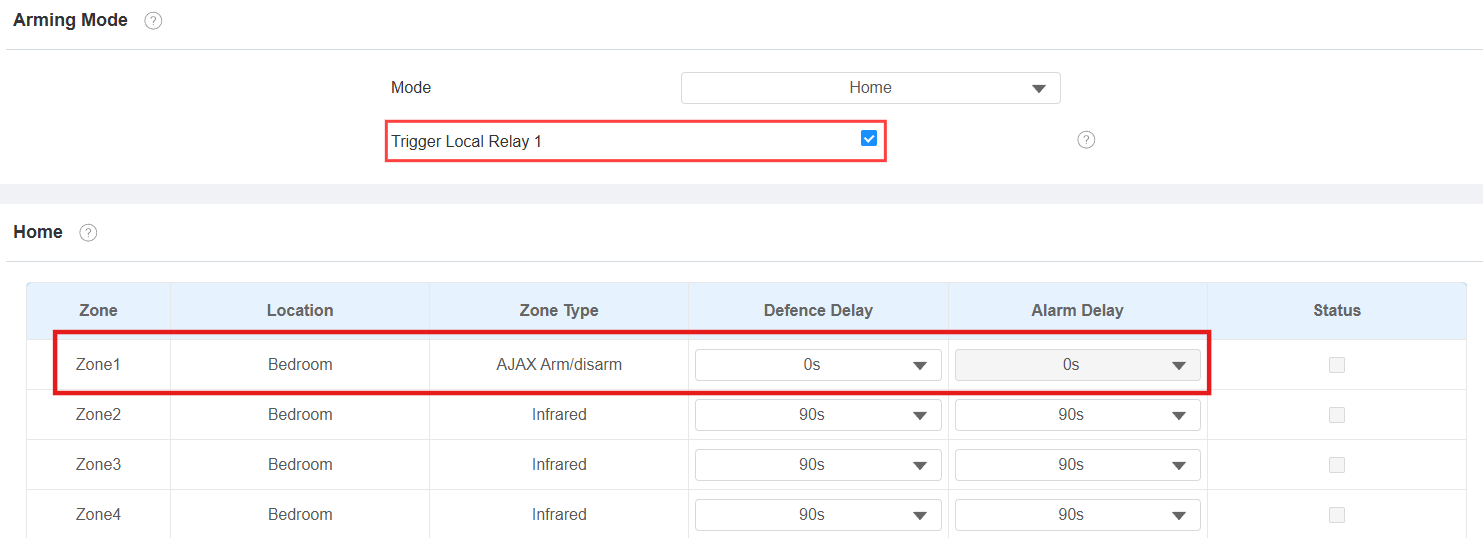
Go to Arming > Arming Mode interface. Enable Trigger Local Relay 1 so that the indoor monitor can send the arming/disarming or alarm signal to AJAX.
You can set up the Defence Delay, which will postpone the switch between different modes as well as the synchronization. The Alarm Delay is 0 by default and cannot be changed.
Arming Function
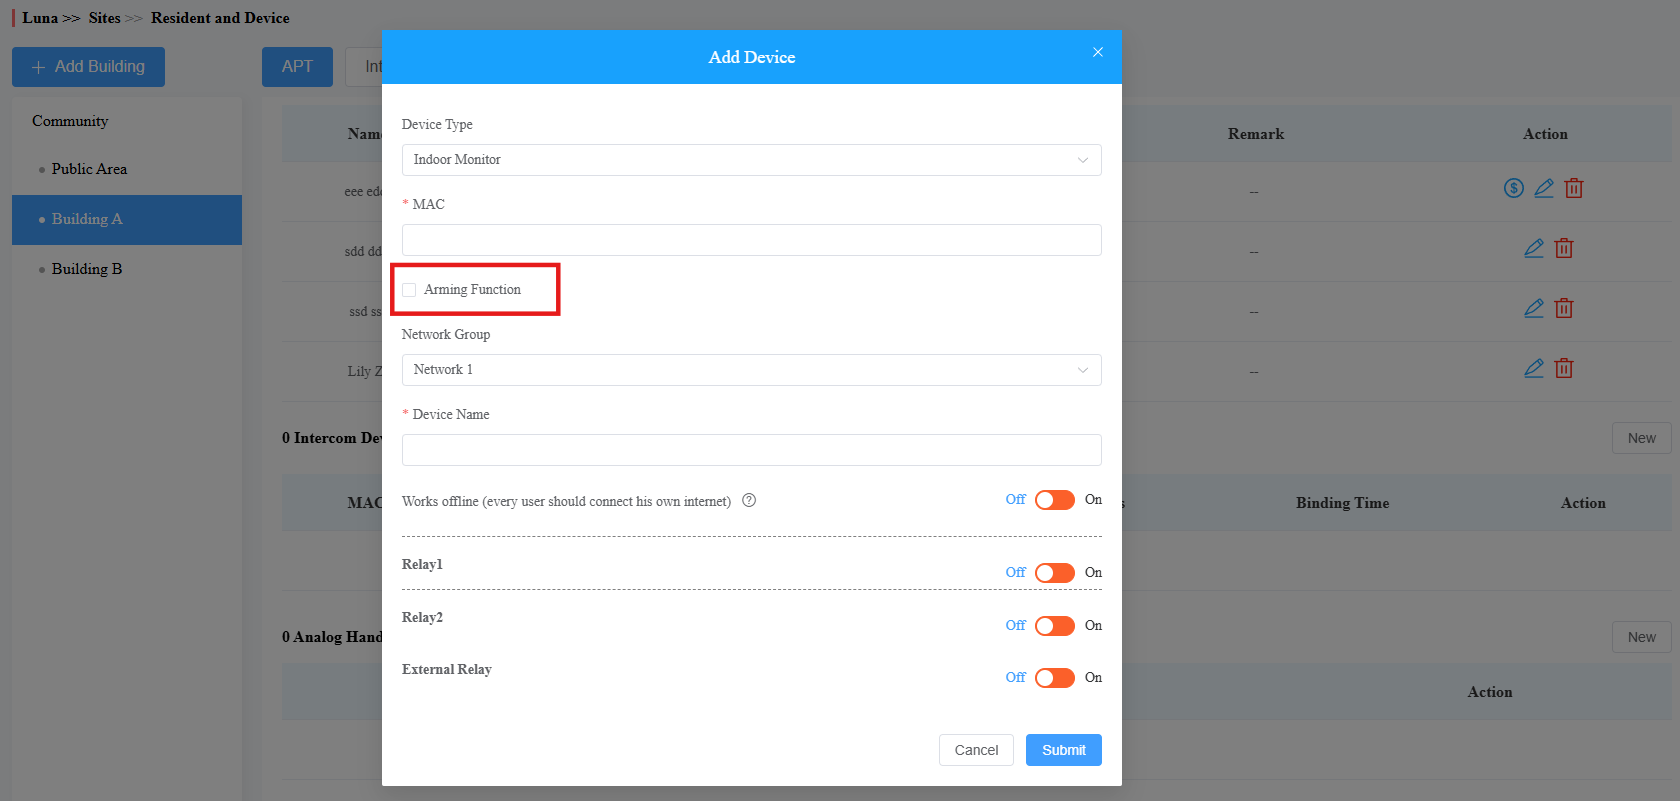
When the indoor monitor is deployed on the SmartPlus Cloud, you can enable the Arming Function when adding the device. In this case, end users can arm/disarm the device with their SmartPlus Apps.
Log into the SmartPlus Cloud platform with an installer account. Take a community project as an example.
Navigate to the target community by clicking
 on the Sites module.
Click
 of the target user.
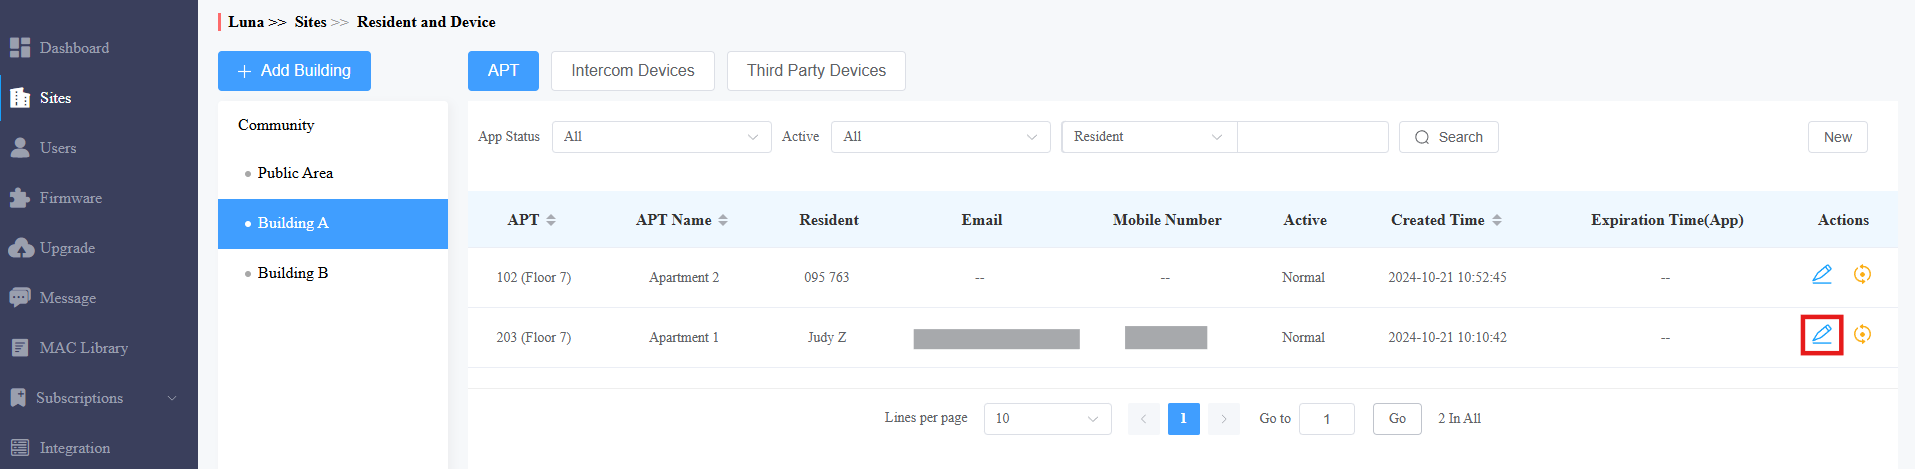
Find the Intercom Devices section. Check Arming Function when adding or modifying the indoor monitor.
Click Submit.
Set the Door Phone
Users can swipe cards on the door phone to arm or disarm the indoor monitor. The arming change will also be synchronized to AJAX.
Log into the device’s web interface with its IP address. The initial username and password are both admin.
Go to System > Security > Smart Security interface.
Check AJAX Mode Enabled.

Go to the Directory > User interface. Click Add to add a new user or click
 to modify an existing user.
Click Obtain and place the card on the device’s card reader. The card code will display automatically.

Click Submit.
After configuration, press the push button for about 2 seconds and the device will pronounce “Security Mode” and flash the red indicator light.
Then, swipe the card to change the arming status. The device will pronounce “Arming/Disarming Completed”. The status will synchronize to the indoor monitor and the AJAX.
The door phone will exit the Security Mode automatically after 5 seconds.
Set AJAX Devices
Before starting, make sure:
you have installed the AJAX App for engineers from AJAX's official website.
you have deployed AJAX devices and added them to the same hub.
Log into the AJAX Pro Desktop with your account.
Add Spaces and Devices. For details, please refer to the AJAX Pro Desktop User Manual.
Click
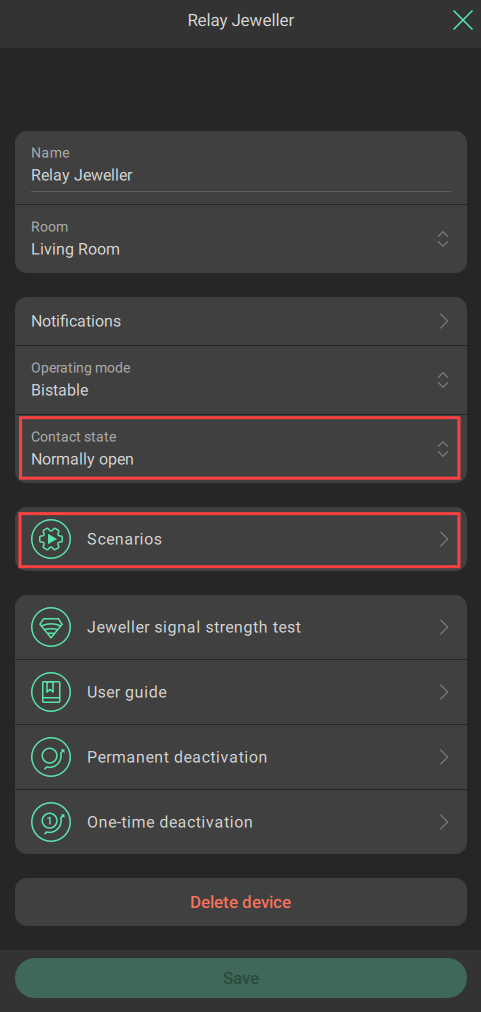
 of the Relay Jeweller.
Set the Contact State to Normally Open to make AJAX devices synchronize arming/disarming/alarms to the Akuvox devices
Click Scenarios. Based on what needs to be synchronized, select By Arming/Disarming and/or By Alarm.
Click
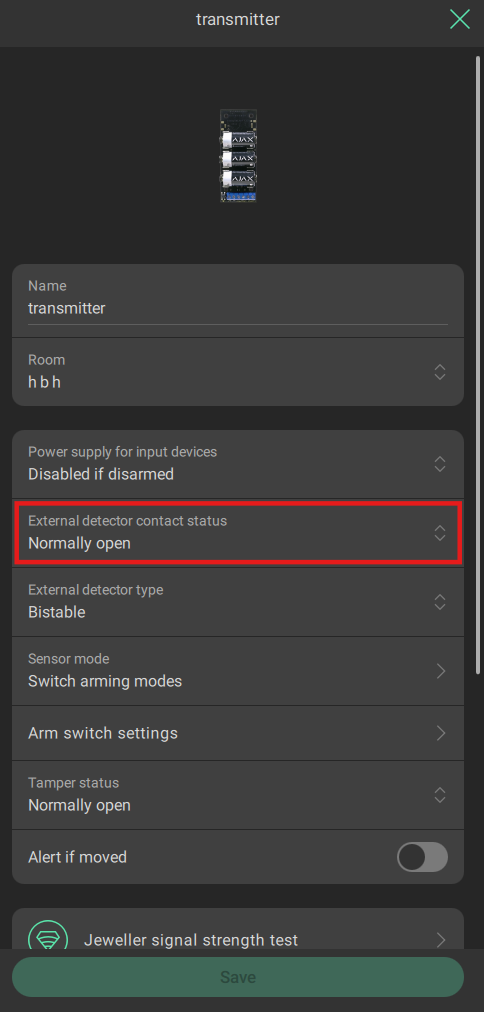
of the Transmitter Jeweller.Set the External detector contact status to Normally Open to make Akuvox devices synchronize arming/disarming/alarms to the AJAX devices.
Click Save.
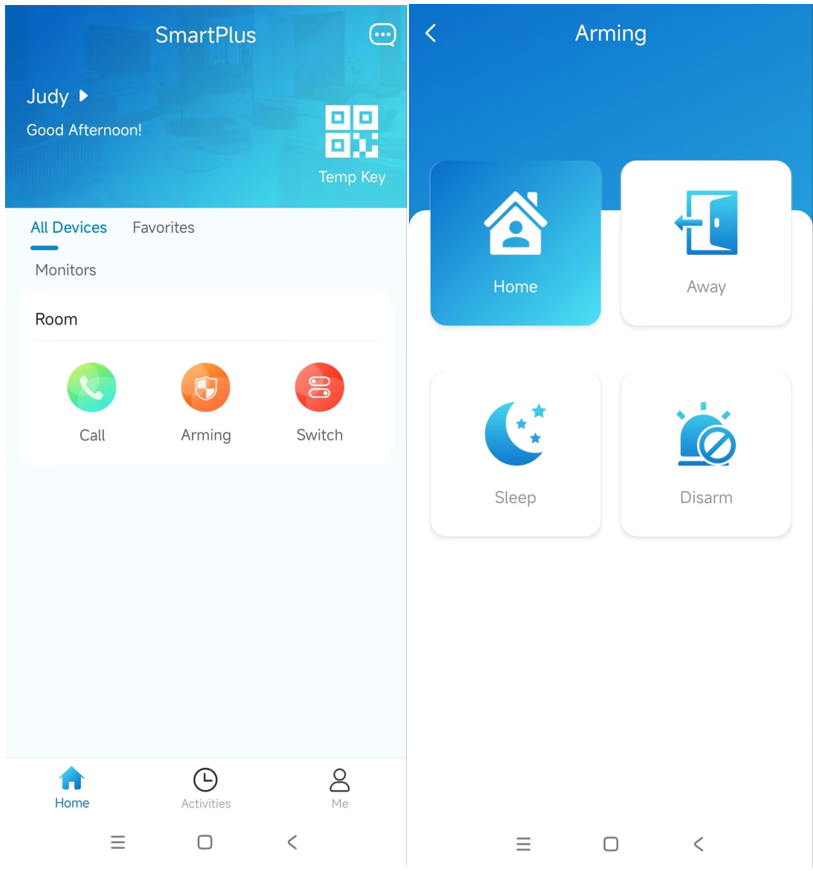
After configuration, end users can arm/disarm devices and receive notifications with their AJAX Apps and SmartPlus Apps. Please note that if the indoor monitor triggers the alarm, the AJAX App will not receive the notification.
SmartPlus:
AJAX: