Auto-answer Configuration
Auto-answer feature allows the device to automatically pick up incoming calls without any manual intervention.
To enable the auto-answer feature, go to the web Account > Advanced > Call interface.

To set it up, go to the web Device > Call Feature > Others interface.
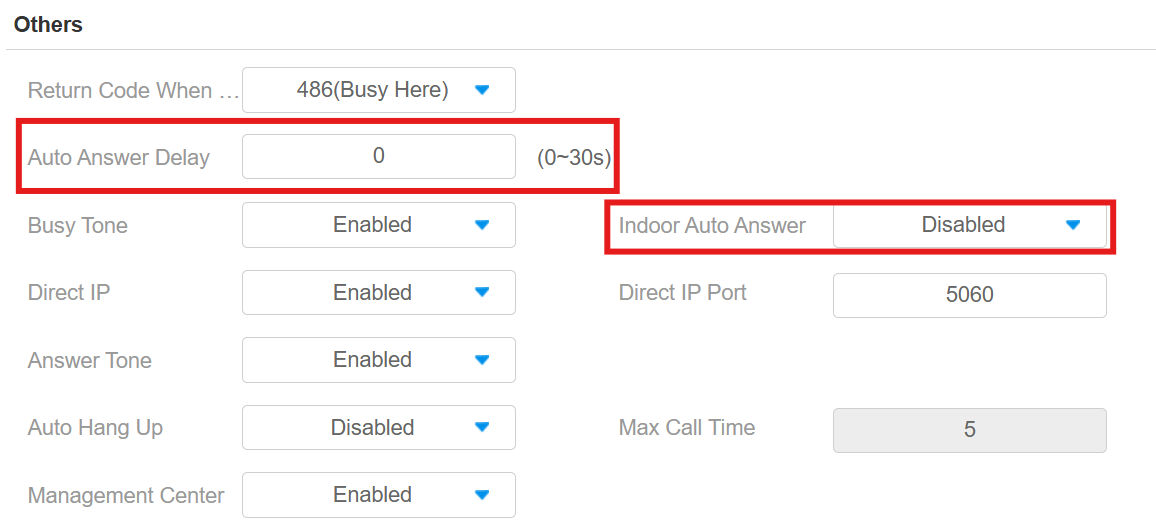
Auto Answer Delay: Set the time interval for the call to be automatically picked up after ringing. For example, if you set the delay time to 5 seconds, the device will answer the call automatically after 5 seconds.
Indoor Auto Answer: Allow calls from other indoor monitors to be answered by the device automatically.
Other Options:
Return Code When Refuse: Decide the code sent to the caller side via the SIP server when rejecting the incoming call.
Busy Tone: Decide whether to sound a busy tone when a call is hung up by the callee.
Answer Tone: Select the tone for answering calls automatically.
Auto Hang Up: Set whether to hang up the incoming calls automatically.
Max Call Time: Specify the maximum duration of all calls. The device will end the call automatically when the time limit is reached.
Management Center: Decide whether to generate the contact labeled Management Center.
When the device is deployed on the SmartPlus Cloud, the cloud system will issue the SmartPlus Property Manager App and the guard phone R49 as a contact labeled Management Center. When this function is disabled, the PM App and guard phone will be displayed as contacts separately.
When the device is deployed on the SDMC, SDMC is shown as Management Center on the device screen. When the function is disabled, no contacts will be displayed as Management Center.
Auto-answer Allow List Setting
La réponse automatique ne peut s’appliquer qu’aux numéros SIP ou IP déjà ajoutés dans la liste des autorisations de réponse automatique de votre moniteur intérieur. Par conséquent, vous devez configurer ou modifier les numéros dans la liste des autorisations sur l’interface web.
To set it up, go to the Device > Call Feature > Auto Answer AllowList interface. Click +Add to add the allowed device.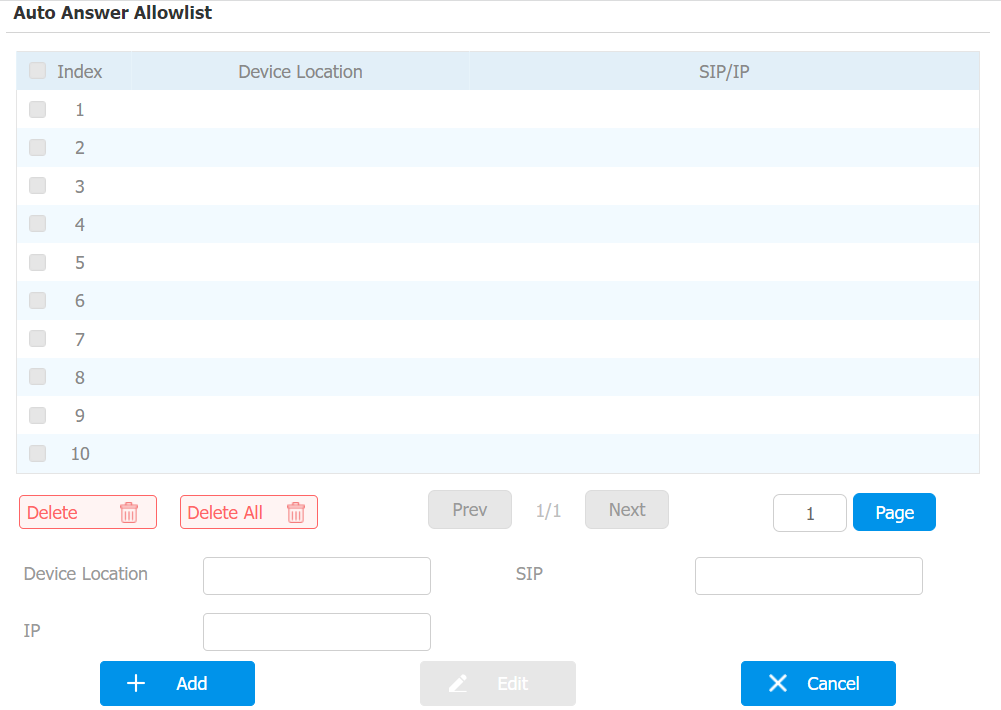
Device Location: Specify the allowed device’s name or location.
SIP/IP: Enter the allowed device’s SIP or IP number.
You can import and export the auto-answer allowlist for quick setup.
Note
SIP/IP number files to be imported or exported must be in either .xml or .csv format.
SIP/IP numbers must be set up in the contacts of the indoor monitor before they can be valid for the auto-answer function.
Intercom Preview
To see the image at the door station before answering the incoming call, you can enable the intercom preview function on web Device > Intercom > Intercom interface.
Intercom Preview: If it is enabled, the group call is not available.
Emergency Call
La fonction d’appel d’urgence est conçue pour les situations urgentes, particulièrement bénéfiques pour les personnes âgées et les enfants. Les utilisateurs peuvent afficher le bouton SOS sur l’écran du moniteur intérieur. Lorsque le bouton est pressé, l’appareil appelle automatiquement les contacts d’urgence désignés, garantissant une aide rapide au besoin.
To display the emergency call softkey, navigate to the web Device > Key/Display > Home Page Display/More Page Display interface.
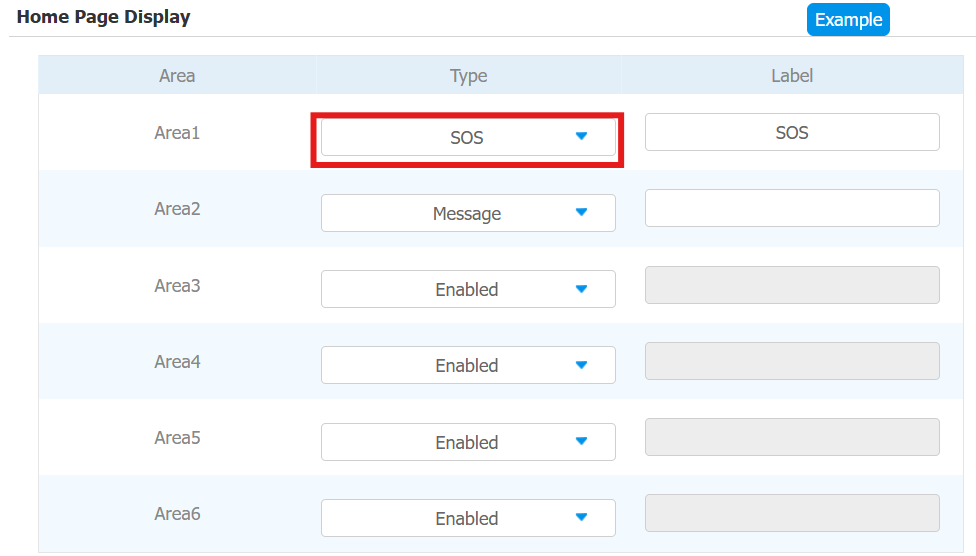
You also need to set up specific parameters on the device or the device web interface. To set it up on the device, go to More > Settings > Advance > SOS screen.
To set it up on the web interface, go to Device > Intercom > SOS interface
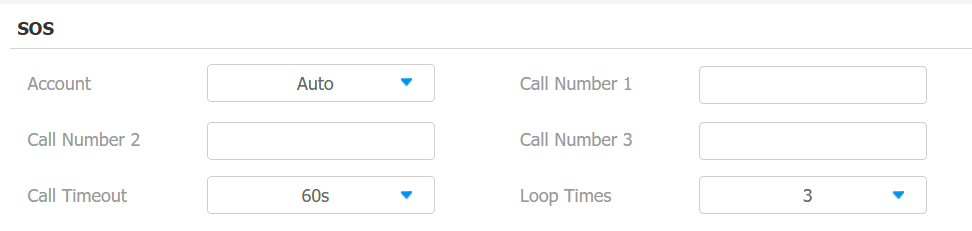
Account: The account to make SOS calls.
Call Number: 3 SOS numbers can be set up. Once users press the SOS key on the home page, indoor monitors will call out the numbers in order.
Call Timeout: The call duration for each number. When users call out and the other side does not answer within the timeout, indoor monitors will continue to call the next number.
Loop Times: Set up the call loop times.
Multicast
La fonction Multicast permet la diffusion un-à-plusieurs pour différentes finalités. Par exemple, il permet au moniteur intérieur d’annoncer des messages de la cuisine vers d’autres pièces ou de diffuser des notifications du bureau de gestion vers plusieurs endroits. Dans ces situations, les moniteurs d’intérieur peuvent écouter ou envoyer des émissions audio.
Cliquez ici pour regarder la vidéo de démonstration.
To set it up, go to the web Device > Multicast interface.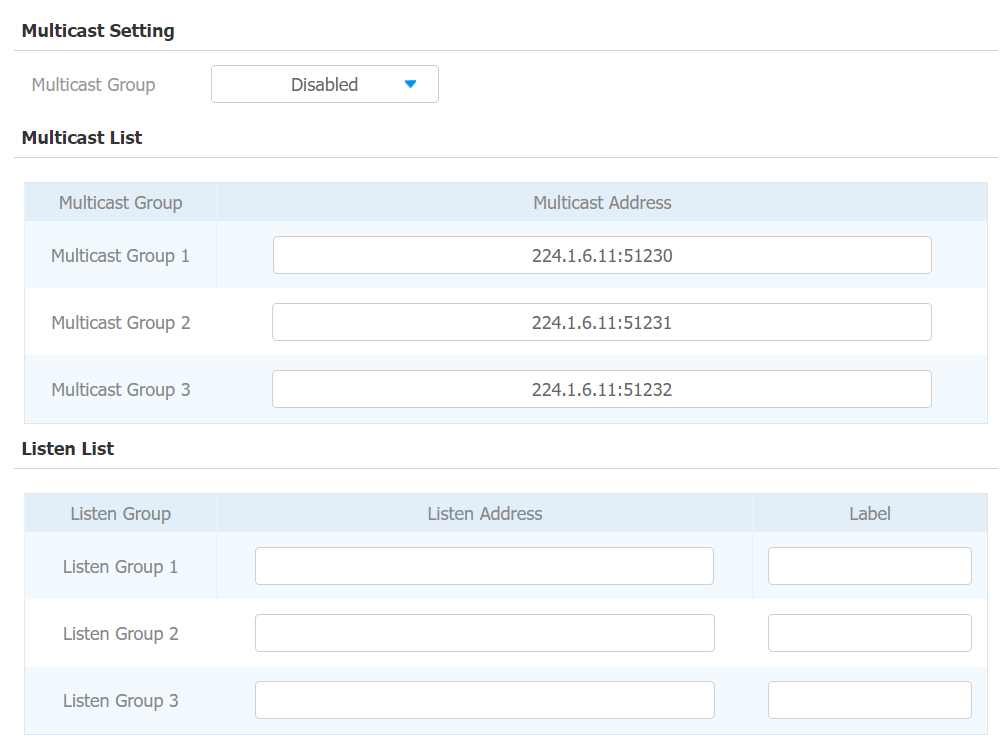
Multicast Group: Set the device in one of the groups or disable this function.
Multicast Address: The multicast IP address is the same as the listen address.
Listen Address: The listen address is the same as the multicast address.
Label: The label name will be shown on the calling screen.
Note
The multicast address entered should be within the specific range and not all multicast IP addresses are valid. Please consult Akuvox tech team for more information.
Call Forwarding
La réélection d’appel est une fonctionnalité qui permet de transférer les appels entrants vers un autre numéro. Les utilisateurs peuvent configurer le transfert d’appels selon différentes situations, comme le transfert constant des appels, le transfert des appels lorsque le moniteur intérieur est occupé, ou lorsqu’il ne répond pas.
Set up the feature on the More > Settings > Advance > Direct IP screen.
Or, set it up on the web Device > Call Feature > Call Forward interface.
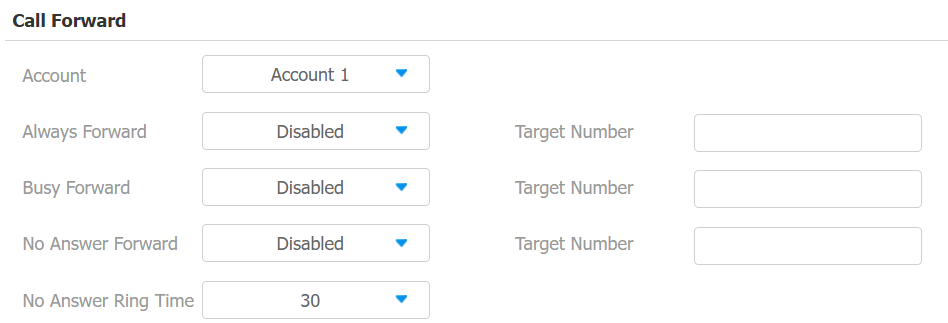
Account: The account or direct IP call to implement the call forwarding feature.
Always Forward: All incoming calls will be automatically forwarded to a specific number.
Busy Forward: Incoming calls will be forwarded to a specific number if the device is busy.
No Answer Forward: Incoming calls will be forwarded to a specific number if the call is not picked up within no answer ring time.
Target Number: The specific forward number when Always Forward, Busy Forward, or No Answer Forward is enabled.
No Answer Ring Time(Sec): The time ranges from 0-120 seconds. This option appears when No Answer Forward is enabled.
Web Call
La fonction d’appel web permet de passer des appels via l’interface web de l’appareil, couramment utilisée pour les tests d’appels à distance.
To set it up, navigate to the Contacts > Local Contacts interface. Enter the target number and select the account to dial out.
