IP Call & IP Call Configuration
Un appel IP est un appel direct entre deux interphones utilisant leurs adresses IP, sans serveur ni PBX. Les appels IP fonctionnent lorsque les appareils sont sur le même réseau.
To configure the IP call feature and port on the device web Phone > Call Feature > Others interface.

Parameter Set-up:
- Direct IP Call: enable the direct IP call. For example, if you do not allow direct IP calls to be made on the device, you can untick the check box to terminate the function.
- Direct IP Call Port: the direct IP Call Port is 5060 by default with the port range from 1-65535. If you enter any values within the range other than 5060, you are required to check if the value entered is consistent with the corresponding value on the device you wish to establish a data transmission.
SIP Call & SIP Call Configuration
Le protocole d’initiation de session (SIP) est un protocole de transmission de signalisation utilisé pour initier, maintenir et terminer des appels.
Un appel SIP utilise SIP pour envoyer et recevoir des données entre appareils SIP, et peut utiliser Internet ou un réseau local pour offrir une communication de haute qualité et sécurisée. L’initiation d’un appel SIP nécessite un compte SIP, une adresse SIP pour chaque appareil, ainsi que la configuration des paramètres SIP sur les appareils.
SIP Account Registration
Chaque appareil a besoin d’un compte SIP pour effectuer et recevoir des appels SIP.
Les dispositifs d’interphone Akuvox prennent en charge la configuration de deux comptes SIP, qui peuvent être enregistrés sur deux serveurs indépendants.
Cliquez ici pour voir l’exemple d’enregistrement du compte SIP.
To configure the SIP account on the device More >Setting > More > Account screen.
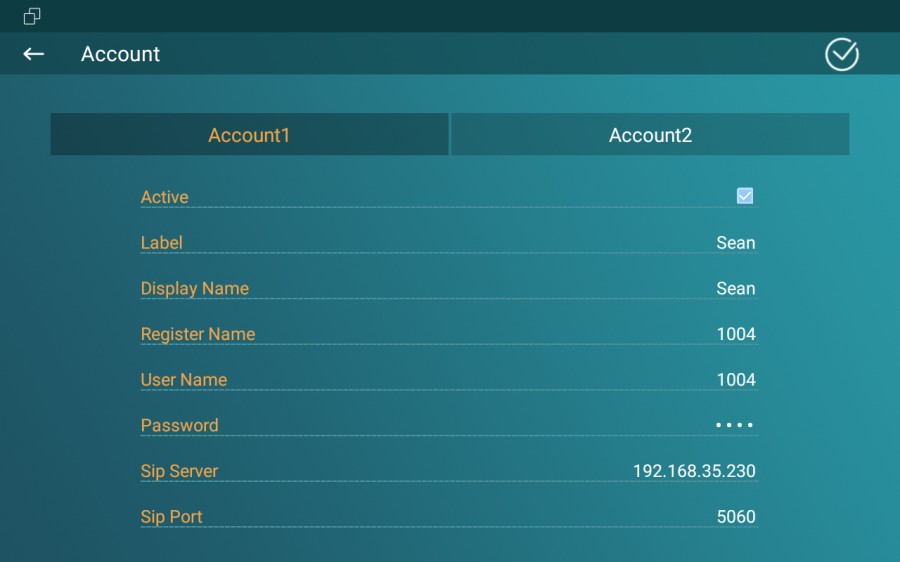
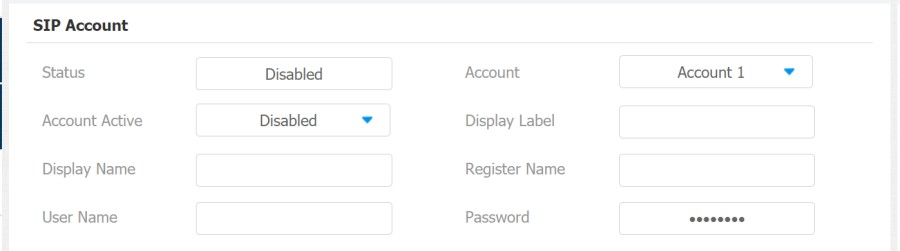
The parameter settings for SIP account registration can be configured on the Account Setting screen and they can also be configured on the device web interface. To perform the SIP account setting on the Web Account > Basic > SIP Account Interface. Register Name, User Name, and Password are obtained from the SIP account administrator.
Parameter Set-up:
- Status: check to see if the SIP account is registered or not.
- Account: select Account1 or Account2.
- Account Enabled: check to activate the registered SIP account.
- Display Label: configure the device label to be shown on the device screen.
- Display Name: configure the name, for example, the device's name to be shown on the device being called to.
SIP Server Configuration
Les serveurs SIP permettent aux appareils d’établir et de gérer des sessions d’appel avec d’autres interphones en utilisant le protocole SIP. Ils peuvent être des serveurs tiers ou un PBX intégré dans un moniteur intérieur Akuvos.
To perform the SIP account setting on the Web Account > Basic > SIP Account Interface.

Parameter Set-up:
- Server IP: enter the Server's IP address number or its URL.
- Port: set up SIP server port for data transmission.
- Registration Period: set up SIP account registration time span. SIP re-registration will start automatically if the account registration fails during the registration time span. The default registration period is 1800, ranging from 30-65535s.
Outbound Proxy Server configuration
Un serveur proxy sortant reçoit et transmet toutes les requêtes au serveur désigné. C’est une configuration optionnelle, mais si elle est configurée, toutes les futures requêtes SIP y sont envoyées en premier lieu.
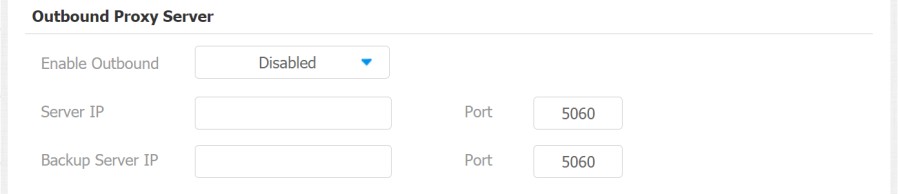
To configure the outbound proxy server on Account > Basic > Outbound Proxy Server interface.
Parameter Set-up:
- Enable Outbound: enable or disable to turn on or turn off the outbound proxy server.
- Server IP: enter the SIP address of the outbound proxy server.
- Port: enter the port number for establishing call sessions via the outbound proxy server.
- Backup Server IP: set up backup server IP for the backup outbound proxy server.
- Port: enter the port number for establishing call sessions via the backup outbound proxy server.
SIP Call DND & Return Code Configuration
La fonction Do Not Disturb (DND) empêche les appels SIP entrants non désirés, assurant ainsi une mise au point ininterrompue. Cela permet aussi de définir un code à envoyer au serveur SIP lors du refus d’un appel.
Go to Phone > Call Feature interface.

Parameter Set-up:
- DND: check Whole Day or Schedule to enable the DND function. DND function is disabled by default.
- Return Code When DND: select what code should be sent to the calling device via the SIP server. 404 for Not found; 480 for Temporary Unavailable; 486 for Busy Here; 603 for Decline.
- Schedule: enable DND schedule for your indoor monitor. To configure a specific time to enable the DND feature. If you choose Schedule for DND, the Whole Day tab is available.
- DND Start Time: the start time for DND schedule.
- DND End Time: the end time for DND schedule.
Device Local RTP Configuration
Le protocole de transport en temps réel (RTP) permet aux appareils de diffuser en temps réel des données audio et vidéo sur un réseau.
Pour utiliser le RTP, les appareils ont besoin d’une gamme de ports. Un port est comme un canal de données sur un réseau. En configurant des ports RTP sur votre appareil et routeur, vous pouvez éviter les interférences réseau et améliorer la qualité audio et vidéo.
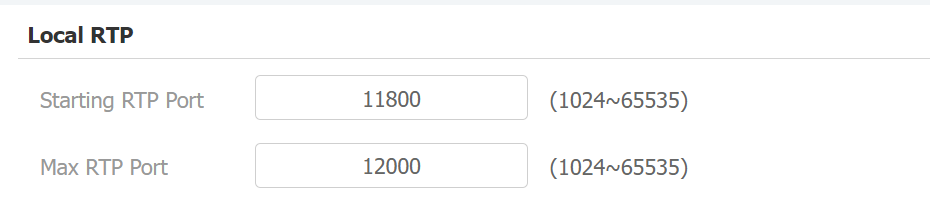
To set up device local RTP on web Network > Advanced > Local RTP interface.
Parameter Set-up:
- Starting RTP Port: enter the port value in order to establish the start point for the exclusive data transmission range.
- Max RTP port: enter the port value in order to establish the endpoint for the exclusive data transmission range.
Data Transmission Type Configuration
Les dispositifs d’interphone Akuvox prennent en charge quatre protocoles de transmission de données : le Protocole de Datagramme Utilisateur (UDP), le Protocole de Contrôle de la Transmission (TCP), la Sécurité de la Couche de Transport (TLS) et le DNS-SRV.
To do this configuration on web Account > Basic > Transport Type interface.

Parameter Set-up:
- UDP: select UDP for unreliable but very efficient transport layer protocol. UDP is the default transport protocol.
- TCP: select TCP for reliable but less-efficient transport layer protocol.
- TLS: select TLS for a secured and reliable transport layer protocol.
- DNS-SRV: select DNS-SRV to obtain a DNS record for specifying the location of services. And SRV not only records the server address but also the server port. Moreover, SRV can also be used to configure the priority and the weight of the server address.