Monitor and Image
Monitor Setting
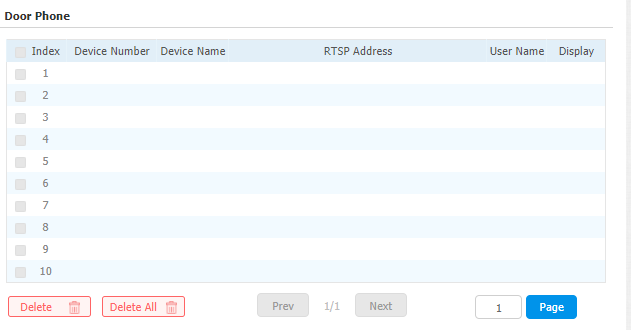
You can configure the monitor setting on the web Phone > Monitor interface. Enter the IP/ SIP number of the door phone in the device number and fill in the device name. Then set up the RTSP address. The RTSP format of the Akuvox door phone is rtsp://deviceIP/live/ ch00_0. You can enable or disable the display in the call. If enabled, when there is an incoming call from the monitor, the video will be displayed.
Parameter Set-up:
-
Device Number: to enter the IP address or SIP number of the corresponding camera.
-
Device Name: to enter the device name of the door phone, which could be set by users.
-
Destination URL: to set RTSP URL for the door phone. The RTSP format of the Akuvox door phone is rtsp://device IP/live/ch00_0
-
User Name: to enter the username if required.
-
Password: to enter the password if required.
-
Display in Call: enable or disable to display of this monitor during the call. If enabled, when there is an incoming call from the monitor, the video will be displayed.
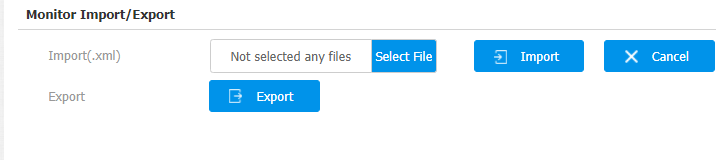
You can also import or export the monitor list in batch in the same interface. The import files can only support the .xml format.
Video Image Capturing
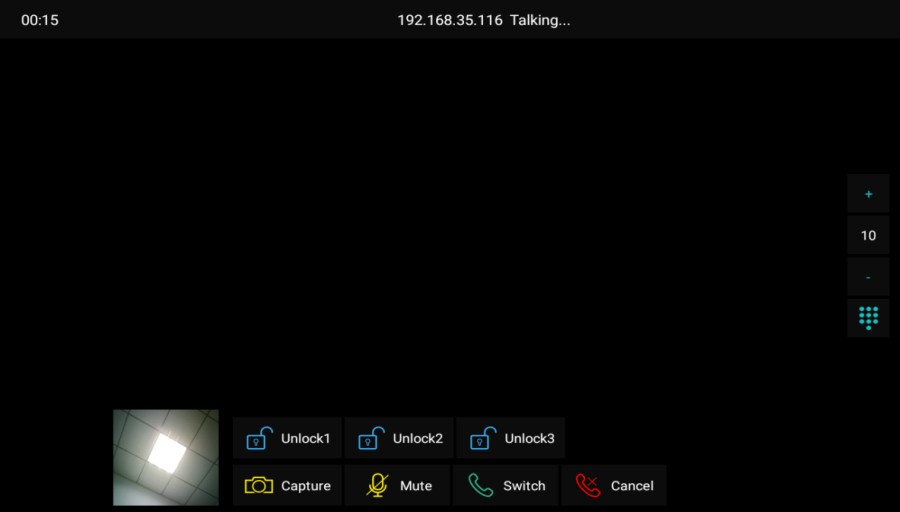
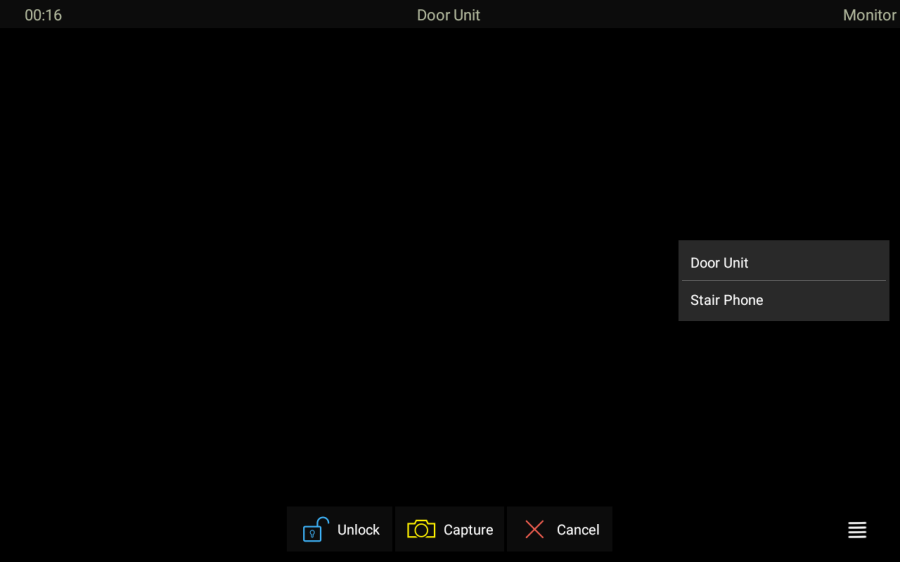
L’appareil permet aux utilisateurs de prendre une capture d’écran pendant un appel vidéo ou en utilisant l’écran s’ils remarquent quelque chose d’inhabituel. Pour prendre une capture d’écran, il suffit d’appuyer sur le bouton Capture.
RTSP Authentication
Grâce à l’authentification RTSP, les utilisateurs peuvent surveiller l’écran intérieur via le flux audio RTSP. Cette fonction peut être appliquée, par exemple, à écouter le bébé dans sa chambre pour des raisons de sécurité.
To set it up, go to Device Setting > Basic > RTSP Setting.

Parameter Set-up:
- RTSP Audio Enable: enable it if you want to monitor the device via RTSP audio stream.
- Authorization Type: select the authorization type (Basic, Digest). Select None if you allow all types of authorization types for the RTSP audio stream.
- User Name: type in the username used for the authentication.
- Password: type in the username used for the authentication.
Alarm and Arming Configuration
La fonction Armement est conçue pour renforcer la sécurité domestique en proposant trois modes avec des réglages de zone personnalisés pour les capteurs connectés. Lorsqu’il est armé, l’appareil déclenche une sirène et avertit certaines personnes si un capteur détecte quelque chose d’inhabituel.
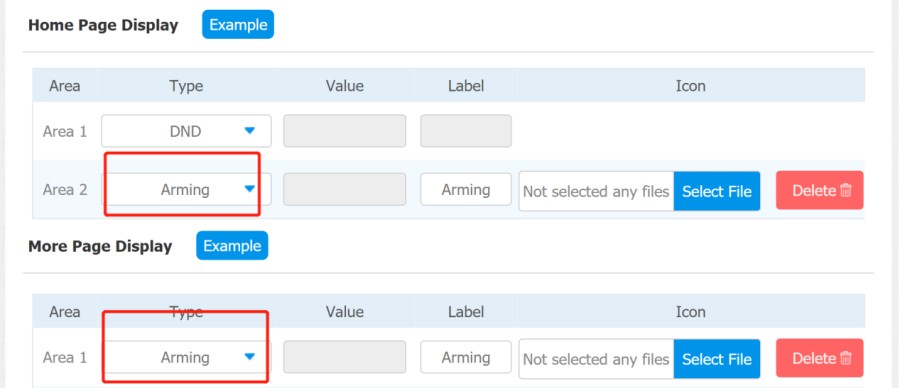
Navigate to Phone > Key/Display.
Configure Alarm and Arming on the Device
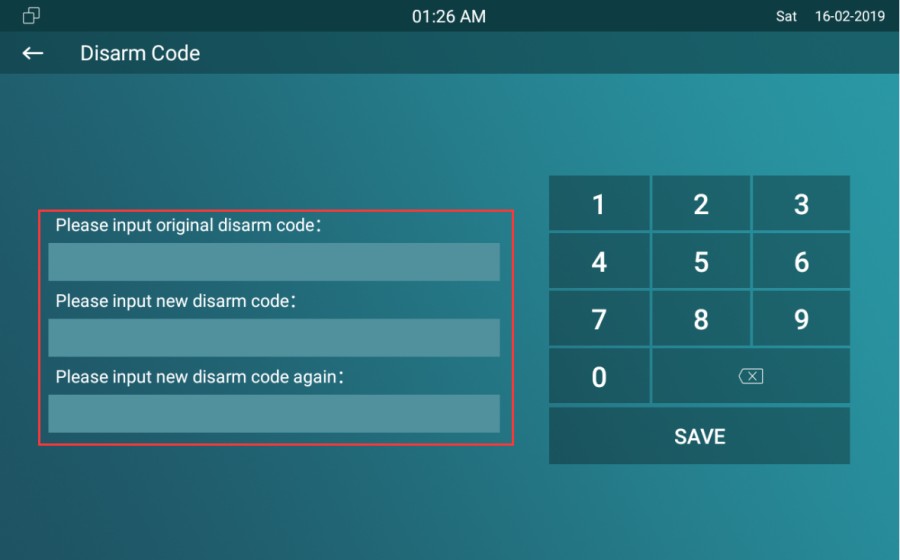
To configure the arming and disarm code on device Advance Settings > Arming/Disarm Code screen. Change the current password and save it.
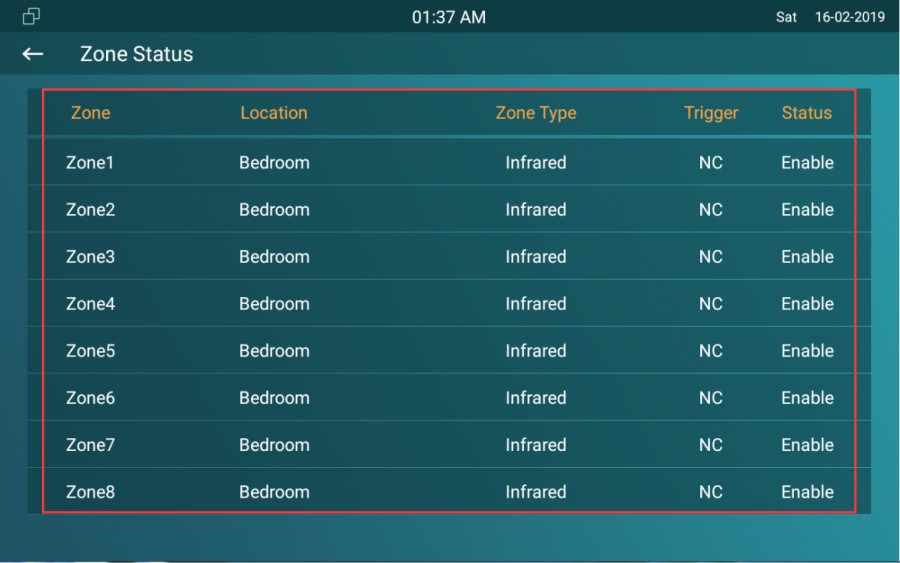
To check the zone status on Arming > Zone Status screen.
Configure Alarm and Arming on the Web Interface
To set up a location-based alarm sensor on the device web Arming> Zone Setting > Zone > Setting interface.

Parameter Set-up:
- Location: set up the location according to where the alarm sensor is stalled. You can select among ten location types: Bedroom, Gate, Door, Guest room, Hall, Window, Balcony, Kitchen, Study, and Bathroom.
- Zone Type: set up the alarm sensor types (Infrared, Drmagnet, Smoke, Gas, and Urgency).
- Trigger Mode: set sensor trigger mode between NC and NO according to your need.
- Status: set the alarm sensor status among three options: Enable, Disable, and 24H. Select Enable if you want to enable the alarm, however, you are required to set the alarm again after an alarm is disarmed. Select Disable if you want to disable the alarm, and select 24H if you want the alarm sensor to stay enabled for 24 hours without needing to set up the alarm manually again after the alarm is disarmed.
Configure Location-based Alarm
Configure the alarm sensor in the same way you do on the web interface by pressing Arming on the home screen.
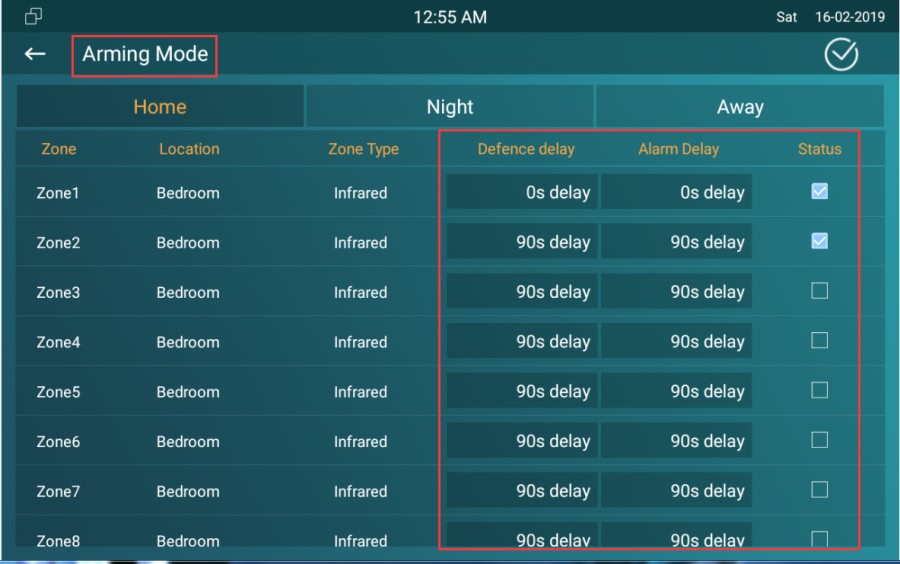
Parameters Set-up:
- Location: to select which location the detection device is located, including Bedroom, Guest room, Hall, Window, Balcony, Kitchen, Study, and Bathroom.
- Zone type: to select the type of detection device, including Infrared, Drmagnet, Smoke, Gas, and Urgency.
- Defence delay: it means when users enable the arming mode, there will be 90 seconds delay time for the alarm mode to be activated.
- Alarm delay: it means when the sensor is triggered, there will be 90 seconds delay time to announce the notification.
- Status: to enable or disable Arming mode on the corresponding Zone.
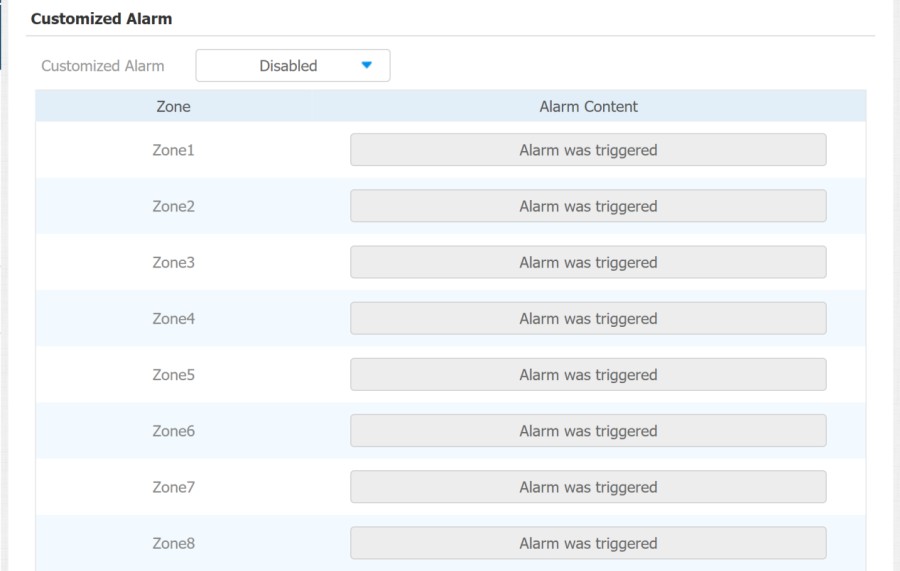
Configure Alarm Text
After the alarm sensor is set up, you are allowed to customize your alarm text shown on the screen when an alarm is triggered on web Arming> Zone Setting > Customized Alarm interface. Enter the alarm text for the alarm at each location according to your need.
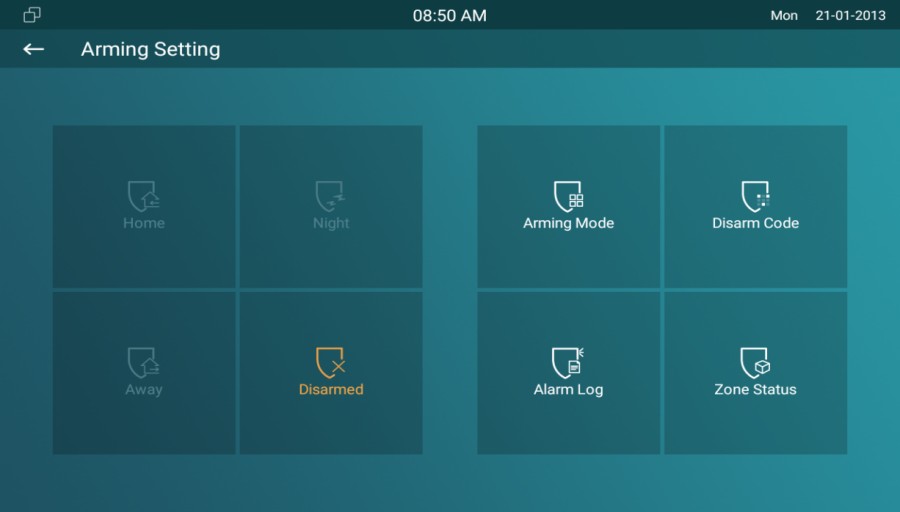
Configure Arming mode
To switch arming mode, disarm the alarm on the Arming screen by pressing their respective icons. Press Disarm icon if you want to clear the Arming Mode.
Configure Alarm Ringtone
You can upload a customized alarm ringtone by choosing the local audio file on the web Phone>Audio >Alarm Ringtone interface.

- The file format of the customized ringtone should be .wav.
Alarm Action Configuration
The triggering of the alarm sensor can be accompanied by the actions you configured in the forms of HTTP command, SIP Message, Call, and Local Relay for different security purposes.
Select Alarm Action Types
Select and set up actions on web Arming > Alarm Action interface.
Parameter Set-up:
- HTTP Command: enable the HTTP command if you want the action to be implemented on a designated third-party device.
- SIP Message: enable SIP message if you want the SIP message to be sent to a designated SIP account as an action.
- Call: enable call if you want a call to go to a designated SIP or IP number.
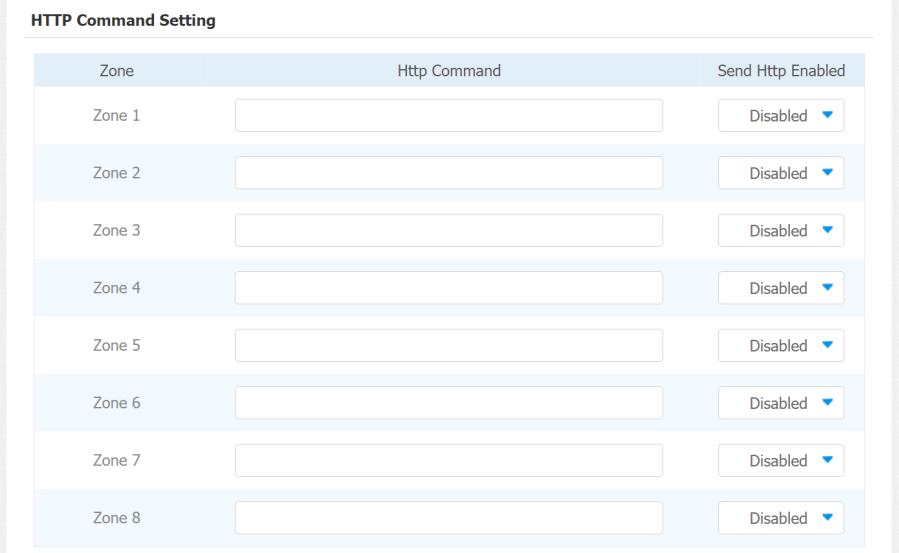
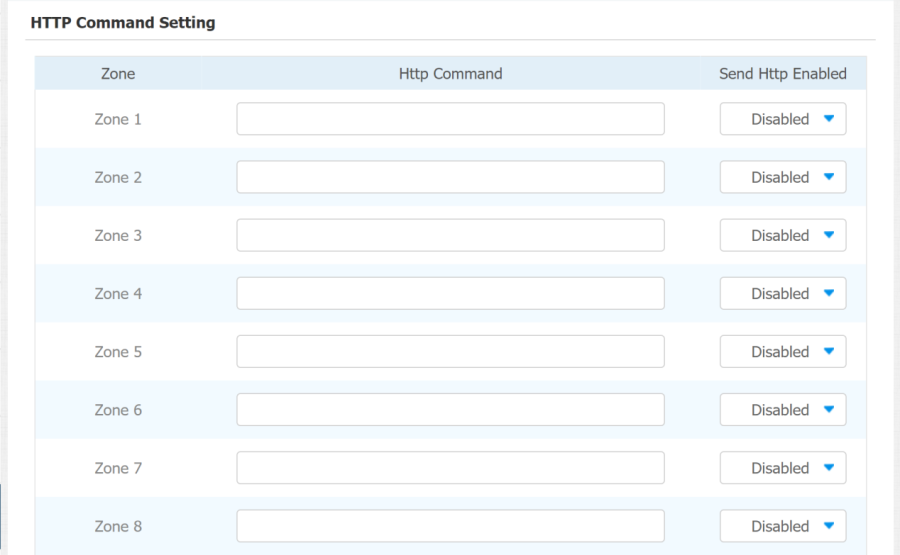
Configure Alarm Action via HTTP Command
To set up the HTTP Command action, you can click Enable in the Send HTTP field to enable the actions for the alarm sensor installed in different locations. Then enter the HTTP command provided by the manufacturer of the device on which the action is to be carried out. To set it up go to Arming > Alarm Action > HTTP Command Setting.
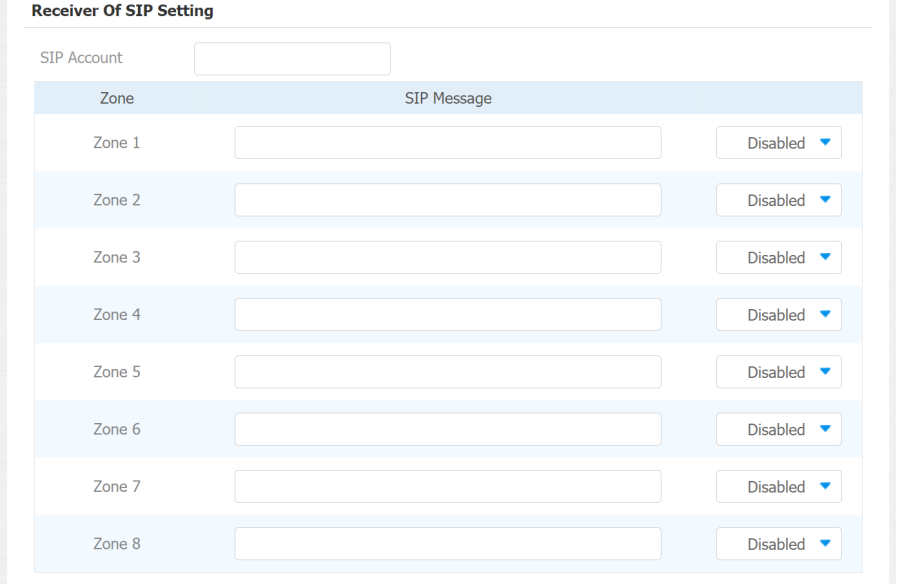
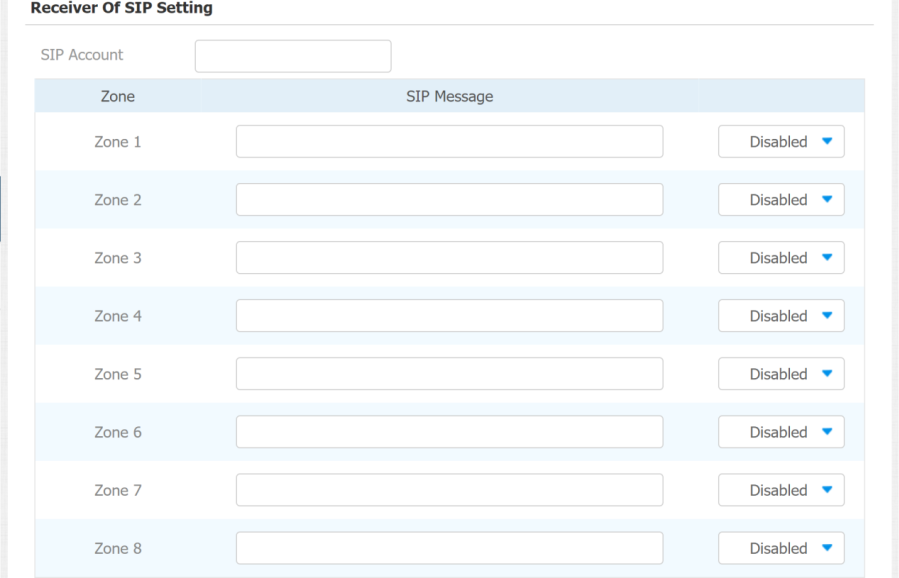
Configure Alarm Action via SIP Message
To set up the SIP message action receiver on the same web interface. Enter the SIP account to which you want to send the configured SIP message as an action when the alarm is triggered.
To set it up go to Arming > Alarm Action > Receiver Of SIP Message.
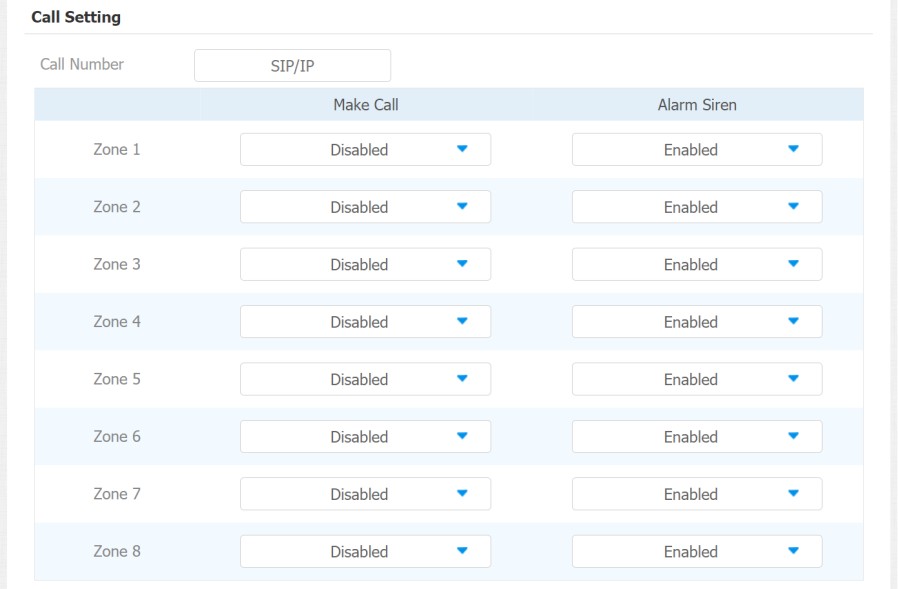
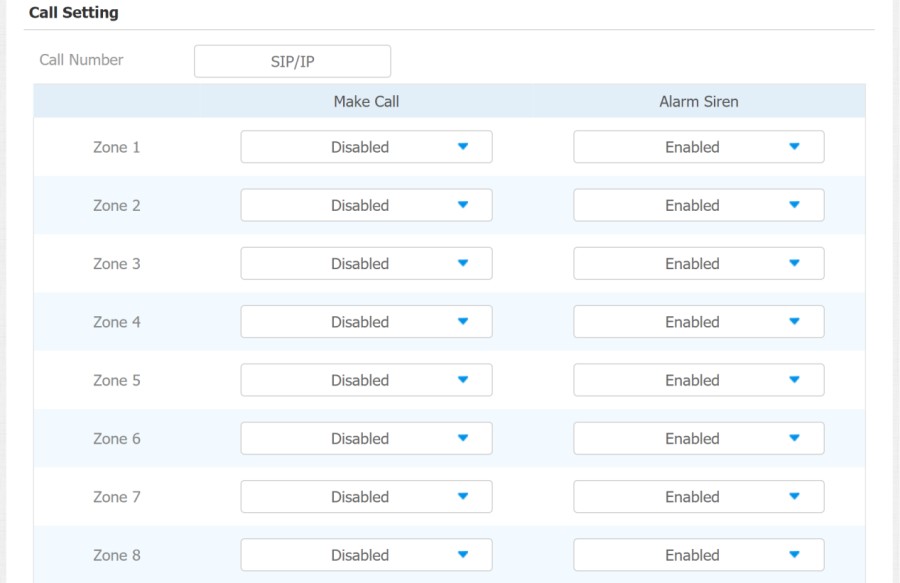
Configure Alarm Action via SIP Call
To set up the call action, you can enter the SIP or IP number of the device to be called as an action, then enable Alarm Siren for the arming zone as needed.
Check Alarm Log
To check alarm log on device Settings > Alarm Log screen. To delete the existing alarm log by clicking the right-side operation icon.

Screen Unlock Setting
Pour éviter tout accès non autorisé à l’appareil lorsqu’il n’est pas utilisé, activez la fonction Verrouillage d’écran. Cette fonctionnalité verrouille automatiquement l’appareil après une période d’inactivité, nécessitant un mot de passe pour être déverrouillé.
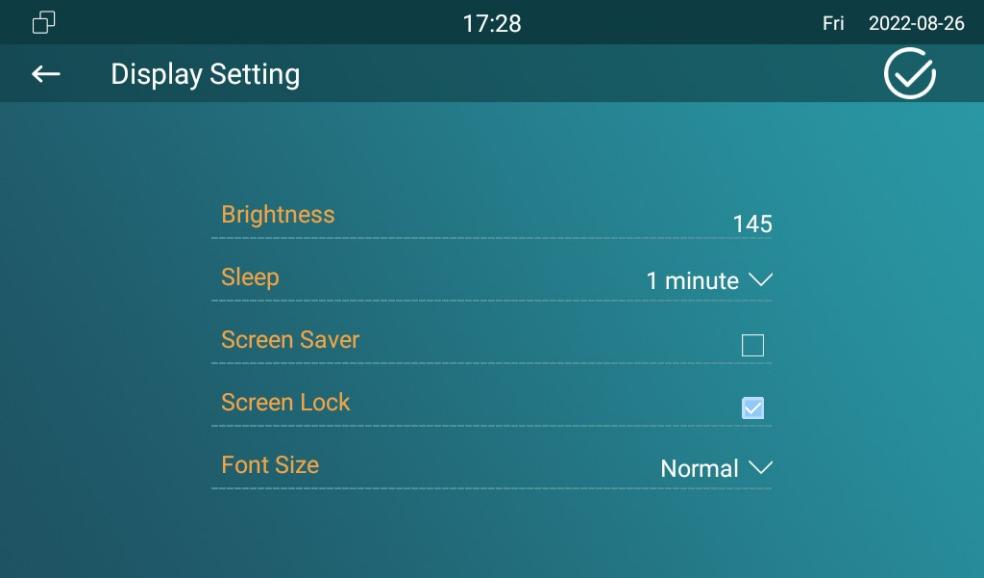
You can enable the screen lock function directly on the device More > Setting > Display screen.
The device screen will be locked over sleep time. You are required to wake up the device through a PIN code.
Screen Unlock by PIN Code
Pour déverrouiller l’écran, les utilisateurs doivent entrer le code PIN prédéfini.
Navigate to the Advance Settings > System Code screen to change a new password.
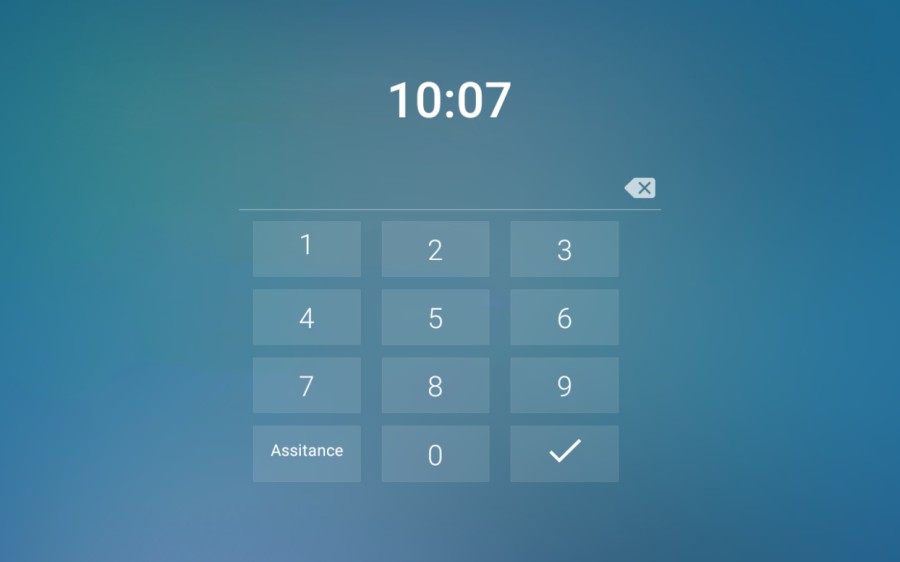
- The default unlock PIN is 123456.
Voice Encryption
La fonction de chiffrement fournit trois méthodes de chiffrement pour protéger les signaux vocaux contre l’écoute clandestine pendant un appel.
Go to Account > Advanced > Encryption interface.

Parameter Set-up:
- Voice Encryption: select encryption mode from four options. If you select to disable it, the call will not be encrypted. SRTP(Compulsory), all audio signals (technically speaking, it is RTP streams) will be encrypted to improve security. SRTP(Optional), encrypts voice from the called party, if the called party also enables SRTP, the voice signals will also be encrypted. ZRTP(Optional) is the protocol that the two parties use to negotiate the SRTP session key.
Remote Control
The remote control function supports configuring a specific server to send HTTP commands or requests to the indoor monitor to do some specific action.
Go to Phone > Call Feature interface.

Parameter Set-up:
- Allowed Access IP List: set up the server IP address that can be allowed to send the HTTP commands to the indoor monitor.
Location
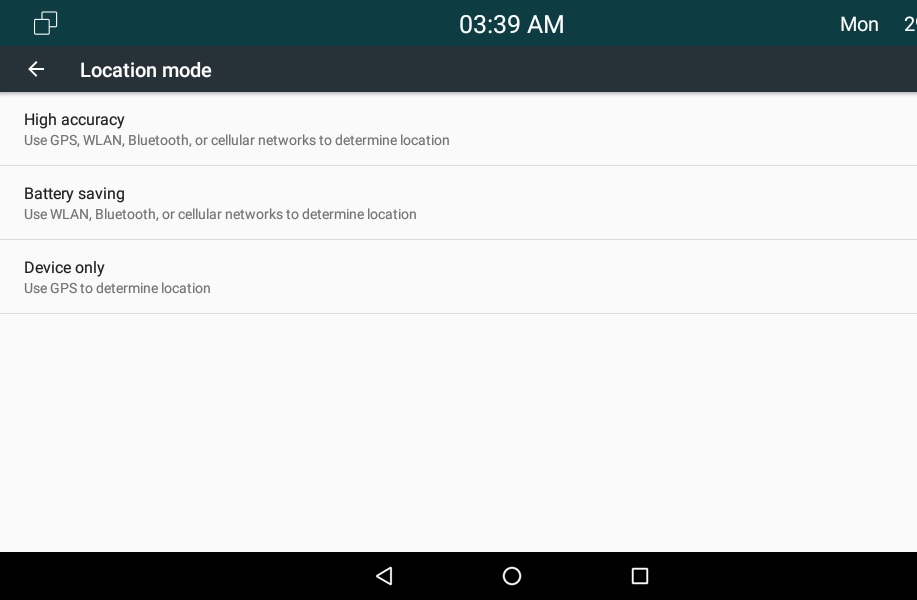
Avec la permission des utilisateurs, le service de localisation utilise les informations provenant du cellulaire, du Wi-Fi, du système de positionnement global (GPS) et du Bluetooth pour déterminer la localisation de l’appareil. Les utilisateurs peuvent désactiver ce service ou modifier ses paramètres à tout moment.
To set it up, go to Security > Advanced > Service.

Parameter Set-up:
- Disabled: select Disabled if you do not allow any app to find your device location.
- Only Device: the device location can be determined using GPS
- High Accuracy: the device location can be determined via WAN, Bluetooth, or cellular networks.
Client Certificate Setting
Les certificats garantissent l’intégrité de la communication et la confidentialité. Pour utiliser le protocole SSL, vous devez télécharger les bons certificats pour la vérification.
Web Server Certificate
C’est un certificat envoyé au client pour authentification lorsque celui-ci demande une connexion SSL avec le téléphone porte Akubox. Veuillez télécharger les certificats dans les formats acceptés.
To upload Web Server certificate on the device web interface Security > Advanced > Web Server Certificate.

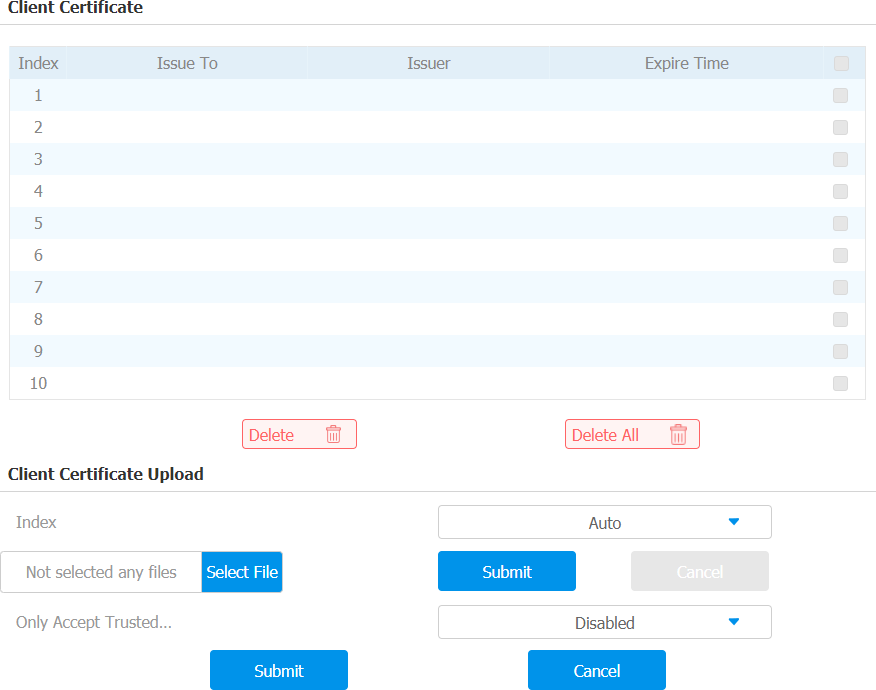
Client Certificate
Ce certificat vérifie le serveur sur le téléphone porte Akuvox lorsqu’ils souhaitent se connecter via SSL. Le téléphone de porte vérifie le certificat du serveur par rapport à sa liste de certificats clients.
To upload and configure client certificates on the same page.
Parameter Set-up:
Index: select the desired value from the drop-down list of Index. If you select Auto value, the uploaded certificate will be displayed in numeric order. If you select values from 1 to 10, the uploaded certificate will be displayed according to the value that the user selected.
Select File: click Select file browse the local drive, and locate the desired certificate (*.pem only).
Only Accept Trusted certificates: if you select Enabled, as long as the authentication success, the phone will verify the server certificate based on the client certificate list. If you select Disabled, the phone will not verify the server certificate no matter whether the certificate is valid or not.
Power Output Setting
Le moniteur intérieur peut servir d’alimentation au téléphone Akuvox avec alimentation 12V, par exemple E10. Vous pouvez activer la sortie d’alimentation, puis connecter le téléphone à la porte RJ45 du moniteur intérieur. De plus, vous pouvez connecter E10 au port 12_out de l’alimentation.
To enable it, go to the Setting > Basic > Power Output Setting interface.

When the Power Output function is set to enabled, and the PON interface is connected with some particular exchangers, it may cause the device reboots repeatedly.
High Security Mode
Le mode haute sécurité est conçu pour renforcer la sécurité. Il utilise le chiffrement à travers divers aspects, notamment le processus de communication, les commandes d’ouverture de porte, les méthodes de stockage des mots de passe, et plus encore.
To configure this feature on the web: Security > Basic > High Security Mode

Notes importantes
1. Le mode Haute Sécurité est désactivé par défaut lorsque vous mettez à jour l’appareil d’une version sans ce mode vers une version qui l’inclut. Mais si vous réinitialisez l’appareil à ses paramètres d’usine, le mode est activé par défaut.
2. Ce mode rend les anciens outils incompatibles. Il faut les mettre à niveau vers les versions suivantes ou supérieures pour pouvoir les utiliser.
· Gestionnaire PC : 1.2.0.0
· Scanner IP : 2.2.0.0
· Outil de mise à jour : 4.1.0.0
· SDMC : 6.0.0.34
3. Le format HTTP pris en charge pour le déclenchement par relais varie selon que le mode hautement sécurisé est activé ou désactivé.
Si le mode est activé, l’appareil n’accepte que les nouveaux formats HTTP ci-dessous pour l’ouverture de porte.
l http ://username :password@deviceIP/fcgi/OpenDoor ?action=OpenDoor&DoorNum=1
Je http://deviceIP/fcgi/OpenDoor?action=OpenDoor&DoorNum=1
Si le mode est désactivé, l’appareil peut utiliser à la fois les nouveaux formats ci-dessus et l’ancien format ci-dessous :
Je http://deviceIP/fcgi/do?action=OpenDoor&UserName=username&Password=password&DoorNum=1
4. Il n’est pas permis d’importer/exporter des fichiers de configuration dans tgz. Formatez entre un appareil avec le mode haute sécurité et un autre sans. Pour obtenir de l’aide au transfert de fichiers, veuillez contacter le support technique d’Akubox.