Image Adjustment
Image Adjustment controls the basic visual parameters of the preview image, including brightness, contrast, saturation, and sharpness. Adjustments are applied immediately and reflected in the preview in real time, allowing the image to be tuned to match lighting and scene conditions.
Set it up on the Image > Image Adjustment interface.
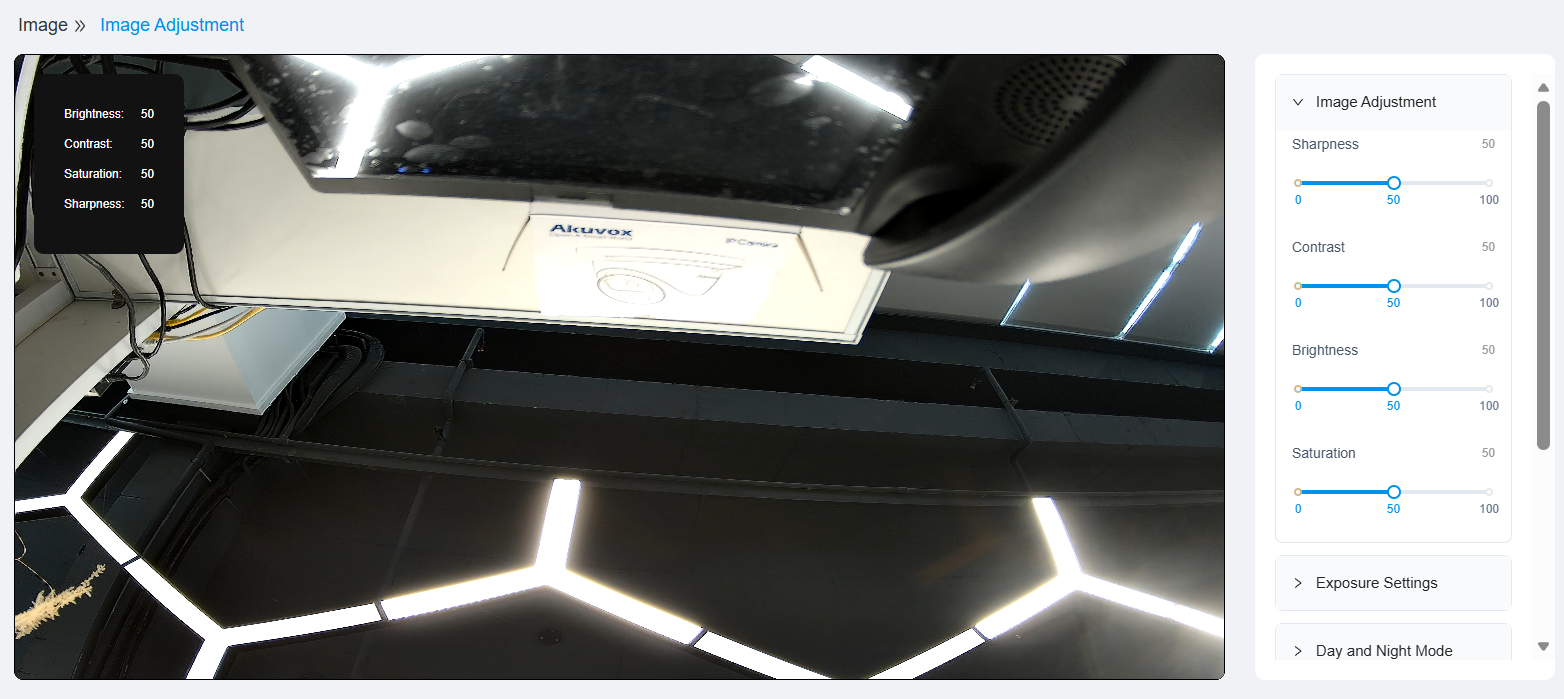
Brightness: The brightness level of the preview image. Range: 0–100. Default: 50.
Contrast: The contrast level of the preview image. Range: 0–100. Default: 50.
Saturation: The color saturation level of the preview image. Range: 0–100. Default: 50.
Sharpness: The sharpness level of the preview image. Range: 0–100. Default: 50.
Image Enhancement
Image Enhancement applies processing to improve image clarity in challenging conditions, including high-contrast lighting, noise, lens distortion, and fog.
Set it up on the Image > Image Adjustment interface. Open Image Enhancement.
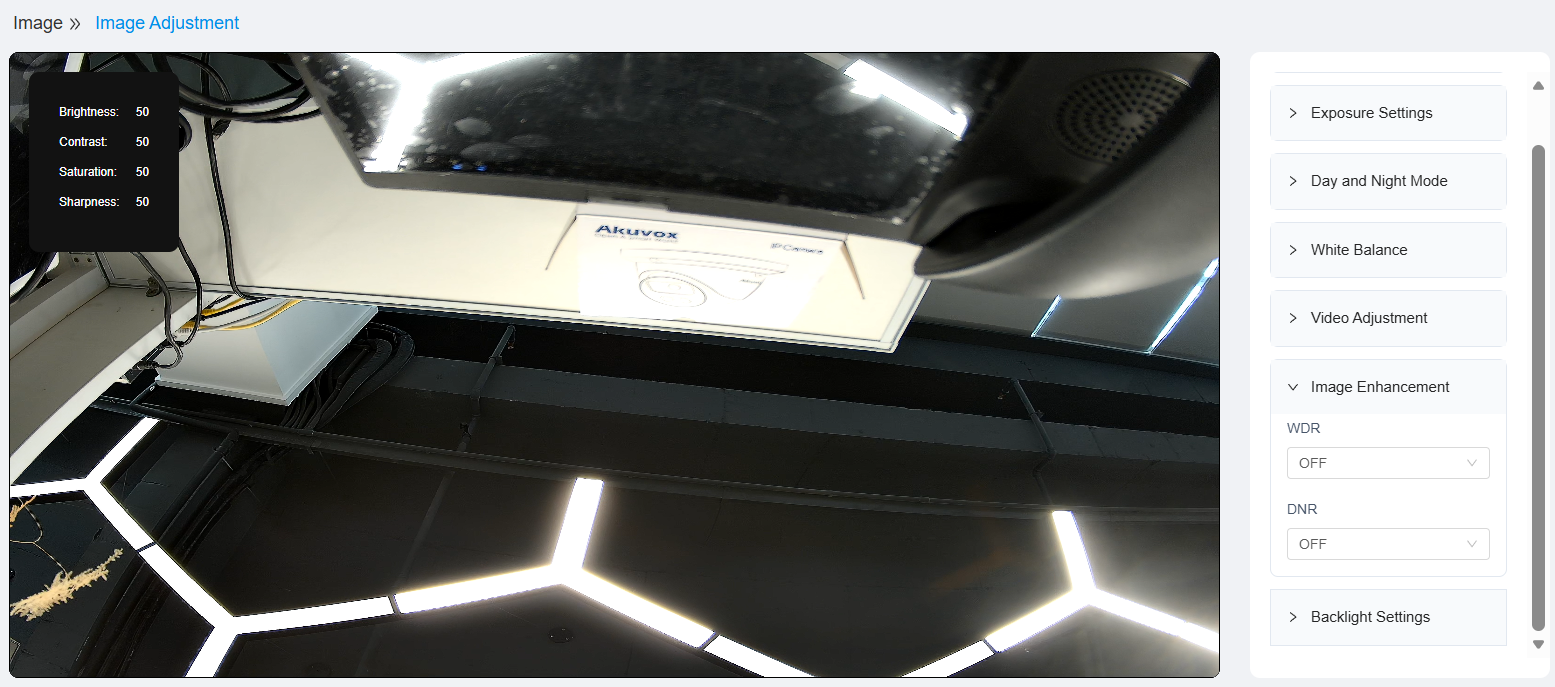
Wide Dynamic Range (WDR): Improve visibility in scenes with both bright and dark areas. Adjust the wide dynamic level from Low to High to control the strength of the effect.
Digital Noise Reduction(DNR): Reduce image noise using 3D noise reduction processing, producing a smoother image. The reduction level can be adjusted to control the strength of the effect.
Exposure Setting
Exposure Settings control how the camera adjusts exposure to maintain image brightness under different lighting conditions. They help improve image quality in scenarios such as low-light environments or indoor areas where lighting flicker may occur.
Set it up on the Image > Image Adjustment interface. Open Exposure Settings.
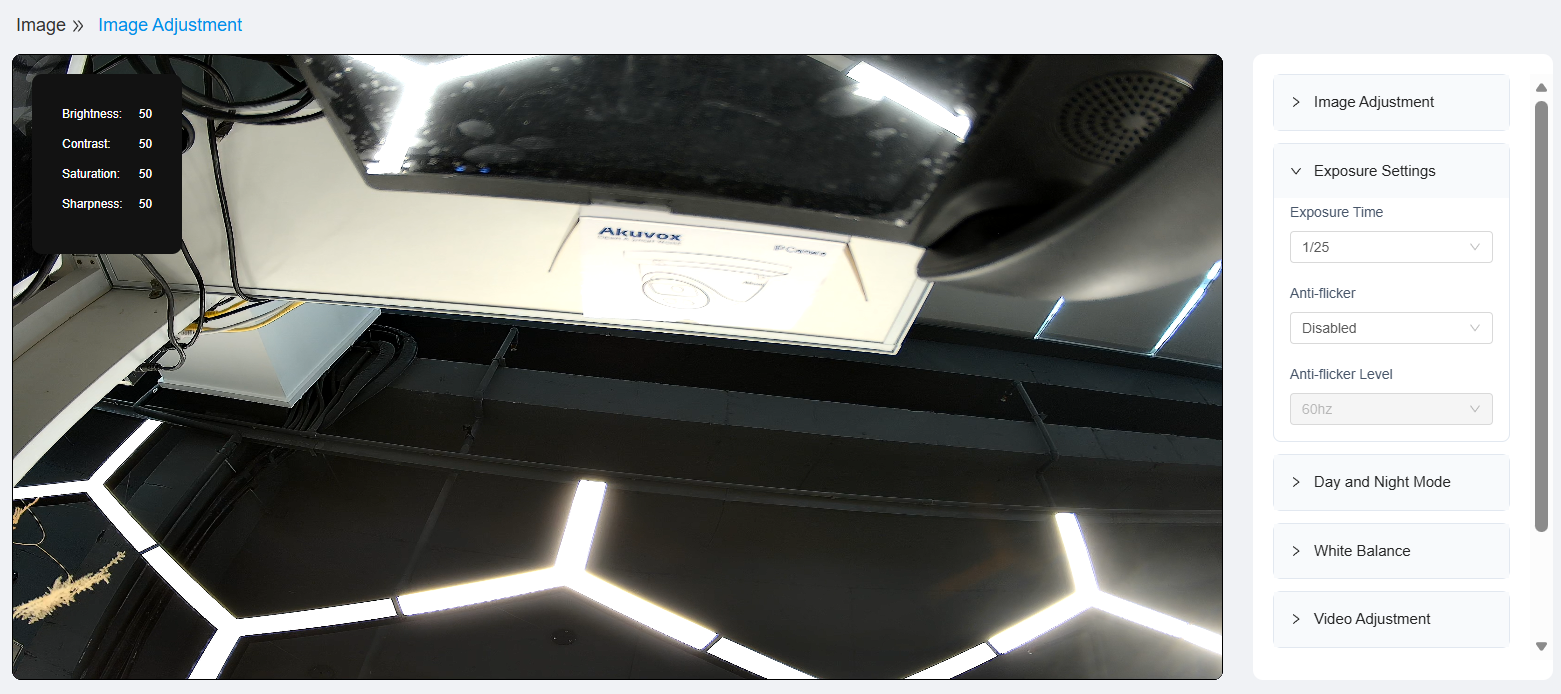
Exposure Time: The electronic shutter duration used to capture each frame, configurable for different monitoring scenarios.
Anti-flicker: Compensation for visible flickering caused by indoor lighting sources. Default: Off. When enabled, the anti-flicker level can be adjusted to match the affected scene.
Anti-flicker Level: Select 50 Hz or 60 Hz to match the local AC power frequency and reduce image flicker under artificial lighting.
Backlight Setting
Backlight Settings control compensation for scenes with strong backlighting or point light sources, preventing specific regions of the image from appearing overexposed or underexposed.
Set it up on the Image > Image Adjustment interface. Open Backlight Settings.
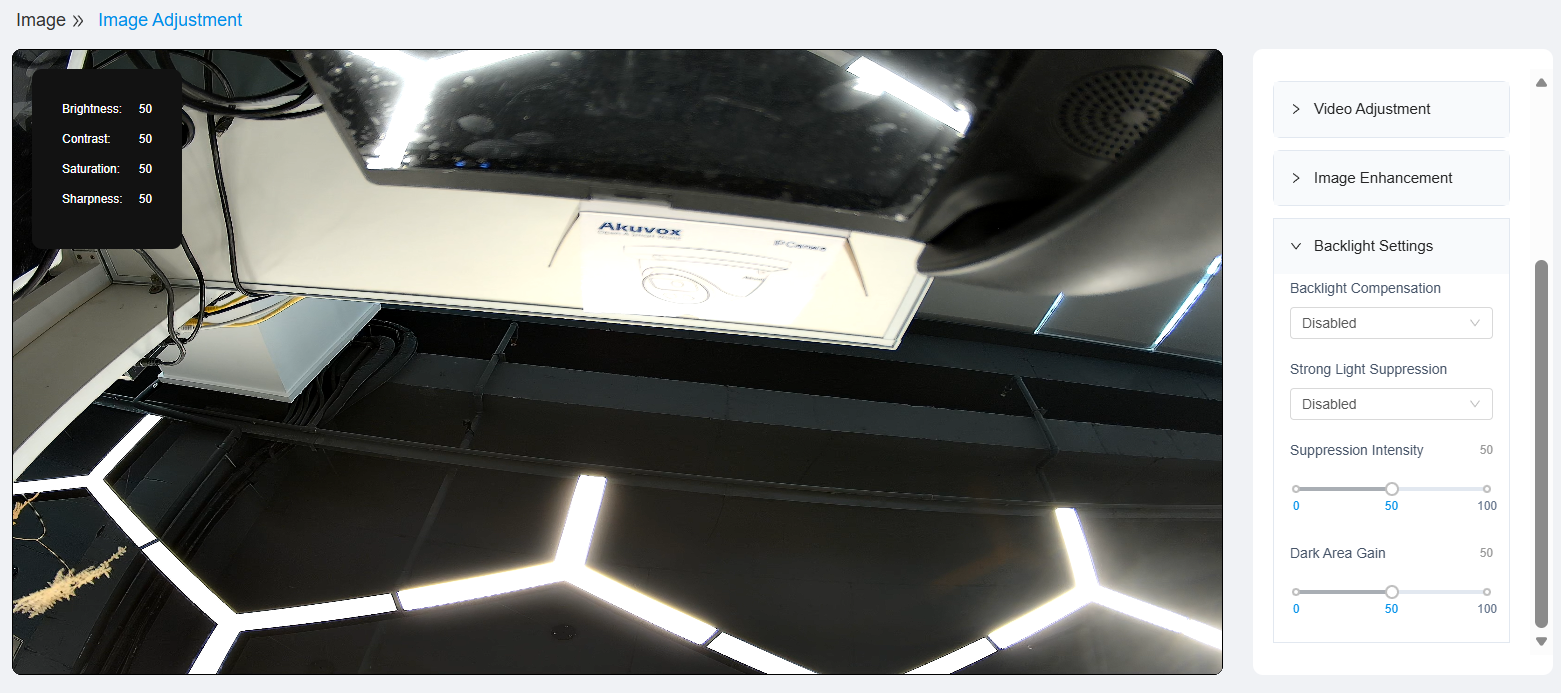
Backlight Compensation: Apply exposure compensation to a selected region of the frame to prevent it from appearing too bright or too dark.
Strong Light Suppression: Used to reduce the effect of strong light sources or point light sources in the frame.
Suppression Intensity: Adjust the strength of highlight suppression in backlit scenes. Higher values reduce overexposure in bright areas but may darken the overall image.
Dark Area Gain: Adjust the brightness enhancement applied to dark areas. Higher values reveal more shadow detail but may increase image noise.
Day and Night Mode
Day and Night Mode controls how the camera switches between color and monochrome imaging based on ambient light, along with related infrared/white-light illumination behavior. It is used to maintain usable image quality across varying lighting conditions throughout the day.
Set it up on the Image > Image Adjustment interface. Open Day and Night Mode.
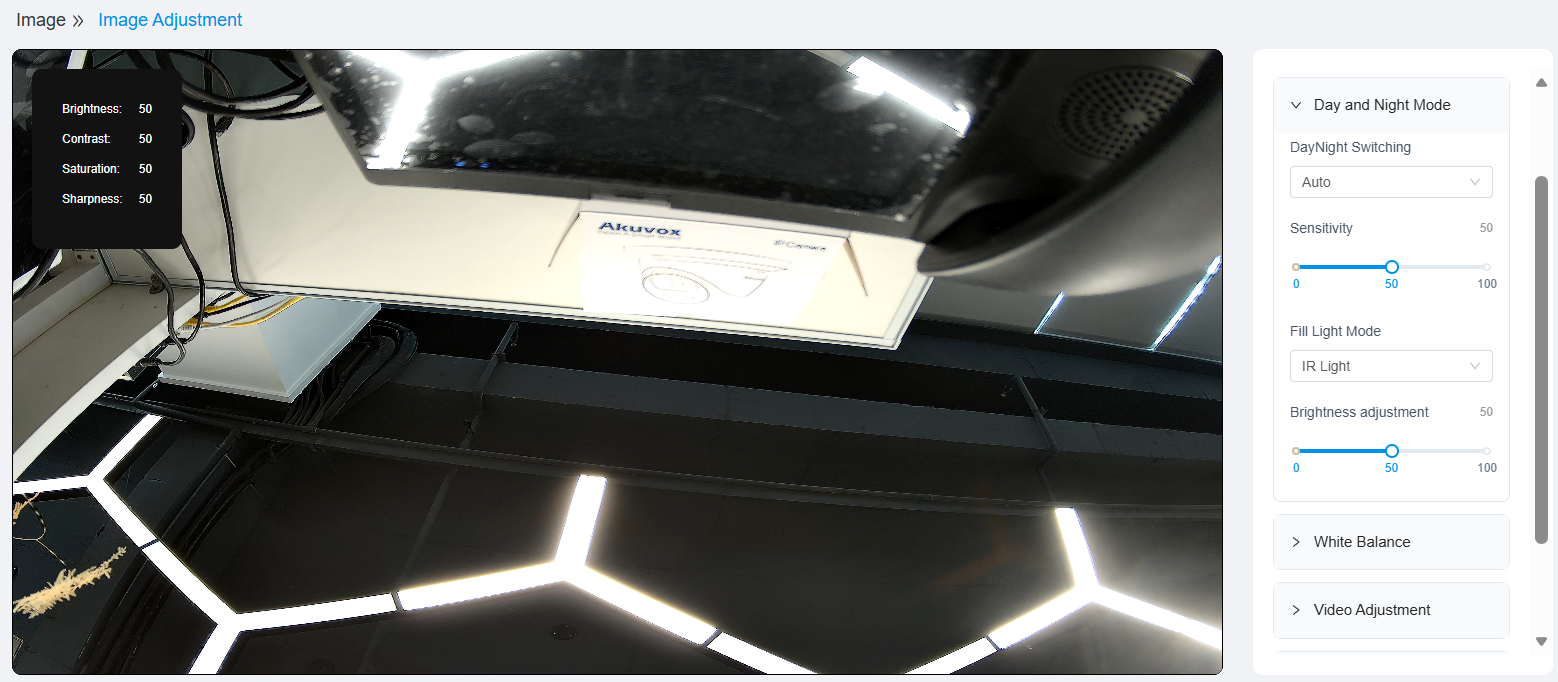
Day/Night Switching: The mode controlling color/monochrome switching.
Daylight: Display the image in color at all times.
Night: Display the image in monochrome at all times.
Auto: Switch automatically between Day and Night mode based on ambient light level.
Timed Switch: Apply Daylight mode within a configured start and end time, and Night mode outside that window.
Sensitivity: The ambient light threshold used for switching between Day and Night modes. Higher sensitivity makes the camera switch to Day mode more easily and stay in Day mode longer, while lower sensitivity makes it switch to Night mode more easily and stay in Night mode longer.
Fill Light Mode: The type of supplemental illumination used in low light.
IR Light: Uses infrared illumination, producing a monochrome image in low light.
White Light: Uses visible white-light illumination, producing a color image in low light.
Brightness Adjustment: Control fill light intensity. Range: 0-100. Default: 50.
White Balance Setting
White Balance adjusts the color balance of the camera image to ensure that objects appear with natural colors under different lighting conditions.
You can select the white balance mode according to the lighting environment.
Set it up on the Image > Image Adjustment interface. Open White Balance.
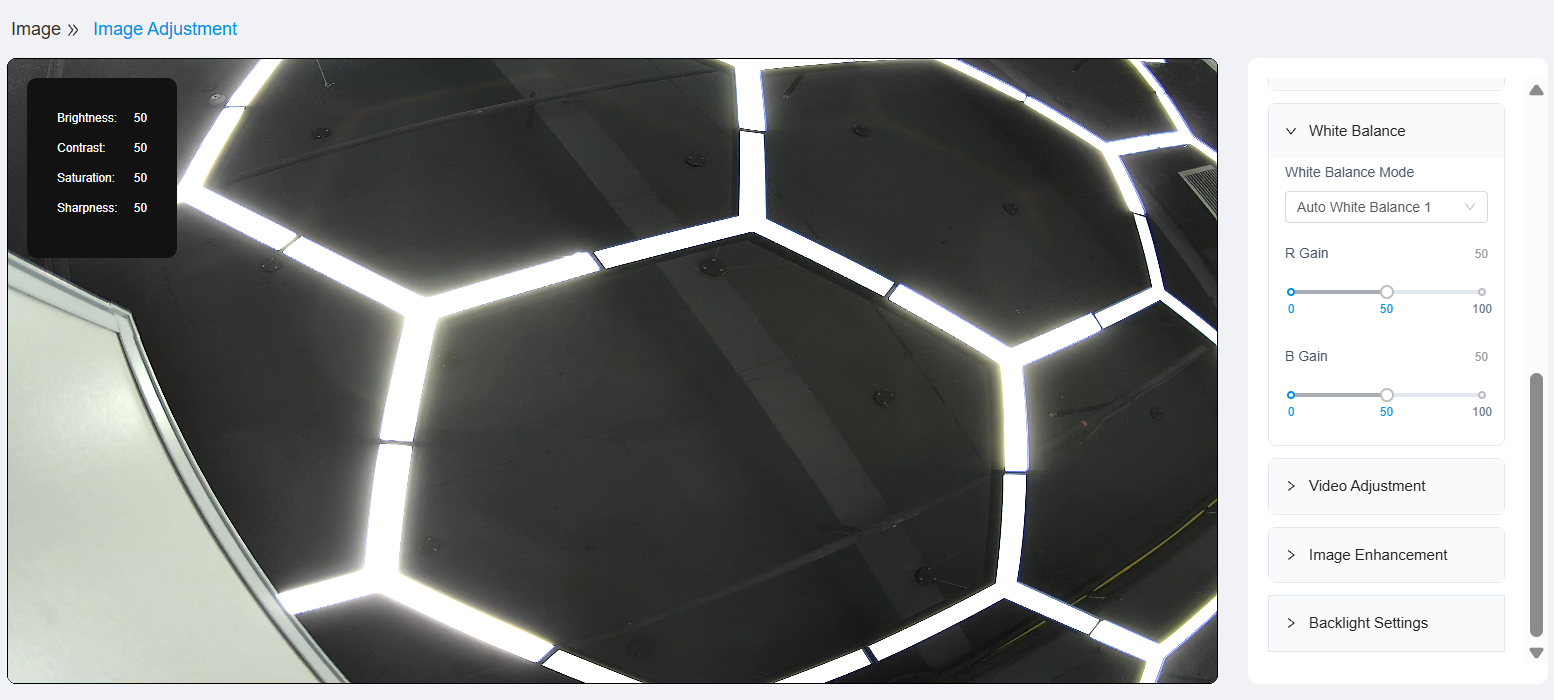
White Balance Mode:
Manual White Balance: Manually adjust the R Gain and B Gain values to fine-tune the image color balance.
Auto White Balance 1: Automatically adjust the white balance based on the detected lighting conditions.
Auto White Balance 2: Automatically adjust the white balance and supports a wider white balance range than Auto White Balance 1.
R Gain: Adjusts the red color gain.
B Gain: Adjusts the blue color gain.
Video Adjustment
Video Adjustment allows you to adjust the image orientation and video system according to the installation environment and display requirements.
Set it up on the Image > Image Adjustment interface. Open Video Adjustment.
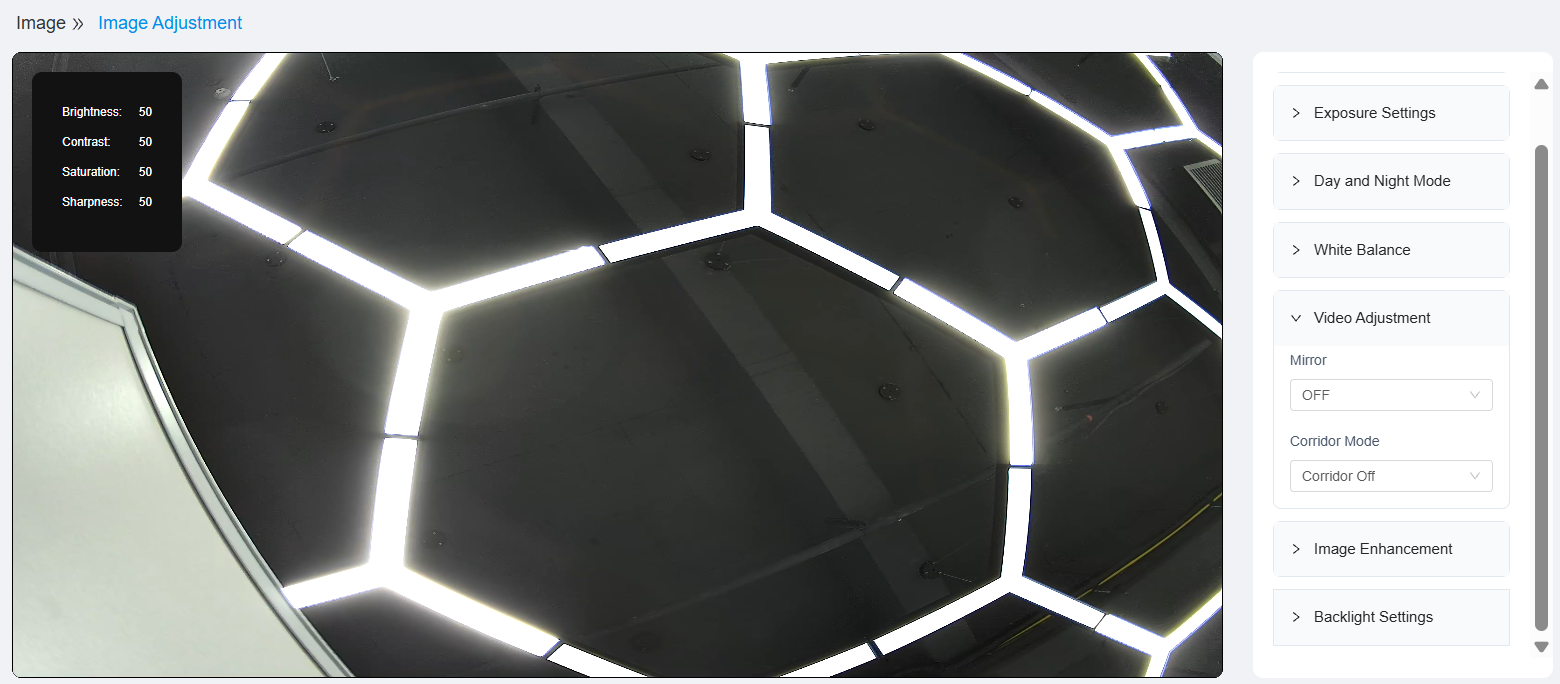
Mirror: The image orientation. You can select Vertical, Horizontal, Vertical & Horizontal, or Off. Use this setting to flip the image when the camera is installed in an inverted position or when the image orientation needs to be adjusted.
Corridor Mode: The image orientation for corridor or vertically oriented scenes. It is Off by default. When enabled, you can rotate the preview image by 90° or 270°.
OSD Setting
OSD (On-Screen Display) overlays time and custom text information onto the video image. The preview window reflects configuration changes in real time, allowing the overlay content, format, and position to be verified before saving.
Set it up on the Image > OSD interface.
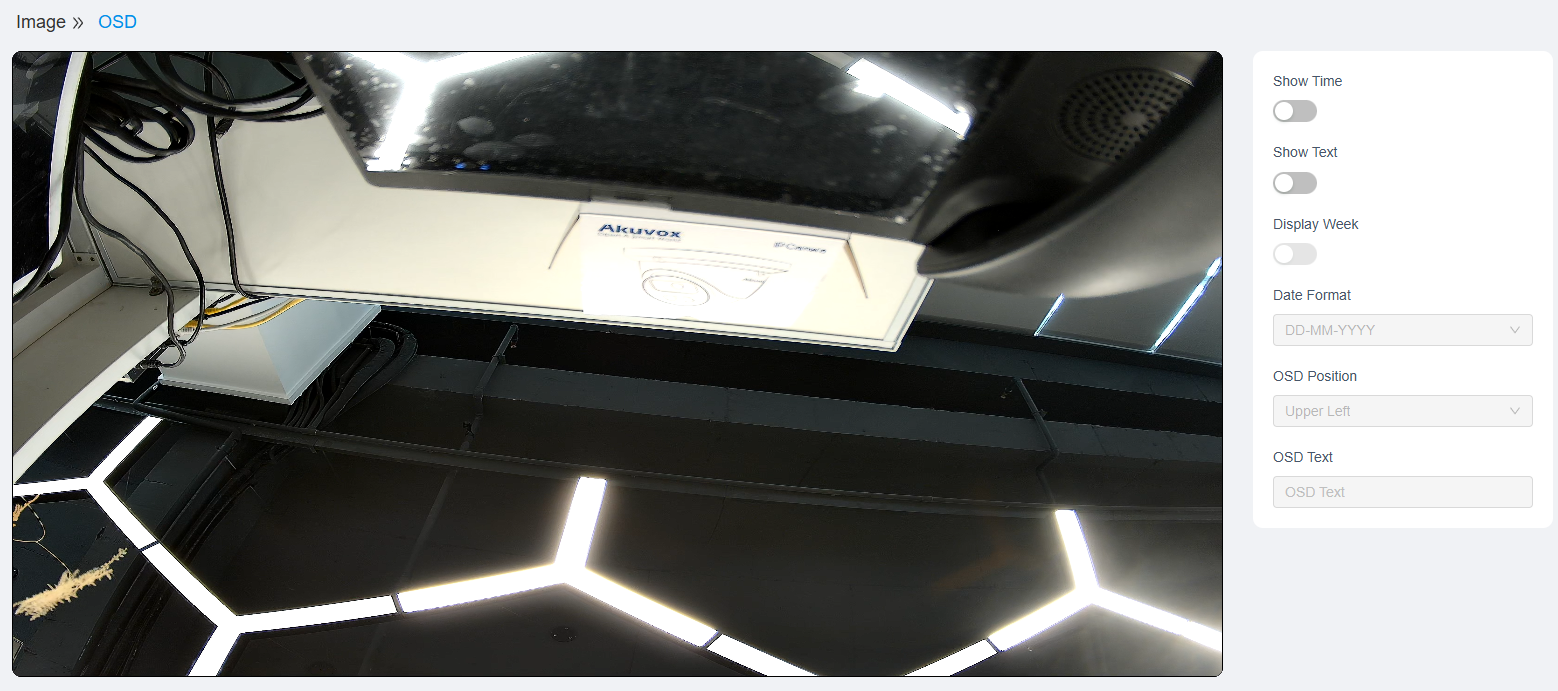
Show Time: Control whether the current time is displayed as an overlay on the video image.
Show Text: Control whether the configured custom text is displayed as an overlay on the video image.
Display Week: The day-of-week text displayed as part of the time overlay (e.g., TUE).
Date Format: The format used to display the date in the time overlay.
OSD Position: The position of the OSD overlay on the video image.
OSD Text: The custom text content displayed as part of the overlay.
Privacy Mask
Privacy Mask blocks selected regions of the video image from view, covering the specified area with a solid block in both the live and recorded video. Up to three independent regions can be configured. The preview window reflects configured regions in real time.
Set it up on the Image > Privacy Mask interface.
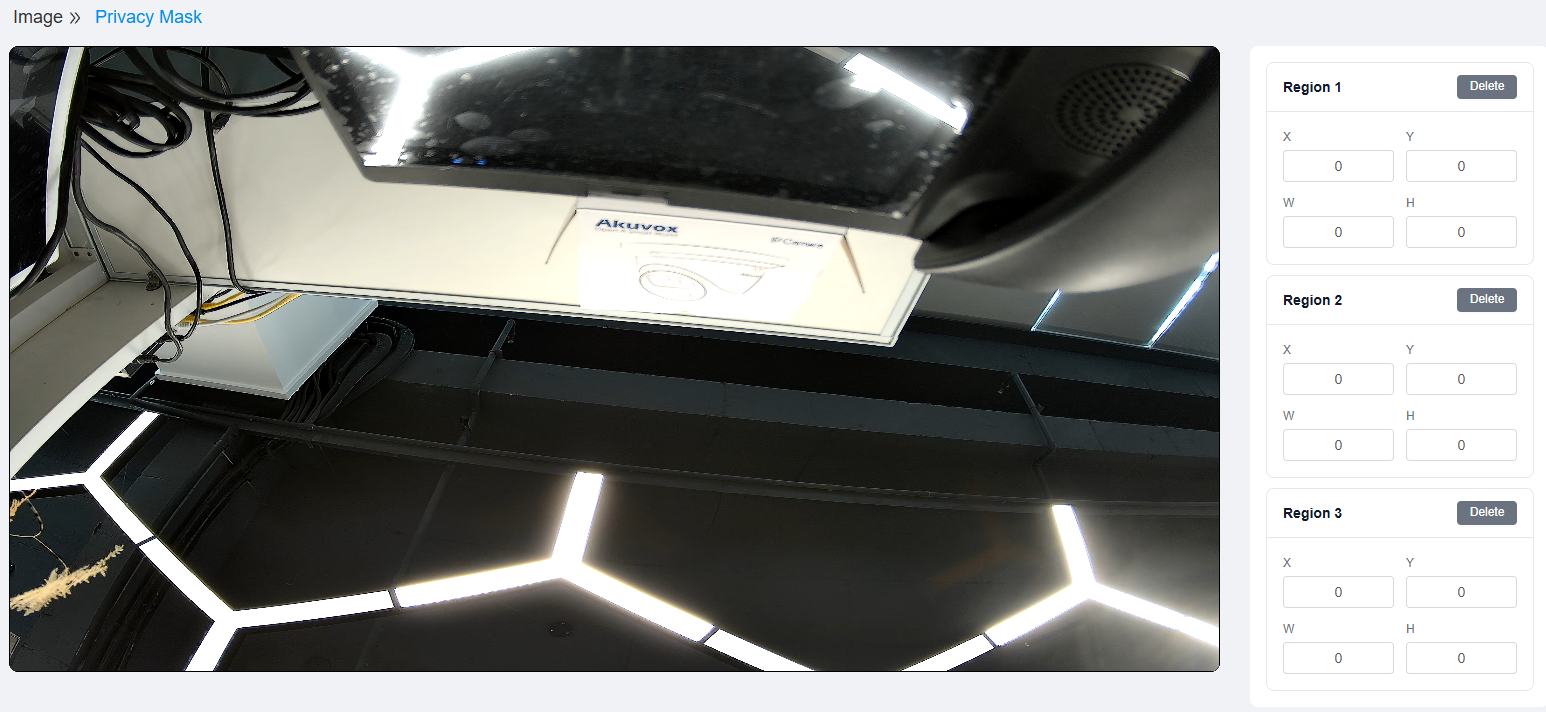
Region1 / Region2 / Region3: Up to three independently configurable masked regions, each defined by the following parameters:
X: The horizontal coordinate of the region's upper-left corner.
Y: The vertical coordinate of the region's upper-left corner.
W: The width of the masked region.
H: The height of the masked region.