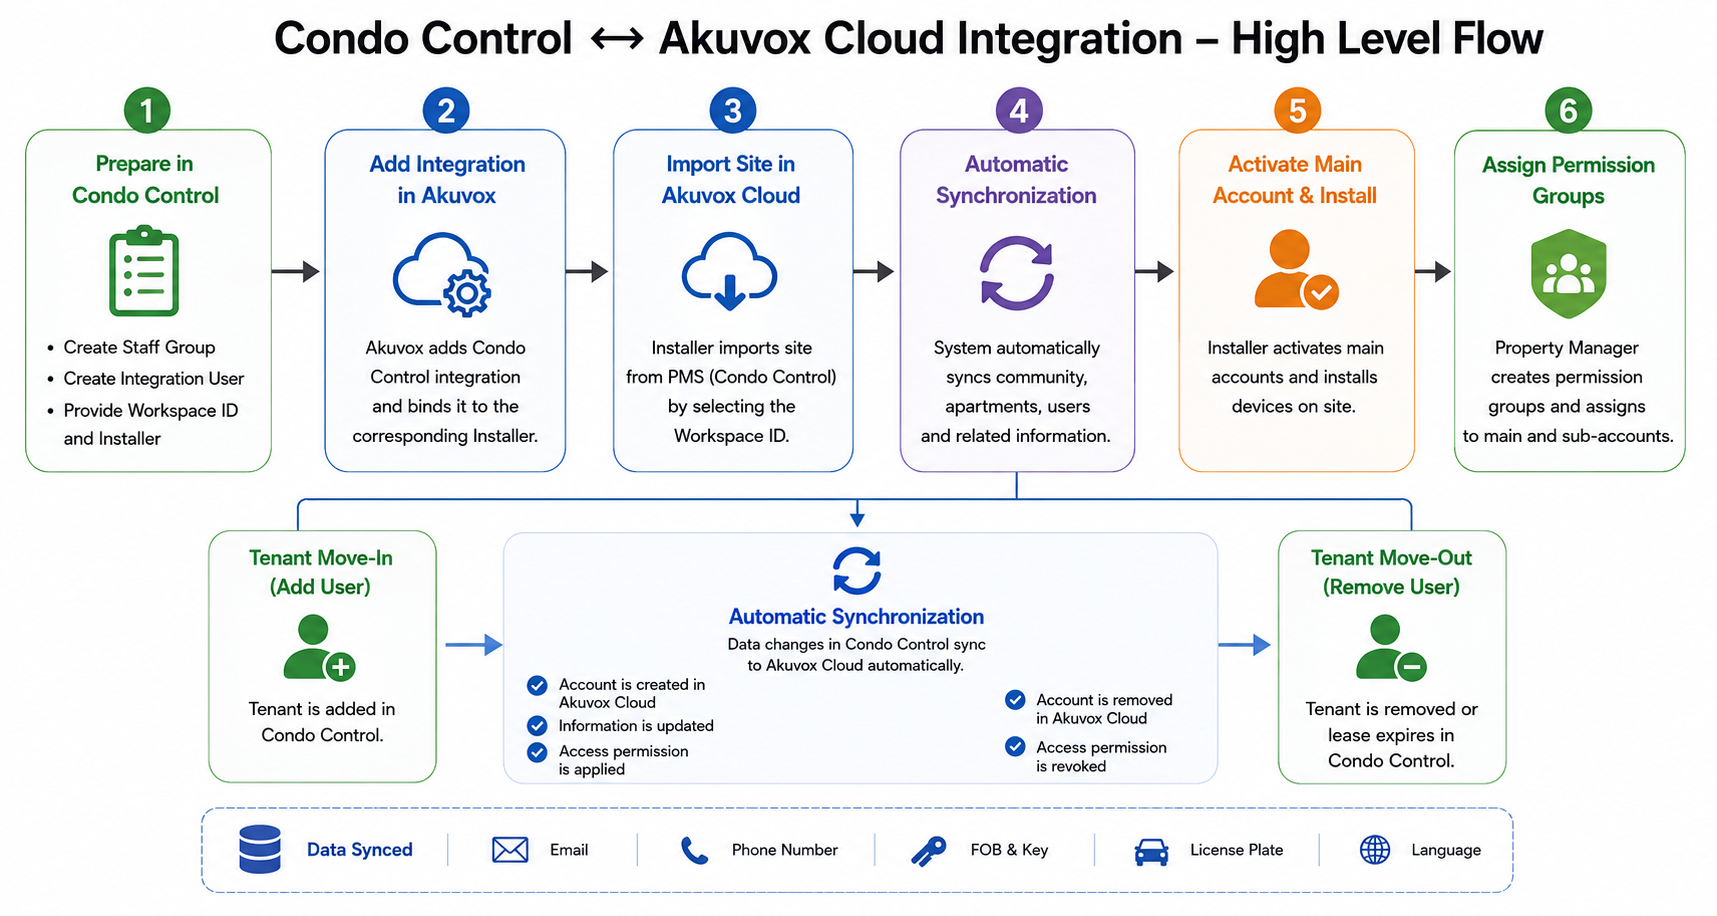
The Akuvox SmartPlus Ucloud platform supports integration with Condo Control.
With this integration, the newly added tenants in Condo Control will be synchronized to SmartPlus Cloud. Property managers can easily maintain one database for tenant management.
Overview
The integration synchronizes Condo Control workspace data into Akuvox Cloud automatically.
The synchronization includes:
Community and apartment structure
Tenant accounts
Email addresses and phone numbers
FOBs and keys
License plates
Lease-based tenant status
Prerequisites
Before integration, the property management company must prepare the following information in Condo Control.
Step 1: Create a Staff Group in Condo Control
Log in to Condo Control with your account.
Click your account in the upper-right corner.
Select Setup.
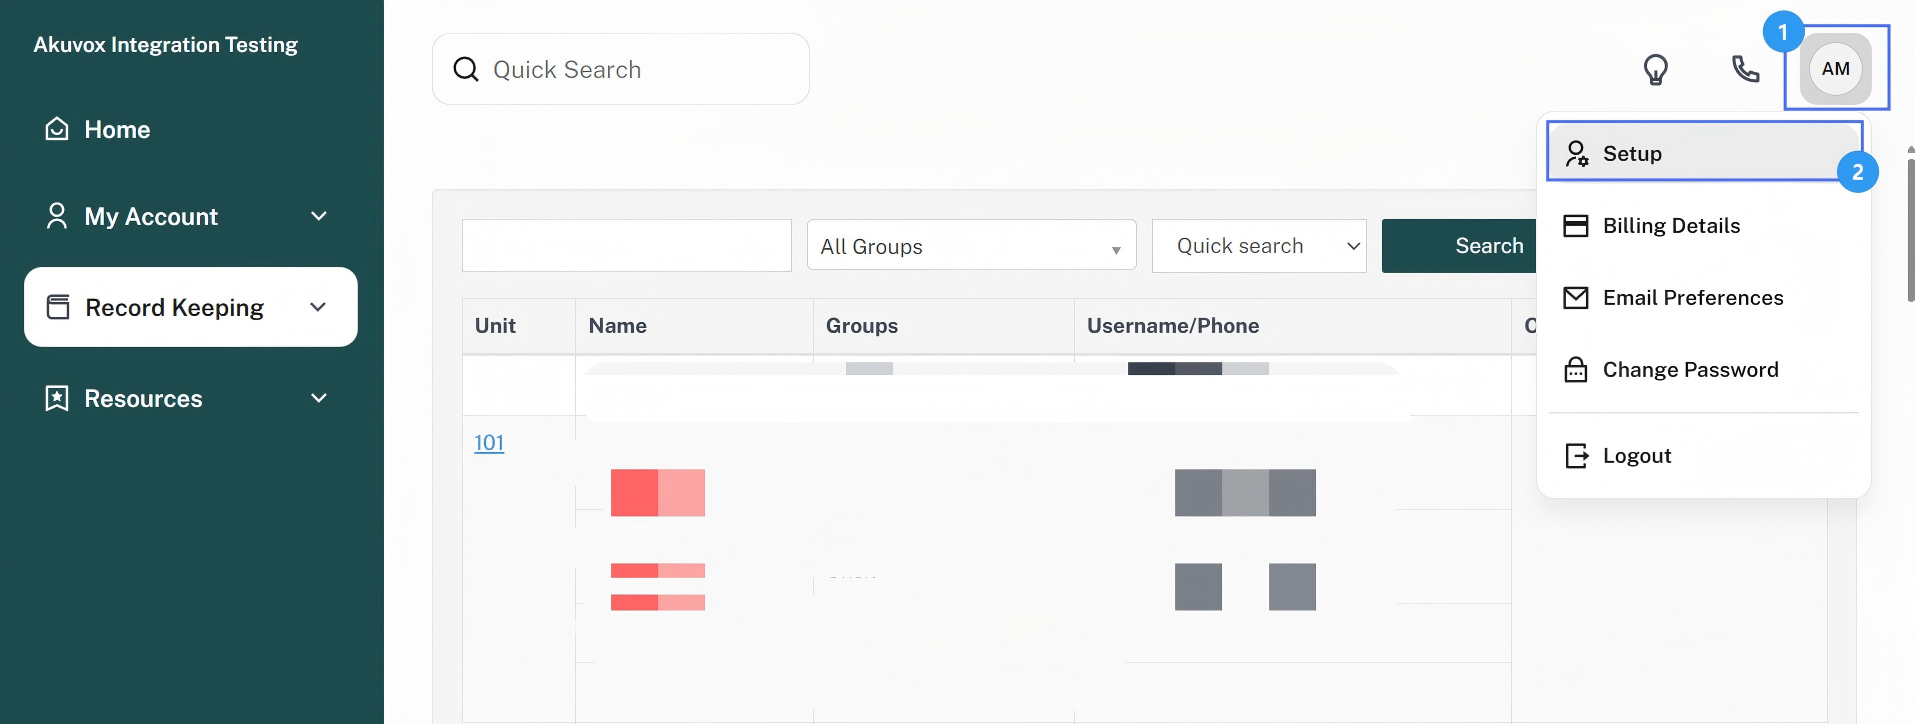
Select Groups in the left-side bar.
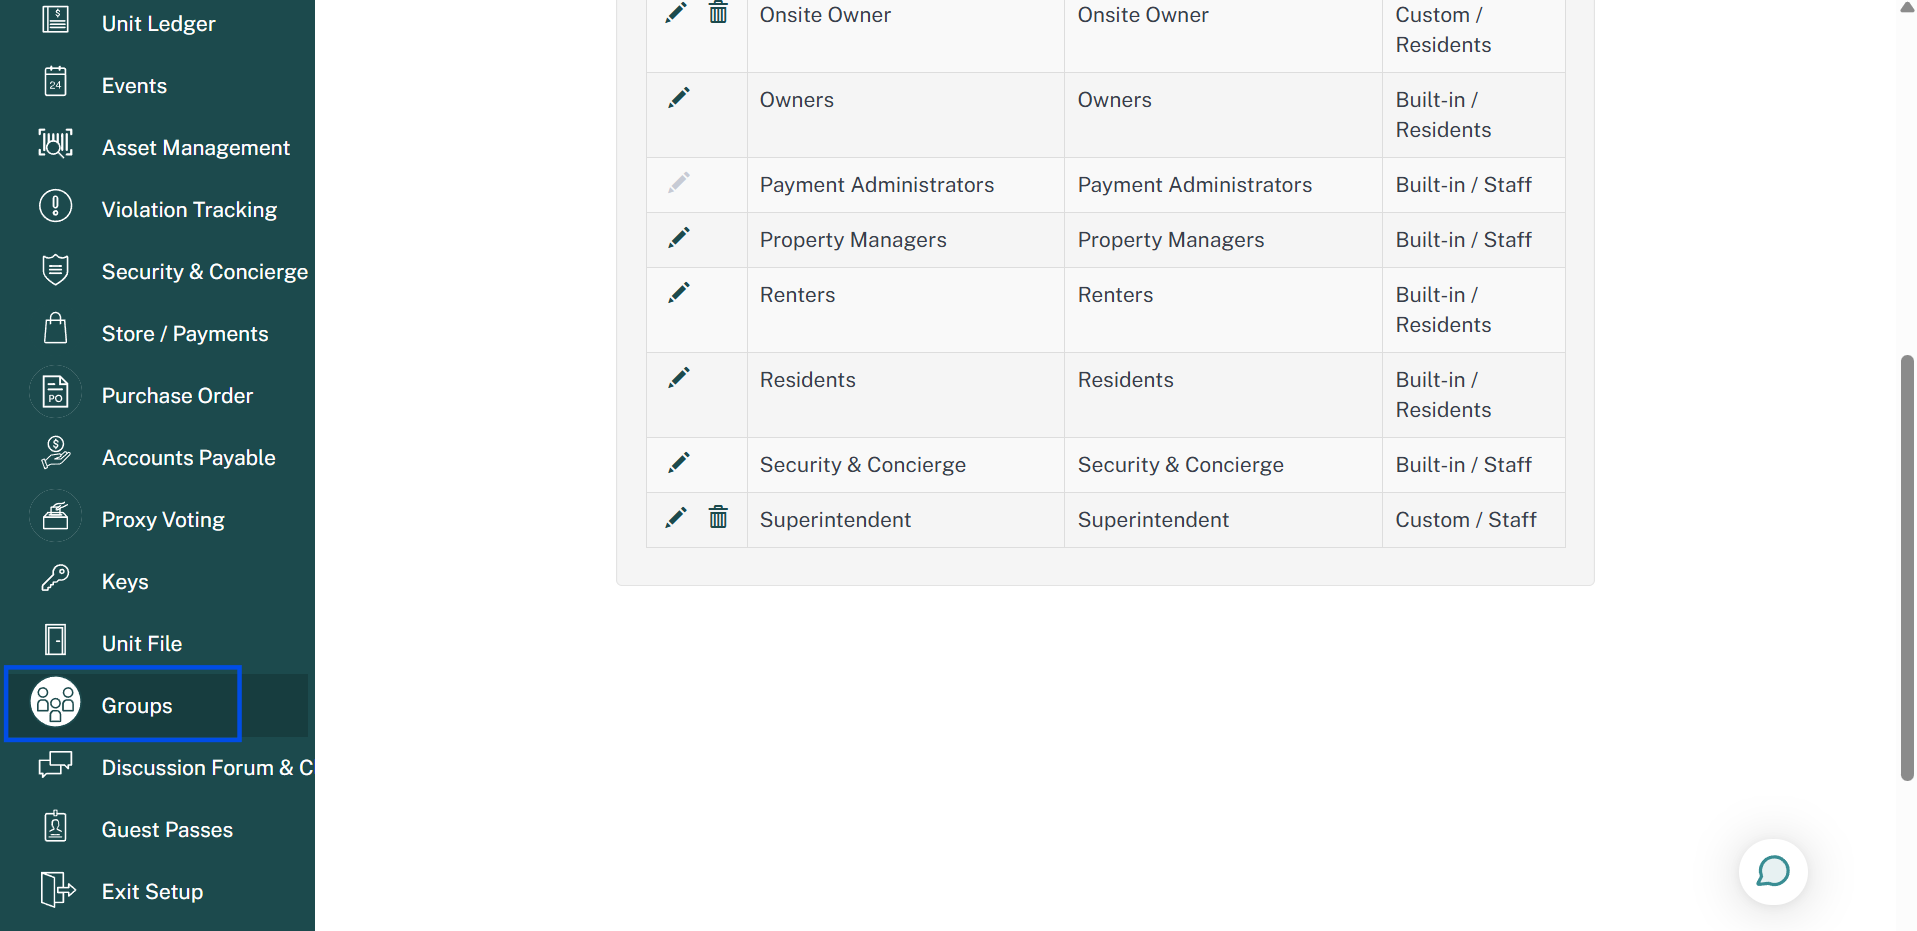
Click New to create a group.
Enter the group name. Recommended: Akuvox Integration.
Enter the group description if needed.
Set the Group Type to Staff.
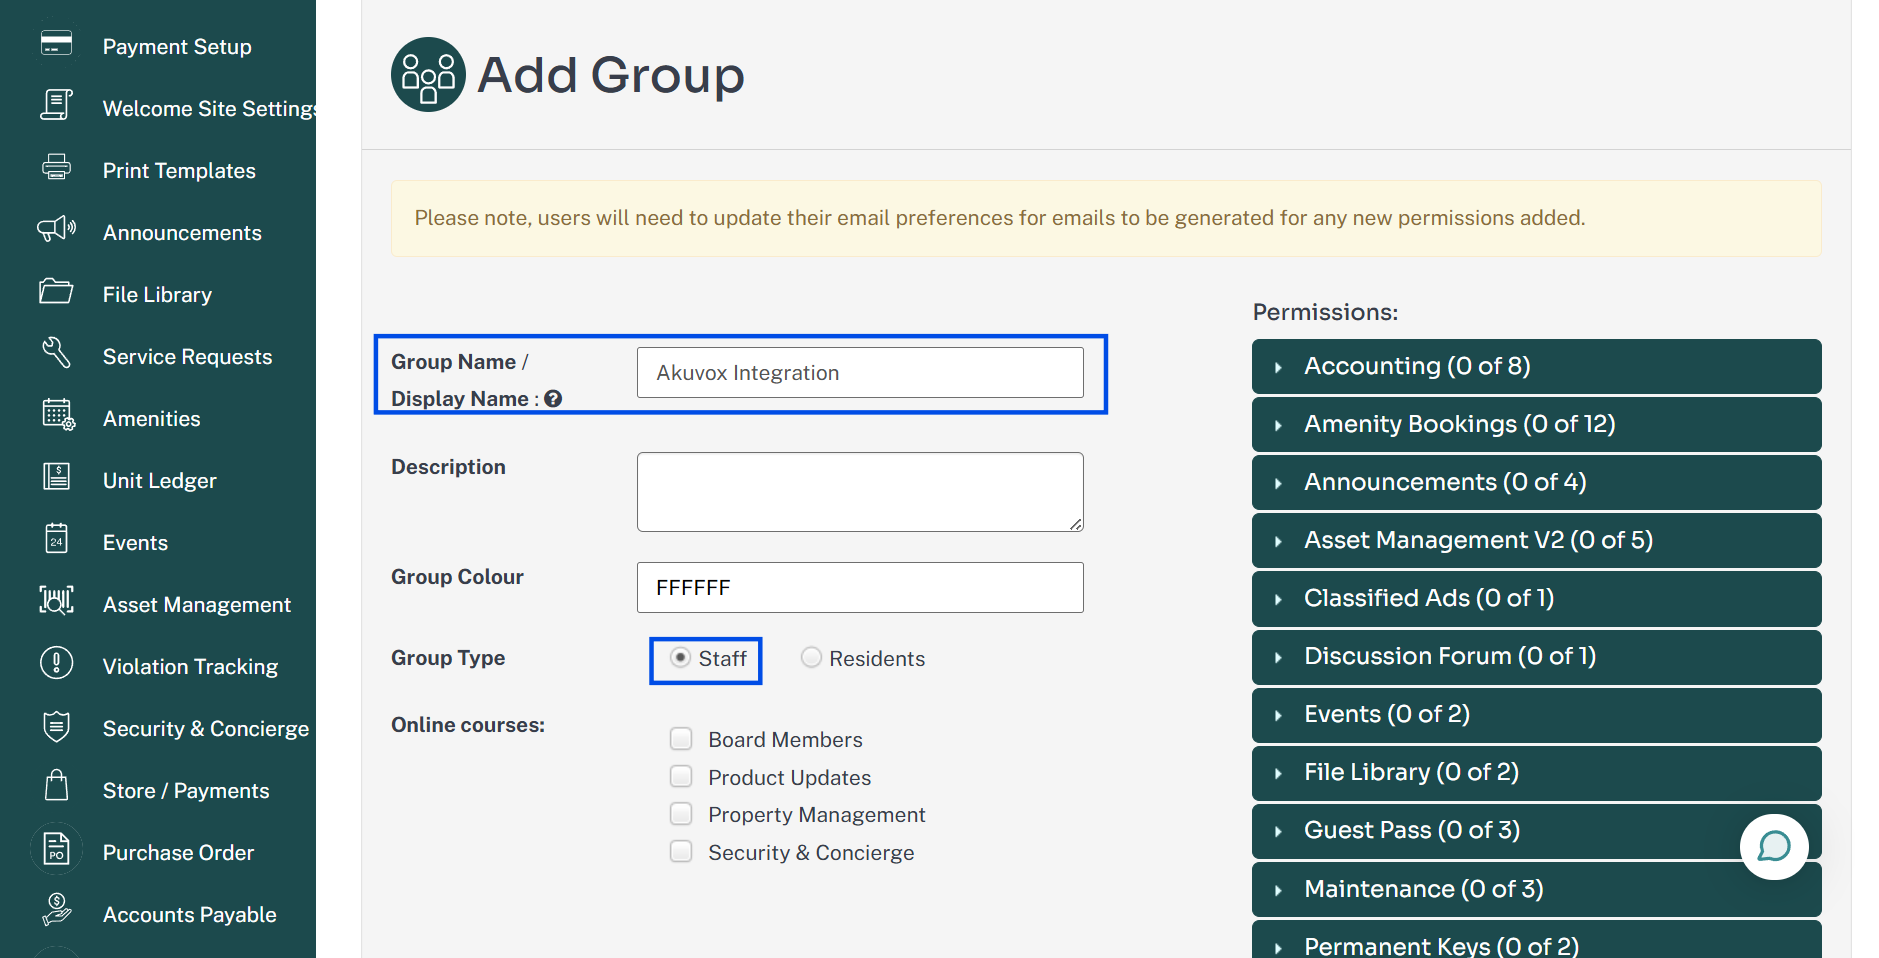
Grant the Can View Unit File permission to the group.
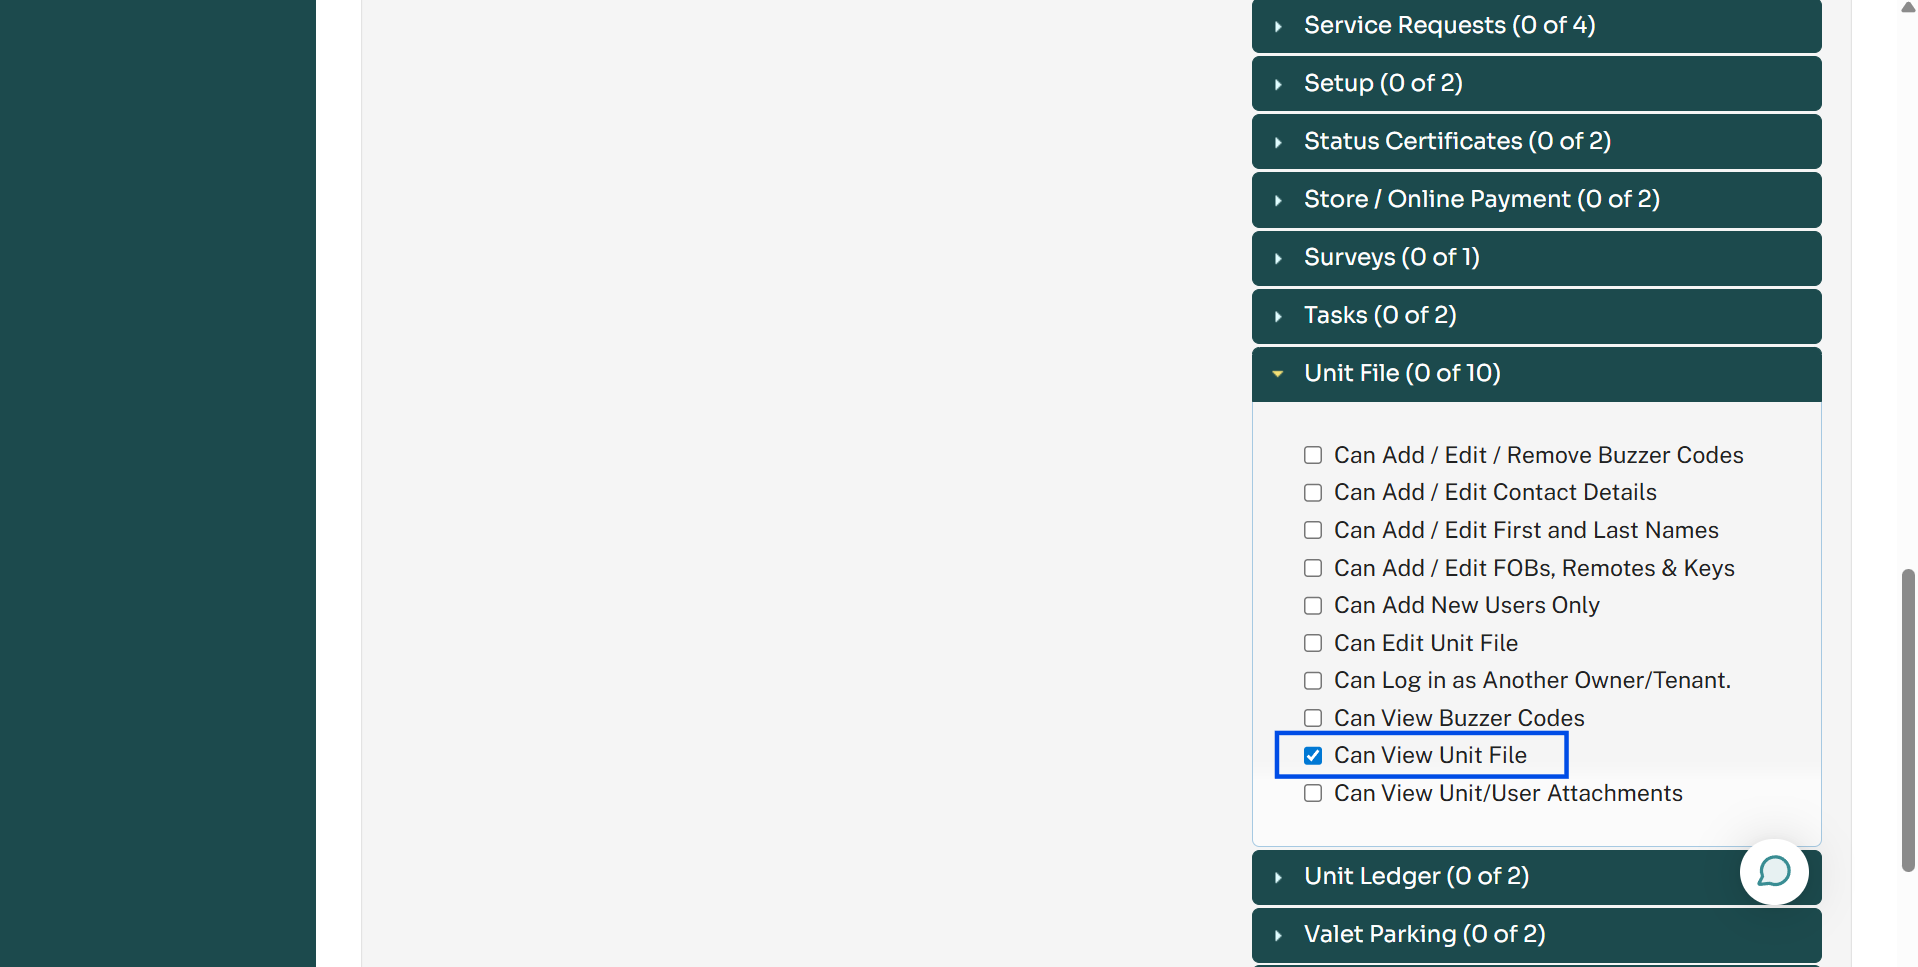
Save the group.
Step 2: Create an Integration User
Create a dedicated integration user in Condo Control.
Select Exit Setup in the left-side bar to return to the homepage.
Select Record Keeping > Unit File > Actions > Add New User.
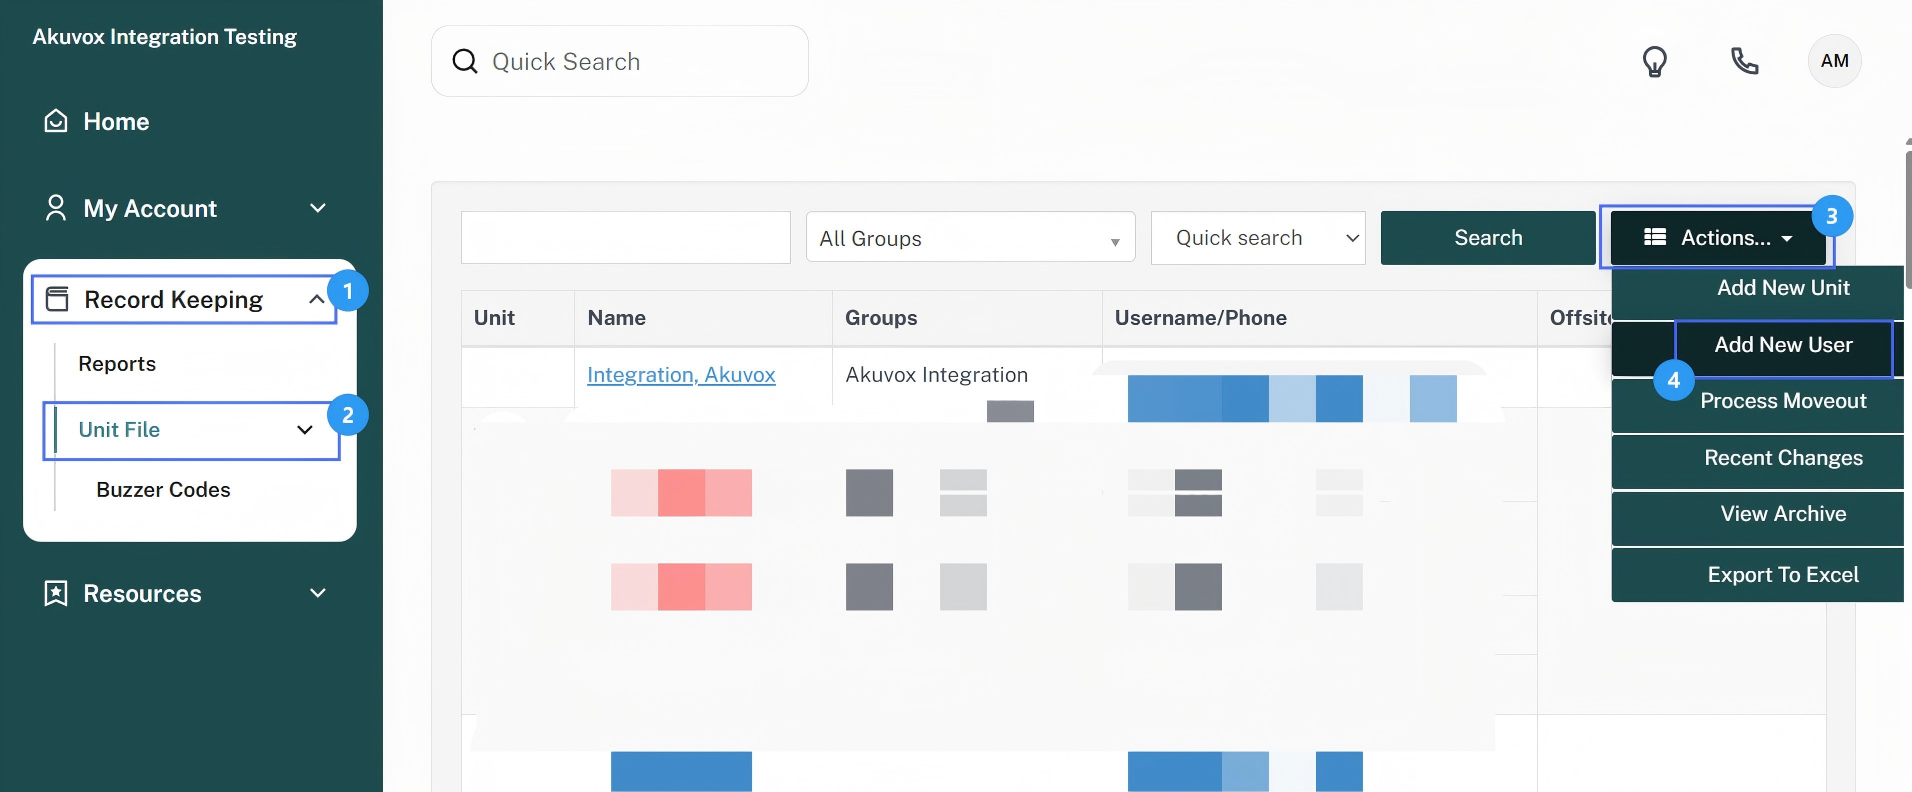
Enter the user information.
Enter the user email address. Recommended email: ccintegration@akuvox.com
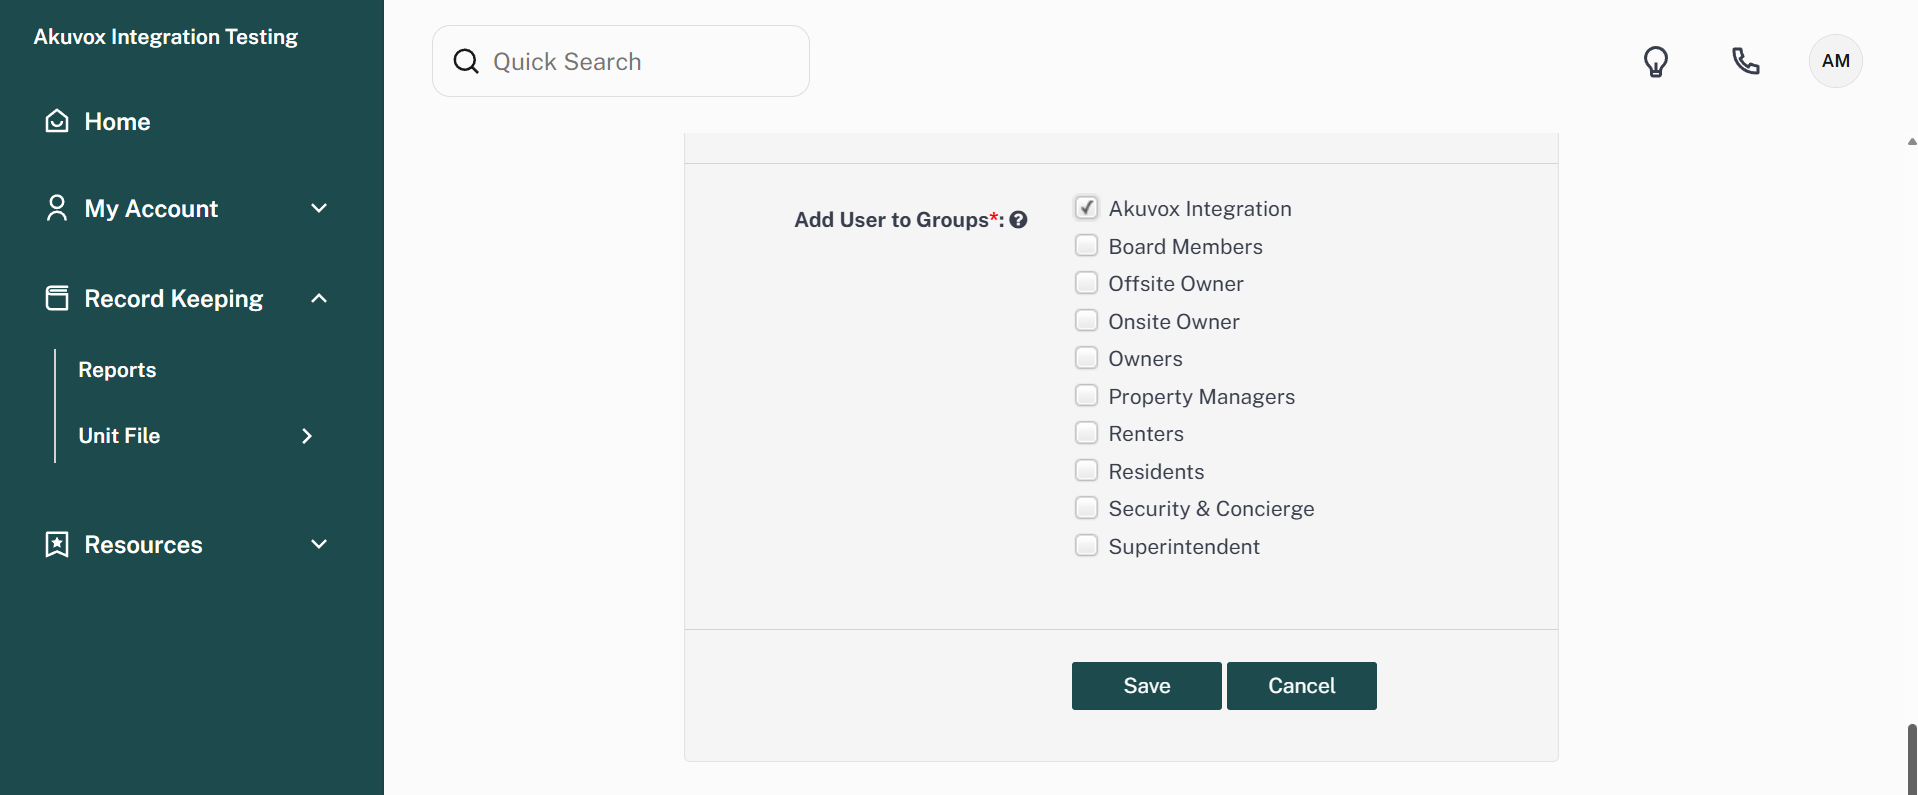
Assign this user to the previously created Akuvox Integration group.
Save the settings.
Step 3: Prepare Workspace Information
Provide the following information to Akuvox:
Condo Control Workspace
Workspace ID
Which Installer account should be bound to the Workspace
Akuvox Cloud Configuration
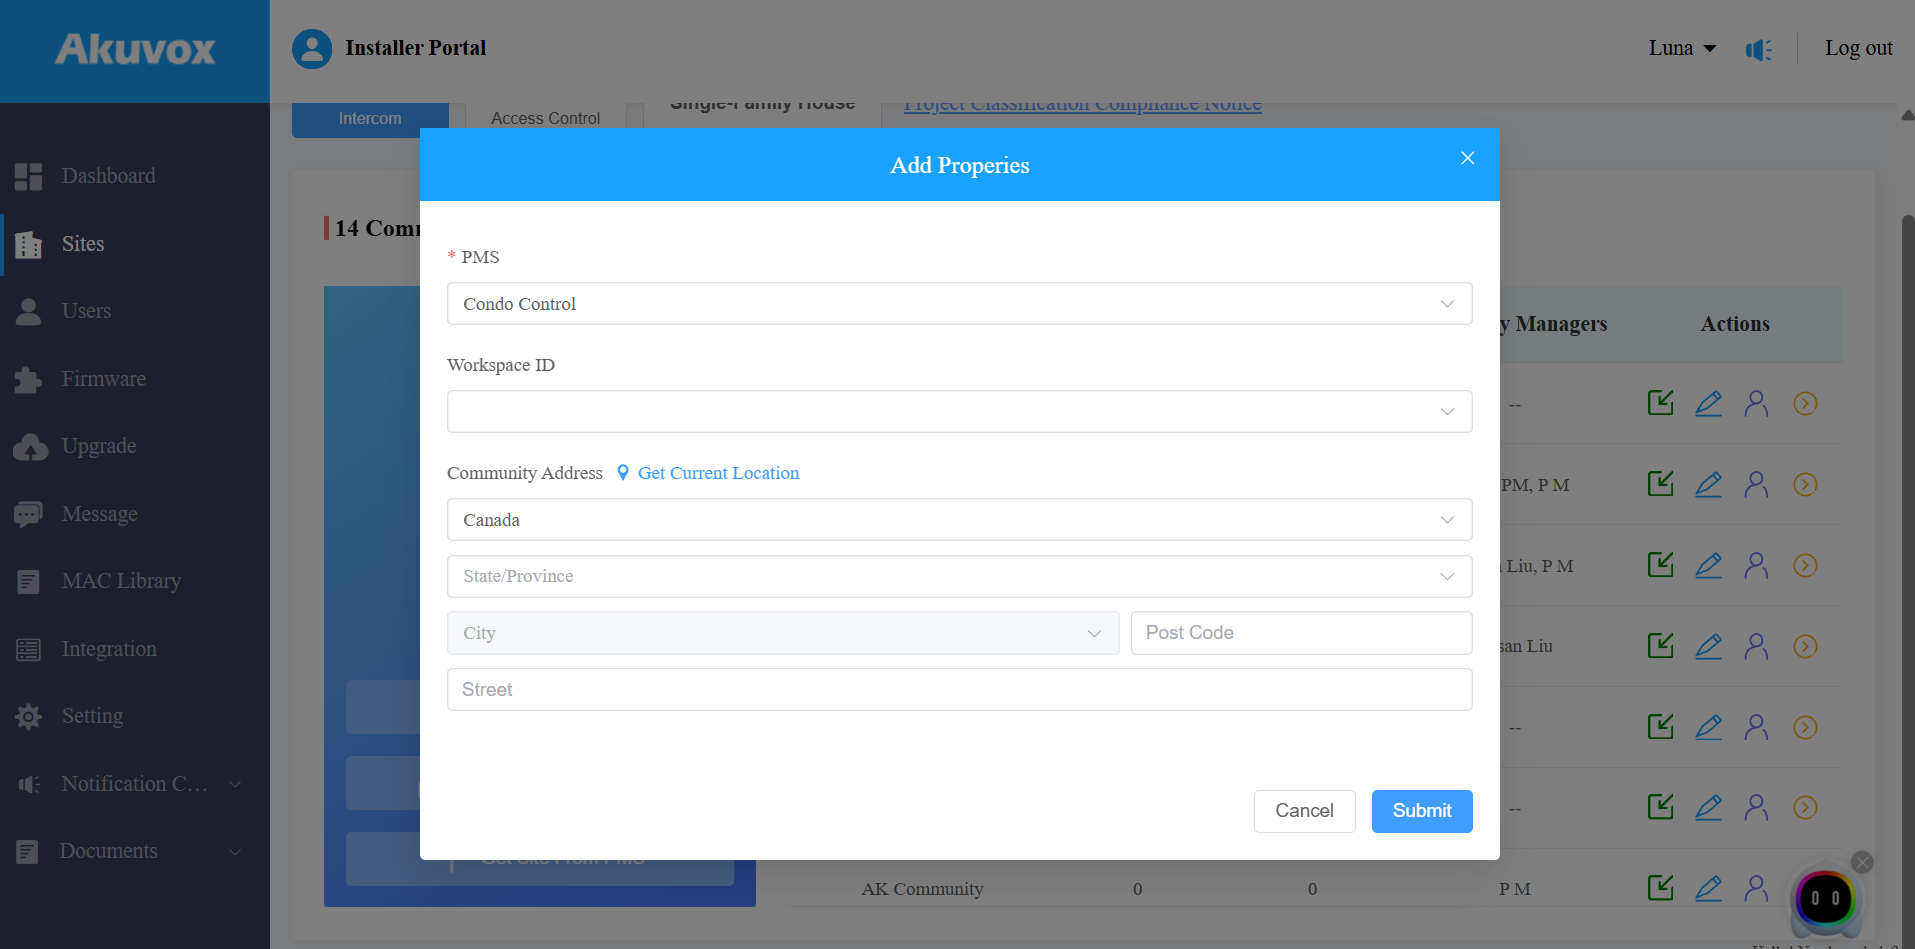
After the integration is configured, the installer can synchronize the Condo Control project into Akuvox Cloud.
Log in to the cloud platform with your installer account.
Select Communities on the dashboard.
Click Get Site From PMS.
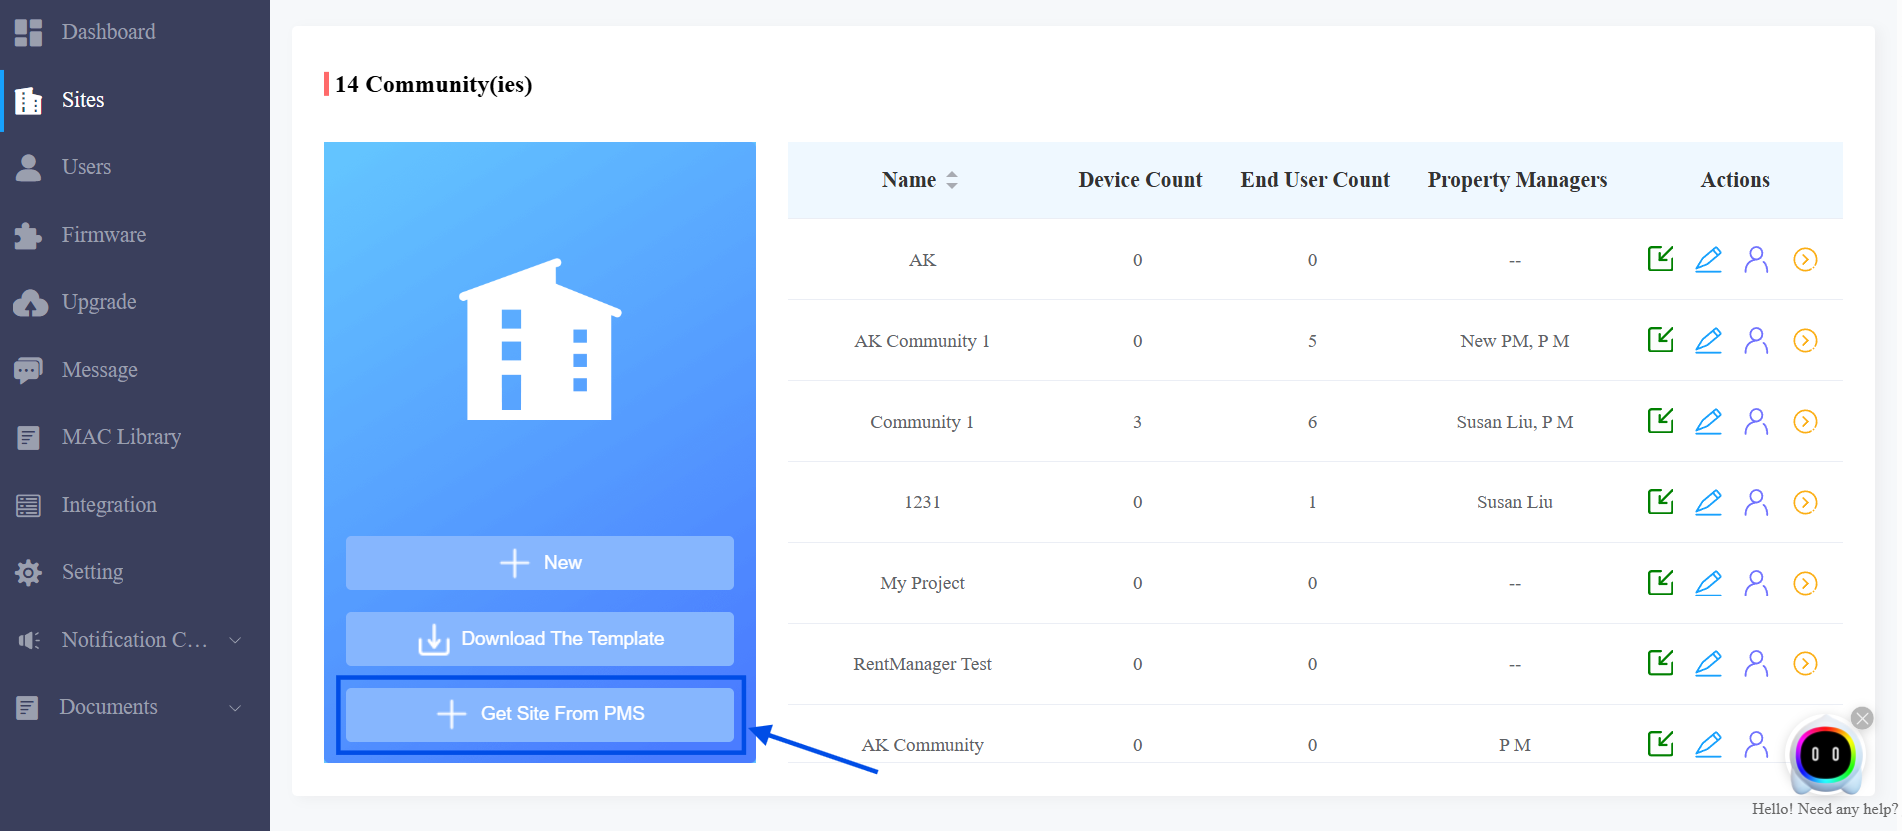
Select Condo Control.
Select the target Workspace ID.
The system will then automatically synchronize the Condo Control project based on predefined mapping rules.
Synchronization Rules
Community Structure Synchronization
Akuvox Cloud automatically creates:
One Community project
One default building named Building 1
Since Condo Control does not have a Building concept, all units are synchronized under Building 1.
Condo Control | Akuvox Cloud |
|---|---|
Workspace | Community |
Unit | Apartment |
No Building concept | Building 1 (auto-created) |
Account Synchronization Logic
Main Account Creation
For each apartment, the system automatically creates one main account.
The account name is the apartment name.
Sub-account Synchronization
Tenant users are synchronized as sub-accounts according to their lease status.
A user is considered valid only when the current date falls within the Lease Start Date ~ Lease End Date.
Note
When the lease end date is reached, users without any active leases are automatically removed from the apartment.
Owner accounts are NOT synchronized because Condo Control does not assign lease information to Owners.
Condo Control allows one user to be associated with multiple units. When synchronized to Akuvox Cloud, the user is synchronized only to the apartment with:
the earliest lease start date
and an active lease status
If a user is deleted in Condo Control, the corresponding main/sub-account is automatically deleted in Akuvox Cloud.
Synchronized User Information
The following user information is synchronized automatically:
Email address
Phone number
FOB credentials
Keys
License plates
Device Deployment and Access Permissions
After synchronization is completed:
The Installer installs devices according to the project layout.
The Property Manager creates permission groups.
The Property Manager assigns permission groups to tenants(sub-accounts).