Integration via Wiegand
The Wiegand feature enables the Akuvox device to act as a controller or a card reader.
you can configure the Wiegand on the web Intercom > Wiegand interface.

Parameter Set-up:
- Wiegand Display Mode: select Wiegand Card code format among 8H10D; 6H3D5D(W26); 6H8D; 8HN; 8HR; 6H3D5D-R(W26); 8HR10D; RAW.
- Wiegand Card Reader Mode: set the Wiegand data transmission format among three options: Wiegand 26, Wiegand 34, Wiegand 58. The transmission format should be identical between the door phone and the device to be integrated.
- Wiegand Transfer Mode: select Input, Output, Convert to Card No. Output Wiegand. If the door phone is used as a receiver, then set it as Input for the door phone. Select Output if you want Wiegand output to be converted to a card number before sending it from the door phone to a receiver.
- Wiegand Input Data Order: set the Wiegand input data sequence between Normal and Reversed. If you select Reversed then the input card number will be reversed and vice versa.
- Wiegand Output Data Order: set the Wiegand output data sequence between Normal and Reversed. If you select Reversed then the input card number will be reversed and vice versa.
- Wiegand Output CRC: tick to enable the parity check function to ensure that signal-based data can be transmitted correctly according to the established data transmission format.
When integrating with third-party devices, you need to set up the Wiegand PIN code output based on the Wiegand output format of the third-party device.
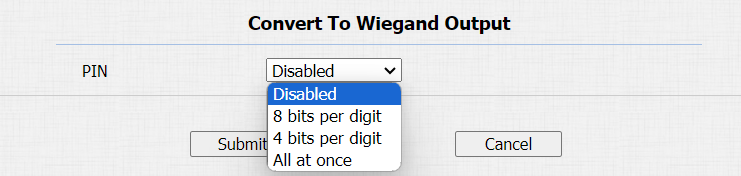
Parameter Set-up:
- PIN: enable or disable the Wiegand PIN code output based on your need. Select the Wiegand PIN code output format when you enable it.
- 8 bits per digit: select it if the third-party device adopts 8 bits per digit format. The PIN code is transferred separately by a digit (one digit consists of 8 bits).
- 4 bits per digit: select it if the third-party device adopts 4 bits per digit format. The PIN code is transferred separately by a digit (one digit consists of 4 bits).
- All at once: select it if the third-party device adopts All at once format. When it is selected, the PIN code will not be transferred until you enter the whole PIN code.
Integration via HTTP API
HTTP API is designed to achieve a network-based integration between the third-party device and the Akuvox device.
You can configure the HTTP API function on the web Intercom > HTTP API interface for the integration.
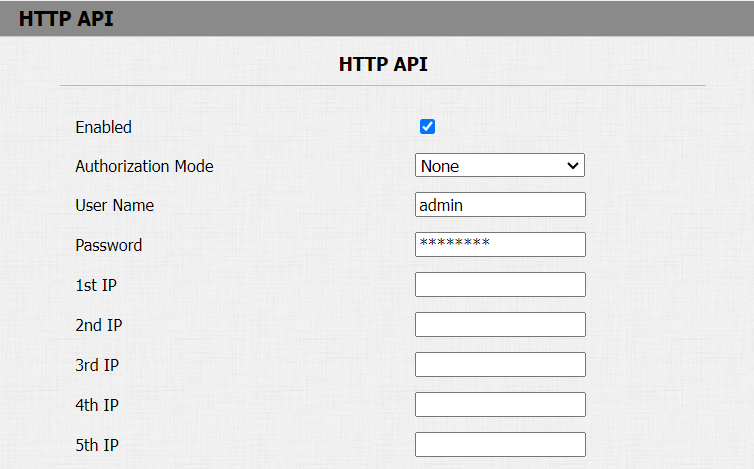
Parameter Set-up:
- HTTP API: select Enable or Disable to enable or disable the HTTP API function for the third-party integration. For example, if the function is disabled, any request to initiate the integration will be denied and HTTP 403 forbidden status will be returned.
- Auth Mode: select among four options: None, Whitelist, Basic, and Digest for authorization type, which will be explained in detail in the following chart.
- User Name: enter the user name when Basic and Digest authorization mode is selected. The default user name is Admin.
- Password: enter the password when Basic and Digest authorization mode is selected. The default user name is Admin.
- IP01-IP05: enter the IP address of the third-party devices when the WhiteList authorization is selected for the integration.
Please refer to the following description for the authentication mode:
| NO. | Authorization Mode | Description |
|---|---|---|
| 1 | None | No authentication is required for HTTP API as it is only used for demo testing. |
| 2 | Normal | This mode is used by Akuvox developers only. |
| 3 | Whitelist | If this mode is selected, you are only required to fill in the IP address of the third-party device for the authentication. The whitelist is suitable for operation in the LAN. |
| 4 | Basic | If this mode is selected, you are required to fill in the user name and the password for the authentication. In the Authorization field of the HTTP request header, use the Base64 encoding method to encode the username and password. |
| 5 | Digest | The password encryption method only supports MD5. MD5( Message-Digest Algorithm)In the Authorization field of the HTTP request header:WWW-Authenticate: Digest realm="HTTP API",qop="auth,auth-int",nonce="xx", opaque="xx". |
| 6 | Token | This mode is used by Akuvox developers only. |
Integration with Milestone
If you want the door phone to be monitored by Milestone or any third-party devices that have been integrated with Milestone, you need to enable the feature.
To do so, go to Intercom > ONVIF.

Power Output Control
The device can serve as a power supply for the external relays. Click here to view power output requirements.
Path: Intercom > Advanced >12V Power Output.
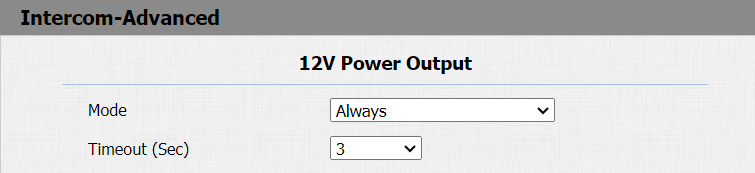
Parameter Set-up:
- 12V Power Output: select Disabled to disable the power output function; select Always to enable the access controller to provide continuous power to the third-party device. Select Triggered By Open Relay if you want the R27 to provide power to the third party device via 12 output and GND interface during the timeout when the status of relays is shifted from low to high.
- Time Out (Sec): select the power supply time duration after the relay is triggered. Three options: 3, 5, 10. It is 3 seconds by default. The power output is 12V, and the maximum output amperage is 0.8A.
Integration with Lift Control
The device can be connected to the Akuvox lift controller for the lift control. Users can summon the lift to go down to the ground floor when they are granted access through various types of access methods on the device.
Click here to watch a demonstration video of configuring the lift control feature.
To set up the lift control, go to Intercom > Lift Control interface.

Parameter Set-up:
- Lift Control List: select integration mode among seven Options: None, Chiyu, KeyKing, ZKT, Akuvox EC32. The detail for the options will be provided in the following chart.
| NO. | Integration Mode | Description |
|---|---|---|
| 1 | None | If you select None, then the RS485 integration will be disabled. |
| 2 | Chiyu | Select Chiyu if you want to integrate with the Chiyu lift controller. |
| 3 | KeyKing | Select Keyking if you want to integrate with the KeKing lift controller. |
| 4 | ZKT | Select ZKT if you want to integrate with the ZKTeco lift controller. |
| 5 | Akuvox EC32 | Select Akuvox EC32 if you want to connect the device with the Akuvox EC32 lift controller. |