Keypad Light
You can set up the keypad light for the A13S model.
To set it up, go to Device > Light interface.
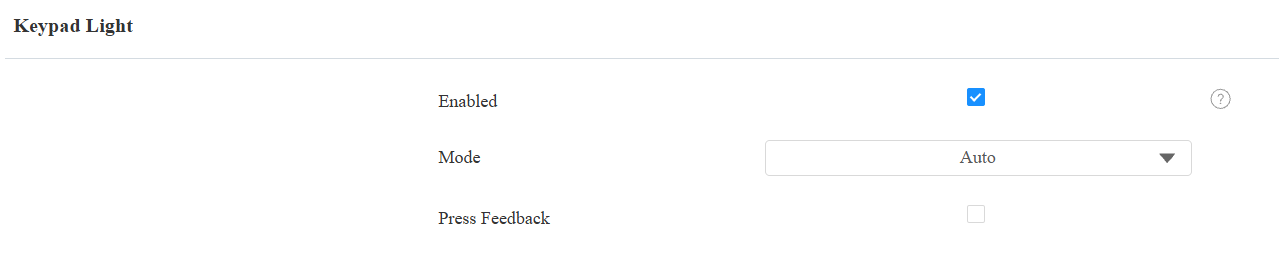
Mode:
Auto: The keypad lights up when a user approaches or touches the keypad and turns off when there is no user interaction.
On: The keypad backlight remains on continuously.
Off: The keypad backlight remains off.
Press Feedback: When enabled, the keypad light flashes every time users press the keypad.
LED Setting on Card Reader Area
You can enable/disable the card reader backlight for the A13C model.
To set it up, go to Device > Light interface.

Status Light
You can configure the status light to provide visual feedback for different device events and statuses.
To set it up, go to Device > Light interface.
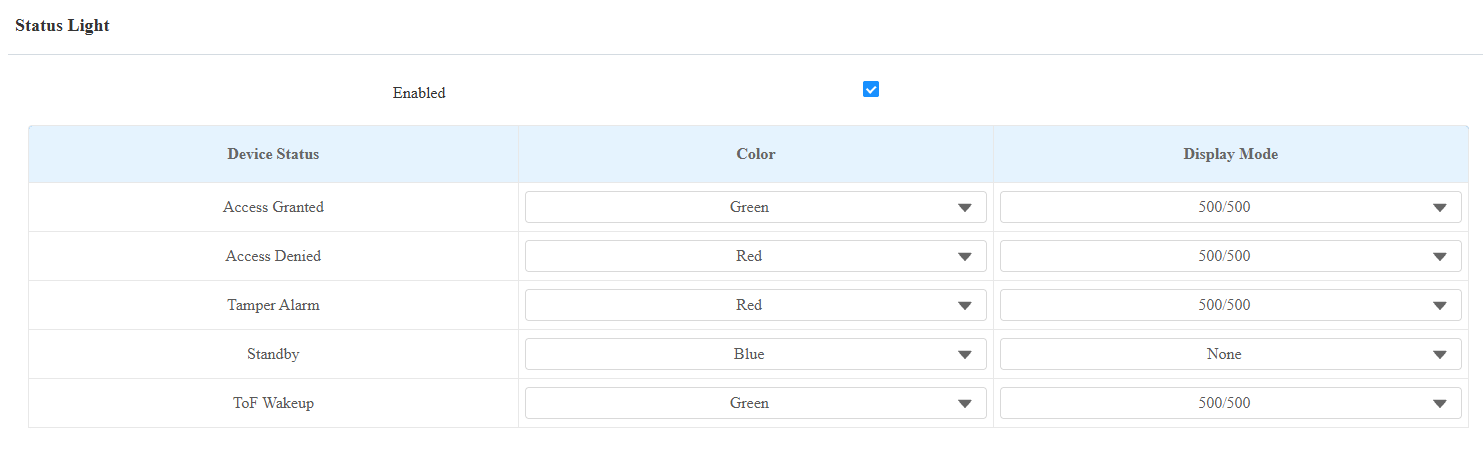
Device Status: The device status for which the status light is configured.
Access Granted: Indicates that access is granted.
Access Denied: Indicates that access is denied.
Tamper Alarm: Indicates that a tamper alarm is triggered.
Standby: Configures the status light behavior when the device is idle.
ToF Wakeup: Configures the status light behavior when a hand wave wakes up the Time-of-Flight (ToF) module.
Color: The color of the status light. Available options include Red, Green, and Blue.
Display Mode: The flashing pattern of the status light.
500/500: The light alternates between on and off at 500 ms intervals.
1000/1000: The light alternates between on and off at 1000 ms intervals.
Always: The light remains continuously on. Available only for Standby.
None: The light remains off. Available for Standby and ToF Wakeup.
Note
ToF Wakeup status light setting is only available for the A13S model.
Light Blink Control
You can disable all light blinking effects for a scheduled time, including network connection, door opening, and ToF trigger indications.
To set it up, go to Device > Light interface.
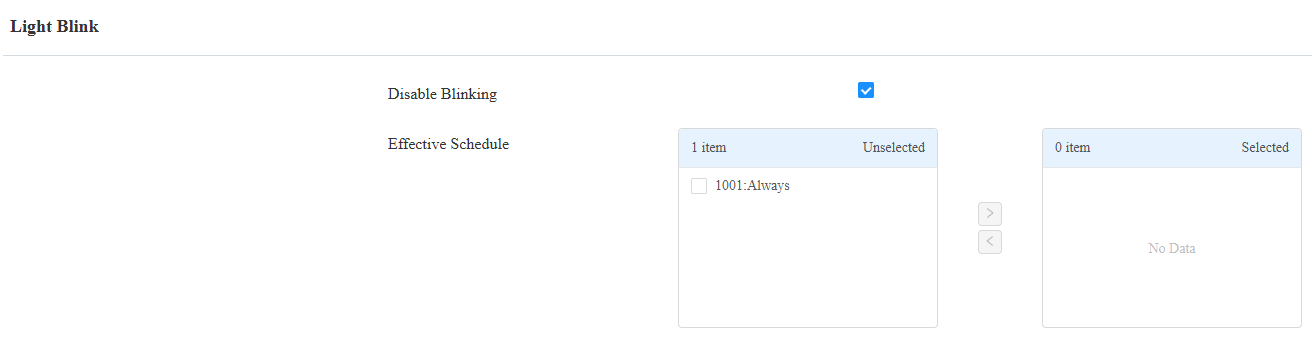
Disable Blinking: The feature is disabled by default.
Effective Schedule: Apply the schedule to the feature by moving it from the left to the right box. Create a schedule on the Setting > Schedule interface.