The indoor monitor has a built-in PBX server which allows the device to serve as an intercom monitor and a SIP PBX, so users do not bother to prepare an extra SIP PBX again. The PBX supports call forward, transfer, conference, ring group features, and so on. You can set it up on the device screen or web interface.
Note
The PBX feature is not supported in version 567.30.114.503, but is supported in version 567.30.114.803. In general, it is available in firmware versions earlier than 567.30.114.503 and later than 567.30.114.803.
On The Device
To set it up, go to Settings > Advance Settings > PBX screen.
Enable PBX Service
On the PBX screen, tap the Setting icon ![]() in the upper-right corner to enable the PBX. After turning on the PBX server, you can check the server address and port in the upper left corner.
in the upper-right corner to enable the PBX. After turning on the PBX server, you can check the server address and port in the upper left corner.
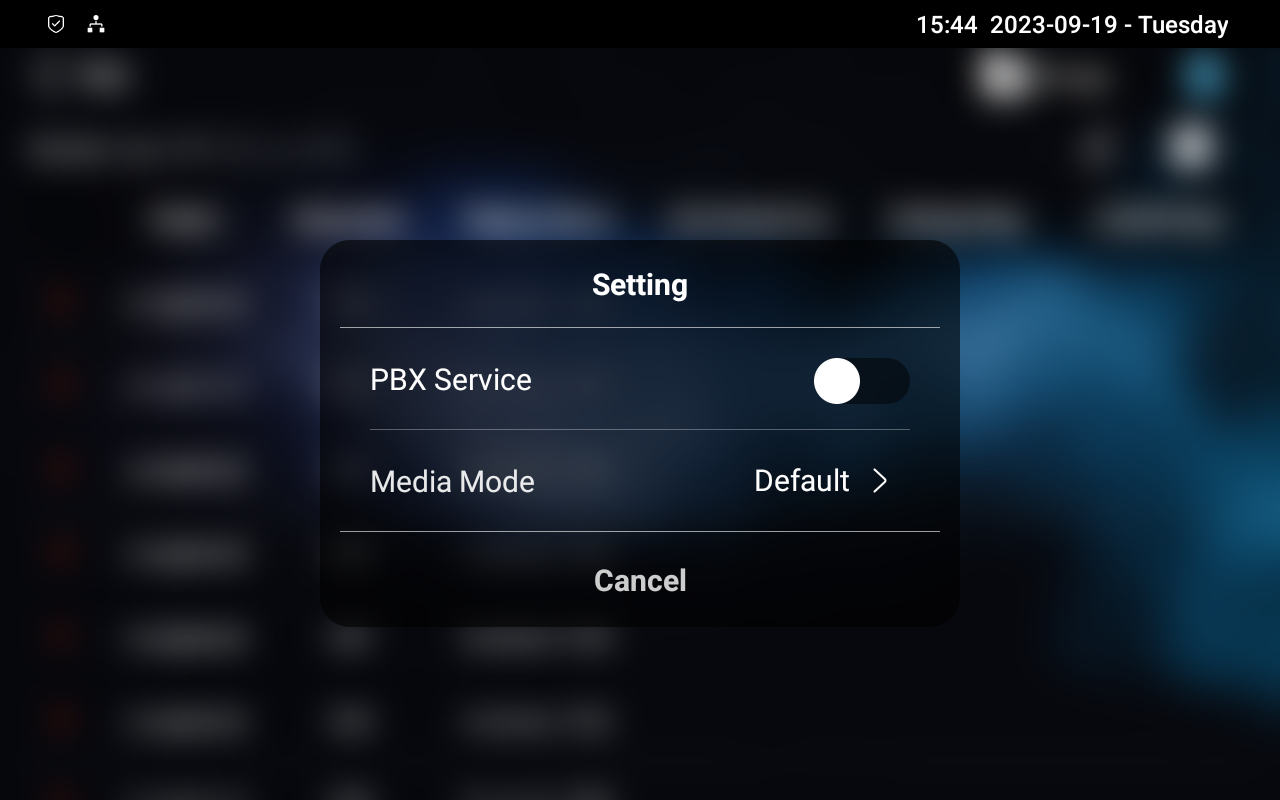
Media Mode:
Default: Select it when the intercom devices are deployed in the same LAN network.
Bypass: Select it when the devices are deployed in different LAN networks where PBX serves as a bridge or a media for the network data transmission.
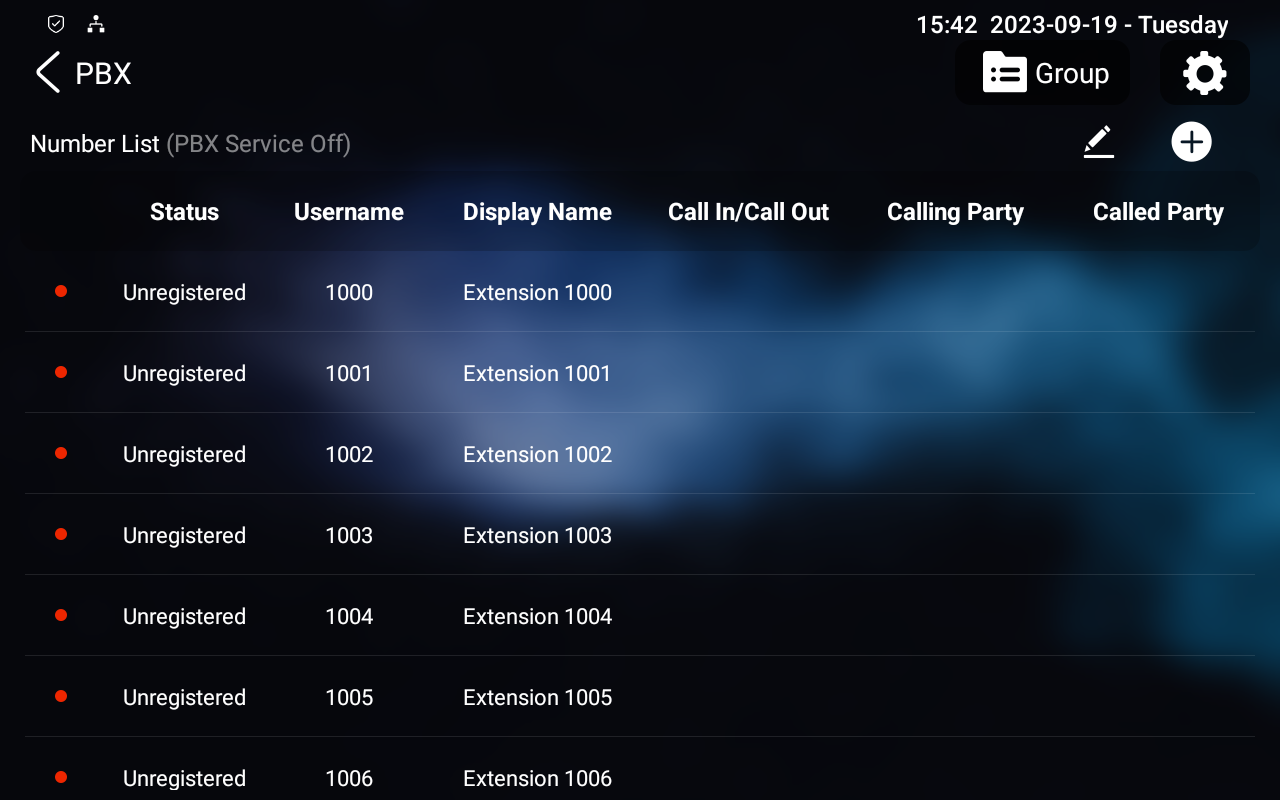
Manage PBX Accounts
You can check the basic PBX information like PBX account status by tapping ![]() in the upper right corner. Then, select the desired row by tapping
in the upper right corner. Then, select the desired row by tapping ![]() .
.

Status: Indicate whether the account is registered or not.
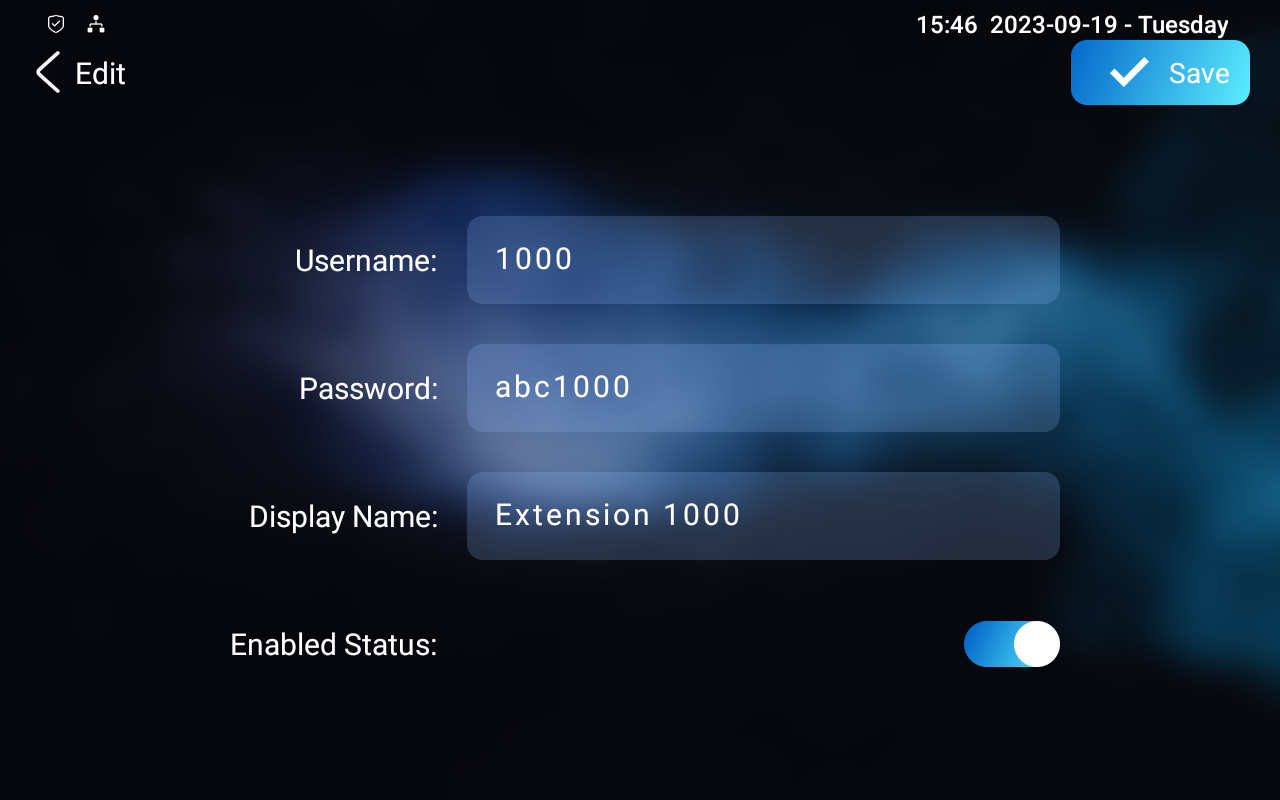
Username: Enter the extension number registered on the SIP server.
Display Name: Enter the display name of this account, which will be shown on other devices when making calls.
Password: Enter the password of the corresponding users.
Enabled Status: Activate or deactivate the SIP account.
Call In/Call Out: The calling status of this account.
Calling Party: The callee number.
Caller Party: The caller number.
Manage PBX Groups
One number can be added to different ring groups. Once receiving an incoming call, the numbers in one group will ring up at the same time.
Tap Group in the upper right corner to add a new ring group or edit the existing group.
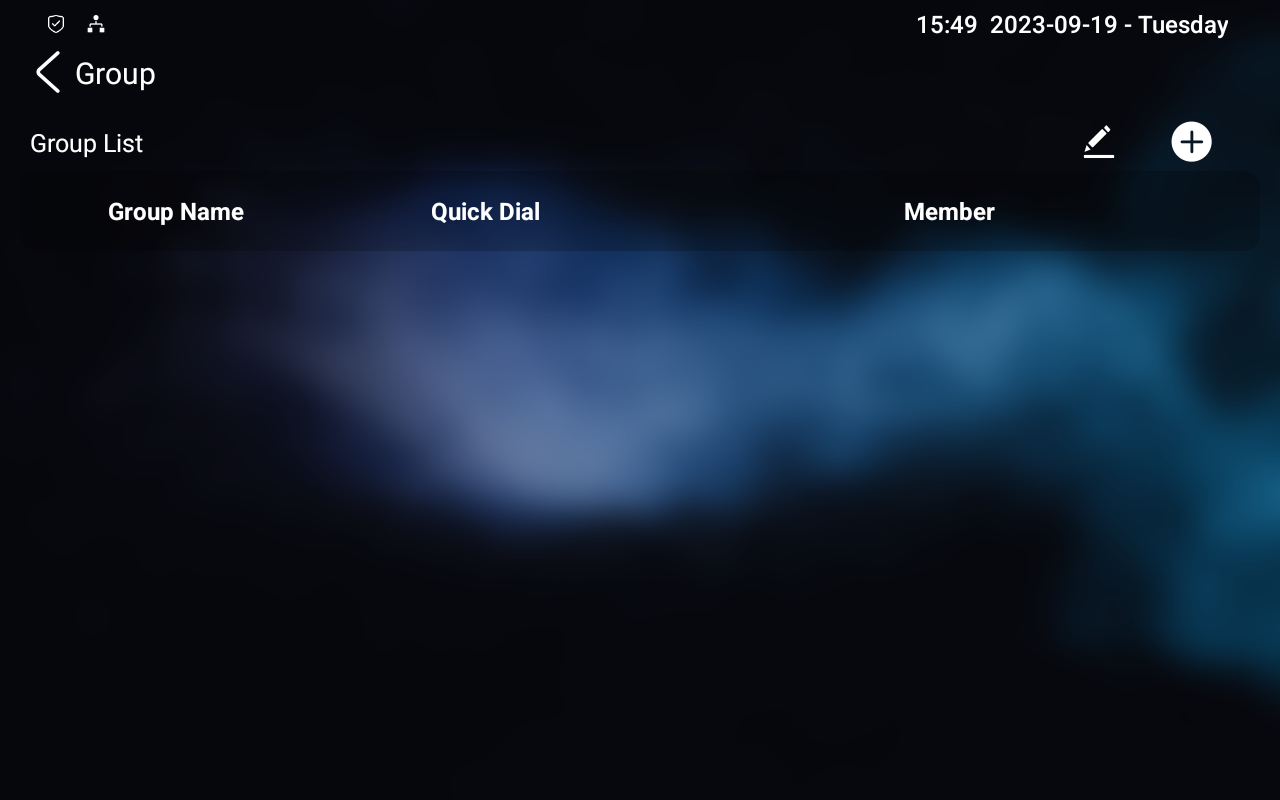
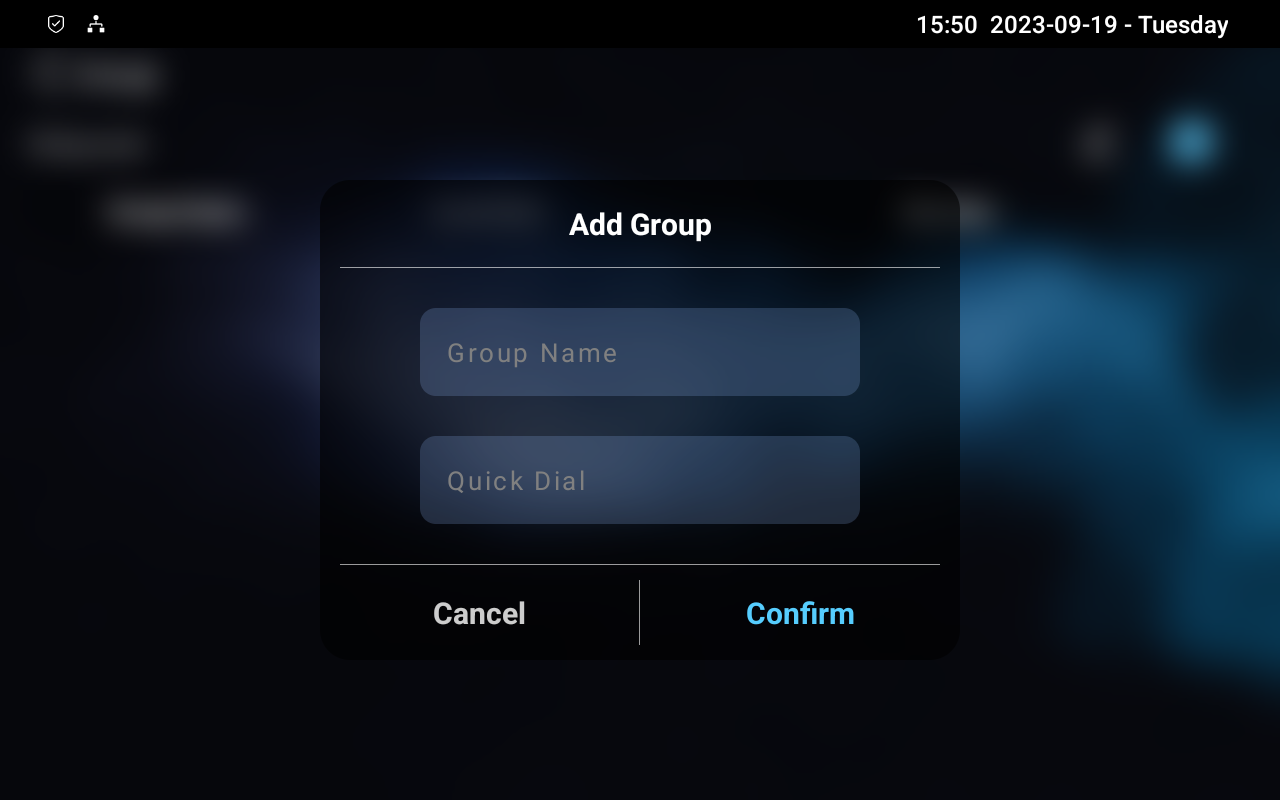
Group Name: Name the group.
Quick Dial: Enter the number used to call members of the group.
Member: Select the registered number from the number list by pressing the area below Member.
On the Web Interface
Enable PBX Service
To set up the PBX feature on the web, go to the PBX > Basic interface.

PBX Status: Indicate whether the PBX is on or off.
Media Mode:
Default: Select it when the intercom devices are deployed in the same LAN network.
Bypass: Select it when the devices are deployed in different LAN networks where PBX serves as a bridge or a media for the network data transmission.
PBX Port: Display the port of the server.
Manage PBX Accounts
You can add or edit accounts on the PBX > Basic interface.

Username: Enter the extension number registered onto the SIP server.
Password: Enter the password of the corresponding users.
Display Name: Enter the display name of this account, which will be shown on other devices when making calls.
Status: Indicate whether the account is registered or not.
Manage PBX Groups
To set up PBX groups, go to the PBX > Ring Group interface. Click +Add or ![]() to create or modify a group.
to create or modify a group.


Group Name: Name the group.
Quick Dial: Enter the number used to call members of the group.
Member: Select the registered number from the number list.