The local contact information is used to initiate SIP or IP calls to other intercom devices. You can group the contact information to facilitate group calls. Moreover, you can add the camera URL of the target device, allowing users to view its live stream during a call or a call preview.
On the Device
You can add, edit, and delete contacts on the device Contacts > Local Contacts screen directly.
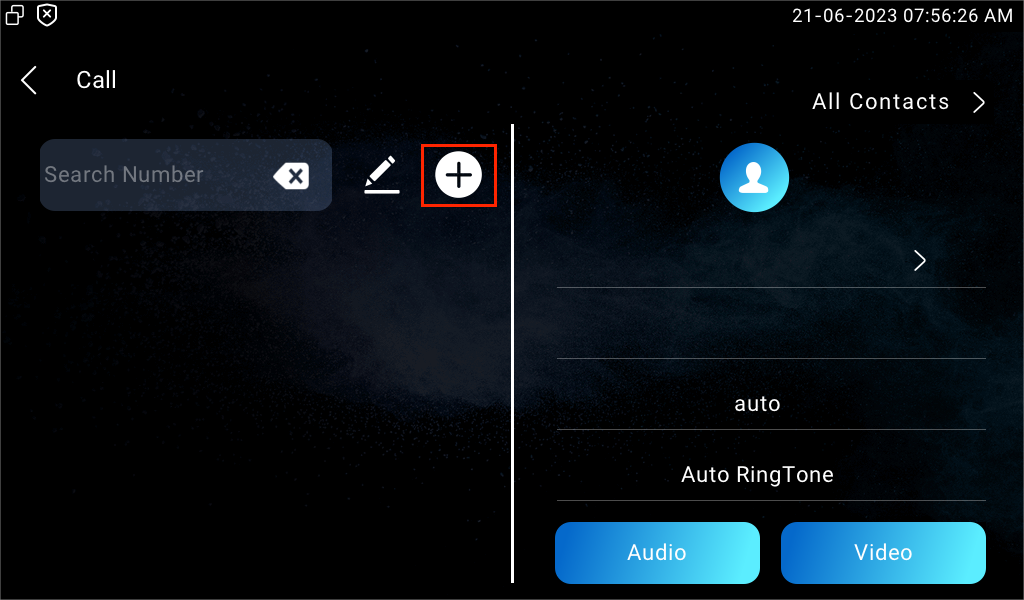
Add Local Contacts
Tap the Add icon to add a contact.
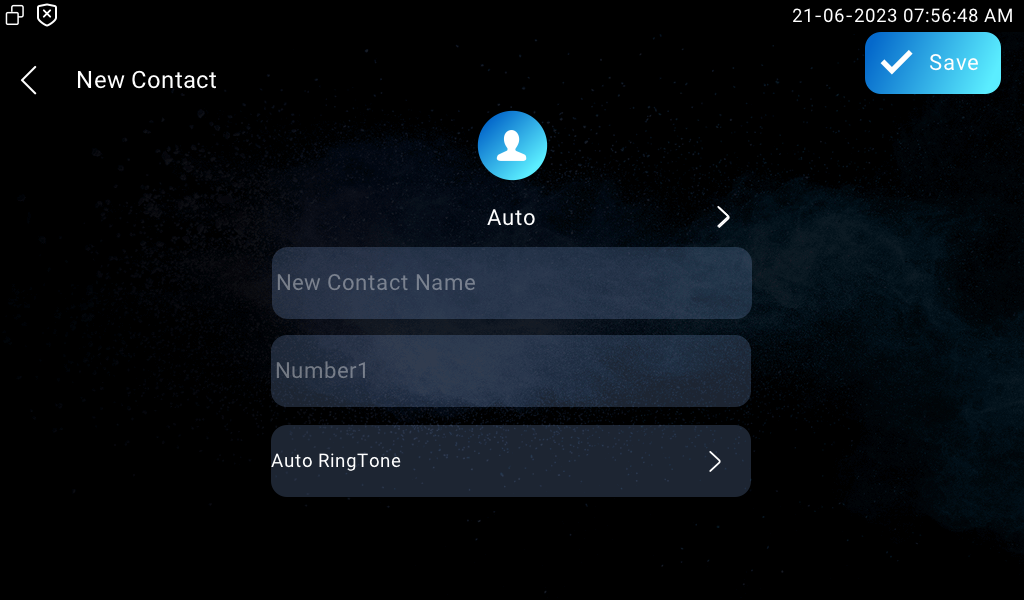
Account: The account to make the call, Account 1 or Account 2. Auto will adopt the registered account to make the call. If both accounts are registered, account 1 is the default option.
New Contact Name: Name the contact to distinguish it from others.
Number: The IP or SIP number.
Auto Ringtone: The phone ringtone for incoming calls.
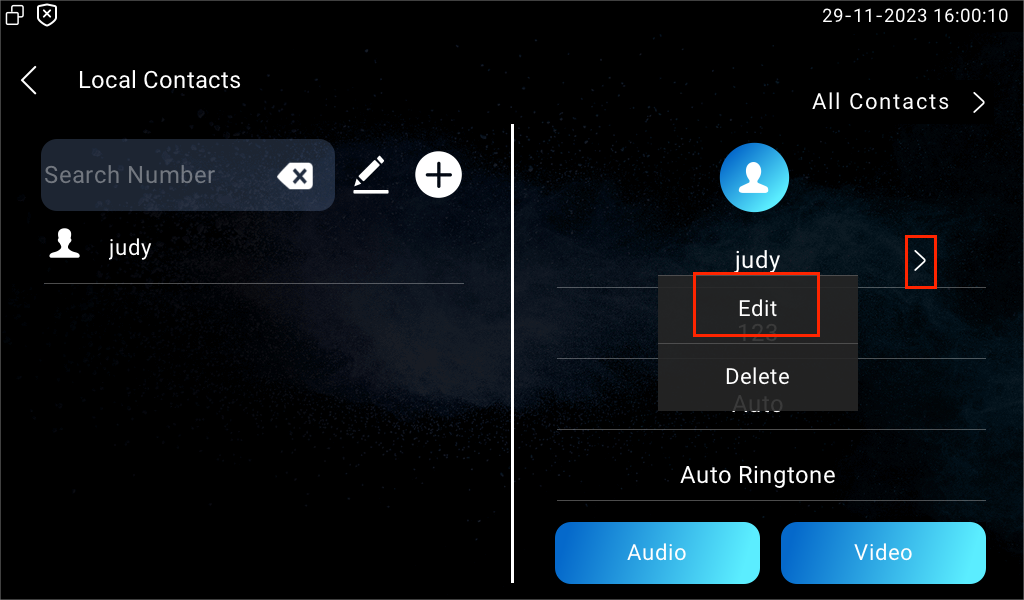
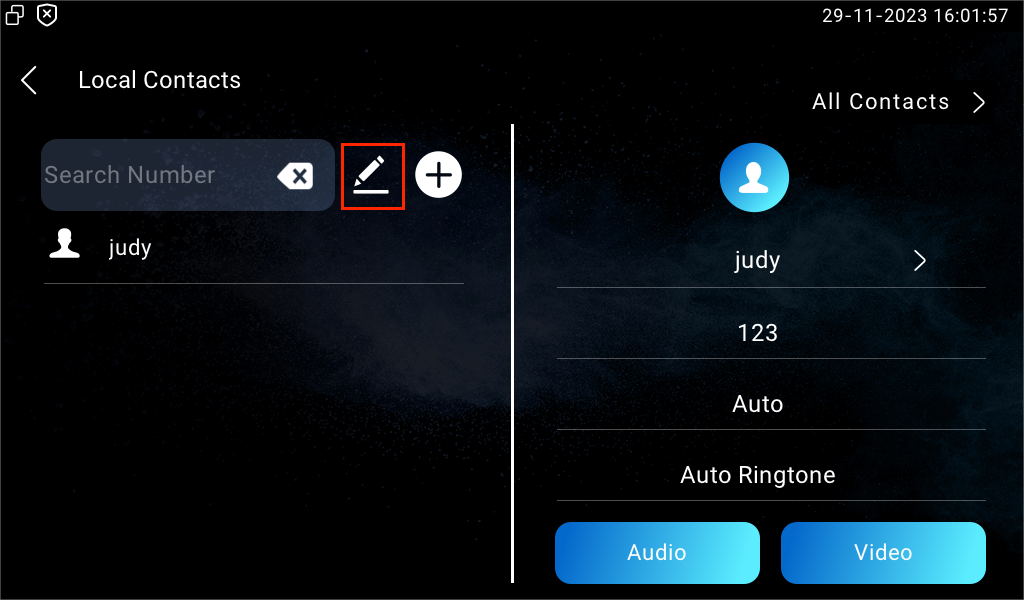
Edit Contacts
You can check and edit the existing contacts in the contact list. Choose one and click Edit to modify.
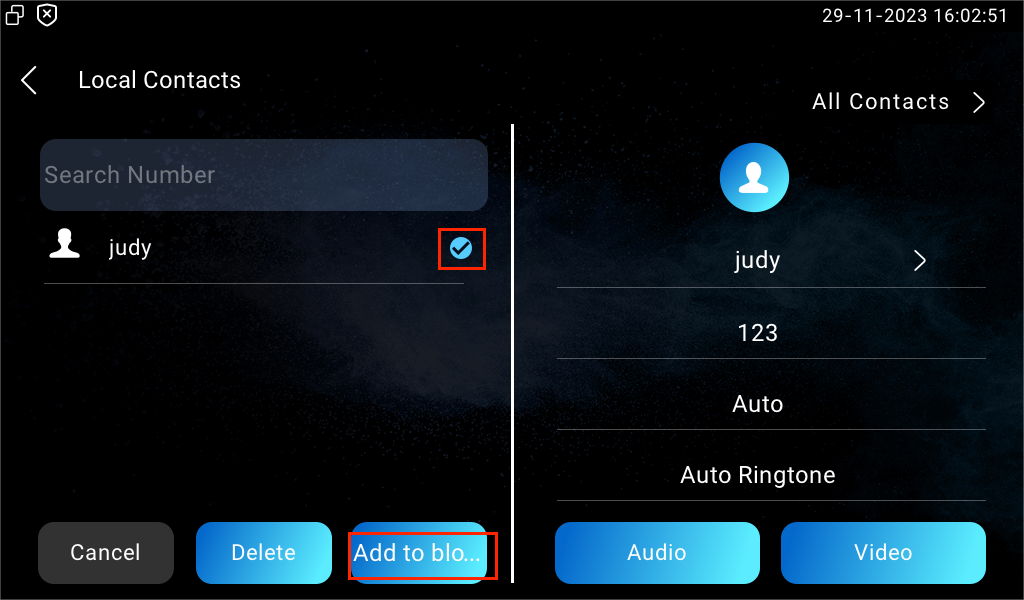
Blocklist Contacts
You can choose from the contact list the contact you want to add to the block list.
Incoming calls from the contacts in the blocklist will be rejected. Press the Edit icon, select the contact, and press Add To Blocklist.
Note
You can delete contacts regardless of whether it is in Blocklist.
On the Web Interface
Add Local Contacts
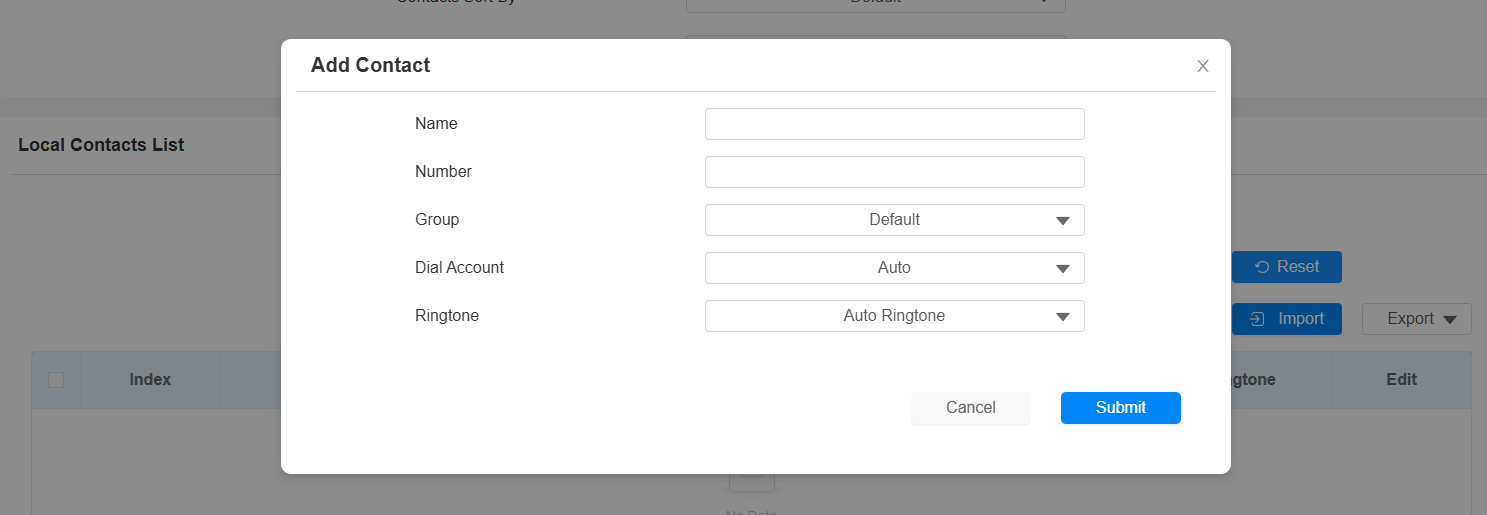
You can add, edit, and search local contacts on the device's web interface. To add contacts, go to Contacts > Local Contacts > Local Contacts List interface, then click +Add. You can add up to 500 contacts.
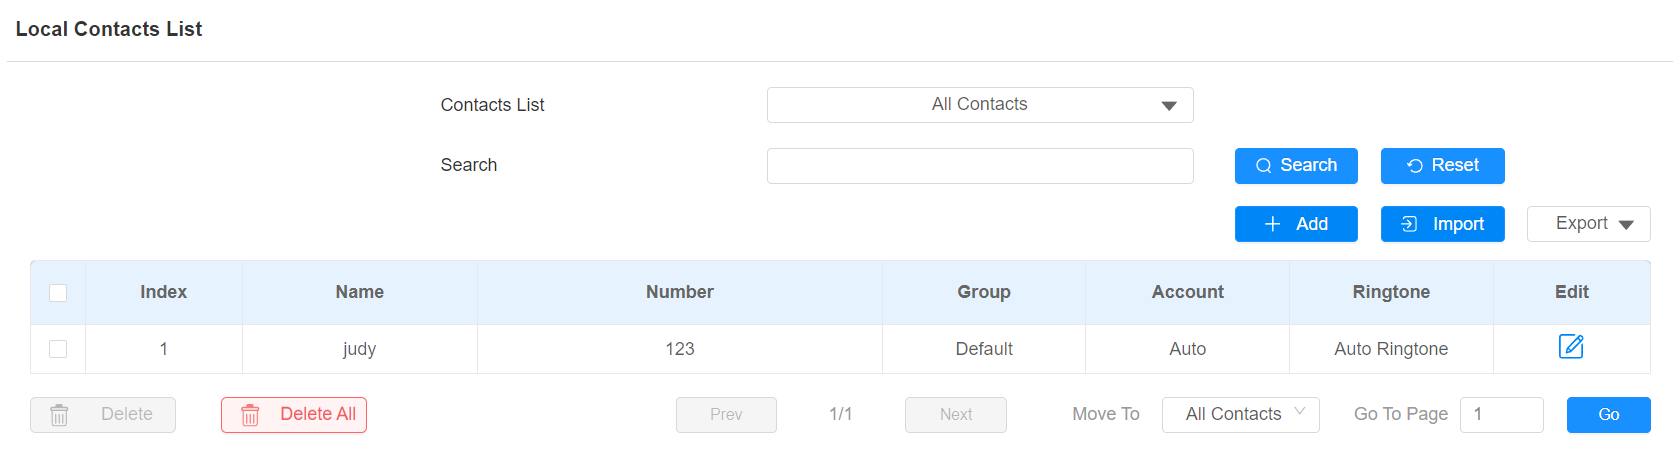
Contacts List: All Contacts displays all the contacts in the contact list. Blocklist displays the contacts in the blocklist.
Search: Search a contact by its name or number.
Name: The contact's name to distinguish it from others.
Number: The SIP or IP number of the contact.
Group: Calls from contacts in Blocklist will be rejected.
Dial Account: The account to make the call, Account 1 or Account 2.
Ringtone: The ringtone for the incoming call from the contact.
Note
If you want to remove the contact from the blocklist on the web interface, you can change the group to Default when editing the contact.
Import and Export Contacts
You can import and export contacts in batch. The file should be in .xml or .csv format.
To import or export contacts, go to Contacts > Local Contacts > Local Contacts List interface.

Contact List Display
To set up contact display, go to the Contacts > Local Contacts > Contacts List Setting interface.

Contacts Sort By:
Default: The local contacts will be displayed before those from SmartPlus, SDMC, etc.
ASCII Code: The contacts will be displayed in order based on the first letter of the contact names.
Created Time: The contacts will be displayed by their created time.
Show Local Contacts Only: If enabled, only the local contacts will be displayed. If disabled, all the contacts from SmartPlus Cloud, SDMC, and so on will be displayed.