Infrared LED Setting
Infrared LED is mainly designed to reinforce the light at night or in a dark environment.
Set it up on the web Intercom > LED Setting > LED Fill Light.
Mode:
Auto: Turn on the LED light automatically based on the minimum and maximum photoresistor value.
Always On: Enable the LED light.
Always Off: Disable the LED light.
Schedule: Turn on the LED light based on the schedule. Specify the Start Time and End Time when this option is selected.
Min/Max Photoresistor: Set the minimum and maximum photoresistor value to automatically control the ON-OFF of the LED light. The photoresistor values inversely relate to light intensity: higher values indicate lower light, and lower values indicate higher light. If the photoresistor value is less than the minimum threshold, turn off the LED. If the photoresistor value is greater than the maximum threshold, turn on the LED.
LED Wakeup Mode
You can set the card reader light to be controlled by infrared detection.
To set it up, go to Intercom > LED Setting > LED Control interface.

Wake Mode:
Auto: When the infrared detection is triggered, the card reader light will be on.
Manual: The LED is not controlled by infrared detection.
Card Reader LED Control
You can enable or disable the LED lighting on the card reader area. You can also set a specific time to turn on the light.
To set it up, go to Intercom > LED Setting > LED Control interface.
Card LED Enabled: When enabled, specify the period when the light is on.
Keypad LED Control
You can enable or disable the LED lighting of the keypad. You can also set a specific time to turn on the light.
To set it up, go to Intercom > LED Setting > LED Control interface.
Keypad LED Enabled: When enabled, specify the period when the light is on.
LED Settings on Screen
You can enable or disable the LED lighting of the screen and set a specific time to turn on the light.
To set it up, go to Intercom > LED Setting > LED Control.
Screen LED Enabled: When enabled, specify the period when the light is on.
Backlight Setting
If you want to brighten up the screen to see the screen with ease in an environment with higher light intensity, you can set up the backlight on the Intercom > LED Setting > LCD Control interface.
Backlight Value: Set the backlight value when the device is working from 0-255.
Backlight Standby Value: Adjust the backlight for the screen in standby mode from 0-255.
Screensaver Setting
You can set the screen saver duration as well as the timing for the screen to be turned off for both screen protection and power reduction.
To set it up, go to Intercom > LED Setting > Standby Interface Display interface.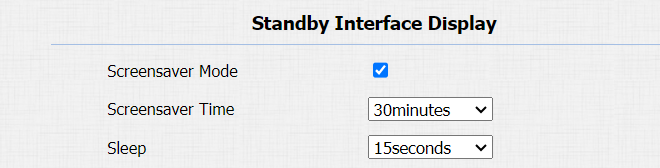
Screensaver Mode: Enable or disable the use of the screensaver. If disabled, the device screen will directly turn dark when it is in standby mode.
Screensaver Time: Set the screen saver duration time(5 seconds to 2 hours).
Sleep: The time to start the screen saver mode(5 seconds to 30 minutes). For example, if it is set to 15 seconds, the device will go into screen saver mode when the device detects no operation or no approaching object for 15 consecutive seconds. When screen saver mode is disabled, the device screen will be turned off directly in 15 seconds.
Upload Screensavers
You can upload screen-saver images individually or in batches to the device via the web interface, enhancing visual experience or serving publicity purposes.
To set it up, go to Intercom > LED Setting > Upload Screensaver Picture interface.
Click Choose File to select a file from your computer, and click Upload.
Click Reset to remove the existing picture.

Note
File Format: PNG; Size: <300KB; Recommended Resolution: 480×272.
If the uploaded image duplicates an existing image ID, the existing image will be overwritten.
Homepage Display
You can customize the homepage display picture on the Intercom > LED Setting > Import Custom Homepage Design interface.
Click Choose File to select a file from your computer, and click Upload to import it.
Click Delete to remove the existing picture.

Note
File Format: PNG; Size: <300KB; Recommended Resolution: 480×272.
If the uploaded image duplicates an existing image ID, the existing image will be overwritten.
LCD Display
You can set what is to be displayed on the device screen on the Intercom > Advanced > LCD Display interface.

LCD Display:
Default: Display Call, Contacts, PIN Entry, and Security Center instructions on the home screen.
Hidden Contacts: Display Call, PIN Entry, and Security Center instructions, but hide the Contacts.
Text Only: Only display the content you enter in the LCD Text box.
LCD Text: Customize the text to be displayed on the home screen.
Contacts Only: Only display contacts.
Hide Contacts & Room Number: Display PIN Entry and Security Center instructions.
Manager Dial Text: Name the Manager Dial key(Press the Call key to call). Its default name is Security Center.
Key Code Exchange
This feature exchanges the function of the Call and Cancel Keys.
To set it up, go to the Intercom > Advanced > Key Code Exchange interface.

Key Code Exchange: When enabled, the Cancel function will be linked to the Cancel key right on top of the Call key on the keypad. When disabled, the function of the Cancel and the Call key will be reversed.