On the Device
You can configure a variety of features of the screen display in terms of brightness, screen saver and font size, etc.
Set up the screen display on the device Settings > Display screen.
.png "screenshots (89).png")
Brightness: Move the blue bar to adjust the screen brightness. The default brightness is 145.
Sleep Time: Set the sleep timing based on the screen saver (15 seconds to 30 minutes).
If the screen saver is enabled, the sleep time here is the screen saver start time. For example, if you set it to 1 minute, the screen saver will start automatically when the device has no operation for 1 minute.
If the screen saver is disabled, the sleep time here is the screen turn-off time. For example, if you set it to 1 minute, the screen will be turned off automatically when the device has no operation for 1 minute.
Screen Saver Time: The time for displaying the screensaver.
Screen Saver: Determine whether to display the screensaver when the device goes into sleep mode.
Time Schedule: Decide the specific time range to display the screen saver.
Screen Saver Type:
Local Pictures: Display pictures uploaded to the indoor monitor as the screen saver.
Local Videos: Display videos from the indoor monitor as the screen saver
Clock: Display the clock as the screen saver.
Screen Lock: Lock the screen after the screen is turned off(turn dark). You are required to enter the code to unlock the screen. The default code is 123456.
Screen Clean: Allow users to wipe the screen clean without triggering unwanted changes in the settings.
Font Size: Select the font size among four options: Small, Normal, Large, and Huge.
Wallpaper: It is for local wallpaper selection.
You can also turn off the screen manually.
On the Web Interface
You can configure the screen display on the Device > Display Setting > Screen Saver Setting interface.
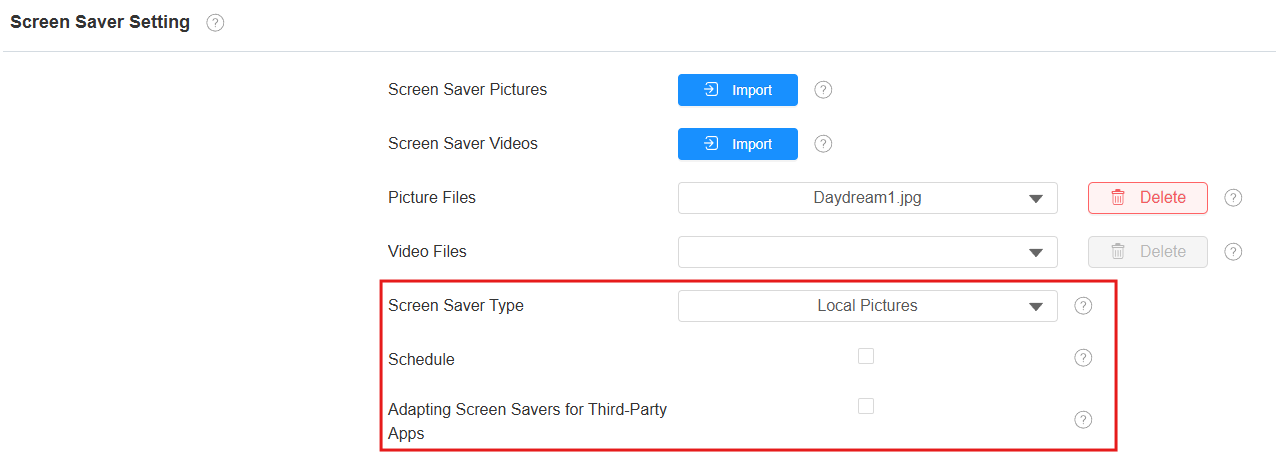
Screen Saver Type:
Local Pictures: Display pictures uploaded to the indoor monitor as the screen saver.
Local Videos: Display videos from the indoor monitor as the screen saver
Clock: Display the clock as the screen saver.
Schedule: Decide the specific time range to display the screen saver.
Adapting Screen Savers for Third-Party Apps: This feature keeps third-party apps running in the background. When enabled, the screen will turn off without a screen saver. The screen-saver parameters will be hidden on the web interface and the device.
To set up the screen sleep time, scroll to the Display Settings on the same interface. Besides, you can set whether to display the time on the home screen.
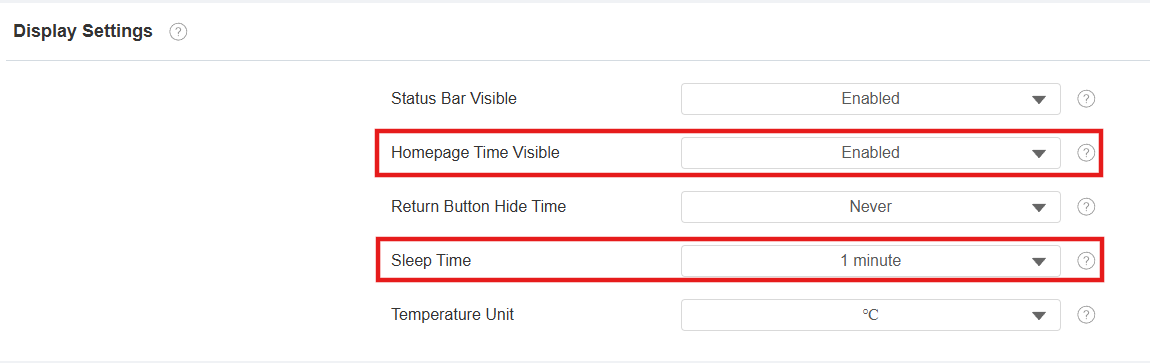
Homepage Time Visible: Enabled by default. If disabled, time will be hidden on the home screen.
Sleep Time: If the screen saver is enabled, the sleep time is the screen saver's start time. For example, if set to 1 minute, the screen saver will play automatically after 1 minute of inactivity. If the screen saver is disabled, the screen will turn off automatically after 1 minute of inactivity.
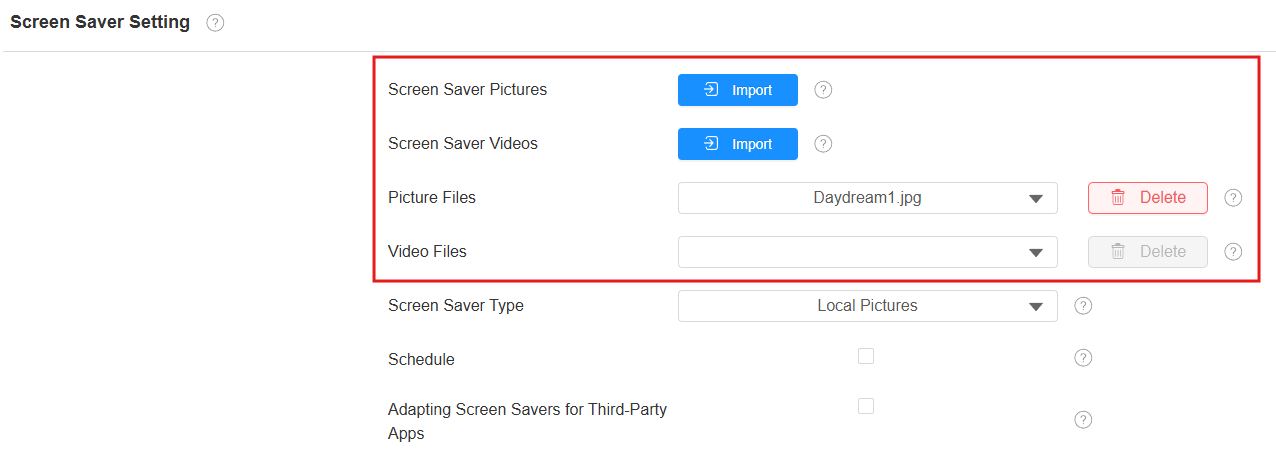
Upload Screensaver
You can upload screen-saver pictures or videos to the device for a public purpose or a greater visual experience.
Navigate to the web Device > Display Setting > Screen Saver Setting interface.
You can click Delete to delete the existing files.
Note
The pictures uploaded should be in JPG, JPEG, or PNG format with a 2M maximum. The recommended resolution is 1280*800.
Previous images with a specific ID will be overwritten if the same ID is assigned to new images.
The videos uploaded should be in MP4, WMV, or AVI format with a 500M maximum. The recommended resolution is 720*1080.
Upload Wallpaper
You can customize your screen background picture on the device web to achieve the visual effect and experience for users.
Navigate to Device > Display Setting > Wallpaper interface.

Note
The pictures uploaded should be in JPG, JPEG, PNG format with a 2M maximum.
The recommended resolution is 1280*800.
Upload Device Booting Image
You can upload the booting image to be displayed during the device’s booting process.
Go to Device > Display Setting> Boot Logo interface.

Boot Logo: The logo will appear on the screen when you reboot the device. Supported format: ZIP and PNG; Max size: 1280*800 PNG.
Web Logo: The logo will appear in the upper left corner of the web interface. Supported format: JPG and PNG; Max size: 252*76 PNG.
Web Homepage Logo: The logo will appear on the login page of the web interface. Supported format: JPG and PNG; Max size: 182*55 PNG.
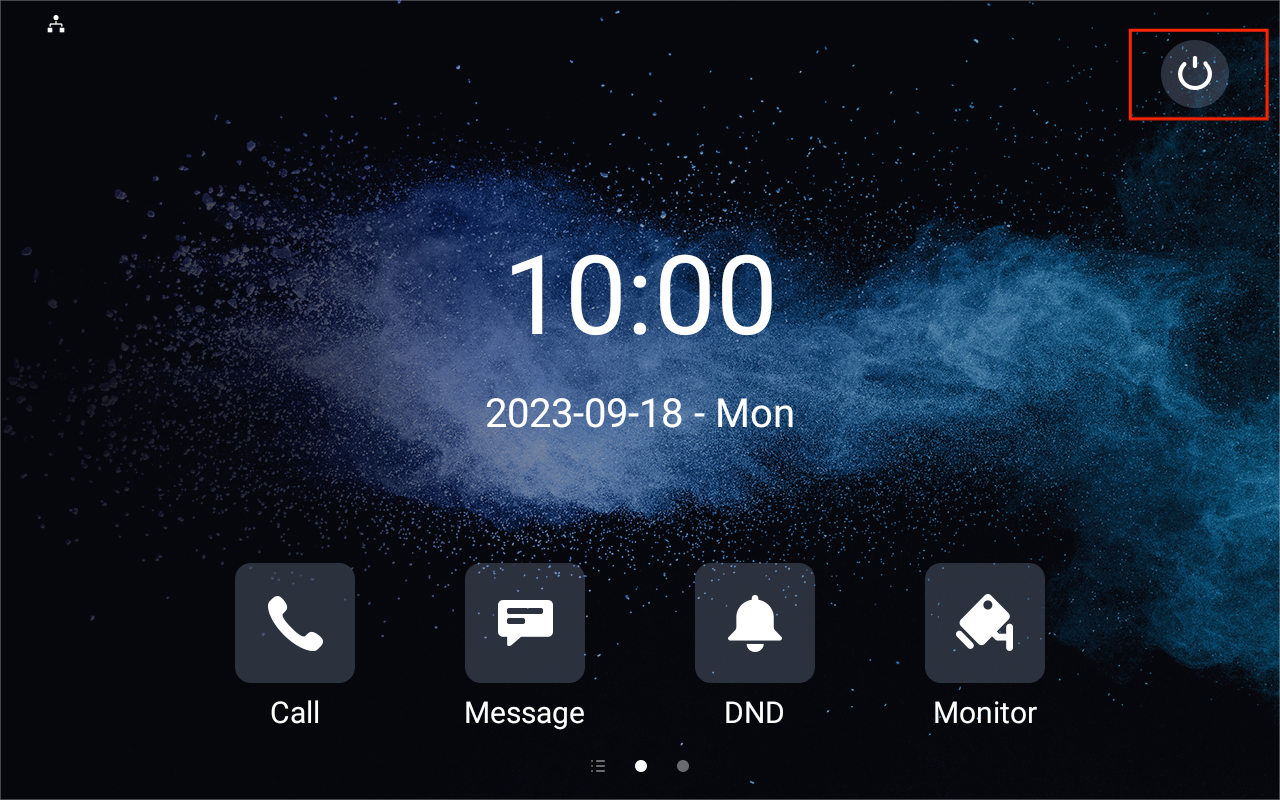
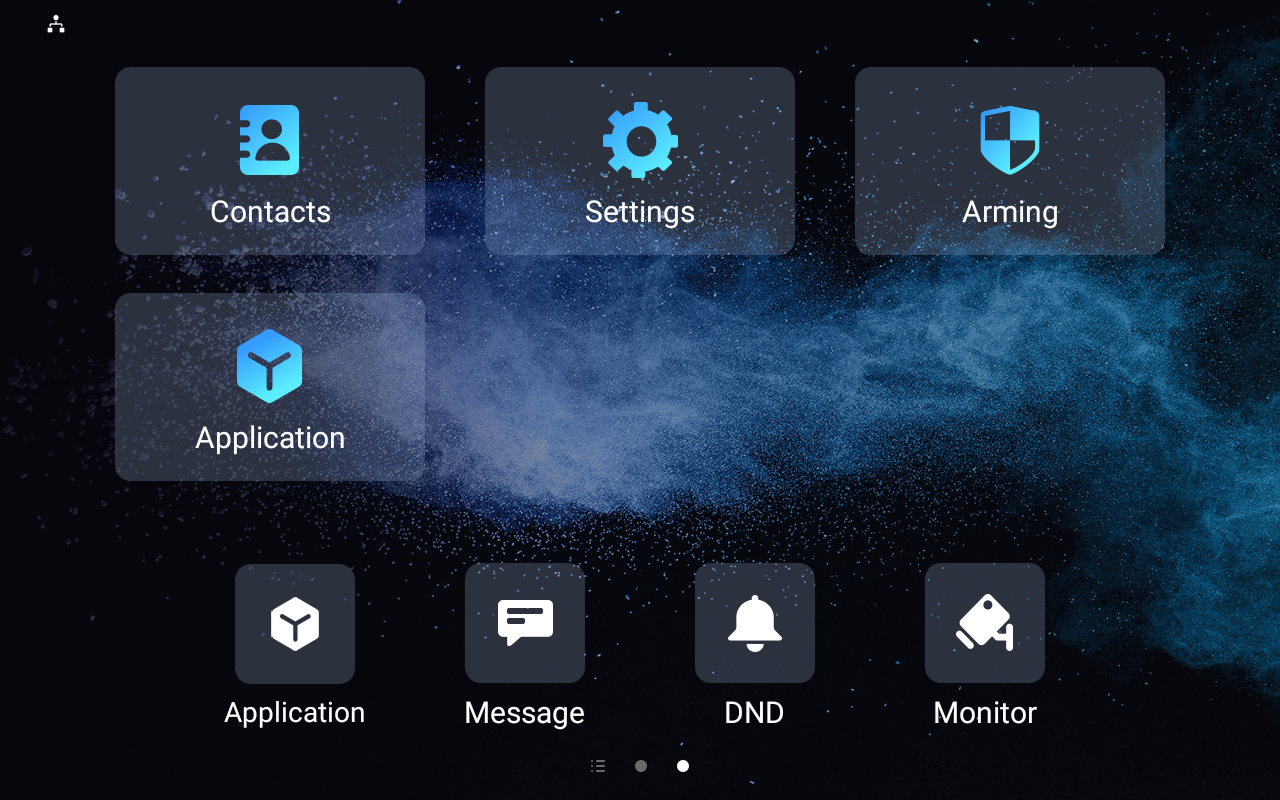
Home Screen Display
You can select the Default or Call List home screen display.
Go to Device > Display Setting > Theme interface.

Default Home Screen:

Call List Screen:

Status Bar Display
You can configure whether to display the status bar and return button when running a third-party app.
To set it up, go to the Device > Display Setting > Display Settings interface.
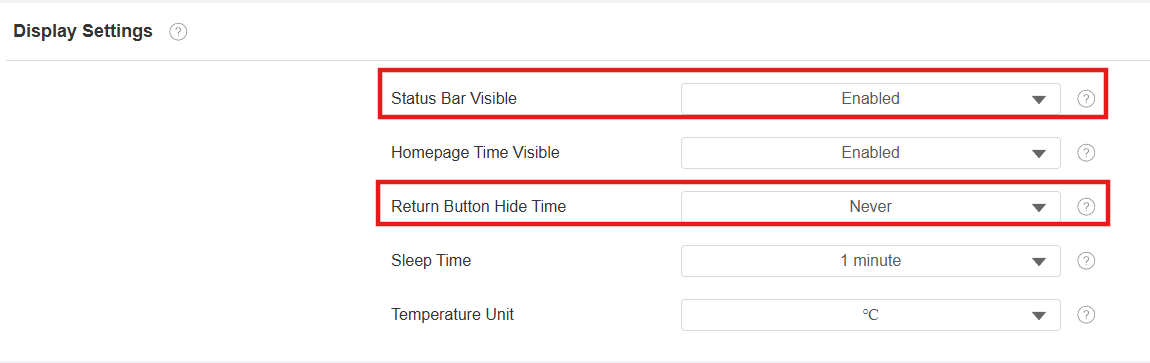
Status Bar Visible: Determine whether to display the status bar when running a third-party app.
Return Button Hide Time: Determine that the return button will be concealed for a certain number of seconds. If you select Never, the button will keep displaying. Users can swipe up on the screen to make the button appear.

Home Screen Tab Display
Akuvox indoor monitor allows you to customize icon display on the Home screen and More screen for the convenience of users' operation.
To set it up, navigate to Device > Display Setting interface.
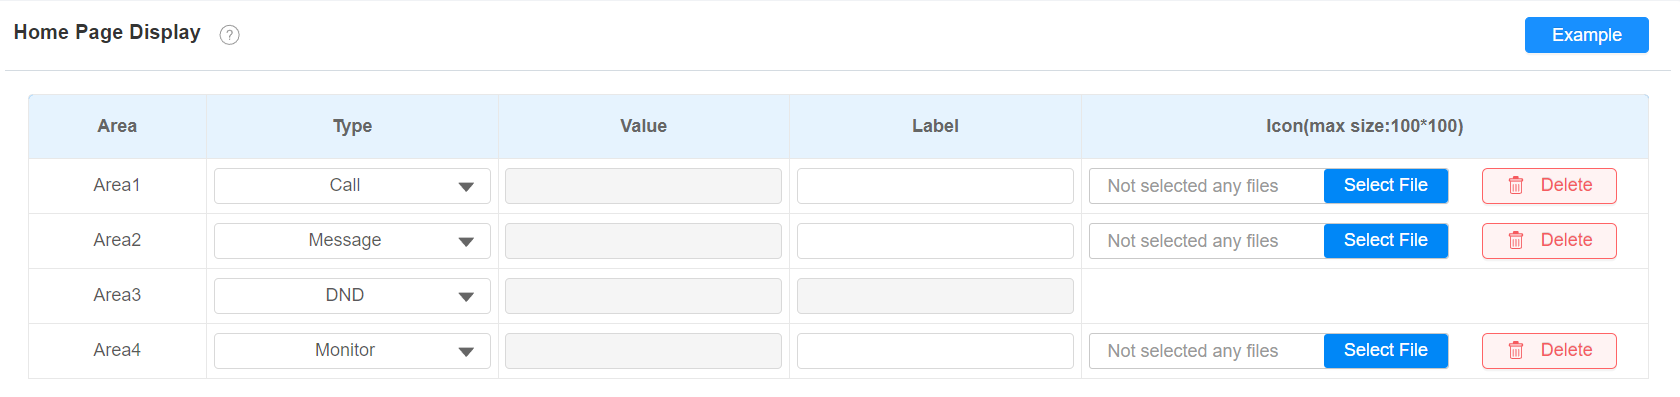
Type: Select the functional icon to be displayed on the home screen.
The Smart Lock icon works with the SmartPlus Cloud service for unlocking akubela SL21.
Value:
The value field for Custom APK will be automatically filled in if you have already installed a third-party app.
When you select Browser, you are required to enter the URL of the browser before the browser icon can be displayed.
When you select Unlock, select the unlock command from Remote Relay HTTP1-10(Configure Remote Relay HTTP on the Device > Relay interface). If the value is left blank, the tab will adopt the setting of Long Press RF Key to Unlock on Idle on the Device > Relay interface.
When you select Concierge, you can enter a speed dial number in the Value field.
Label: Name the icon. The DND icon cannot be renamed.
Icon: Click to upload the icon picture. The maximum icon size is 100*100. The picture format can be JPG, JPEG, or PNG.
You can click Example to see the icon layout.

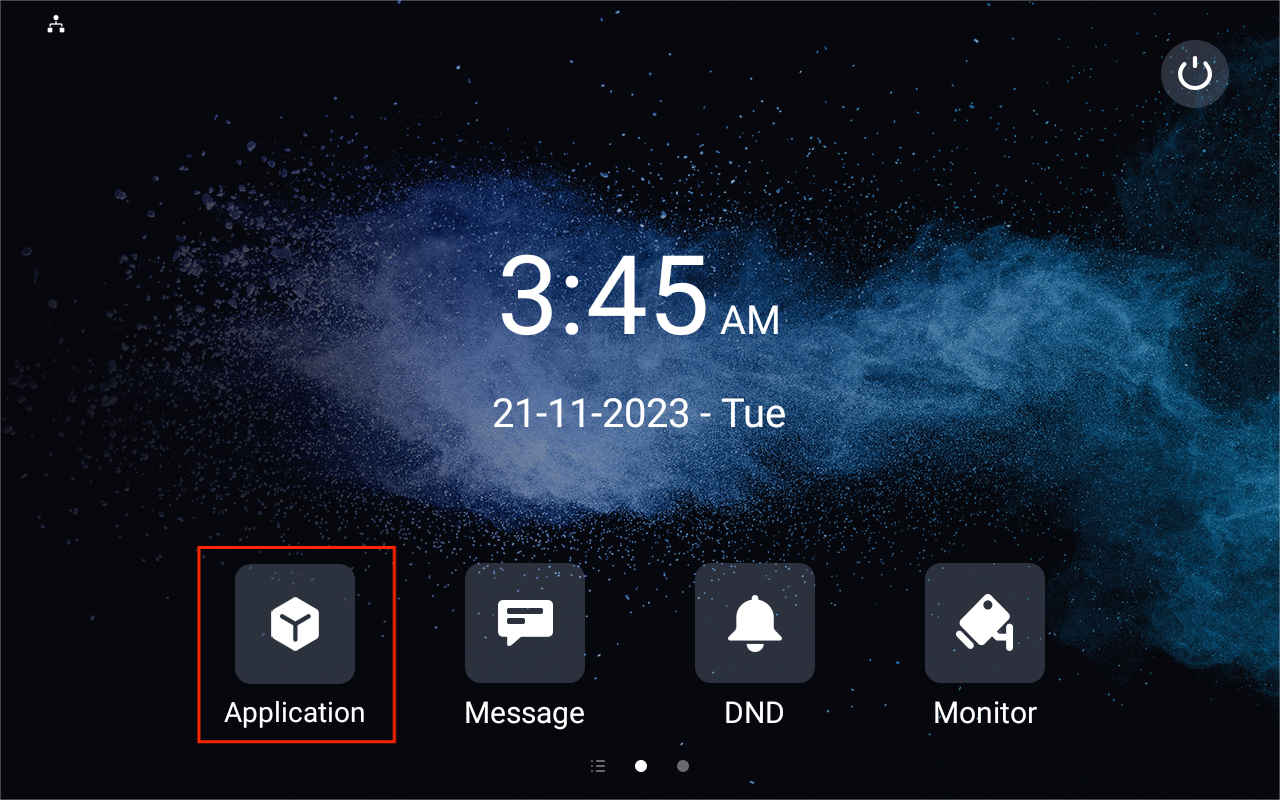
To easily access the third-party app, you can create an Application icon on the home screen. Tap the icon and run the desired app.
Configure the icons displayed on More Page Display on the same interface.
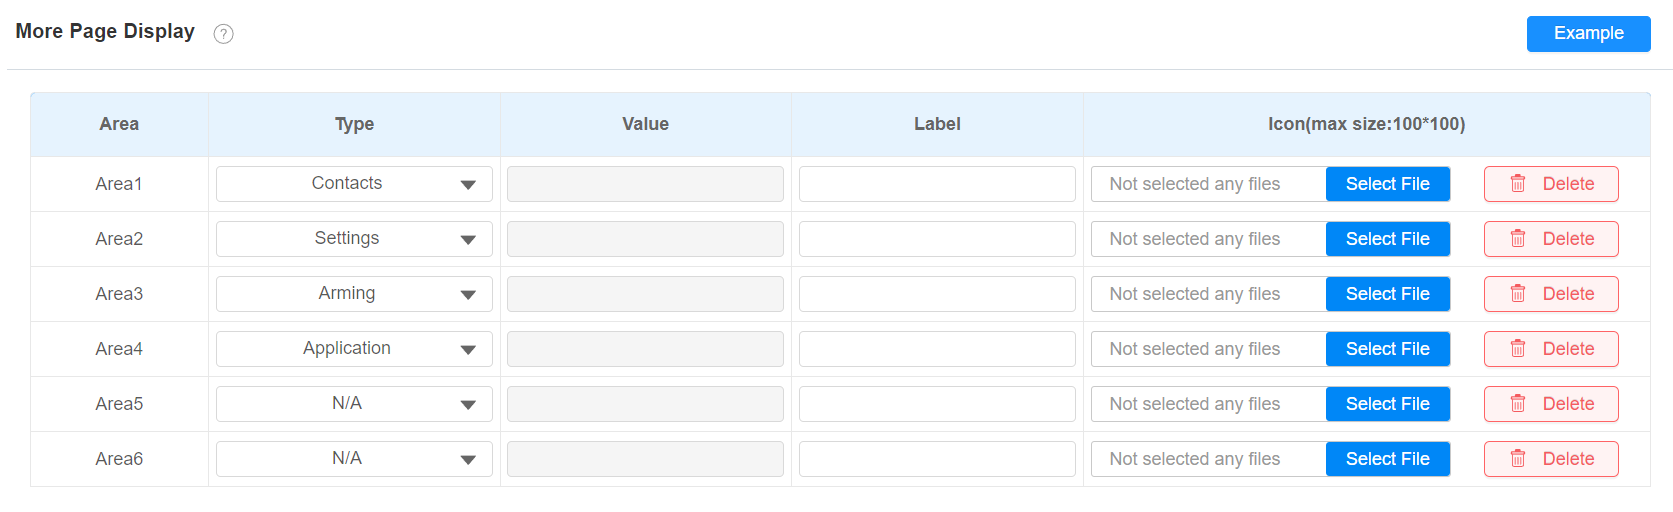
You can also customize the homepage display by selecting your favorite functions on the device screen.
To configure it, tap Settings > Advance Settings, and enter the default system code 123456. Tap Custom Homepage, then tap any of the icons to select the desired function.

Function Tabs Configuration
You can set up the display of functional tabs on the talking, monitor, and call preview screens.
To set up tabs on the Talking screen, go to Device > Display Setting > Softkey in Talking Page interface.
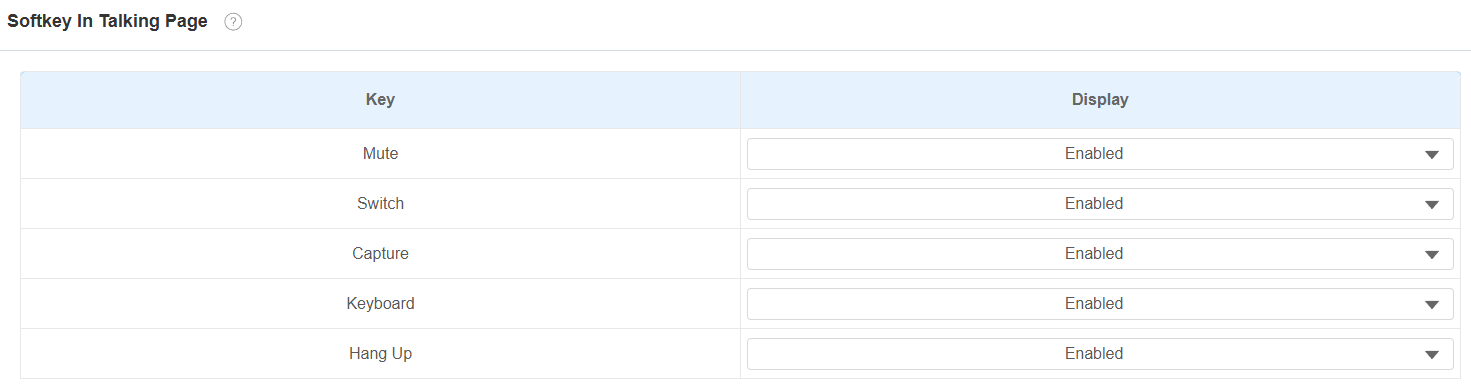
Mute: Tap to mute the talking.
Switch: Tap to switch between Video and Audio talking mode.
Capture: Tap to take a screenshot of the talking screen.
Keyboard: Tap to display the keyboard.
Hang up: Tap to end the call.
To set up tabs on the Call Preview screen, go to Device > Display Setting > Softkey in Call-Preview Page interface.
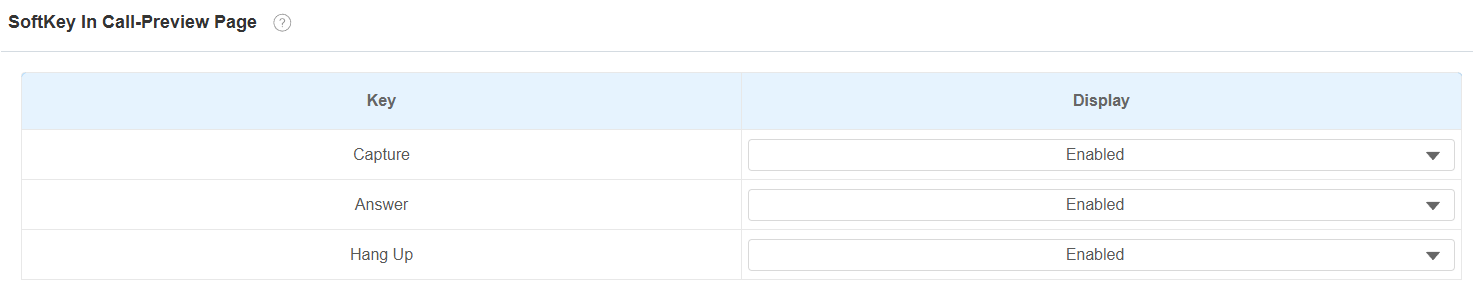
Capture: Tap to take a screenshot of the preview screen.
Answer: Tap to answer the incoming call.
Hang up: Tap to end the call.
To set up tabs on the Monitor screen, go to Device > Display Setting > Softkey in Monitor Page interface.
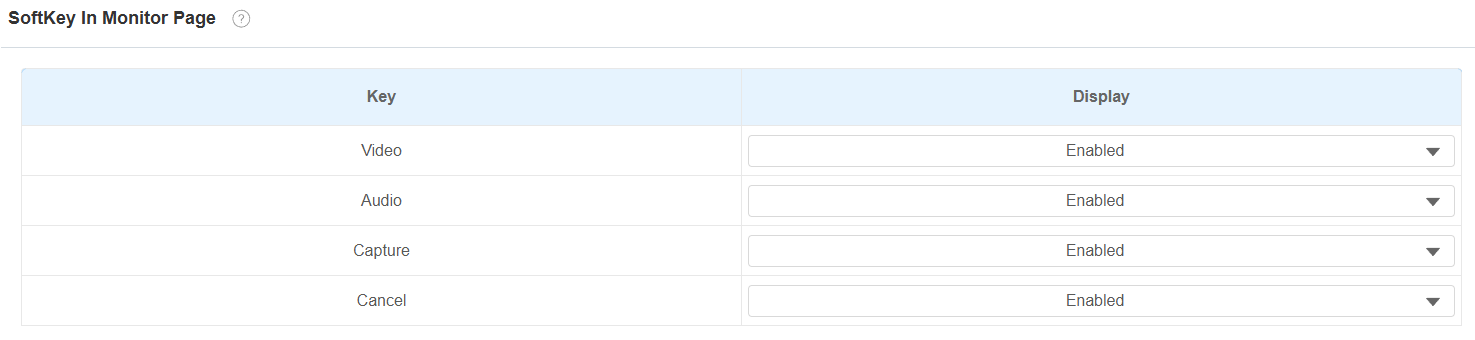
Video: Tap to make a video call to the door phone.
Audio: Tap to make an audio call to the door phone.
Capture: Tap to take a screenshot of the monitor screen.
Cancel: Tap to exit the monitor screen.
Unlock Tab Configuration
You can customize the unlock tab and select the relay type on the talking, monitor, and call preview screen for the door opening.
To set up the unlock tab on the talking screen, go to Device > Relay > SoftKey In Talking Page interface.
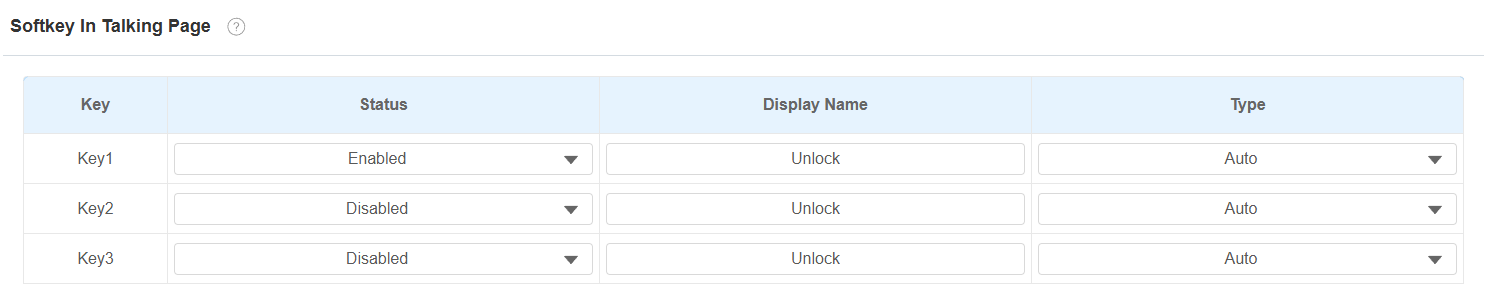
Status: With it enabled, the unlock tab will be displayed on the talking screen.
Display Name: Name the unlock tab.
Type: Select the relay trigger type according to the actual setup.
Scroll down to set up the unlock tab on the Monitor screen on the SoftKey In Monitor Page section.
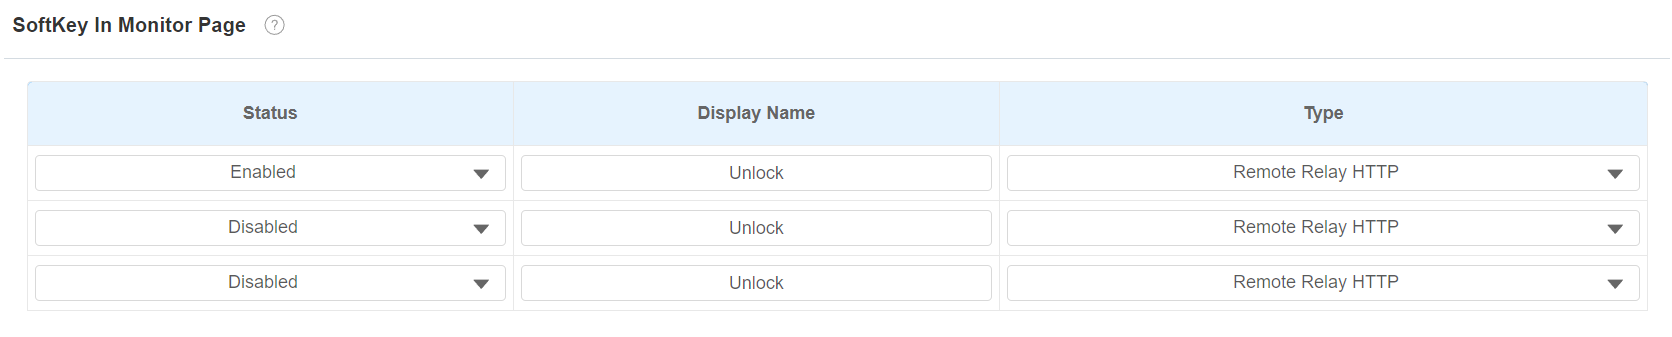
Status: With it enabled, the unlock tab will be displayed on the monitor screen.
Display Name: Name the unlock tab.
Type: Select the relay trigger type according to the actual setup.
Scroll down to set up the unlock tab on the Call Preview screen on the SoftKey In Call-Preview Page section.

Status: With it enabled, it will be displayed on the call preview screen.
Display Name: Name the unlock tab.
Type: Select the relay trigger type according to the actual setup.
Function Display on the Settings Screen
You can set the functions to be displayed on the Settings screen.
Set it up on the Device > Display Settings > Settings Page Display interface.

Temperature Display Setting
When the device is connected to the SmartPlus Cloud, temperature information will be displayed on the device's Home screen.
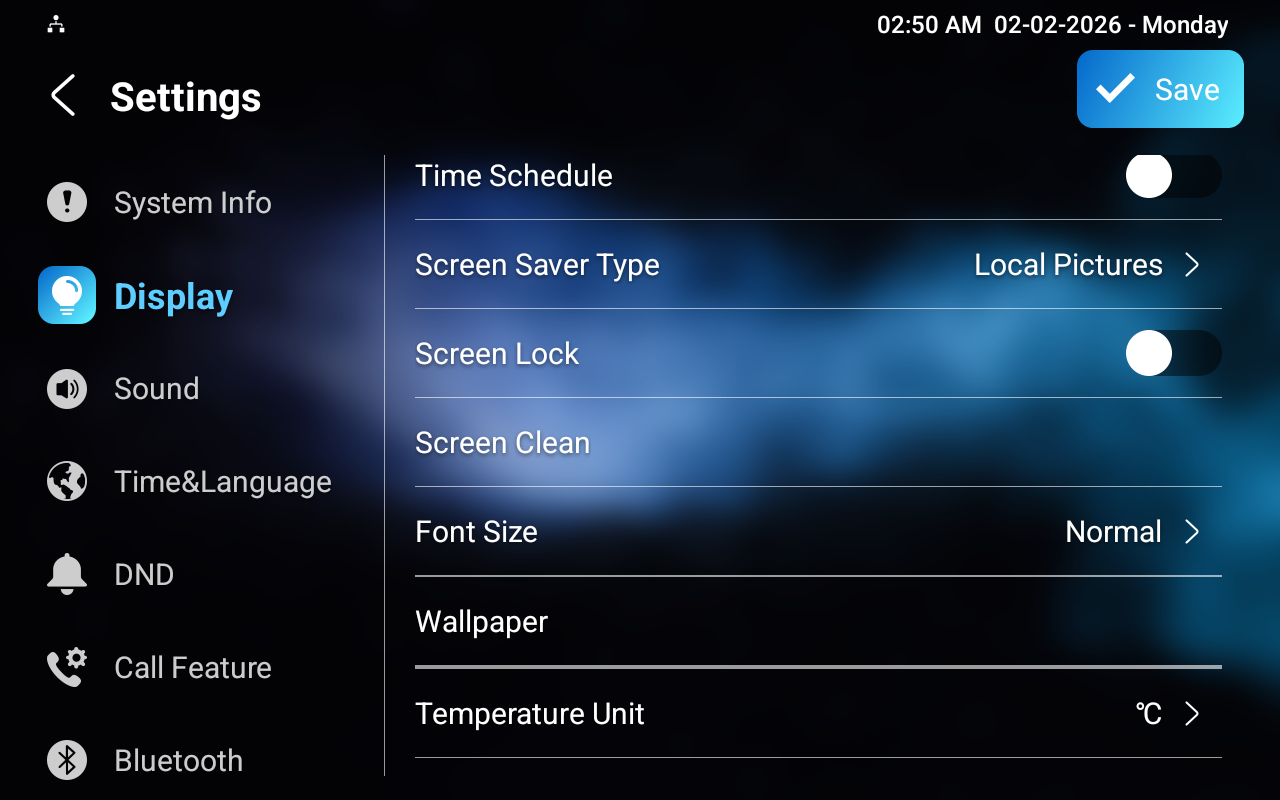
You can switch the temperature unit between Fahrenheit and Centigrade on the device.
To set it up, go to the Settings > Display screen.
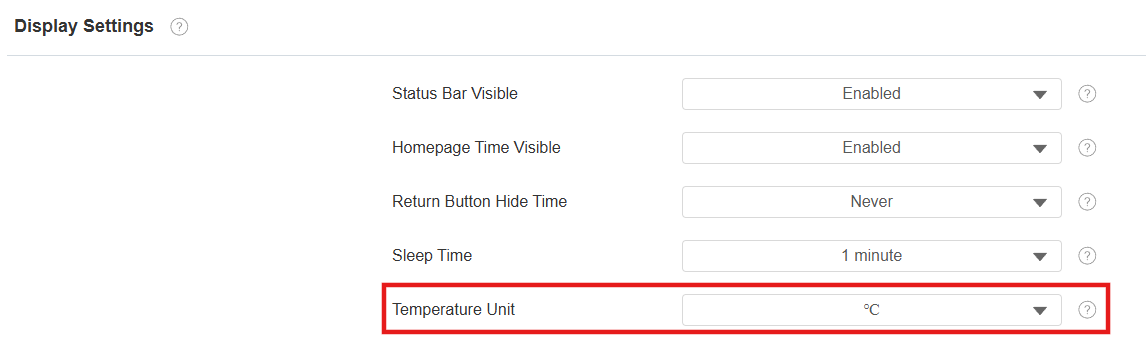
Or, configure it on the web Device > Display Setting > Display Settings interface.
Note
Please refer to Configure Weather Display on Indoor Monitors for configuration details.