Monitor and Image
Monitor Setting
You can add video streams using RTSP. If the Display in Call function is enabled, the video of the added monitor device will show up when it calls the indoor monitor.
Navigate to the web Phone > Monitor interface.
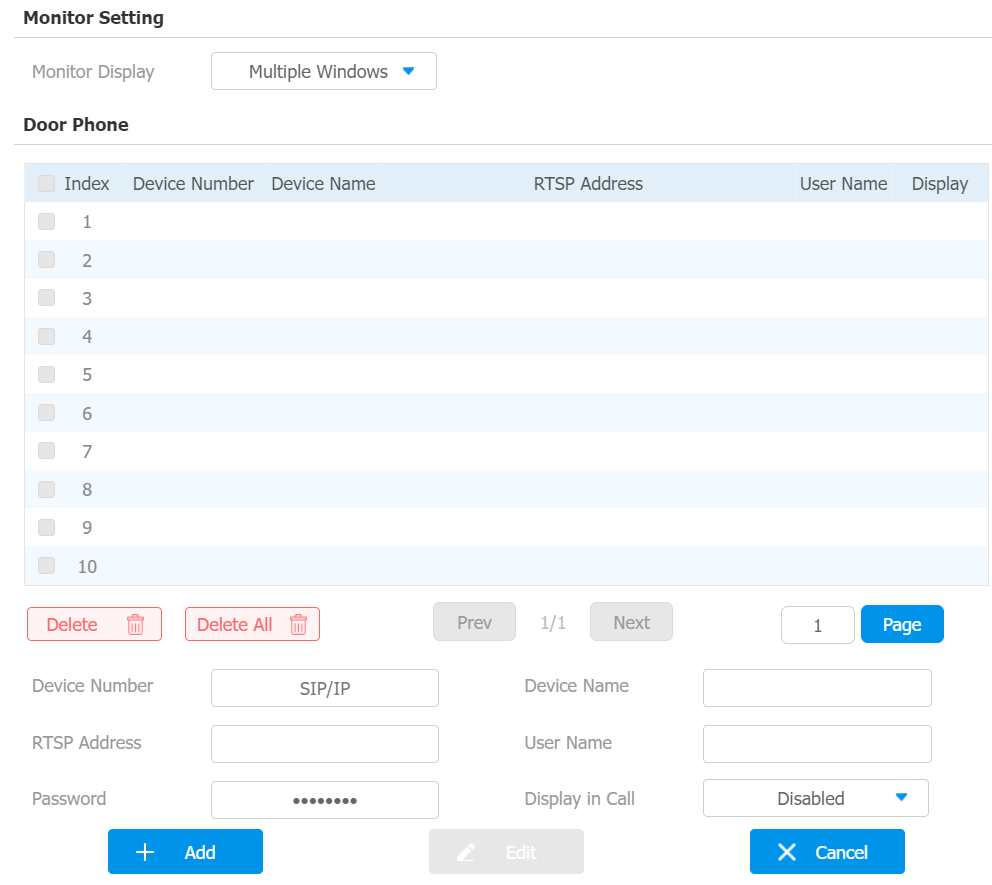
Parameter Set-up:
- Monitor Display: select Multiple Window if you want to display four video monitoring channels on the screen. Select Single Window if you want to display only one video monitoring channel.
- Device Number: type in the monitored device number for identification.
- Device Name: type in the device name for identification.
- RTSP Address: type in the RTSP address of the monitored device. RTSP format: rtsp://Device IP address/live/ch00_0.
- Username: type in the username of the monitored device for monitoring authentication.
- Password: type in the password of the monitored device for monitoring authentication.
- Display In Call: enable it if you want to display the monitoring video when you are in the call.
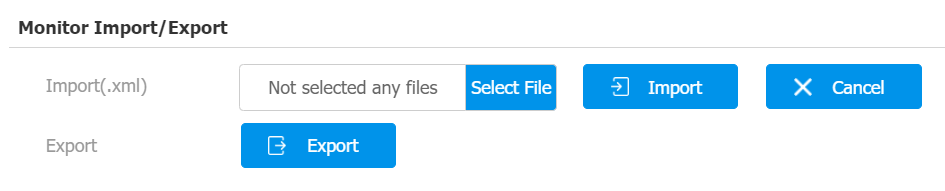
You can import and export the monitored device setting via a template in .xml format.
Video Image Capturing
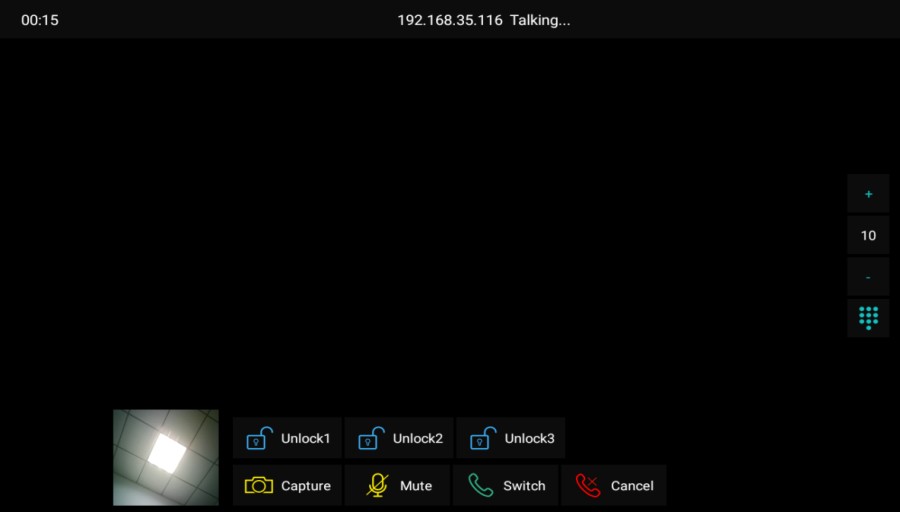
The device lets users take a screenshot during a video call or while using the monitor if they notice anything unusual. To take a screenshot, simply tap the Capture button.
RTSP Authentication
With RTSP authentication, users can monitor the indoor monitor via RTSP audio stream. This feature can be applied to, for example, listen to the baby in the baby’s room for safety.
To set it up, go to Device Setting > Basic > RTSP Setting interface.

Parameter Set-up:
- Authorization Type: select the authorization type (Basic, Digest). Select None if you allow all types of authorization types for the RTSP audio stream.
- User Name: type in the username used for the authentication.
- Password: type in the password used for the authentication.
Alarm and Arming Configuration
The Arming function is designed to enhance home security by offering three modes with custom zone settings for connected sensors. When armed, the device will sound a siren and notify specific people if a sensor detects something unusual.
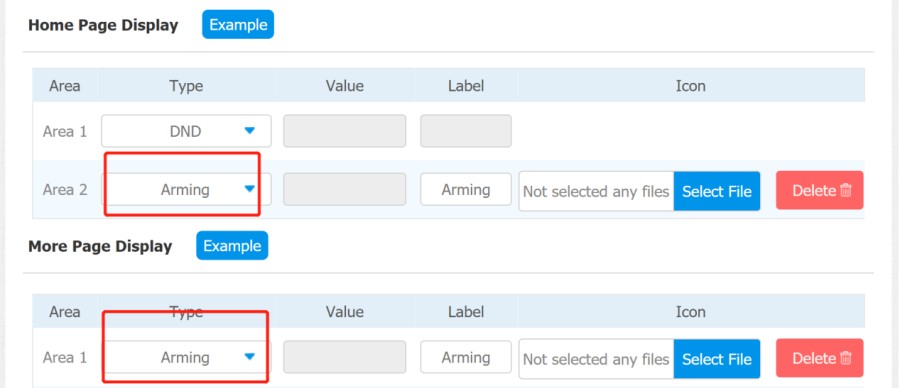
To configure the Arming icon on the web Phone > Key/Display interface.
Configure Alarm and Arming on the Device
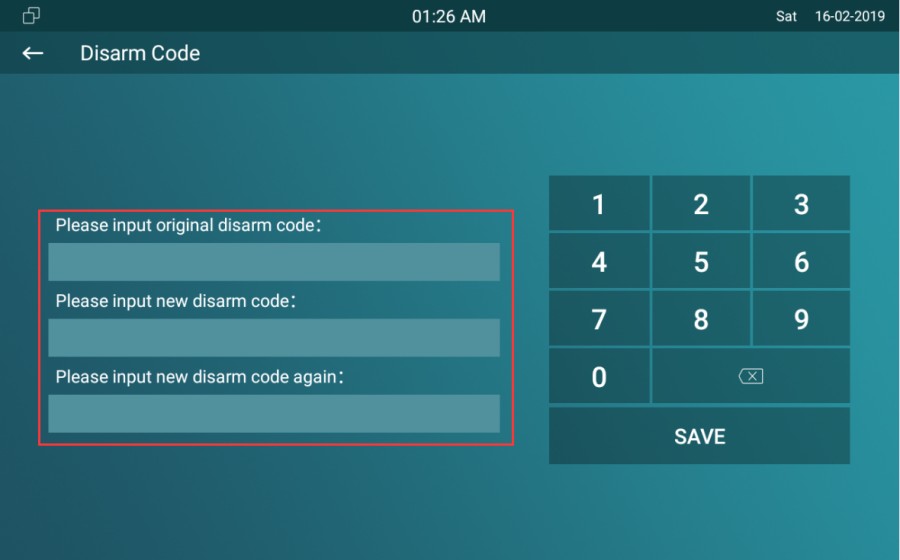
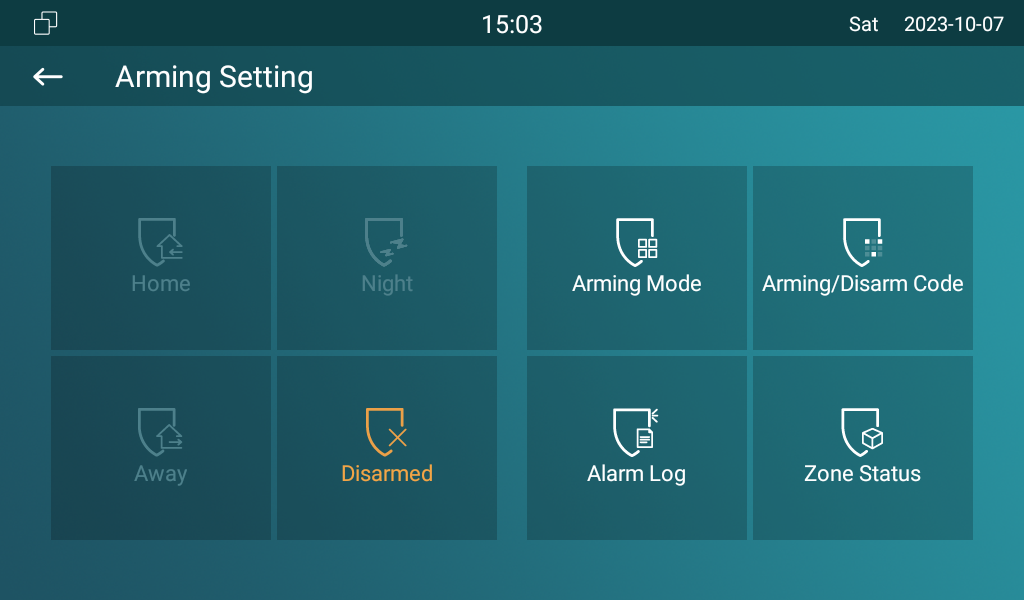
To configure the arming and disarm code on device Arming screen. Change the current password and save it.
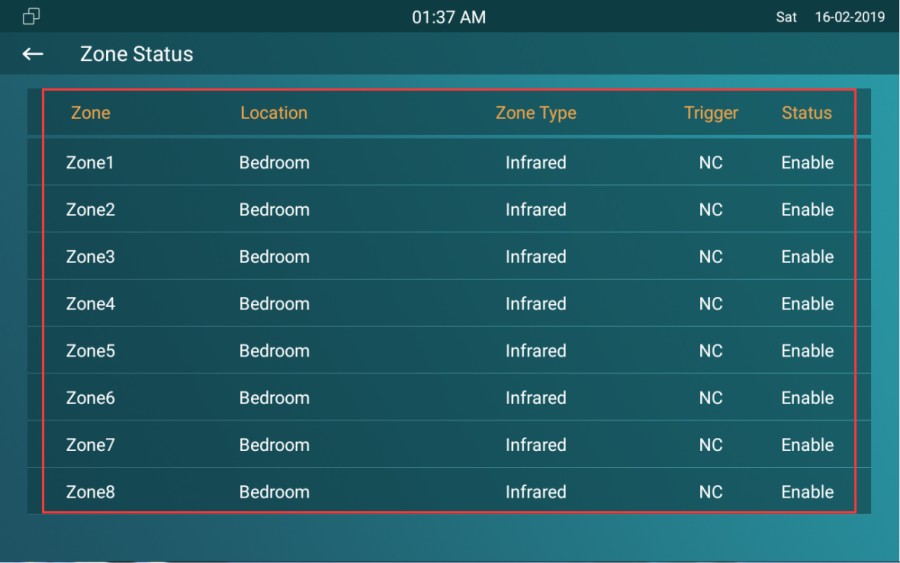
To check the zone status on Arming > Zone Status screen.
Configure Alarm and Arming on the Web Interface
To set up a location-based alarm sensor on the device web Arming> Zone Setting > Zone Setting interface.

Parameter Set-up:
-
Location: set up the location according to where the alarm sensor is stalled. You can select among ten location types: Bedroom, Gate, Door, Guest Room, Hall, Window, Balcony, Kitchen, Study, and Bathroom.
-
Zone Type: set up the alarm sensor types (Infrared, Drmagnet, Smoke, Gas, and Urgency).
-
Trigger Mode: set sensor trigger mode between NC and NO according to your need.
-
Status: set the alarm sensor status among three options: Enabled, Disabled, and 24H. Select Enabled if you want to enable the alarm, however, you are required to set the alarm again after an alarm is disarmed. Select Disabled if you want to disable the alarm, and select 24H if you want the alarm sensor to stay enabled for 24 hours without needing to set up the alarm manually again after the alarm is disarmed.
Configure Location-based Alarm
Configure the alarm sensor in the same way as you do on the web interface on the Arming > Arming Mode screen.
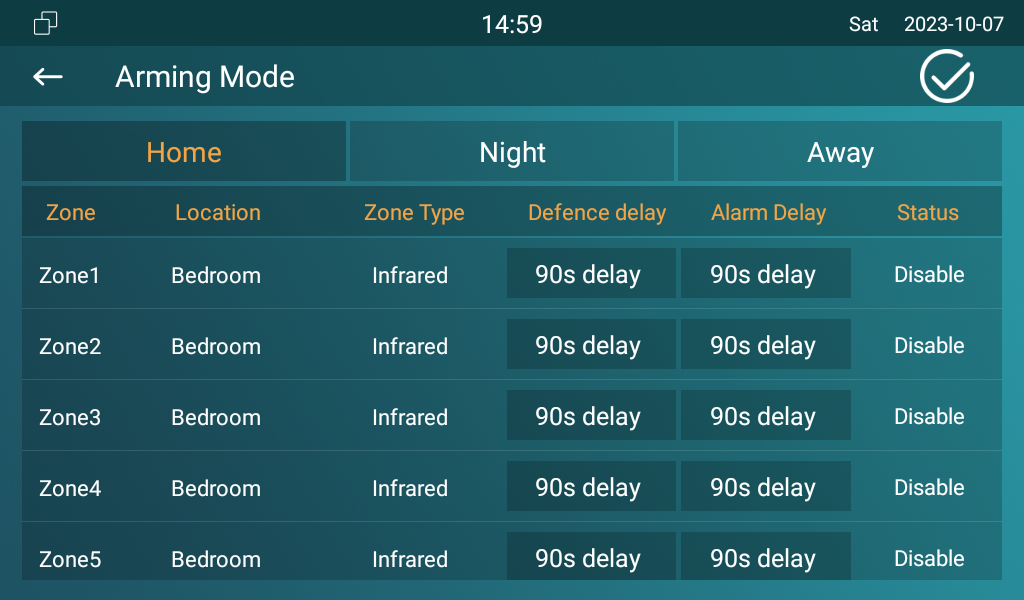
Parameters Set-up:
-
Location: to select which location the detection device is located, including Bedroom, Guest Room, Hall, Window, Balcony, Kitchen, Study, and Bathroom.
-
Zone Type: to select the type of detection device, including Infrared, Drmagnet, Smoke, Gas, and Urgency.
-
Defence Delay: it means when users enable the arming mode, there will be 90 seconds delay time for the alarm mode to be activated.
-
Alarm Delay: it means when the sensor is triggered, there will be 90 seconds delay time to announce the notification.
-
Status: to enable or disable arming mode on the corresponding zone.
Configure Alarm Text
Once the alarm sensor is configured, you can access the device's web interface to personalize the alert content displayed on the screen when an alarm is triggered.
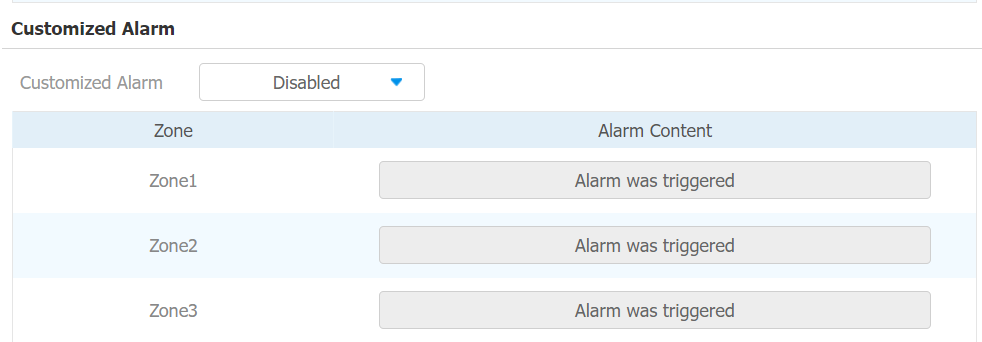
Go to Arming > Zone Setting > Customized Alarm interface.
Parameter Set-up:
- Customized Alarm: enable the feature before you can type in the customized alarm text.
- Alarm Context: type in the alarm text in the specific arming zone. The alarm text will be displayed when an arming is triggered.
Configure Arming Mode
Users can set the system to a certain mode, such as Away mode when they leave home. To do this, tap the icon of the desired mode. To disarming the system, tap Disarmed.
Configure Alarm Ringtone
You can upload a customized alarm ringtone by choosing the local audio file on web Phone > Audio > Alarm Ringtone interface.

- The file format of the customized ringtone should be .wav.
Alarm Action Configuration
When the alarm sensor is triggered, it can start different actions, such as HTTP commands, SIP messages, calls, and local relay activation after setup.
Select Alarm Action Types
Select and set up actions on web Arming > Alarm Action interface.
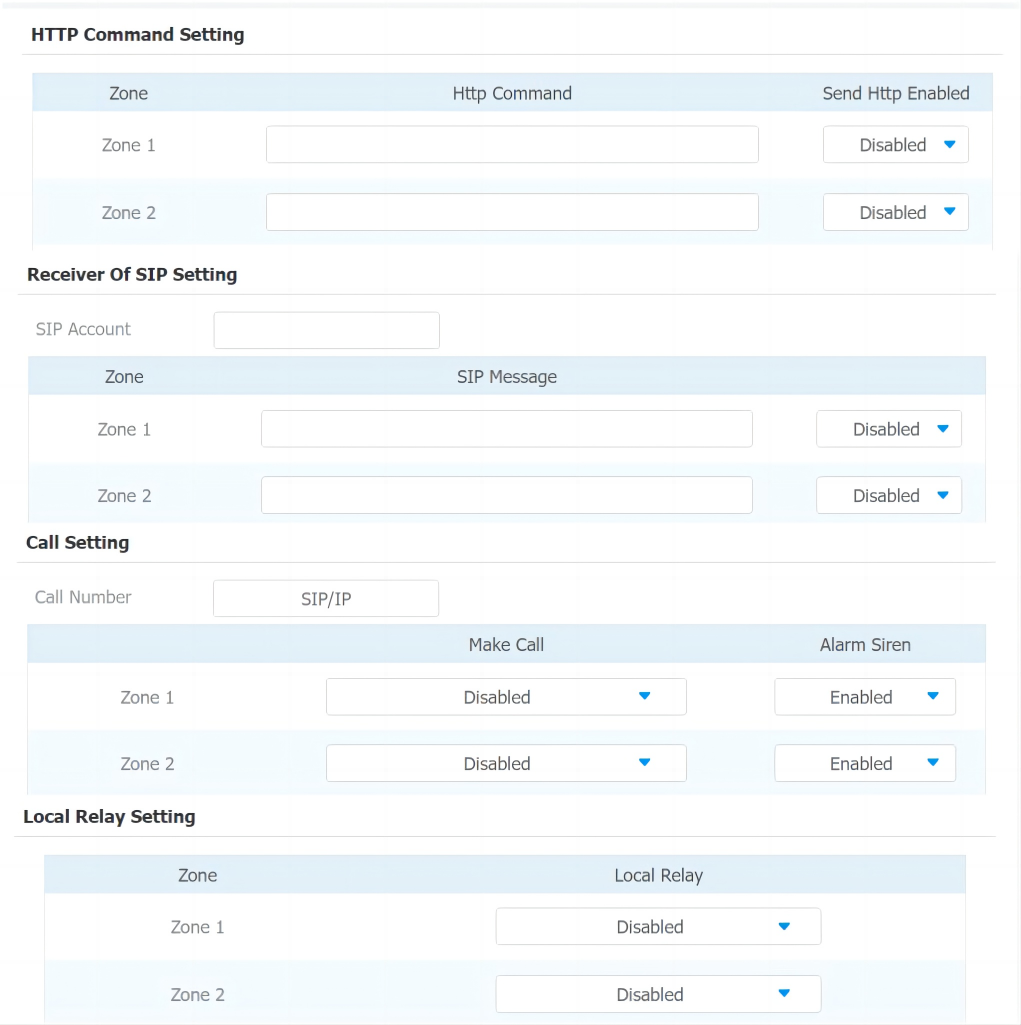
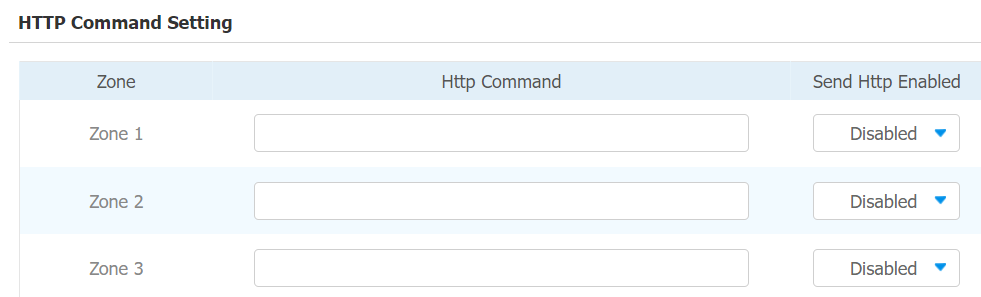
Configure Alarm Action via HTTP Command
To set up the HTTP Command action, you can click Enable in the Send HTTP field to enable the actions for the alarm sensor installed in different locations. Then enter the HTTP command provided by the manufacturer of the device on which the action is to be carried out.
Configure Alarm Action via SIP Message
The device can send messages to a designated device when the alarm is triggered. To set this up, enter a SIP number or IP address along with the message content.
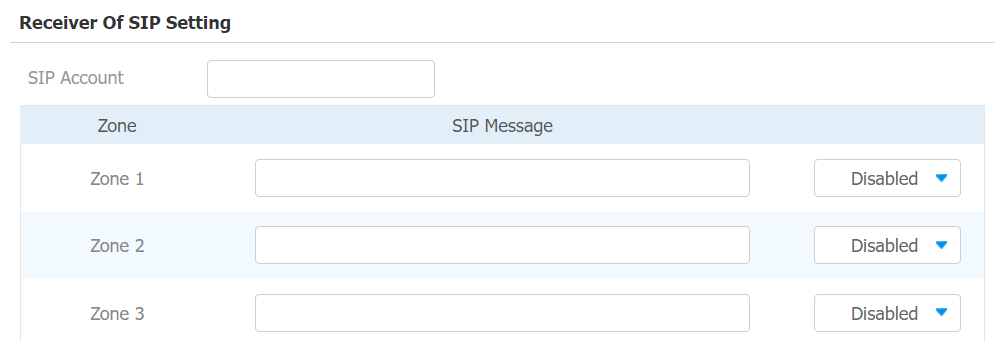
Parameter Set-up:
- Enabled/Disabled: enable it before you can send the customized messages to a designated SIP number or an IP number when the alarm is triggered.
- SIP Message: type in the message you want to send to the designated SIP number or IP number when the alarm is triggered.
Configure Alarm Action via SIP Call
To enable the device to make a call when the alarm is triggered, enter the SIP or IP number of the called party. Additionally, you can allow the indoor monitor to sound a siren simultaneously.
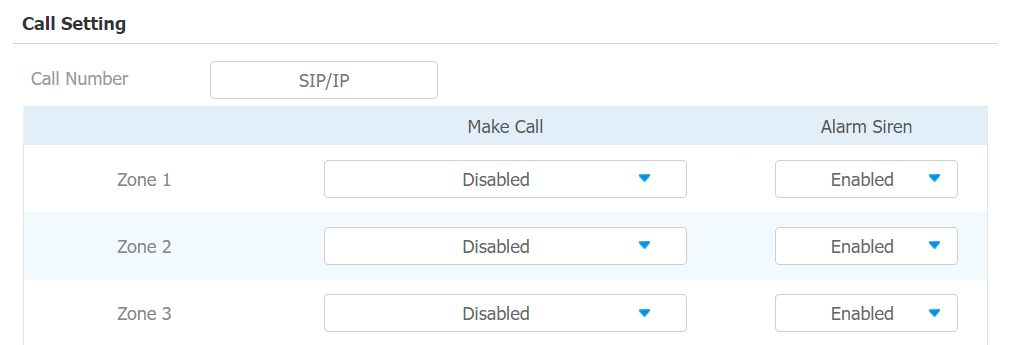
Parameter Set-up:
- Make Call: enable it so that a call will go to the designated SIP or IP number when alarm is triggered.
- Alarm Siren: enable it if you want to trigger alarm siren on the indoor monitor when the alarm is triggered.
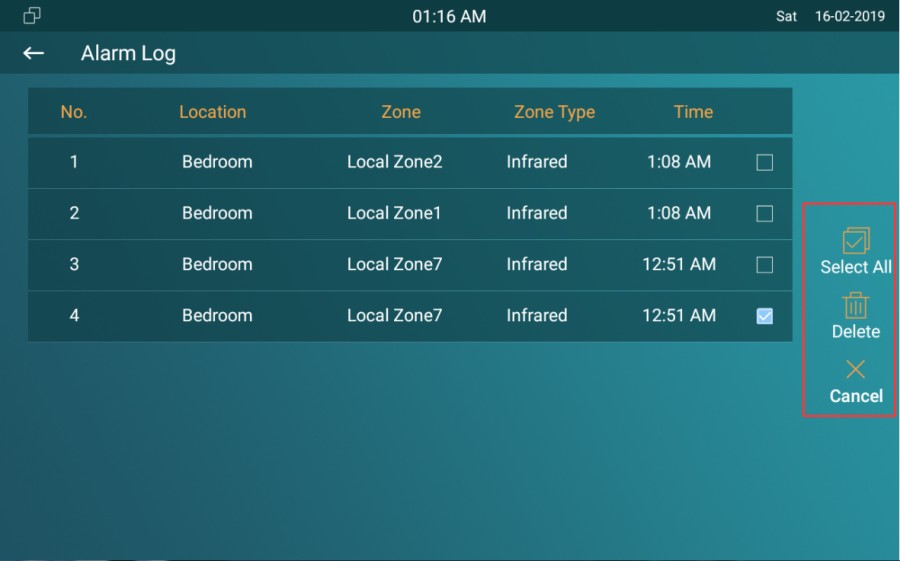
Check Alarm Log
To check alarm log on device Arming > Alarm Log screen. To delete the existing alarm log by clicking the right-side operation icon.
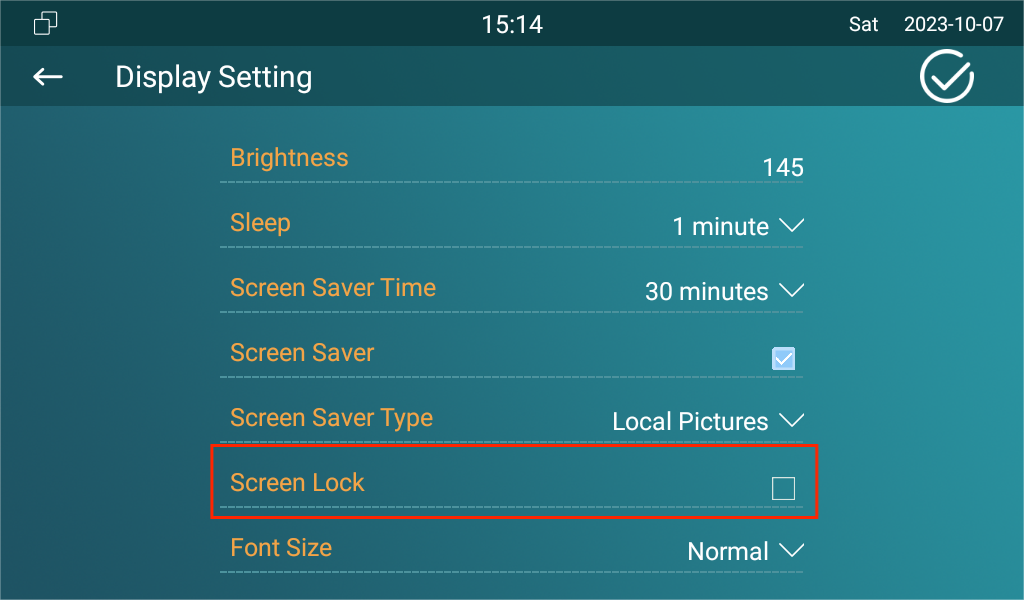
Screen Unlock Setting
To prevent unauthorized access to the device when it is not being used, enable the Screen Lock function. This feature automatically locks the device after a period of inactivity, requiring a password to unlock.
You can enable screen lock function directly on the device Settings > Display screen.
Screen Unlock by PIN Code
To unlock the screen, users need to enter the preset PIN code.
Navigate to the Advance Settings > System Code screen to change a new password.
- The default unlock PIN is 123456.
Voice Encryption
The encryption function provides three encryption methods to protect voice signals from eavesdropping during a call.
Go to Account > Advanced > Encryption interface.

Parameter Set-up:
- Voice Encryption: select encryption mode from four options. If you disable it, the call will not be encrypted. SRTP(Compulsory), all audio signals (technically speaking, it is RTP streams) will be encrypted to improve security. SRTP(Optional), encrypts voice from the called party, if the called party also enables SRTP, the voice signals will also be encrypted.ZRTP(Optional) is the protocol that the two parties use to negotiate the SRTP session key.
Remote Control
The remote control function allows a specific server to send HTTP commands or requests to the indoor monitor for actions like unlocking a local relay.
Navigate to Phone > Call Feature > Remote Control interface.

Parameter Set-up:
- Allowed Access IP List: set up the server IP address that can be allowed to send the HTTP commands to the indoor monitor.
Location
With users’ permission, Location service uses information from cellular, Wi-Fi, Global Positioning System (GPS), and Bluetooth to determine the device’s location. Users can turn off this service or change its settings anytime.
To set it up, go to Security > Advanced > Service.

Parameter Set-up:
-
Disabled: select Disabled if you do not allow any app to find your device location.
-
Only Device: the device location can be determined using GPS
-
High Accuracy: the device location can be determined via WAN, Bluetooth, or cellular networks.
Client Certificate Setting
Certificates ensure communication integrity and privacy. To use the SSL protocol, you need to upload the right certificates for verification.
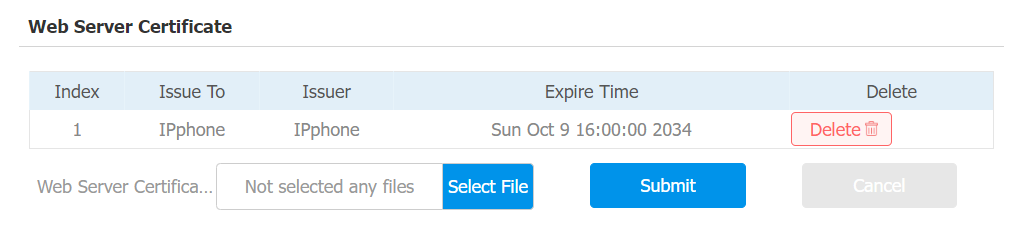
Web Server Certificate
To upload web server certificate on the device web interface Security > Advanced > Web Server Certificate.
Client Certificate
To upload and configure client certificates on the same page.
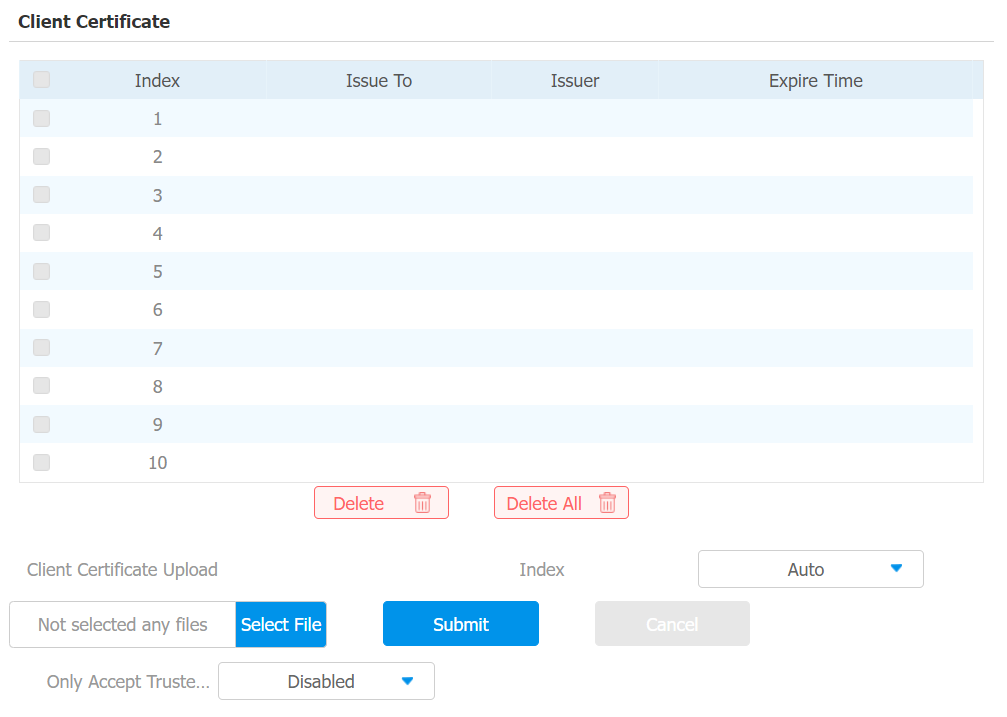
Parameter Set-up:
-
Index: select the desired value from the drop-down list of Index. If you select Auto, the uploaded certificate will be displayed in numeric order. If you select values from 1 to 10, the uploaded certificate will be displayed according to the value selected.
-
Select File: click Select file to browse the local drive, and locate the desired certificate (*.pem only).
-
Only Accept Trusted Certificates: if you select Enabled, as long as the authentication success, the device will verify the server certificate based on the client certificate list. If you select Disabled, the device will not verify the server certificate no matter whether the certificate is valid or not.
Power Output Setting
The indoor monitor can serve as a power supply to the Akuvox door phone with 12V power supply for example E10. You can enable the power output, then connect the door phone to the RJ45 port on the indoor monitor. Also, you can connect E10 to the 12_out port for the power supply.
To enable it, go to the Device Setting > Basic > Power Output Setting interface.
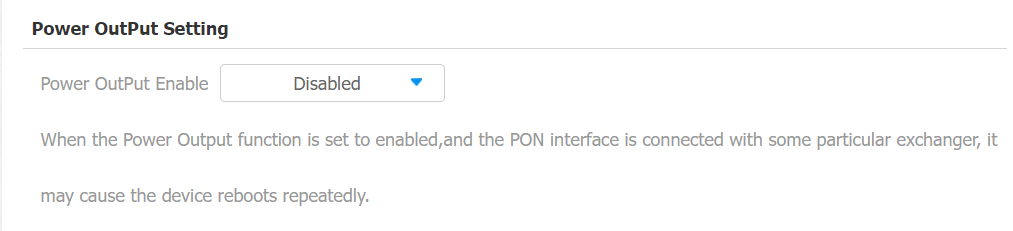
- When the Power Output function is enabled, and the PON interface is connected with some particular exchangers, it may cause the device to reboot repeatedly.
High Security Mode
High security mode is designed to enhance the security. It employs encryption across various facets, including the communication process, door opening commands, password storage methods, and more.
To configure this feature on the web Security > Basic > High Security Mode interface.

Important Notes
1. The High Security mode is off by default when you upgrade the device from a version without the mode to one with it. But if you reset the device to its factory settings, the mode is on by default.
2. This mode makes the old version tools incompatible. You need to upgrade them to the following versions or higher to use them.
·PC Manager: 1.2.0.0
·IP Scanner: 2.2.0.0
·Upgrade Tool: 4.1.0.0
·SDMC: 6.0.0.34
3. The supported HTTP format for relay triggering varies depending on whether high secure mode is enabled or disabled.
If the mode is on, the device only accepts the new HTTP formats below for door opening.
l http://username:password@deviceIP/fcgi/OpenDoor?action=OpenDoor&DoorNum=1
l http://deviceIP/fcgi/OpenDoor?action=OpenDoor&DoorNum=1
If the mode is off, the device can use both the new formats above and the old format below:
l http://deviceIP/fcgi/do?action=OpenDoor&UserName=username&Password=password&DoorNum=1
4. It is not allowed to import/export configuration files in tgz. format between a device with the high security mode and another one without it. For assistance with file transfer, please contact Akuvox technical support.