Specific Akuvox devices support selecting relay(s) to be triggered when they are connected to more than one door lock.
Note
The models with specific firmware versions or higher support this feature:
R29: 29.30.3.3
E16 V2.0: 216.30.10.36
E16 V3.0: 416.30.11.206
E18: 18.30.11.17
X915: 915.30.10.128
X915 V2.0: 2915.30.10.319
A15: 1115.30.10.407
This article takes R29 as an example.
Configure Unlock Options on the Device
Log in to the device’s web interface with the username and password. The default is admin.
Navigate to the Access Control > Relay > Unlock Options interface.
Select Visible.

Click Submit.
When adding or editing the user on the Directory > User interface, check the relays to be unlocked by the user on the Access Setting section. Please note that if the user can only open one relay, the Unlock Options will not display.
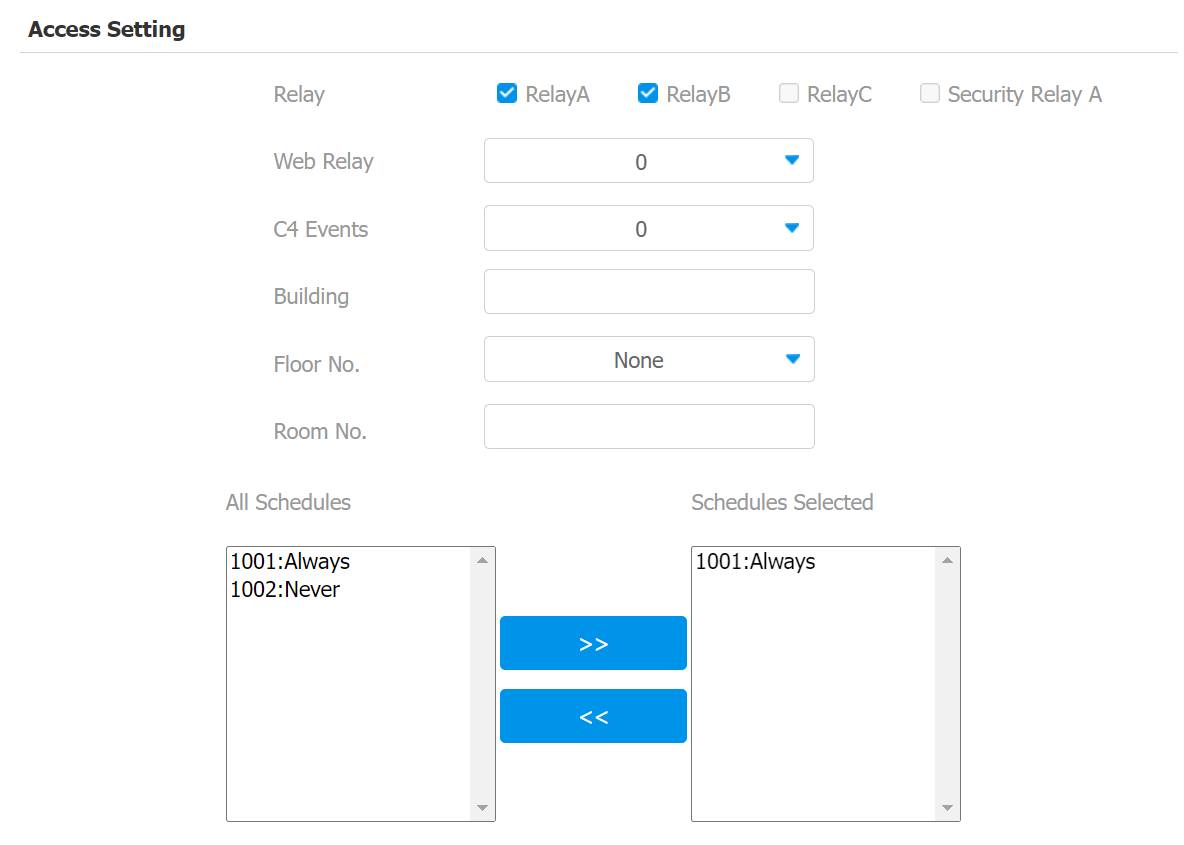
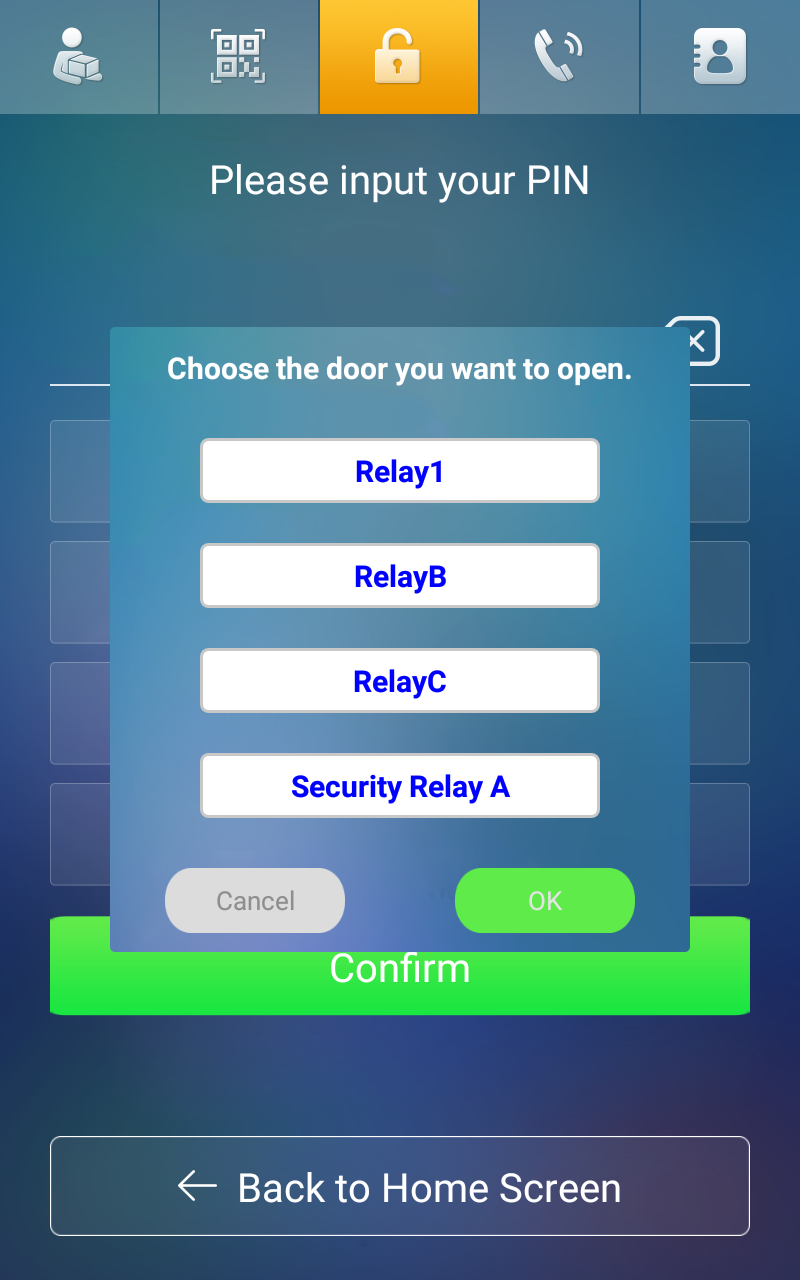
Relay options will be displayed on the device’s screen when users open the door using PIN codes, RF cards, or facial recognition. With other access methods, the relay options will not appear.
Note
Relays should be enabled and configured before being displayed on the screen.
Configure Unlock Option Names on the Cloud
When the device is connected to the SmartPlus Cloud, the relay names configured on the cloud are synchronized to the device and displayed as the corresponding unlock option names.
Compatible model and minimum version
E16 V2.0: 216.30.12.103
Log in to the cloud portal with your installer account.
Navigate to the project where the device is added. Take a community project as an example.
Under the Intercom Devices section, click New to add a new device, or click
 to modify an existing one.
 Set the Relay Name for the target relay.
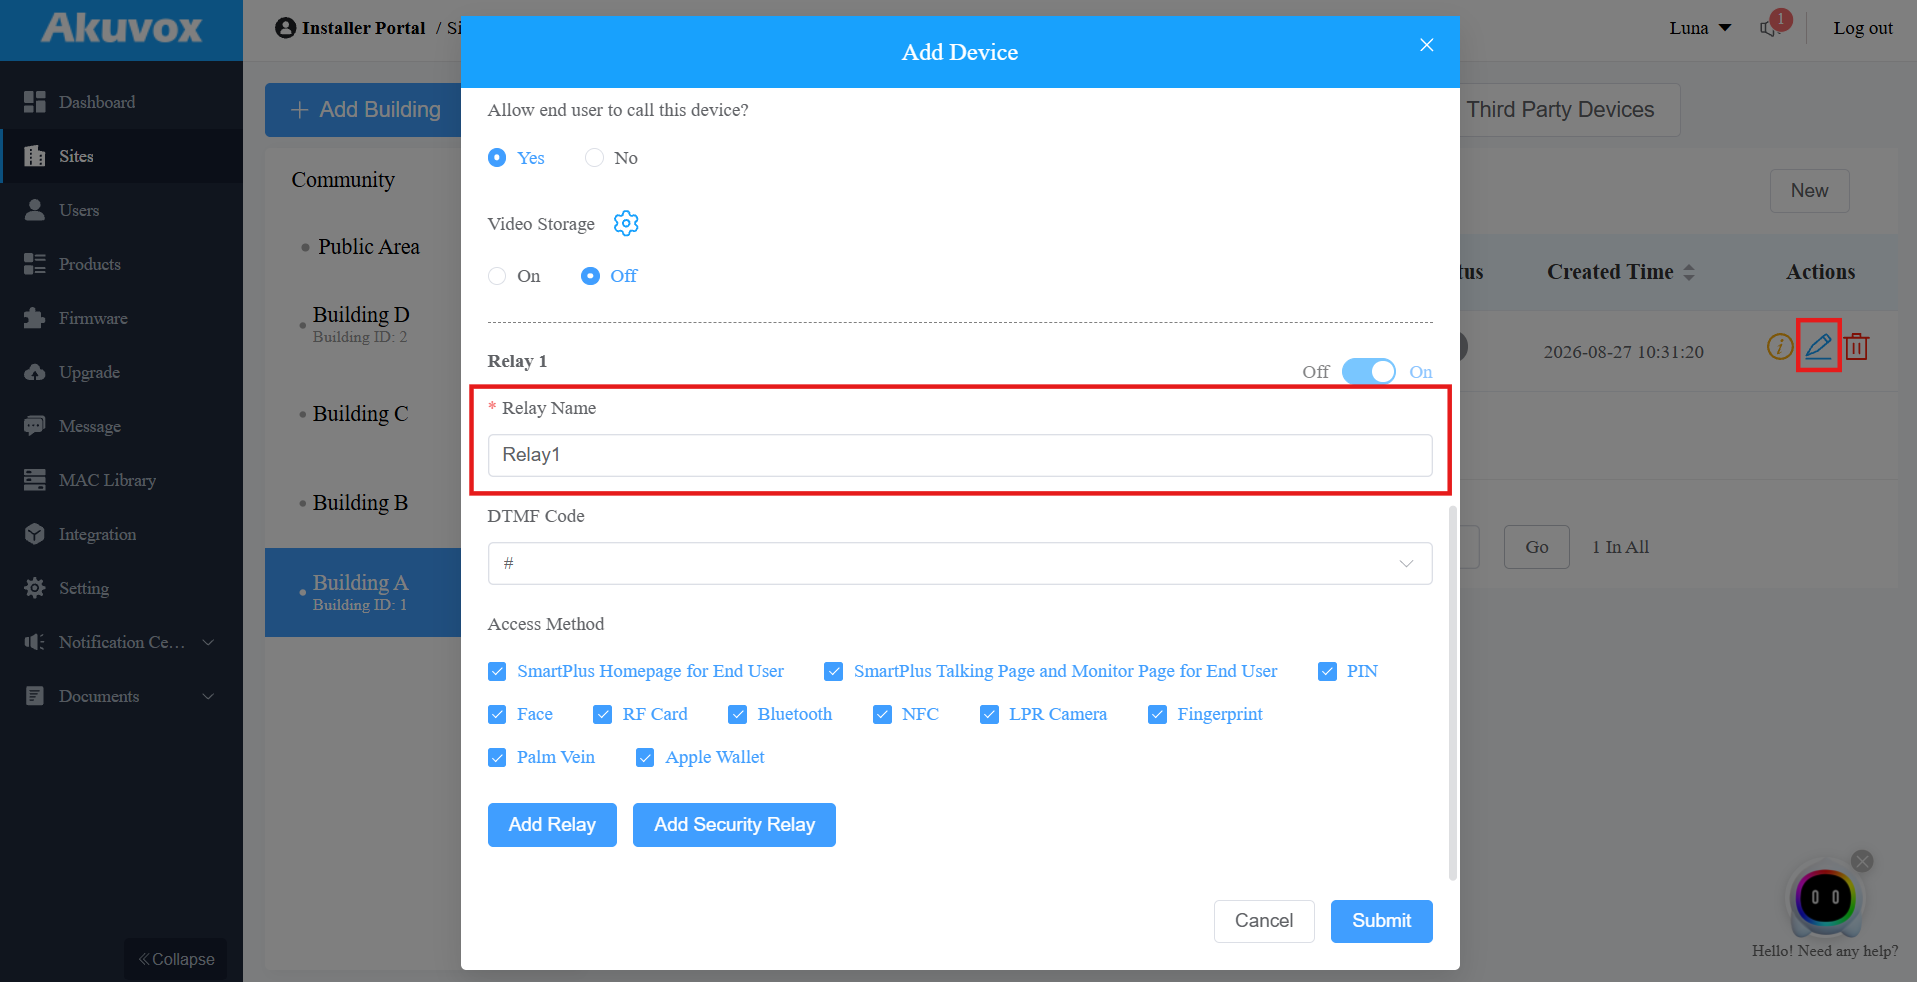
Click Submit.
After the configuration is synchronized to the device, the configured Relay Name is displayed as the corresponding unlock option name on the device.