Your HyPanel Supreme
Indicator light
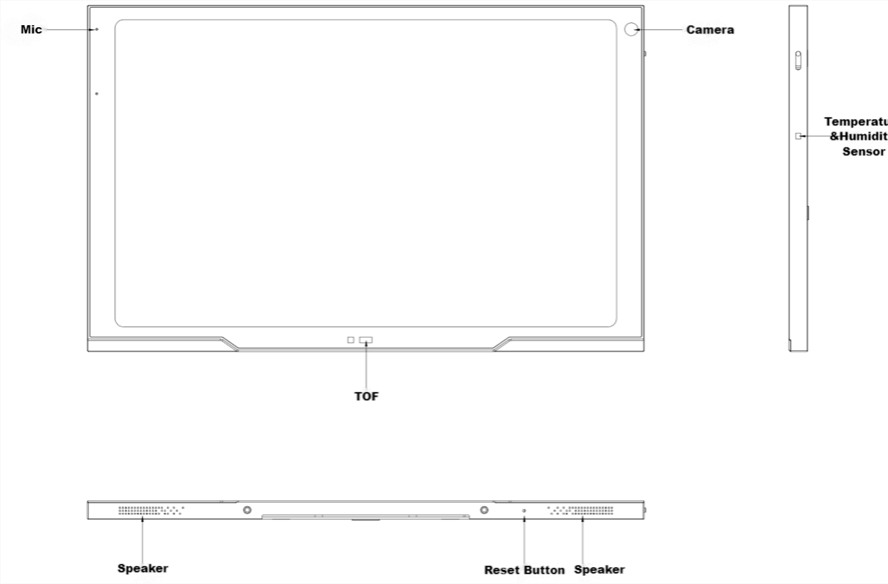
HyPanel Supreme has an indicator light below the screen that shows network status:
Red: Not connected to a network
Off: Successfully connected
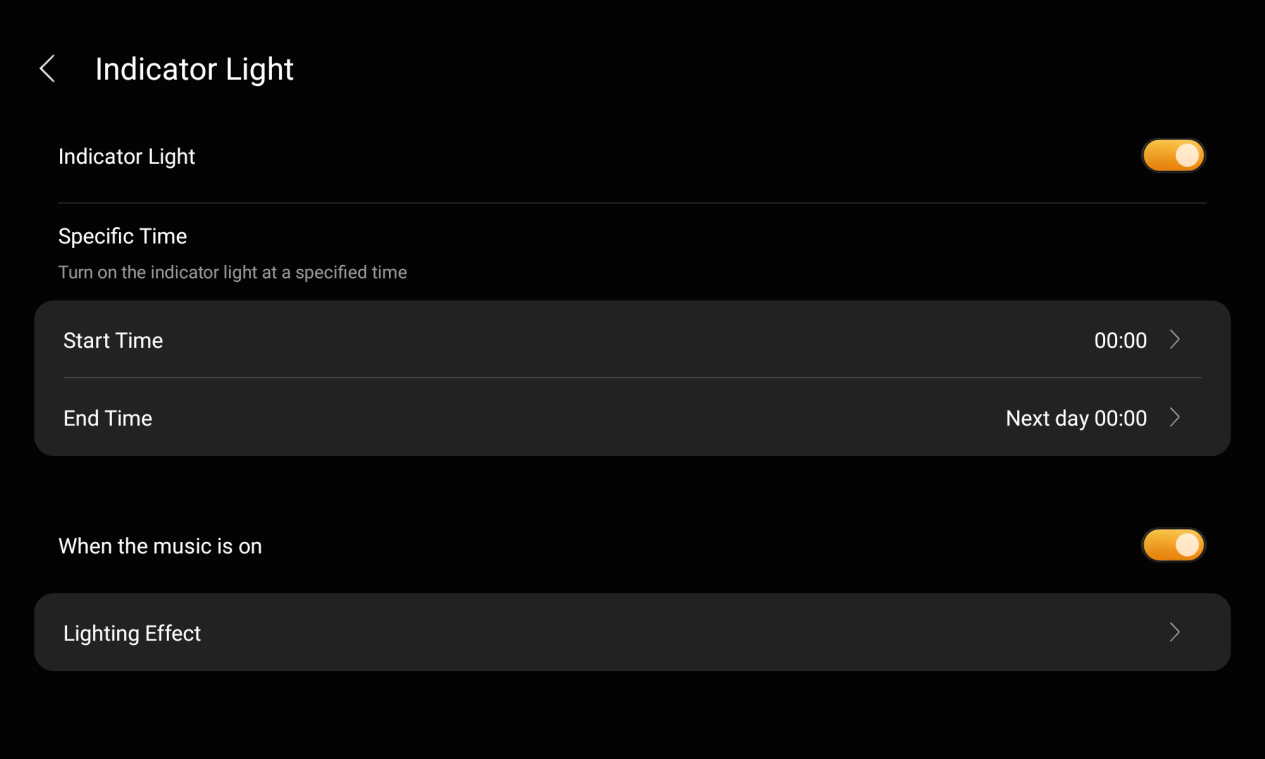
It also serves as ambient lighting when playing music. You can customize its color, effects (static or dynamic), and active time.
To adjust or disable the light:
Swipe down from the top of the screen and go to  > Display > Indicator light.
Control center
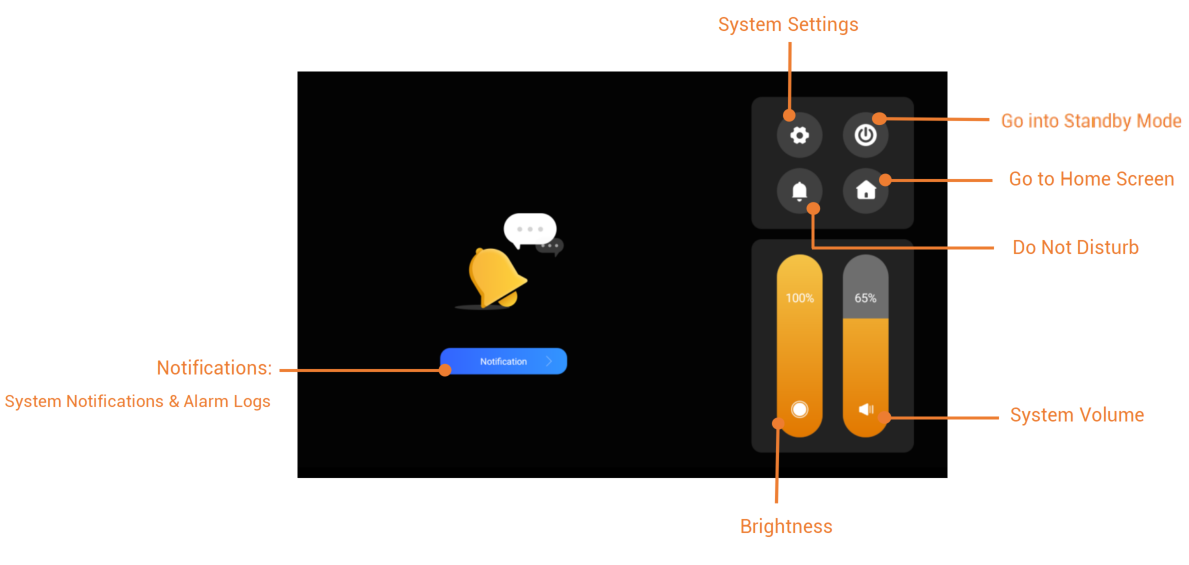
To open the Control Center for quick control, swipe down from the top edge of any screen.
Notification center
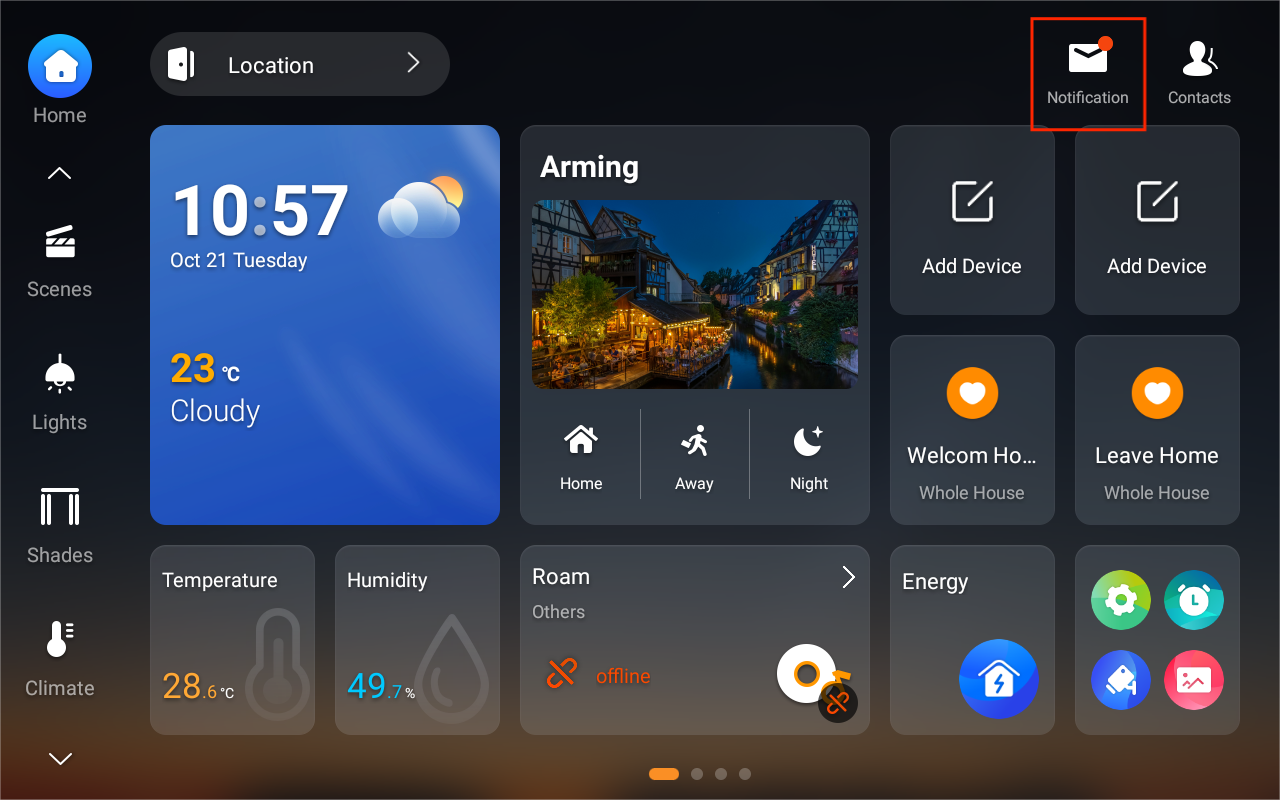
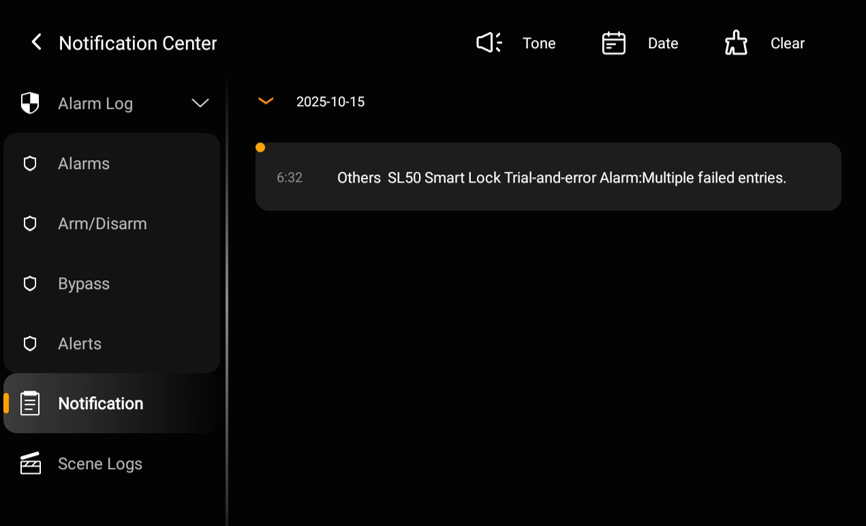
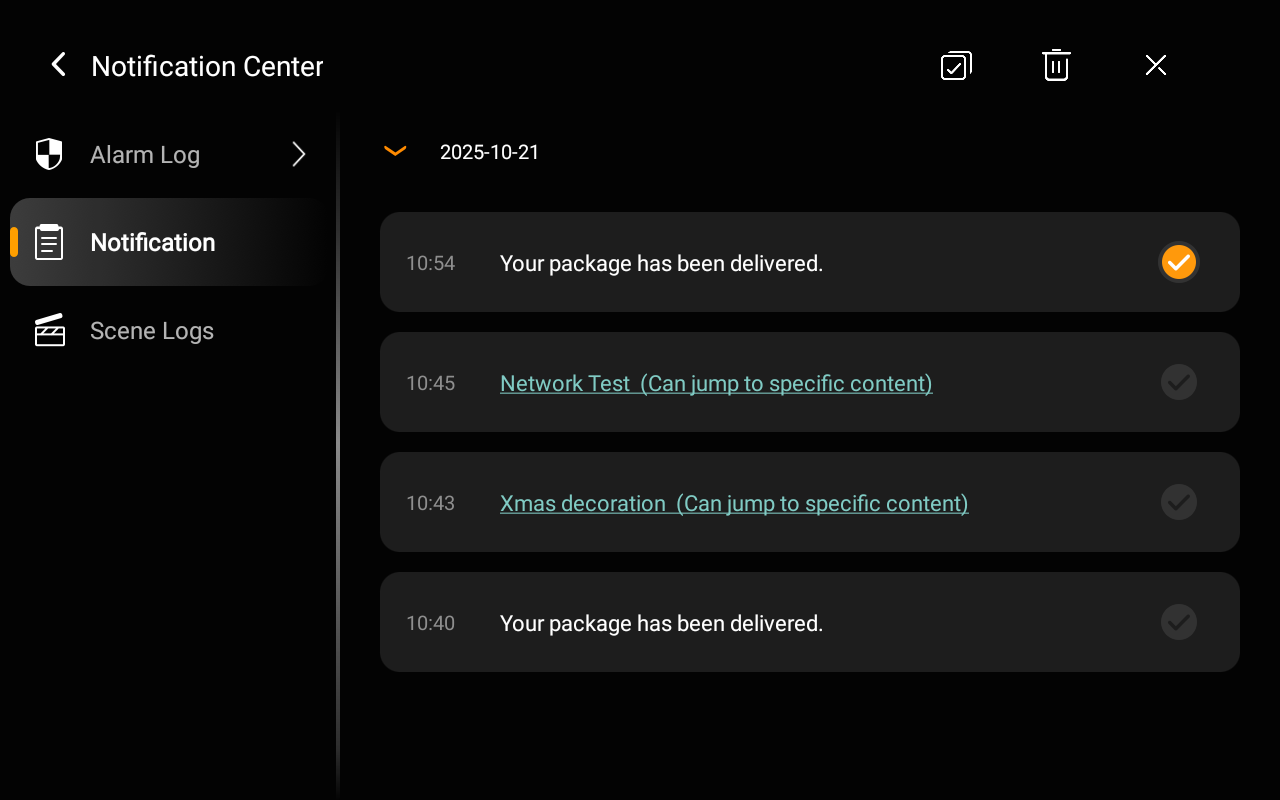
To open the notification center, tap  on the Home screen. All alerts, alarms, system notifications, and scene logs are displayed here, including false attempt and loitering alarms from SL50 and SL60 smart locks.
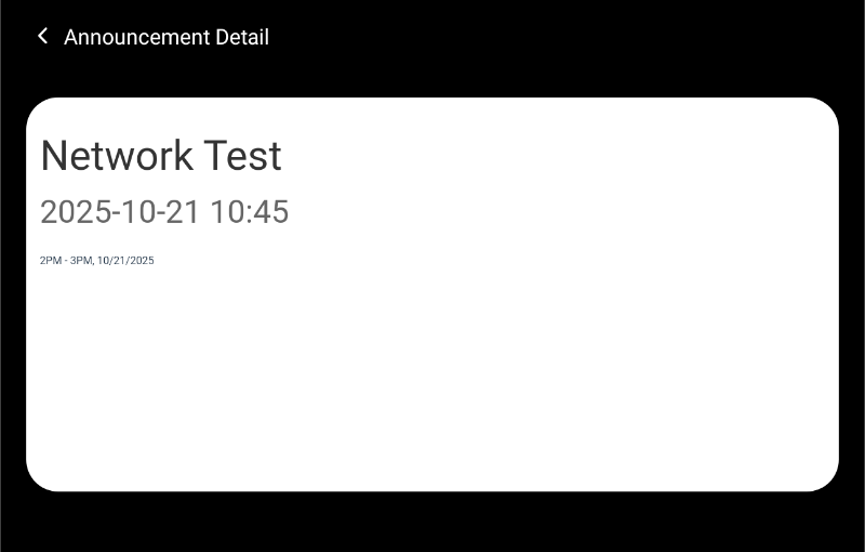
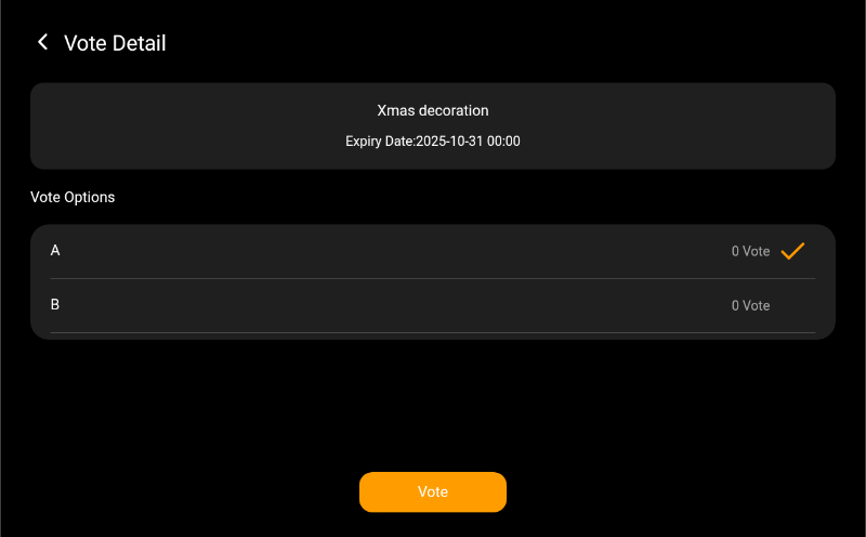
If your HyPanel Supreme is part of a community project, you can also receive notifications from the property managers, such as package deliveries, community voting, upcoming events, and more.
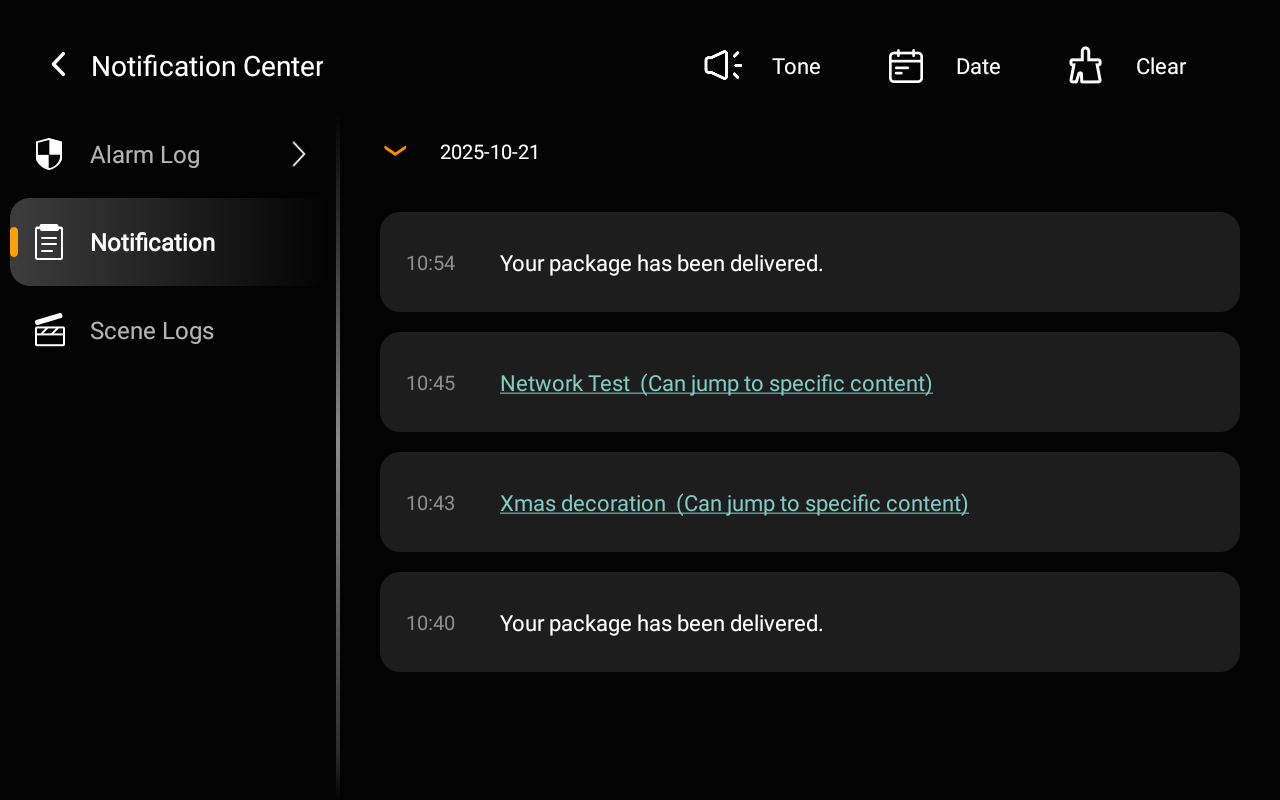
To view the details of votes, activities, or announcements, simply tap the corresponding link.
TIP:
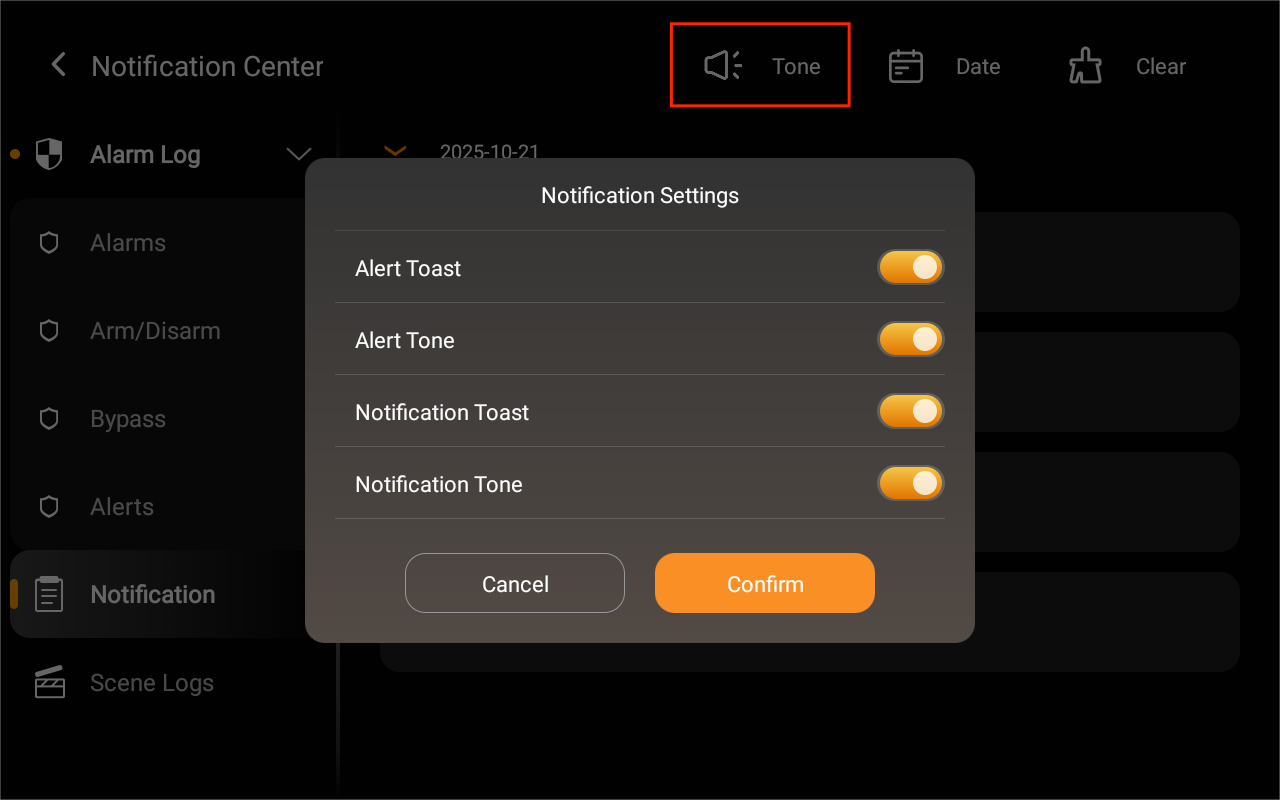
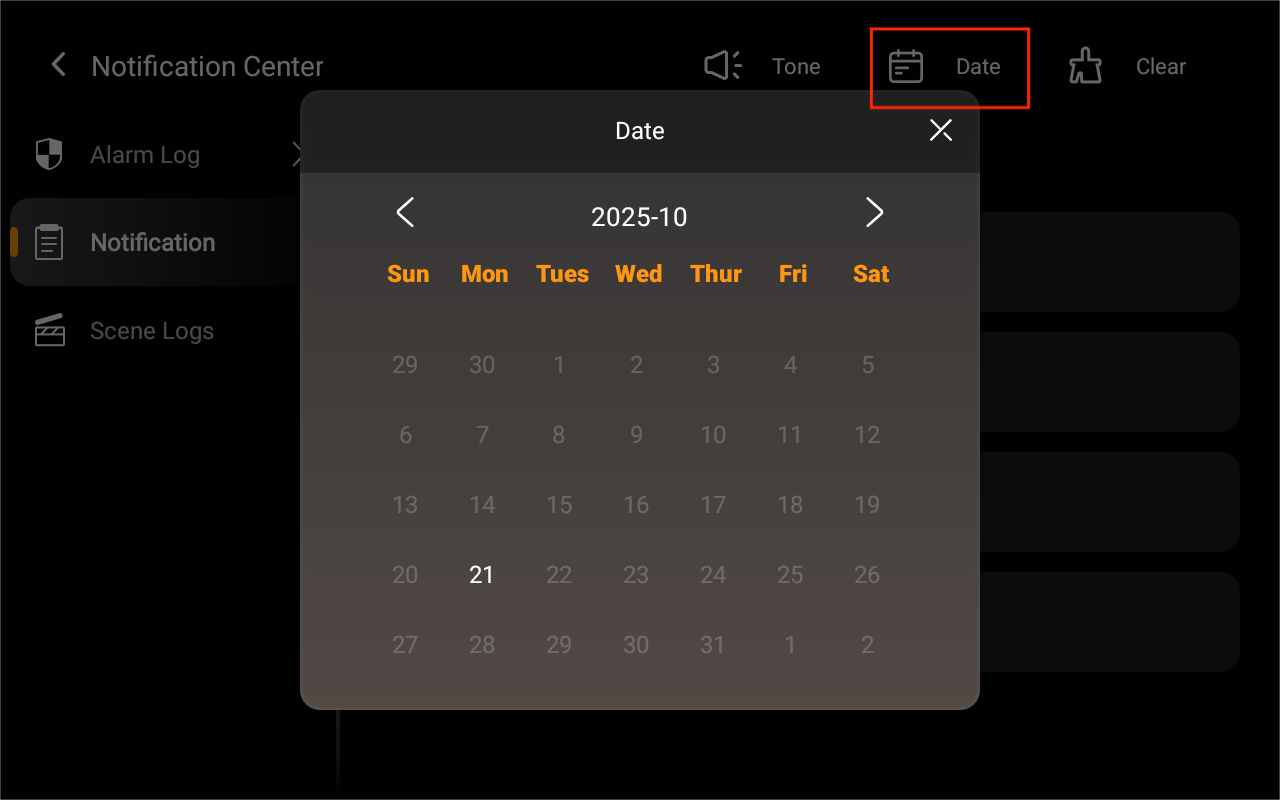
Here’s what you can do in the Notification Center:
To mute notification sounds and prevent pop-ups, tap
.
To filter notifications or logs by date, go to their screen, and tap
.
To delete notifications or logs, go to their screen, tap
, select the items you want to remove, then tap
.
Home screen
On the home screen, you can access features and functions by tapping icons and menus. You can also customize the wallpaper and the shortcuts displayed on the home screen.
TIP:
You can choose which feature to be available on the HyPanel Supreme via the user web portal.
Category tabs
Besides the Scenes tab, when an application or a new type of device is added, a corresponding category appears on the left side.
Here are some examples:
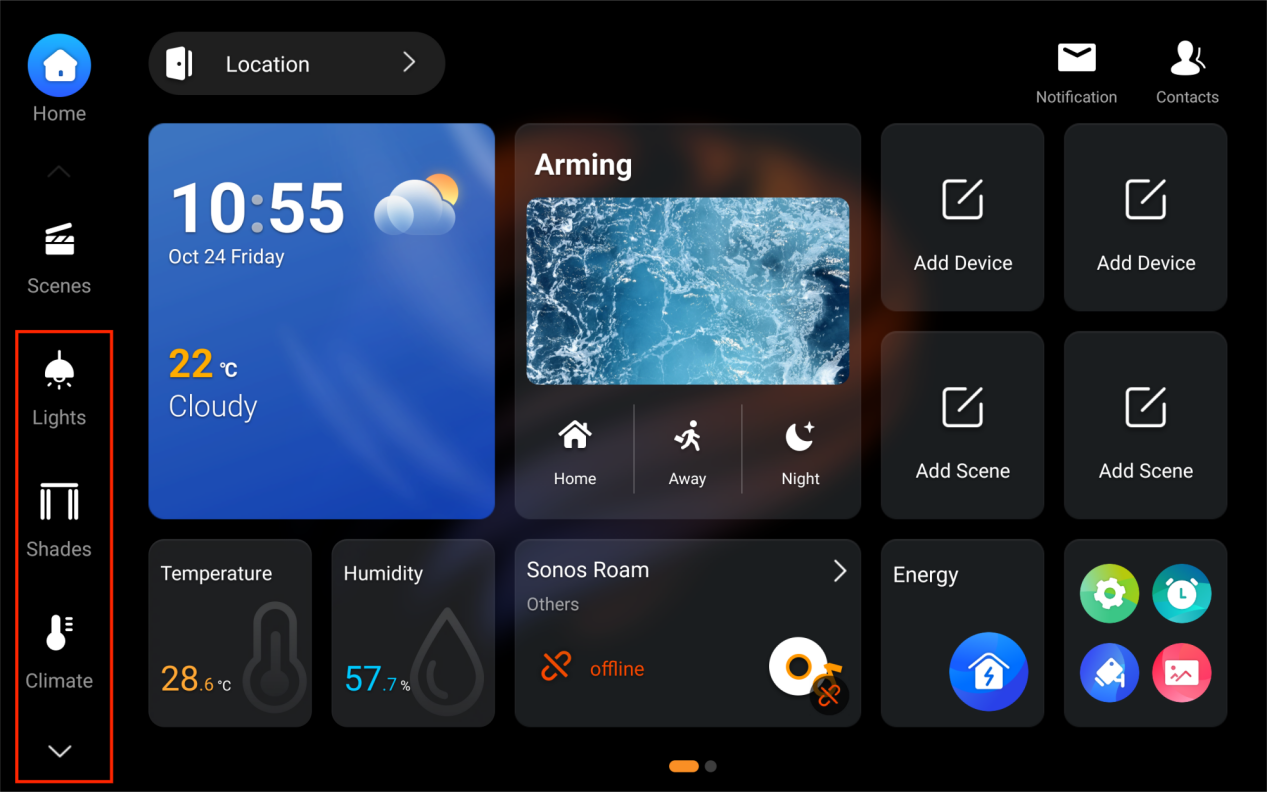
Lights: Lighting devices.
Shades: Shades, curtains, blinds, and more.
Climate: Air quality monitors, air conditioners, thermostats, cooling/heating system, and more.
Electric: Switches, relays, and more.
Security: Sensors such as motion sensors, door phones, locks, cameras, and more.
Media: Speakers, TV, and more.
More: akubela panels, IR controllers, customized remotes, and more.
Shortcut cards
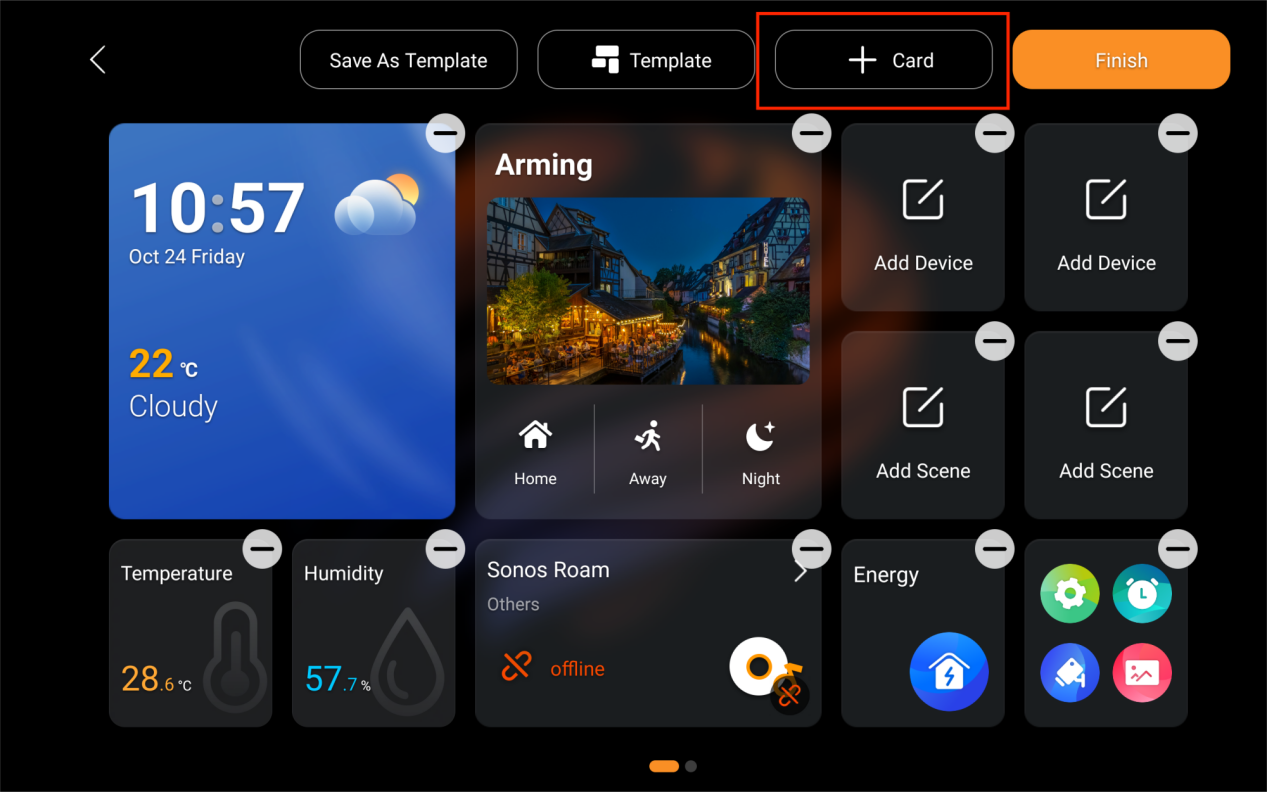
You can add, remove, replace, or rearrange shortcut cards on Home screen.
Add cards
Tap and hold the blank area on the Home screen, then tap
 .
Select a category.
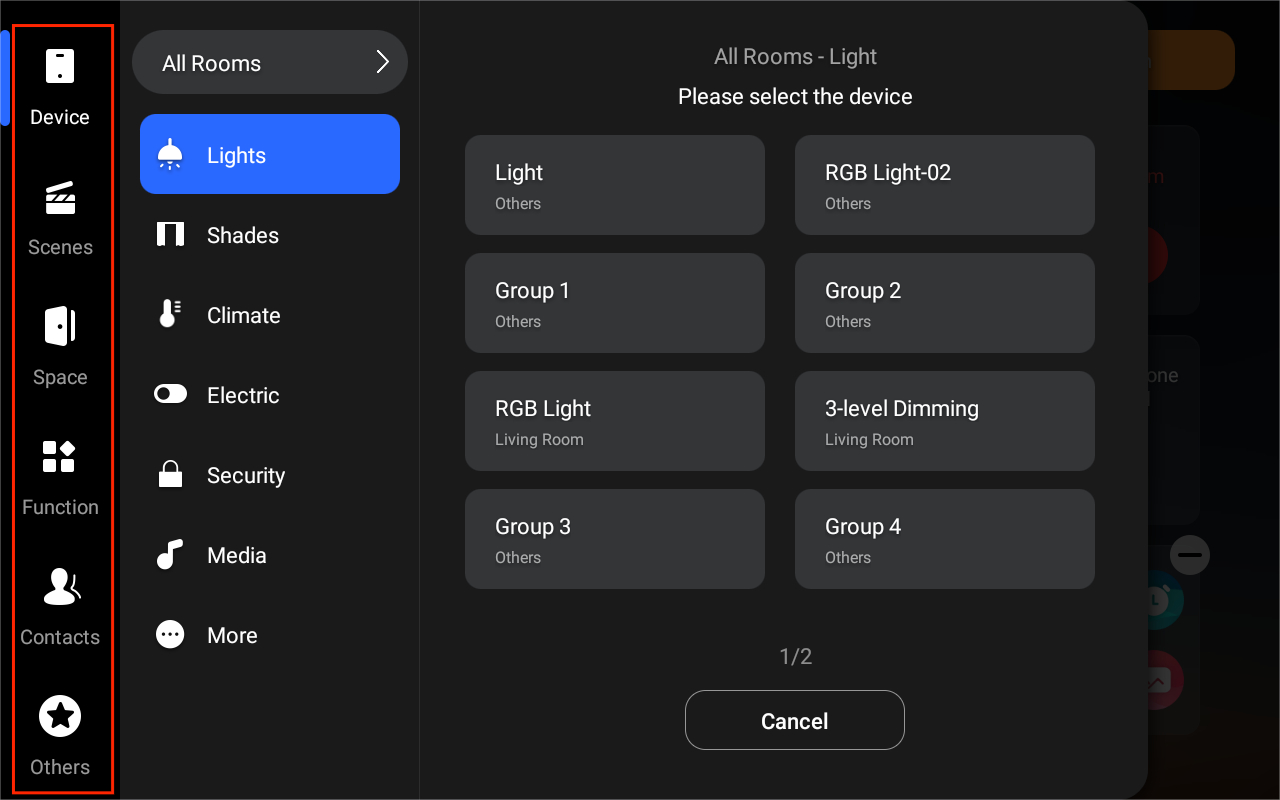
Choose the desired card(s):
To add one card, tap
 , then select the desired card.
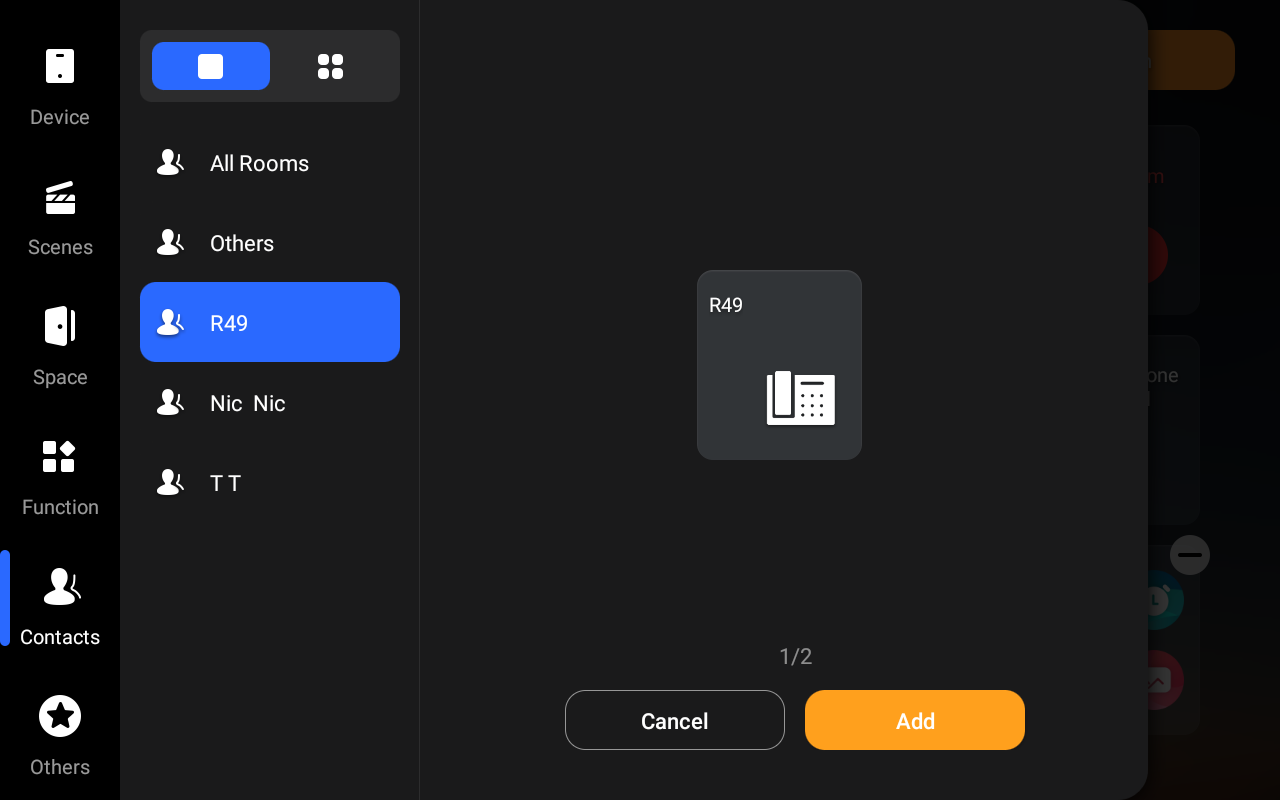
To add multiple cards into one drawer(not supported for Devices and Others categories), tap
 , and select the desired ones.
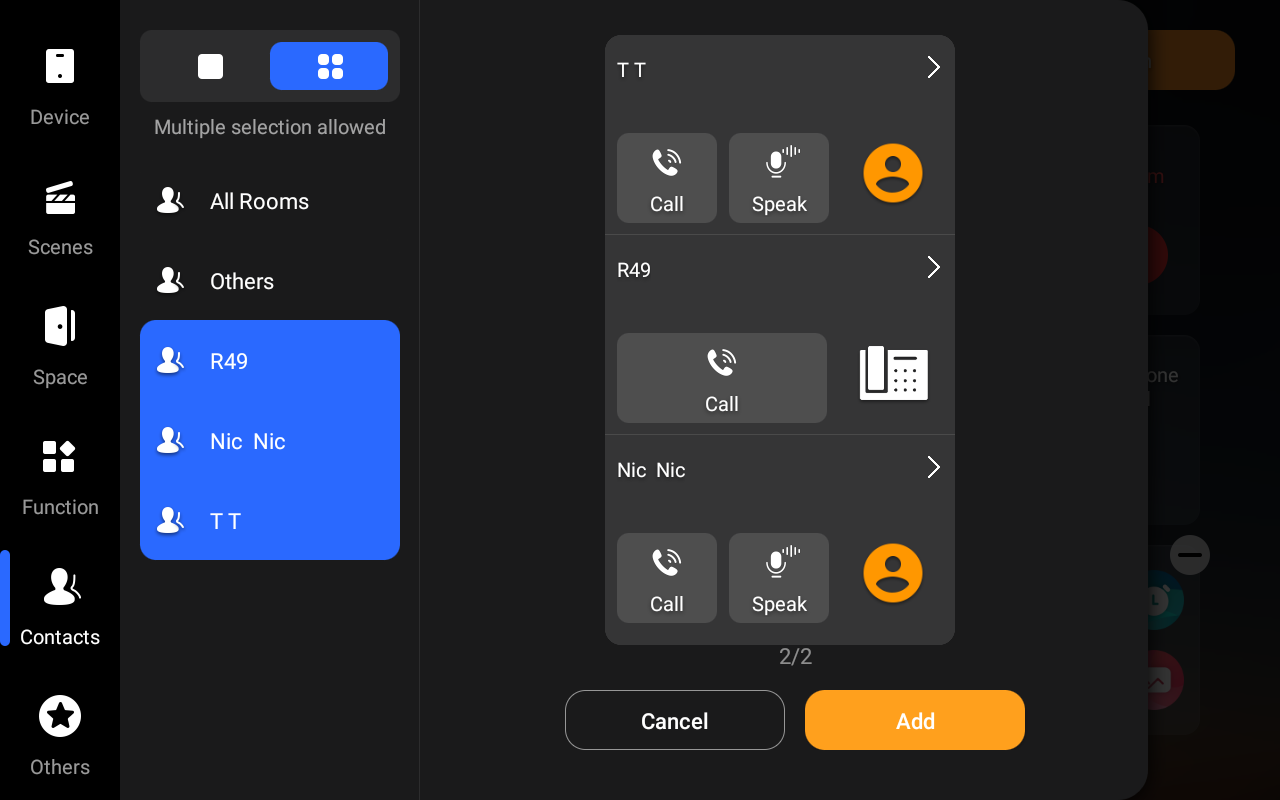
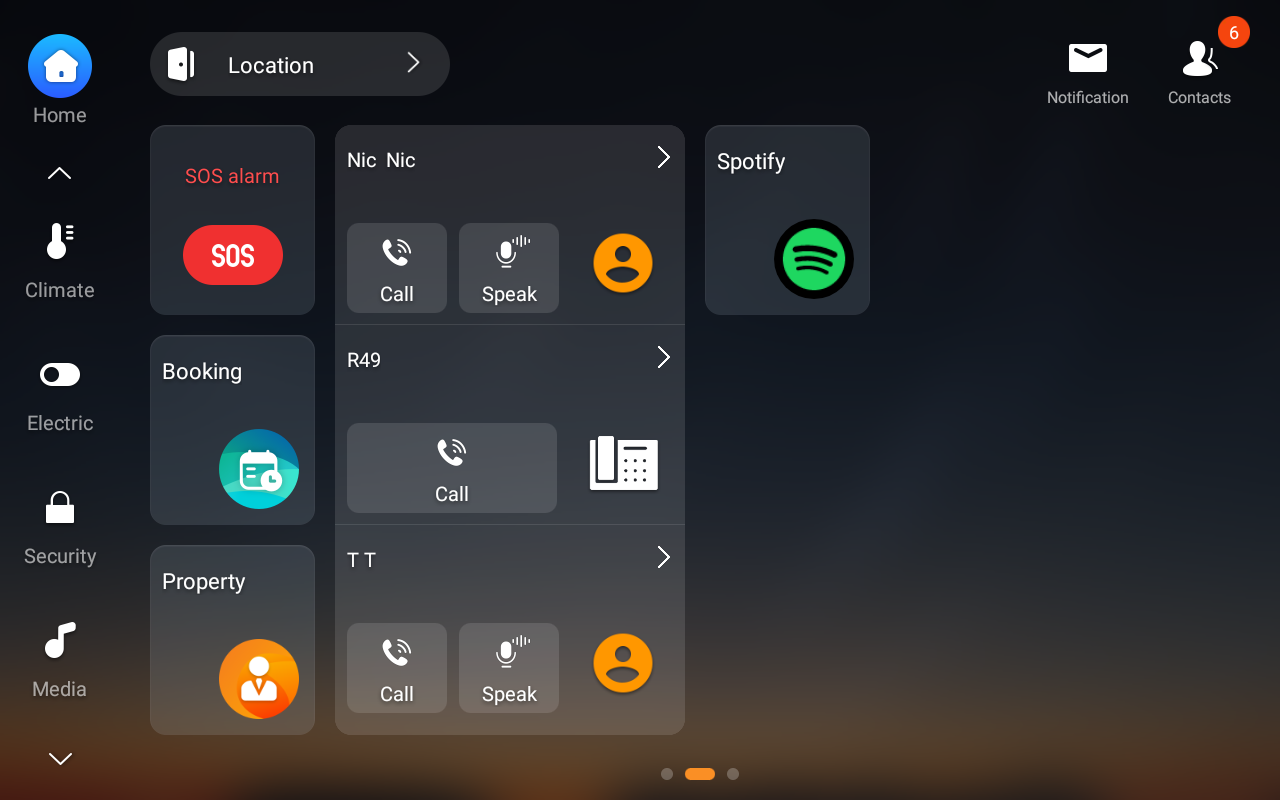
Tap Add > Finish. The new card and drawer will display on the Home screen.
Remove cards
You can remove cards individually or in batch.
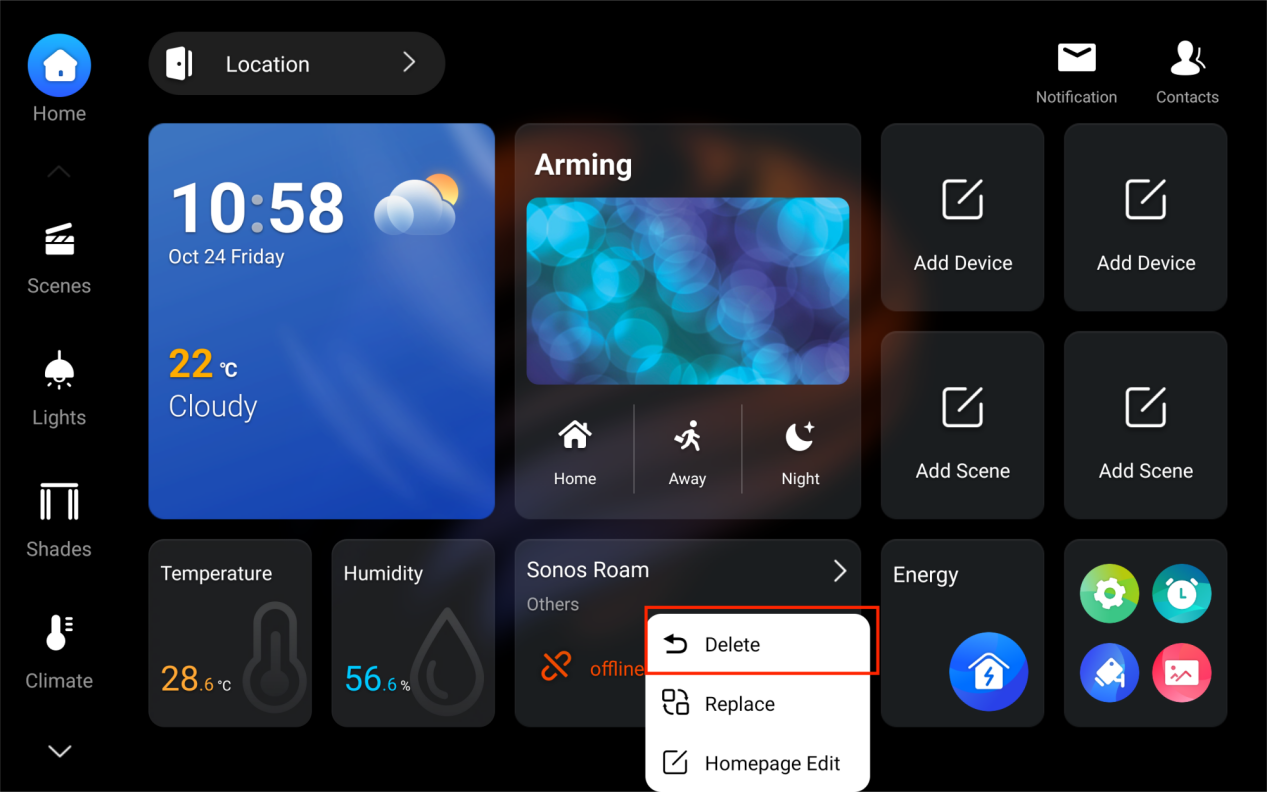
To delete one card: Tap and hold it, then select Delete.
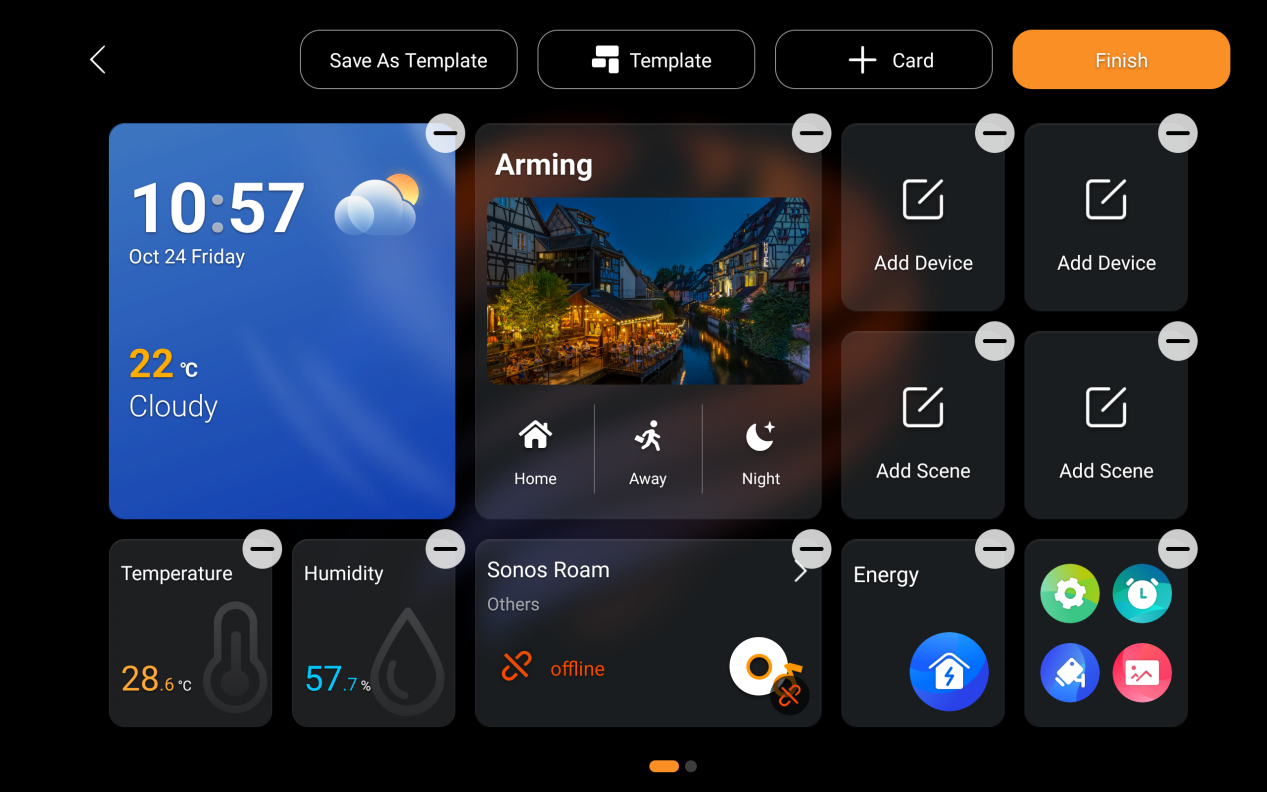
To delete multiple cards: Tap and hold the blank area on the Home screen, then tap
 .
Replace cards
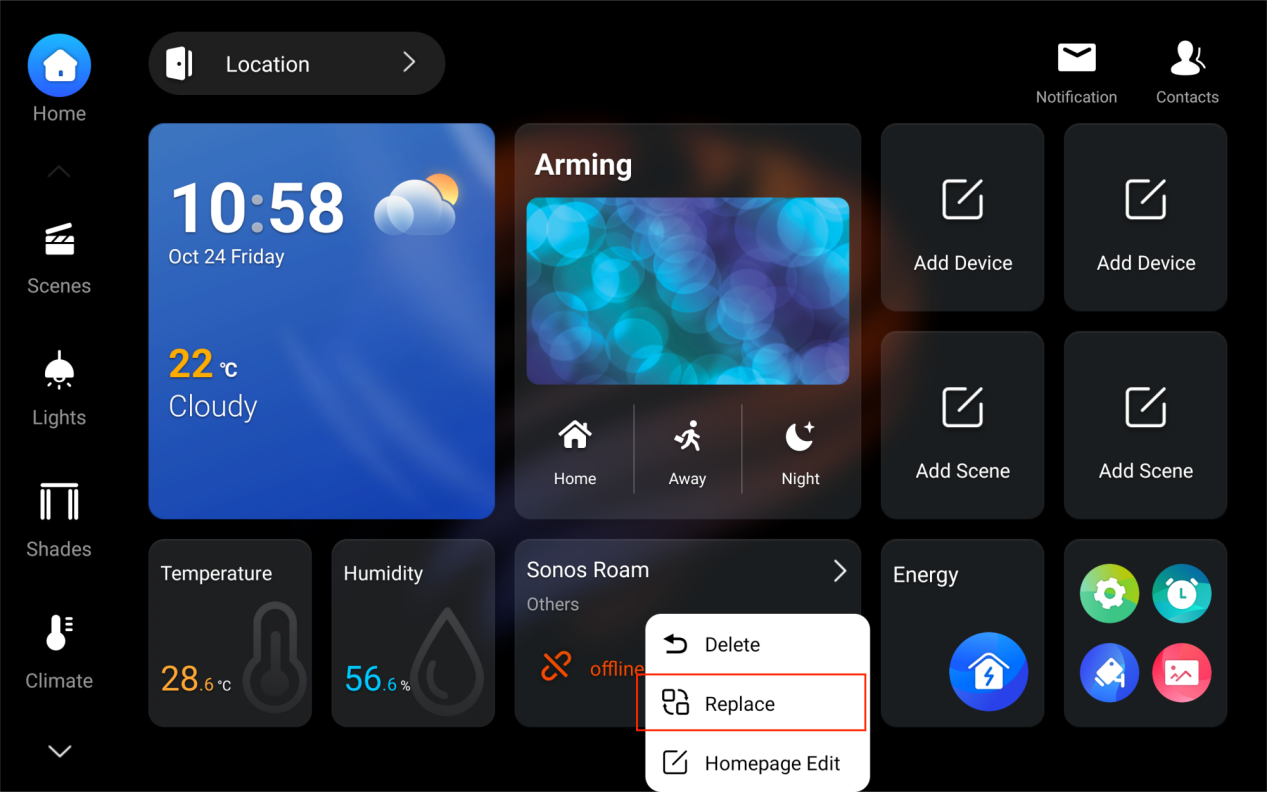
Tap and hold a card, tap Replace, and choose a new one.
Rearrange cards
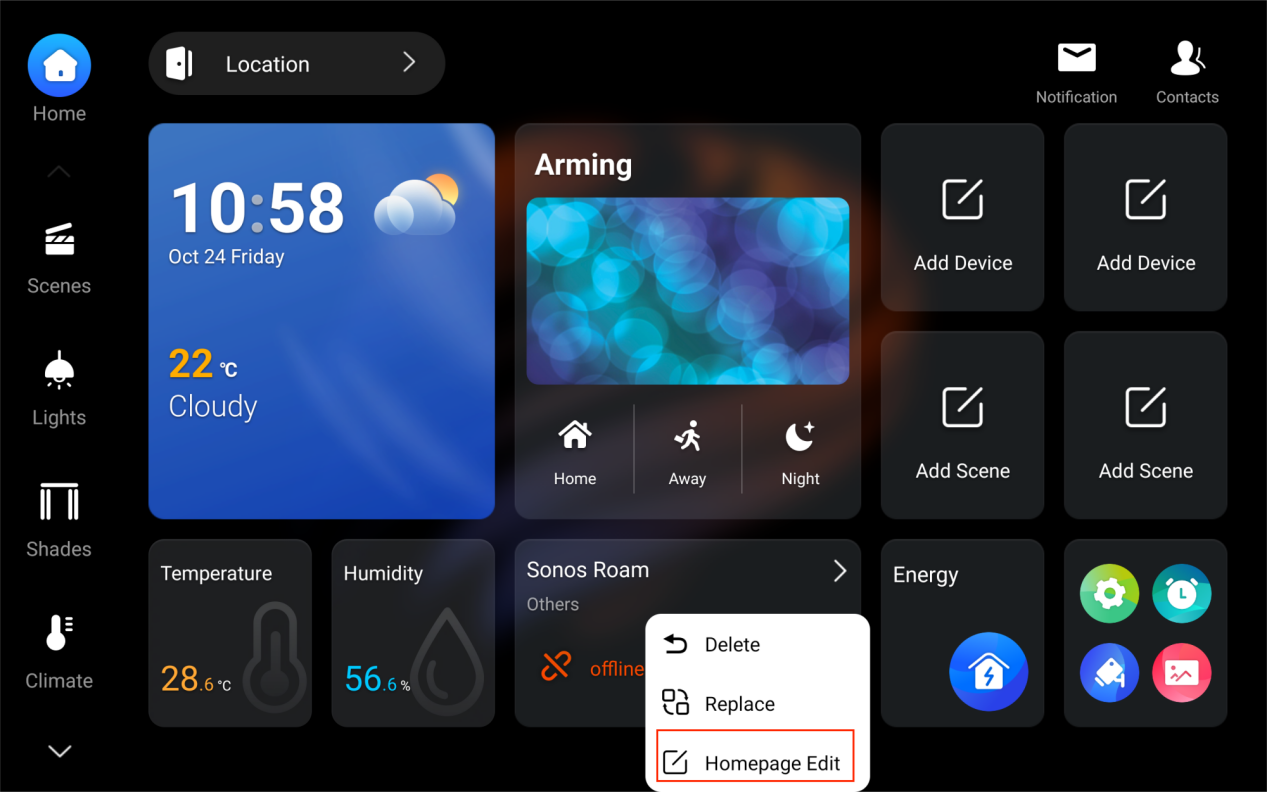
Tap and hold any card, tap  , then drag it to your desired place.
Display templates
The panel provides four default Home screen templates for displaying shortcut cards. You can also save your custom Home screen layout as a reusable template.
Save a custom template
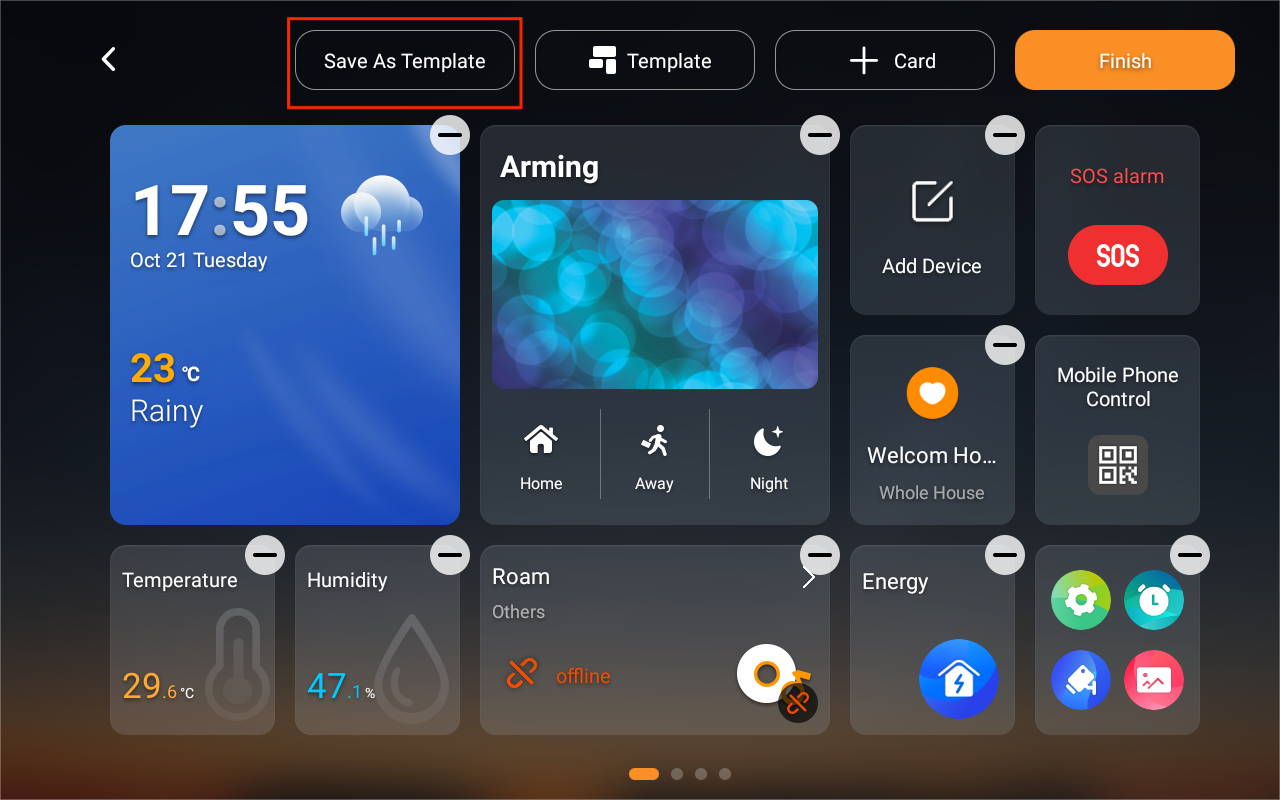
To save your current Home screen layout as a template:
Tap and hold the blank area on the Home screen.
Tap
 .
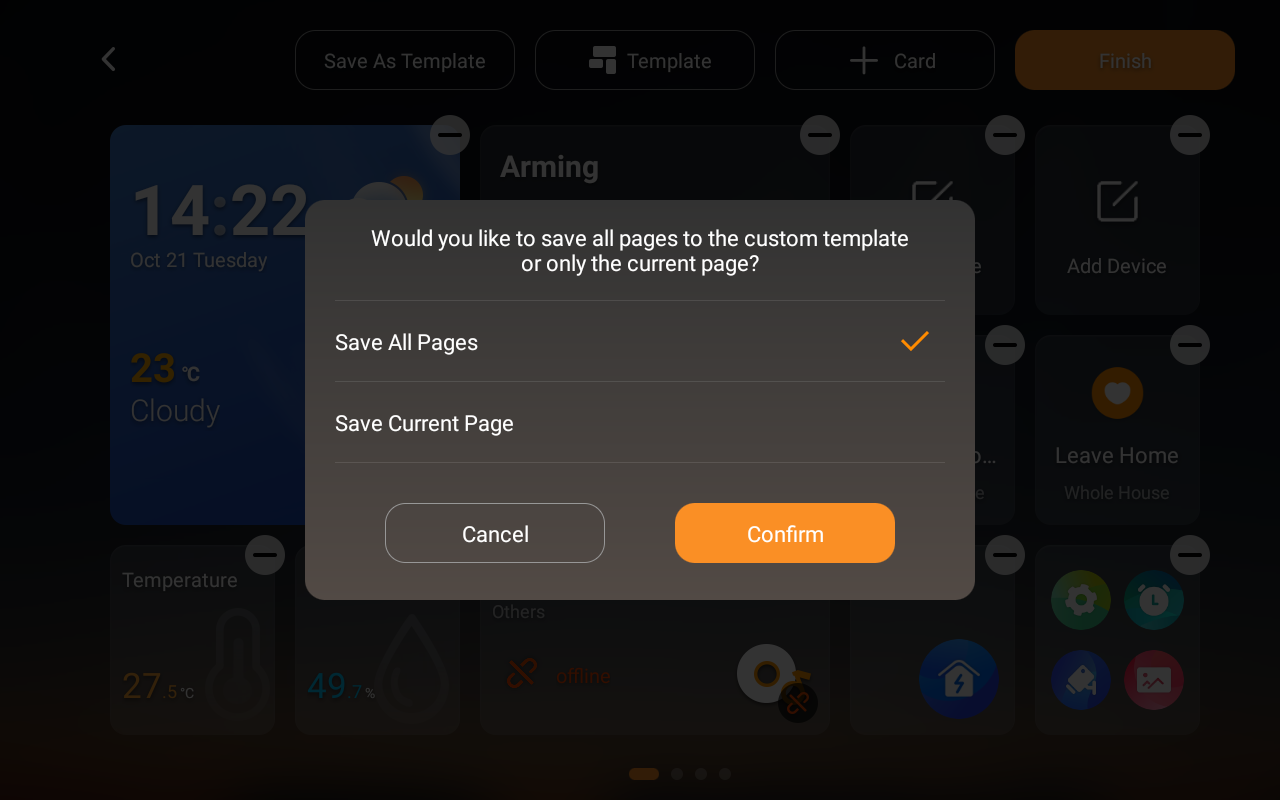
Choose whether to save the current page or all pages as the template.
Name the template, then tap Confirm.
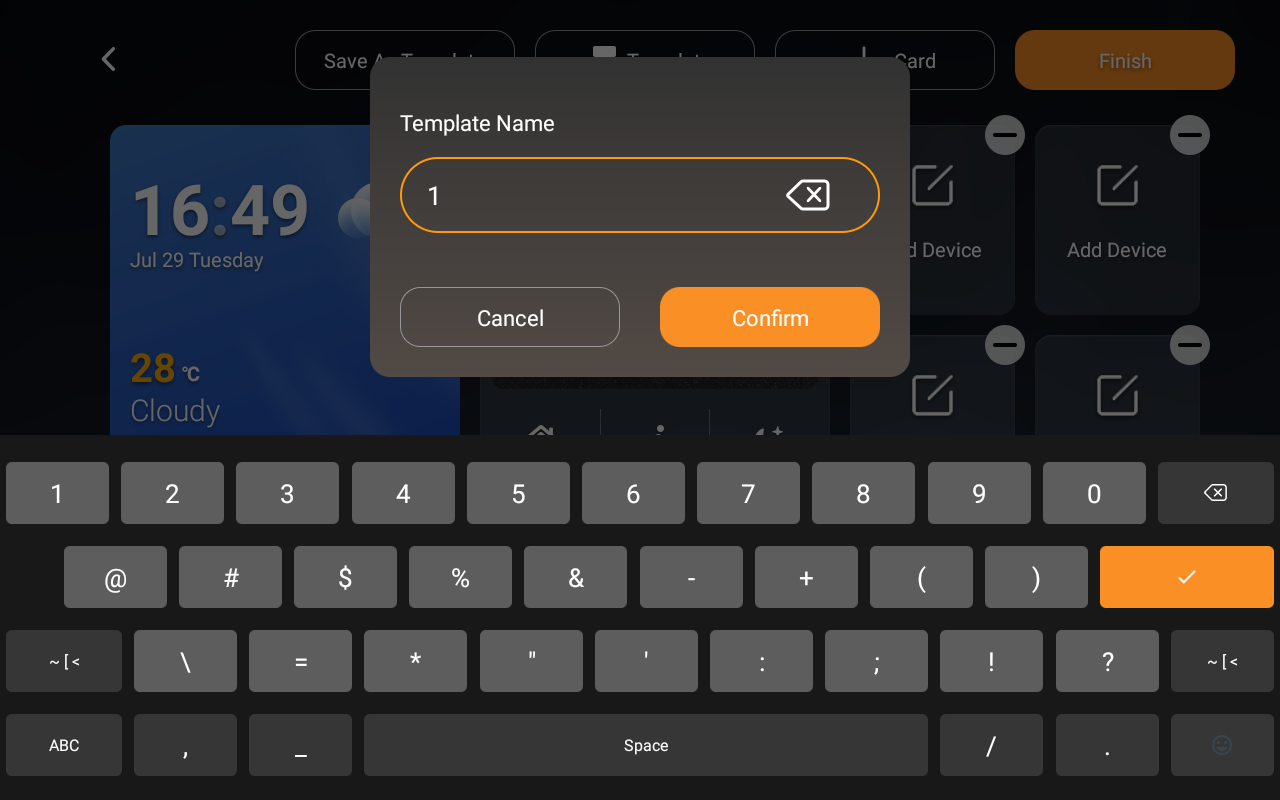
Your saved template will appear under Template > My Custom Pages.
Change Home screen layout
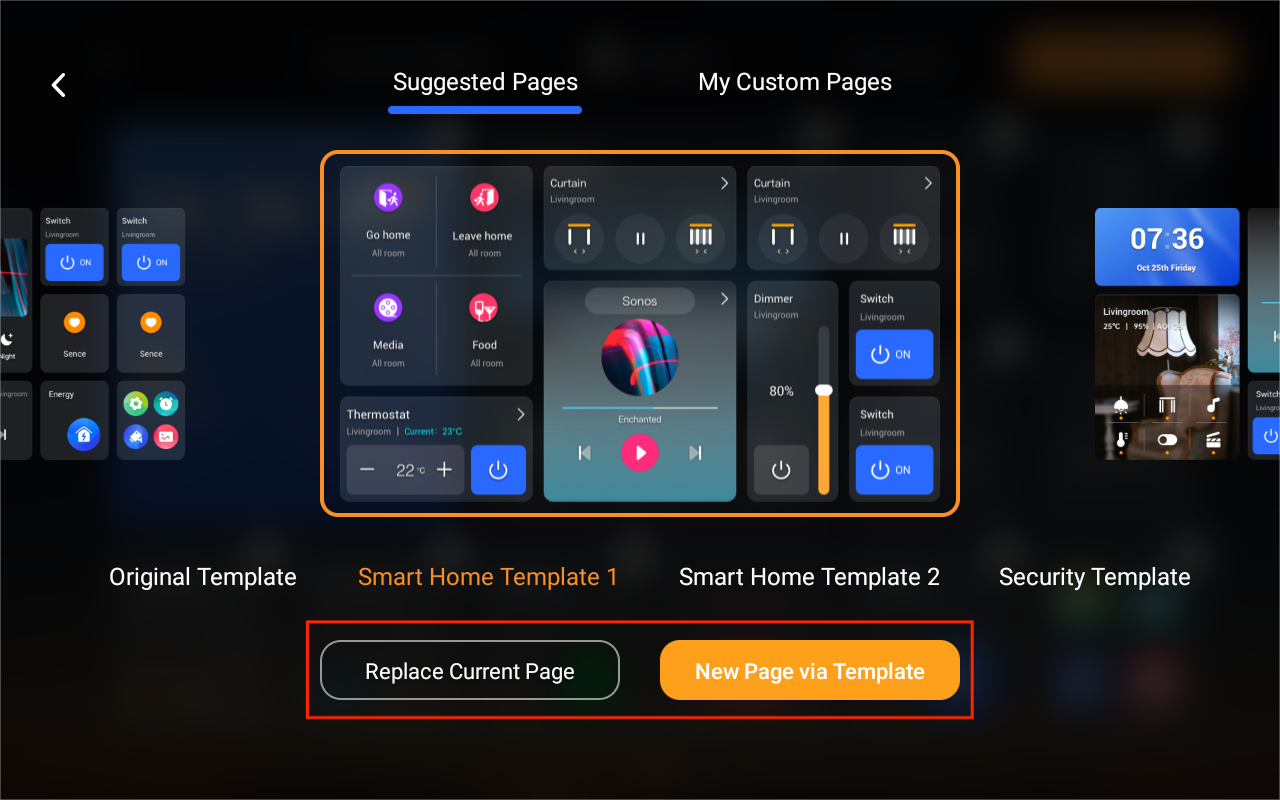
You can either replace the current Home screen with a different template or add a new one.
Tap and hold the blank area on the Home screen.
Tap
 .
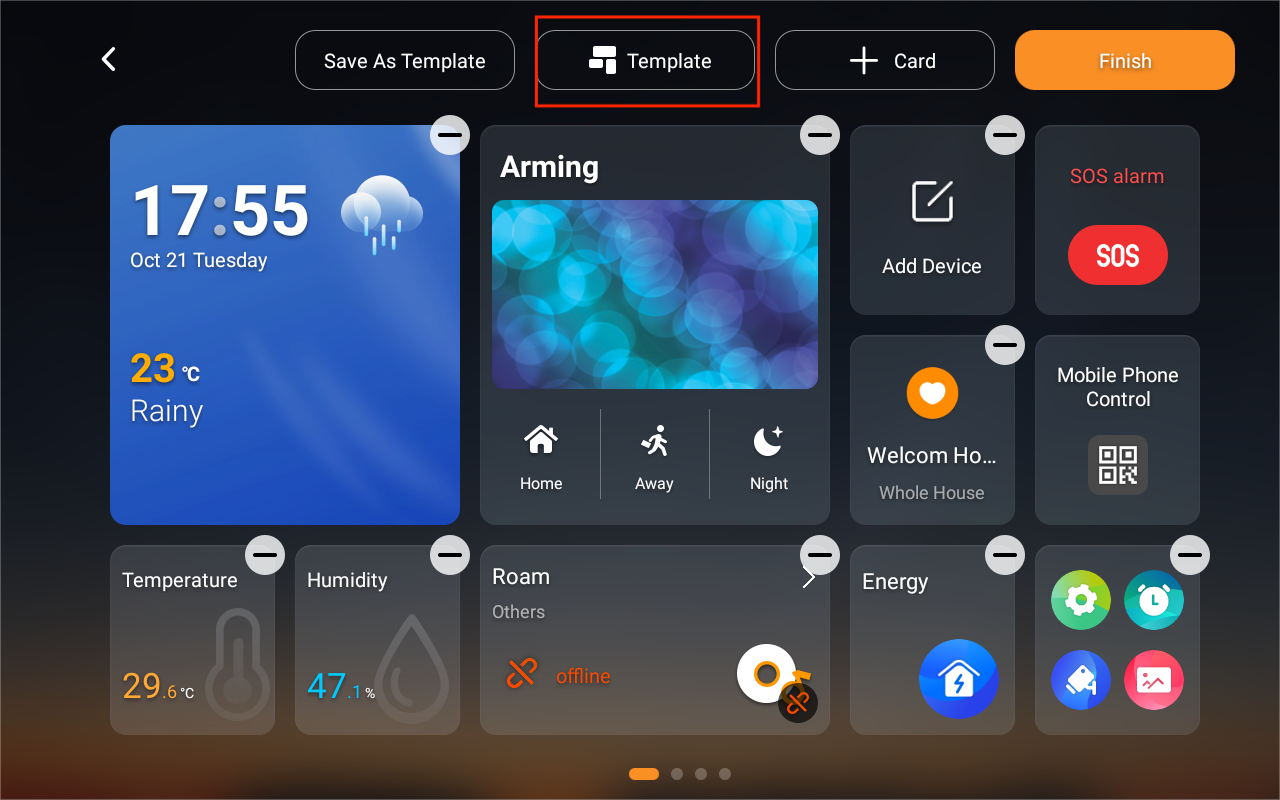
Select a default or custom template.
Choose whether to replace the current page or add a new one.
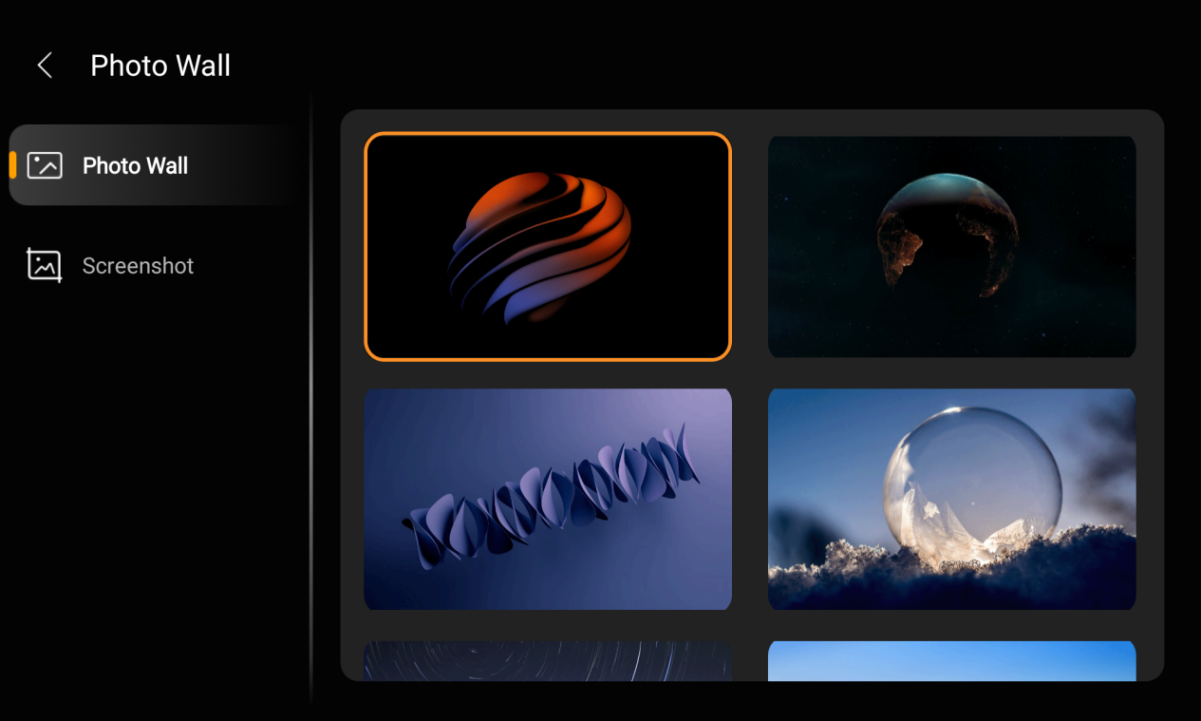
Wallpaper
Tap  at the bottom right of the Home screen, tap Photo Wall, and select the desired photo.
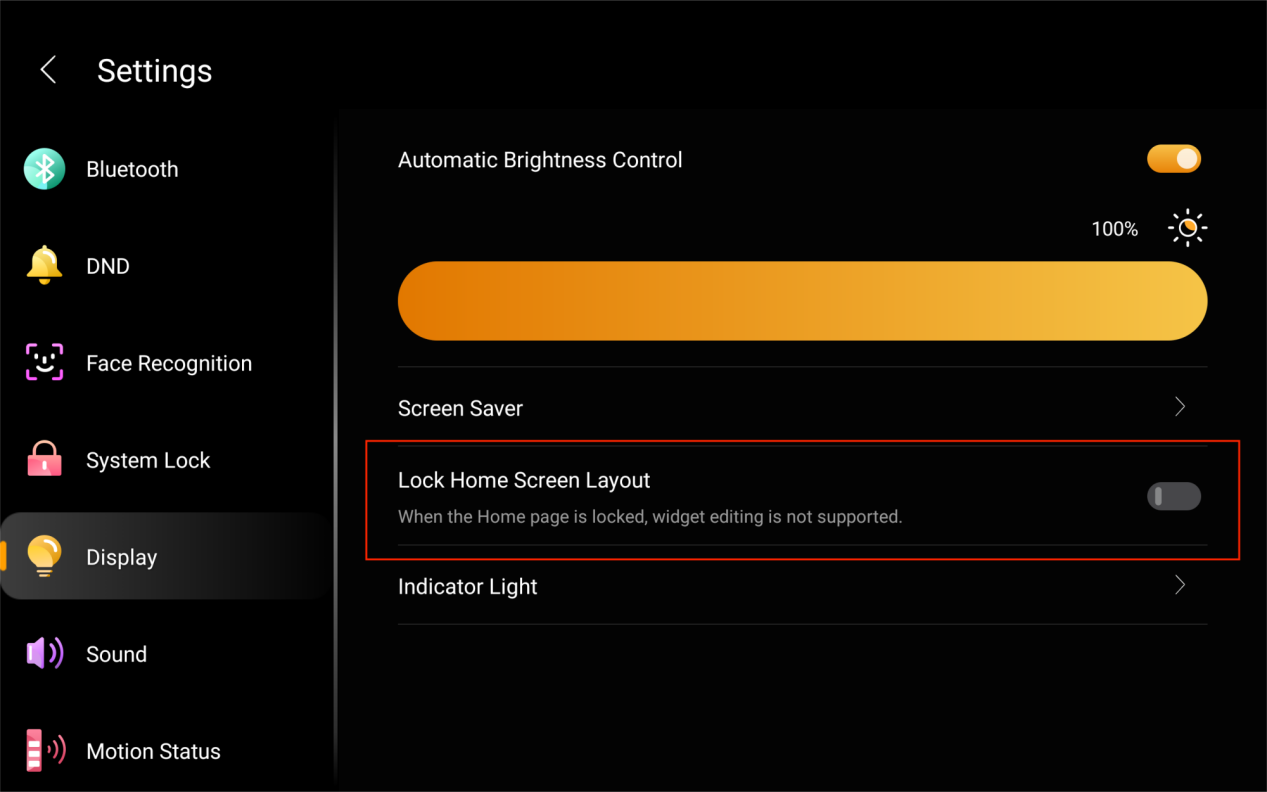
Lock Home screen
To prevent unauthorized or accidental changes to the Home screen, swipe down from the top edge of any screen, go to  > Display, and enable Lock Home Screen Layout.
Once enabled, the following actions will be disabled:
Adding, removing, replacing, or rearranging shortcut cards
Changing display templates
Modifying device settings
Deleting devices
Hotel guest room control QR code
NOTE:
Available only on panels used in hotel guest rooms for GRMS projects.
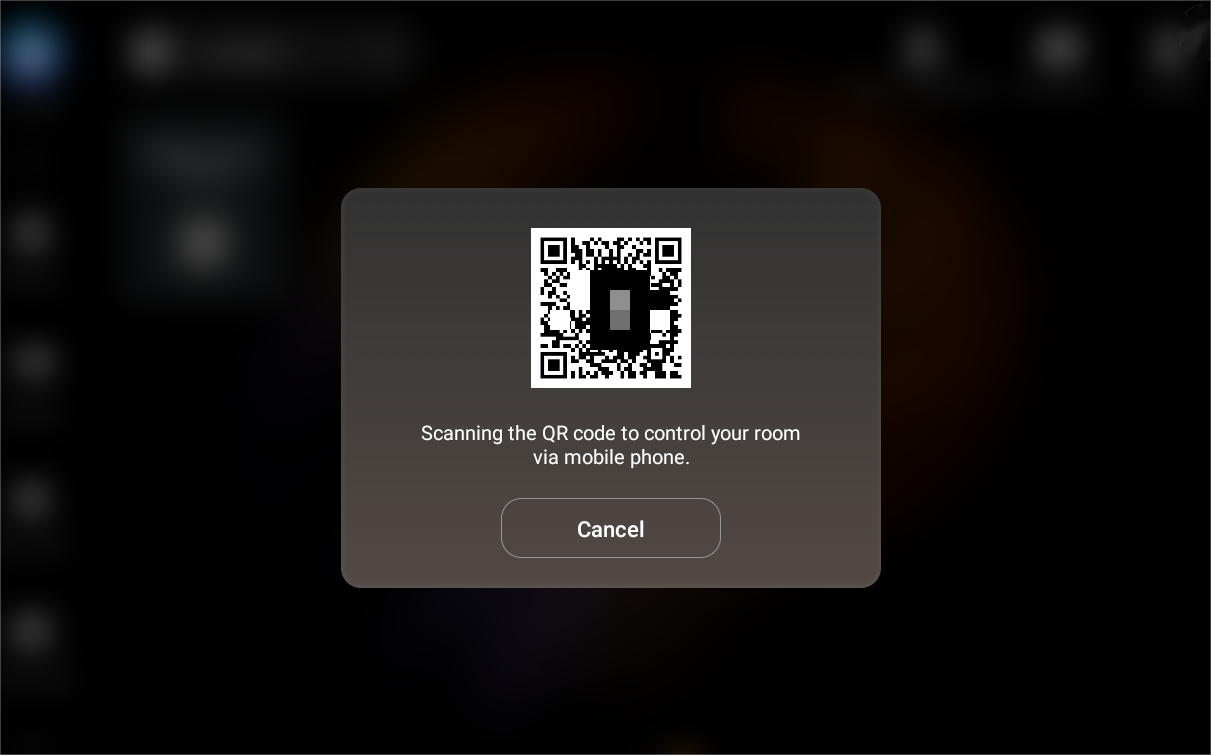
For panels in GRMS setups, a QR code will appear on the Home screen. Hotel guests can scan the code to control their room devices via an H5 web interface without downloading any app.
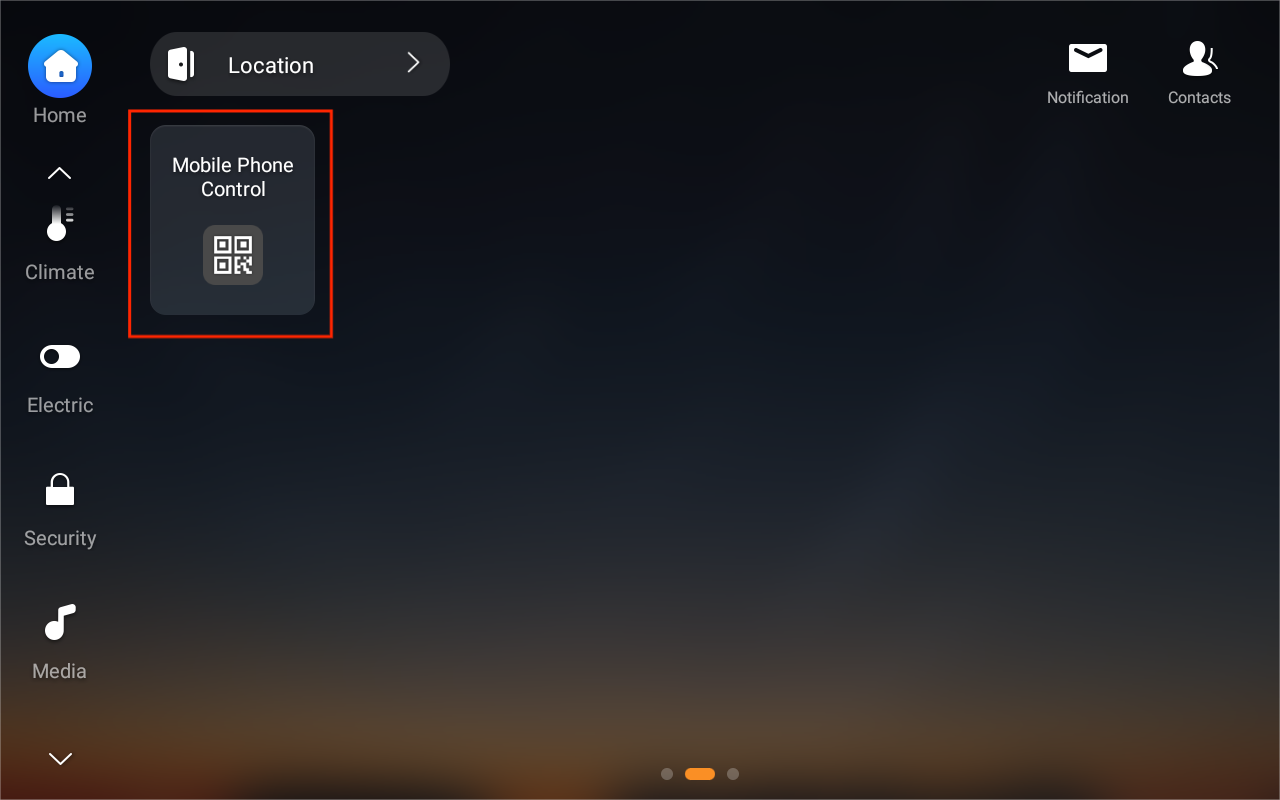
The QR code is valid only during the guest’s stay.
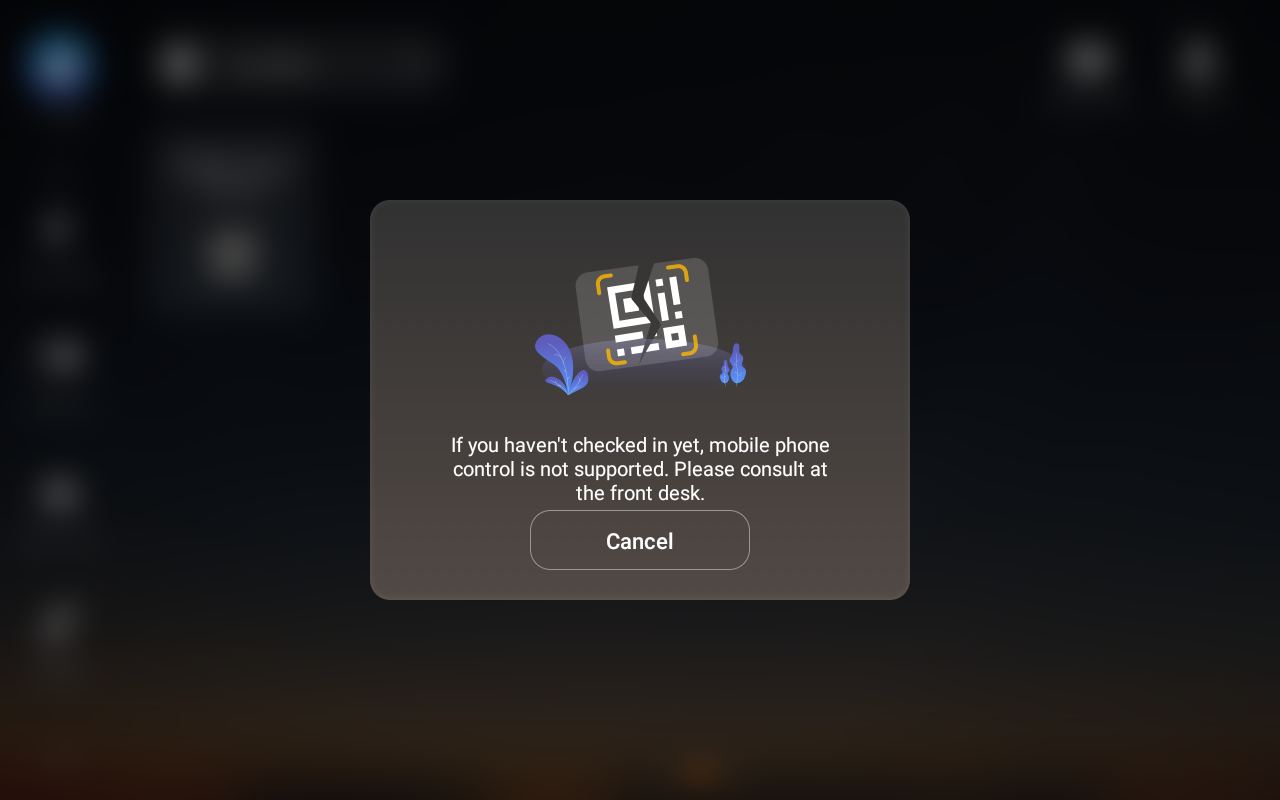
Once the guest checks out, the QR code becomes unavailable.
Community-specific features
The following features are exclusive to panels in community projects.
Amenity Booking
Easily reserve shared facilities like gyms, swimming pools, or community rooms.
Tap the Booking card on the Home screen.
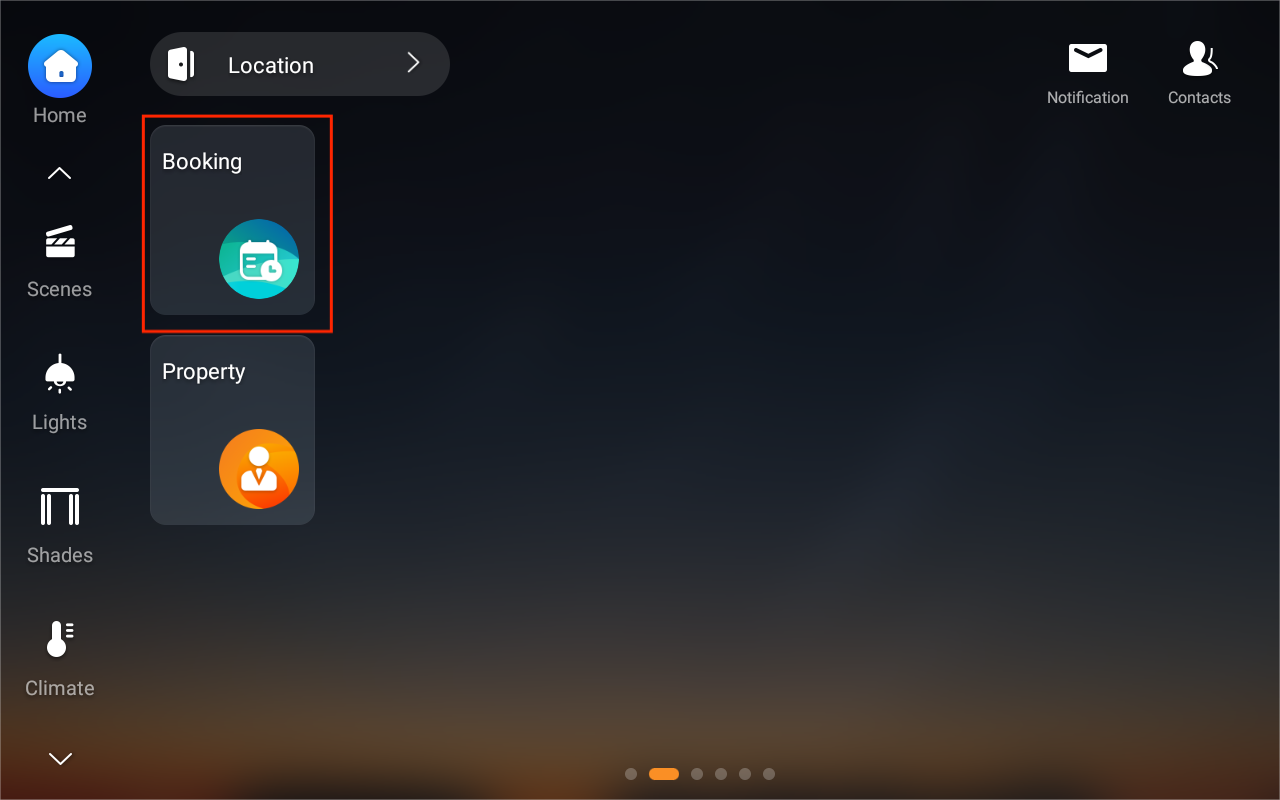
Select your preferred facility and desired date.
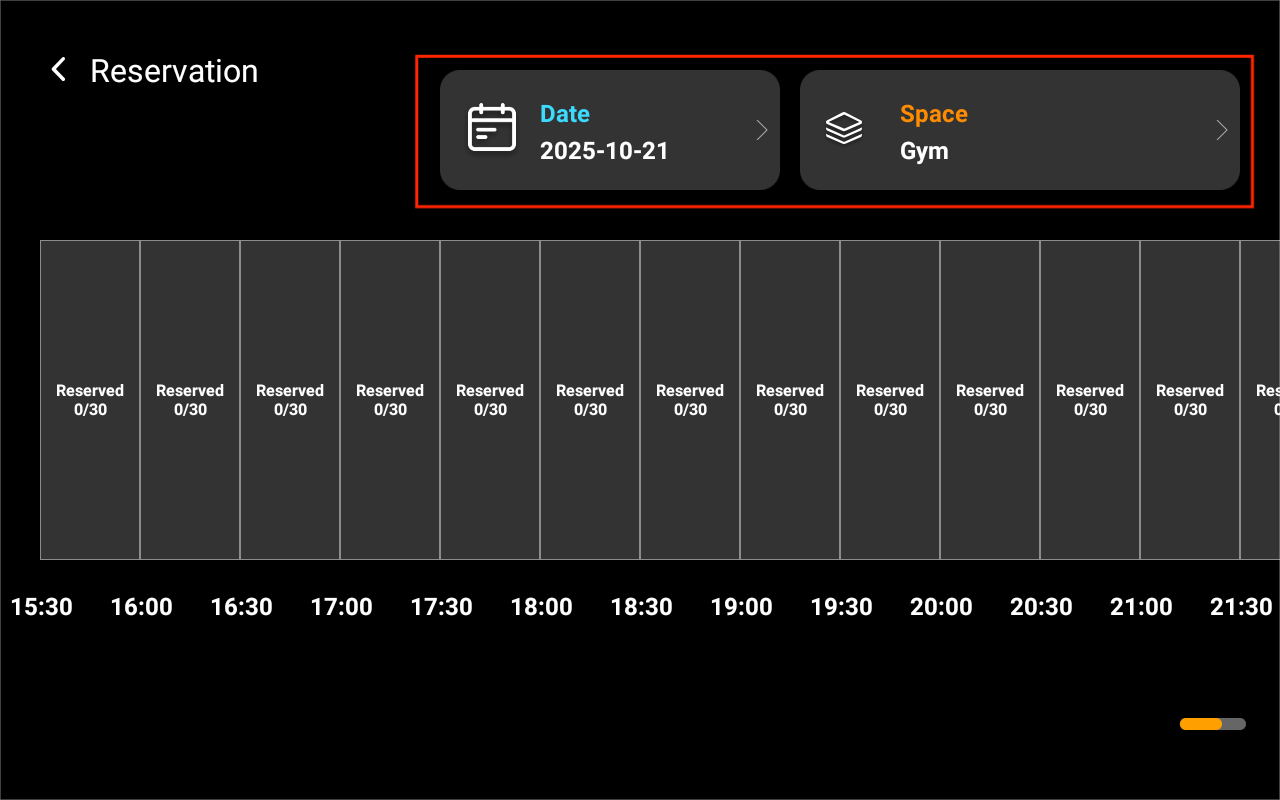
Pick an available time slot.
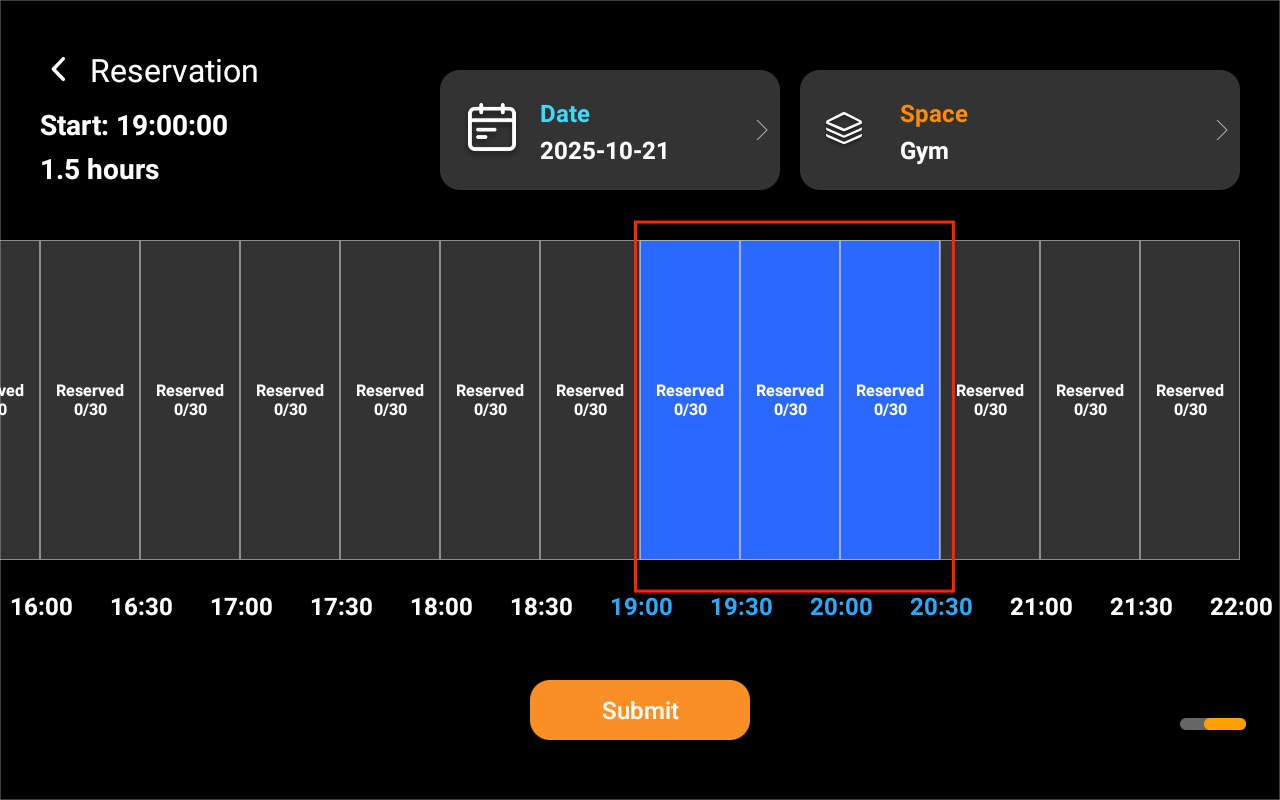
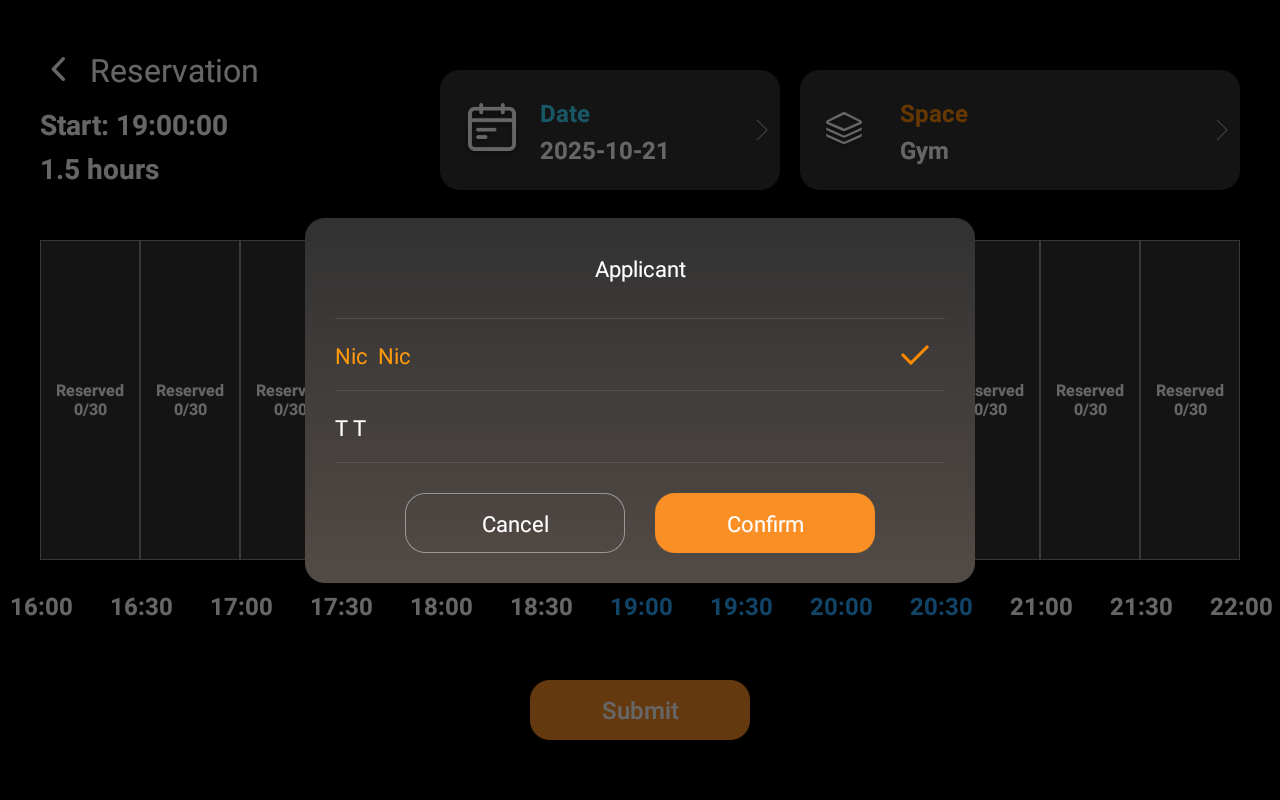
Tap Submit. If your community has multiple managers, select the appropriate one for verification and wait for confirmation.
Property Services
Access maintenance, community voting, and utility reporting in one place.
NOTE:
The Meter Reading option appears only if it has been enabled by your property manager.
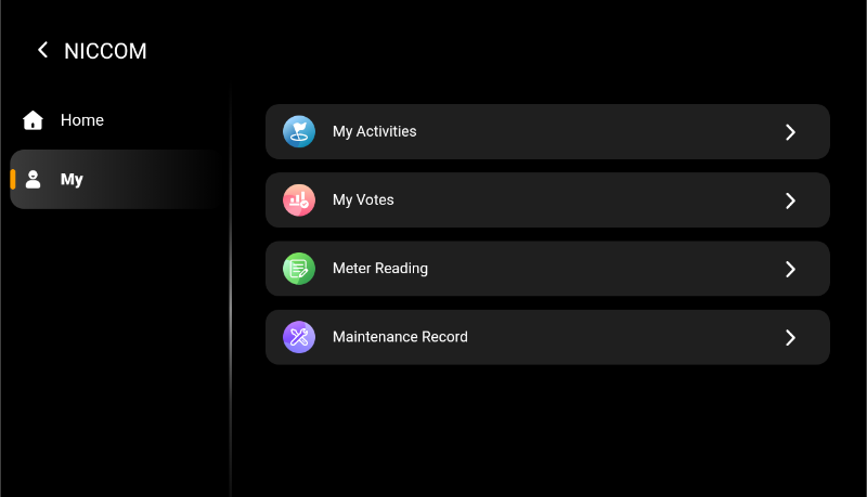
Tap the Property card on the Home screen to jump directly to Maintenance or Meter Reading.
To see all available options, tap More.
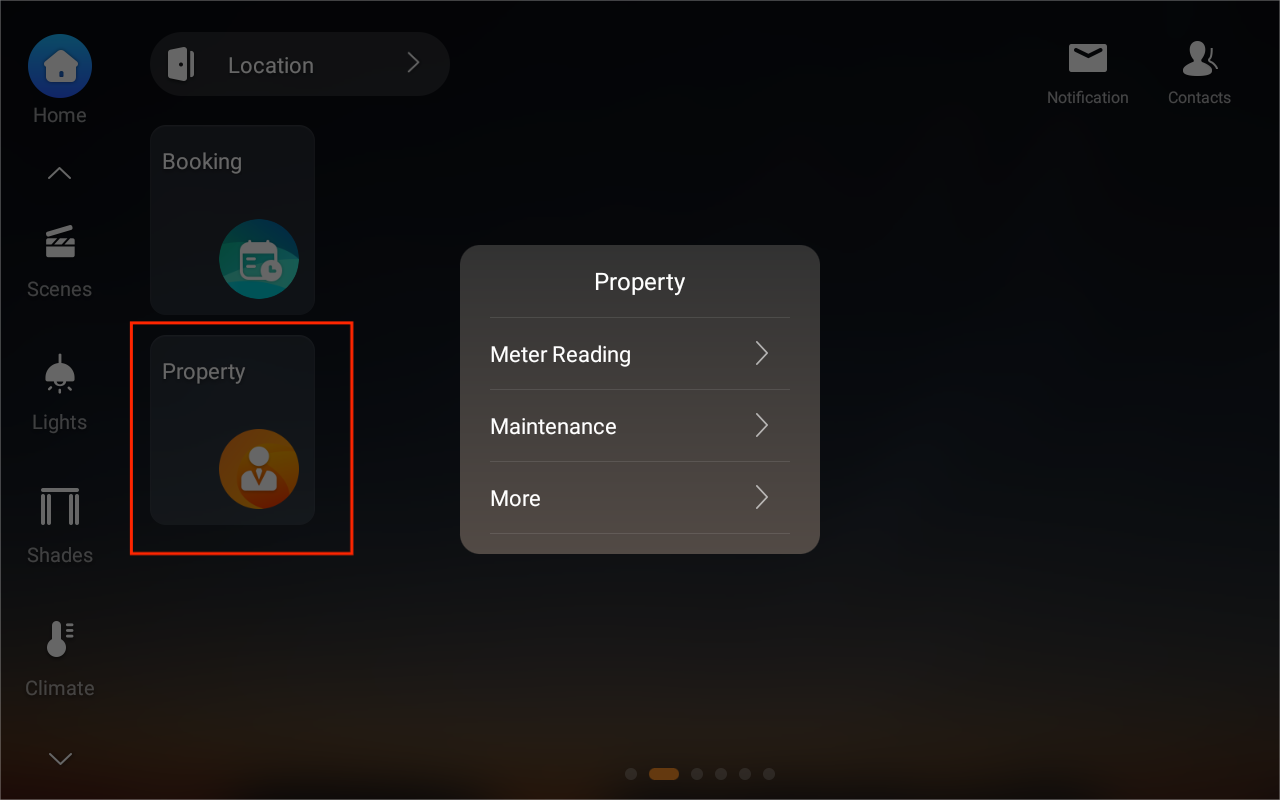
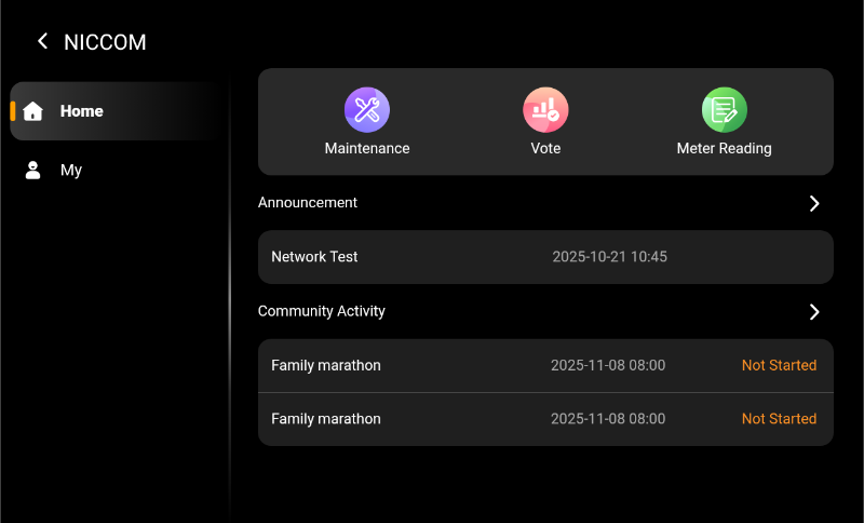
Maintenance: Submit new repair requests or track the status of existing ones.
Vote: Participate in community polls and view official results.
Meter Reading: Self-report utility data (water, electricity, etc.) directly to management.
Announcements: Stay updated with the latest community news.
Community Activity: Browse and sign up for upcoming local events.
Personal Activity: Go to the Me screen to review your past votes, requests, and history.
Robot Delivery
If your service provider has configured cloud integration, the Robot Send card will appear on your Home screen, allowing you to summon a delivery robot.
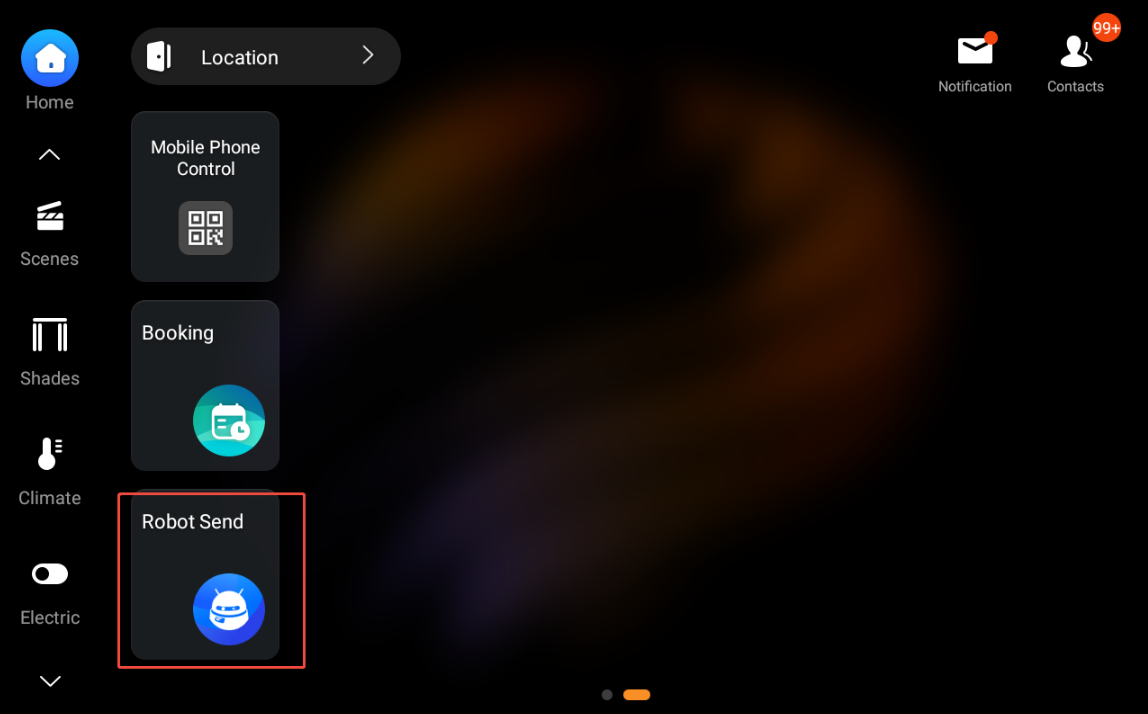
To start a delivery, tap the Robot Send card and follow the status updates:
Summon: Tap this to initiate a new delivery task.
Robot is On the Way: The robot has received the command and is navigating to your current location.
Robot Arrived: The panel will trigger a simulated "incoming call" to alert you that the robot is at your door.
Picked Up: Place your item in the compartment within 5 minutes and confirm on the screen.
Delivery Arrived: The robot completes the trip and you will receive a final completion notification.
Voice control
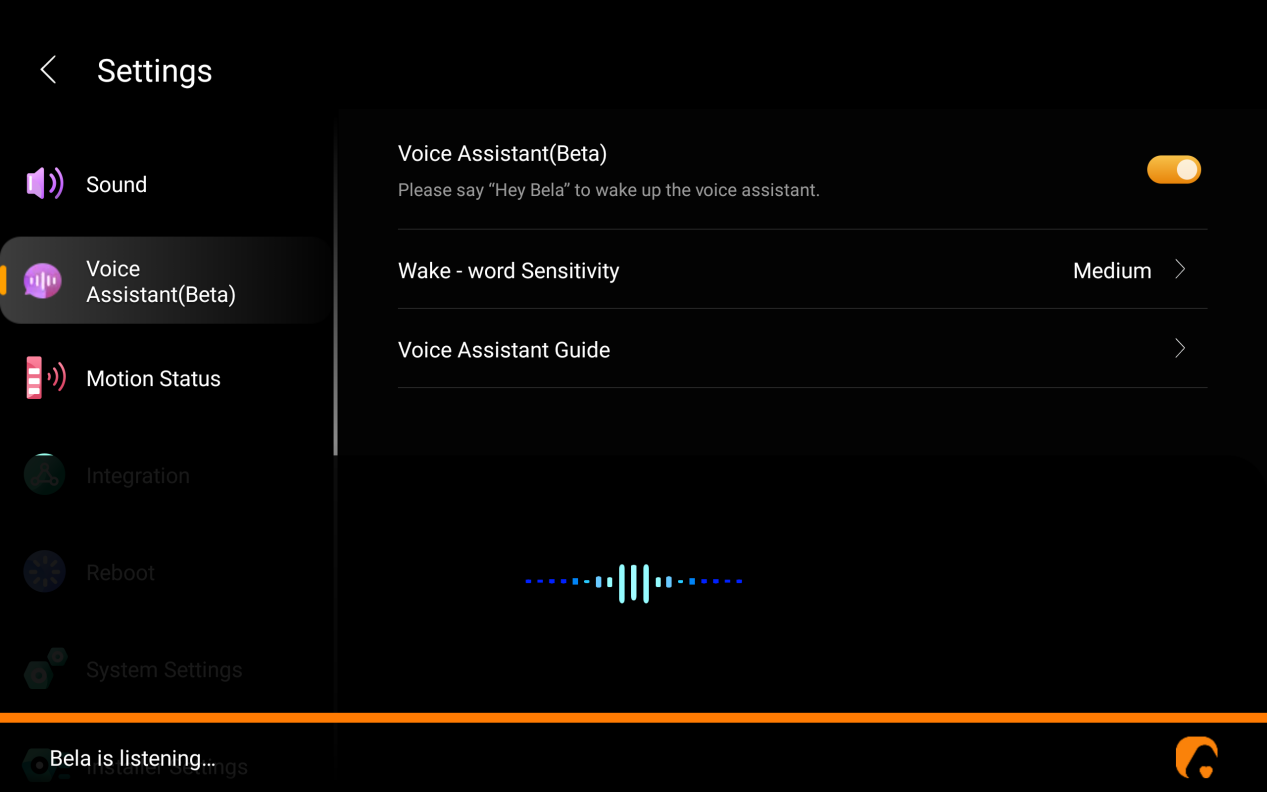
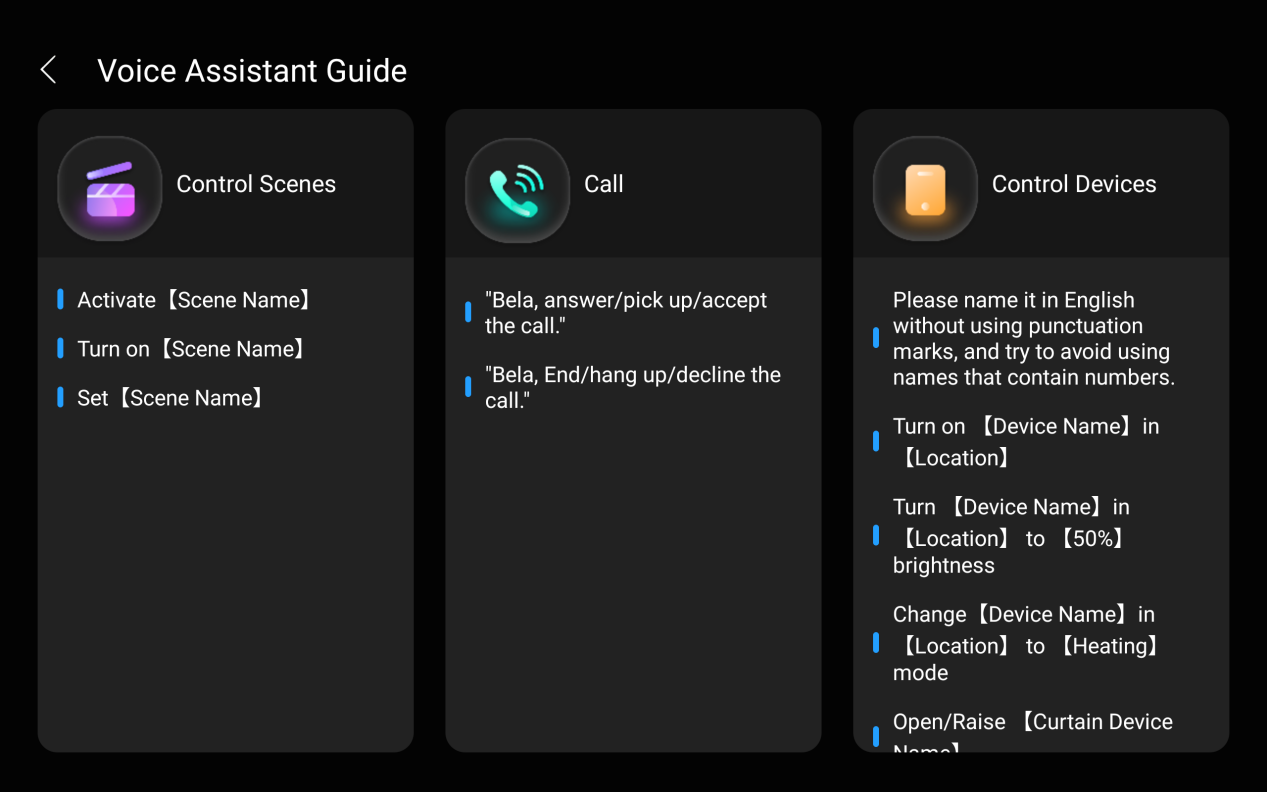
You can use the Bela voice assistant to control devices and scenes, as well as answer and end calls.
Enable Bela
Swipe down from the top edge of any screen.
Go to
 > Voice Assistant(Beta).
Toggle on Voice Assistant and adjust the Wake-word Sensitivity if needed.
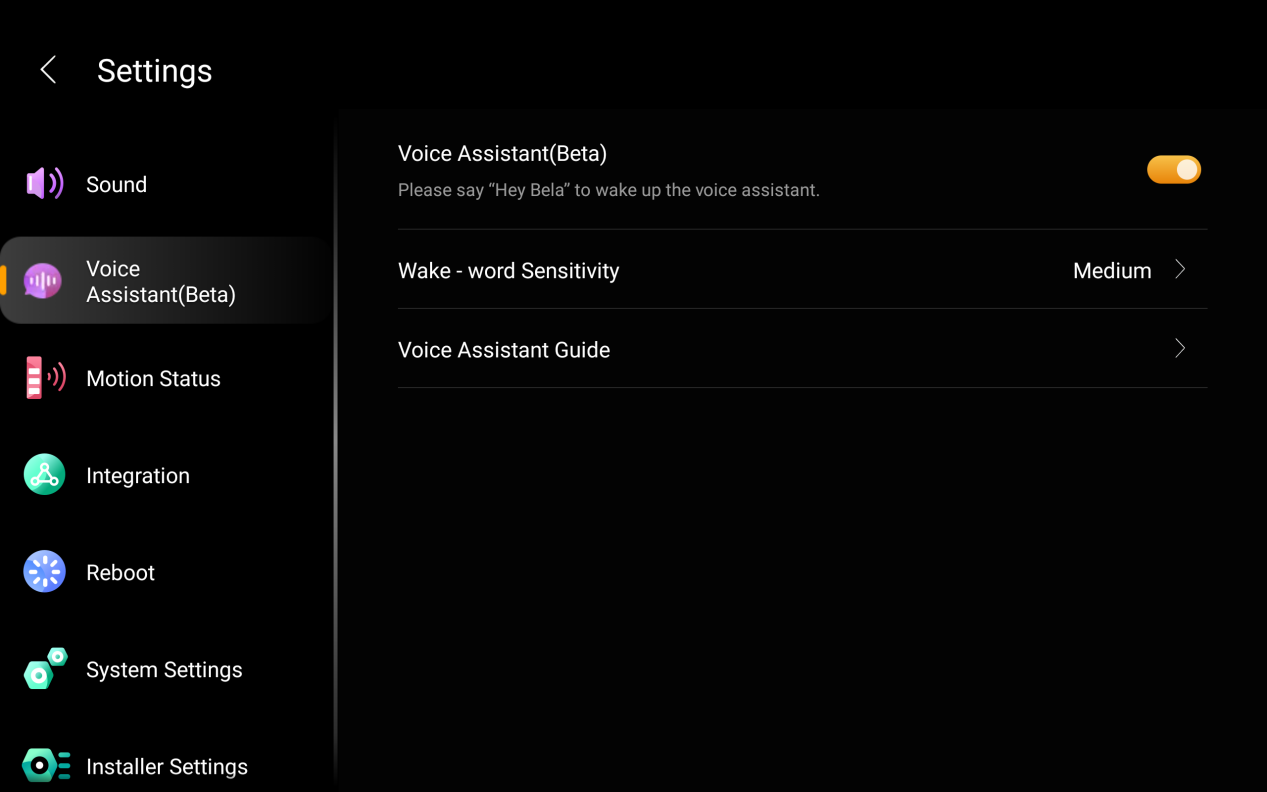
Use voice control
Say “Hey Bela” to wake up the voice assistant, then speak your command.
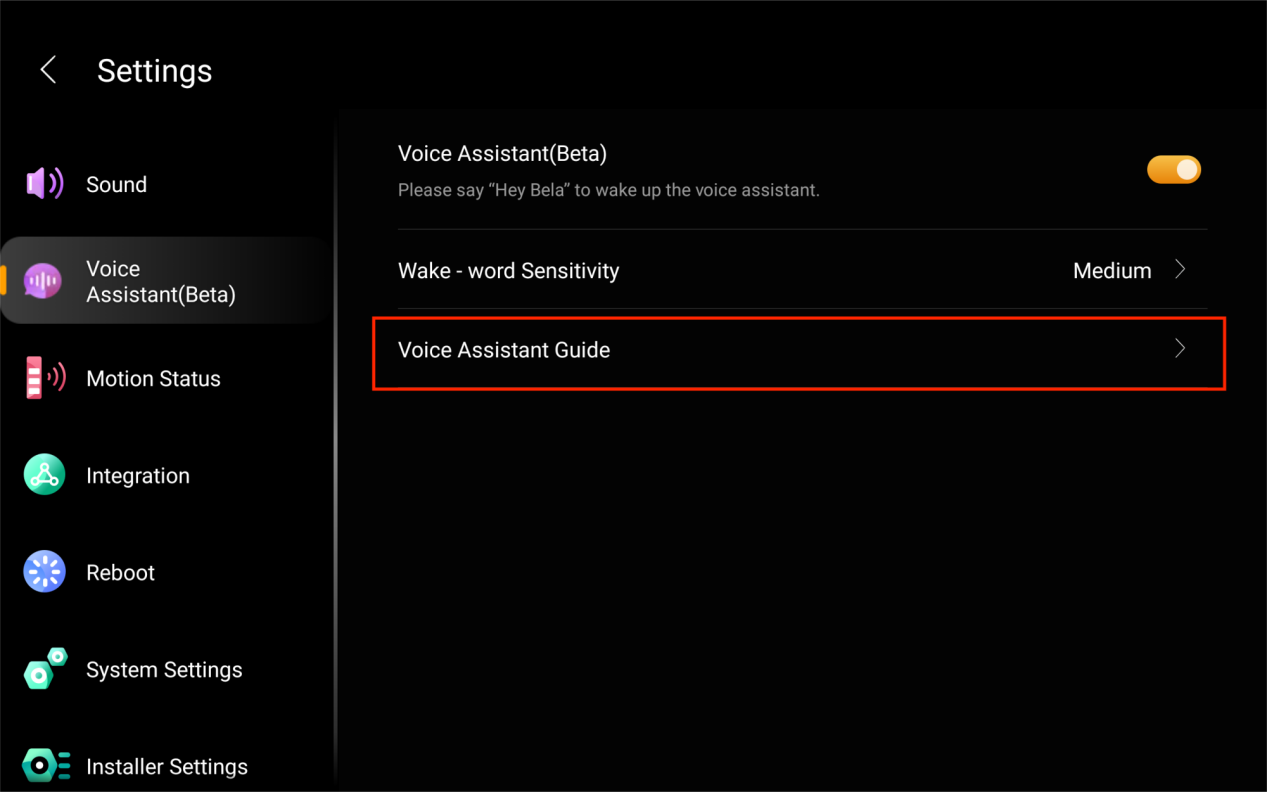
For supported commands, refer to the Voice Assistant Guide.
Gesture control
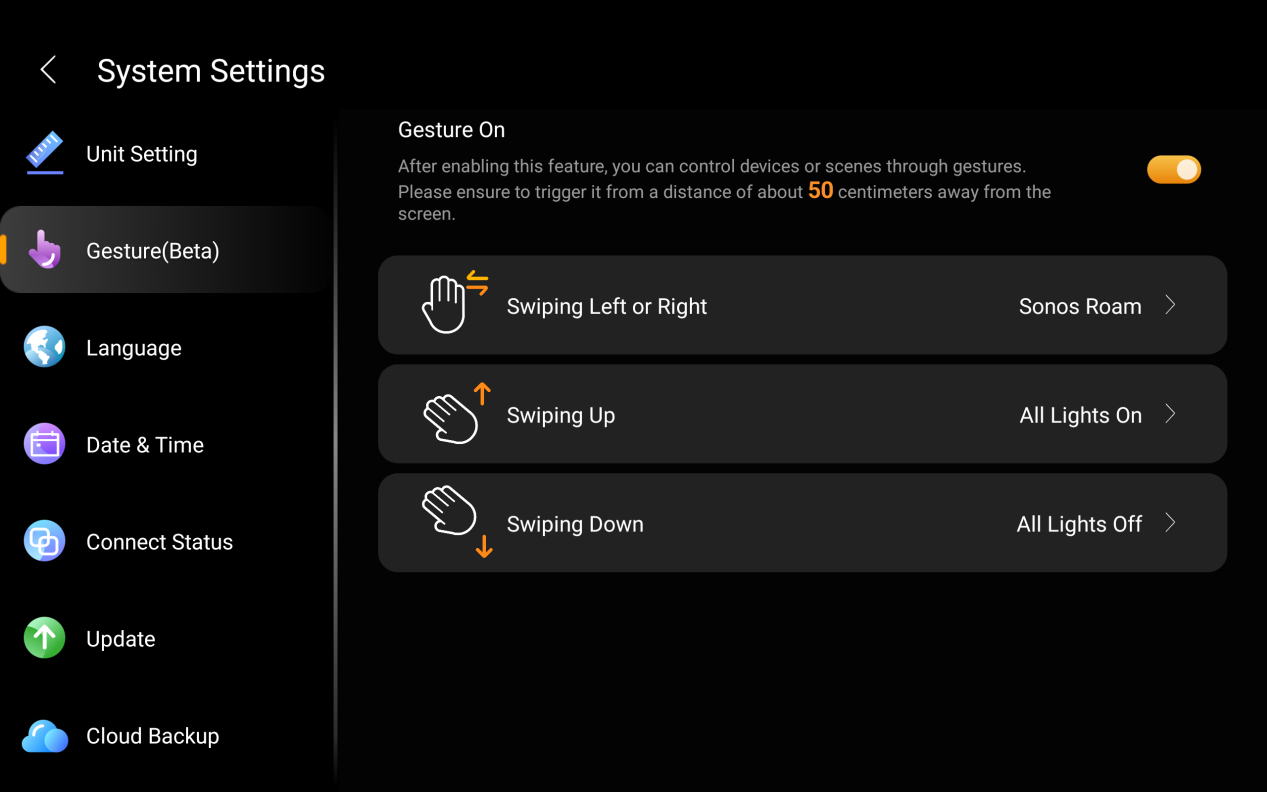
HyPanel Supreme supports gesture control, allowing you to operate the panel by swiping your hand about 50 cm (20 inches) in front of it for quick, touch-free control.
To enable and configure gesture actions, go to  > System Settings > Gesture(Beta).
Learn the server status
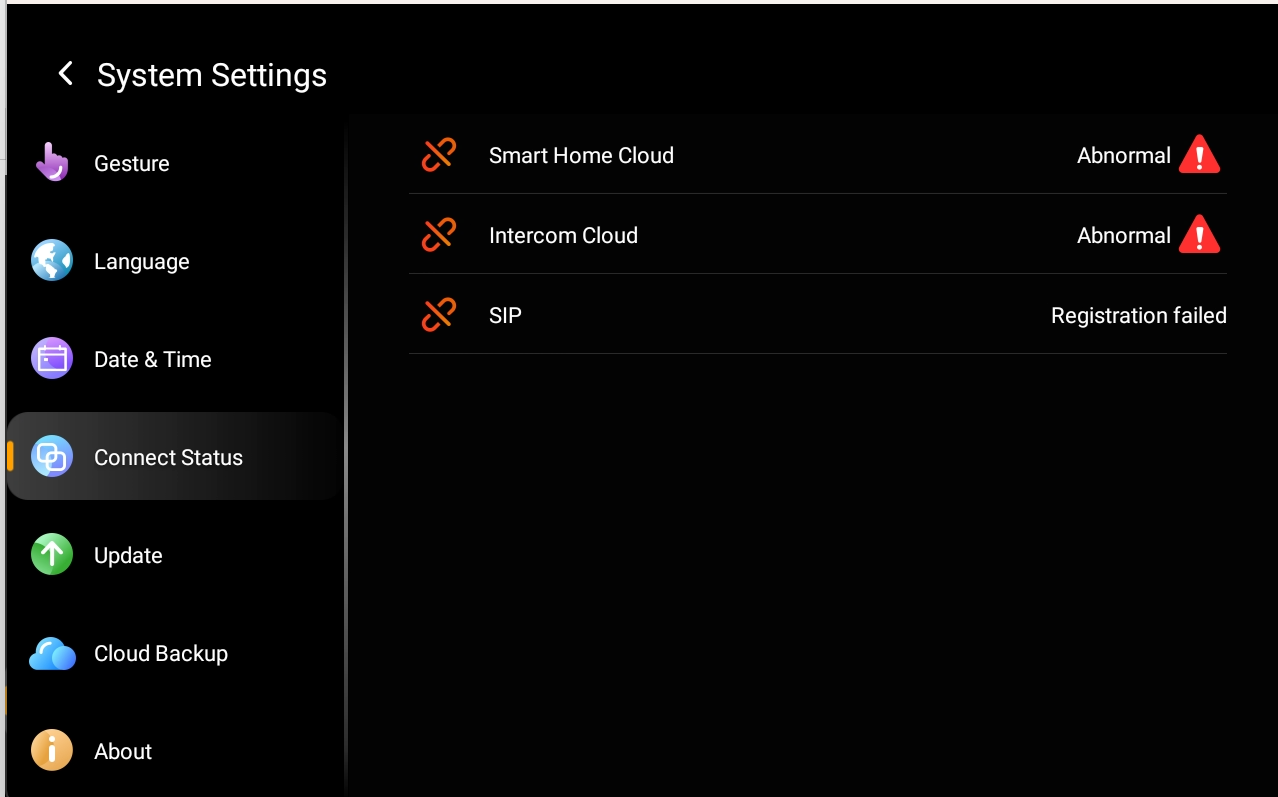
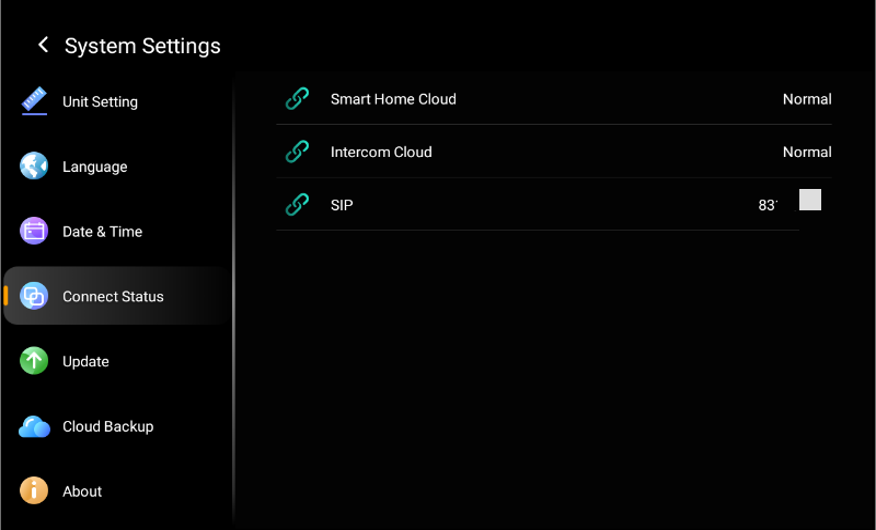
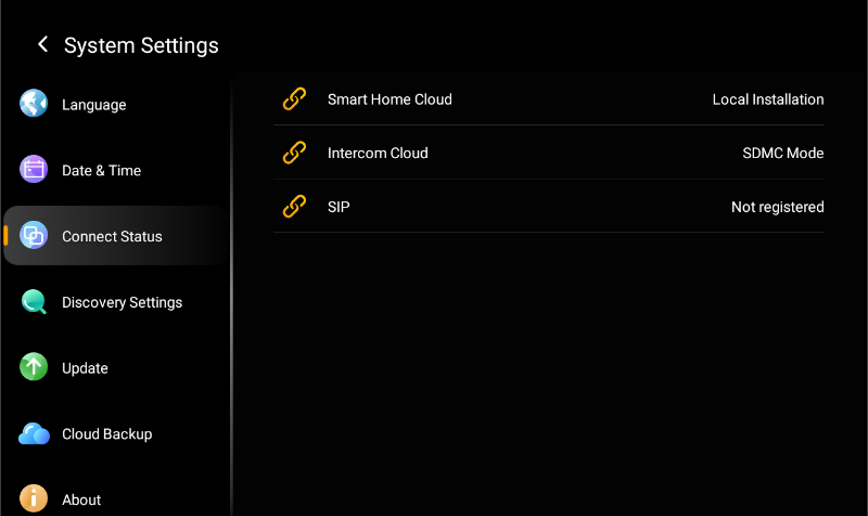
When you find some features do not work, you can firstly check if the server connection is normal.
Swipe down from the top edge of any screen, and tap
 > System Settings > Connect Status.
The status of your server connection will display in the center.
The screen that displays a green
 , it indicates that your device is successfully connected to the cloud server, and the communication with server is normal.
The screen that displays a yellow
 , it indicates that your device is being used locally without the cloud connection.
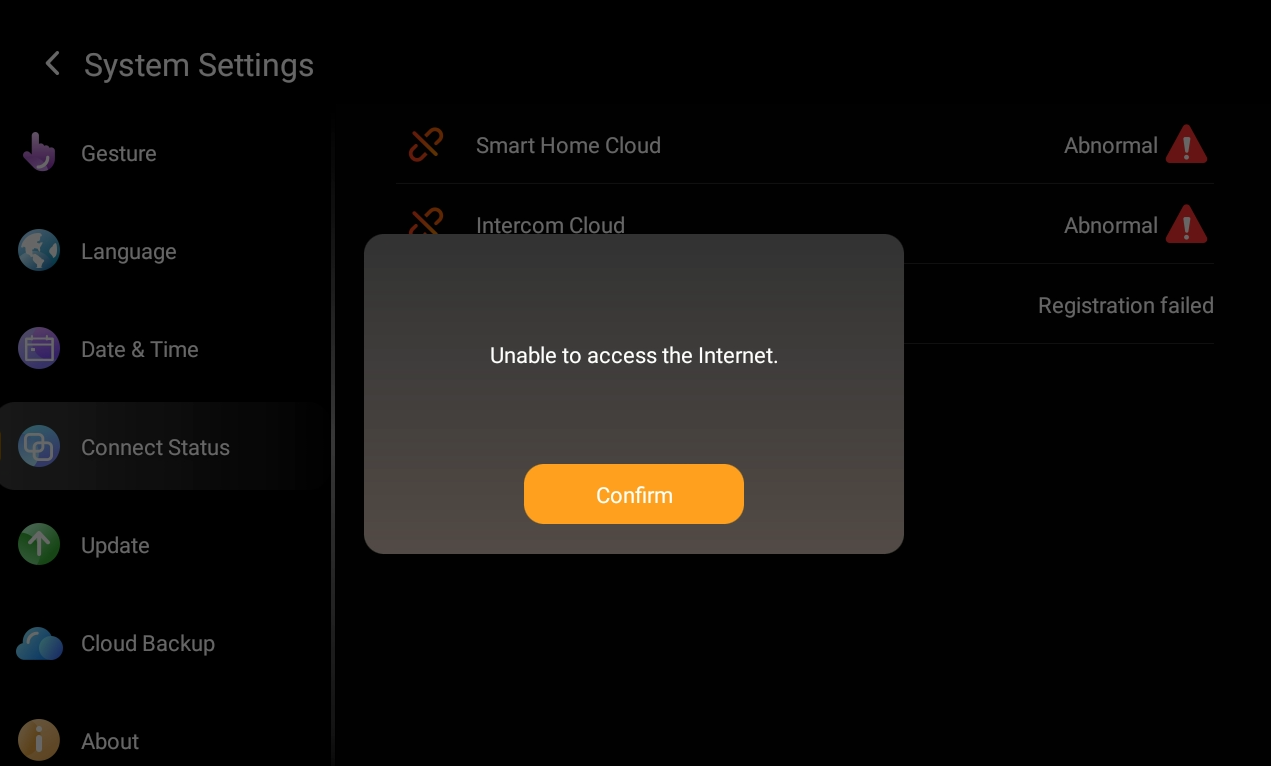
If the screen displays a red indicator
 , it means an issue has occurred. Tap
 to view the error details.
For assistance, contact your service provider or the akubela technical support team.