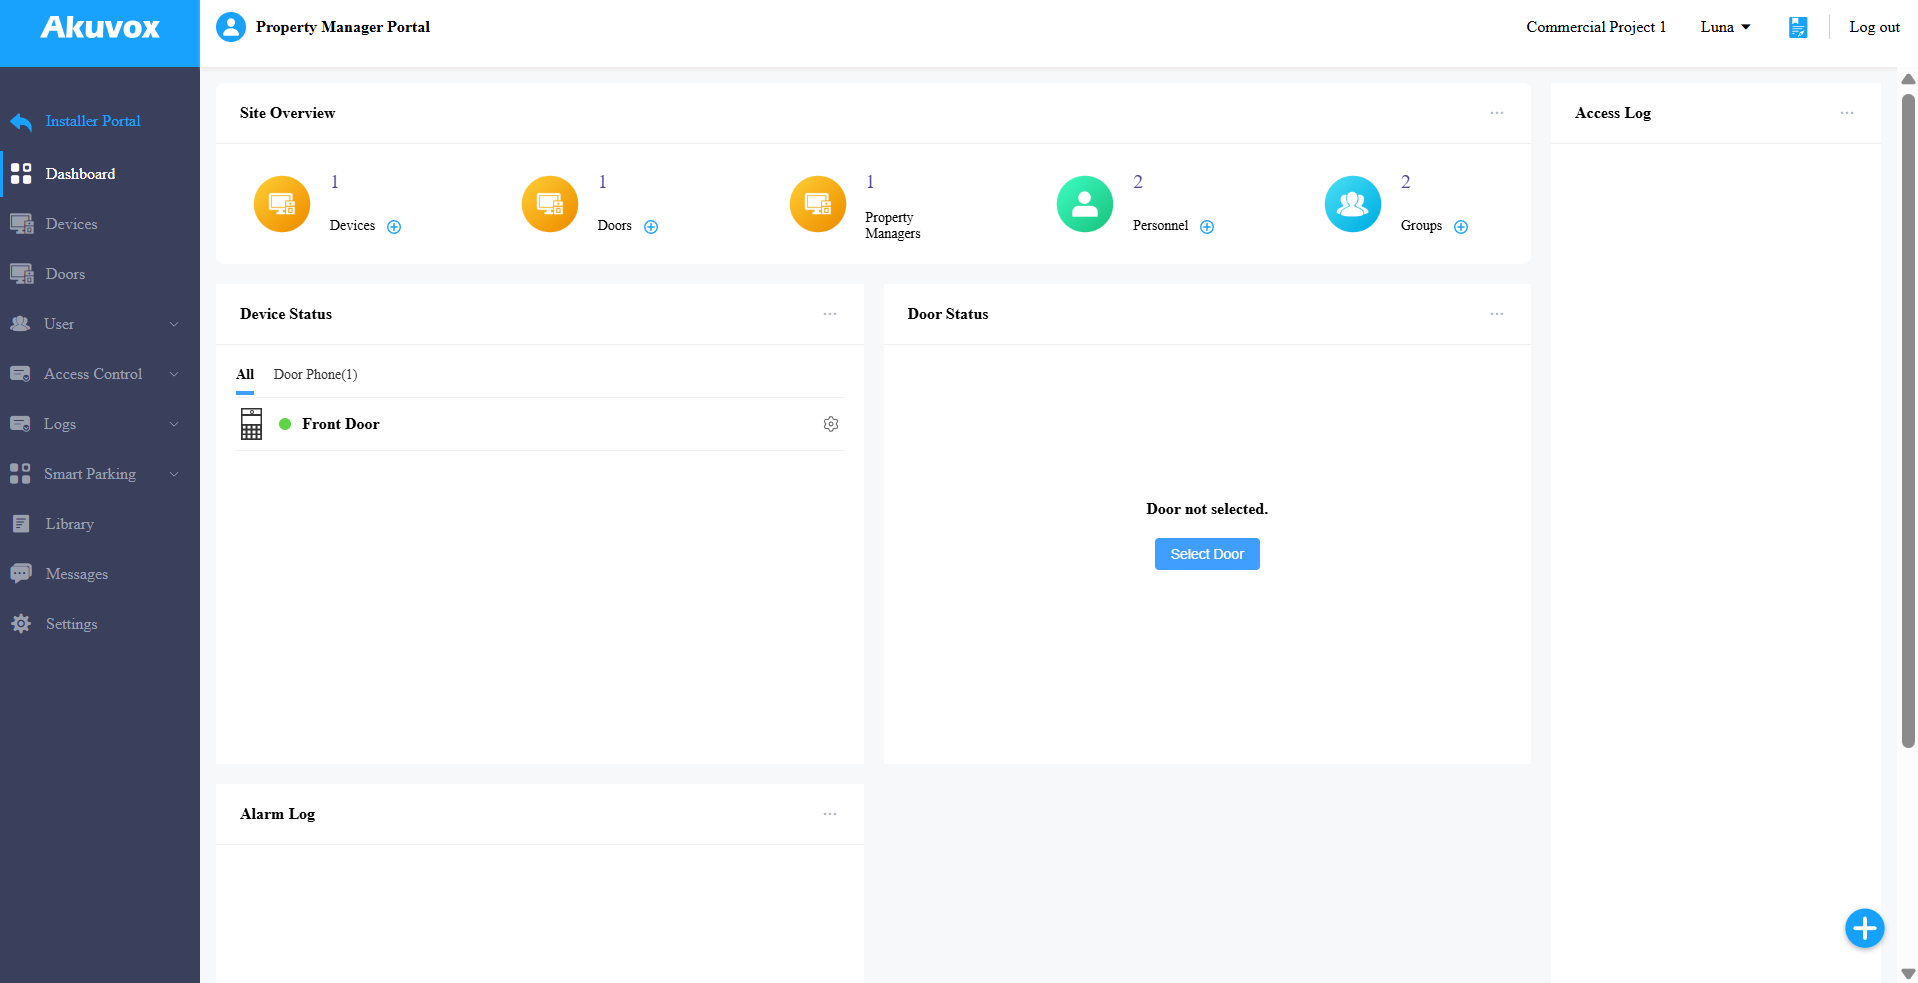
The first time you manage a single-company commercial project, follow the quick start instructions for basic configurations.
As an installer, you can add devices and personnel, and set up access control.
As a project manager, you can add personnel and set up access control.
Click Quick Start to start the configuration.
During the quick start process, click Skip to bypass a step; click Next to proceed; click Back to return to the previous step.

Add Devices
ONLY installers have permission to add devices. If you are a property manager, simply skip this section.
Click +New Device on the right.
Set up the device. Click here to view the explanation of each item.
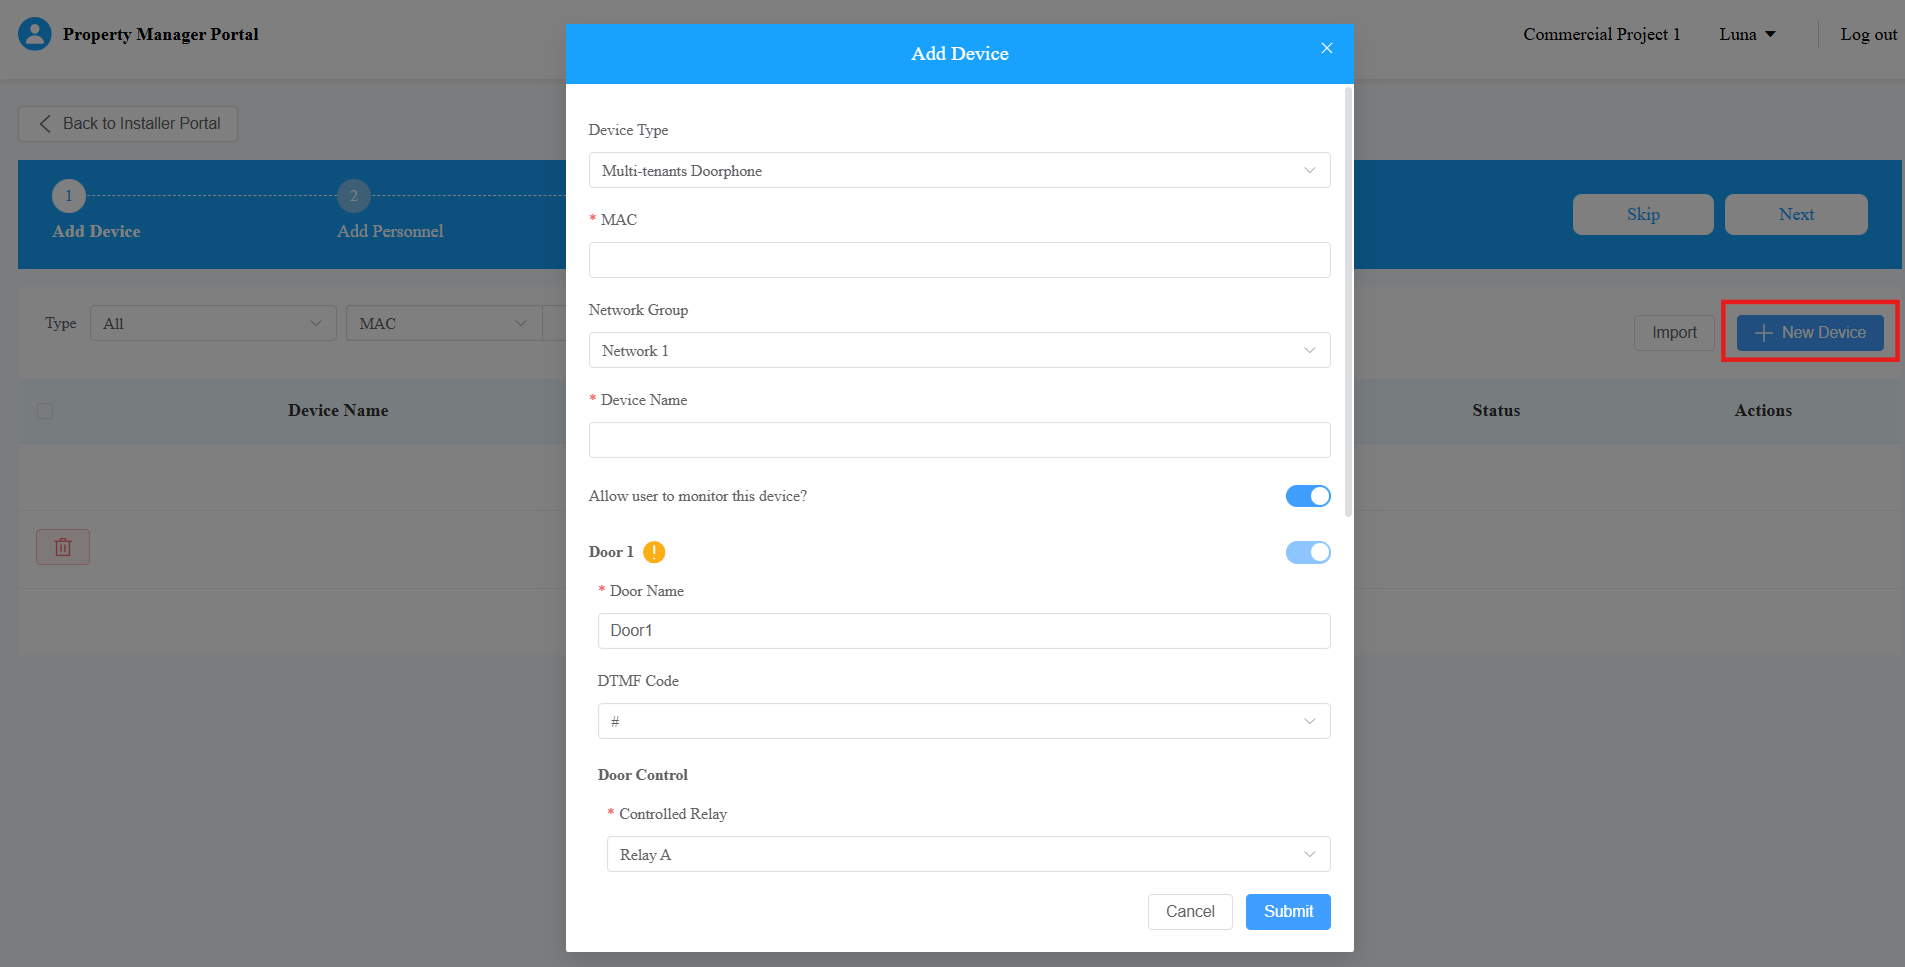
Submit the setting.
You can import devices through a template.
Click Import > Download Import Template.
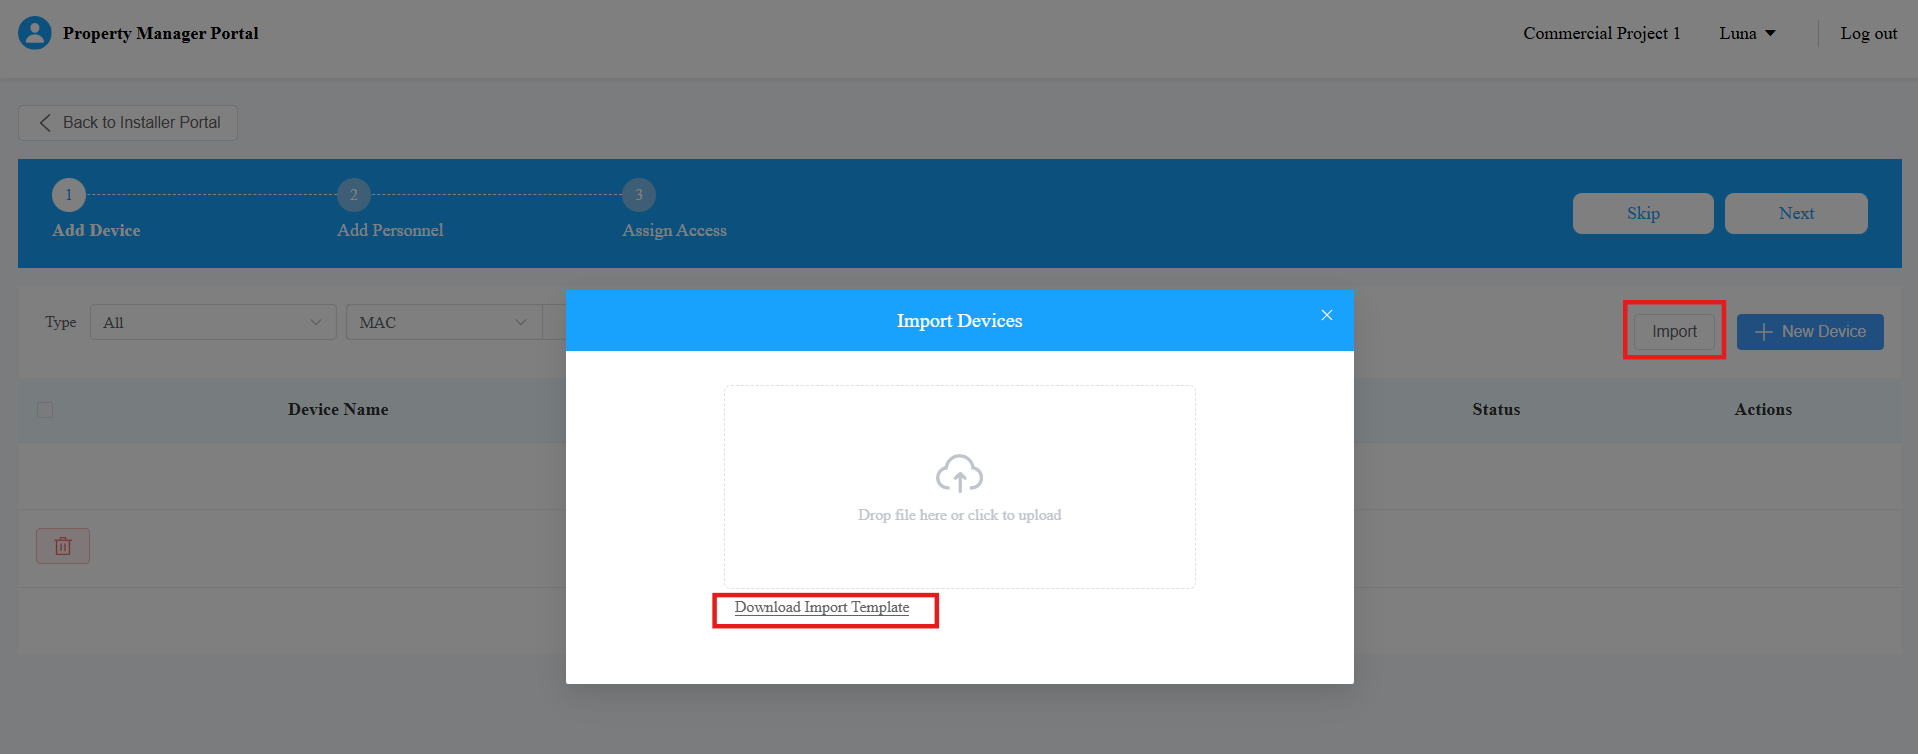
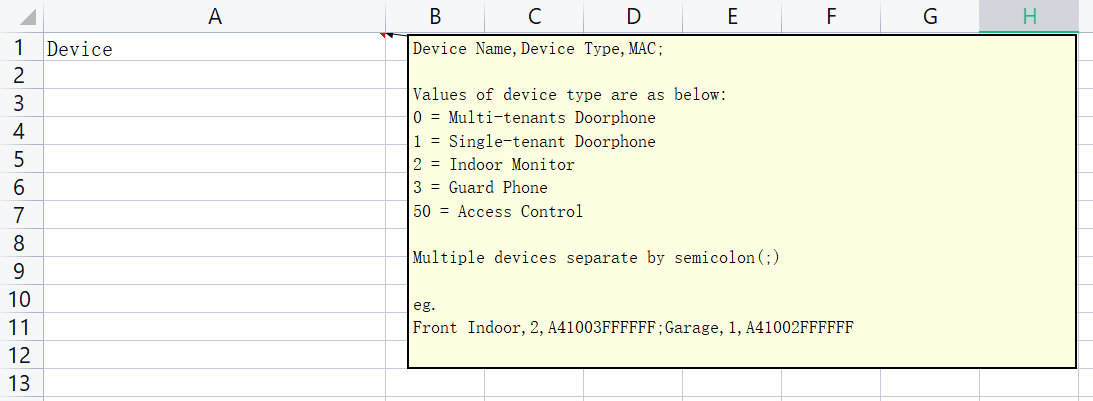
Enter the device information in the template.
Move your mouse cursor to the Device column to view the input instructions.
After filling in the template, upload the file.
“Import Complete” will display.
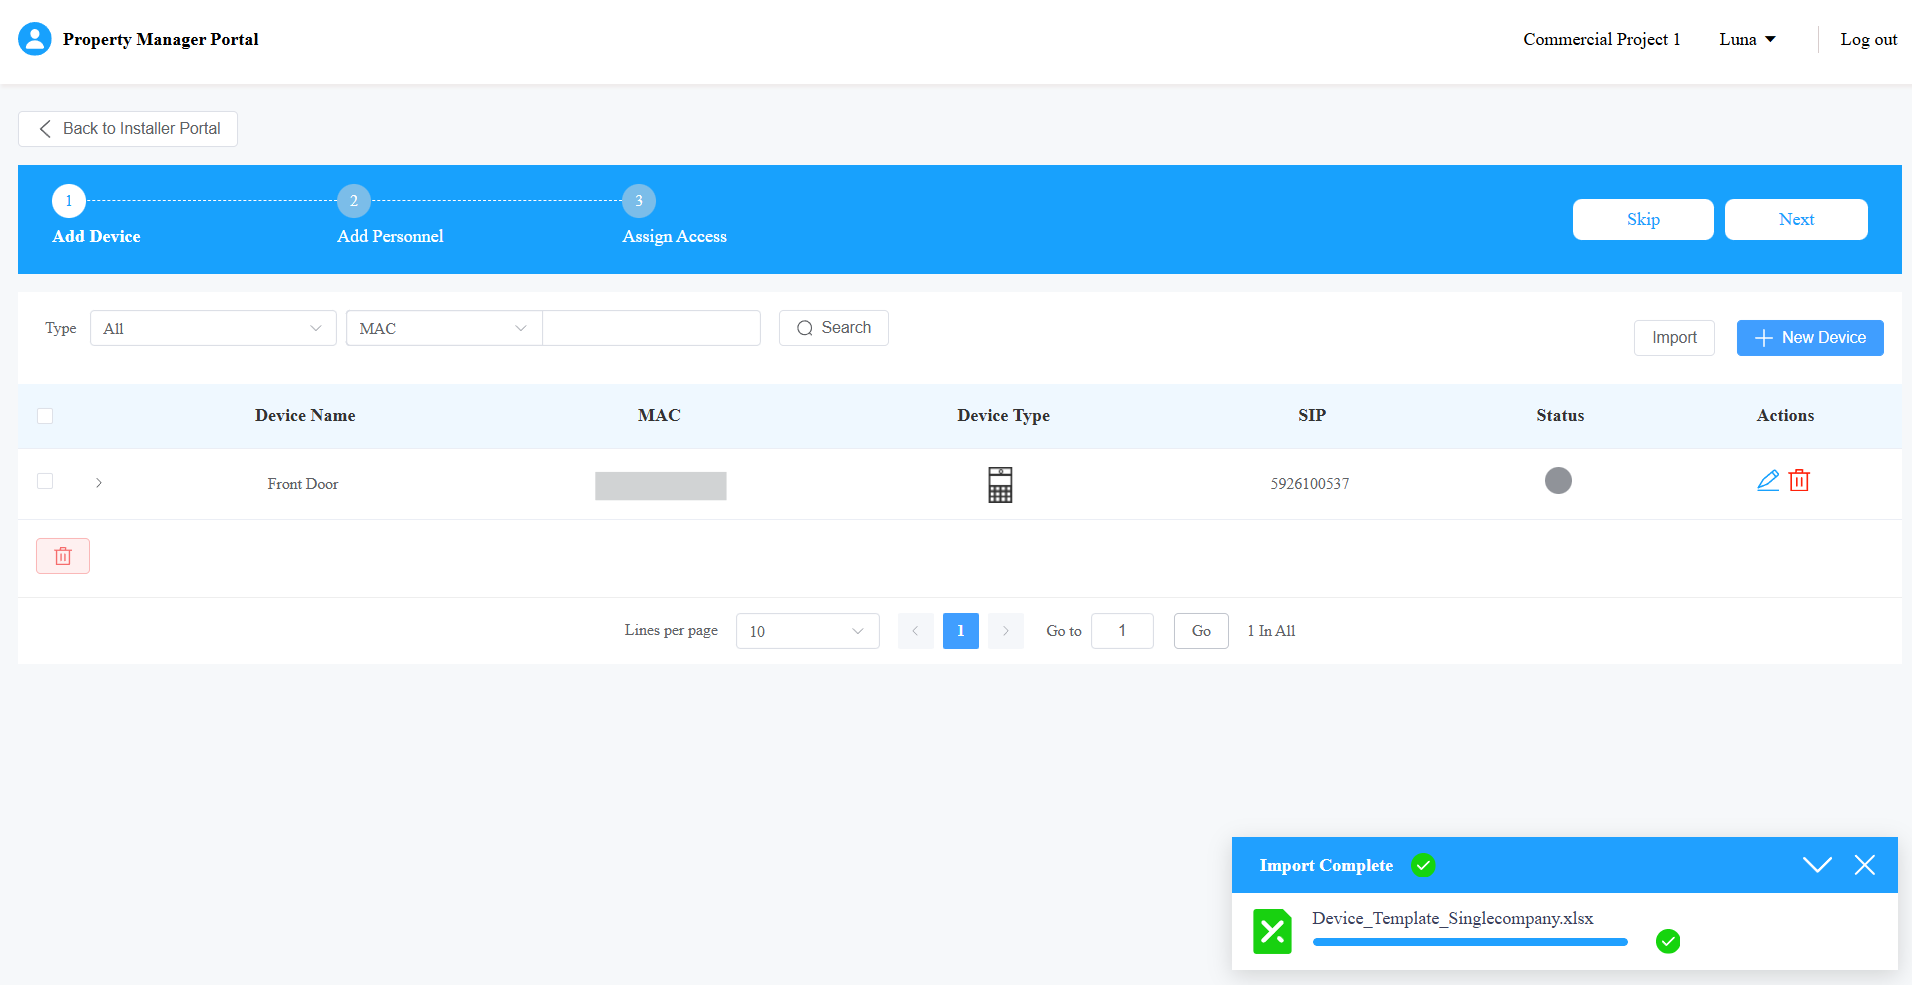
After adding the device, click  to modify its settings; click
  to delete it.
Add Personnel
Click New Personnel on the right to add a user.
Enter the user’s information and set up his/her permissions.
Click here to view the explanations of each item.
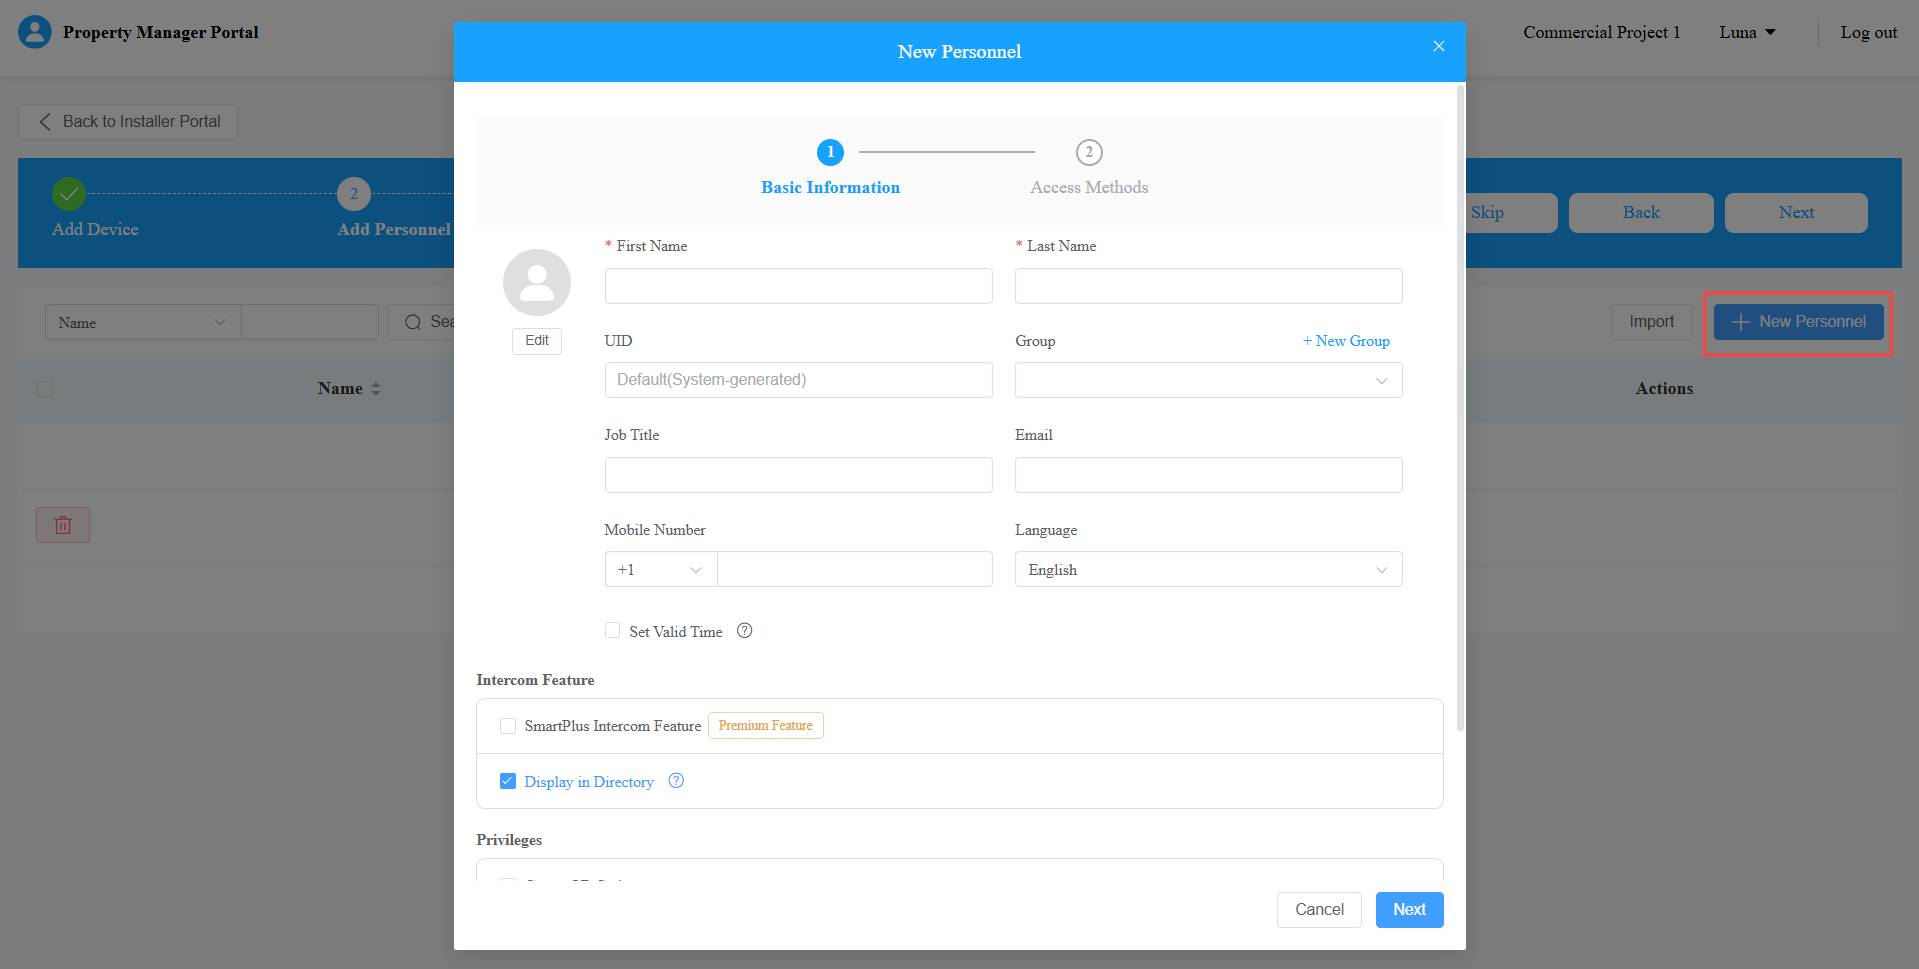
Submit the setting.
You can import personnel through a template.
Click Import > Download Import Template.
Enter information in the template. Username and Call Type are mandatory to fill in. Others are optional.
Move your mouse cursor to specific columns to view input instructions.


After filling in the template, upload the file.
“Import Complete” will display.
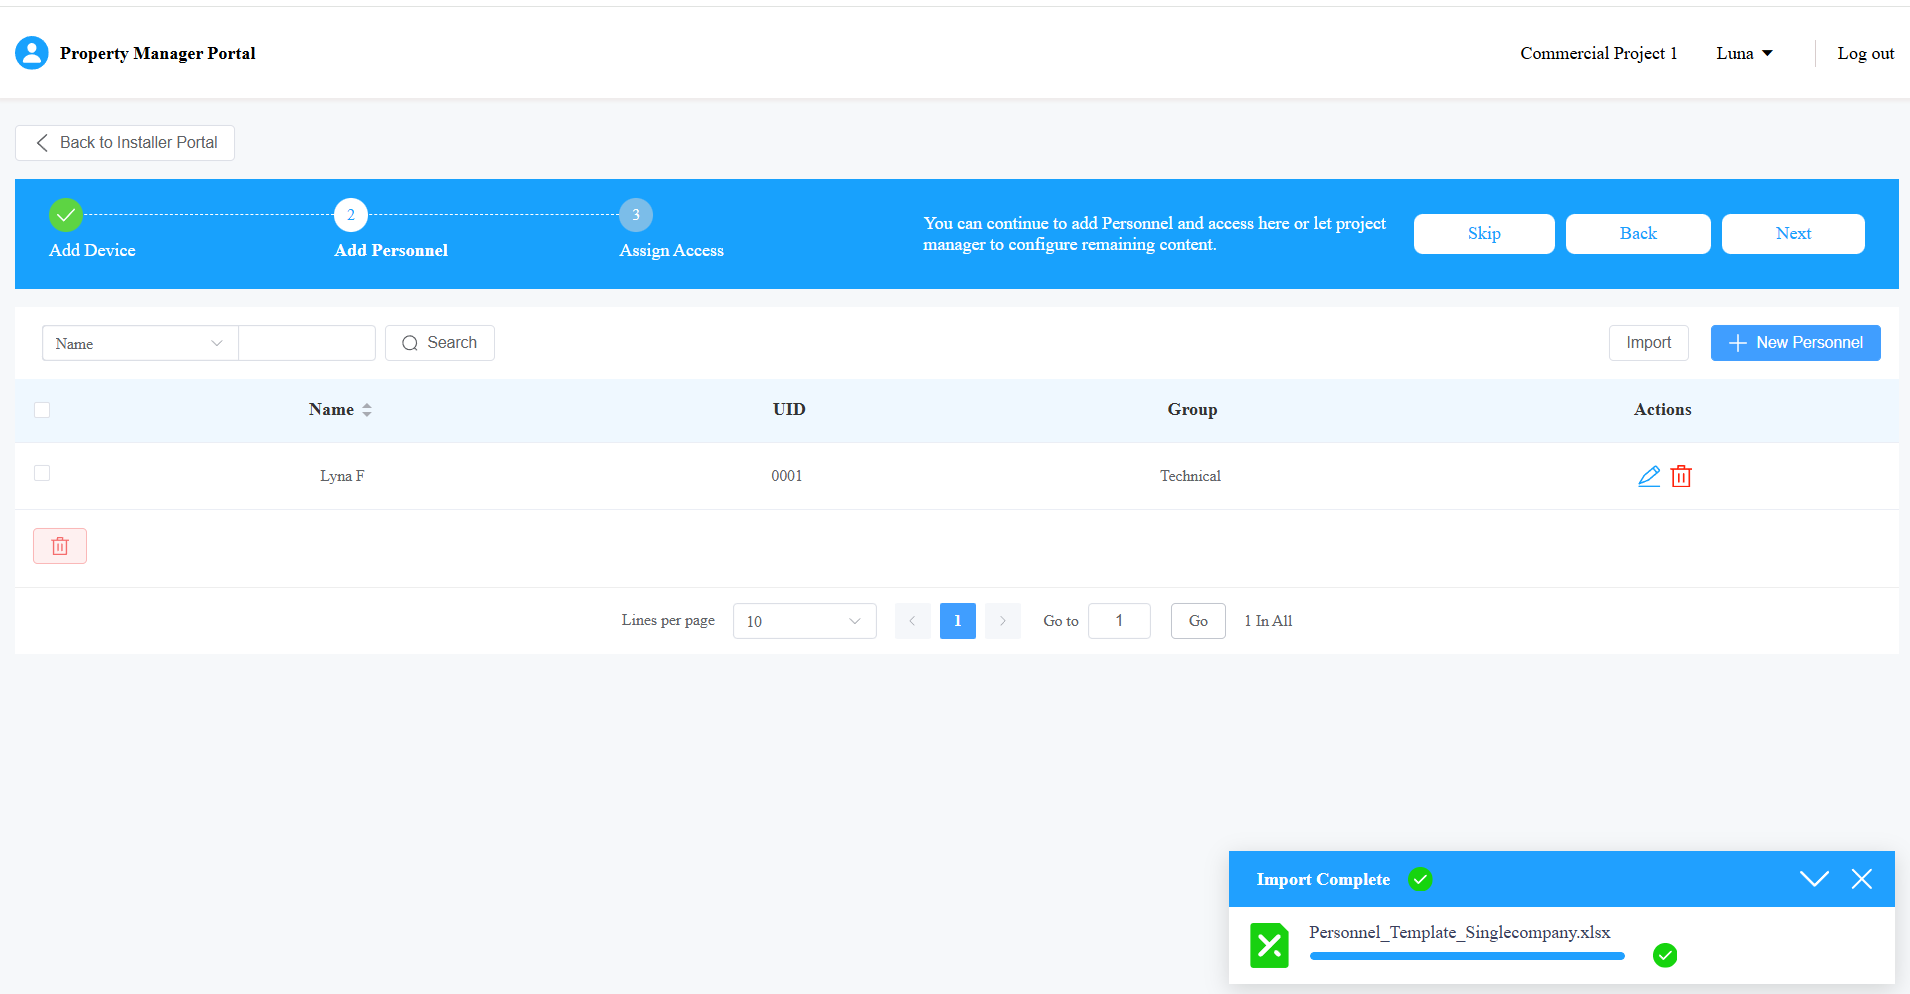
After adding the user account, click to modify the account settings; click to delete it.
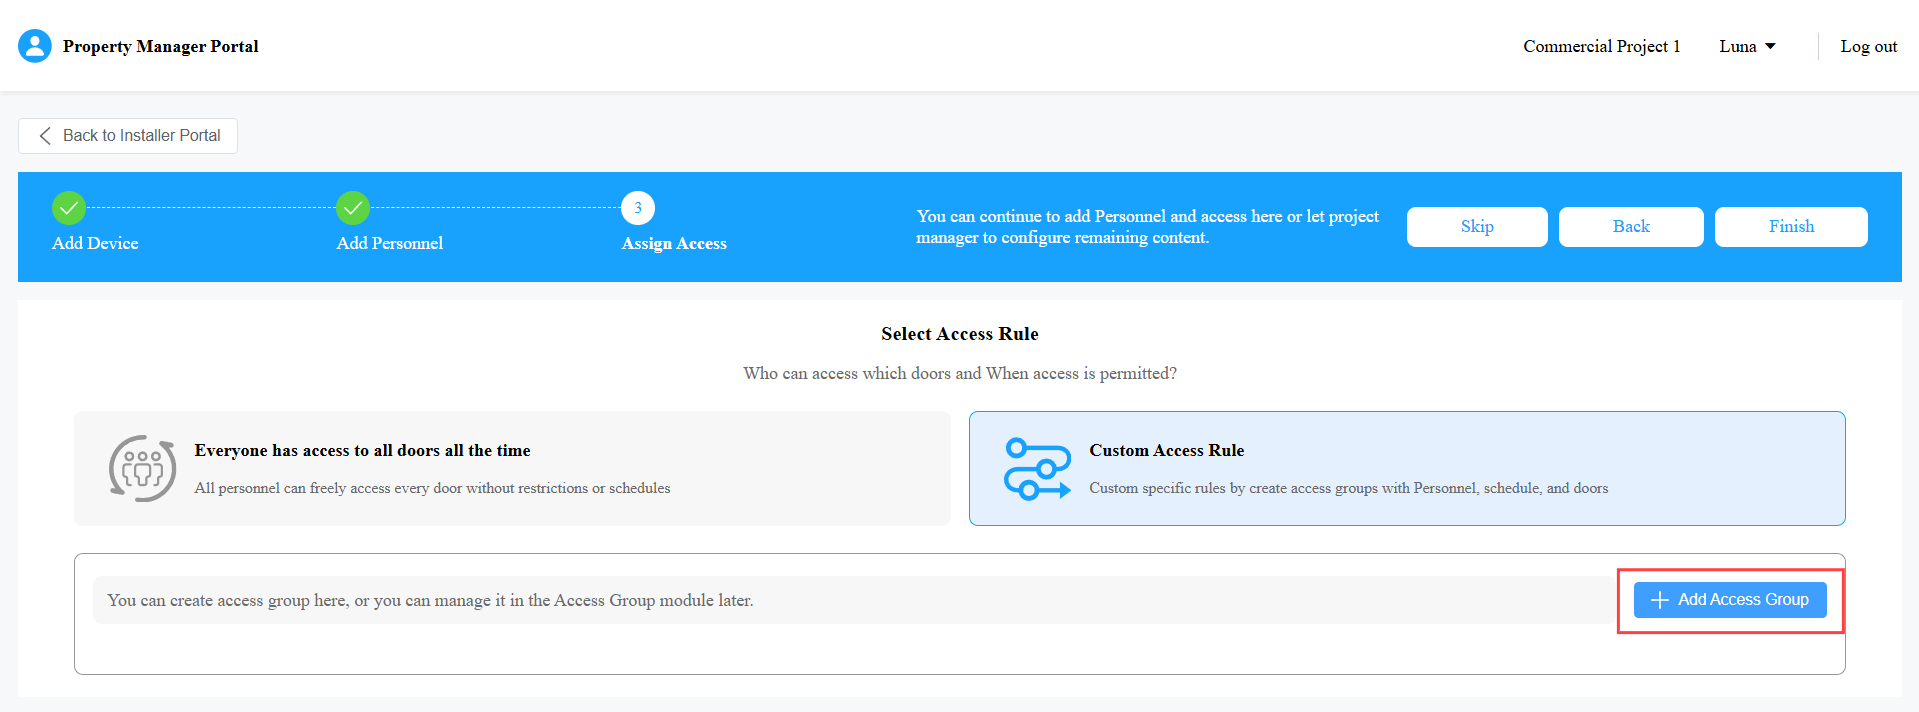
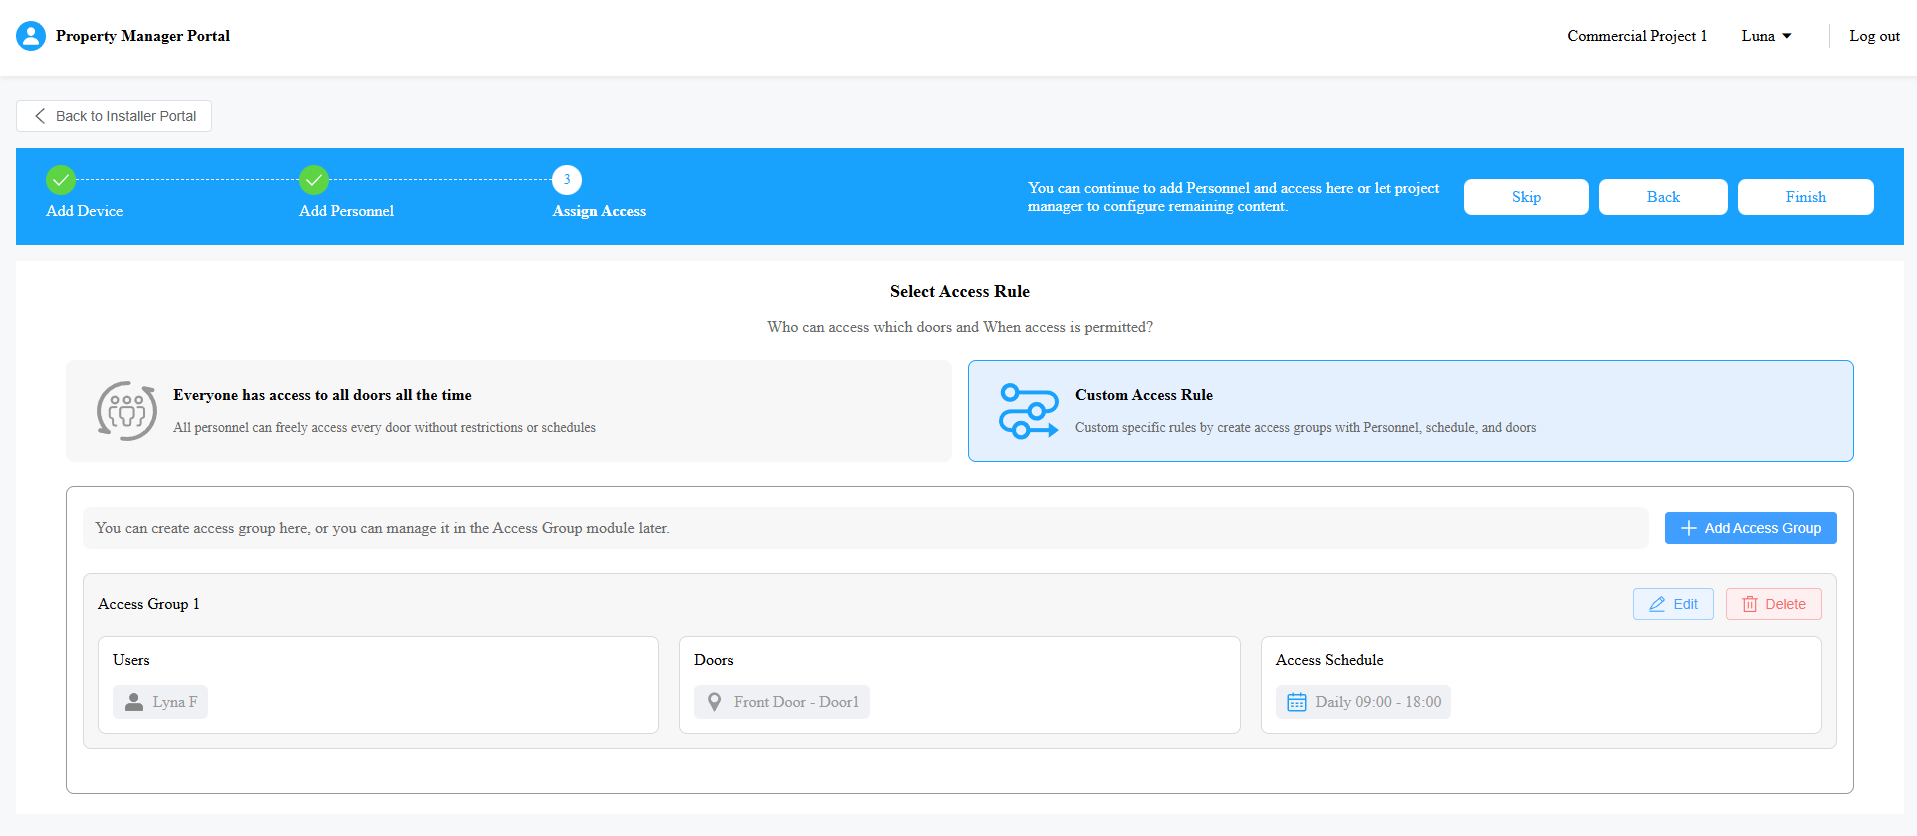
Set up Access Control
Select the access rule: everyone can open doors without restrictions, or customize the access rule.
To customize a rule, select Custom Access Rule.
Click +Add Access Group.
Set up the access group.
Click here to view the explanations of each item.
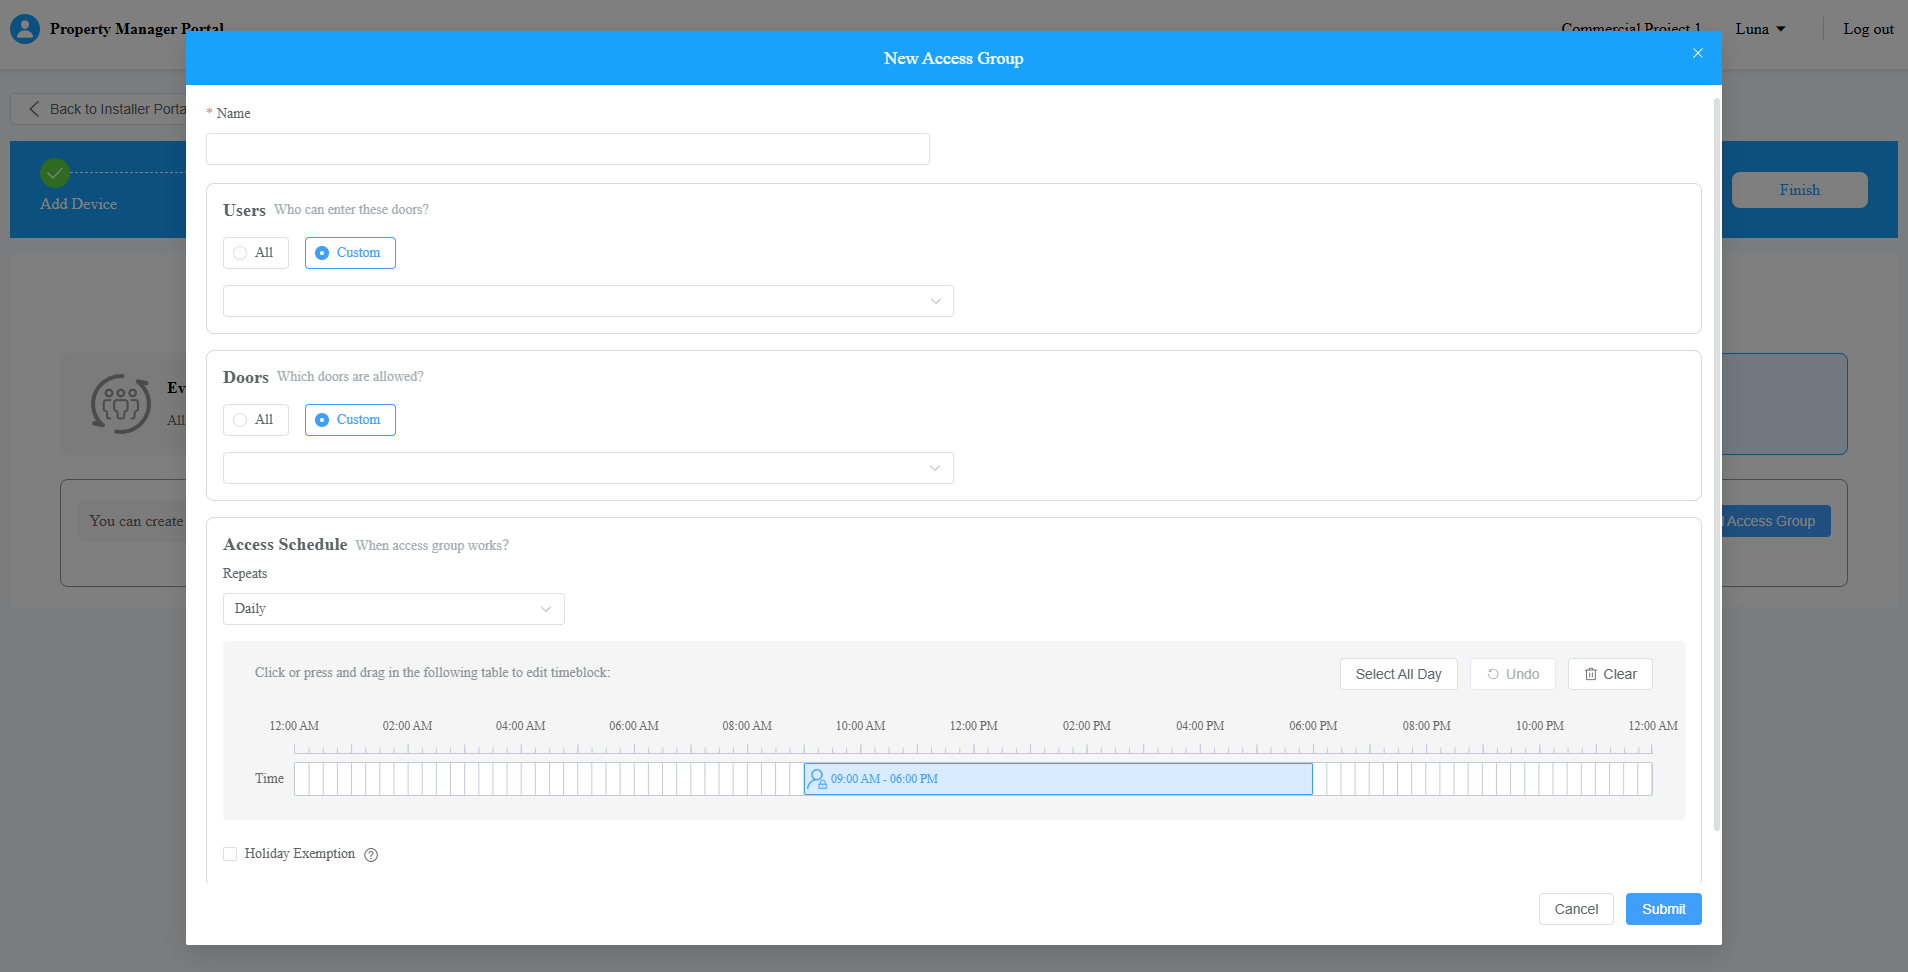
Submit the setting.
After adding the access group, click Edit to modify its settings; click Delete to remove it.
Click Finish to finish the setup and enter the project.