The integration achieves intercom interaction between Akuvox and Zipato devices, allowing users to make calls and open doors flexibly. This article covers the intercom IP call configuration based on the integration.
Tip
Click here to learn the SIP call integration between Akuvox and Zipato.
Before You Start
Compatible models: all door phones with the latest firmware.
Tested Zipato model: ZipaTile2.
Make sure the ZipaTile2 and Akuvox door phone are on the same network for IP calls.
Take R29 with version 29.30.10.412 as an example.
Set up Akuvox Door Phone
Calling
Use the device IP to log in to its web interface. The initial username and password are admin.
Go to Intercom > Dial Plan interface. Click Add.
Enter the ZipaTile2’s IP address and the prefix that replaces the IP address for dialing.
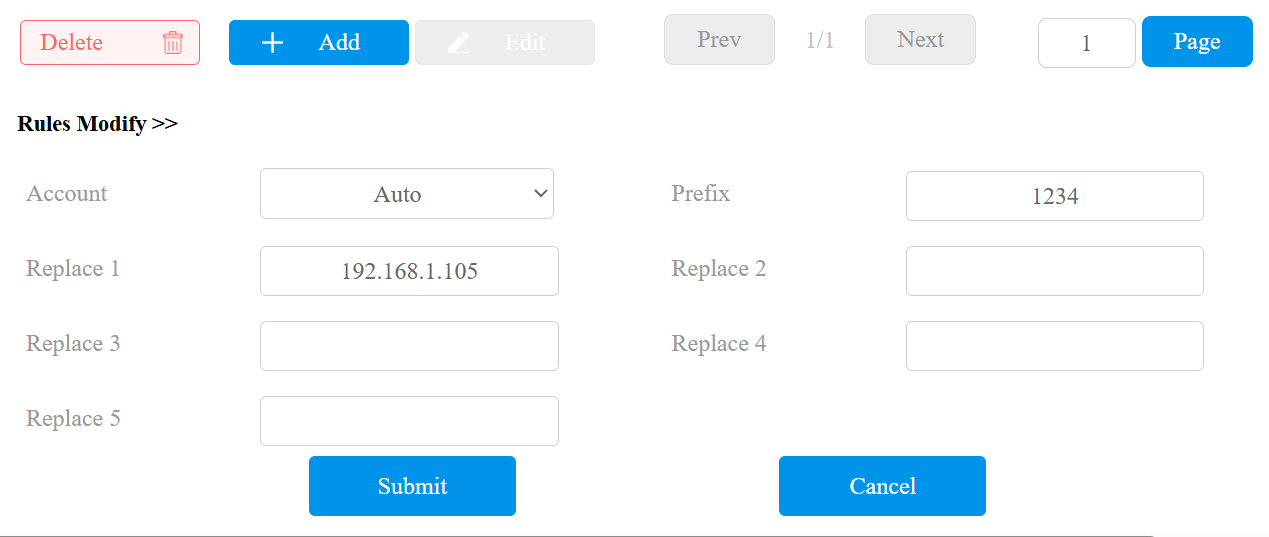
Click Submit.
Unlocking
Go to the Access Control > Relay interface.
Select the DTMF mode and set the DTMF code to the same as that on the ZipaTile2 intercom app.
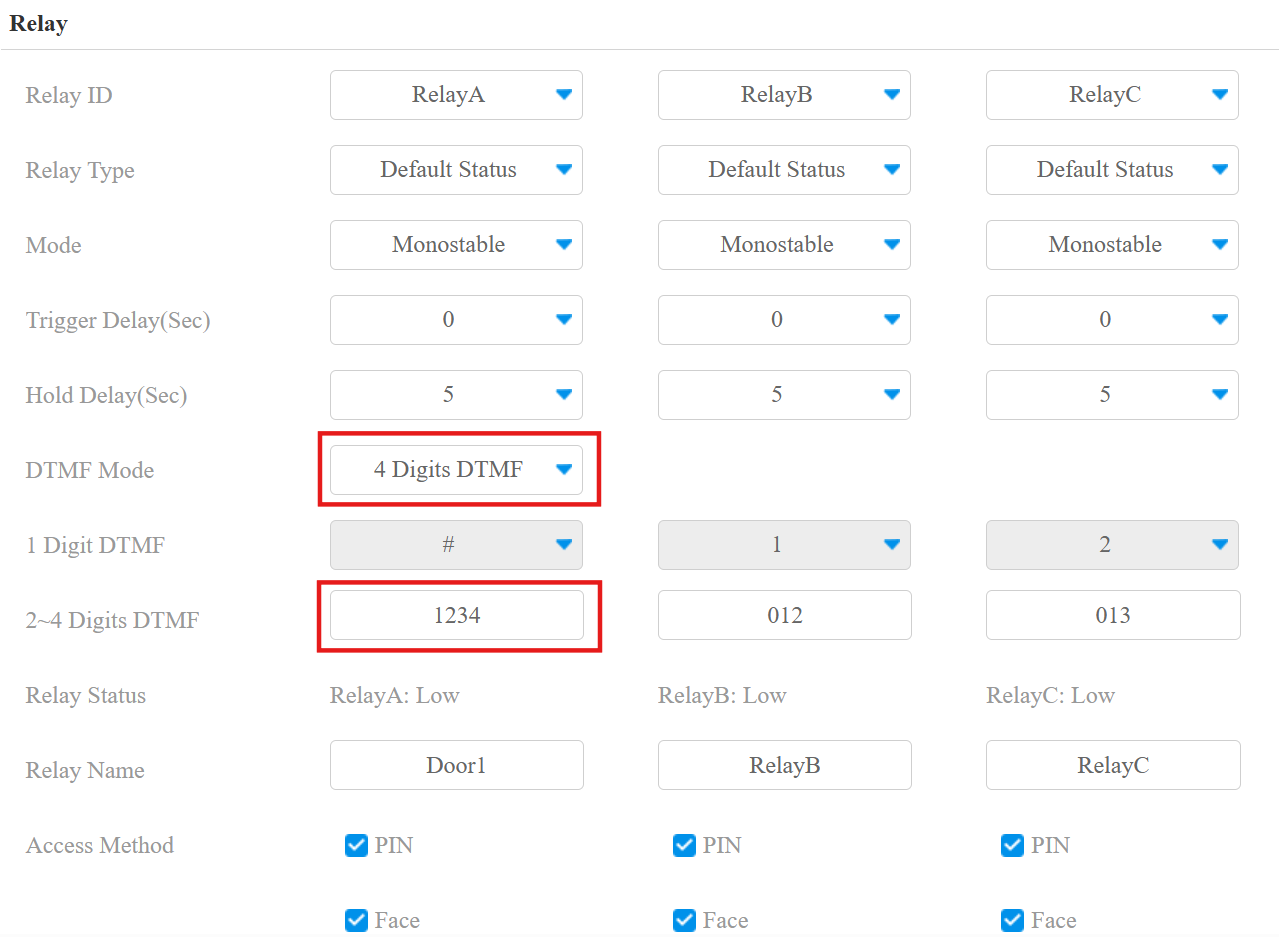
Click Submit.
Set up the ZipaTile2
Calling
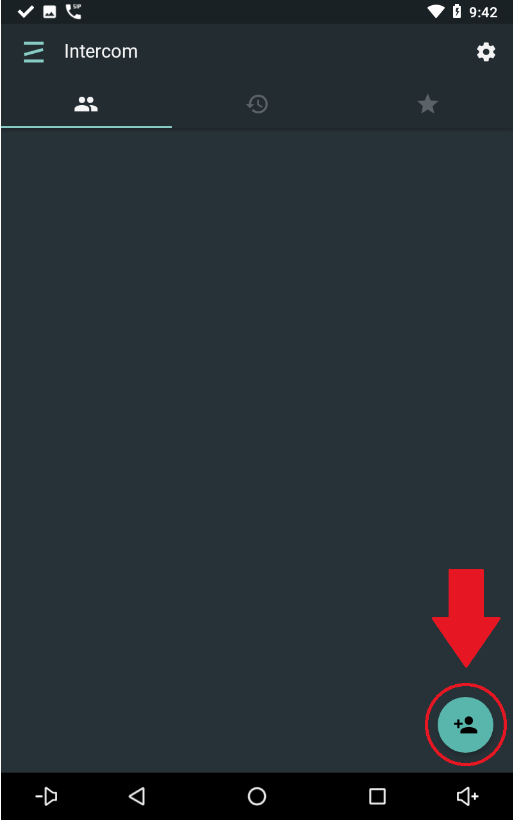
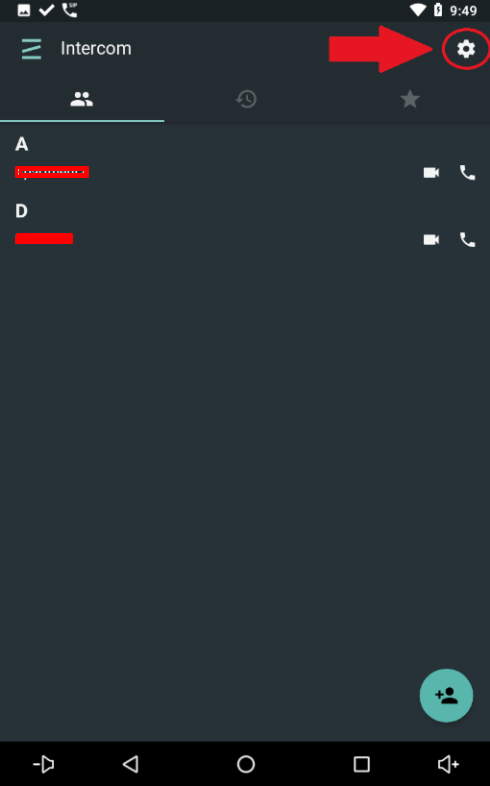
Go to the Intercom page and tap the Contact Add button in the lower right corner.
Enter the contact information for the contact.
Firstname / Lastname - Display name for the contact.
SIP URL - This is the identifier for the contact in the format port@ip_address (Door phone’s IP address).
Press SAVE.
After adding the contact, tap the Edit icon in the upper right corner.
Enable the Doorphone option, which will allow the app to send the DTMF signal to the door phone.
Enter the RTSP URL in the format: rtsp://door phone’s IP/live/ch00_0
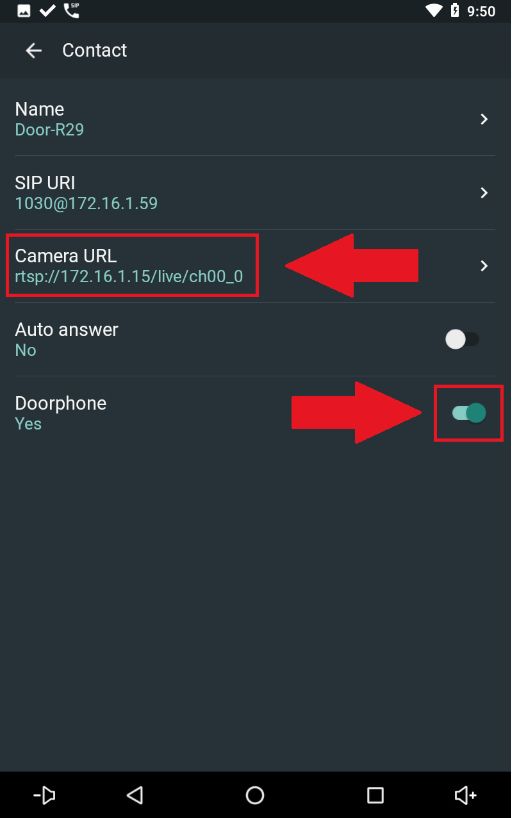
On the Contact page, users can view the live stream from the door phone.

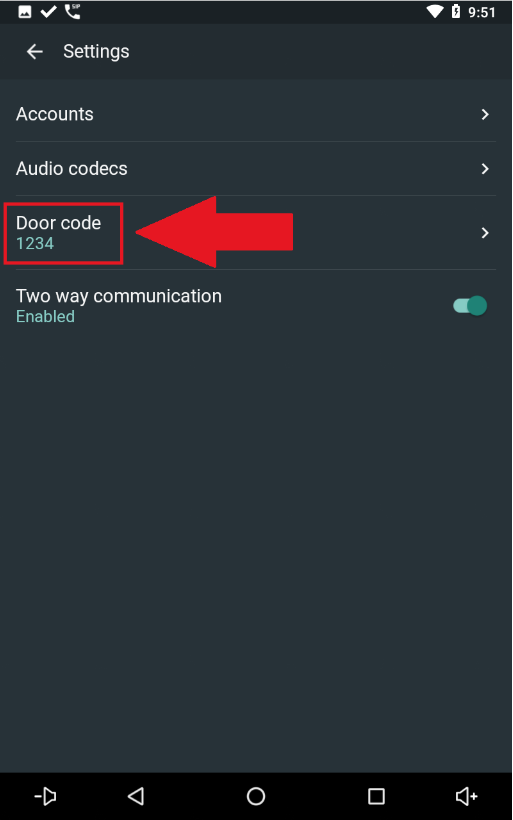
Unlocking
On the intercom main page, select the Gear option in the upper right corner.
Set the door code the same as that set on the door phone.