Akuvox indoor monitor system settings can be either accessed on the device or its web interface.
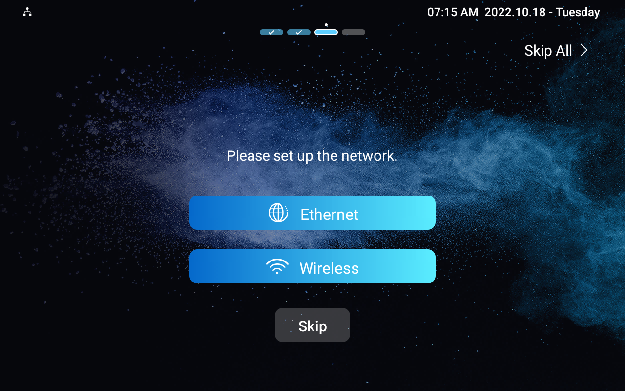
Device Start-up Network Selection
After the device boots up initially, you are required to select the network connection for the device. You can either select Ethernet or a Wireless network connection.
Note
Please refer to Network Setting & Other Connection for the configuration of the Ethernet and wireless network connection.
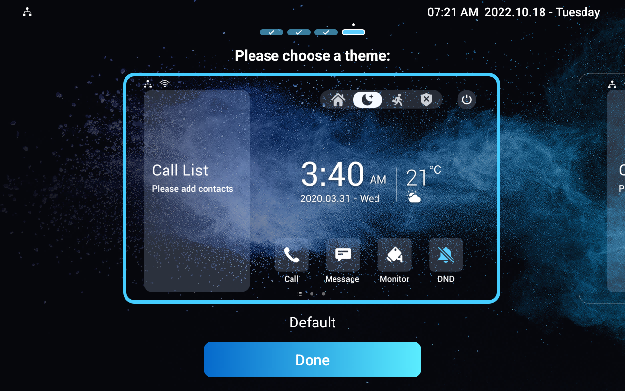
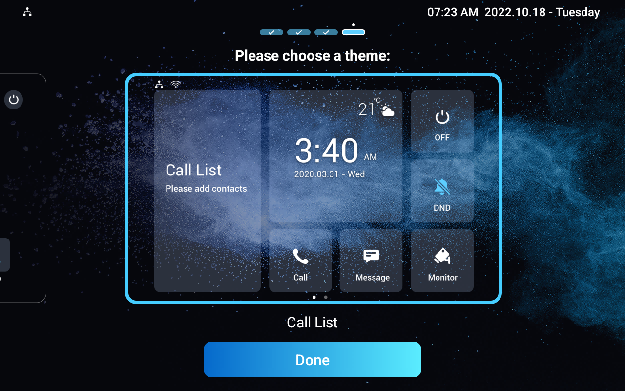
Device Home Screen Type Selection
Akuvox indoor monitor supports two different home screen display modes: Default and Call List. Choose one suitable mode for your scenarios.
Access the Device Settings
Access Device Basic Settings
You can access the device's basic settings and advanced settings where you can configure different types of functions as needed. To access the device's basic setting, swipe your finger left on the home screen, then tap ![]() . You can check the basic information like MAC, firmware, etc.
. You can check the basic information like MAC, firmware, etc.
(1).png "screenshots (8)(1).png")
Access Device Advance Settings
To access the advanced settings, press ![]() and then tap the Advance Settings. Press the default password 123456 to enter the advanced settings.
and then tap the Advance Settings. Press the default password 123456 to enter the advanced settings.


Access the Device Web Settings
You can also enter the device IP address on the web browser to log in to the device web interface where you can configure and adjust parameters, etc.
To check the IP address, you can go to the device Setting > System Info > Network screen. Or, search the device by IP scanner, which can search all the devices on the same LAN.

Note
Download IP scanner:
https://knowledge.akuvox.com/docs/akuvox-ip-scanner?highlight=IP
See detailed guide:
Google Chrome browser is strongly recommended.
The initial username and password are admin and please be case-sensitive to the user names and passwords entered.
Your computer should be on the same LAN as the device.