Event Settings allow the camera to detect abnormal activities or changes in the monitoring scene and trigger corresponding actions. The camera supports basic events, smart events, and event linkage configurations for different surveillance requirements.
Basic Events
Motion Detection
Motion Detection identifies moving objects within the video frame and triggers an alarm or linked action when motion is detected. Define detection zones with the Draw Area component.
Set it up on the Event > Basic Event > Motion Detection interface.
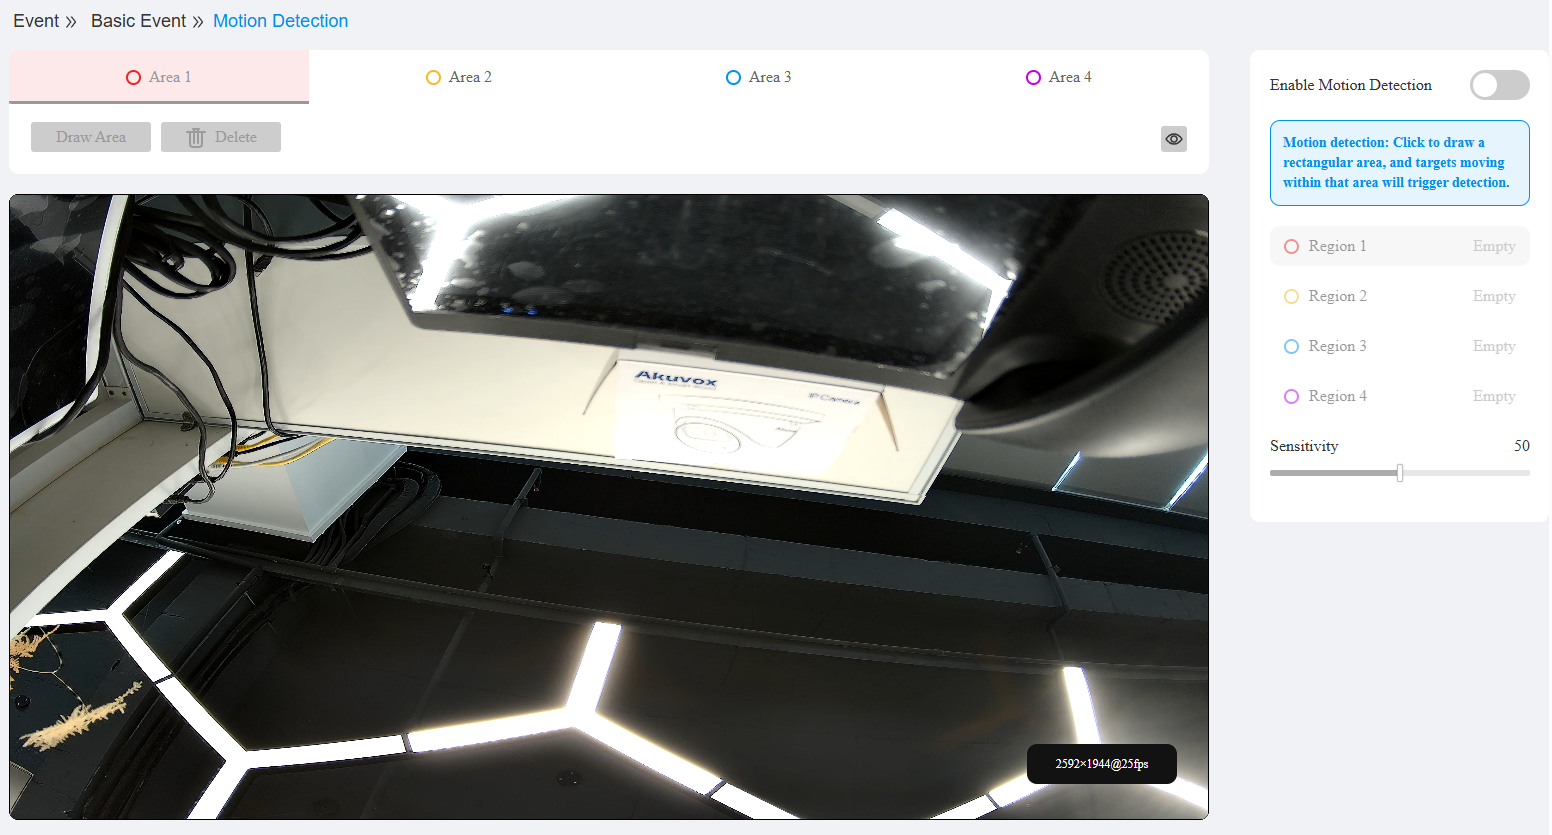
Enable Motion Detection: Enable or disable the feature. It is enabled by default.
Sensitivity: The sensitivity of motion detection. Range: 0–100. Default: 50. Higher values detect smaller or subtler movements.
Detection Schedule: Set the schedule for when the feature works. The default is 24/7.
Video Tampering
Video Tampering detects deliberate interference with the camera's view, such as the lens being covered, sprayed, or redirected, and triggers an alarm.
Set it up on the Event > Basic Event > Video Tampering interface.
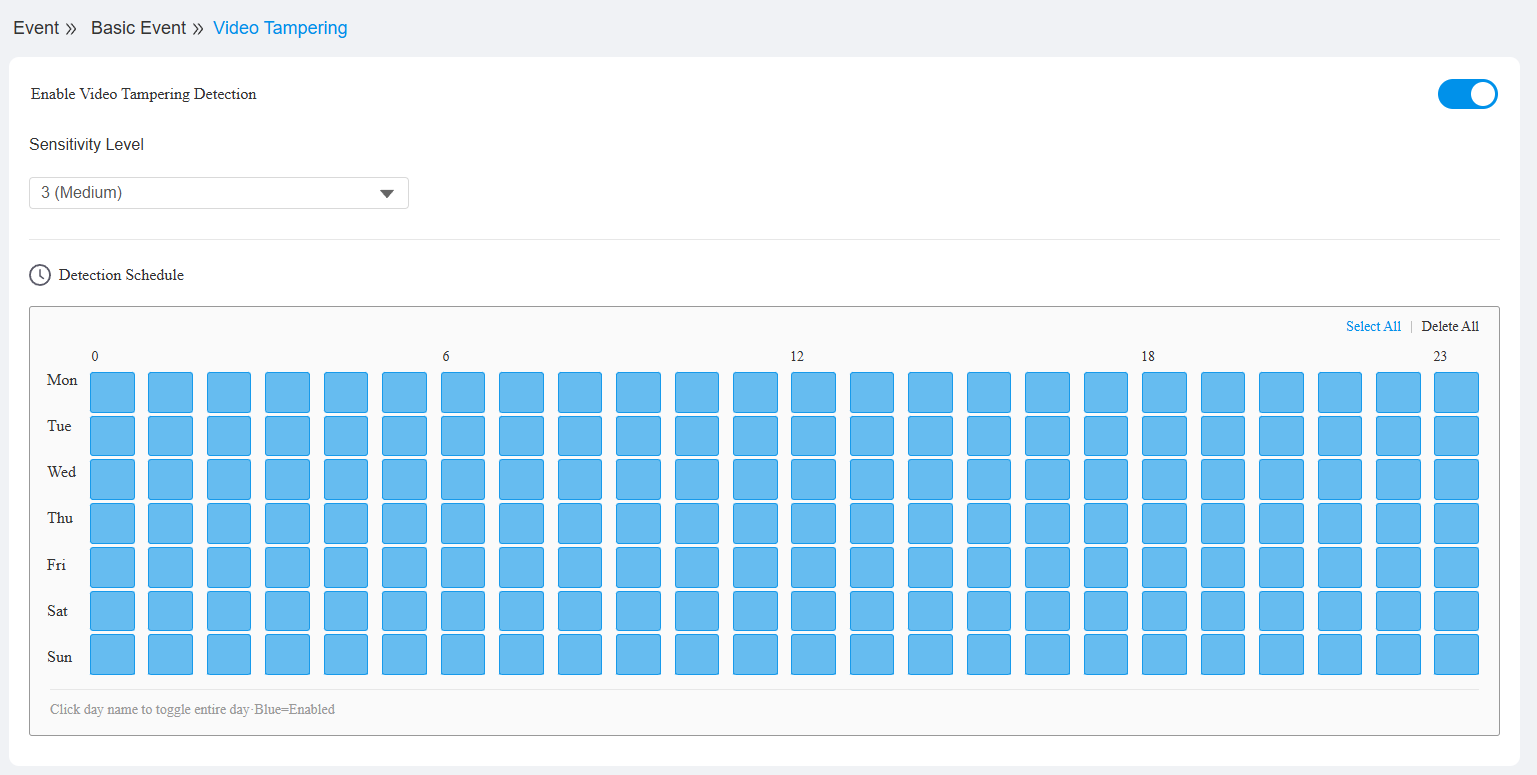
Enable Video Tampering Detection: Enable or disable the feature. It is disabled by default.
Sensitivity Level: The sensitivity of tampering detection. Lower values require a more pronounced change in field of view to trigger an alarm, reducing false positives; higher values detect subtler changes, increasing detection coverage at the cost of a higher false-positive rate. Range: 1 (Low) – 5 (High). Default: 3 (Medium).
Detection Schedule: Set the schedule for when the feature works. The default is 24/7.
Scene Change
Scene Change detects a significant shift in the camera's field of view, such as the camera being manually redirected or moved, and triggers an alarm. It is typically deployed alongside Video Tampering to provide combined protection against lens obstruction and camera displacement.
Set it up on the Event > Basic Event > Scene Change interface.
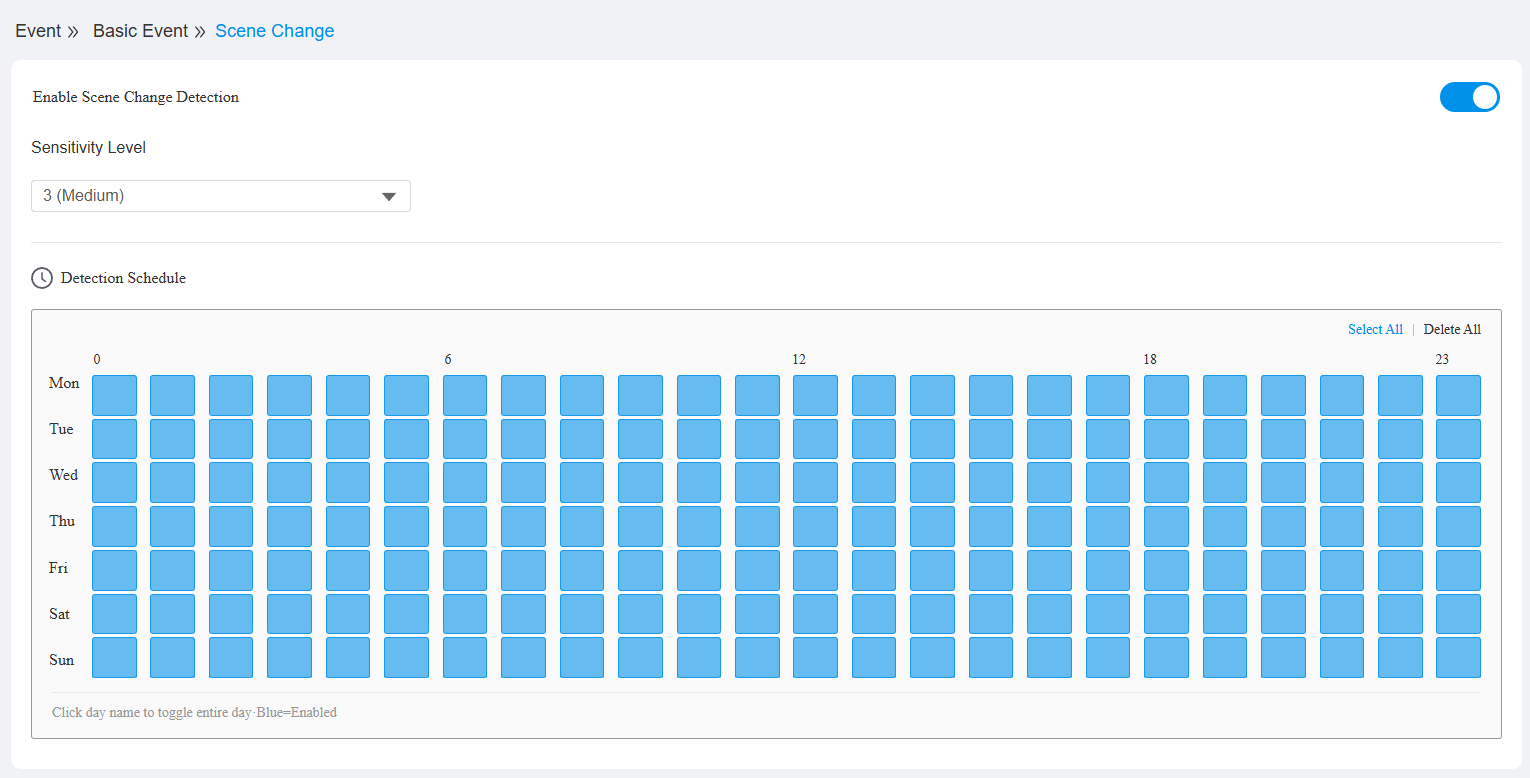
Enable Scene Change Detection: Enable or disable the feature. It is disabled by default.
Sensitivity Level: The sensitivity of scene change detection. Lower values require a more pronounced change to trigger an alarm, reducing false positives; higher values detect subtler shifts in view, increasing detection coverage at the cost of a higher false-positive rate. Range: 1 (Low) – 5 (High). Default: 3 (Medium).
Detection Schedule: Set the schedule for when the feature works. The default is 24/7.
Sound Detection
Sound Detection uses the camera's built-in microphone to identify abnormal ambient sound levels and triggers an alarm based on the configured detection type.
A real-time audio level visualization is displayed to assist with threshold configuration, showing the current sound level, the configured threshold reference line, the current detection status, and the active detection type.
Set it up on the Event > Basic Event > Sound Detection interface.
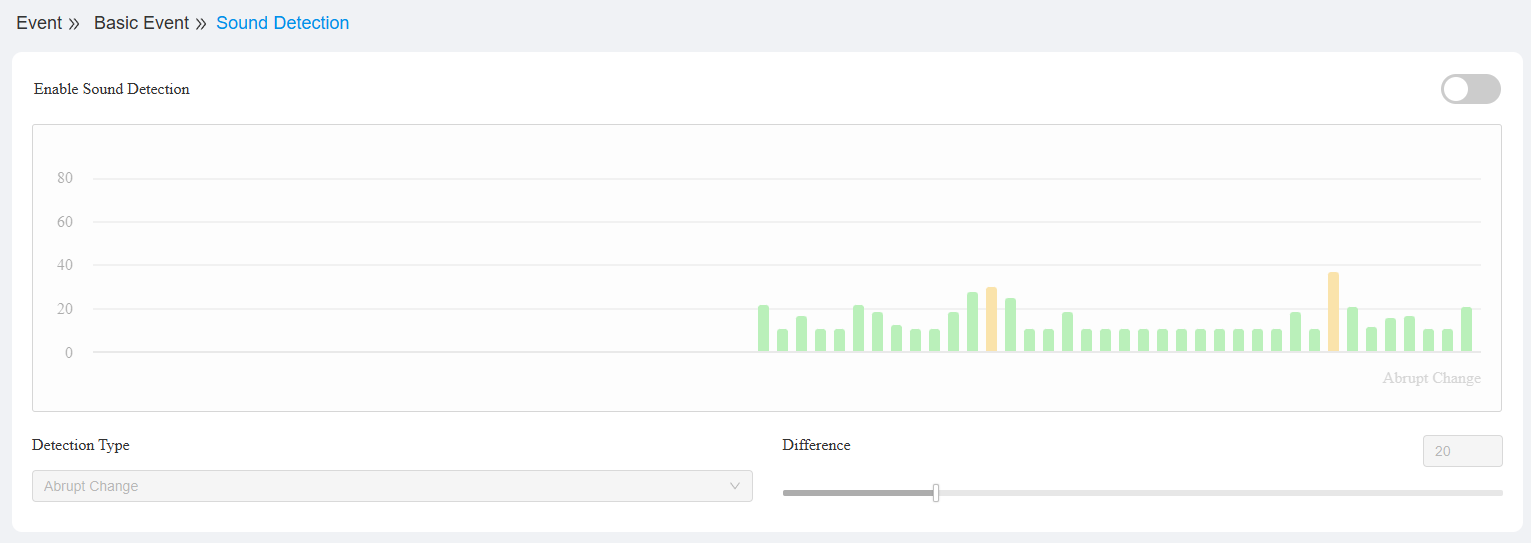
Enable Sound Detection: Enable or disable the feature. It is disabled by default.
Detection Type: The algorithm used to evaluate sound level changes. Default: Abrupt Change.
Abrupt Change: Detect sudden changes in volume in either direction, rise or drop.
Sudden Rise: Detect only sudden increases in volume.
Sudden Drop: Detect only sudden decreases in volume.
For these three types, set Difference: the volume change (in dB) required to trigger an alarm. Range 1–90, default 20.
Threshold: Trigger an alarm whenever volume exceeds a fixed level.
Detection Schedule: Set the schedule for when the feature works. The default is 24/7.
Smart Events
Line Crossing Detection
Line Crossing detects a person or vehicle crossing a virtual line drawn in the video frame and triggers an alarm. Detection can be limited to a specific direction of travel. Define detection lines with the Draw Line component.
Set it up on the Event > Smart Event > Line Crossing interface.
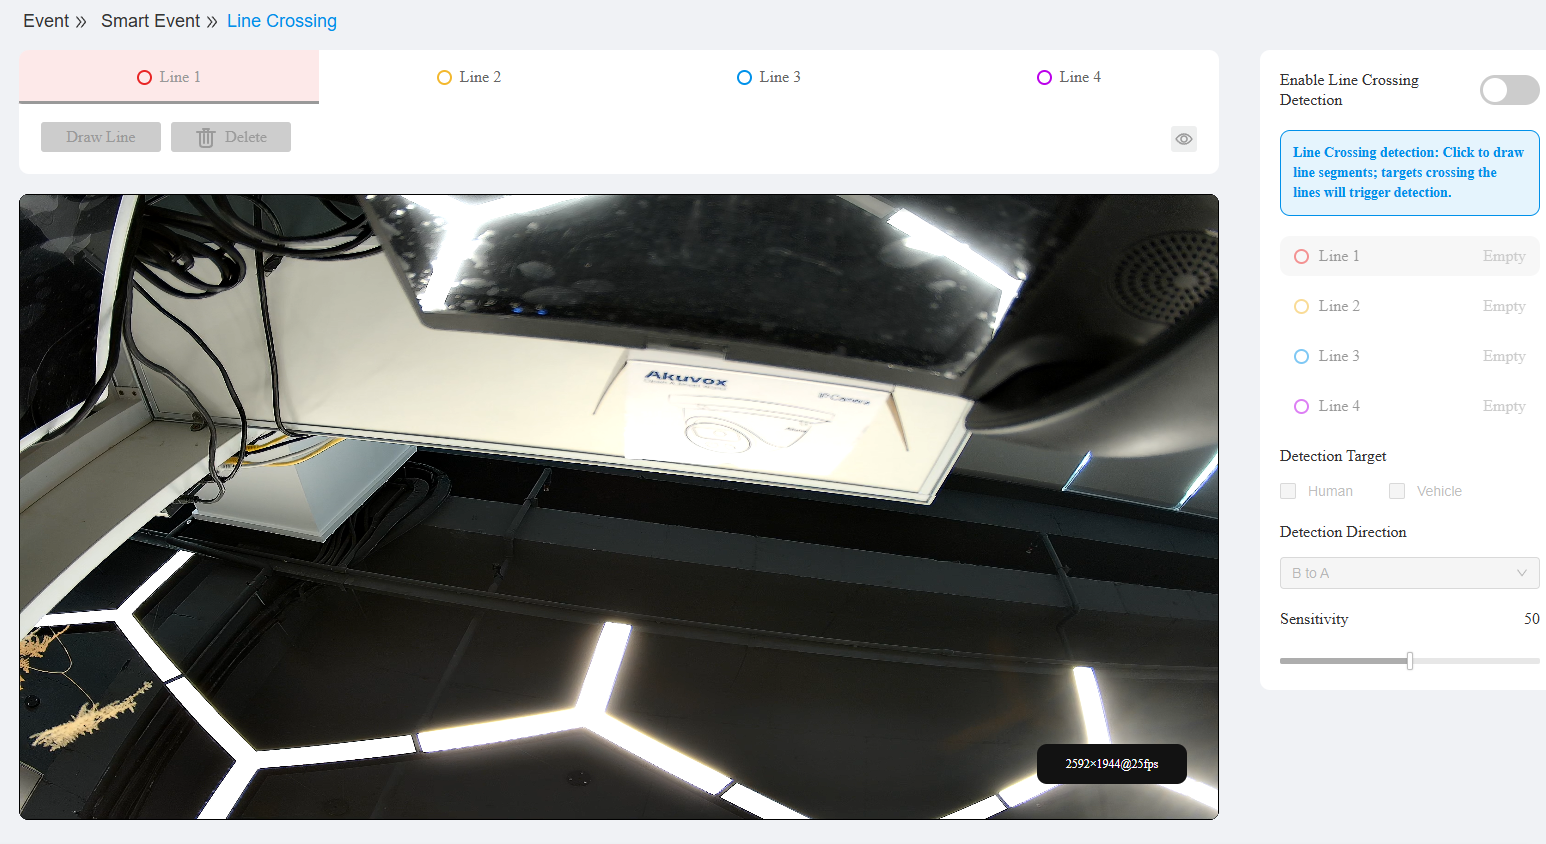
Enable Line Crossing Detection: Enable or disable the feature. It is disabled by default.
Detection Line: Up to four directional lines defined in the video preview. Each line is drawn by placing a start point (A) followed by an end point (B); a direction indicator is displayed at the line's midpoint.
Detection Target: The detection target: Human and/or Vehicle.
Detection Direction: The direction of crossing that triggers an alarm. Default: Both.
A to B: Trigger only when a target crosses from the A side of the line to the B side.
B to A: Trigger only when a target crosses from the B side of the line to the A side.
Both: Trigger on crossings in either direction.
Sensitivity: The sensitivity of line crossing detection. Range: 0–100. Default: 50.
Detection Schedule: Set the schedule for when the feature works. The default is 24/7.
Intrusion Detection
Intrusion detects a target entering a restricted polygon area and remaining within it beyond a configured duration, then triggers an alarm. The duration threshold filters out targets that briefly pass through the area without lingering. Define detection zones with the Draw Area component.
Set it up on the Event > Smart Event > Intrusion interface.
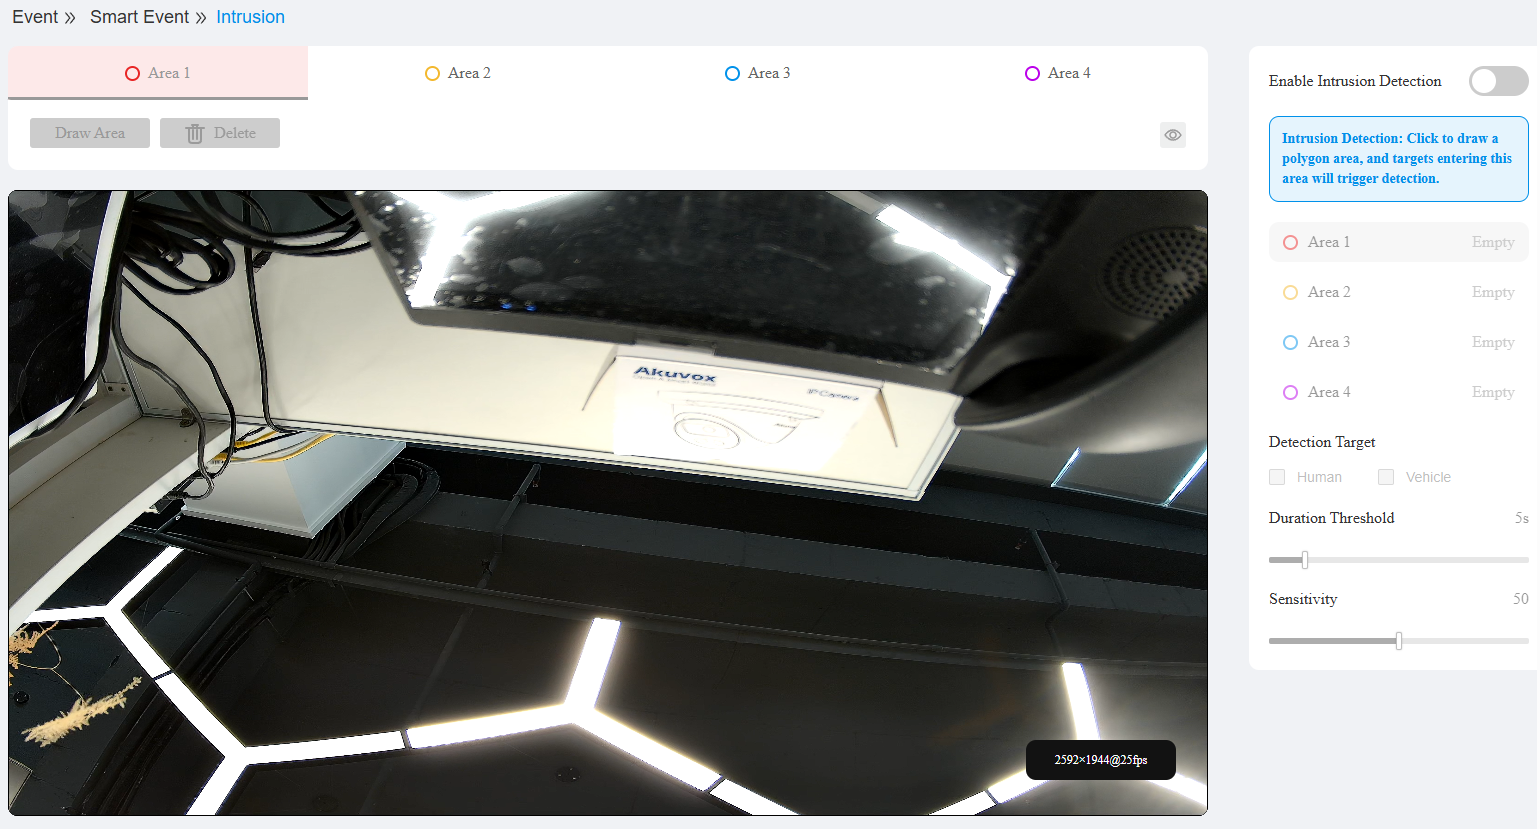
Enable Intrusion Detection: Enable or disable the feature. It is disabled by default.
Detection Area: Up to four polygon regions defined in the video preview.
Duration Threshold: The minimum duration a target must remain within the detection area before an alarm is triggered. Range: 1–30 s. Default: 5 s.
Sensitivity: The sensitivity of intrusion detection. Range: 0–100. Default: 50.
Detection Schedule: Set the schedule for when the feature works. The default is 24/7.
Region of Interest(ROI)
ROI designates one or more areas of the video frame for enhanced encoding quality, improving image clarity in the selected areas within the constraints of the configured bitrate. Define detection zones with the Draw Area component.
Set it up on the Event > Basic Event > ROI interface.
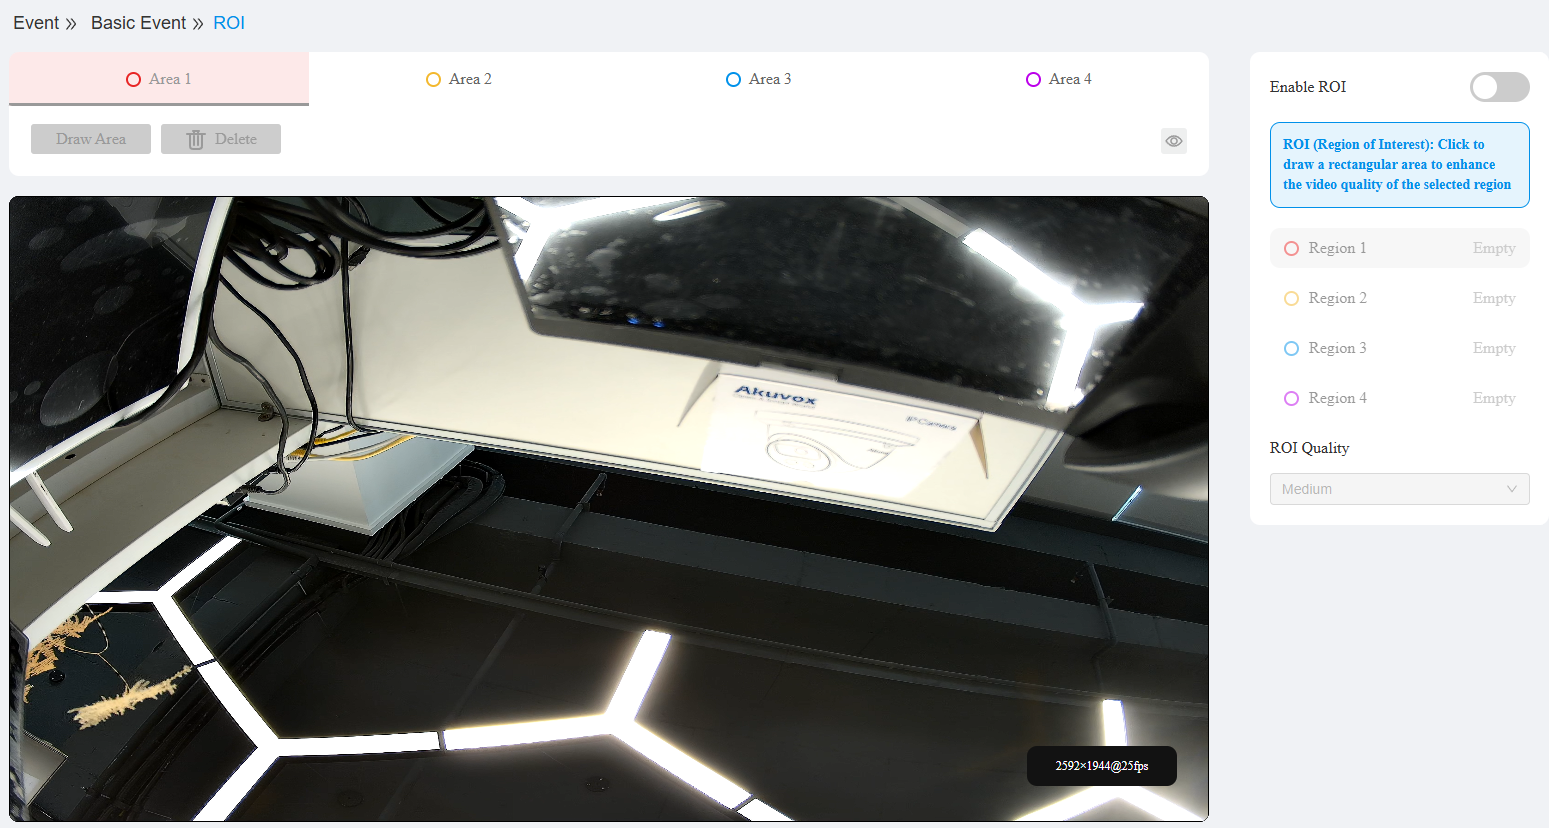
Enable ROI: Enable or disable the feature. It is disabled by default.
Detection Area: Up to four regions defined in the video preview.
ROI Quality: The degree of encoding enhancement applied within ROI regions. Default: Medium.
Low: Applies light enhancement, minimizing additional bandwidth usage.
Medium: Balances image quality against bandwidth usage.
High: Maximizes image clarity within ROI regions, prioritizing quality over bandwidth.
Event Linkage
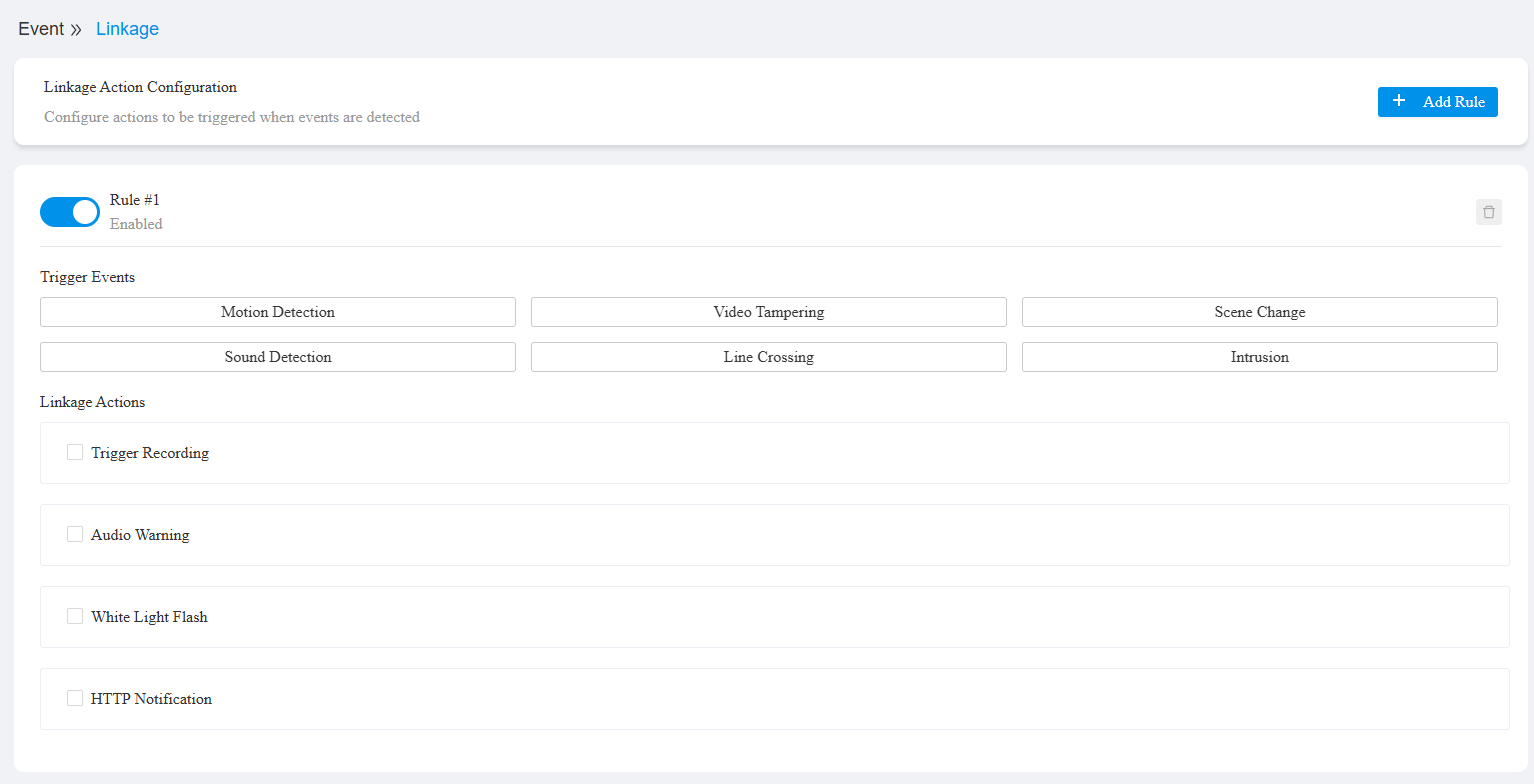
Linkage defines rules that connect event detection triggers to one or more response actions. Each rule specifies which detection events cause it to fire and which actions are performed when triggered, such as recording, uploading snapshots, or sending notifications.
Up to 10 rules can be configured, and each rule can be independently enabled or disabled.
Set it up on the Event > Linkage interface.
Rule Management
Rule: A configurable unit linking one or more trigger events to one or more linkage actions. Up to 10 rules can be configured.
Enable Rule: Enable or disable the rule. When disabled, all configuration items within the rule are unavailable for editing.
Add Rule: Add a new blank rule with an automatically generated ID.
Trigger Events
Trigger Events: The detection event(s) that activate the rule. Multiple event sources can be selected for a single rule.
Linkage Actions
Linkage Actions: The response action(s) performed when the rule is triggered.
Trigger Recording: Configurable when an SD card is inserted.
Channel: The recording channel used.
Pre-Record (s): The duration of the video recorded before the triggering event. Range: 0–30. Default: 5.
Post-Record (s): The duration of the video recorded after the triggering event ends. Range: 5–300. Default: 10.
Audio Warning:
Audio File: The audio file played when the rule is triggered.
Custom: Choose to upload a custom file. Format: .wav.
Repeat Times: The number of times the audio file is played. Range: 1–10. Default: 3.
Volume (%): The playback volume. Range: 0–100. Default: 80.
White Light Flash:
Flash Mode: The illumination pattern used. Steady keeps the white light on continuously; Strobe (default) flashes the light at the configured frequency.
Duration (s): The total duration the white light remains active. Range: 1–300. Default: 10.
Frequency (Hz): The flash rate used in Strobe mode. Range: 1–10. Default: 2.
HTTP Notification:
URL: The HTTP server address that receives the alarm notification.
Method: The HTTP request method used to send the notification. Options: GET, POST (default), PUT.
GET can be used for simple notifications using URL parameters.
POST is recommended for sending event details to third-party platforms.
PUT is suitable for updating an existing resource or status.