Configurations and upgrading on Akuvox door phone can be done on the web interface via one-time auto-provisioning and scheduled auto-provisioning via configuration files, thus saving you from setting up configuration needed one by one manually on the door phone.
Provisioning Principle
Auto-provisioning is a feature used to configure or upgrade devices in batch via third-party servers. DHCP, PNP, TFTP, FTP, and HTTPS are the protocols used by the Akuvox devices to access the URL of the address of the third-party server which stores configuration files and firmware, which will then be used to update the firmware and the corresponding parameters on the device.
Please see the flow chart below:
.png)
Configuration Files for Auto-provisioning
Configuration files for auto-provisioning come in two formats: general configuration files and MAC-based configuration files.
Differences:
General Configuration Provisioning:
A general configuration file is stored on a server, allowing all related devices to download the same file to update parameters.
MAC-Based Configuration Provisioning:
MAC-based configuration files are specific to individual devices, identified by their unique MAC addresses. Files named with the device's MAC address will be matched automatically before downloading for provisioning.
Note
Configuration files must be in CFG format.
The name of the general configuration file for batch provisioning varies by model.
The MAC-based configuration file is named after its MAC address.
Devices will first access general configuration files before the MAC-based ones if both types are available.
You may click here to see the detailed format and steps.
AutoP Schedule
Akuvox provides you with different AutoP methods that enable the device to perform provisioning for itself according to the schedule.
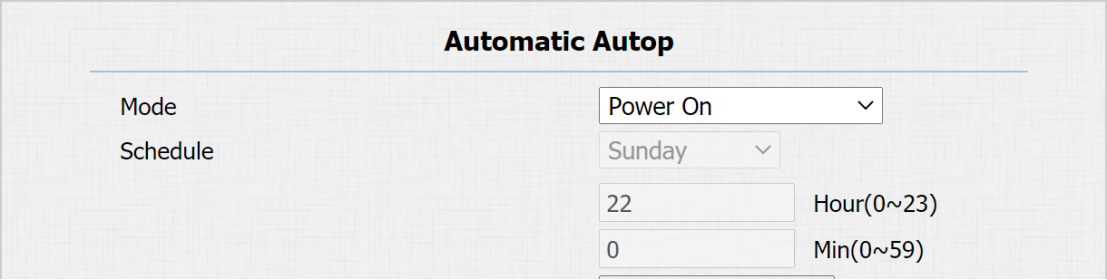
Path:Upgrade > Advanced > Automatic Autop interface.
Parameter Set-up:
-
Mode: select "Power on", if you want the device to perform Autop every time it boots up. Select "Repeatedly", if you want the device to perform autop according to the schedule you set up. select "Power On + Repeatedly" if you want to combine Power On Mode and Repeatedly mode that will enable the device to perform Autop every time it boots up or according to the schedule you set up. select "Hourly Repeat" if you want the device to perform Autop every hour.
-
Schedule: if "Repeatedly" is selected, you can set up the time schedule for the AutoP.
PNP Configuration
Plug and Play (PNP) is a combination of hardware and software support that enables a computer system to recognize and adapt to hardware configuration changes with little or no intervention by a user. To do this configuration on web Upgrade > Advanced > PNP Option interface.

Static Provisioning Configuration
You can manually set up a specific server URL for downloading the firmware or configuration file. If an auto-provision schedule is set up, the device will perform the auto-provisioning at a specific time according to the auto provision schedule you set up. In addition, TFTP, FTP, HTTP, and HTTPS are the protocols that can be used for upgrading the device firmware and configuration.
Parameter Set-up:
-
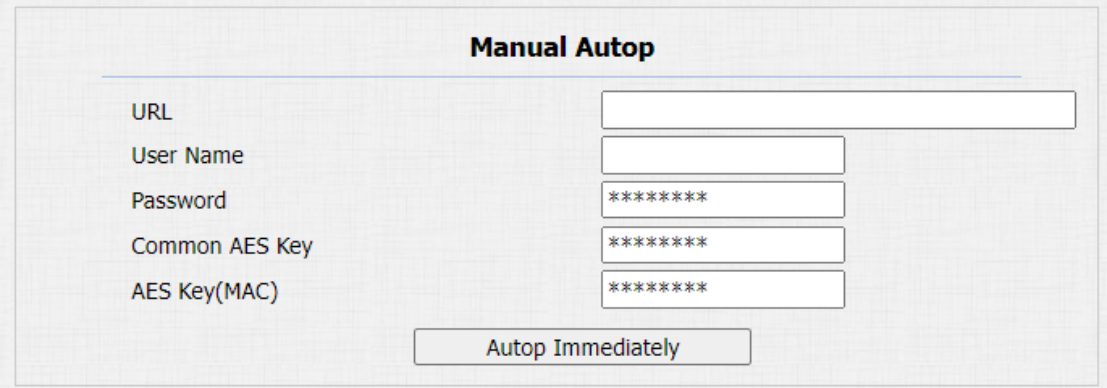
URL: set up TFTP, HTTP, HTTPS, FTP server address for the provisioning
-
User Name: set up a user name if the server needs a user name to be accessed otherwise leave it blank.
-
Password: set up a password if the server needs a password to be accessed otherwise leave it blank.
-
Common AES Key: set up AES code for the intercom to decipher the general Auto Provisioning configuration file.
-
AES Key (MAC): set up AES code for the intercom to decipher the MAC-based auto provisioning configuration file.
- AES, as one type of encryption, should be configured only when the config file is encrypted with AES.
-
Server Address Format:
- TFTP: tftp://192.168.0.19/
- FTP: ftp://192.168.0.19/ (allows anonymous login)
ftp://username:password@192.168.0.19/(requires a user name and password) - HTTP: http://192.168.0.19/ (use the default port 80)
http://192.168.0.19:8080/ (use other ports, such as 8080) - HTTPS: https://192.168.0.19/ (use the default port 443)
-
Akuvox does not provide user specified server. Please prepare TFTP/FTP/HTTP/HTTPS server by yourself.