Integration via Wiegand
If you want to integrate the door phone with third-party devices via Wiegand, you can configure the Wiegand on the web interface. Path: Intercom > Wiegand.
Parameter Set-up:
-
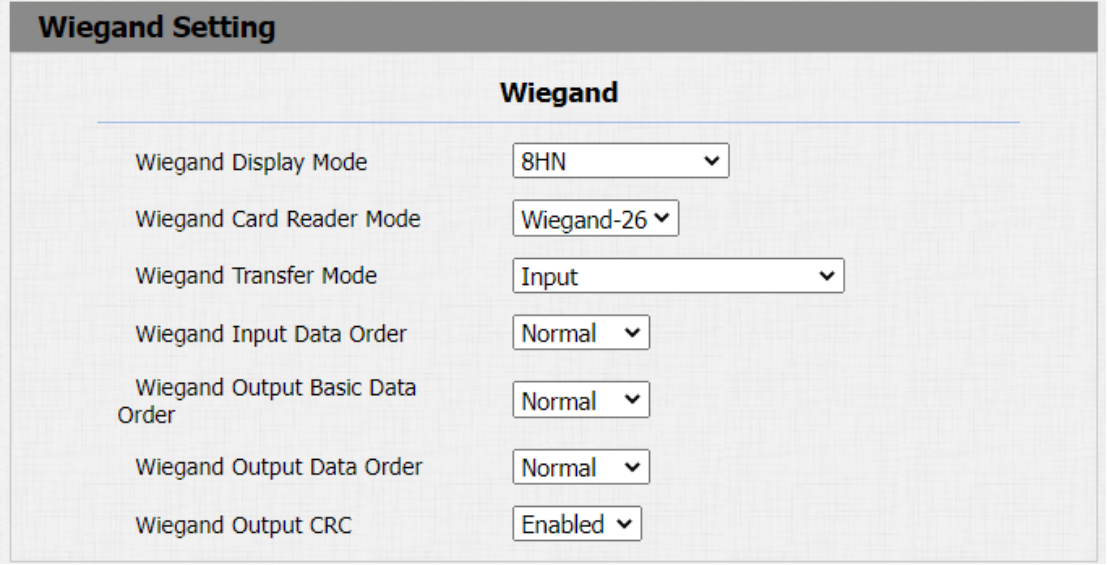
Wiegand Display Mode: select Wiegand Card code format among 8H10D; 6H3D5D; 6H8D; 8HN; 8HR; RAW.
-
Wiegand Card Reader Mode: set the wiegand data transmission format among three options: "Wiegand 26", "Wiegand 34", "Wiegand 58". The transmission format should be identical between the door phone and the device to be integrated.
-
Wiegand Transfer Mode: select Input, Output, Convert to Card No.OutputWiegand. If the door phone is used as a receiver, then set it as "Input" for the door phone. Select "Output" if you want wiegand output to be converted to card number before sending it from the door phone to a receiver. For facial recognition access, the user card number corresponding to the facial recognition access will be sent out in binary system.
-
Wiegand Input Data Order: set the Wiegand input data sequence between "Normal" and "Reversed" if you select "Reversed" then the input card number will be reversed and vice versa.
-
Wiegand Output Data Order: set the Wiegand output data sequence between “Normal” and “Reversed” if you select "Reversed" then the input card number will be reversed and vice versa.
-
Wiegand Output CRC: tick to enable the parity check function to ensure that signal-based data can be transmitted correctly according to the established data transmission format.
You can configure the wiegand output mode if needed. The output occurs when you press the PIN code on the device.

Parameter Set-up:
- PIN: select "Disabled" if you want to disable the function. Select "4 bits per digit" of you want to output the PIN code by four continuous bits as a set. Select "8 bits per digit" if you want to output the PIN code by eight continuous bits as a set.
Integration via HTTP API
HTTP API is designed to achieve a network-based integration between the third-party device and the Akuvox device.
You can configure the HTTP API function on the web Intercom > HTTP API interface for the integration.
Parameter Set-up:
-
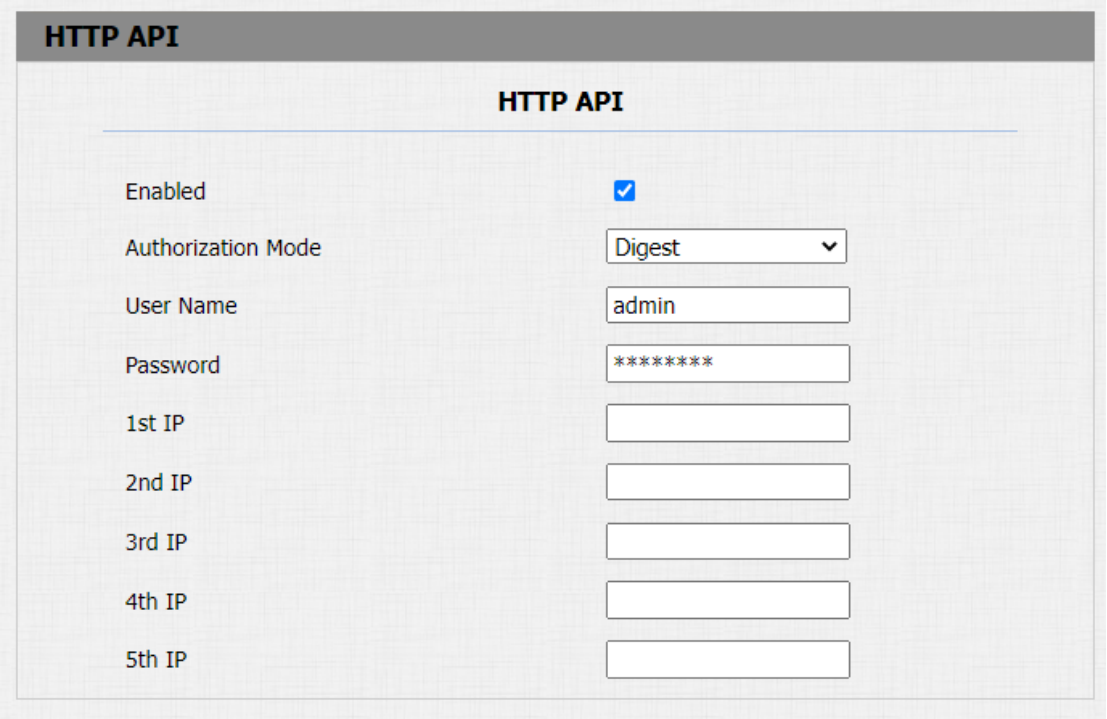
Enabled: enable or disable the HTTP API function for the third party integration. For example, if the function is disabled any request to initiate the integration will be denied and be returned HTTP 403 forbidden status.
-
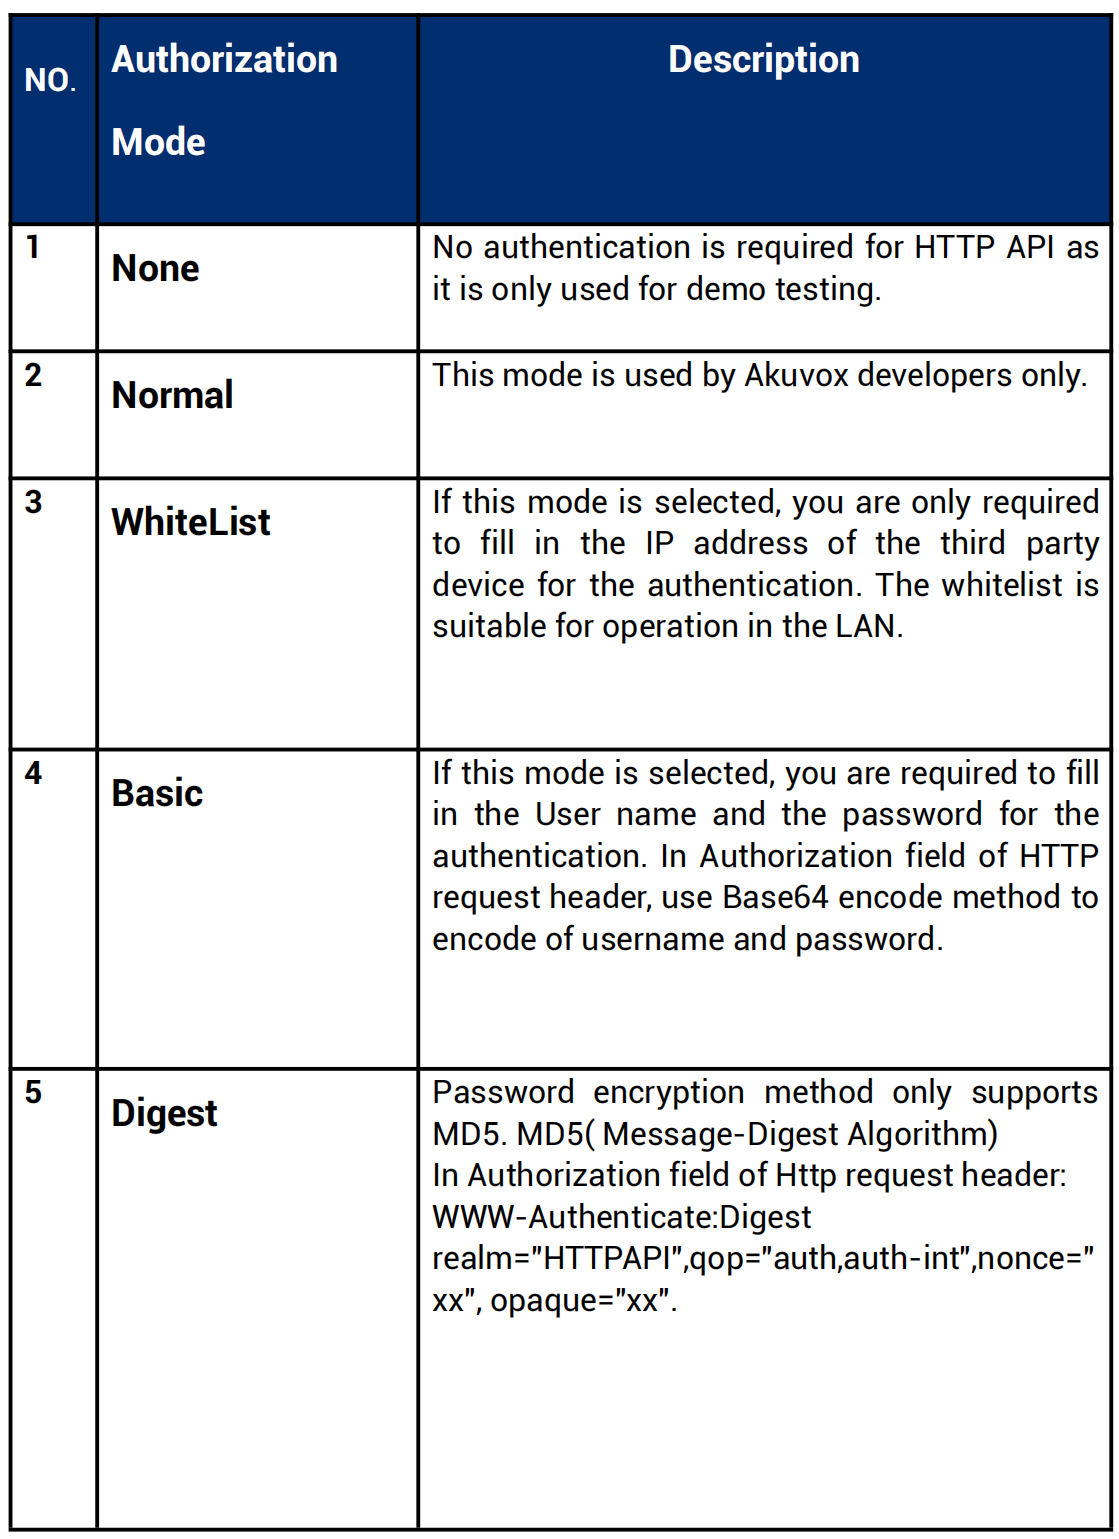
Authorization Mode: select among four options: "None" "WhiteList" "Basic", "Digest" for authorization type, which will be explained in detail in the following chart.
-
User Name: enter the user name when "Basic" and "Digest" authorization mode is selected. The default user name is “Admin”.
-
Password: enter the password when "Basic" and "Digest" authorization mode is selected. The default user name is “Admin”.
-
1st IP-5th IP: enter the IP address of the third party devices when the “WhiteList” authorization is selected for the integration.
Please refer to the following description for the Authentication mode:

Lift Control Configuration
Integration between the door phone and third party devices such as intercom devices for door access and lift control should be configured in the device web interface before the integration can be made.
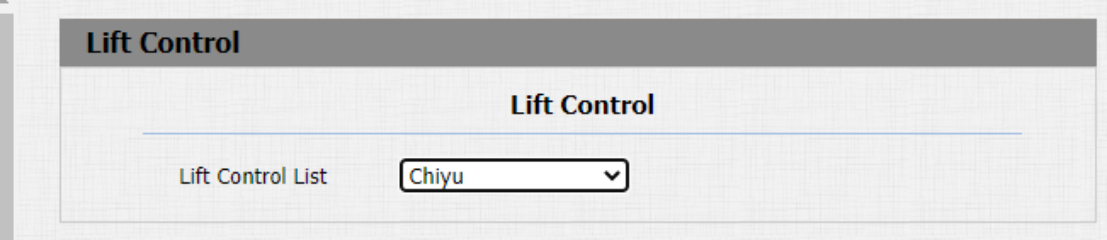
Lift control should be configured properly on the door phone’s web Intercom > Lift Control > Lift Control List interface before you can implement the integration between the door phone and the third party devices.
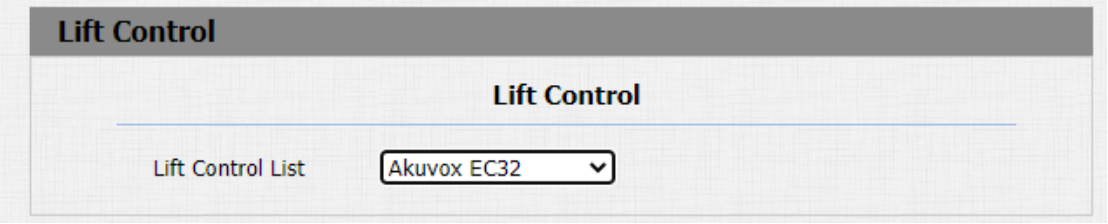
Parameter Set-up:
- Lift Control List: select the lift controller brand you need.
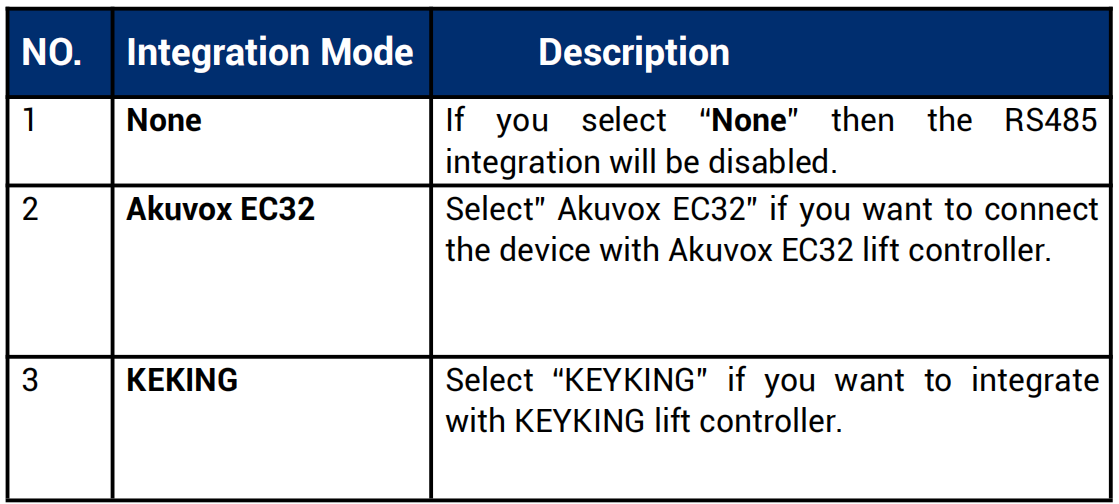
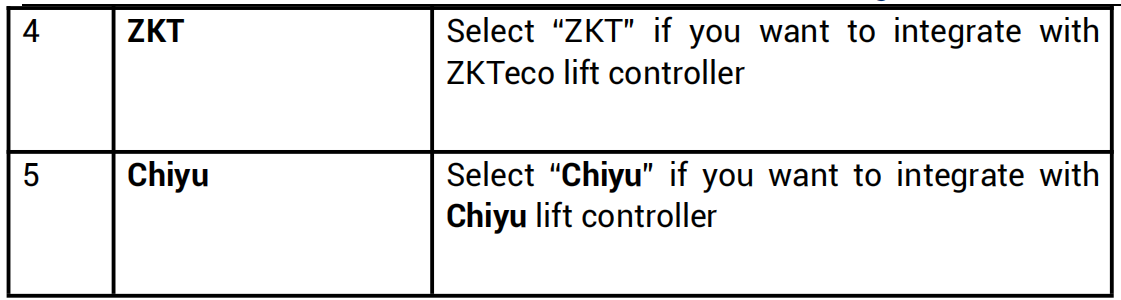
- Please consult with Akuvox technical support if you have any inquiries on the integration mode of any OEM lift controller integration project
KeyKing Setting
To integrate KeyKing lift controller, you are required to set up the KeyKing address obtained from your solution provider. You can navigate to Intercom > Lift Control > KeyKing Advance Setting.
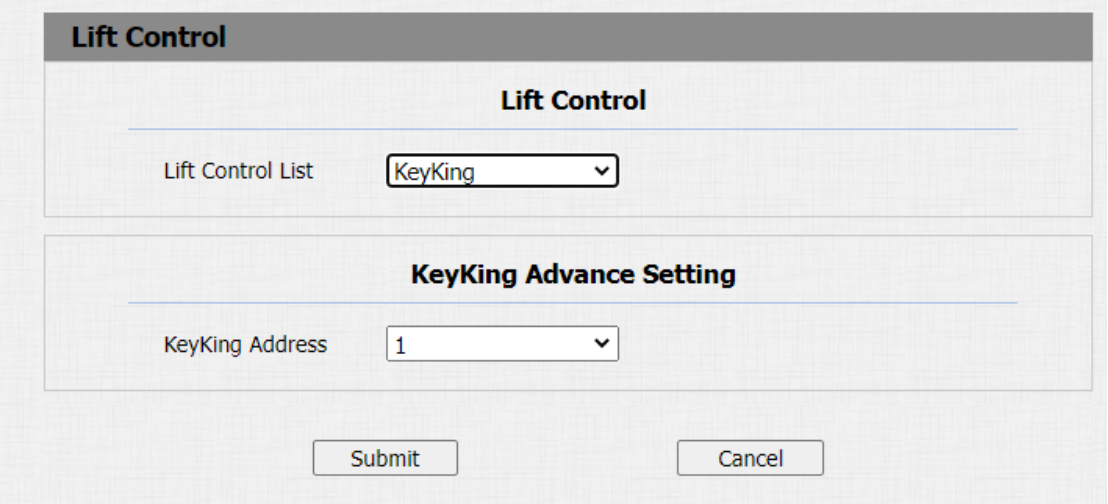
Parameter Set-up:
- KeyKing Address: enter the KeyKing address provided by your solution provider. The address number must be identical with the address number on the lift controller board.
Akuvox EC32 Lift Controller
You are required to configure Akuvox EC32 before you can connect the door phone to the lift controller. You can navigate to Intercom > Lift Control > Akuvox EC32 & ZKT Advance Setting.
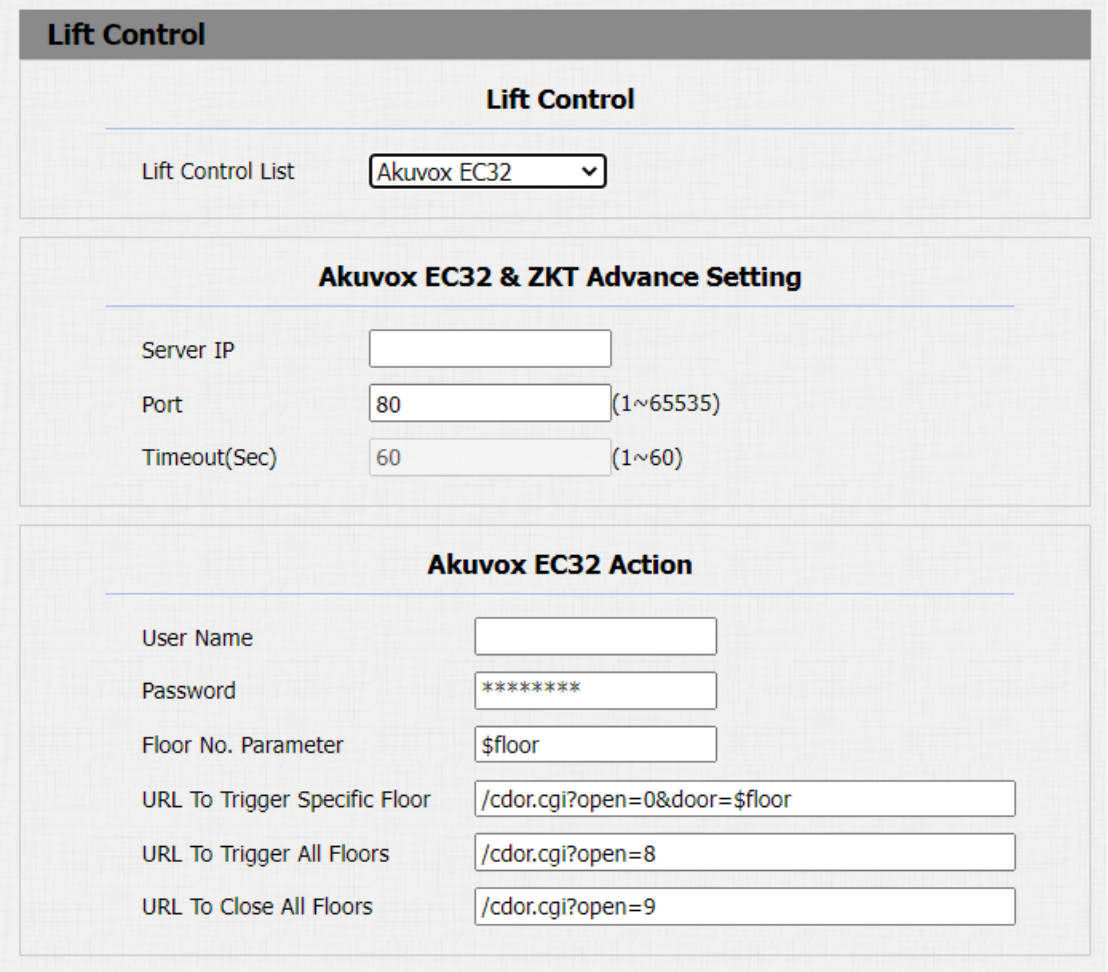
Parameter Set-up:
-
Server IP: enter the IP address of the Akuvox EC32 controller server.
-
Port: enter the port of Akuvox EC32 controller server.
-
Timeout (Sec): enter the lift controller timeout. For example, if you set the timeout as "30 seconds" have to press the lift button corresponding to the floor you are going to within 30 seconds, otherwise, the button will be locked again, and you have to go out of the lift and do it all over again.
-
User Name: enter the user name of the lift controller for the authentication.
-
Password: enter the password of the lift controller for the authentication.
-
Floor NO. Parameter: enter the Floor number parameter provided by Akuvox. The default parameter string is "$floor". You can define your own parameter string if needed.
-
URL To Trigger Specific Floor: enter the Akuvox lift control URL for triggering a specific floor. The URL is "/cdor.cgi?open=0&door=$ floor", but the string "$floor" at the end must be identical with the parameter string you defined.
-
URL To Trigger All Floors: enter the Akuvox URL for triggering all floors.
-
URL To Close All Floors: enter the Akuvox URL used for closing all floors.
ZKT Lift Controller
You are required to configure ZKteco lift controller before you can connect the door phone to the lift controller. You can navigate to Lift Control > Akuvox EC32 & ZKT Advance Setting.
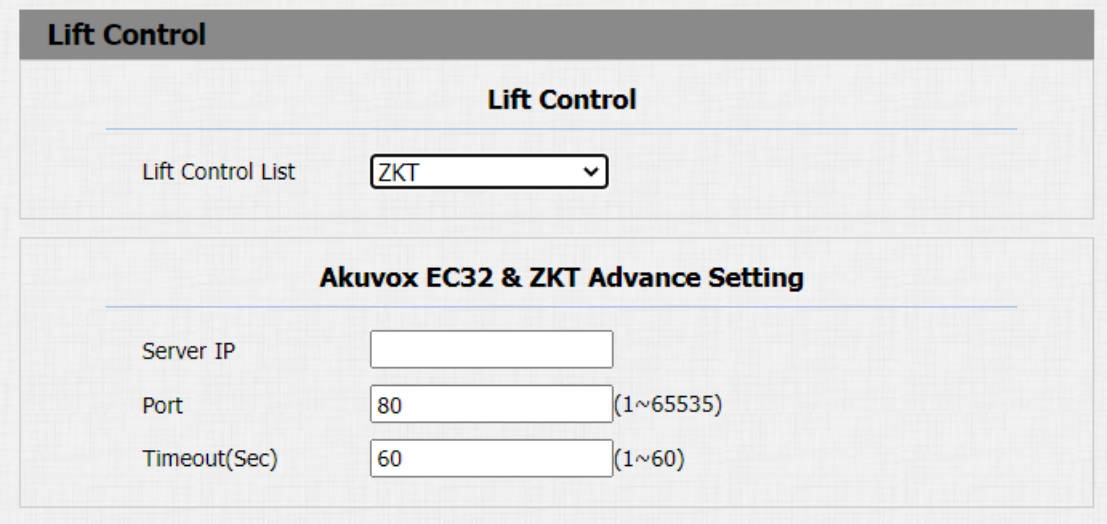
Parameter Set-up:
-
Server IP: enter the IP address of the Akuvox EC32 controller server.
-
Port: enter the port of Akuvox EC32 controller server.
-
Timeout (Sec): enter the lift controller timeout. For example, if you set the timeout as “30 seconds” have to press the lift button corresponding to the floor you are going to within 30 seconds, otherwise, the button will be locked again, and you have to go out of the lift and do it all over again.
Chiyu Lift Controller
You need to select Chiyu lift controller to integrate with Chiyu lift controller. You can navigate to Intercom > Lift Control.