Call Auto-answer Configuration
Auto-answer feature allows the device to automatically pick up incoming calls without any manual intervention. You can also customize this feature by setting the time duration for auto-answering and choosing the communication mode between audio and video.
Set it up on the web Phone > Call Feature > Others interface.
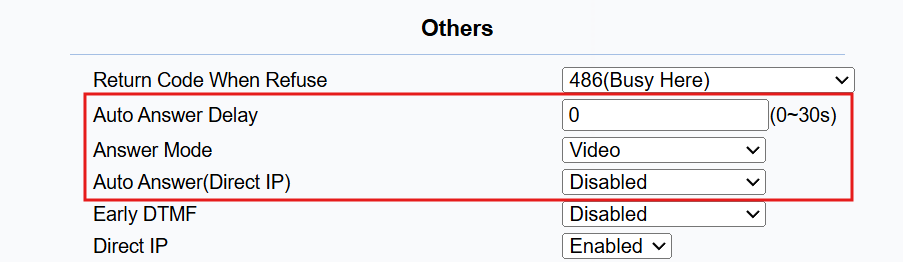
Auto Answer Delay: Set up the delay time (from 0-30 sec.) before the call can be answered automatically. For example, if you set the delay time to 1 second, then the call will be answered in 1 second automatically.
Answer Mode: The video or audio mode for answering the call automatically.
Auto Answer(Direct IP): The setting applies to IP calls.
To configure the auto-answer feature for SIP calls, navigate to the web Account > Advanced > Call interface.
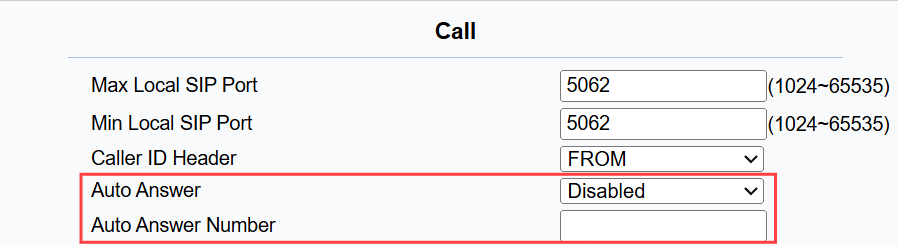
Auto Answer: The setting applies to SIP calls.
Auto Answer Number: Enter the SIP number of the caller whose call will be answered automatically.
Auto-answer Allowlist
Auto-answer can only be applicable to the SIP or IP numbers that are already added in the auto-answer allow list of your indoor monitor. Therefore, you are required to configure or edit the numbers in the allow list on the web interface.
To set it up, go to the Security > Allowlist interface. Click +Add to add the allowed device.
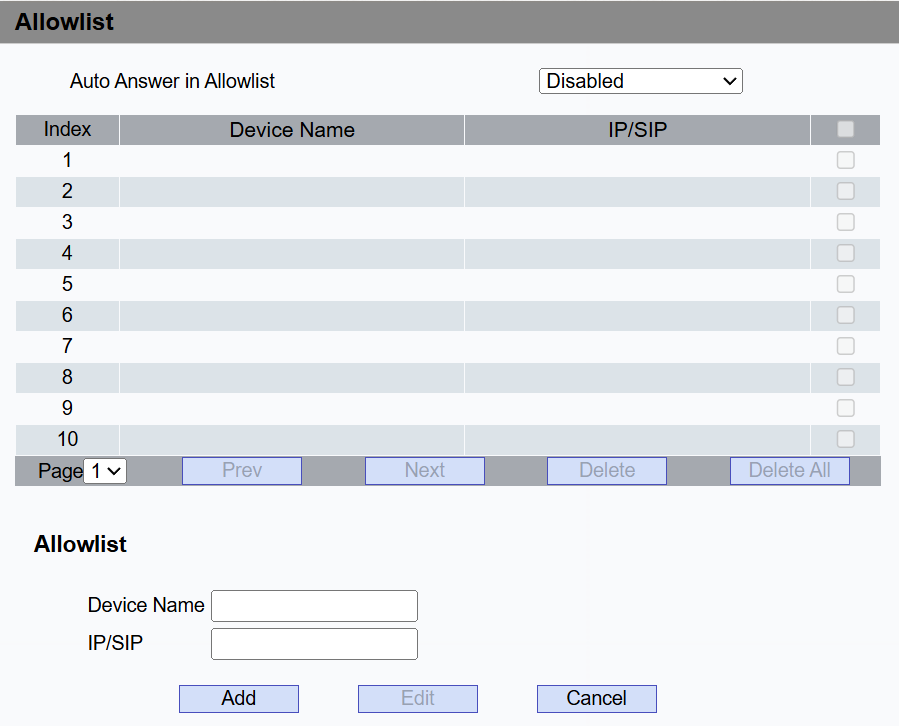
Auto Answer in Allowlist: Turn on/off the feature.
Device Name: Specify the allowed device’s name.
IP/SIP: Enter the allowed device’s SIP or IP number.
Auto-answer Allowlist Import and Export
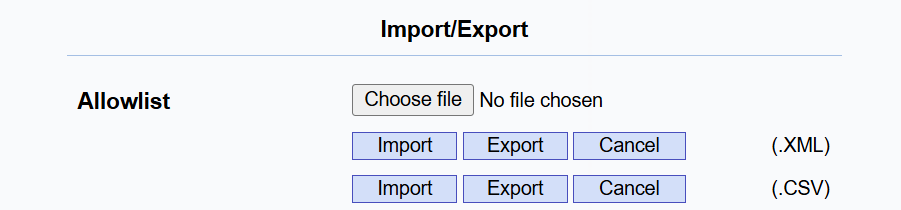
You can import/export the auto-answer allowlist for quick setup.
Set it up on the Security > Allowlist interface. The supported file formats are XML and CSV.
SIP Hacking Protection
Internet phone eavesdropping is a network attack that allows unauthorized parties to intercept and access the content of the communication sessions between intercom users. This can expose sensitive and confidential information to the attackers. SIP hacking protection is a technique that secures SIP calls from being compromised on the Internet.
Enable the feature on the web Account > Advanced > Call interface.
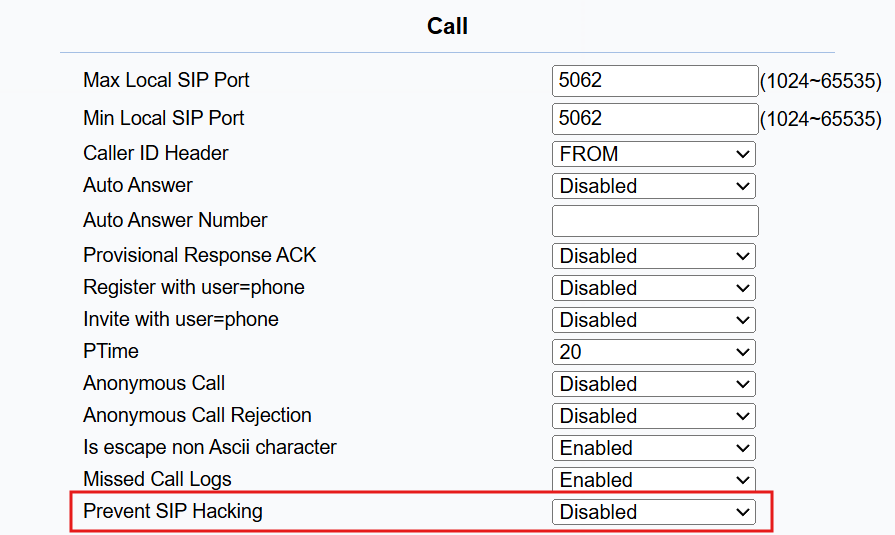
Prevent SIP Hacking: Enable to activate this feature during SIP calls. This feature is only available for SIP calls.
Audio Record Control
You can set whether to record audio during a call.
Set it up on the Phone > Preference > Others interface.
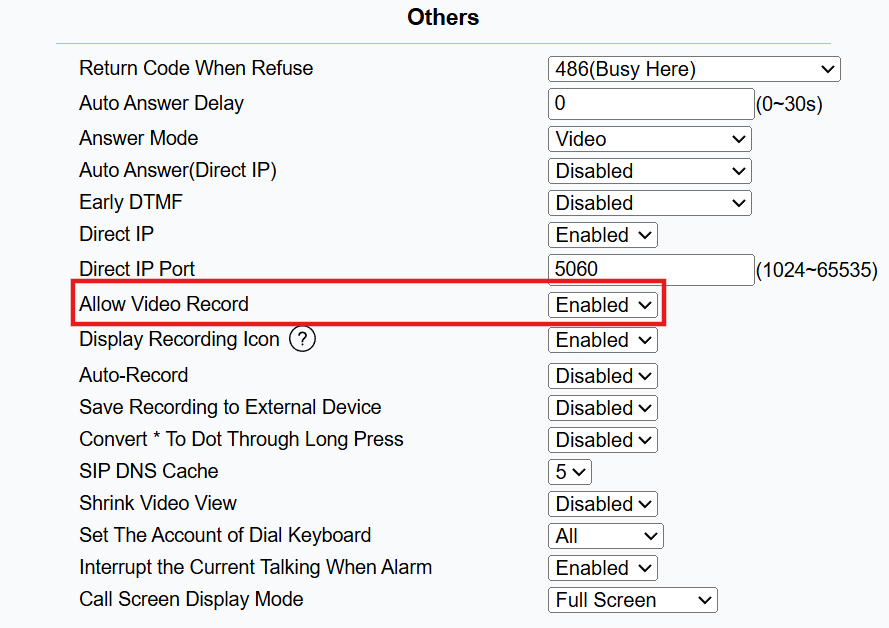
Allow Video Record: Enabled by default. When disabled, the audio record icon will be hidden.
DND
The Do Not Disturb(DND) feature prevents unwanted incoming SIP calls, ensuring uninterrupted focus. It also allows you to set a code to be sent to the SIP server when rejecting a call.
Set it up on the web Phone > Call Feature > DND interface.
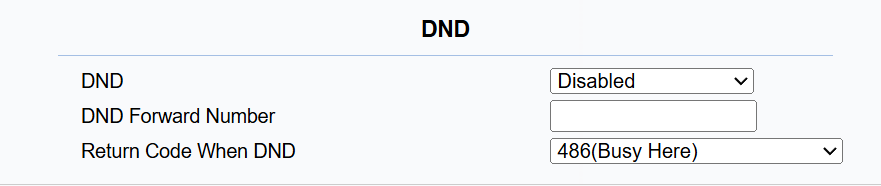
DND Forward Number: When the device refuses the call, the call will be forwarded to the number.
Return Code When DND: Specify the code sent to the caller via the SIP server when rejecting an incoming call in DND mode.
Speed Dial
Speed dial allows users to make speedy calls by pressing the contacts on the speed dial screen.
Set it up on the web Phone > Speed Dial interface.

Account: The account to make the speed dial call.
Name: The contact name.
Number 1/2/3: The contact’s IP or SIP number. One contact can have three numbers at most. When users press the contact on the Speed Dial screen, three numbers will be called simultaneously.
To call the speed dial number, tap a random option among Phone, Alarm, Message, and Monitor. Then, tap Speed Dial.

Multicast
The Multicast function allows one-to-many broadcasting for different purposes. For example, it enables the device to announce messages from the kitchen to other rooms or to broadcast notifications from the management office to multiple locations. In these scenarios, the device can send audio broadcasts.
Set it up on the web Phone > Multicast interface.
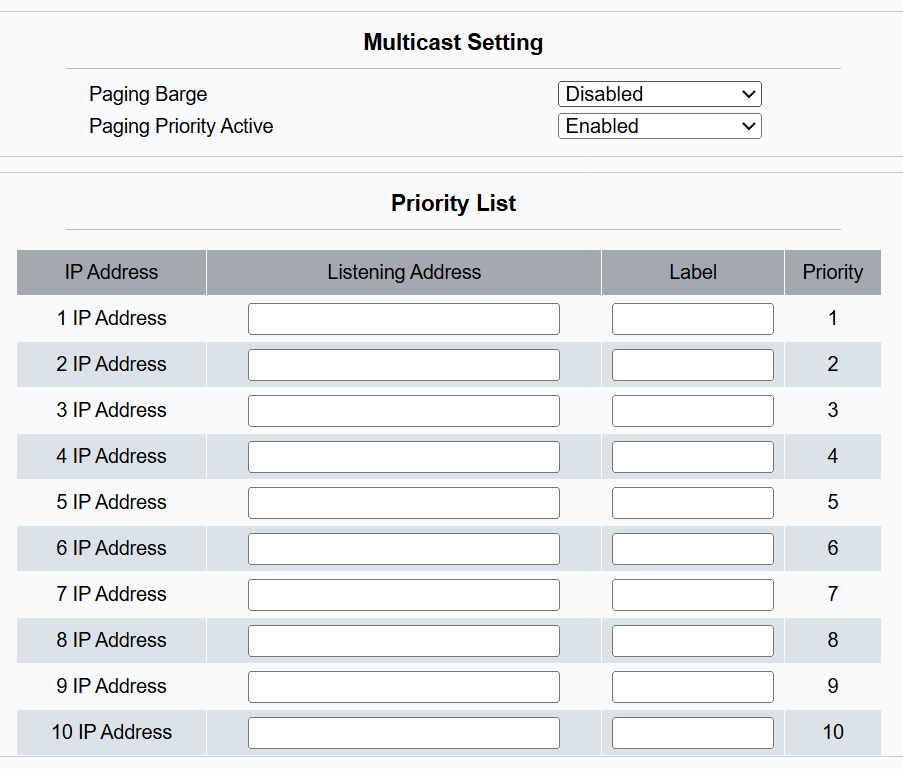
Paging Barge: Multicast, or how many multicast calls have a higher priority than SIP call. If you disable it, the SIP call will have high priority.
Paging Priority Active: Multicast calls are called in order of priority or not.
Listening Address: Enter the multicast IP address. The multicast IP address needs to be the same as the listening address, and the multicast port cannot be the same for each IP address. Multicast IP addresses are from 224.0.0.0 to 239.255.255.255.
Label: The name to be shown on the calling screen.
Scheduled Audio Multicast
The device supports scheduled audio multicast by configuring an Ext Key as a multicast trigger with a predefined schedule. For example, in a factory scenario, an administrator can configure the system to automatically play a shift change notification at 12:00 PM every day.
It is designed to work in conjunction with the Multicast function:
The Multicast settings (configured in Phone > Multicast) define the broadcast destination (IP/port and listening devices).
The Ext Key scheduled task defines when to trigger the multicast and which audio file to play.
Set this feature up on the Phone > Ext Key interface. Set the Ext Key Type to Multicast Paging.
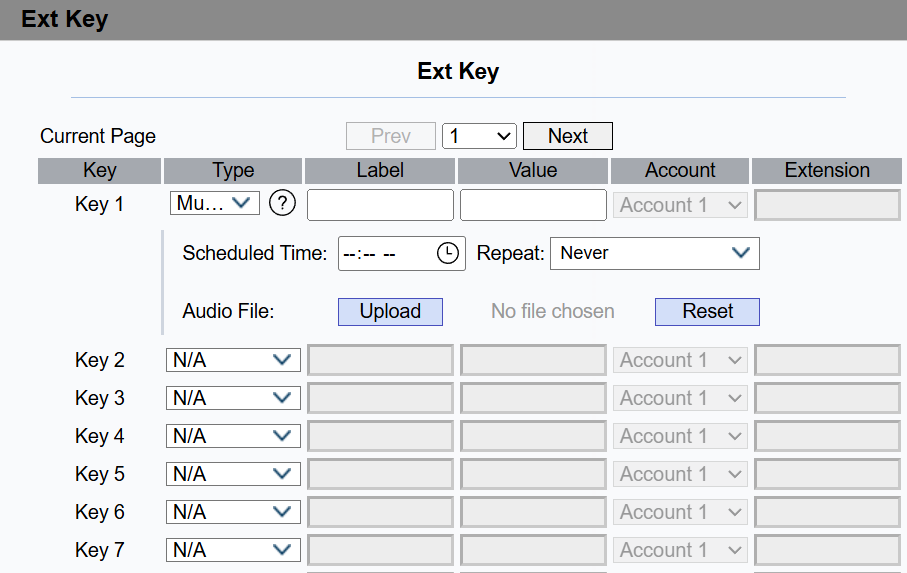
Scheduled Time: Specify the time at which the audio multicast will be triggered automatically.
Repeat: Define how often the multicast repeats. Options include Never, Monday ~ Sunday, and Everyday.
Audio File: Click Upload to import the audio file. File format: WAV; Size: < 100 MB.
Emergency Call
SOS numbers need to be set up before users can make SOS calls. You can set up a maximum of three SOS numbers, which can be initiated automatically when pressing SOS on the home screen when an emergency occurs.
Set it up on the web Phone > Intercom interface.
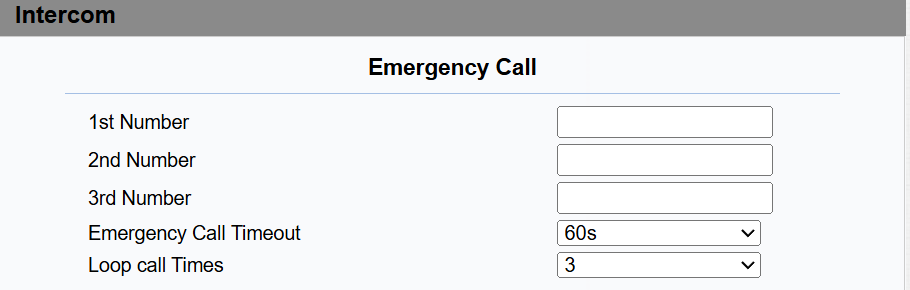
Number: Set up three SOS numbers, which will be called when pressing SOS on the device's home screen.
Emergency Call Timeout: Set up the timeout for each number. Once users call out, if the other side does not answer within the timeout, the device will continue to call the next number.
Loop Call Times: Set up the call loop times.
Call Forwarding
Call Forward is a feature that allows for transferring incoming calls to another number. Users can set up call forwarding according to different situations, such as always forwarding calls, forwarding calls when the indoor monitor is busy, or when it doesn’t pick up the call.
Set it up on the Phone > Call Feature > Forward Transfer interface.
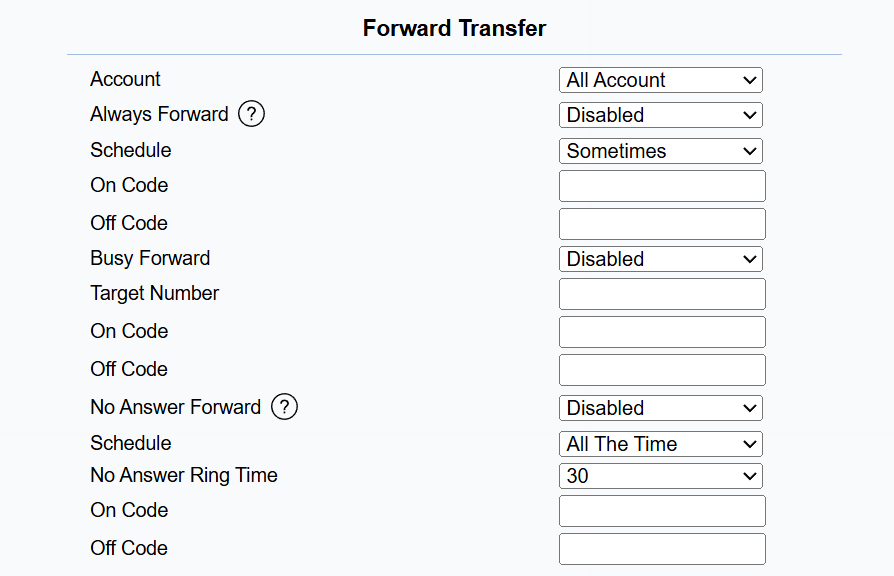
Account: Choose the registered account to implement the call forwarding feature.
Always Forward: All incoming calls will be automatically forwarded to a specific number.
Schedule: Set it when the forwarding rule is active. Options include All The Time and Sometimes. This allows different forwarding behaviors for working hours and non-working hours.
Always Forward Configuration: A list of forwarding rules. Multiple configurations can be created (up to 20) to support different time periods when the Sometimes schedule mode is selected.
Target Number: The destination number to which incoming calls will be forwarded.
Add Configuration: Available when the Sometimes schedule mode is selected. This enables time-based routing (e.g., office hours vs after hours).
Busy Forward: Incoming calls will be forwarded to a specific number if the phone is busy.
Target Number: The destination number to which incoming calls will be forwarded.
No Answer Forward: Incoming calls will be forwarded to a specific number if the phone is not picked up within the no-answer ring time.
Schedule: Set it when the forwarding rule is active. Options include All The Time and Sometimes. This allows different forwarding behaviors for working hours and non-working hours.
No Answer Ring Time: 0~120 seconds. Specify how long an incoming call rings on the device before the system considers it unanswered and forwards the call to the configured target number.
No Answer Forward Configuration: A list of forwarding rules. Multiple configurations can be created (up to 20) to support different time periods when the Sometimes schedule mode is selected.
Target Number: The destination number to which incoming calls will be forwarded.
Add Configuration: Available when the Sometimes schedule mode is selected. This enables time-based routing (e.g., office hours vs after hours).
On/Off Code: The code sent to the SIP server to turn on/off the call forwarding feature.
Call forwarding can also be set up on the device ![]() > Call Settings screen.
> Call Settings screen.
(1).png "image(782)(1).png")
Quick Dial By Number Replacement
The dial number replacement feature simplifies long and complex dial numbers of the device, providing shorter and more user-friendly alternatives for making calls. It allows the substitution of multiple dial numbers, such as IP addresses or SIP numbers, with a single, simplified number.
Set it up on the Phone > Dial Plan interface. Click Add.

Account: Choose the account for dial number replacement. By default, it is set to Auto, which means calls will go out from the registered account. You can select either Account 1 or Account 2 to make the call. If both accounts are registered, it will use Account 1 by default.
Prefix: The short number that replaces the dial number.
Replace: Enter the dial number(s) to be replaced. For example, if you replace five original dial numbers with a common short number, such as 101, then the five intercom devices with the dial number will be called at the same time when users dial 101.
You can import or export the quick dial numbers on the same interface. The file supported is XML.

Quick dial can also be set up on the device ![]() > Dial Plan screen.
> Dial Plan screen.
(1).png "image(784)(1).png")
Area Code
Area codes are also known as NPAs (Numbering Plan Areas). They usually indicate different geographical areas within one country. If the entered numbers match the predefined area code rule, the phone will automatically prefix the outgoing number with the area code.
Set it up on the device ![]() > Dial Plan > Area Code screen.
> Dial Plan > Area Code screen.
(1).png "image(788)(1).png")
Min Length (1-15): Set the minimum length of the SIP number.
Max Length(1-15): Set the maximum length of the SIP number
Account: Select the account for which you want to apply the area code function.
Incoming Call Notification
The device can send the calling contact’s information to a third-party server in the HTTP URL format.
Set it up on the Phone > Call Feature interface.

Incoming Call Notification: Turn on/off the feature. It is disabled by default.
Server Address: The address of the third-party server.
Auto-record when Making Calls
The device can automatically record videos and audio when it calls other devices.
To set this up, go to the Phone > Call Feature > Others interface.
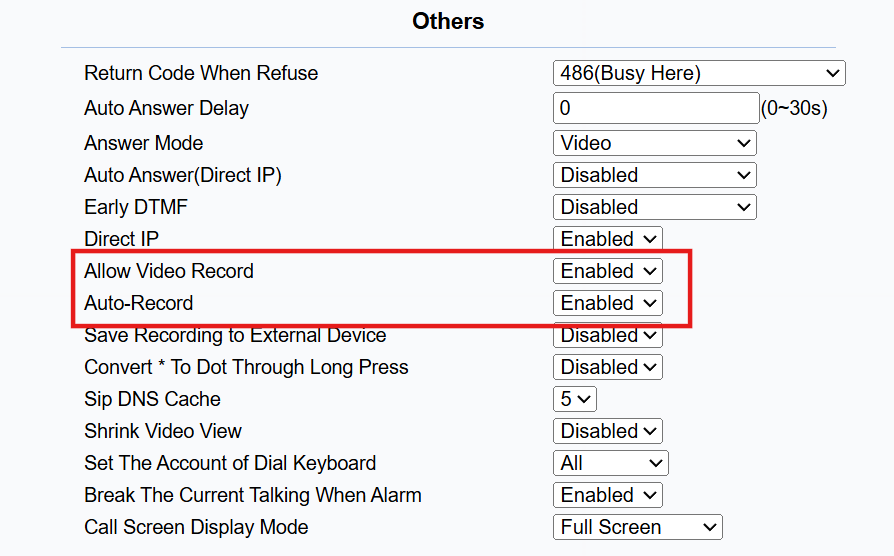
Allow Video Record: It is disabled by default. When enabled, the device will automatically start recording a video when it calls other devices. During the call, users can tap
 to stop the recording.
Auto-Record: It is disabled by default. When enabled, the device will automatically start recording audio when it calls other devices.
You can also set this feature by tapping ![]() > Call Settings. Scroll to the bottom.
> Call Settings. Scroll to the bottom.
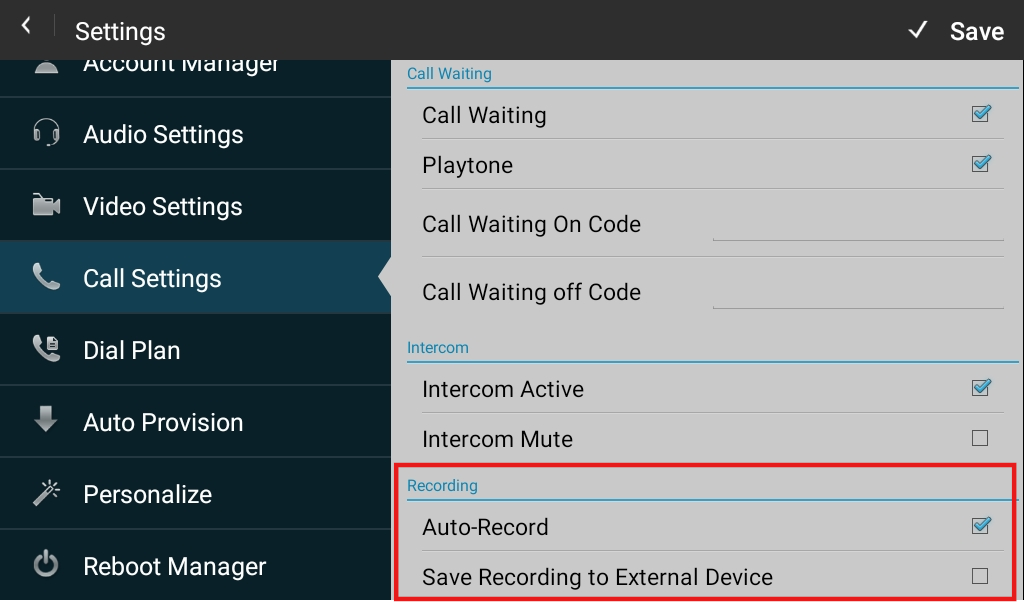
Save Recording to External Device: When checked, recorded files will be saved to the external device instead of the internal folder.
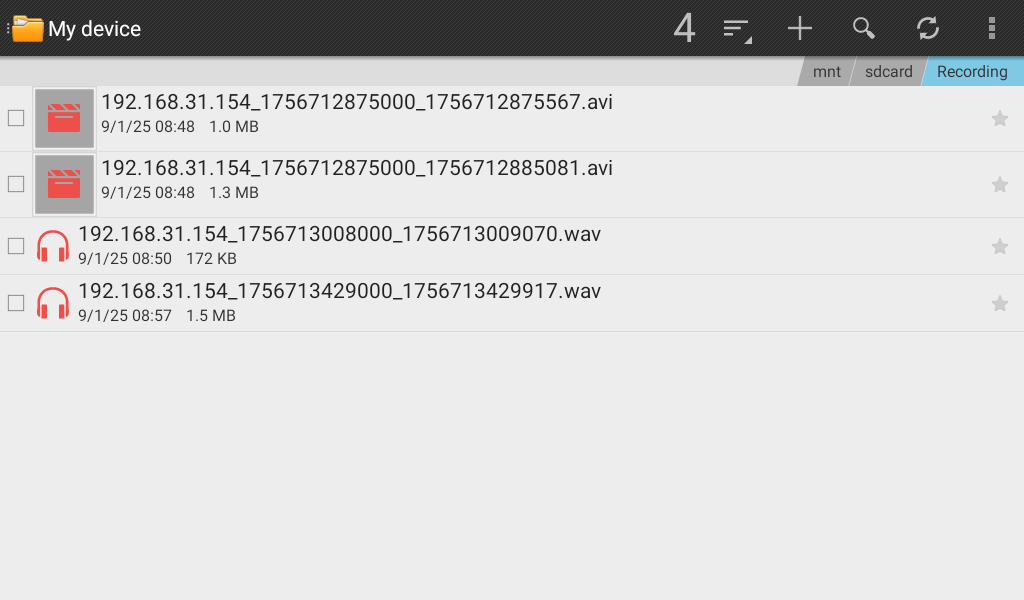
You can check the recorded files by tapping ![]() > Recordings.
> Recordings.
Hotline Configuration
The device supports configuring a hotline number, allowing users to automatically call a specified number when they pick up the handset. This feature is useful for quickly connecting to emergency services, customer support, or any other predefined contact.
Set it up on the Phone > Call Feature > Hotline interface.
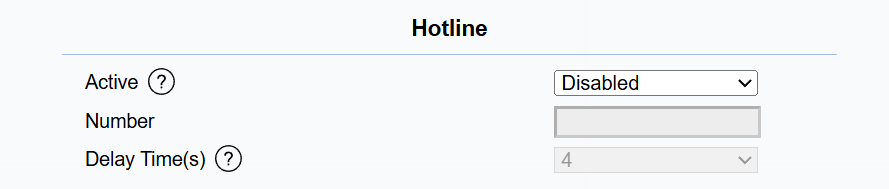
Active: Enable/disable the feature.
Number: The IP or SIP number to be called.
Delay Time(s): Set the interval (0–5 seconds) between the moment the user picks up the handset and when the device automatically dials the number. The default is 4 seconds.