You can watch the video or refer to the text instructions.
Video Outline:
0:00--Overview
0:27--Set up Door Phone and Indoor Monitor
2:18--Add Drivers and Connect Devices
3:30--Update Settings to Akuvox Devices
4:24--Make One-to-One SIP Calls
5:37--Make Group Calls
6:35--View Call Preview from the Door Phone
7:03--Open Doors
8:29--Configure Doorbell Button
Note
For S567 with the version 567.30.14.102 or higher, enable Discovery Mode for connection with Control4.
Preparation
Update Composer
Note
The Composer version should be consistent with the C4 controller.
When logging into the Composer for the first time, you can check its version.

If you want to check the information about updates, click Help > Check for Updates.


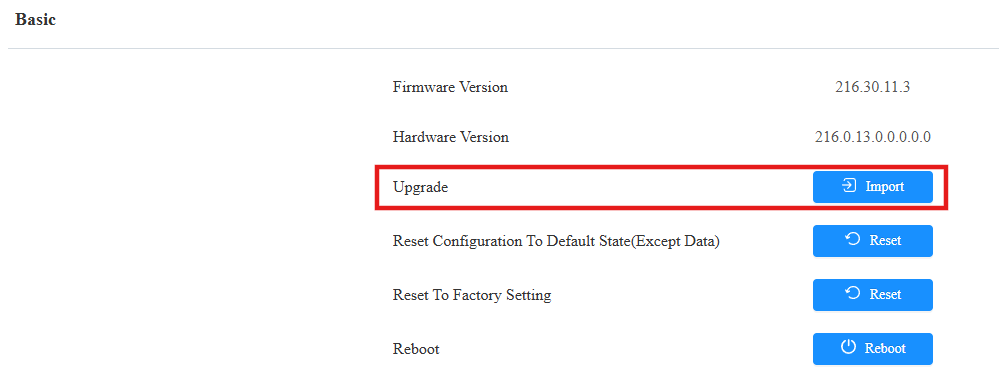
Upgrade Devices
You need to upgrade devices to specific firmware for integration with Control4.
Log into the device’s web interface with its IP address. The default username and password are admin.
Navigate to the System > Upgrade interface.
Choose the file from the local drive and click Upgrade.
Note
To download firmware, go to Firmware & Tool on Knowledge Base and choose the target category and model.
The routes to obtain the IP address vary by model, you may refer to https://knowledge.akuvox.com/docs/before-entering-device-web-interface.
Also, you can use IP scanner to scan IP address(es) of all devices within the same LAN.
Google Chrome browser is strongly recommended.
Your computer should be on the same network as the device.
Set the Door Phone and Indoor Monitor
After upgrading devices to the versions that support C4 integration, you need to activate the integration and turn off specific switches such as discovery mode for fulfilling communication between C4 and Akuvox devices.
Please refer to the Door Phone Configuration and Indoor Monitor Configuration.
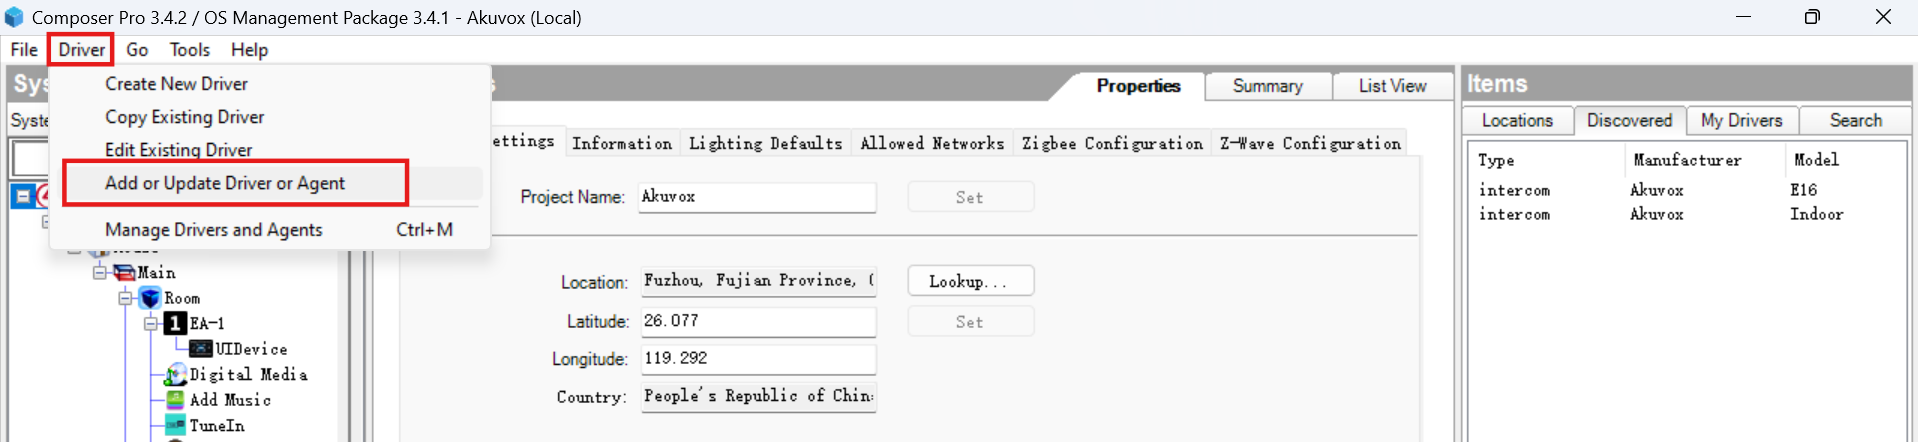
Add Drivers in Composer
Run the Composer software.
Find Driver on the menu and click Add or Update Driver.
Select the driver from your computer and upload it.
Note
You can install the C4 app in indoor monitors instead of adding drivers.
To acquire drivers, go to the Driver Download chapter.

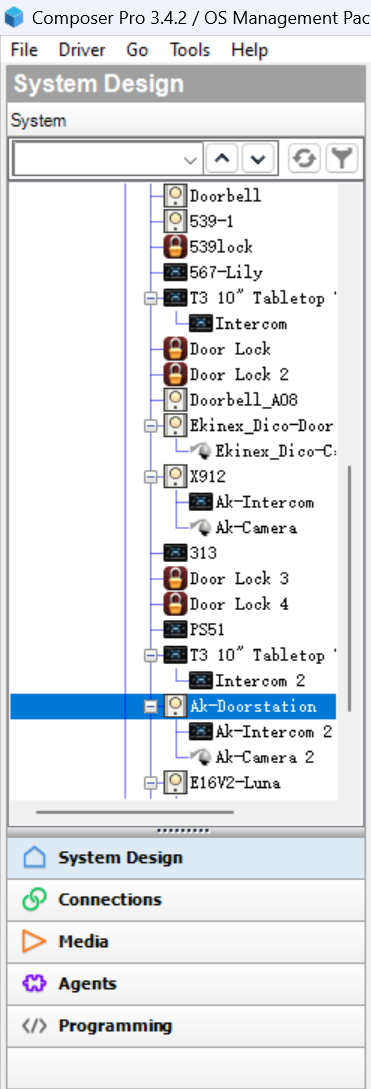
Click Discovered on the left Items menu. Right-click on the discovered device and click Add to the Project.
If the device does not display, click Refresh to update the list.

You can see the device with the default name Ak-Doorstation in the System Design interface.
You can right-click to rename the device for identification.
Connect Devices to the Composer
Go to Connections > Network > IP Network Connections interface, where you can check the device’s connection status.
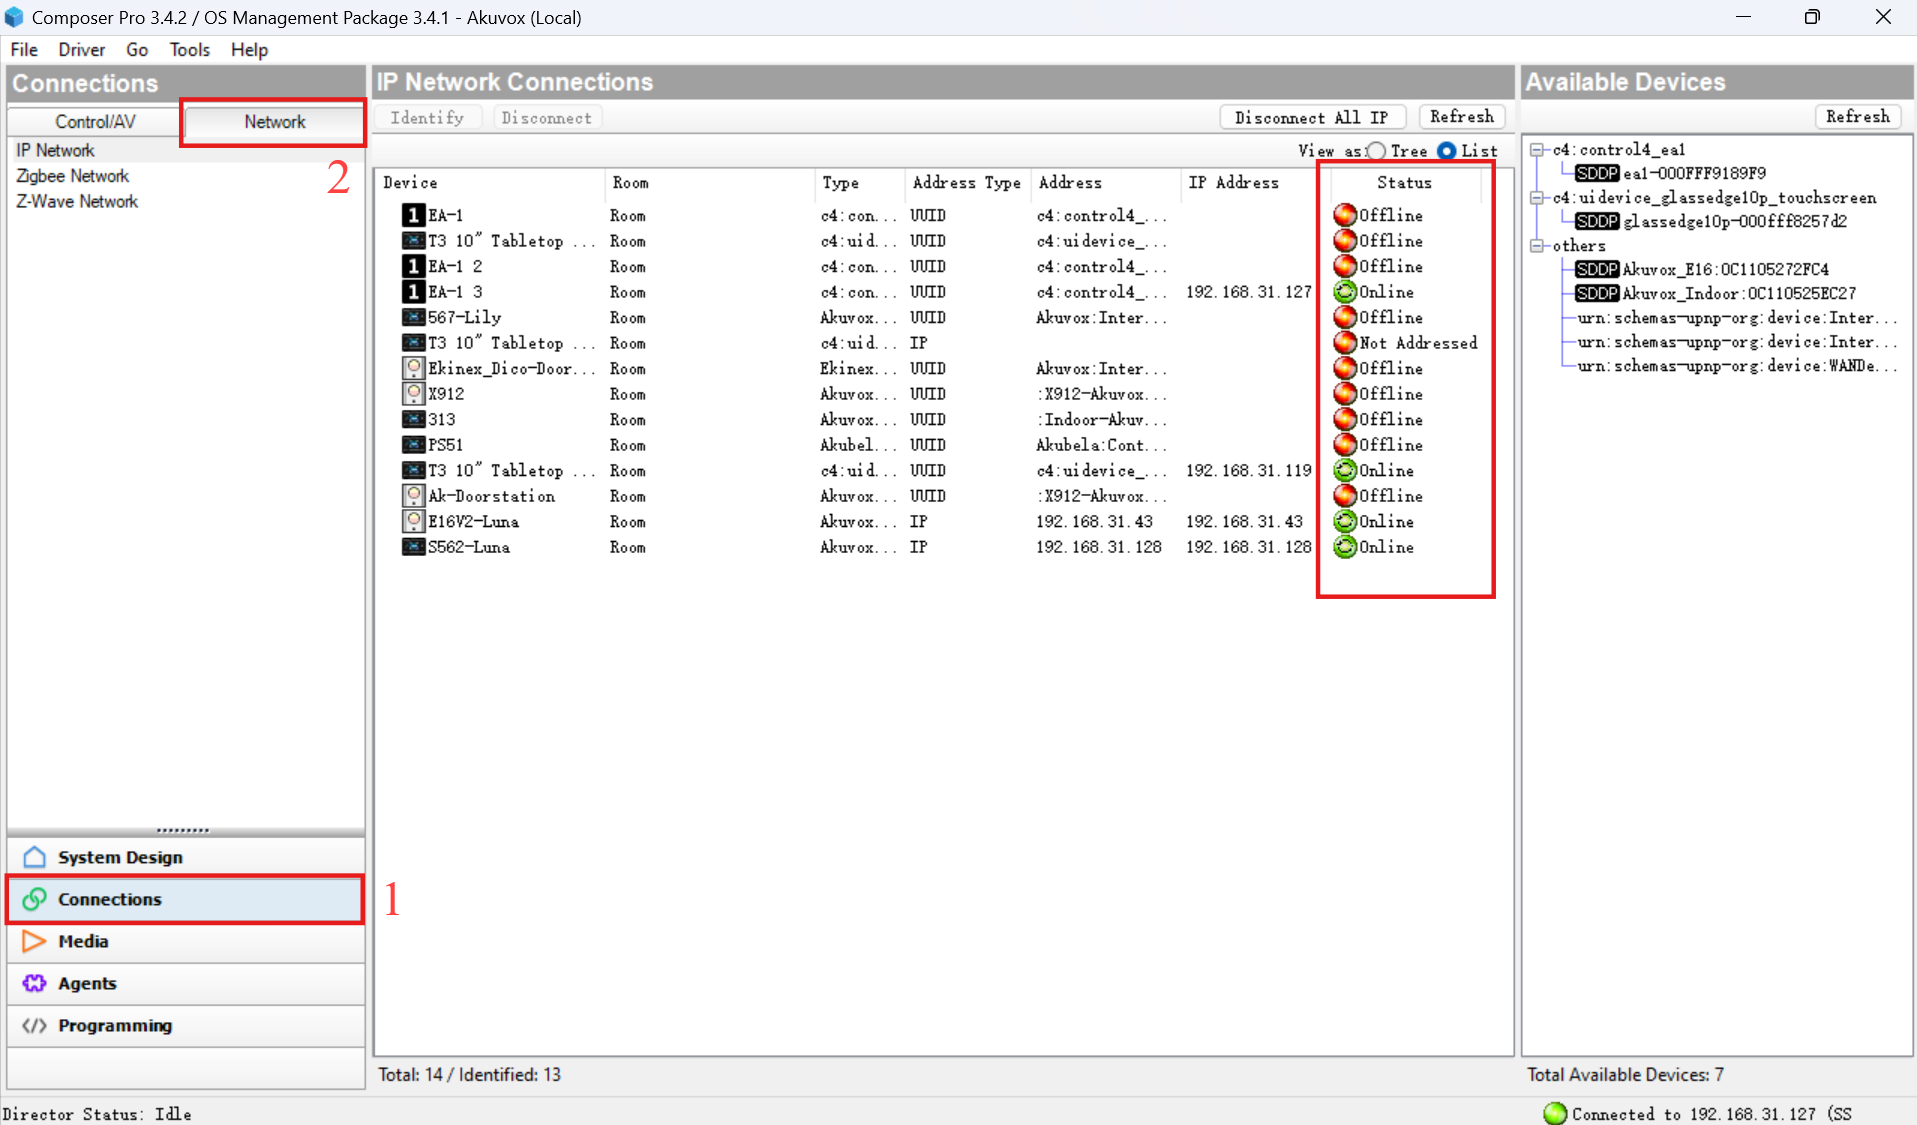
Click the desired device if it appears Offline.
Enter the device’s IP address and close the window.
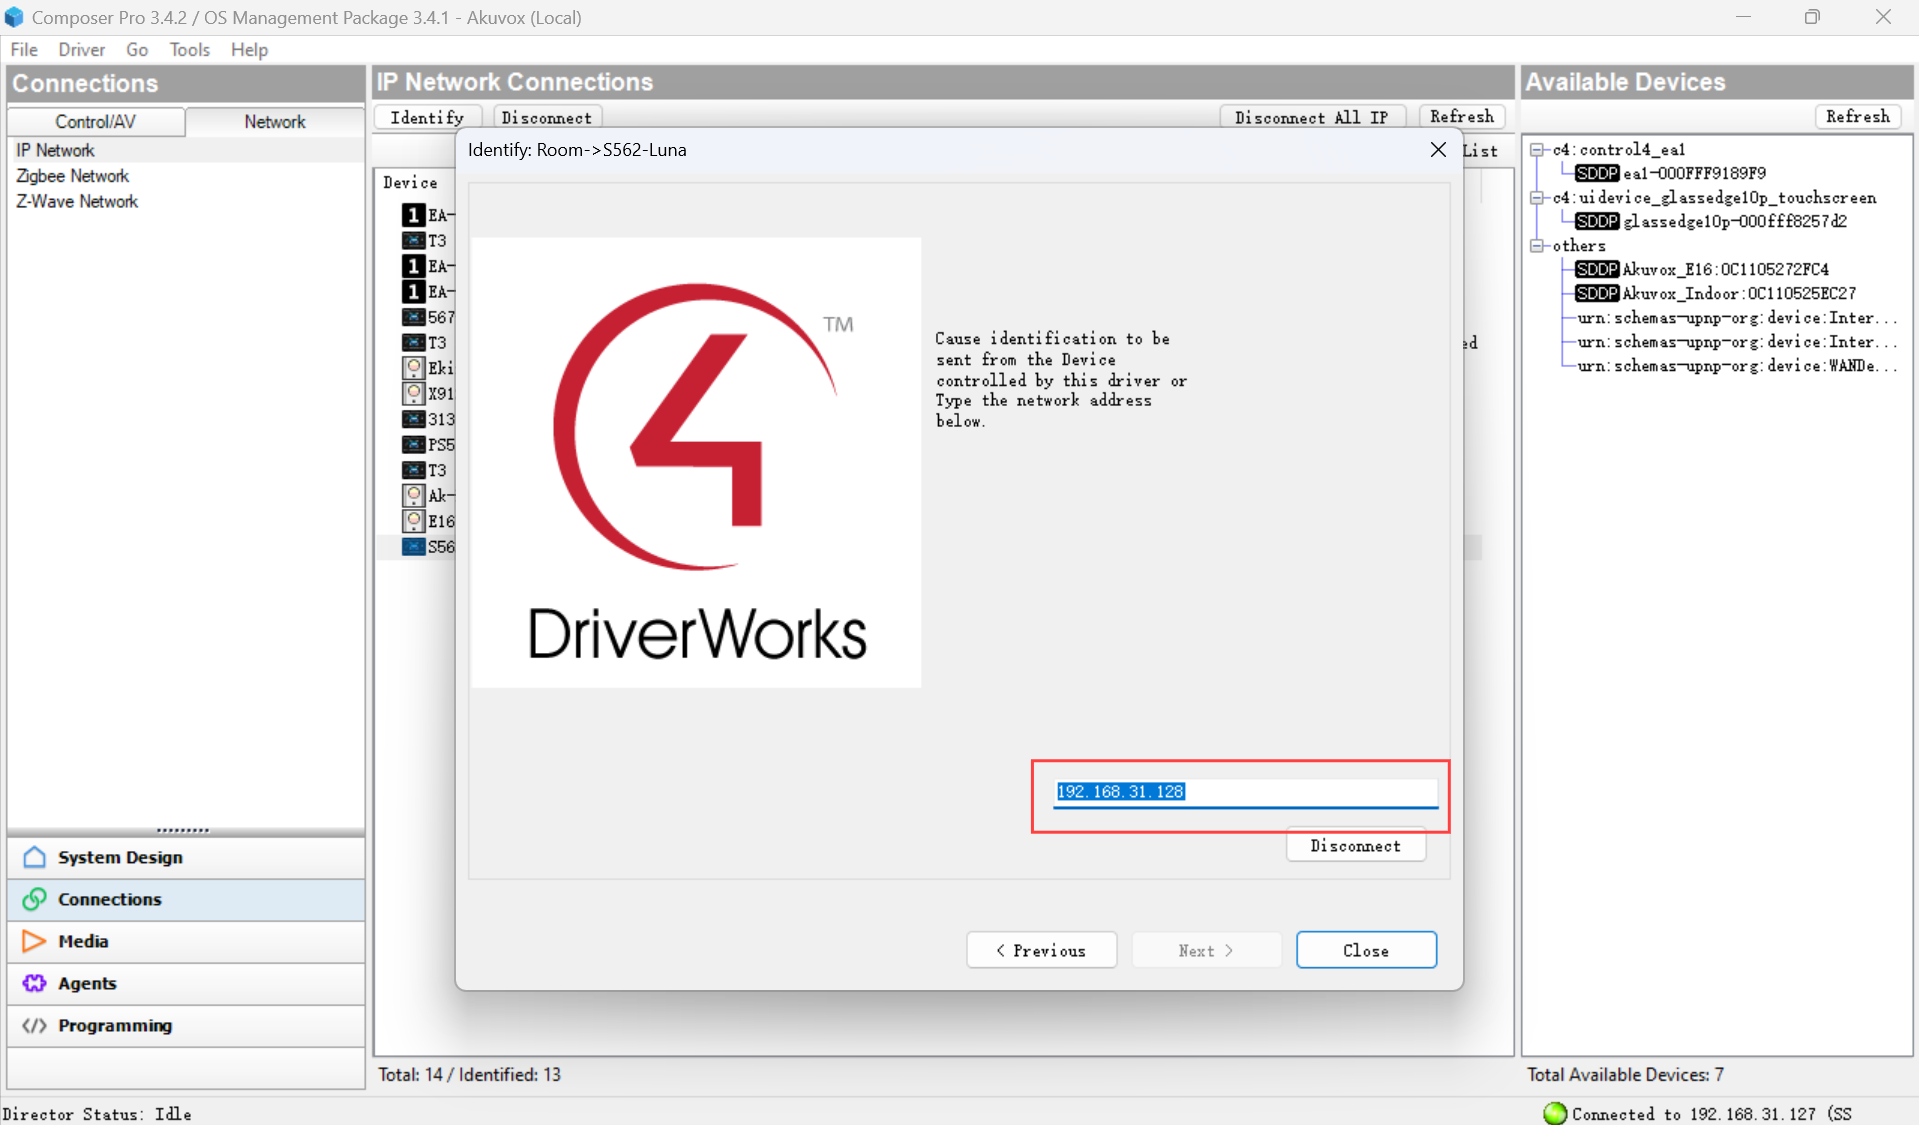
The device will appear online. Go back to the System Design interface, and the device’s information is shown.
Features Configuration
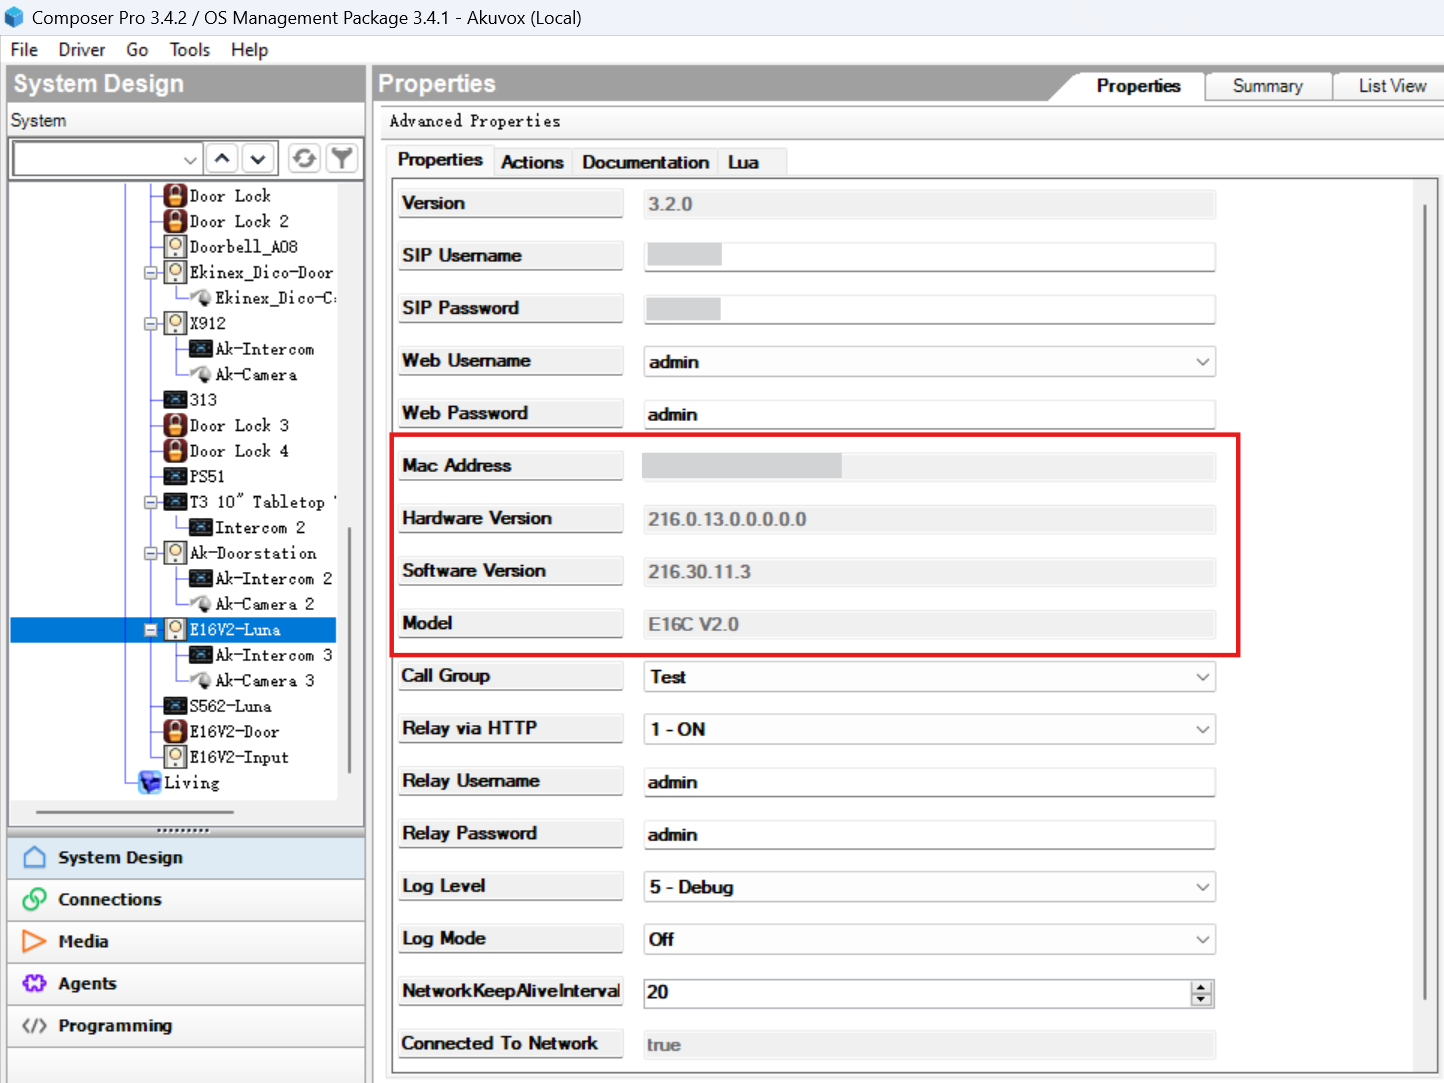
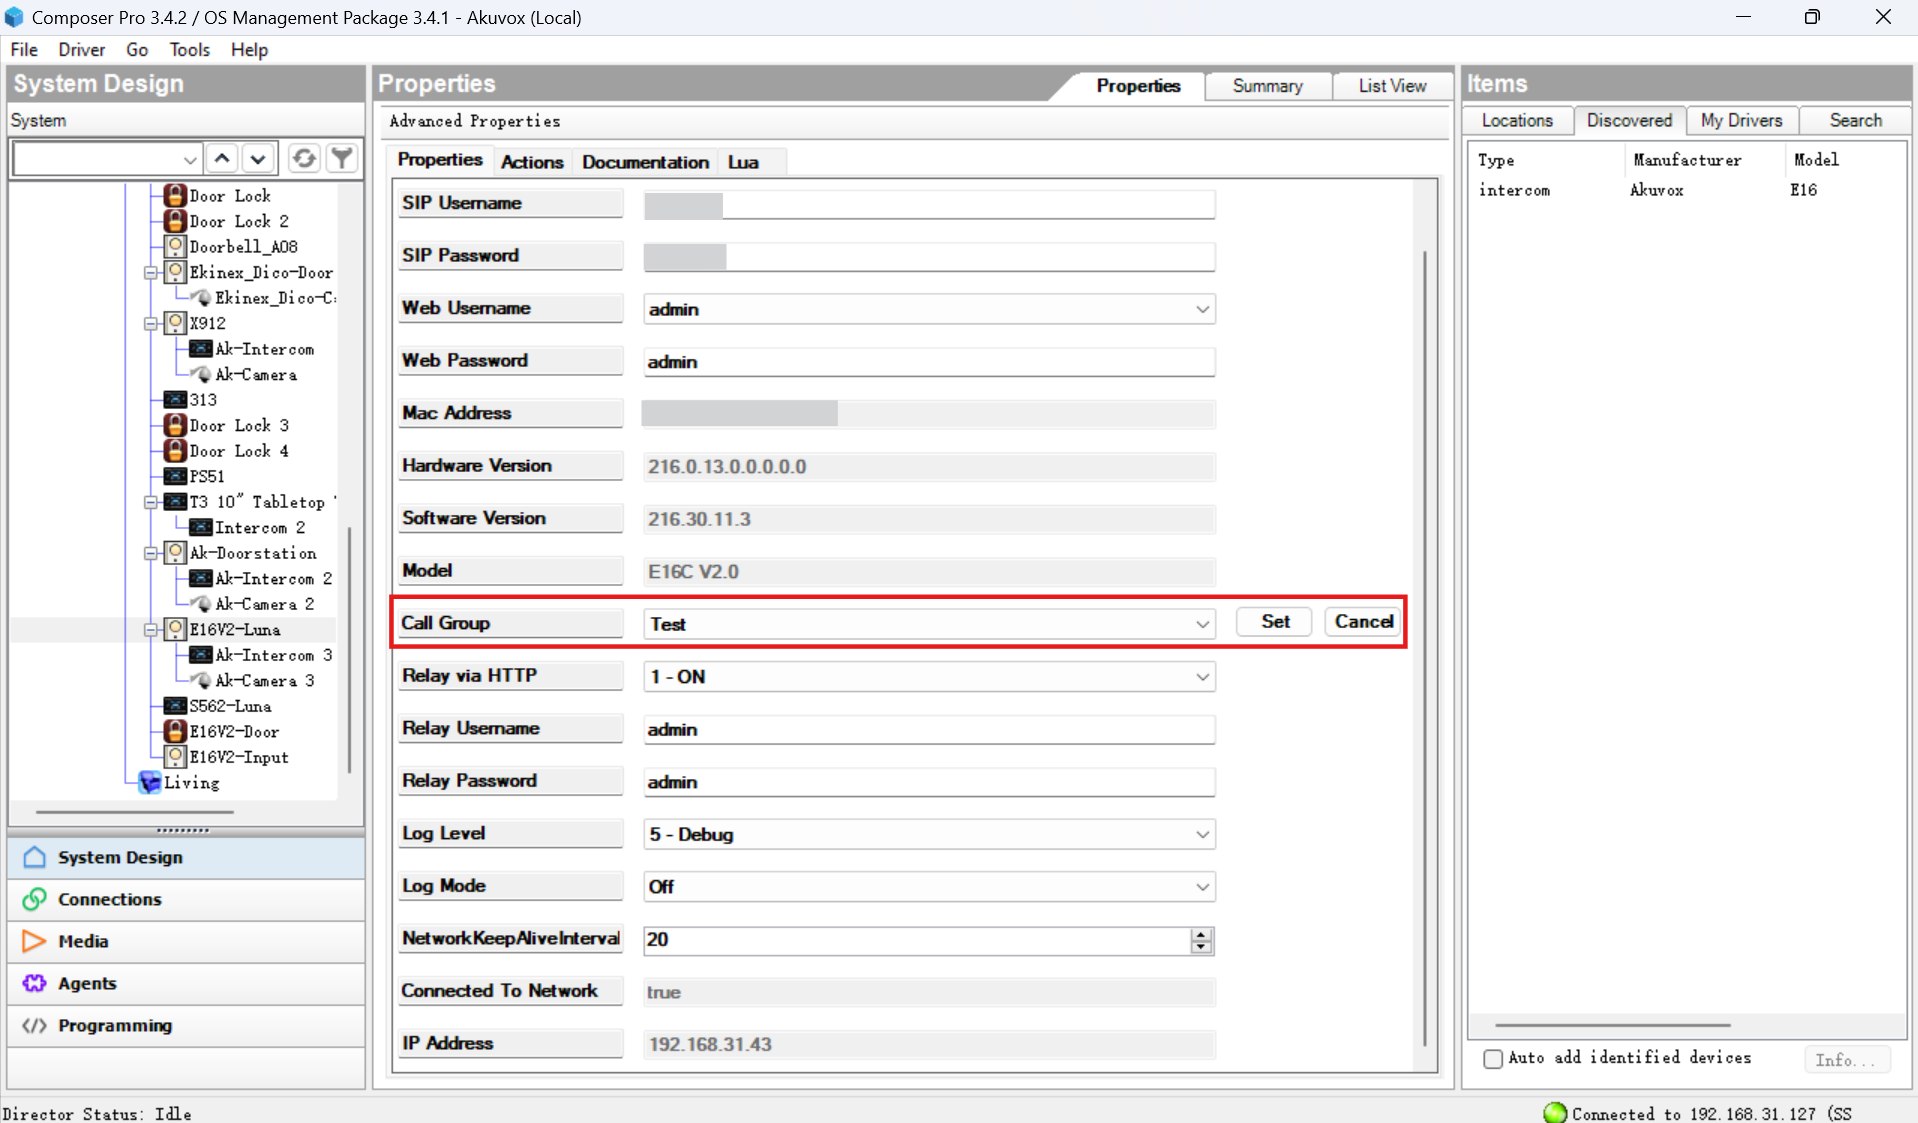
Update Settings to Akuvox Devices
You can change some settings on the System Design interface and update them to the door phone.
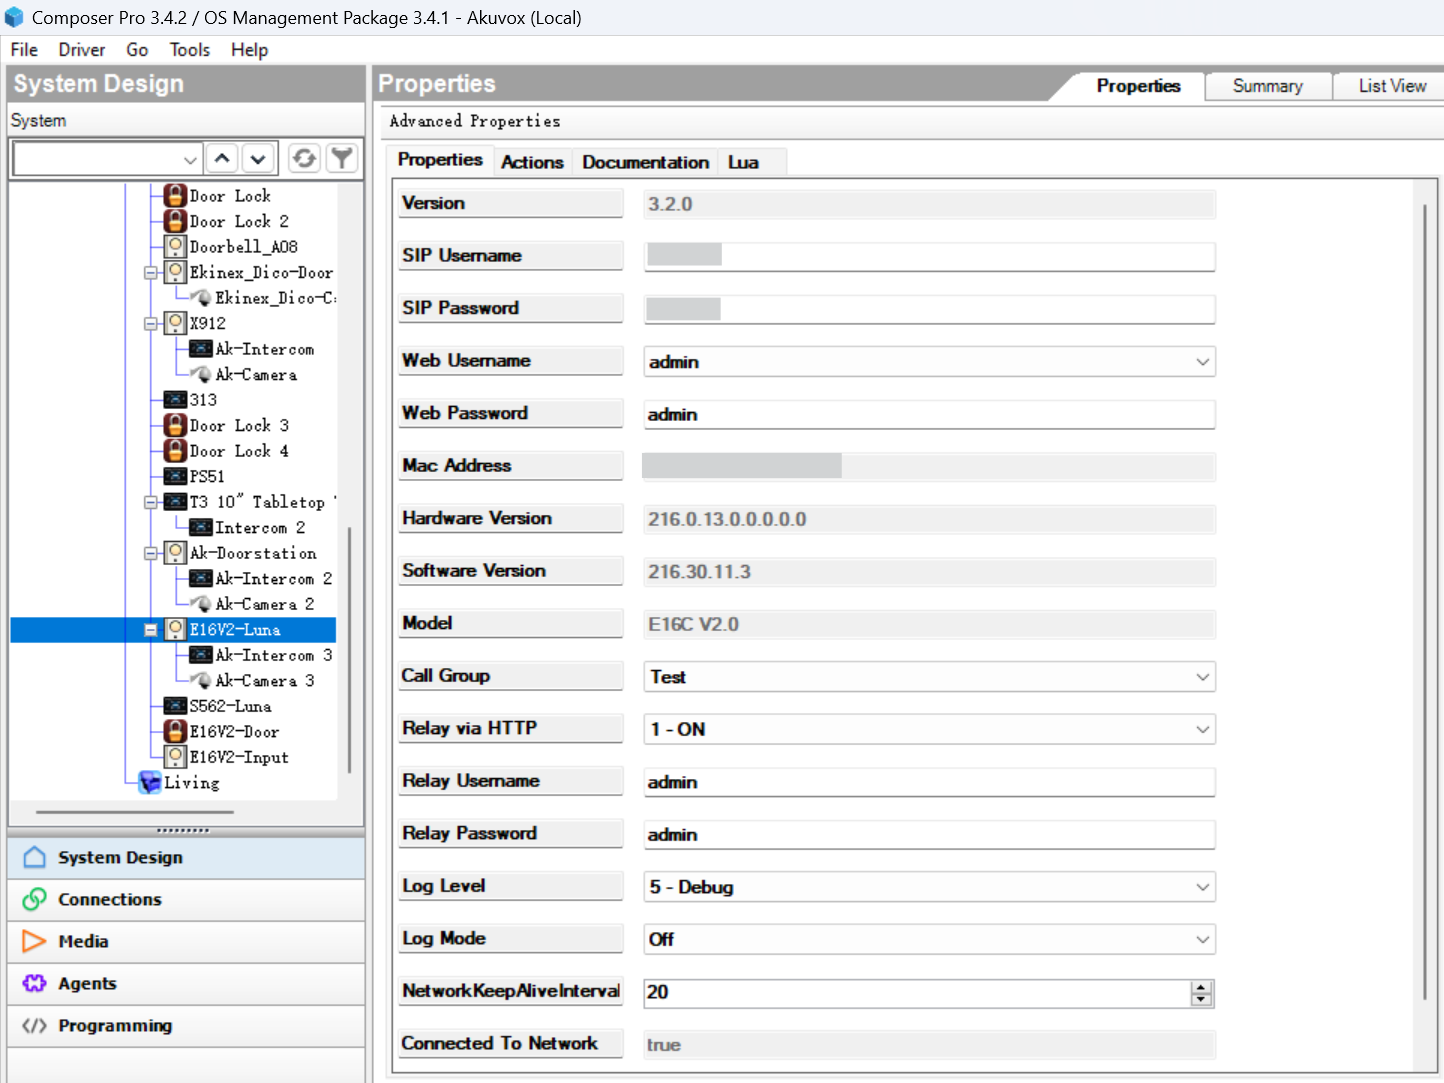
Web Username/Web Password: The username and password used to access the device’s web interface.
Call Group: The default is All(Containing the C4 panel). You can create a new group and add more contacts. For instructions, refer to the Add Contacts to a Group section.
Relay via HTTP: Allow door-opening via HTTP command. Keep it on if you want to use this feature.
Relay Username/Password: The credentials used in the HTTP command.
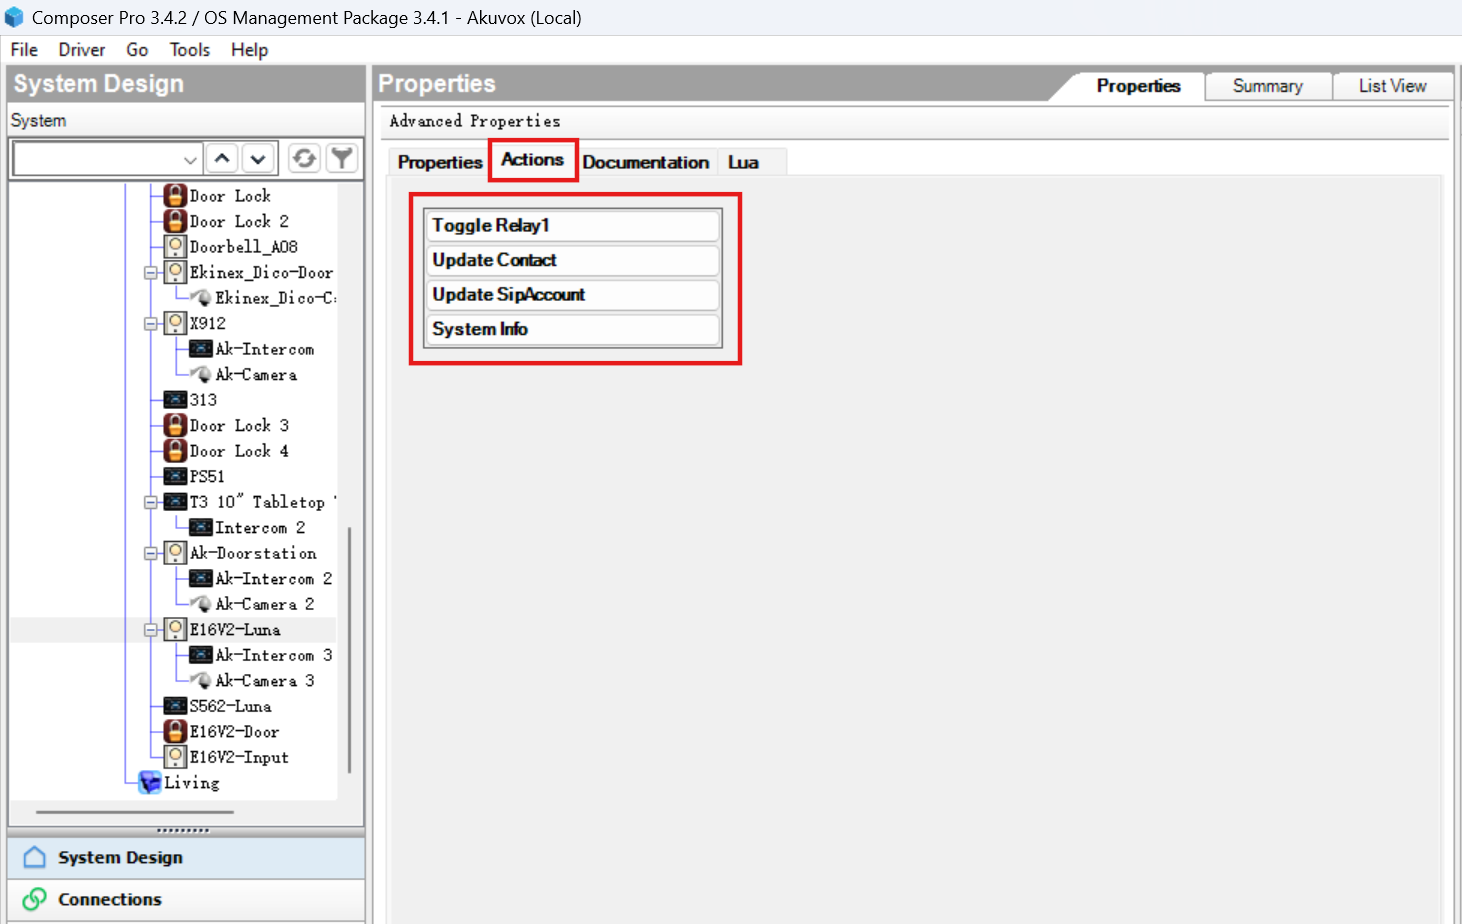
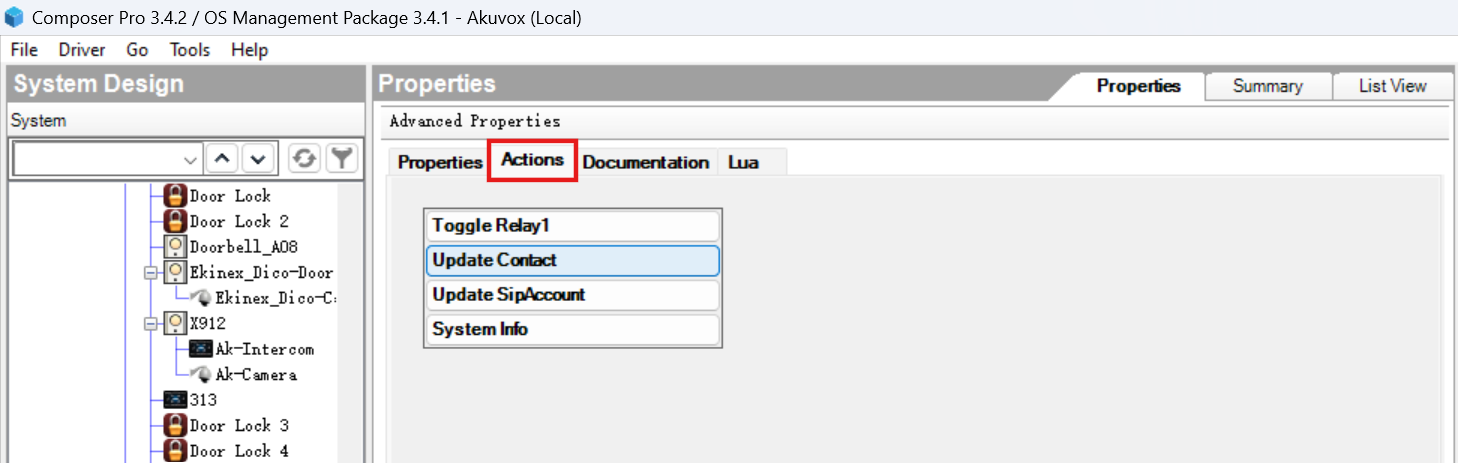
After changing the settings, click Actions and update the changes to the door phone.
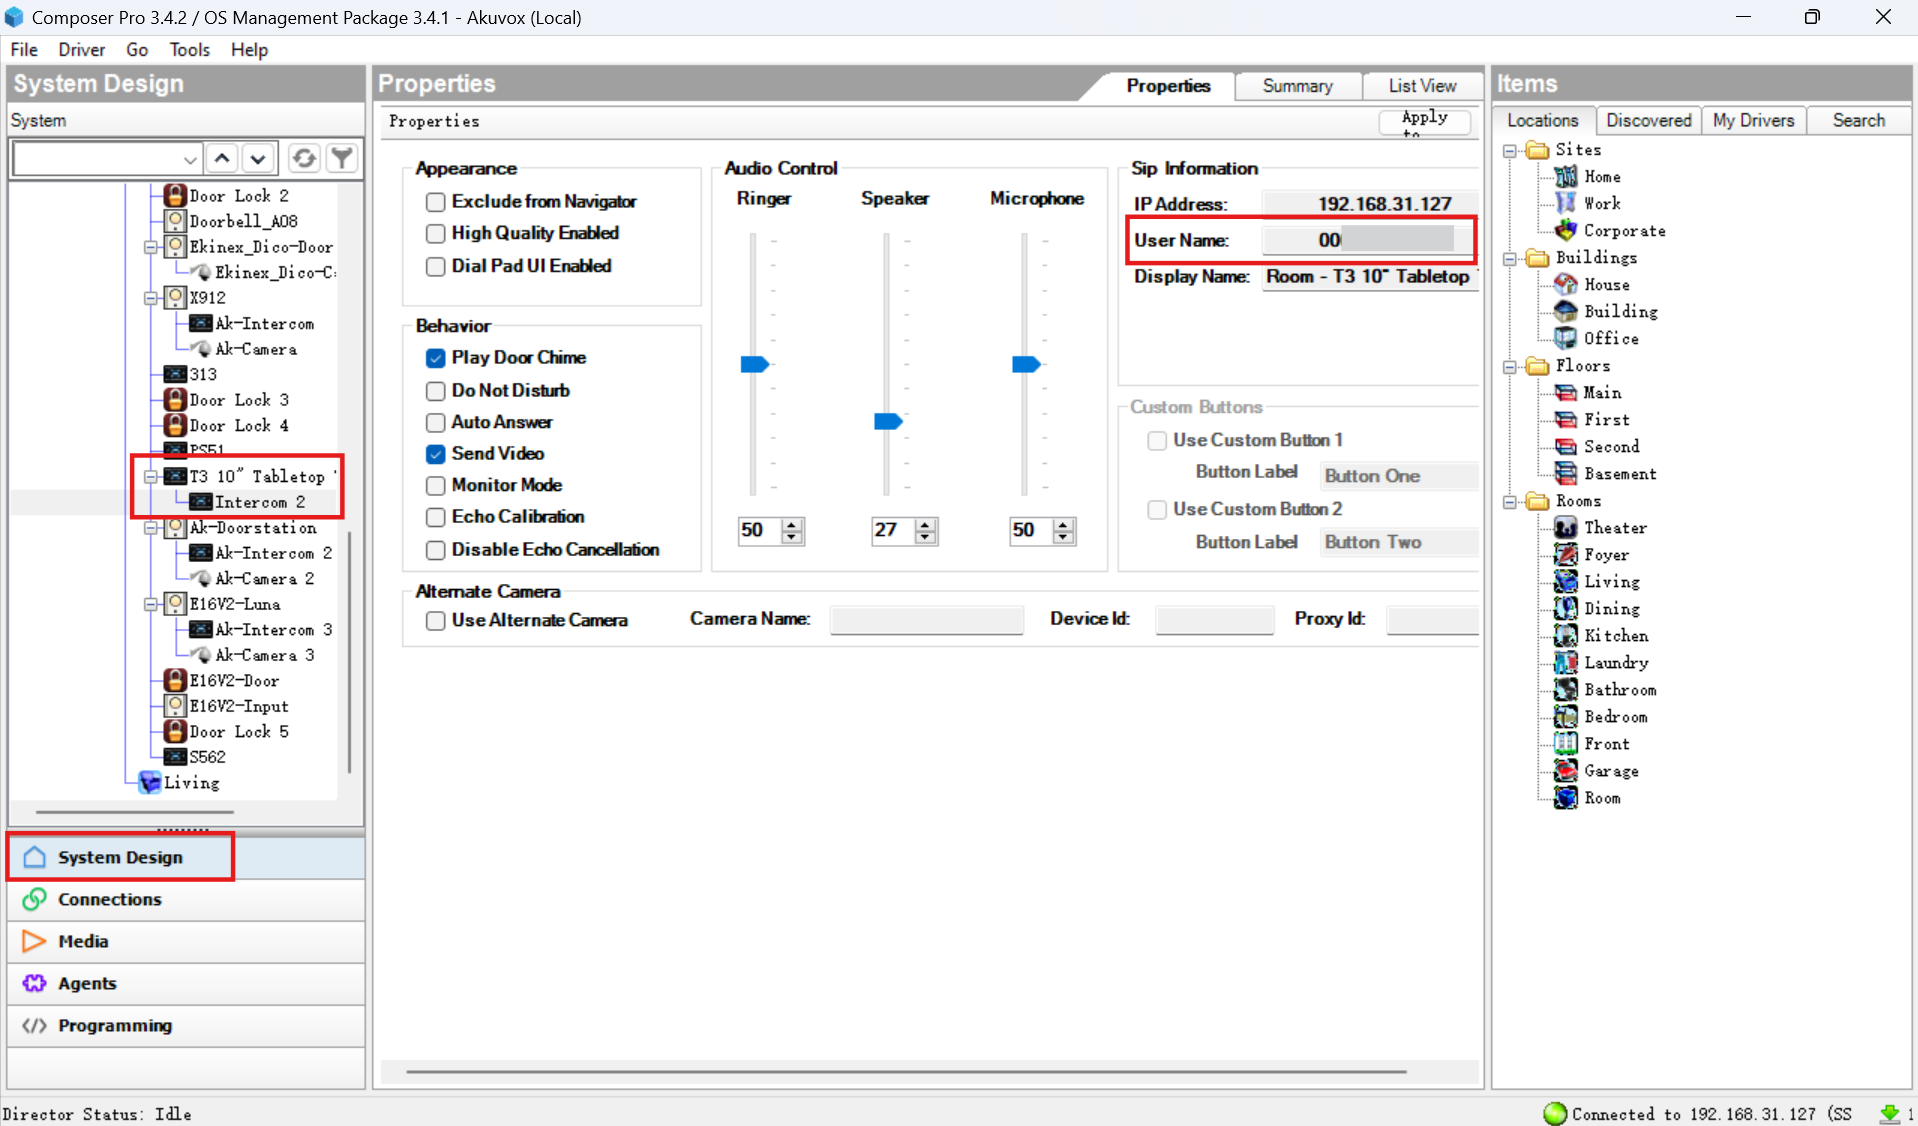
Make SIP Calls
After the connection, the Akuvox device will register a SIP account automatically.
You can find the device with the default name Ak-Intercom on the C4 panel and tap to make a call.
To initiate a call from the door phone, you can add the C4 panel as a contact to the door phone. For detailed steps, see the Door Phone Configuration chapter.
Check the C4 panel’s number on System Design > Intercom under the panel name.
Add Contacts to a Group
The composer creates a default group named All, which only contains C4 panels.
You can customize a group and add devices to it.
Go to Agents > Communication interface. Click New to create a new group.
If you do not find Communication, click Add to add it.
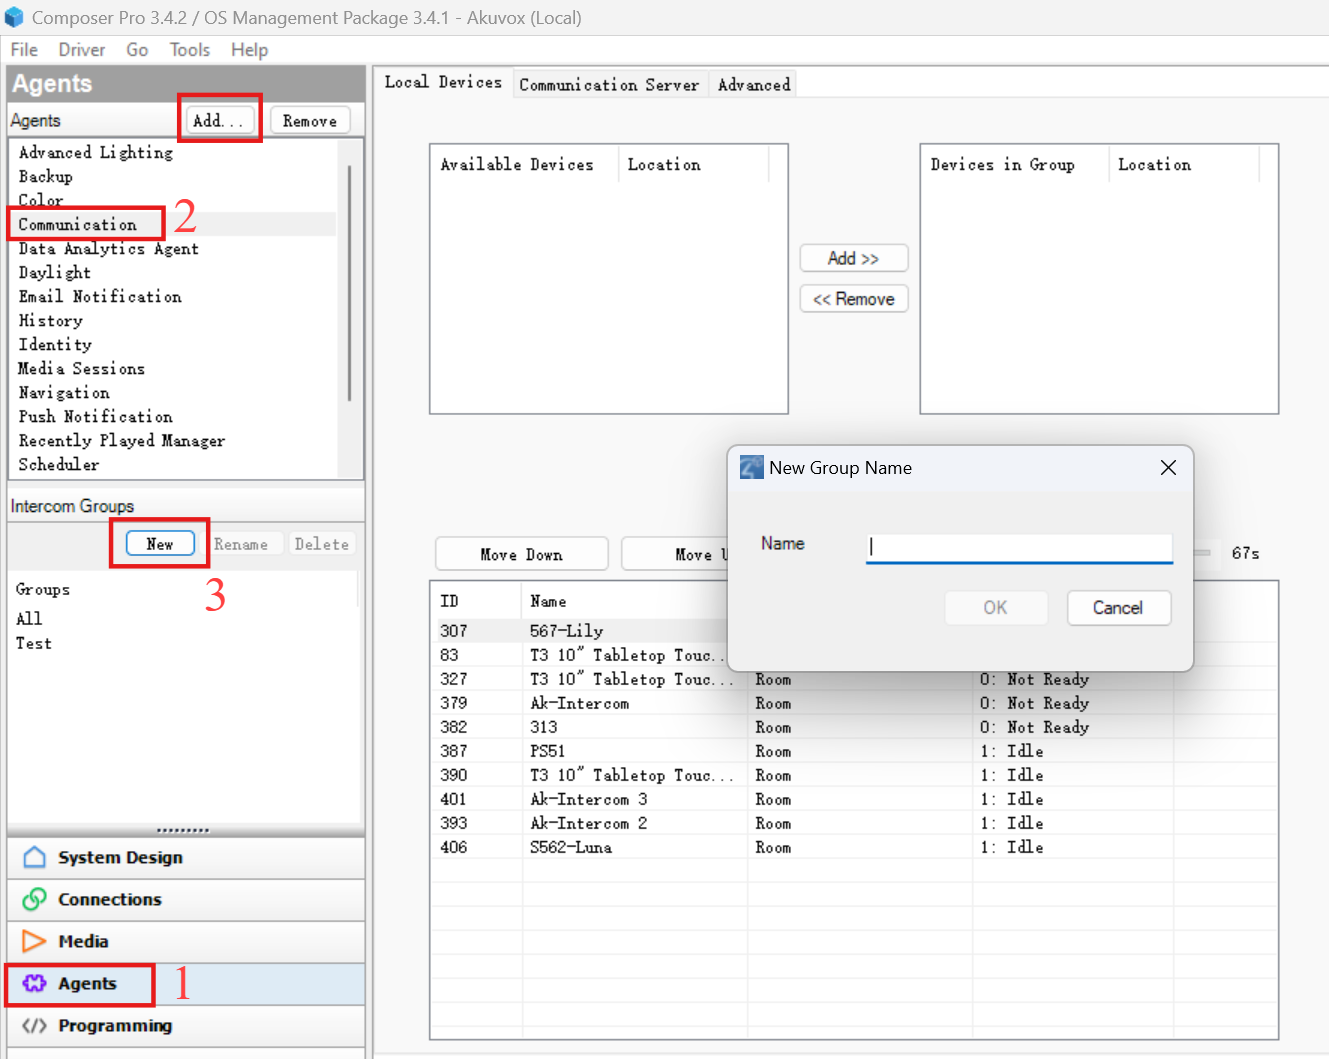
Move the desired devices from the left to the right box.
Click File in the upper left corner and select Refresh Navigators to update the configuration to the C4 panel.

Then, to bind the door phone to the group, go to System Design > [Device Name] > Properties interface.
Find the Call Group, select the desired group, and click Set.
Go to Actions and click Update Contact.
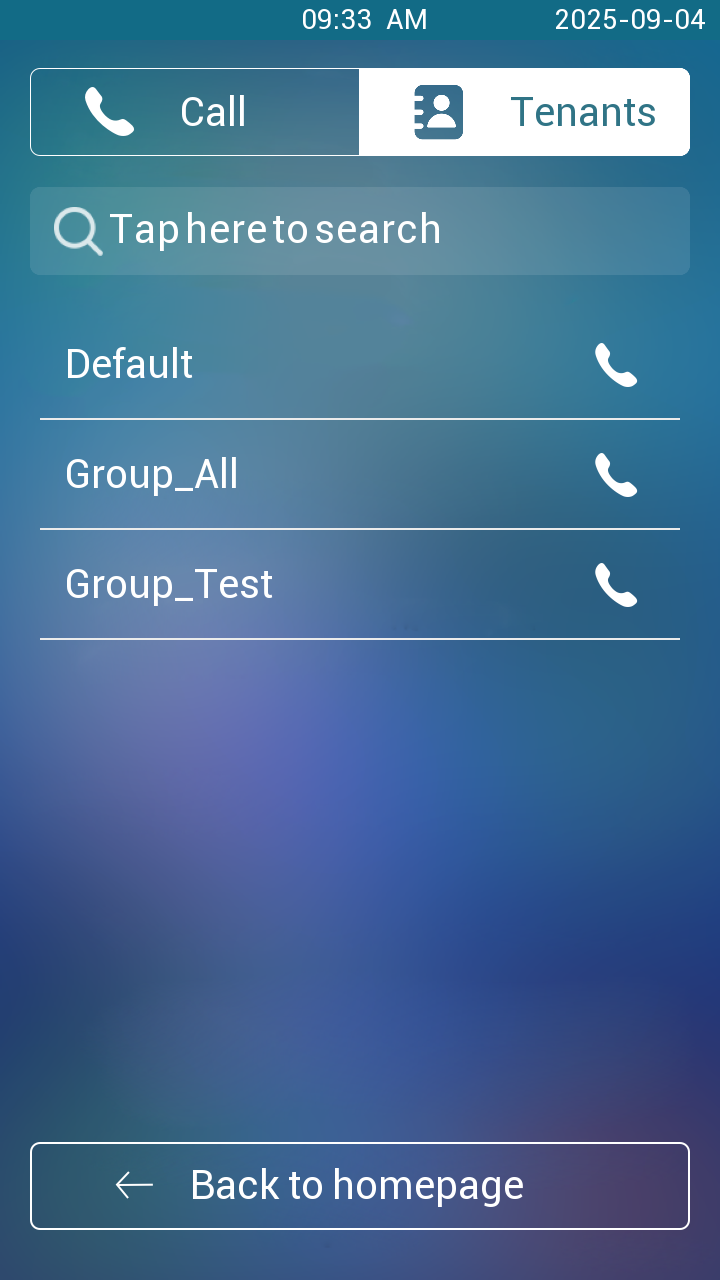
The group name will be displayed on the door phone’s directory list.
E16V2
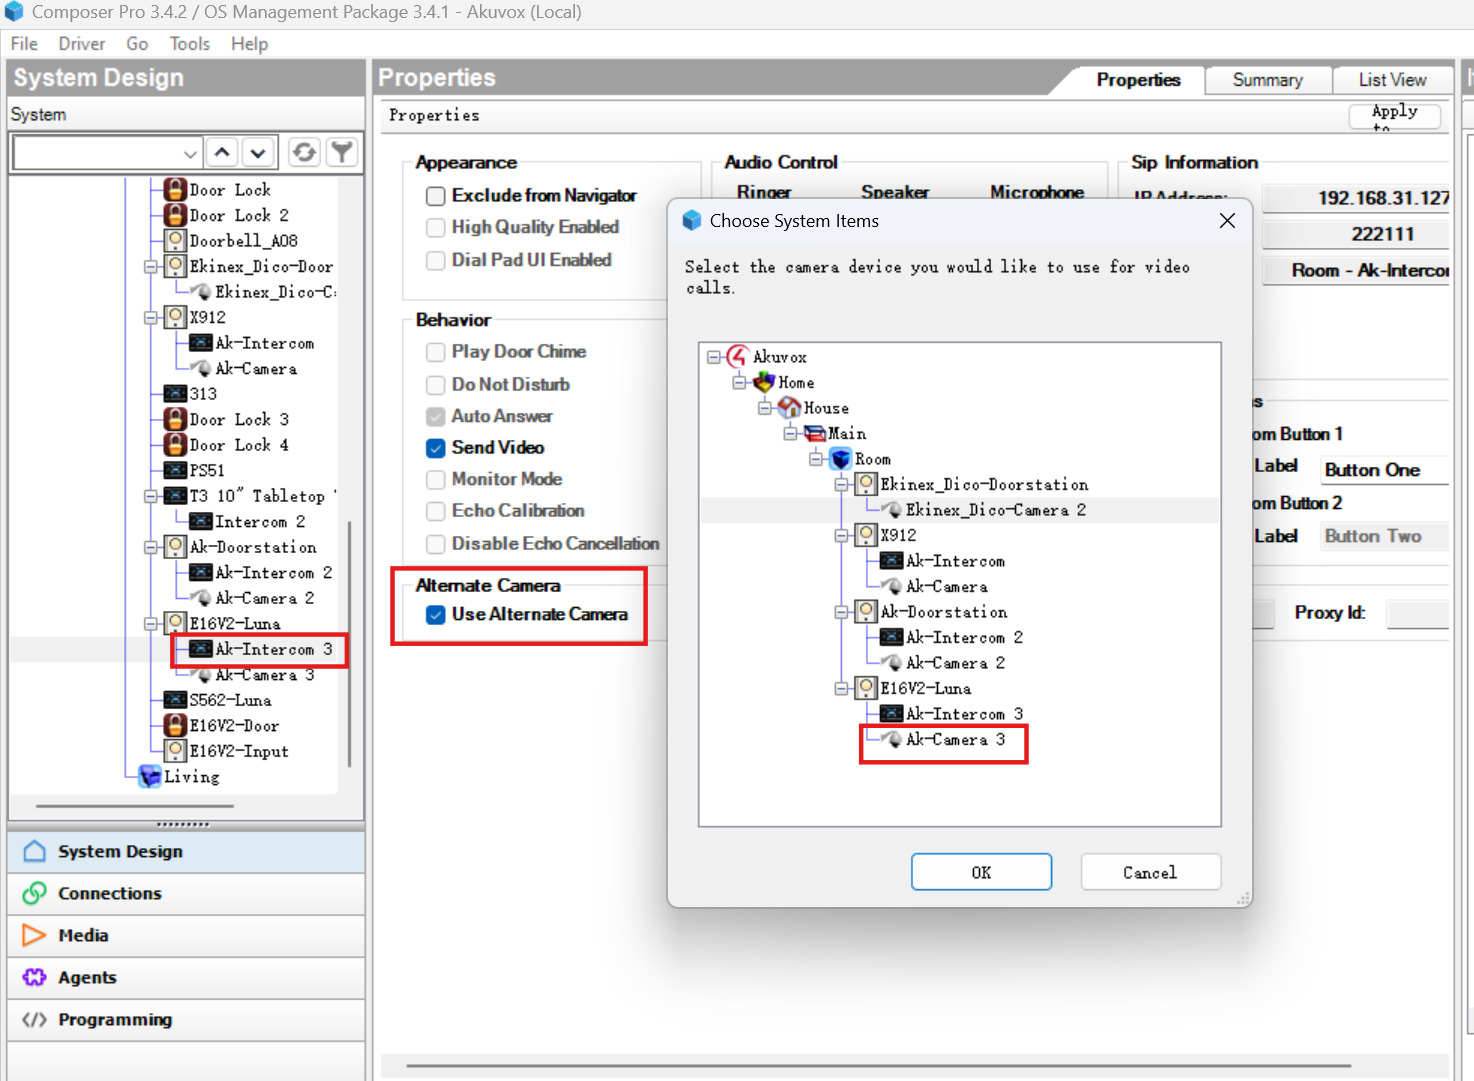
View Live Stream from the Door Phone
To view the call preview from the door phone, you need to enable the camera.
Go to System Design > AK Intercom.
Check Use Alternate Camera and select Ak-Camera under the device.
Unlock
Through configuration, users can press the unlock button on the C4 panel to open the door.
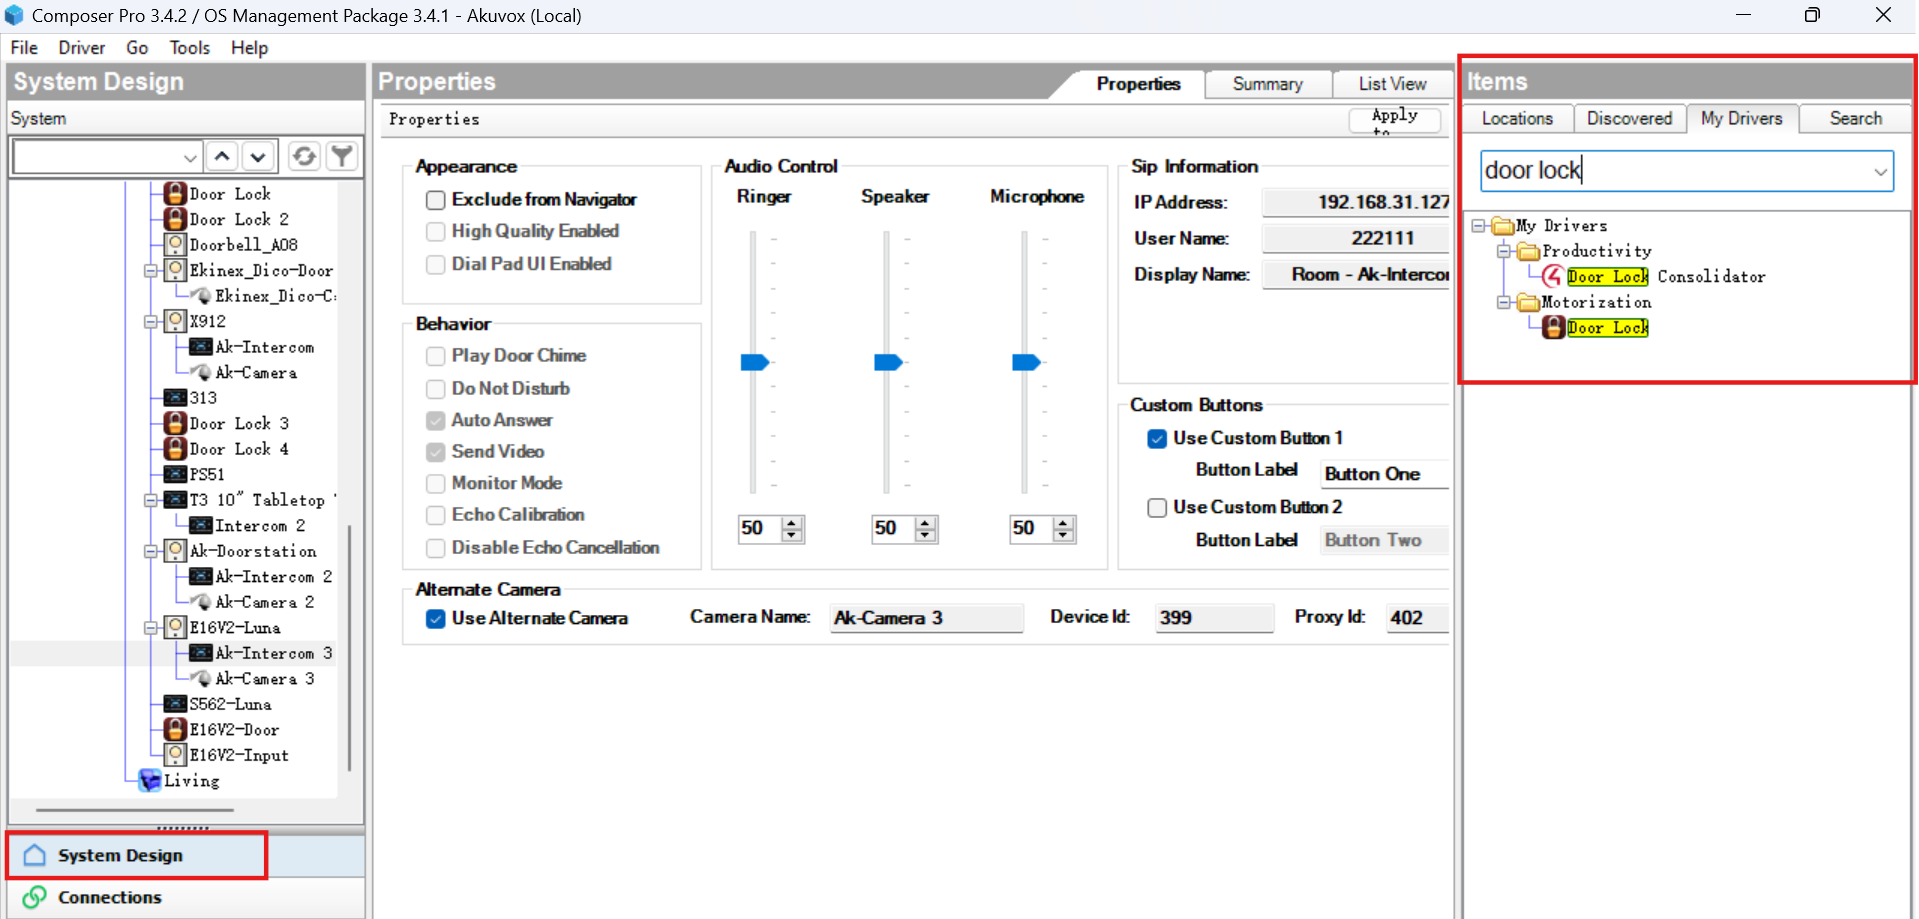
Bind Door Lock and Relay
Search for the lock driver in My Drivers on the Items menu.
Double-click it to add it. Its default name is Door Lock.
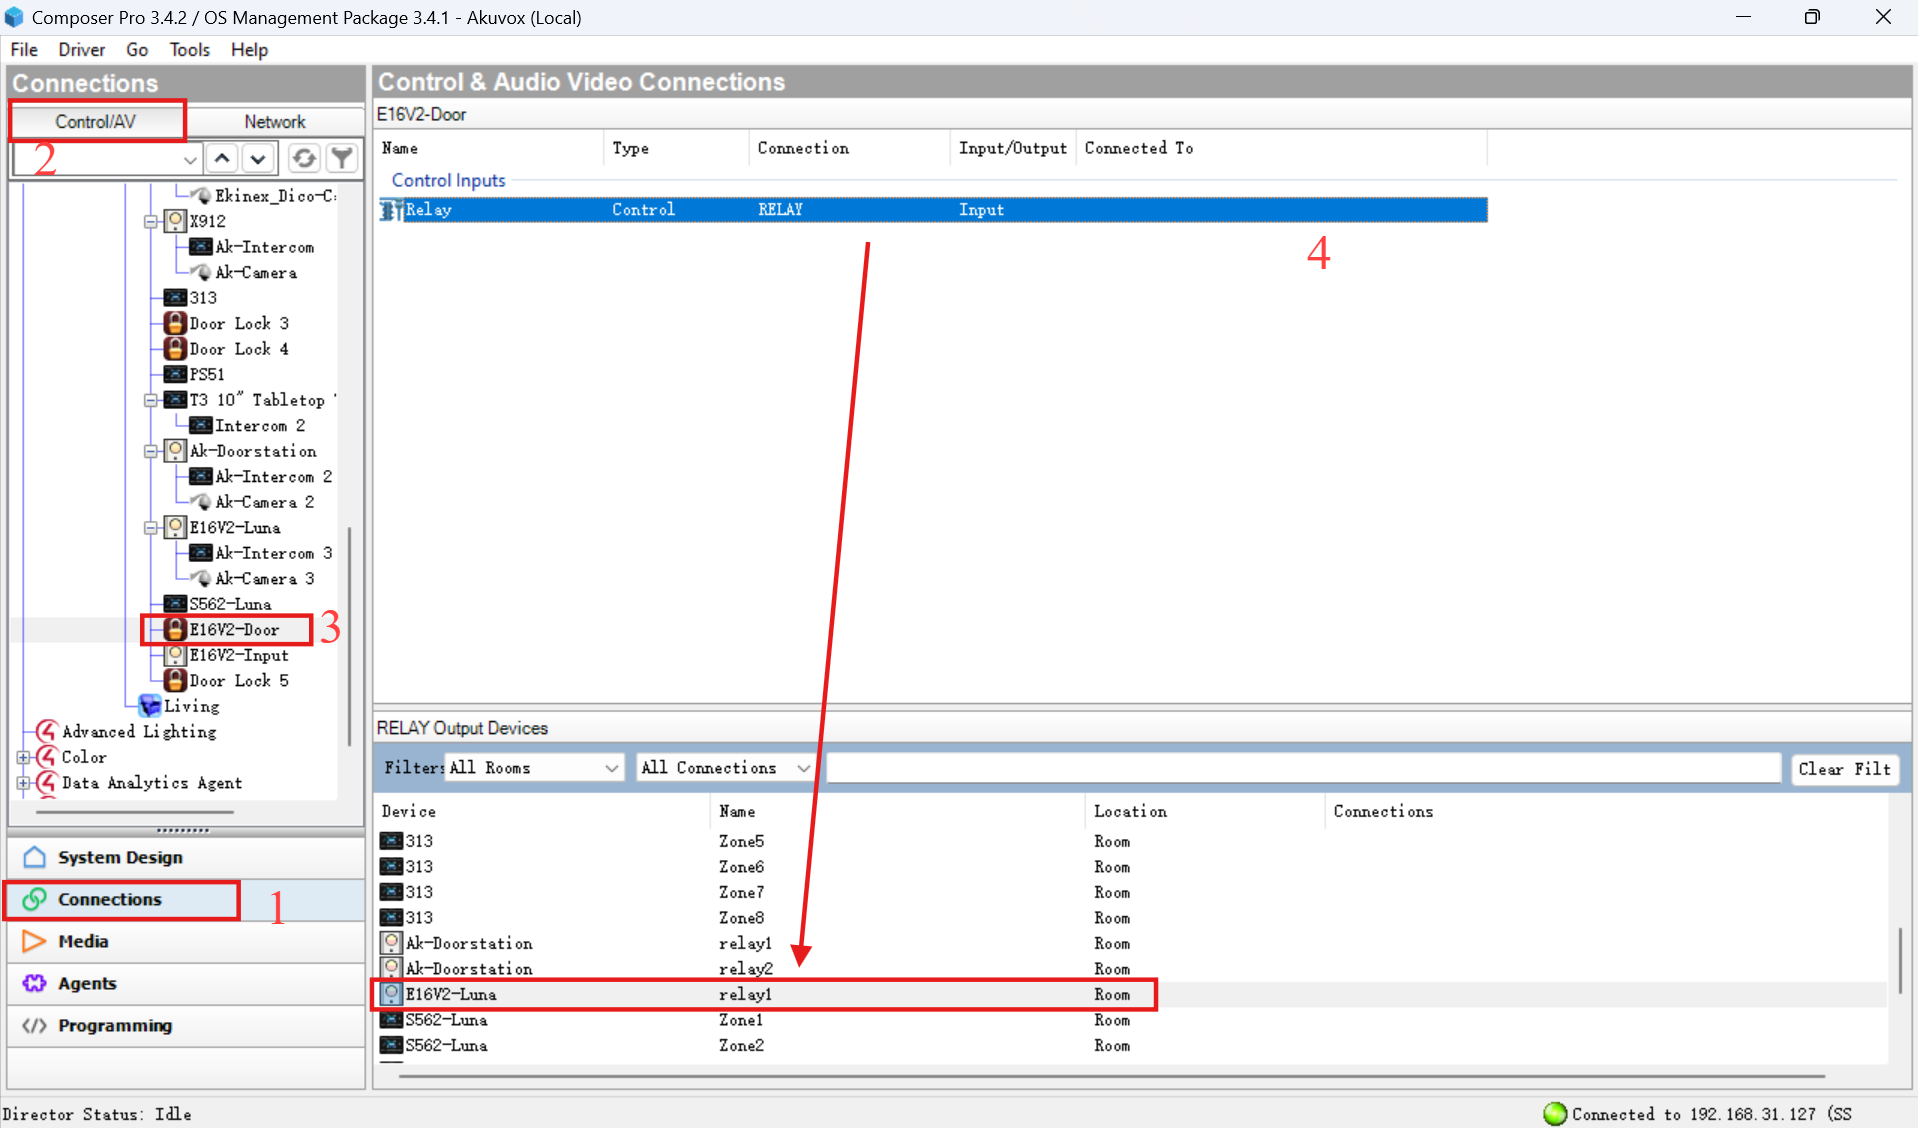
To bind the door lock to the door phone relay, click Connections > Control/AV and find the door lock.
Drag and drop the relay on the desired door lock.
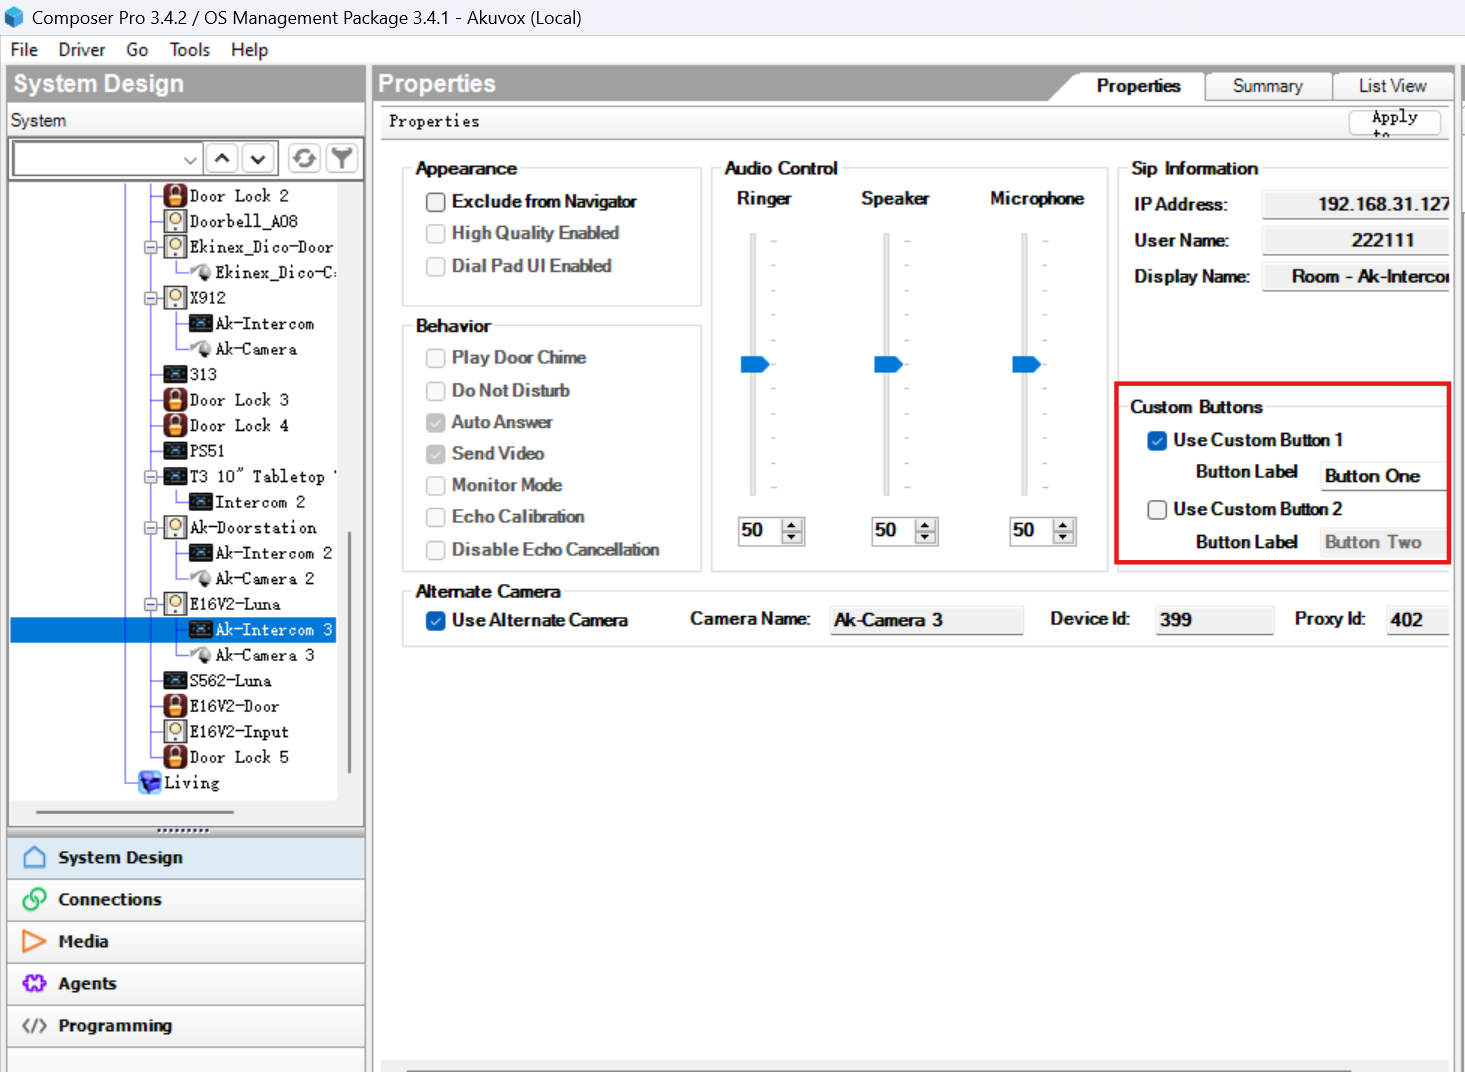
Configure Unlock Button
Go to System Design > AK Intercom interface and enable the custom button. Customize the button name.
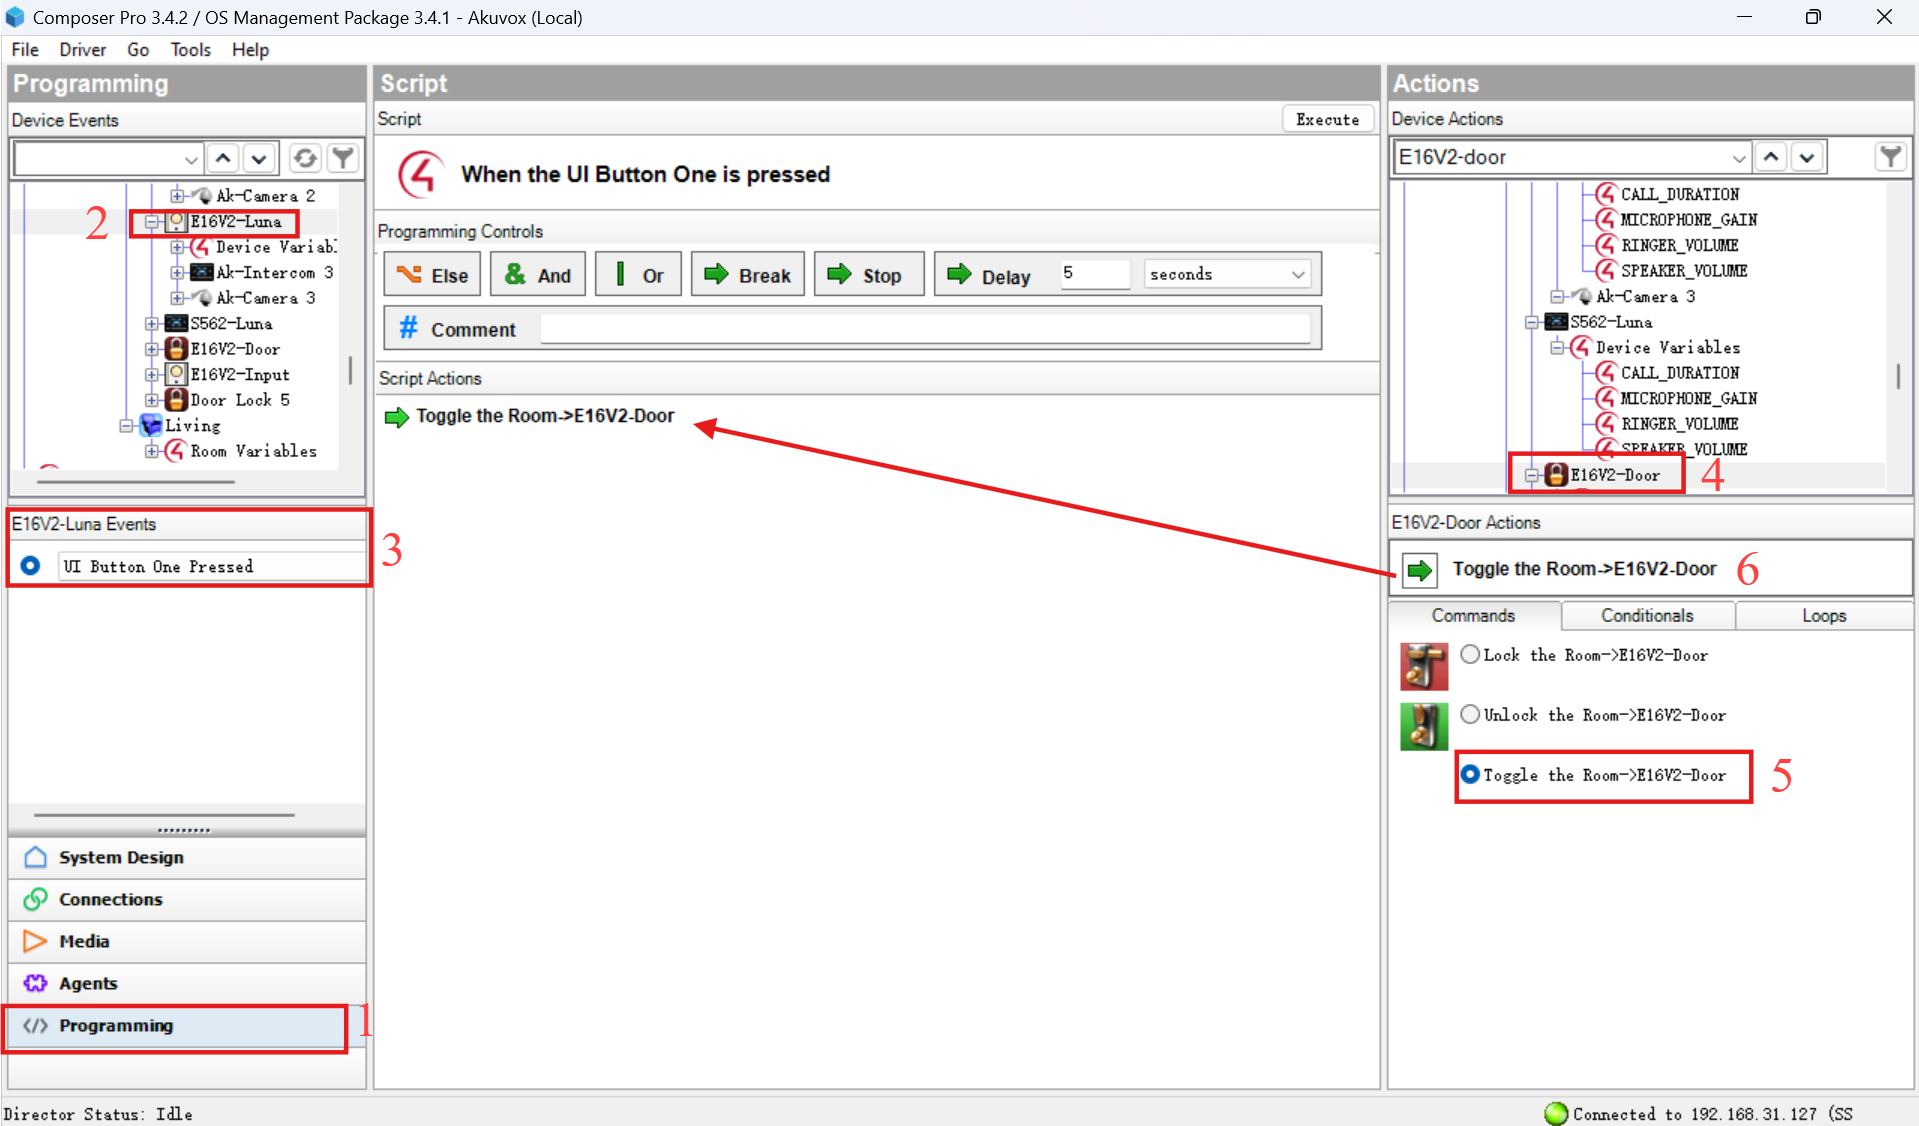
To bind the button to the door lock, go to the Programming > [The device name] interface and select UI Button One Pressed.
In Door Lock Actions on the right, select Toggle the Room→[The lock name].
Drag and drop
 on Script Actions to achieve the binding.
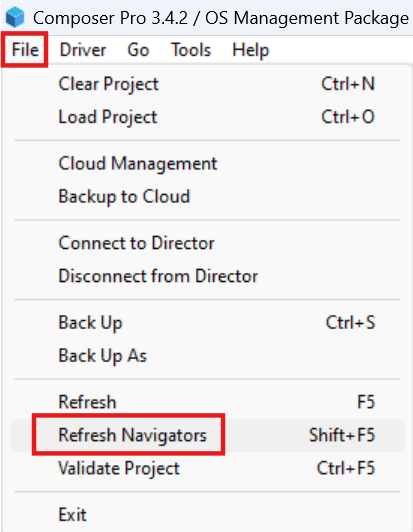
Click File in the upper left corner and select Refresh Navigators to update the configuration to the C4 panel.
Configure Doorbell Button
The door phone can be connected to a doorbell button through the input ports. By triggering inputs, certain actions can be carried out.
This section takes initiating the group call as an example.
Search “doorbell“ in My Drivers and double-click the option to add the button.

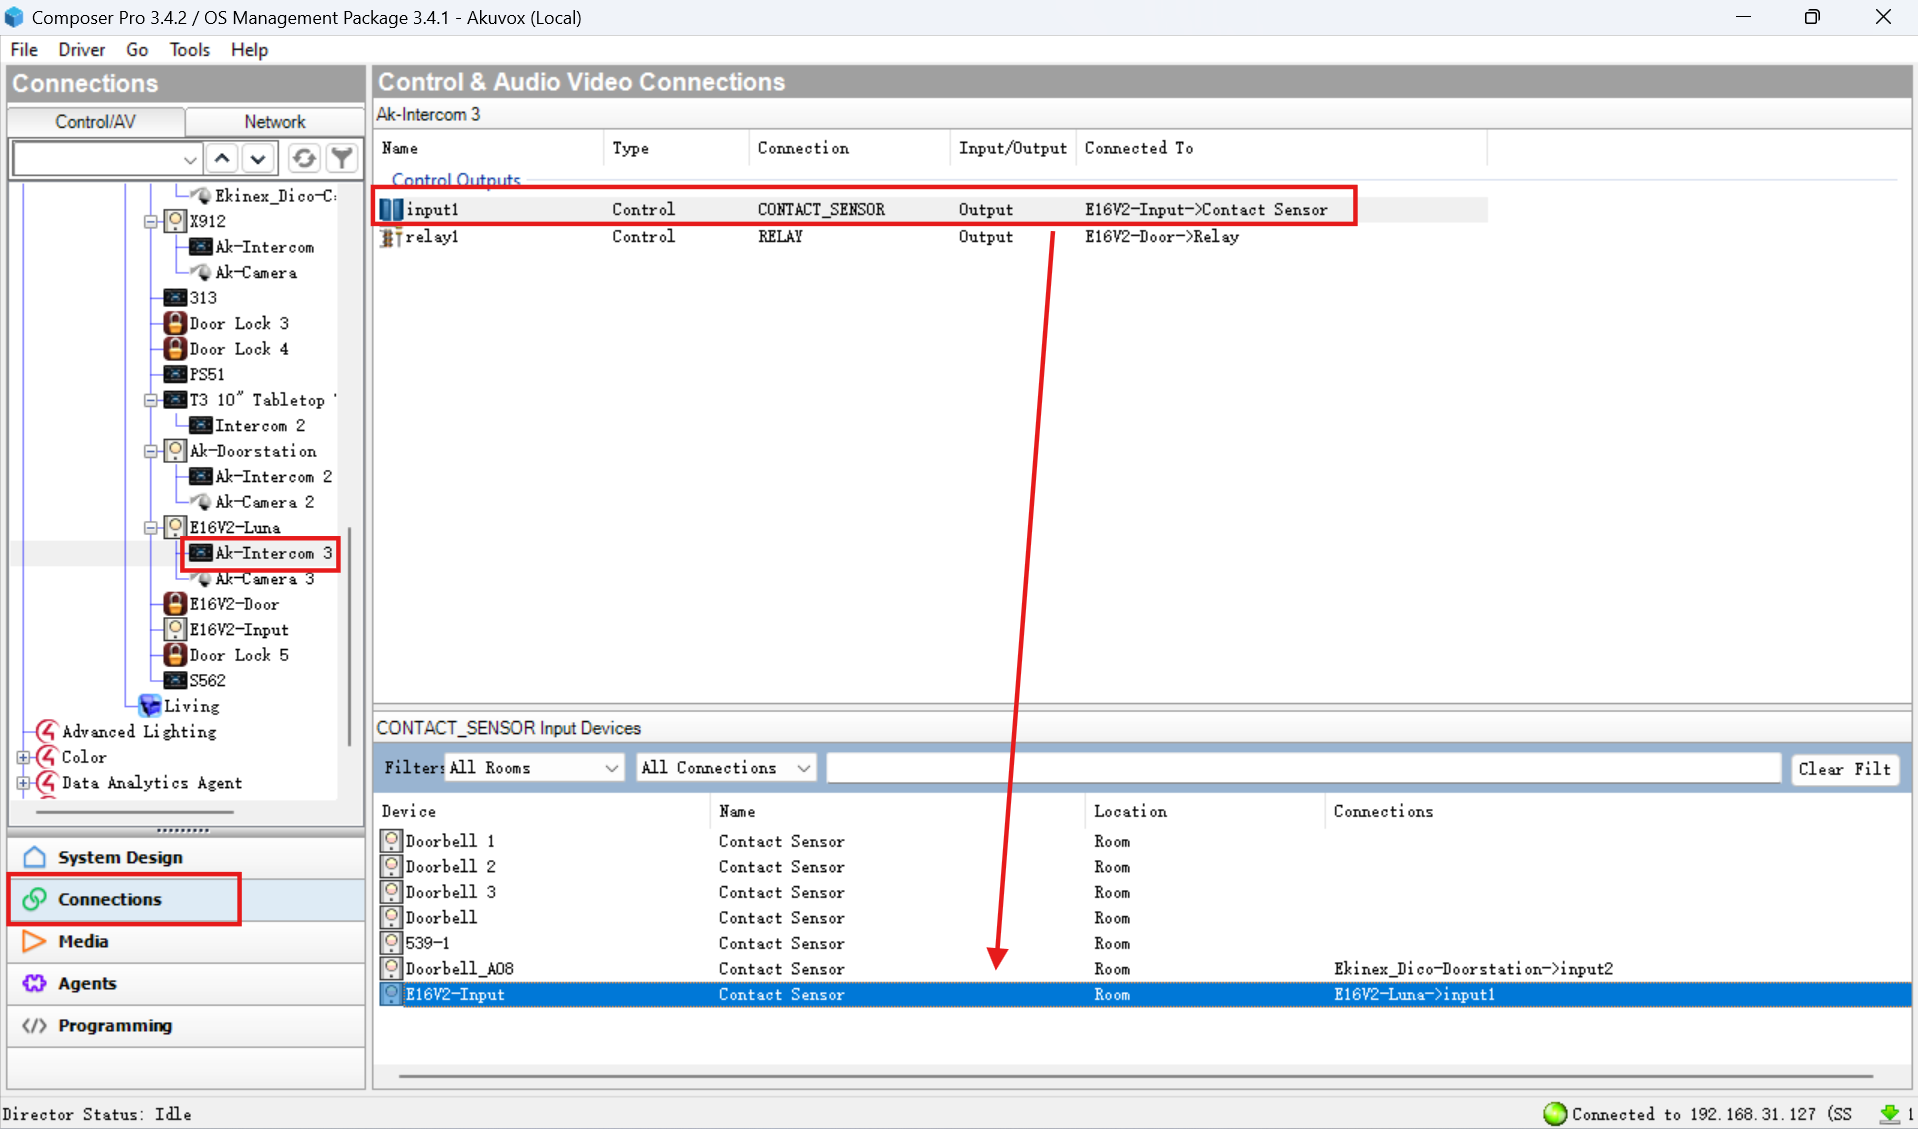
Then, you need to bind the button to the door phone’s input.
Go to Connections > AK Intercom interface. Drag and drop the door phone input on the desired button.
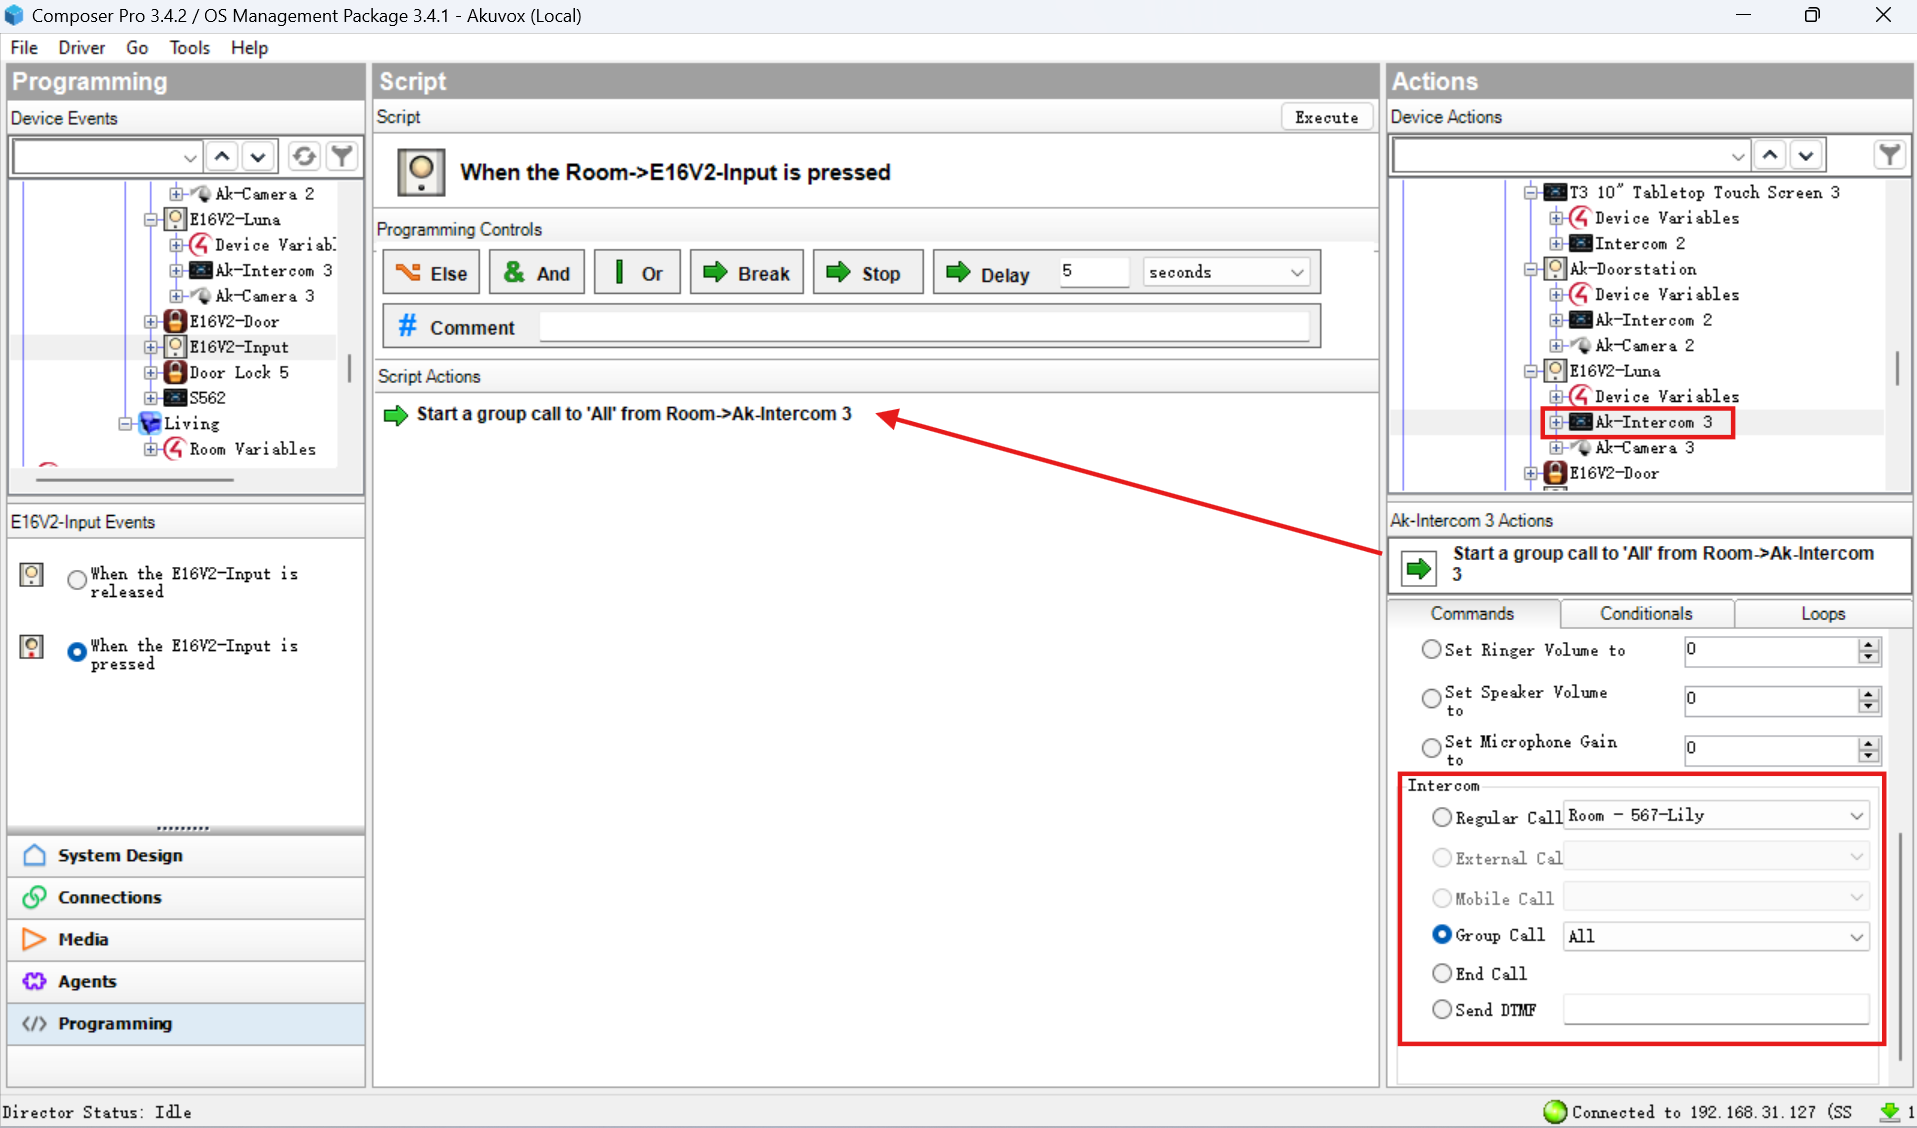
Then, you need to decide the action after users press the button.
Go to the Programming > Doorbell interface and select When the Doorbell is pressed.
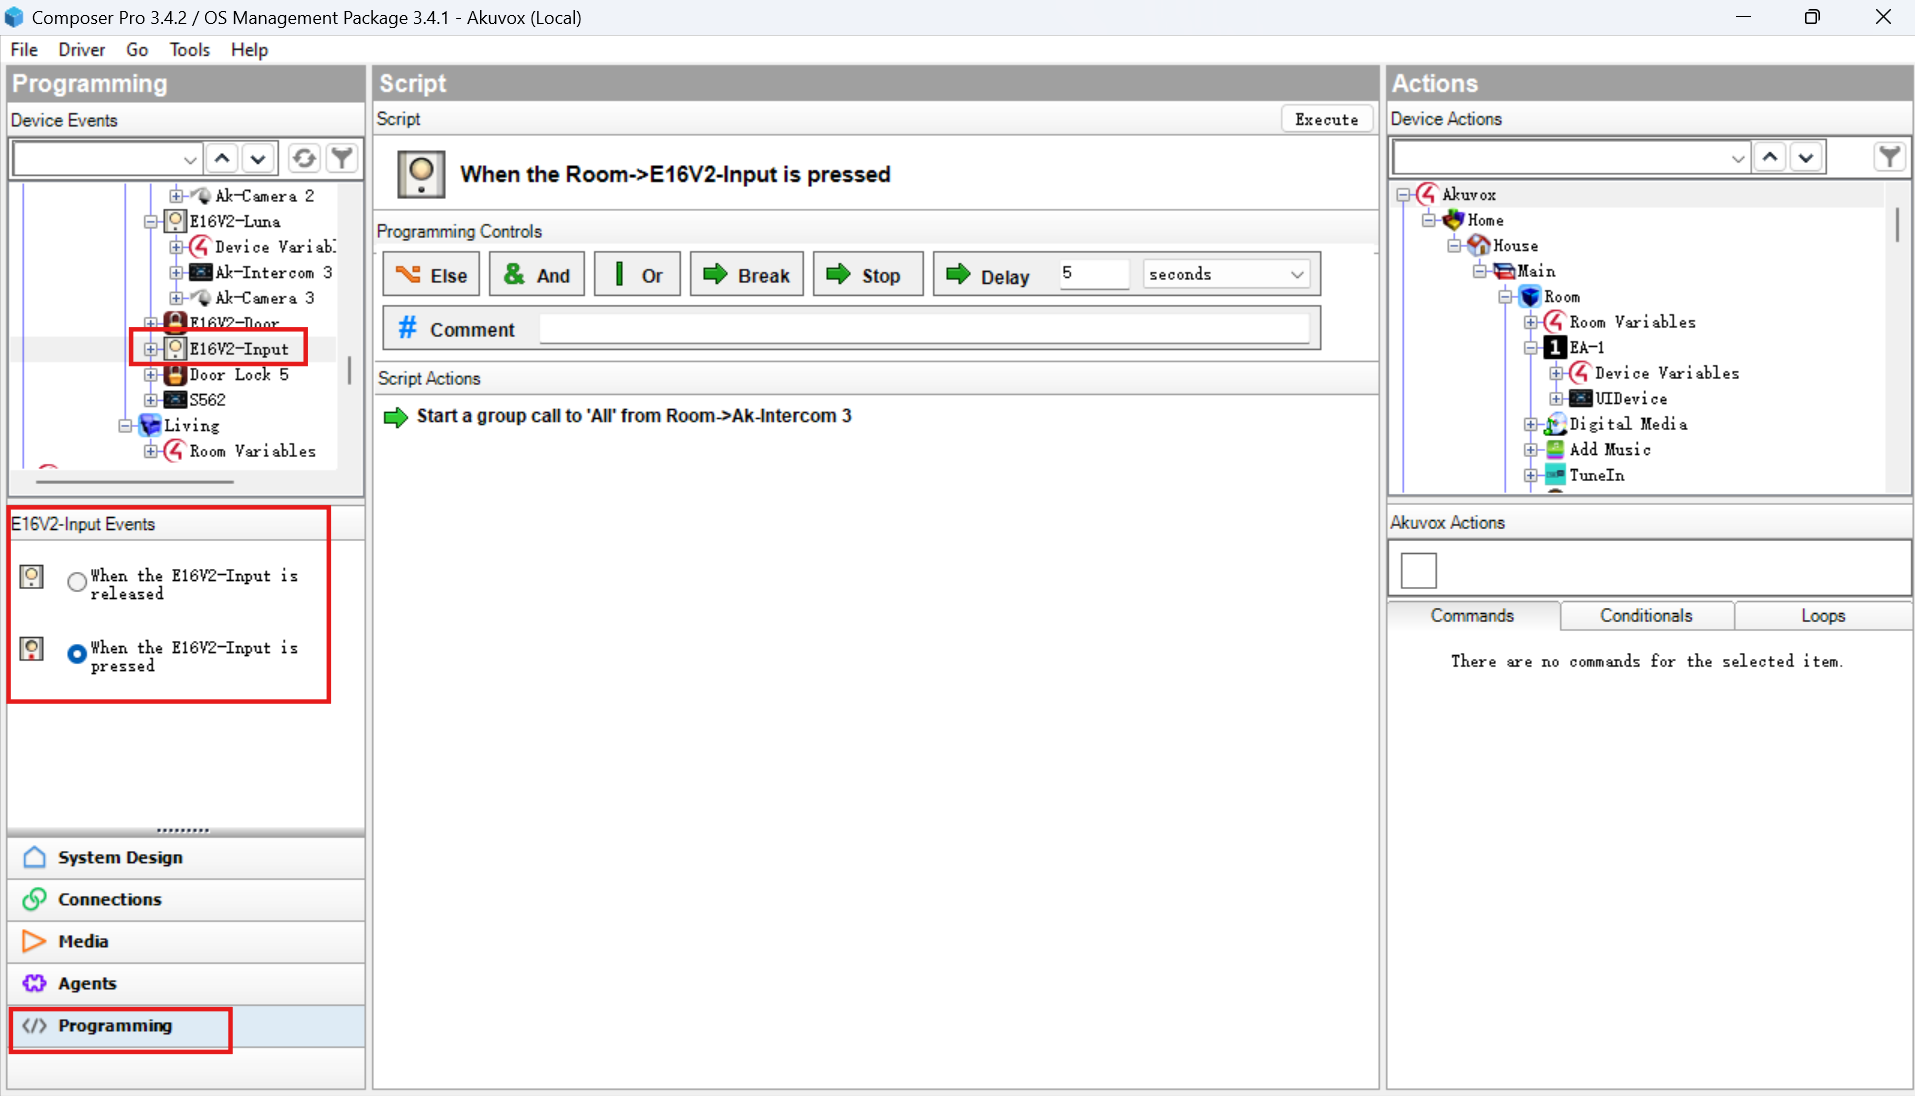
In Actions of Devices Actions on the right, select the desired Intercom feature of the door phone.
Enable Group Call and select the target group.
Drag and drop
 on Script Actions.
Click File in the upper left corner and select Refresh Navigators to update the configuration to the C4 panel.
After configuration, the action configured will be performed by triggering the input.
Trigger C4 Events by Unlocking
Specific door phone models support triggering C4 events when users use their credentials to open doors.
Click here to view the supported models and configurations on the door phone.
After setting up relays in the composer, you can set up additional events.
Click Programming > [The device name].
Select the event ID that should be the same configured on the door phone.
Set the device intercom actions in the right Device Actions and configure the desired action.
For example, when users open the door, the door phone makes a call to the C4 panel.
Drag and drop the action onto Script Actions.

Click File in the upper left corner and select Refresh Navigators to update the configuration to the C4 panel.