Akuvox X937 indoor monitor supports AI agent integration through AKClaw, enabling AI-based device control and chat interaction. Once configured, you can send commands through messaging apps, and the AKClaw AI agent will act on your behalf directly on the device.
With this feature, you can:
Control devices through natural language.
Integrate with third-party chat platforms.
Execute automation skills.
Manage AI models directly on the device.
This guide explains how to configure the AI model and integrate chat platforms.
Compatible model and version(or higher)
X937: 937.30.1014.810
Before You Start
Ensure the device firmware supports AKClaw.
Prepare AI provider API key.
Ensure device internet access.
Ensure the firewall allows outbound connections.
Required chat platform accounts are prepared (if integration is needed).
Your phone and the X937 must be connected to the same local network (Wi-Fi or LAN) before scanning the QR code.
Add an AI Model
This section connects AKClaw to an AI provider. AKClaw uses this model to understand your natural language commands.
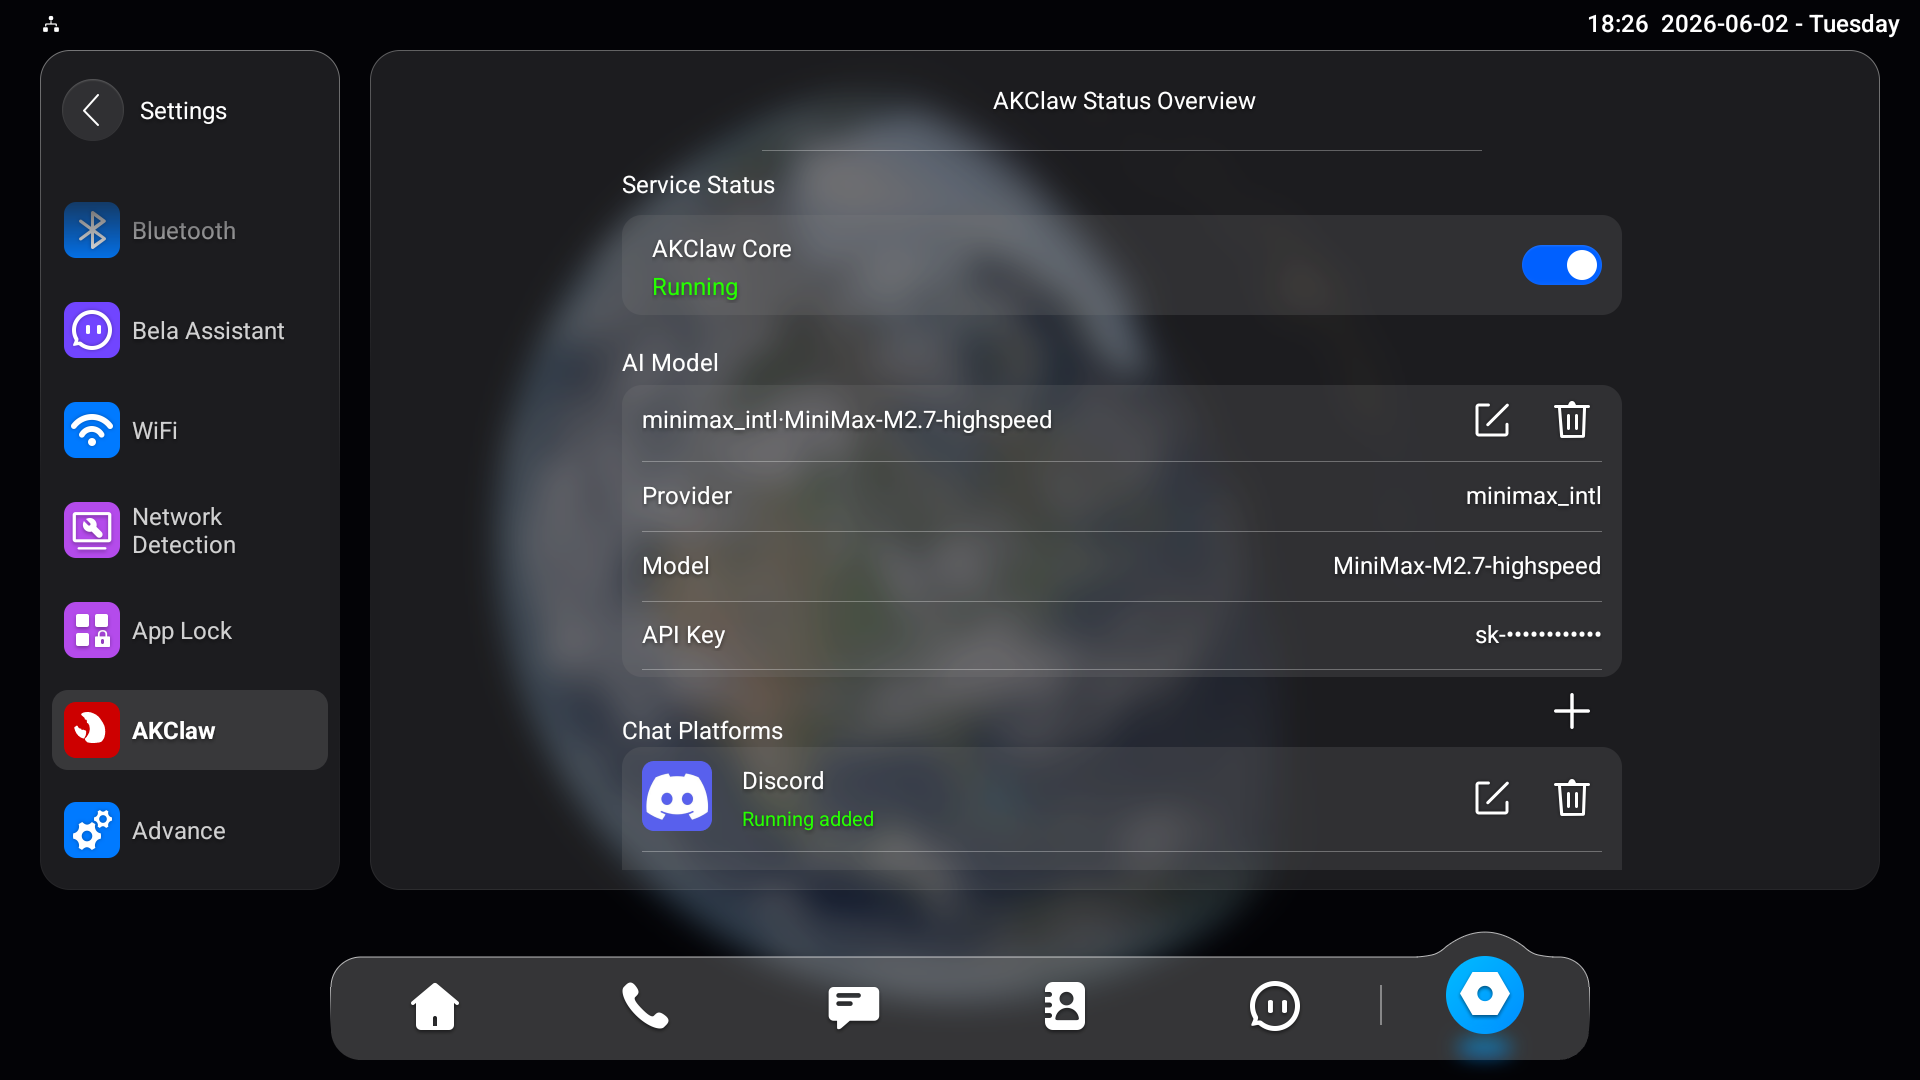
Tap Settings > AKClaw.
Enable AKClaw Core and add an AI Model.
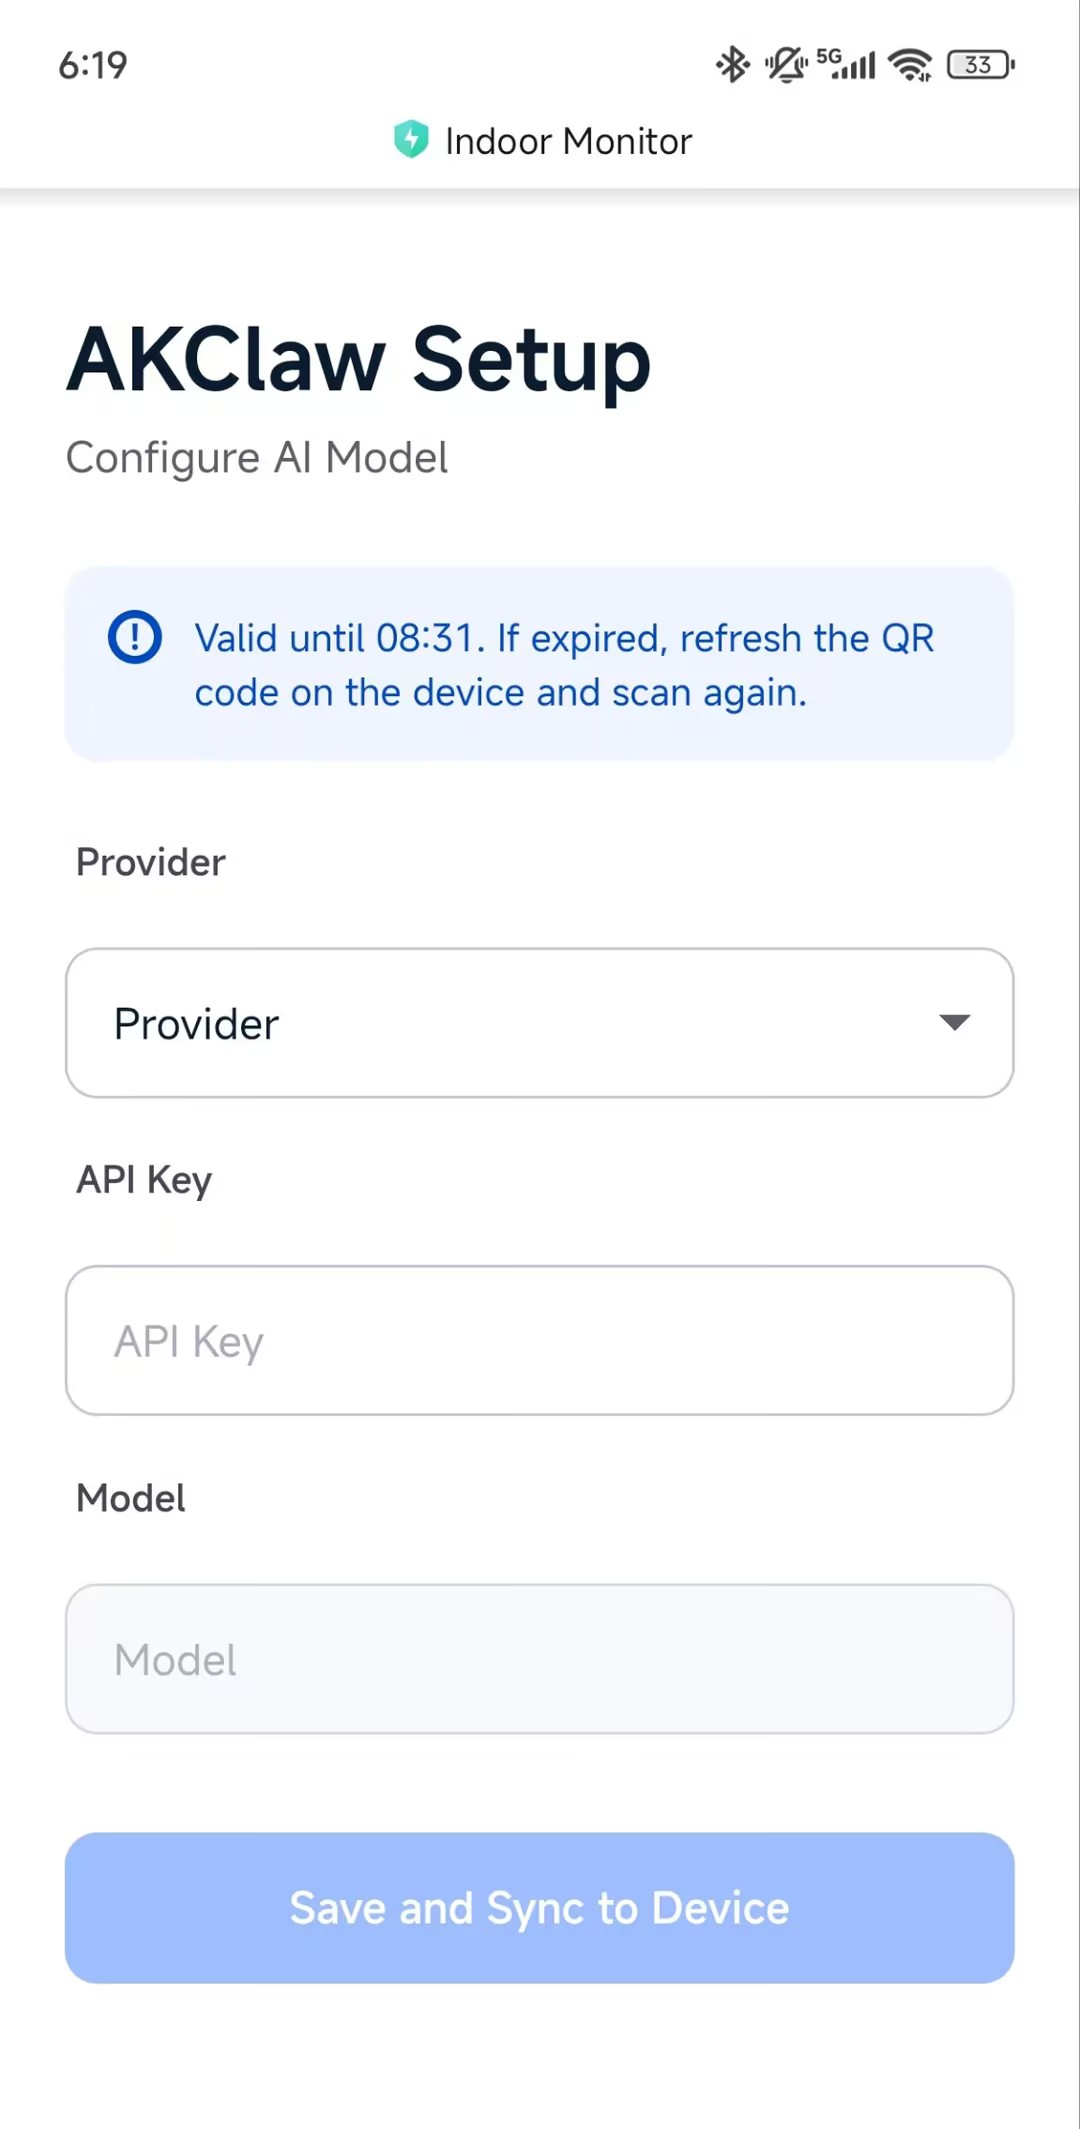
Scan the QR code with your phone to open the AKClaw web page.
Note
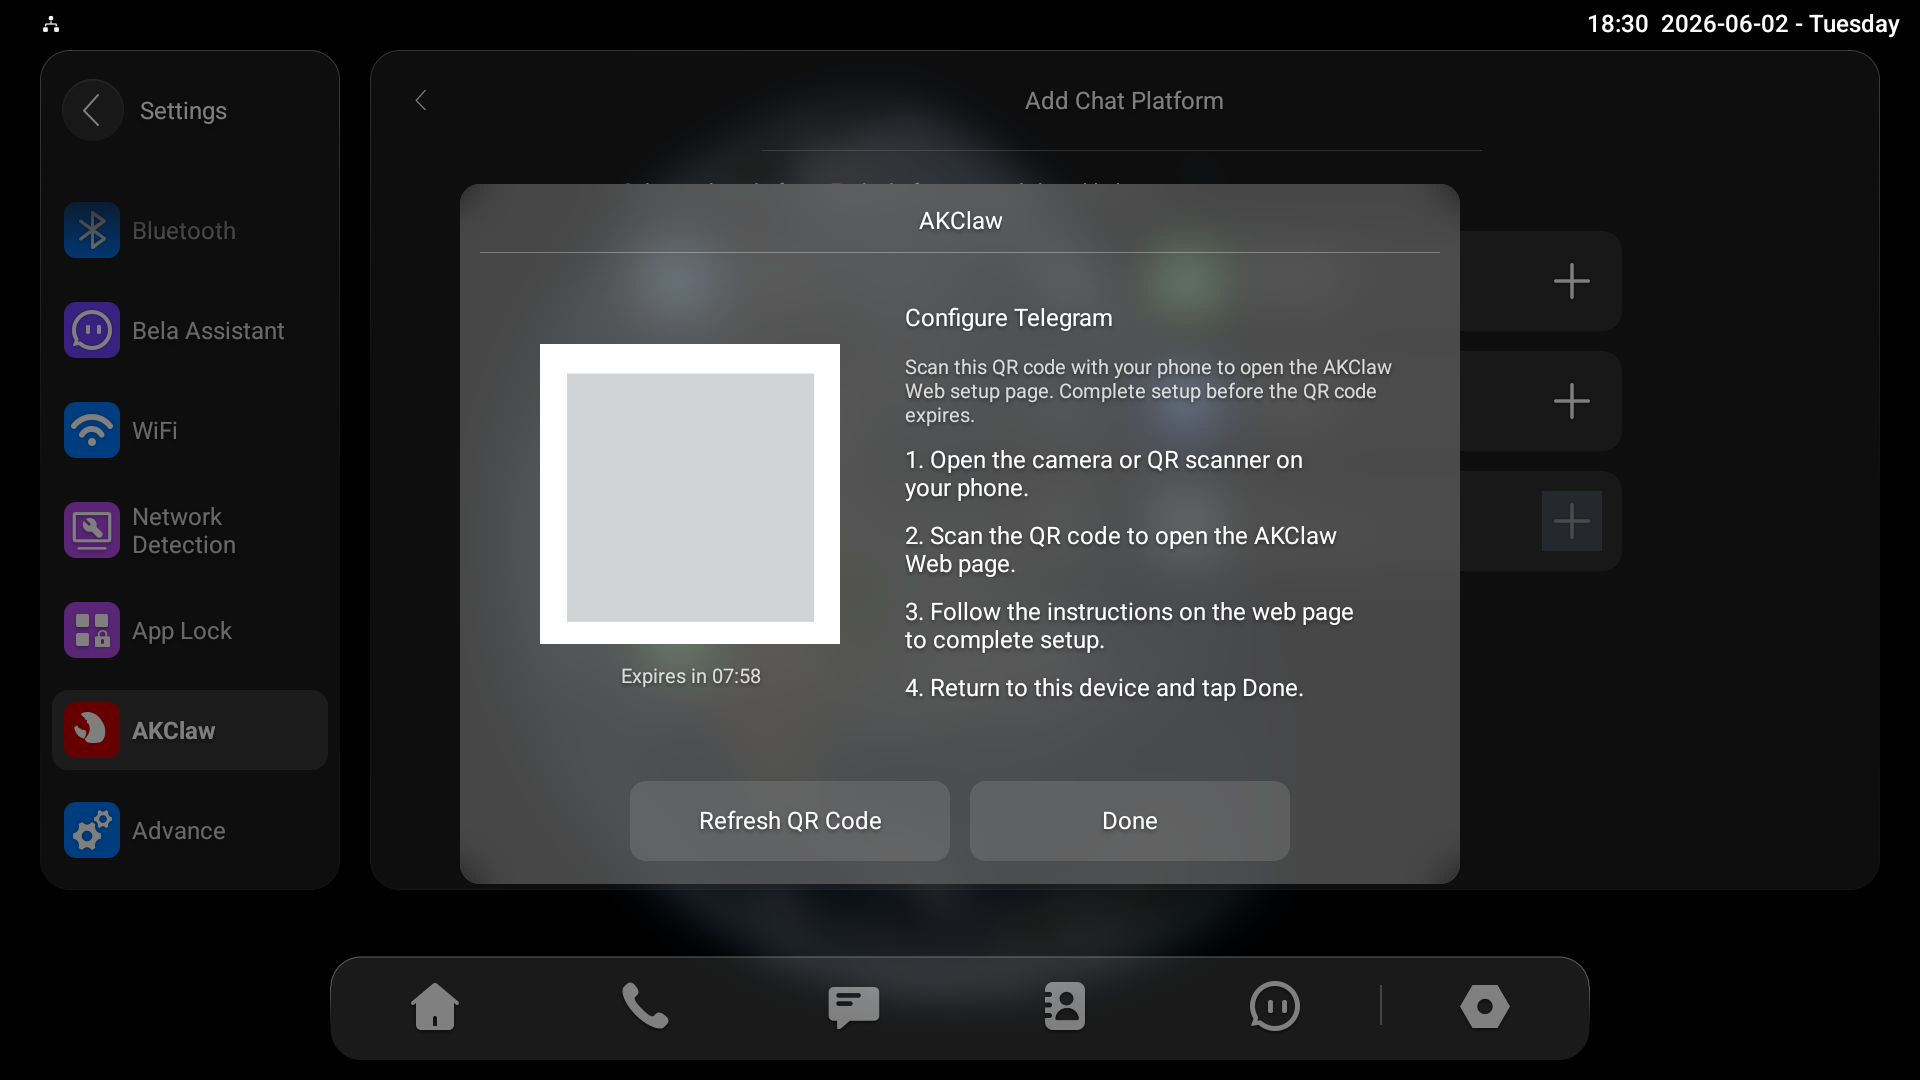
The QR code expires after approximately 10 minutes. If it expires before you finish, tap Refresh QR Code on the device and scan again.

Select the Provider and enter the API Key.
Select the Model.
Tap Save and Sync to Device. “Config Submitted” will display on the indoor monitor.
Then, wait for the AKClaw Core status to turn to Running.
Add Chat Platforms
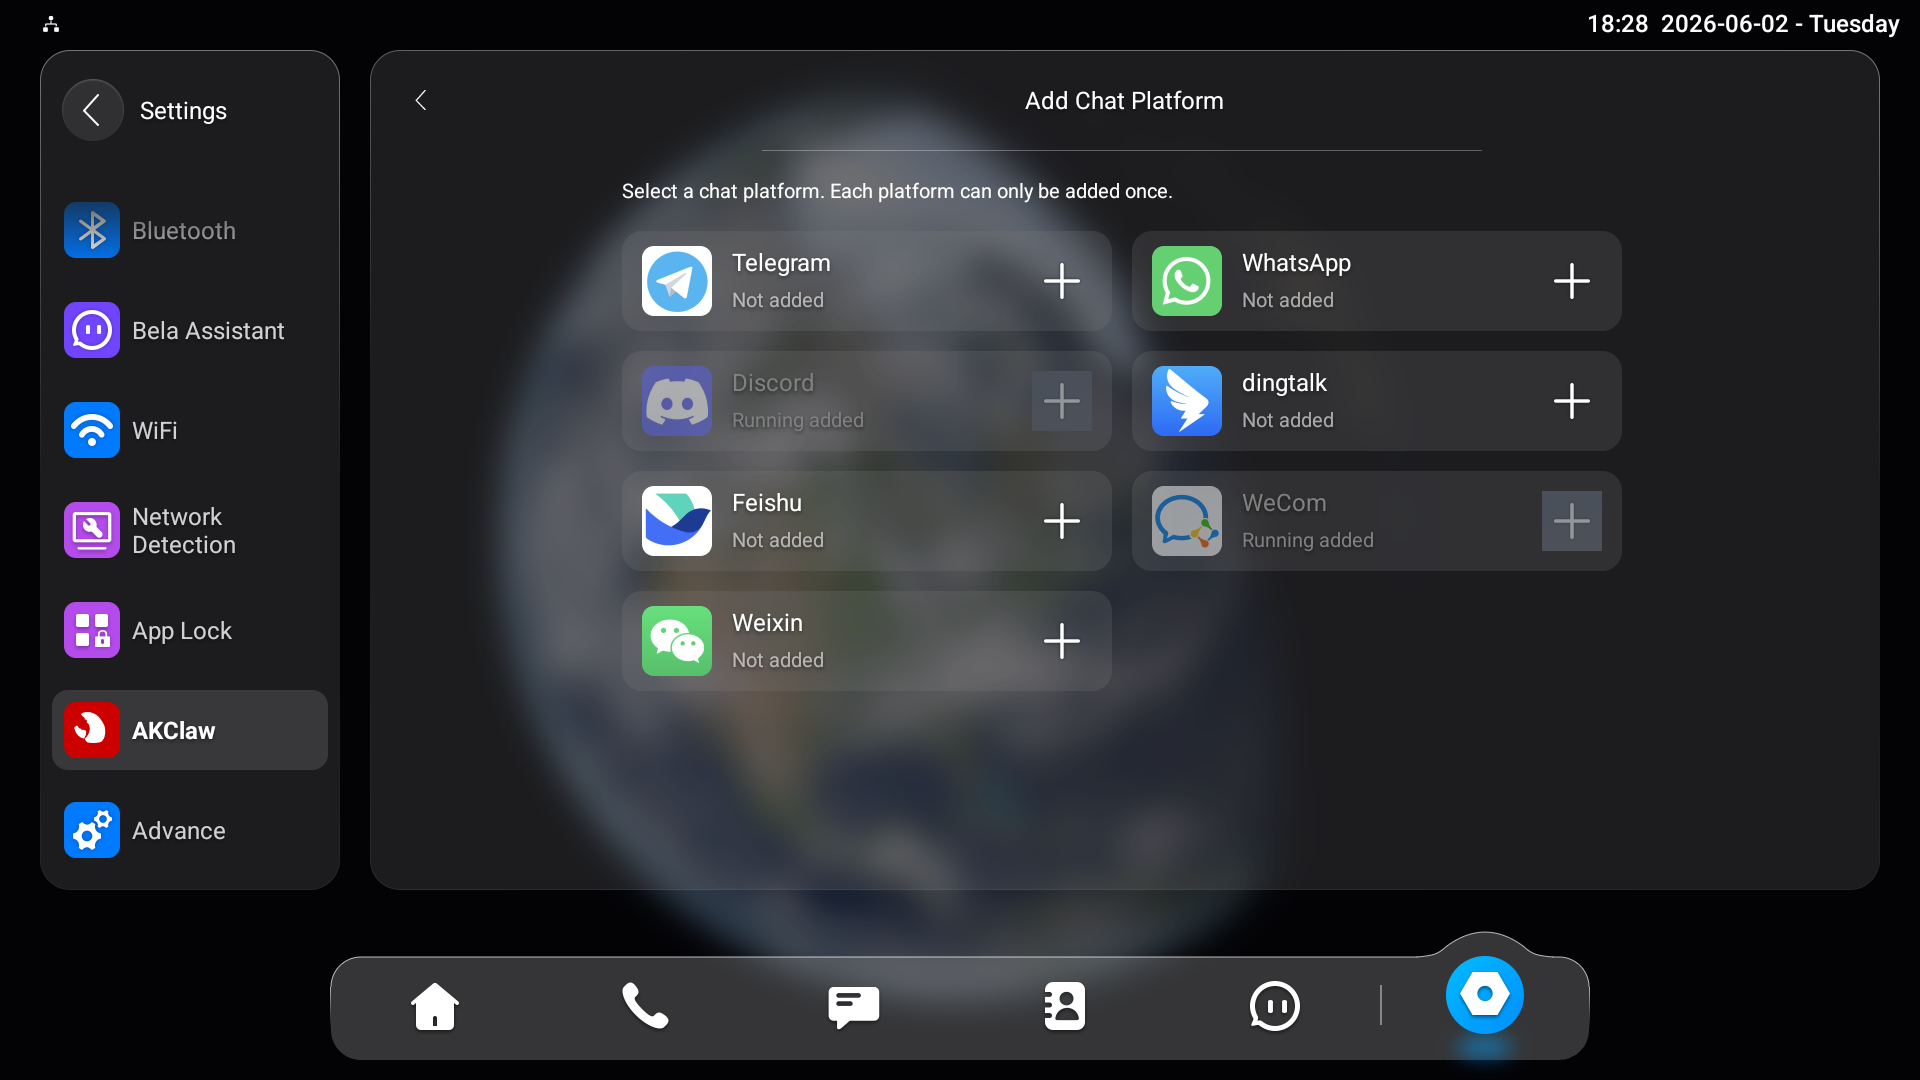
Once AKClaw Core is running, you can link one or more chat platforms. Each platform can only be added once. The following platforms are supported: Telegram, WhatsApp, Discord, DingTalk, Feishu, WeCom, and Weixin.
Tap + to add chat platforms on the AKClaw screen.
Tap + next to the desired chat platform and follow the steps below.
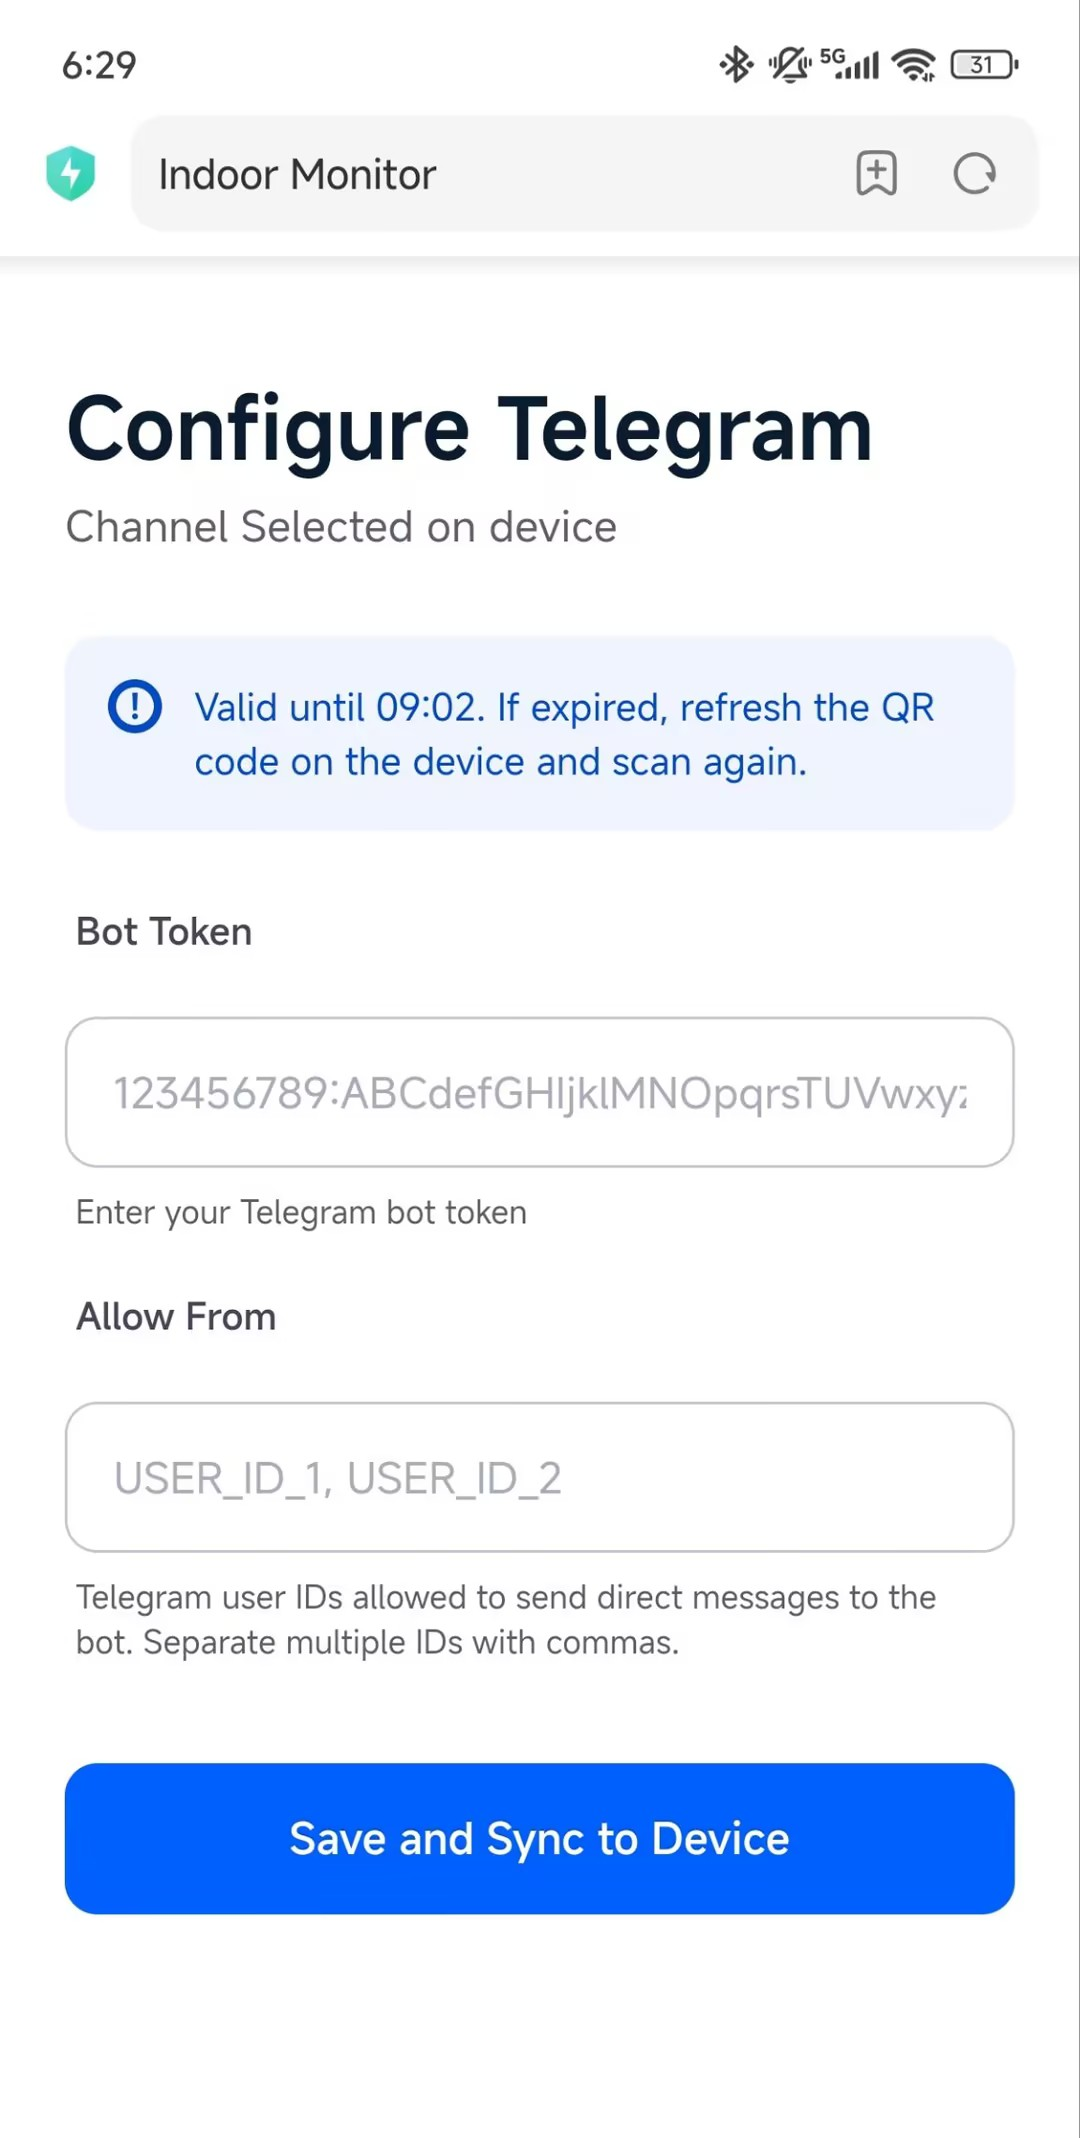
Telegram
Telegram setup uses a bot token that is automatically retrieved.
Tap + next to Telegram.
Scan the QR code with your phone.
The Bot Token and Allow From are filled in automatically. Simply tap Save and Sync to Device.
“Config Submitted” will display on the indoor monitor.
Note
Allow From specifies which Telegram user IDs are permitted to send commands to the bot. To find your Telegram user ID, search for the bot @userinfobot in Telegram and send it any message. It will reply with your numeric user ID. Separate multiple IDs with commas.
Tap + next to WhatsApp.
Enter your phone number in the format: +{country code}{phone number}, e.g., +861234567899.
Tap Add to add the phone number.
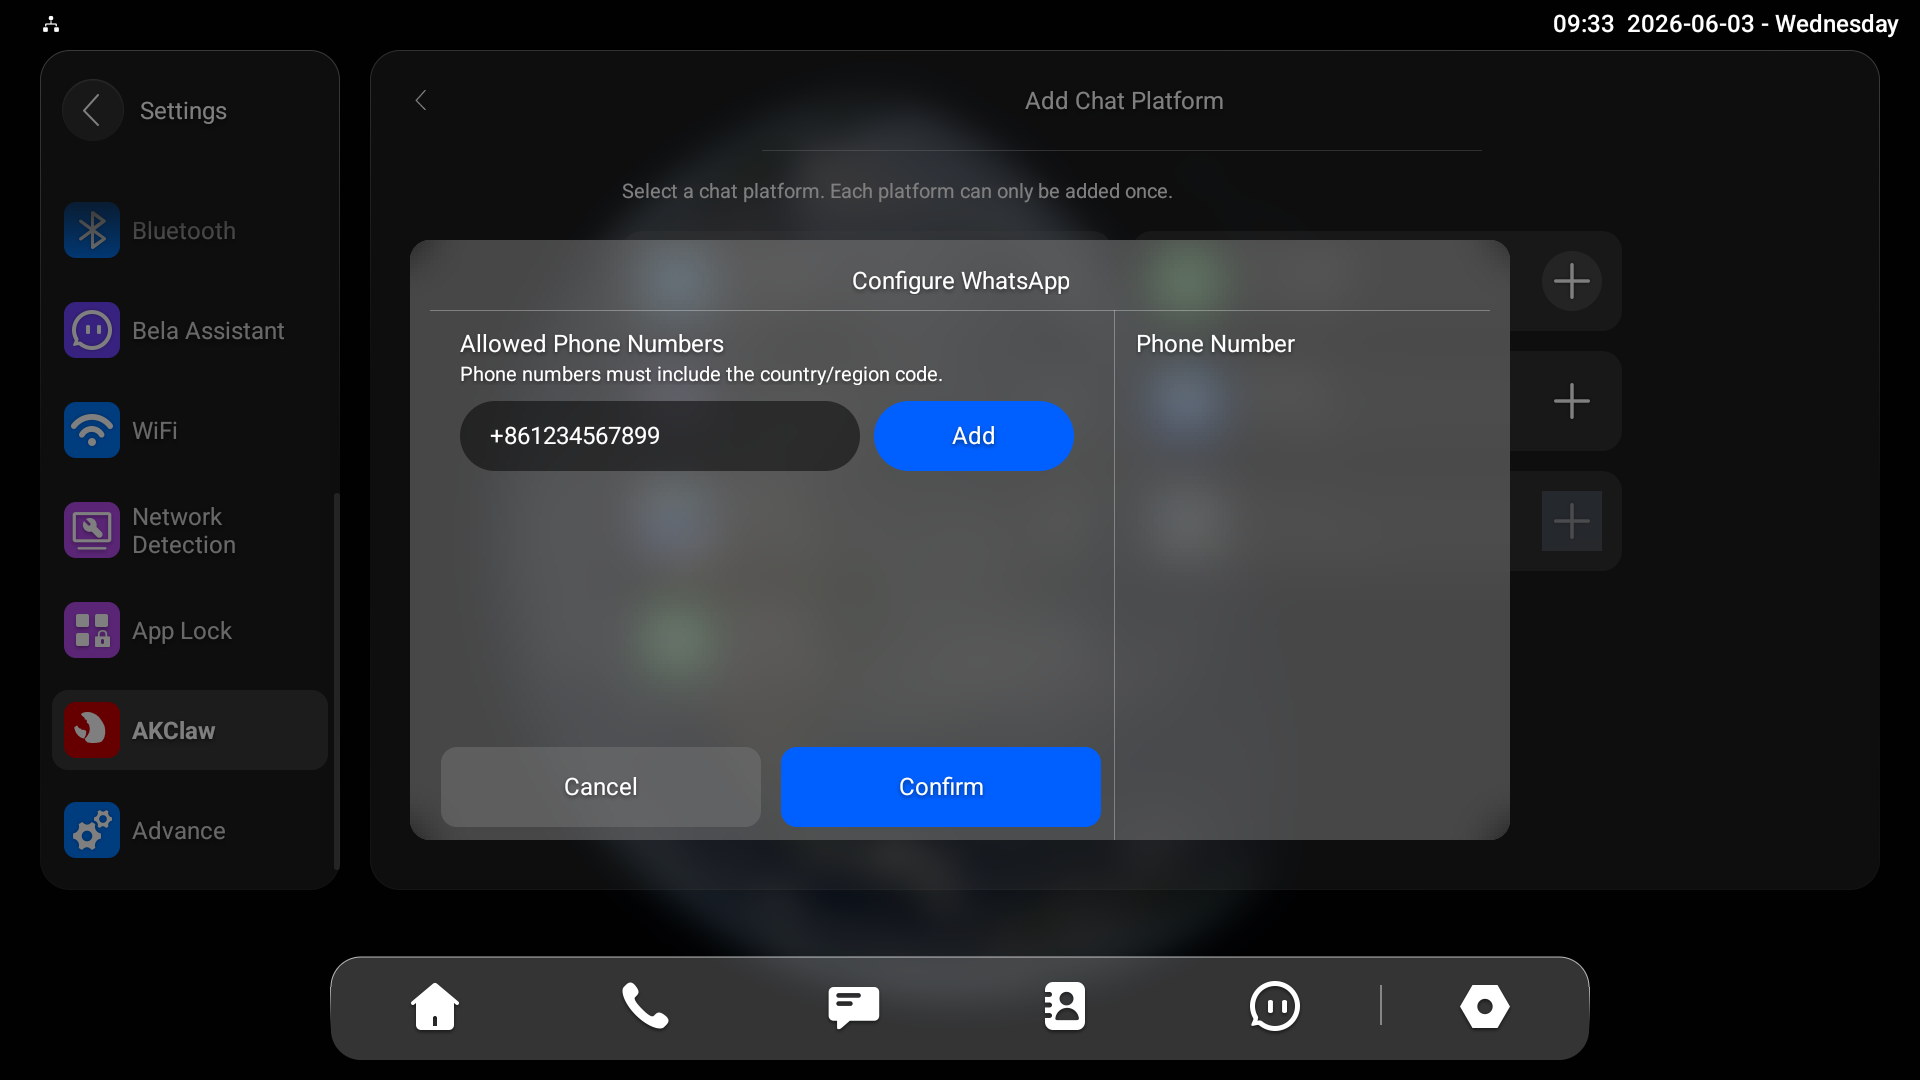
Tap Confirm. A QR code will appear on the device screen.
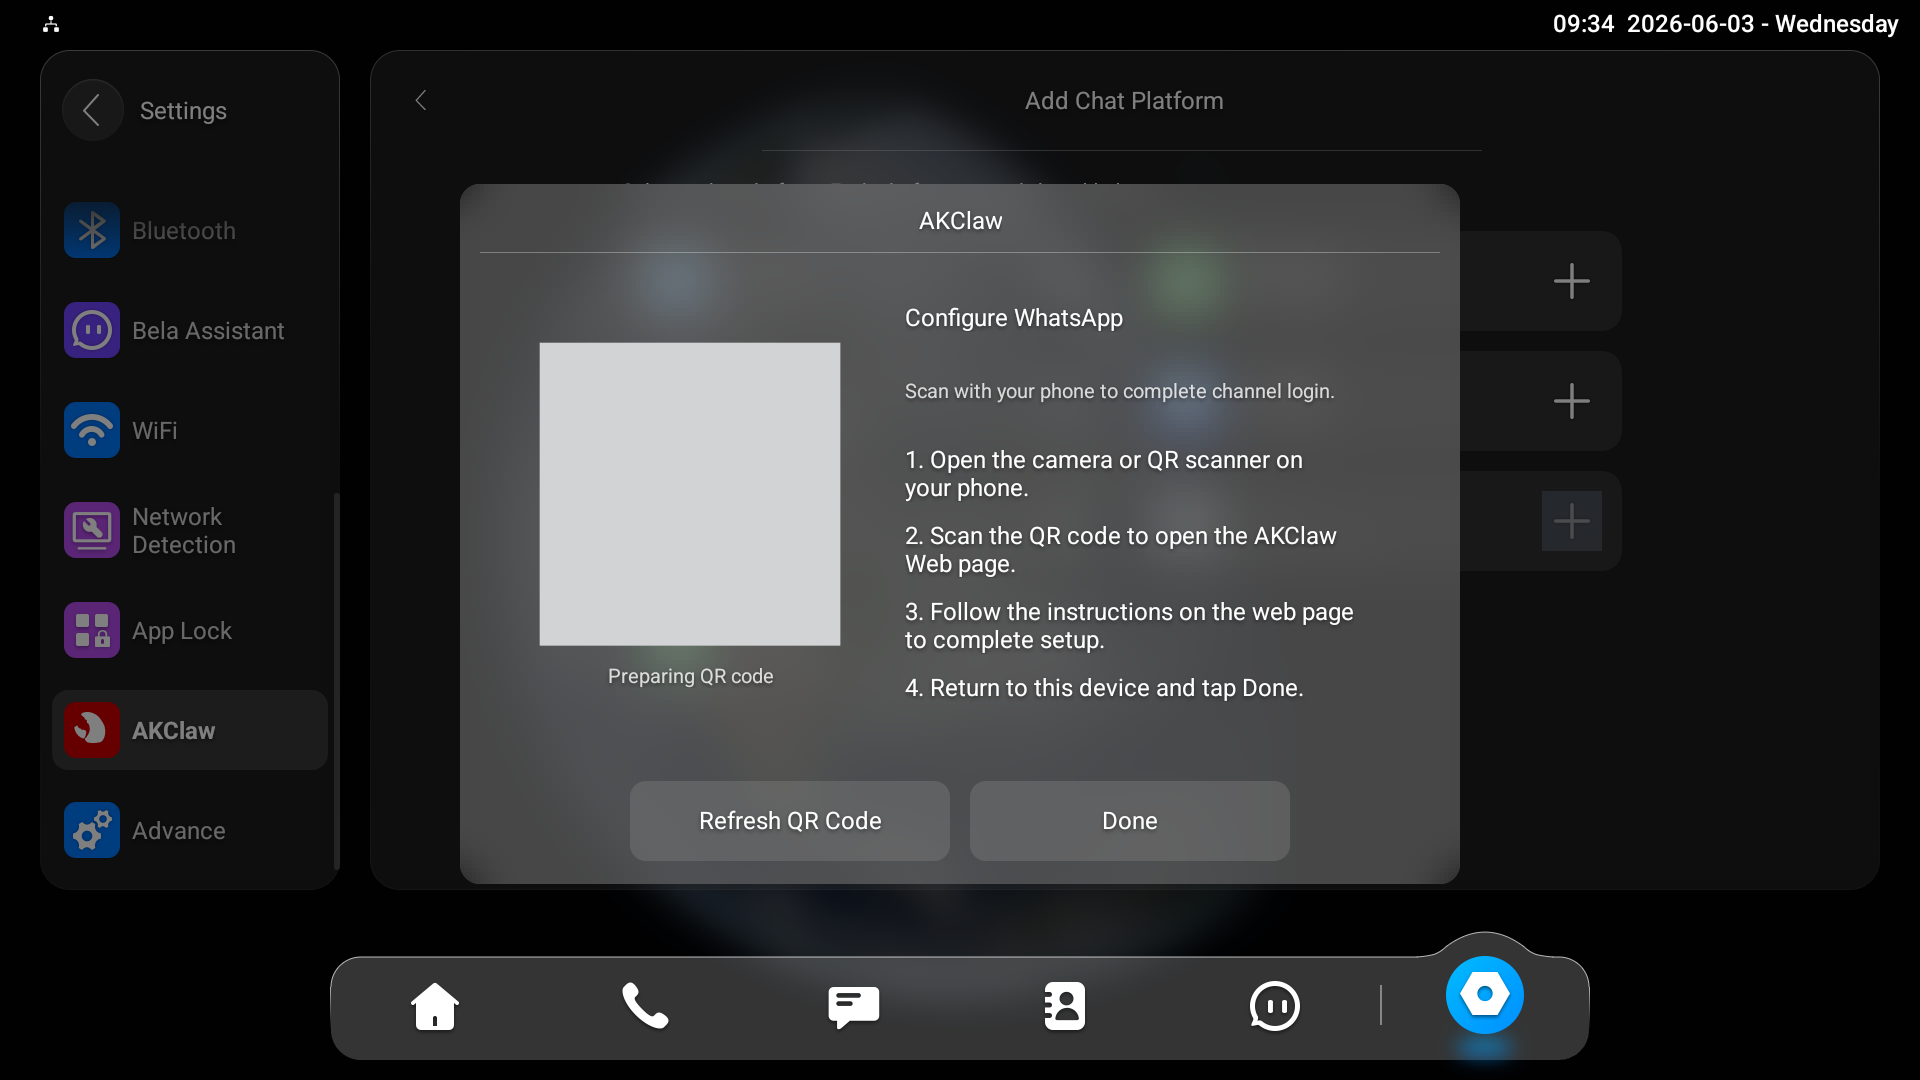
Open WhatsApp on your mobile phone.
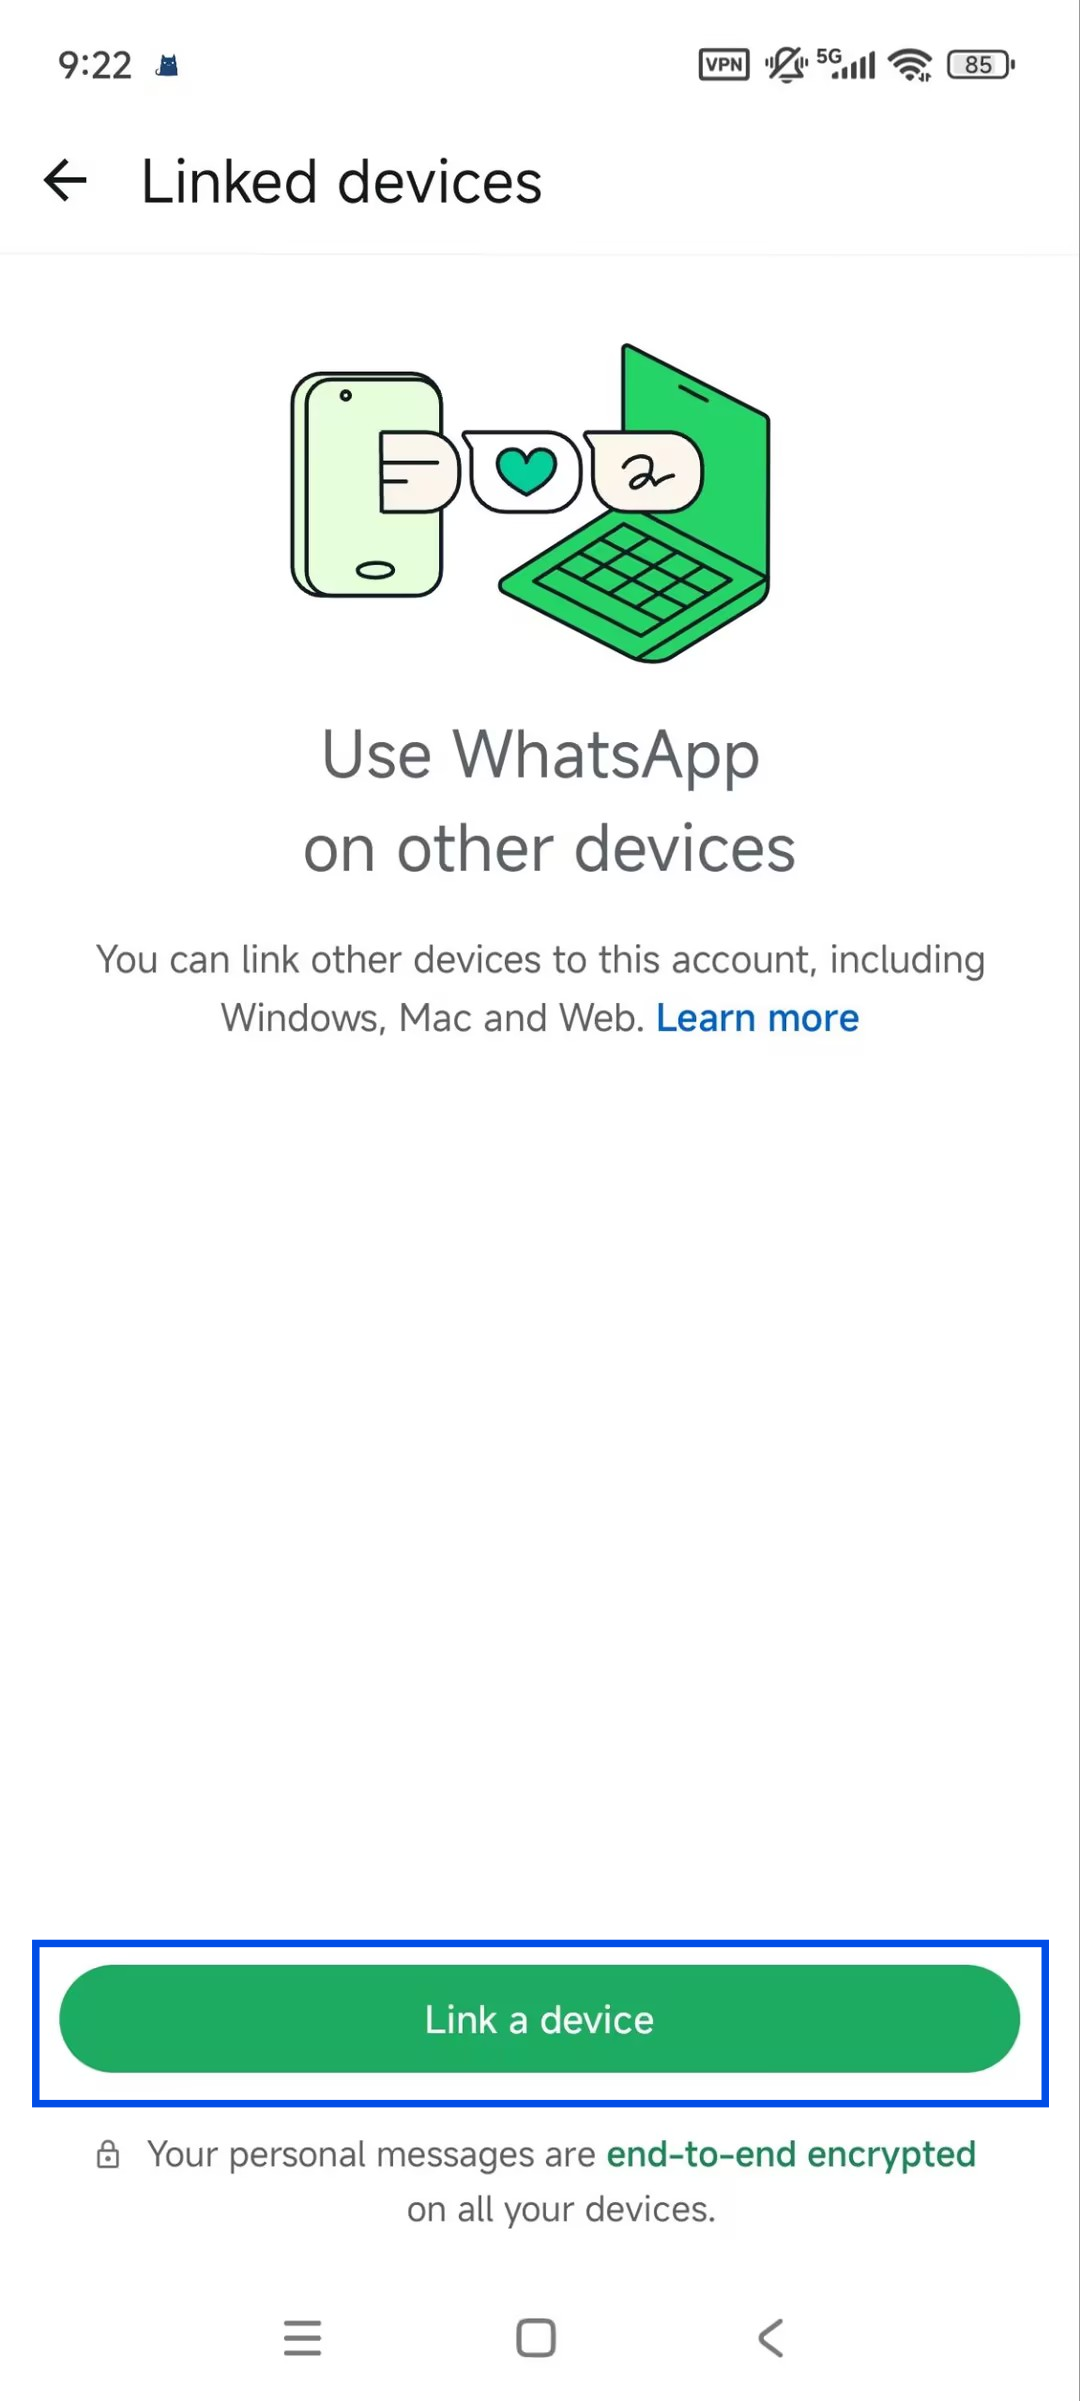
Tap the menu icon in the upper-right corner and select Linked devices.
Tap Link a device.
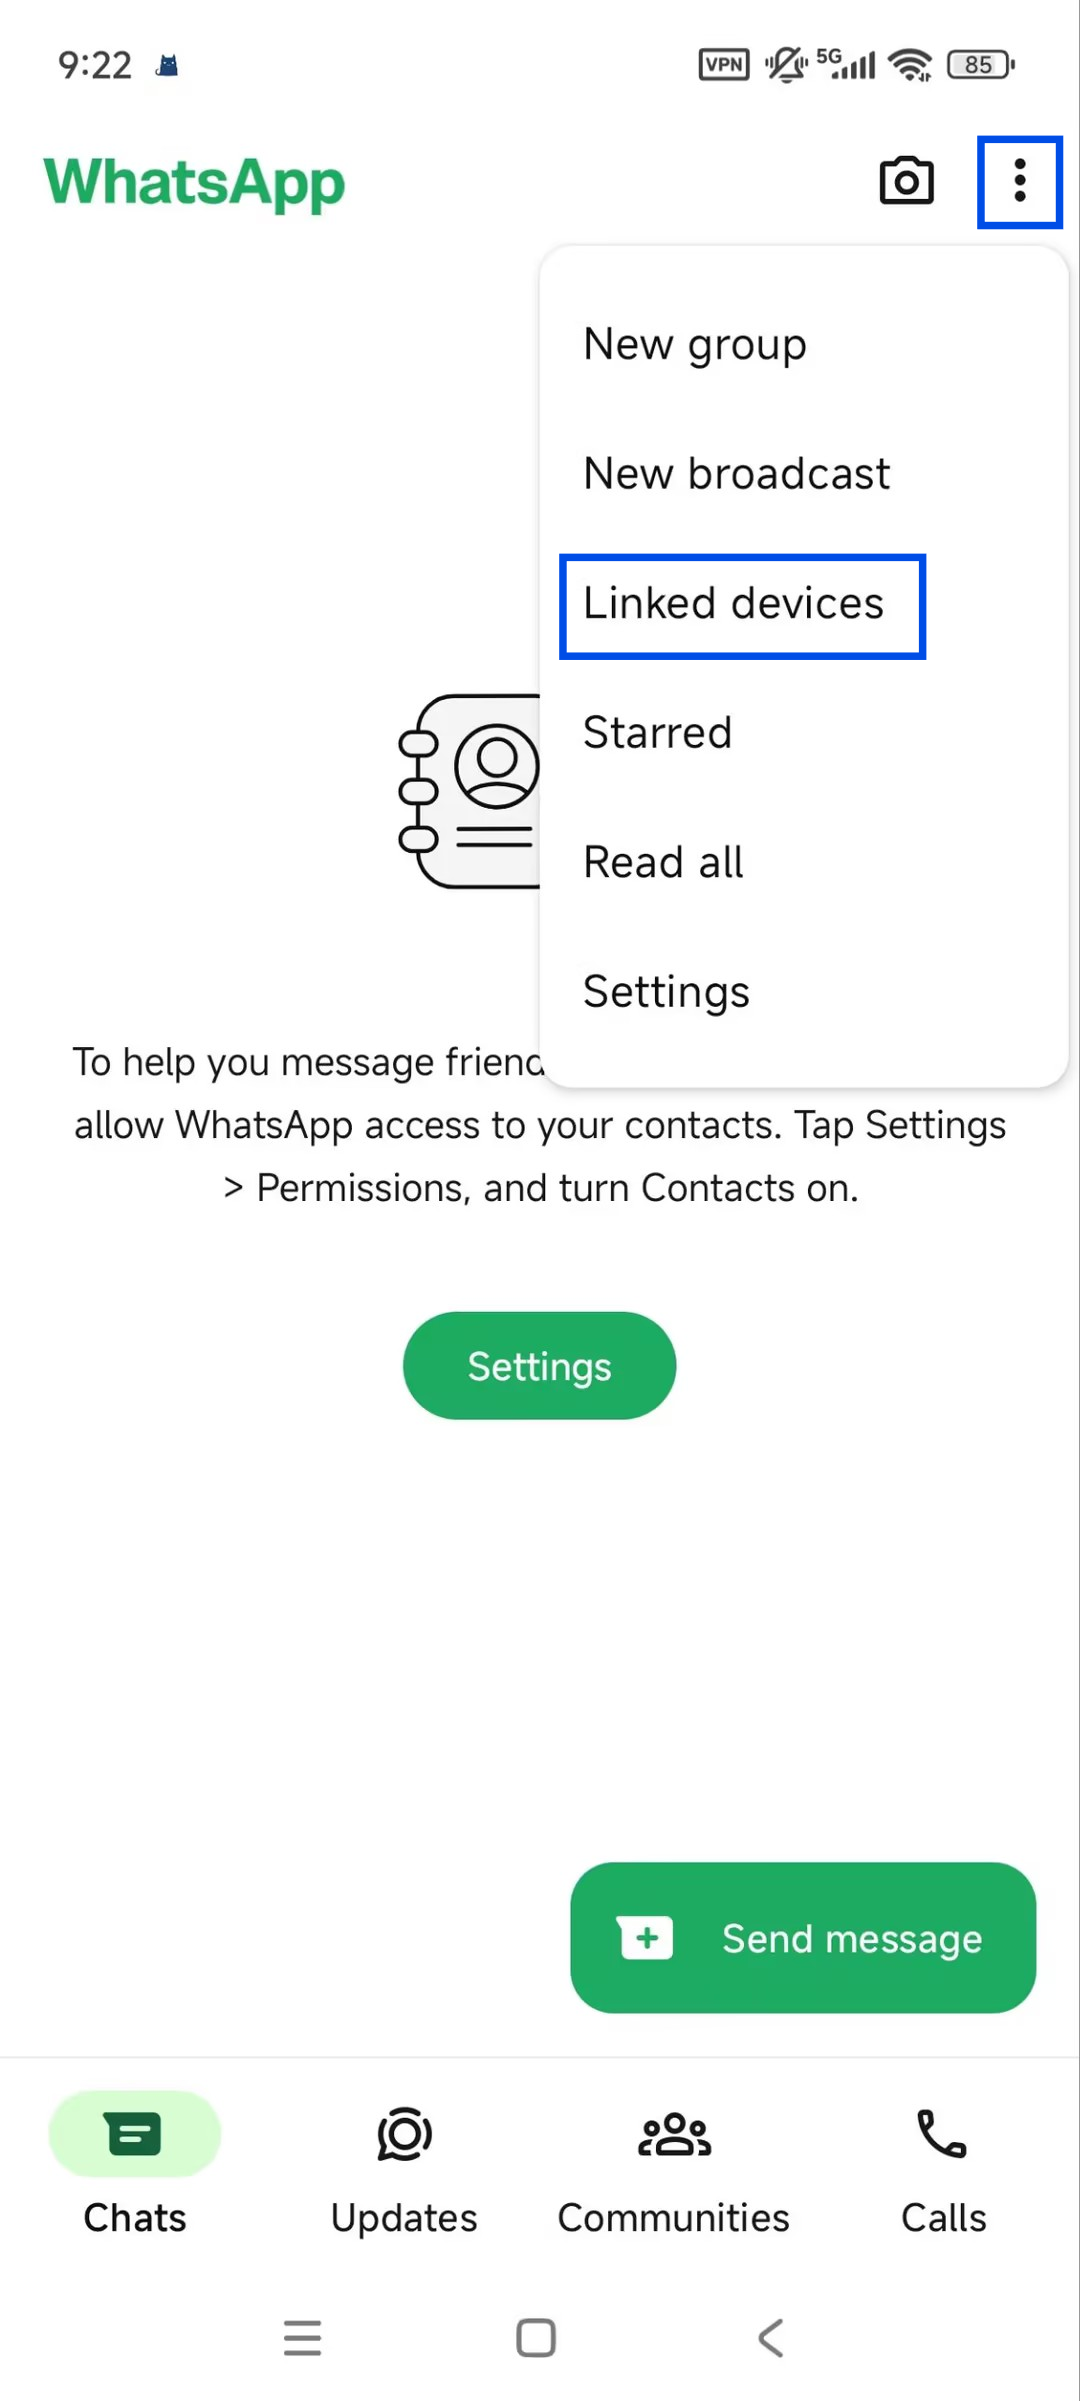
Scan the QR code on the indoor monitor.
Note
The WhatsApp account that scans the QR code will become the AKClaw bot account.
Then, wait about 1–2 minutes after the connection is established.
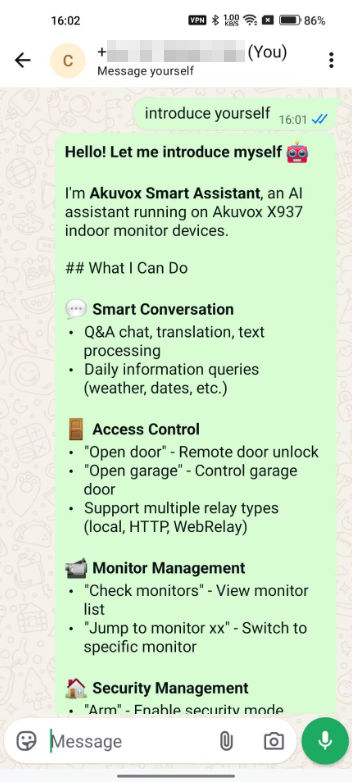
Send a message to your own WhatsApp account. The Bot will automatically reply to your message.
Discord
Discord setup requires creating a bot application in the Discord Developer Portal before configuring the device.
Create Discord Application
Open the Discord website and log in to your account.
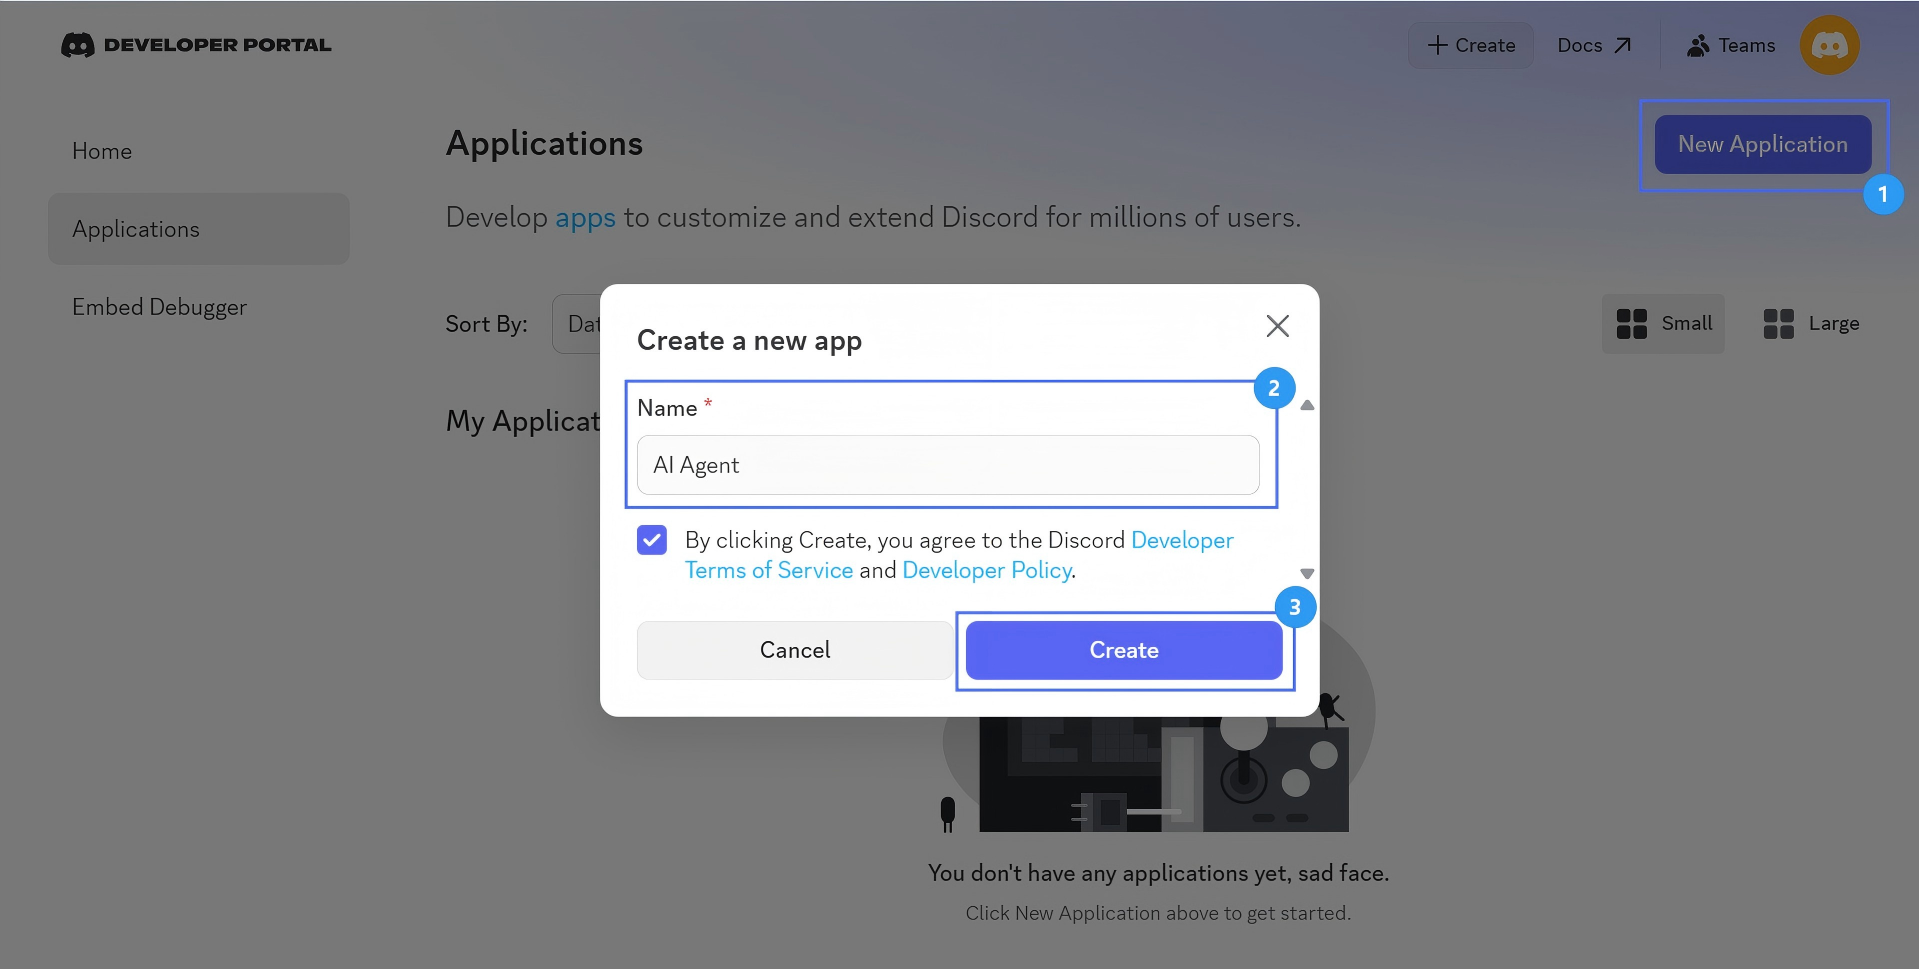
Click New Application.
Customize the app name and click Create.
Generate Bot Token
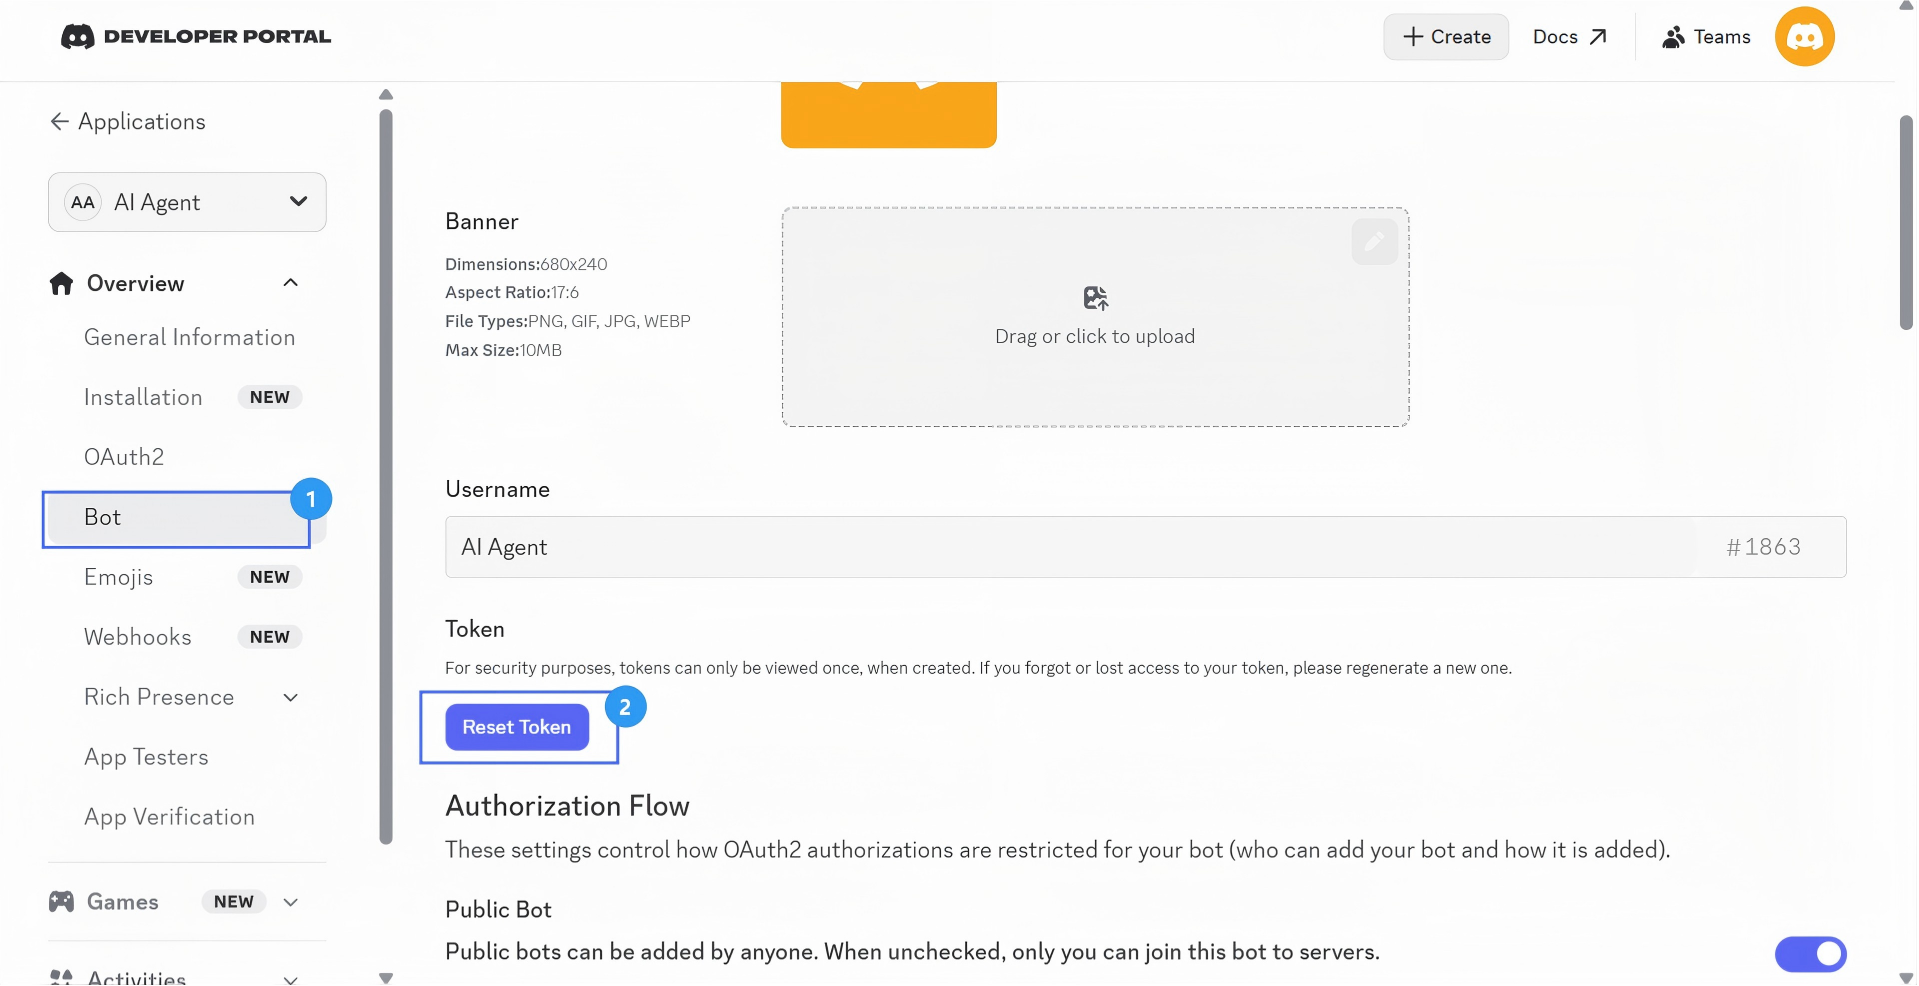
Select Bot in the left Overview menu.
Click Reset Token to generate a new token.
Copy the new token for later use in the X937.
Enable Bot Intents as shown in the picture.

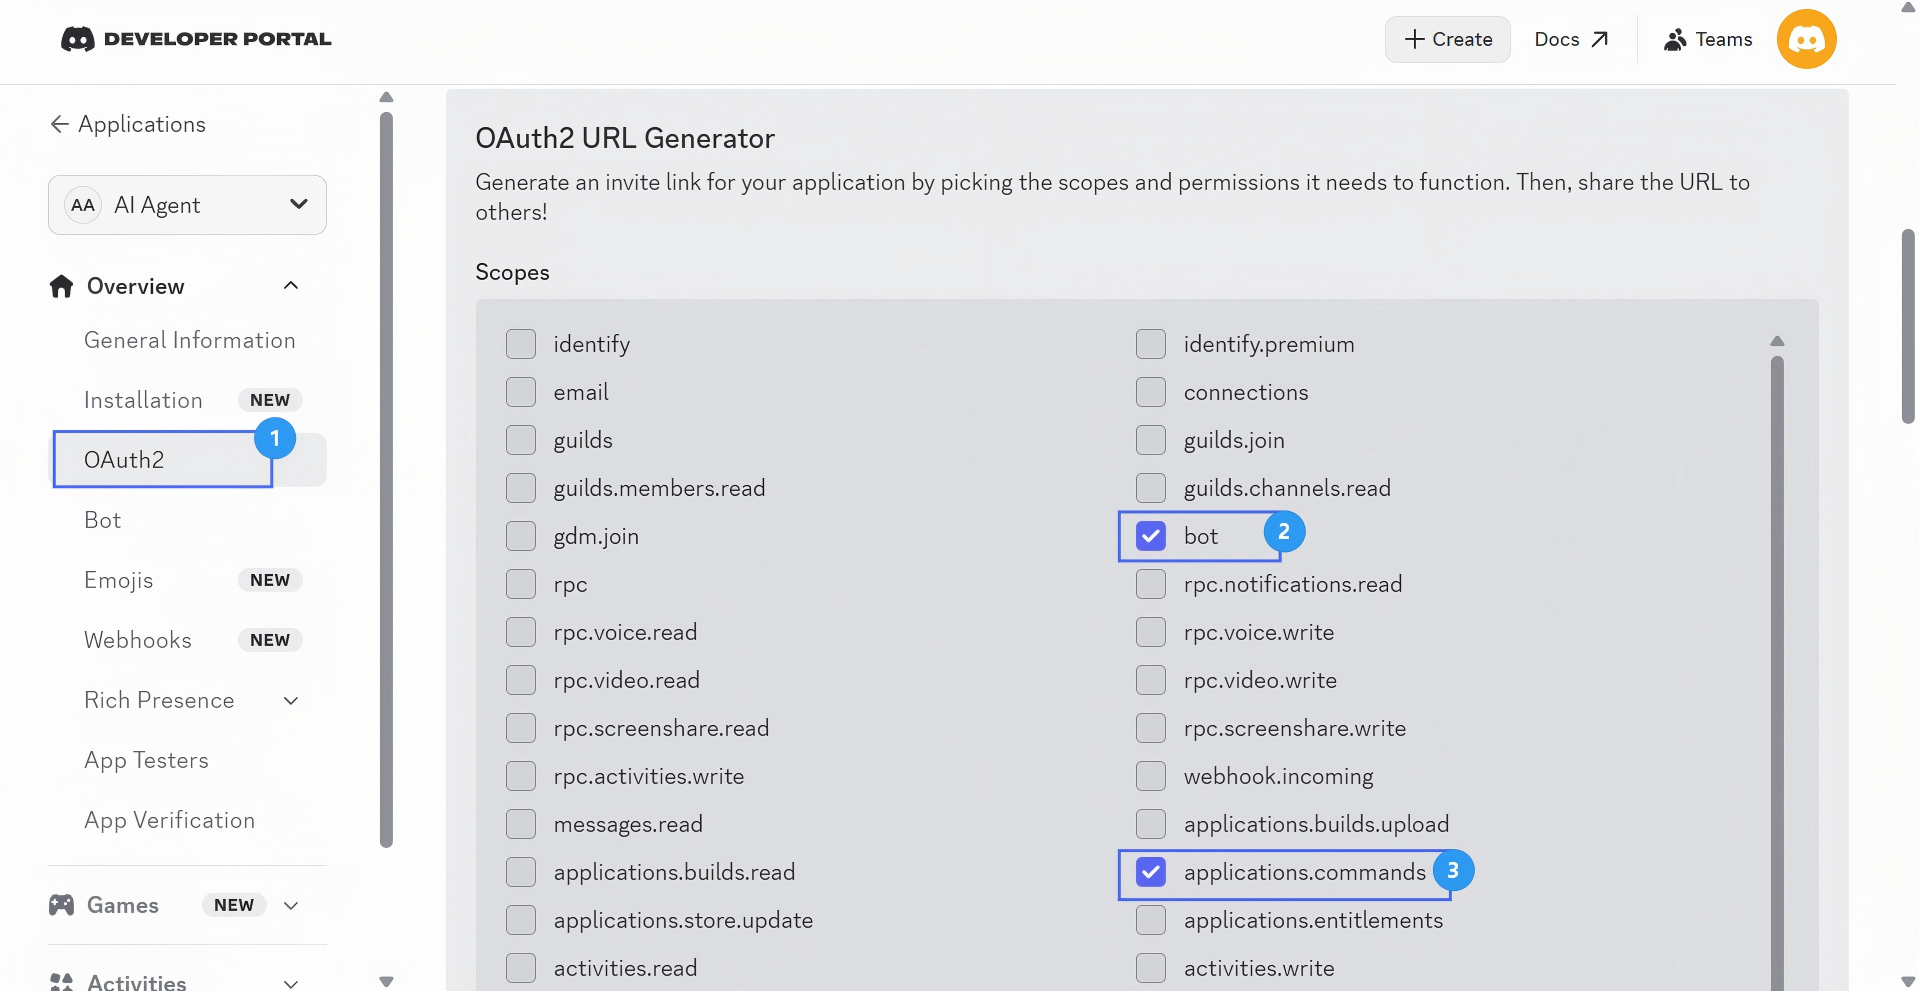
Configure OAuth
Select OAuth2 in the left Overview menu.
Enable the following 2 scopes:
bot
application.commands
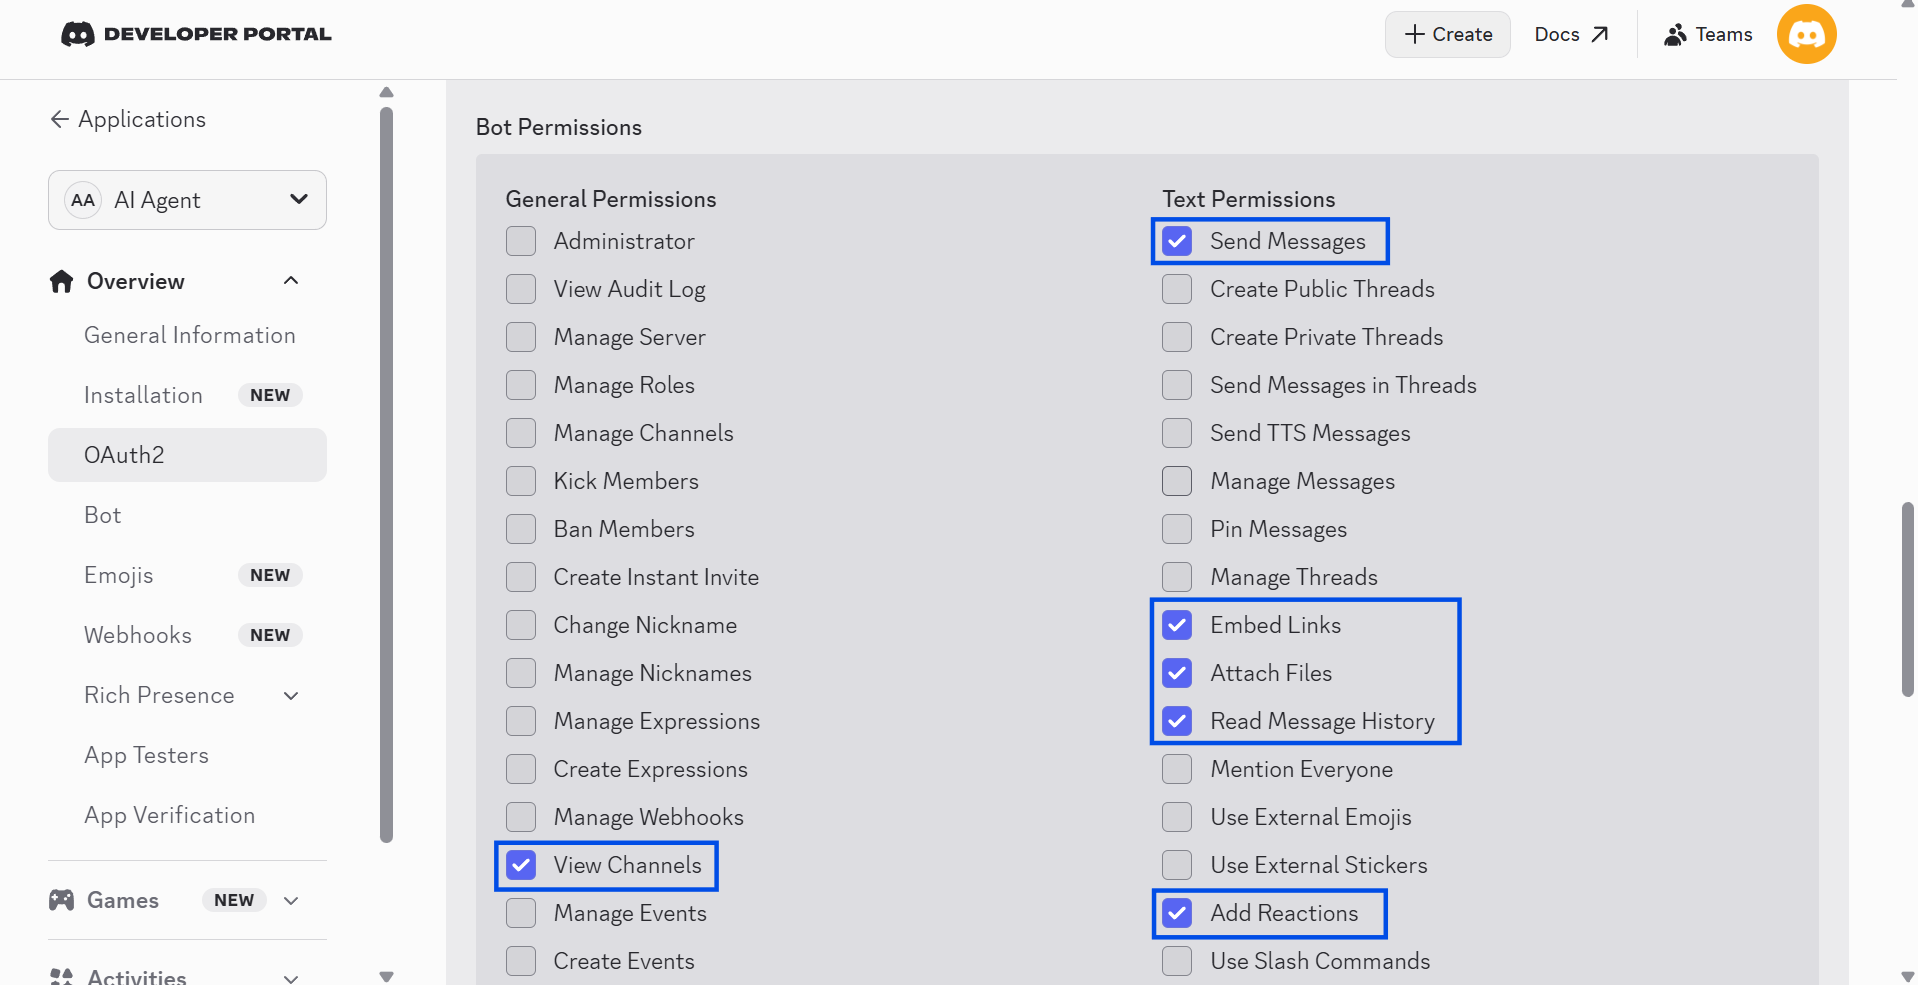
Enable the Bot Permissions as shown in the picture.
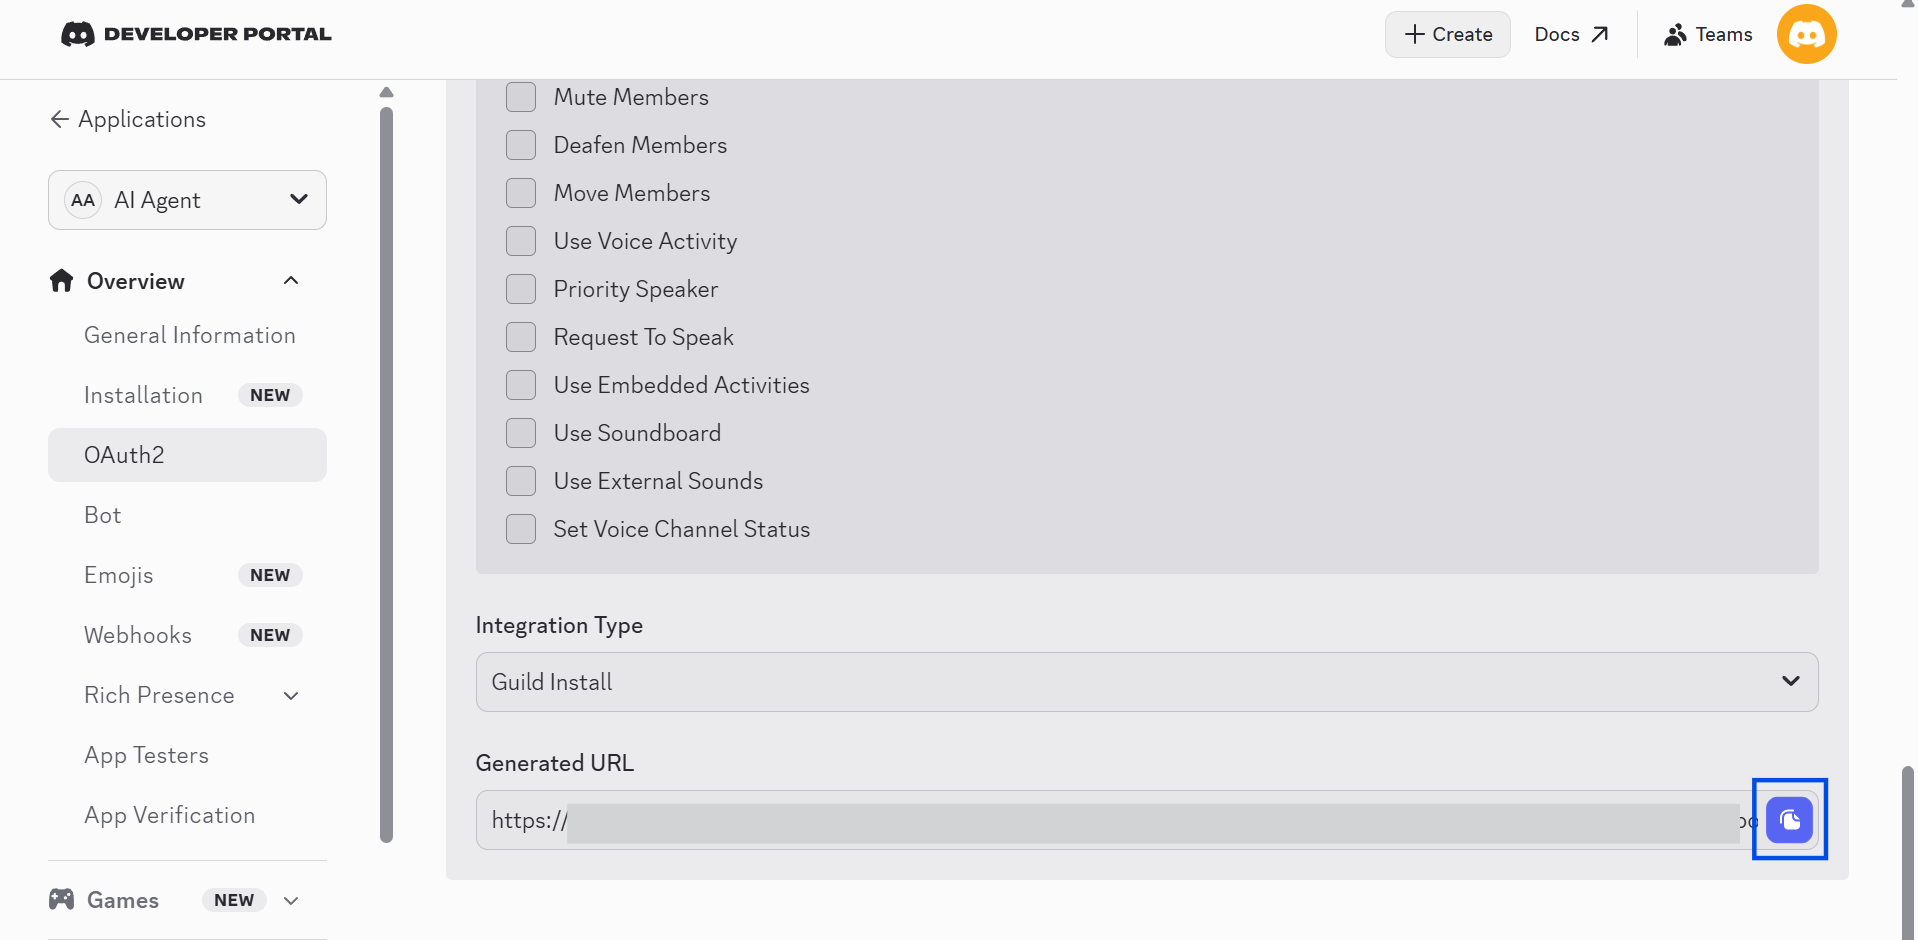
Scroll down to copy the URL and open it in a browser.
Select your server and click Continue.
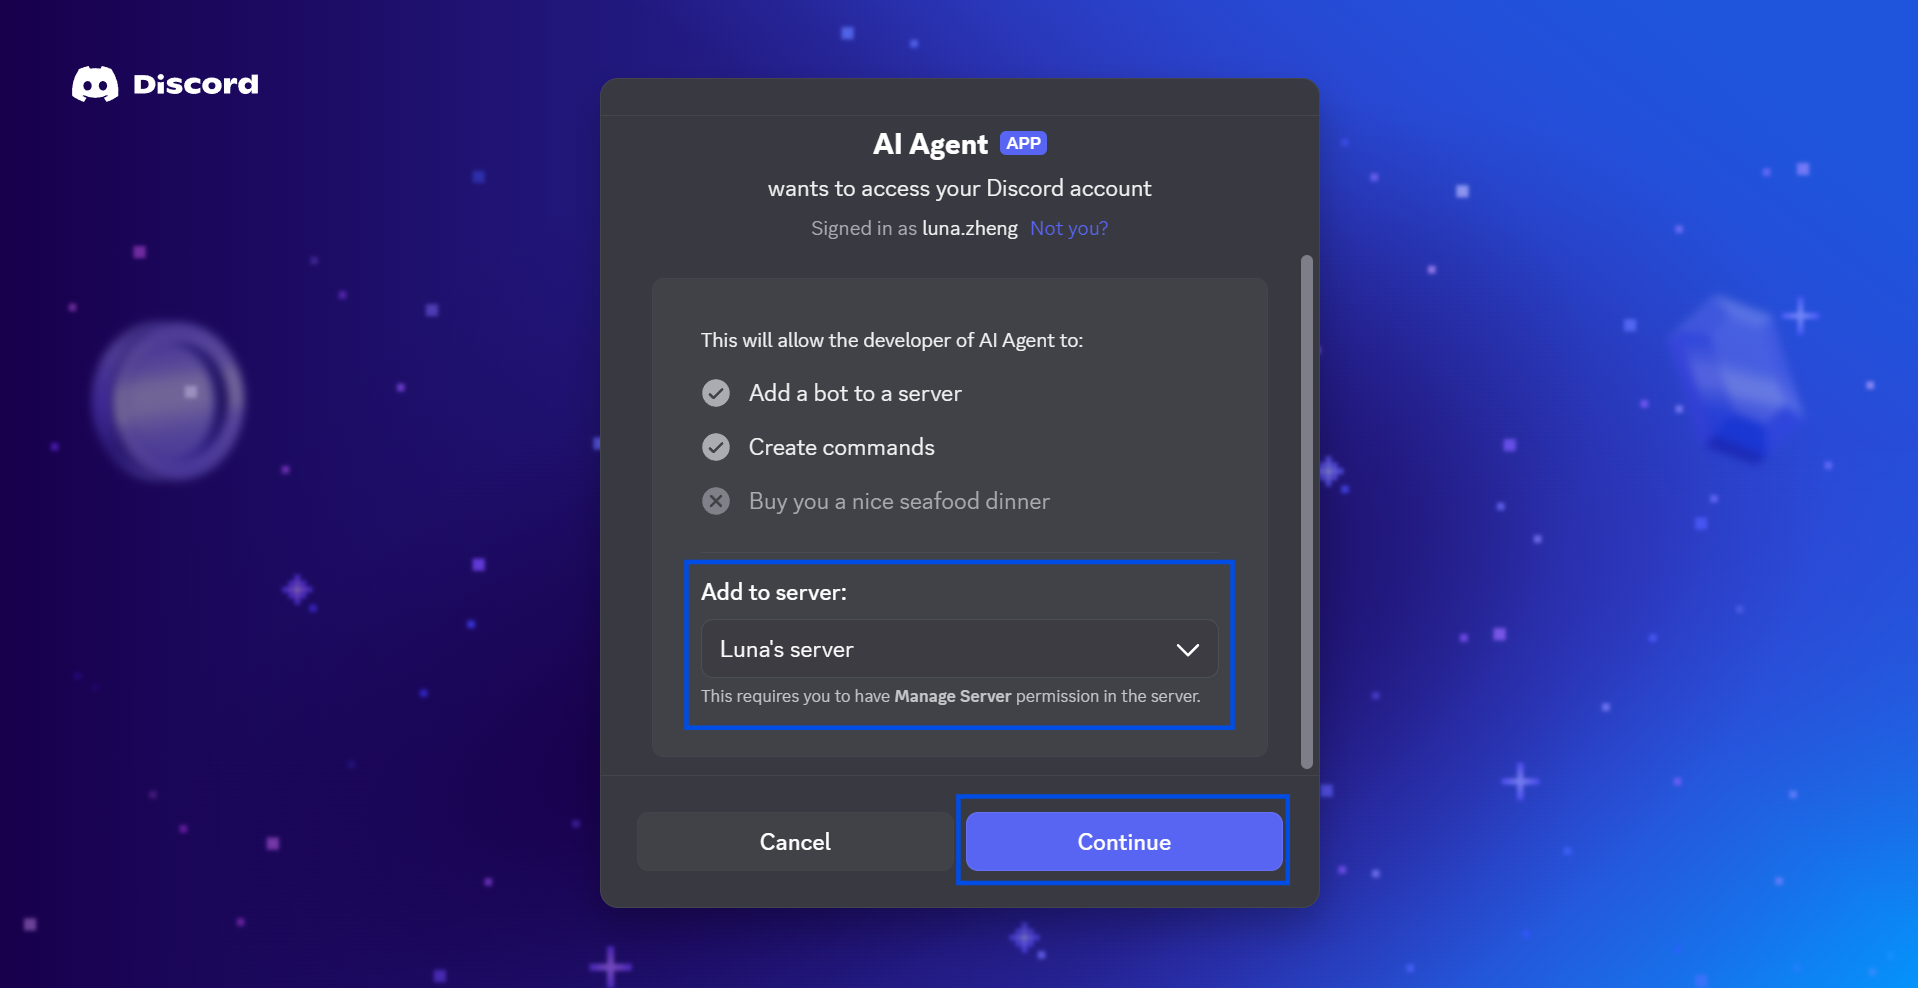
Confirm the authorization, and the “Success” notification will display.
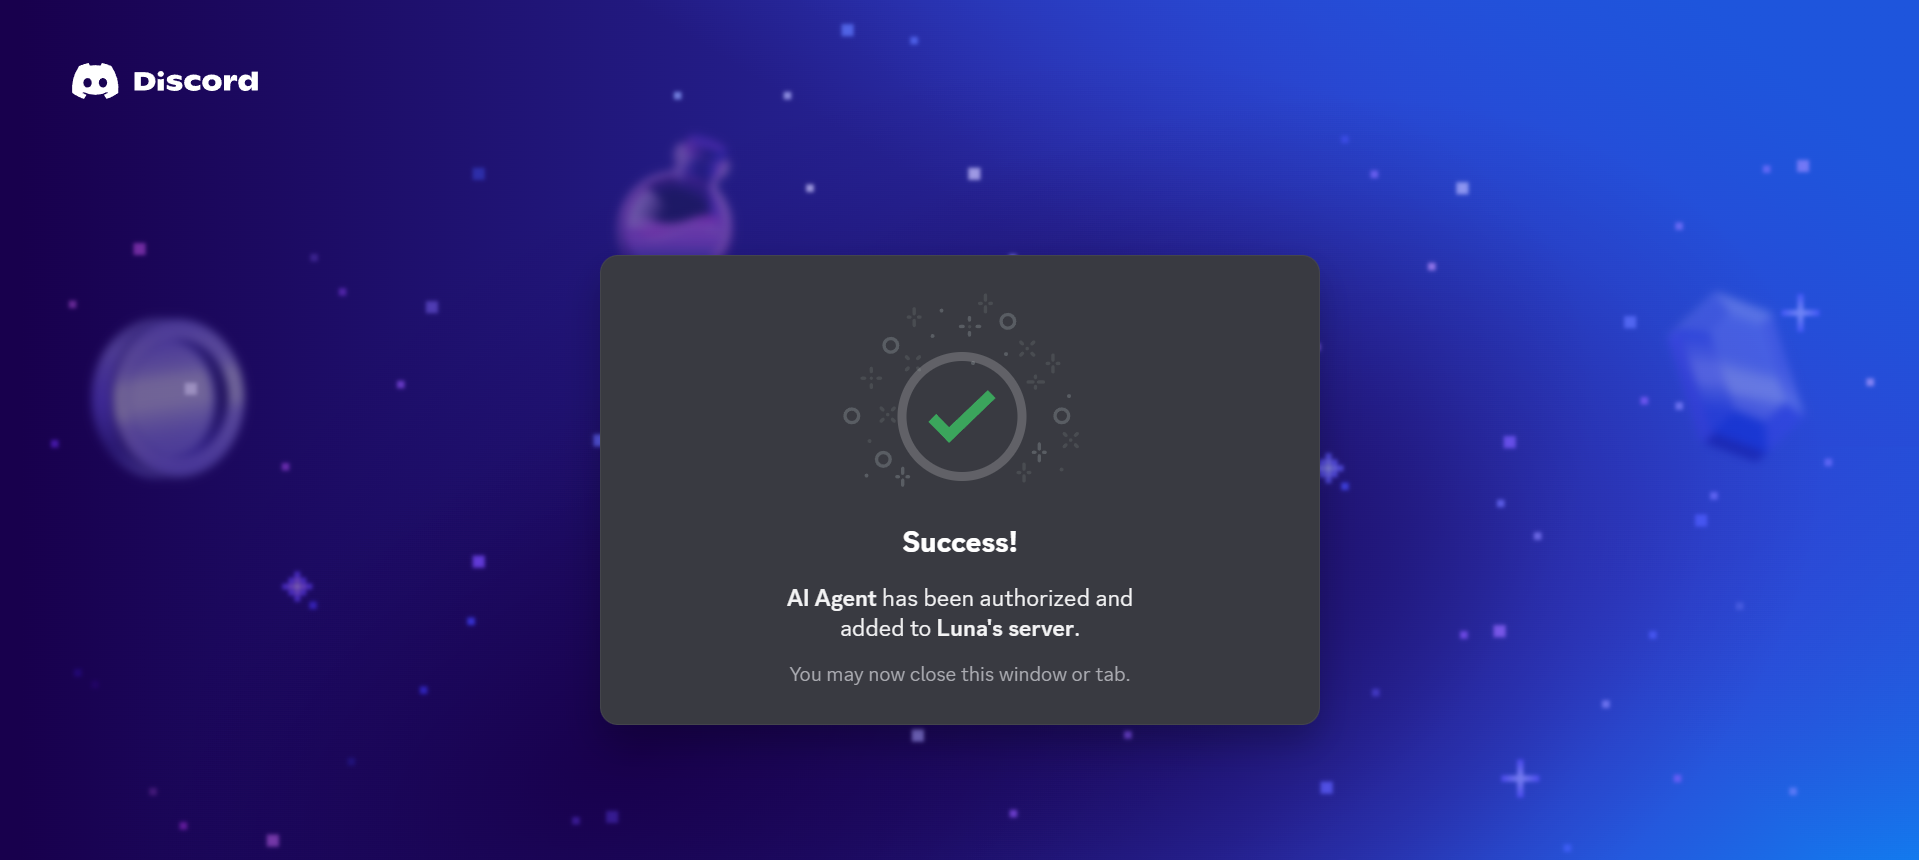
Then, the Bot will be added to your channel.

Configure Device Settings
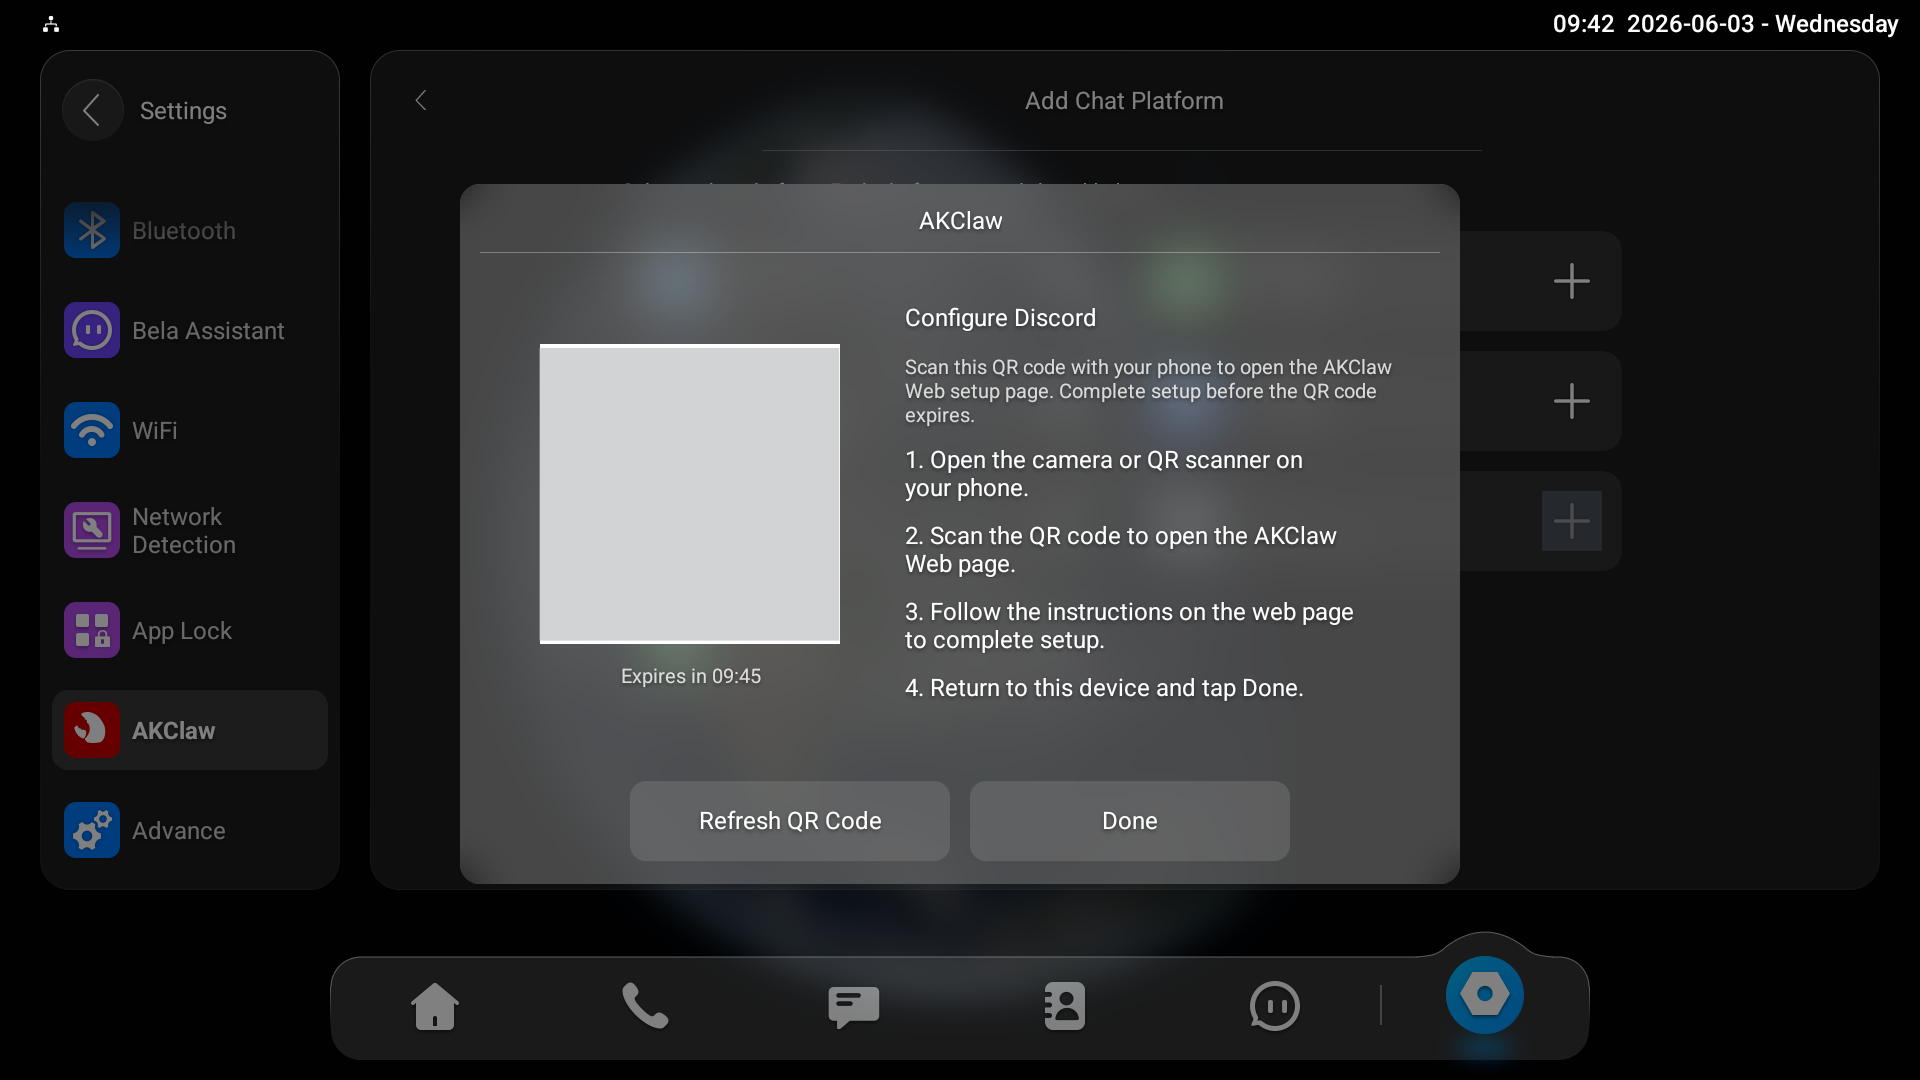
Tap + next to Discord on the indoor monitor.
Scan the QR code with your phone to open the AKClaw Discord setup page.
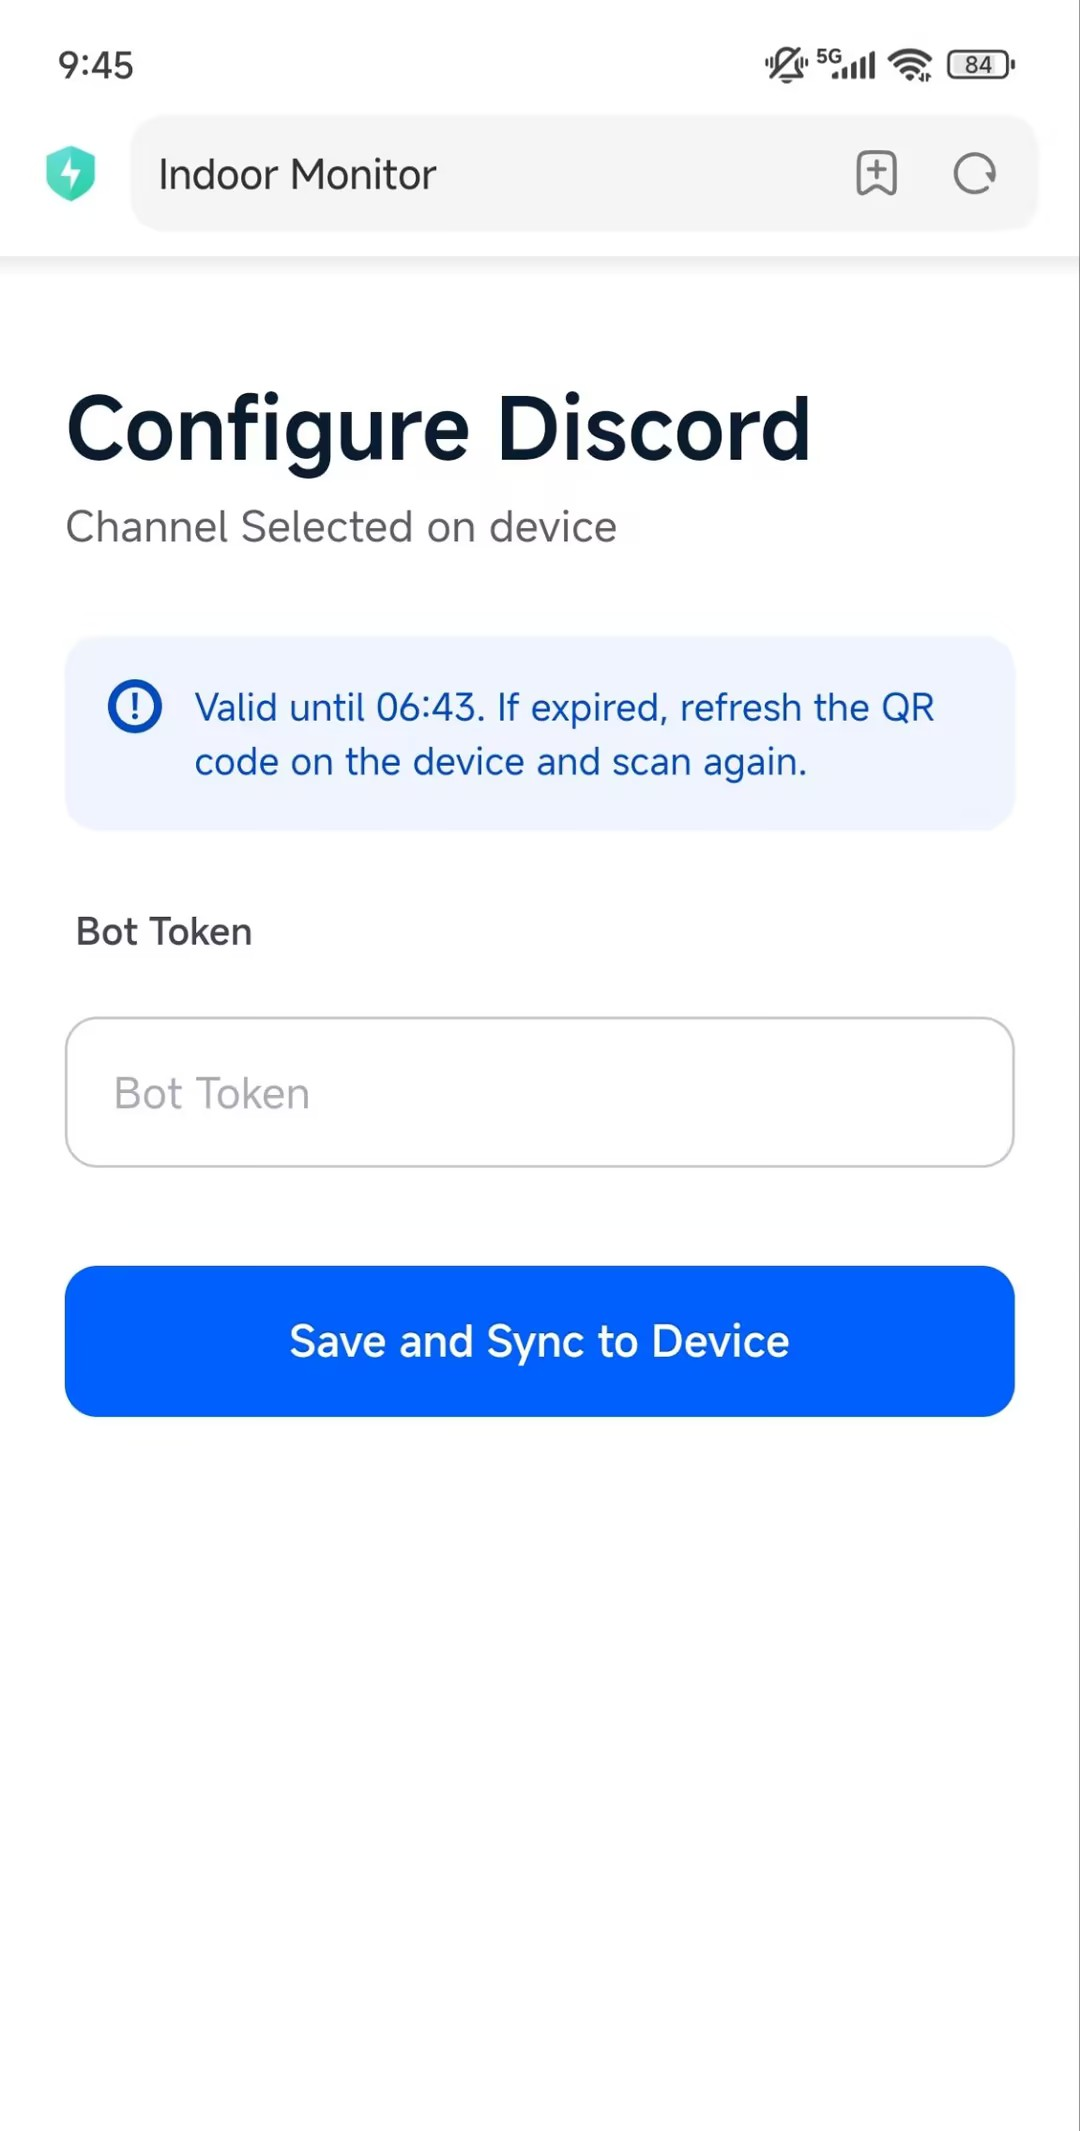
Enter the Bot Token you copied in the Generate Bot Token step.
Tap Save and Sync to Device. “Config Submitted” will display on the indoor monitor.
Then, you can @the Bot in your Discord chat for a conversation, such as asking it to open the door, arm the device, turn up the speaker volume, and so on.
Troubleshooting
If the bot does not respond:
Check the API key is correct.
Check device internet connectivity.
Check AKClaw service status is Running.
Check bot permissions on Discord.
Check that the bot is added to the correct channel.
Supported AI Agent Control Function
The AI agent supports natural language interaction. Users can speak naturally without using exact predefined commands.
Category | Function | Example Command | Description |
|---|---|---|---|
Home Control | Door unlocking | Unlock FrontDoor | Unlock connected doors by voice request. |
Live monitoring | Open the monitor of FrontDoor | View the live video feed from a door phone or linked entrance device. | |
Arm / Disarm security | Arm Home / Arm Away | Enable or disable security modes such as Home Mode or Away Mode. | |
Sensor status check | Check door status | Check the status of door/window sensors, motion detectors, and smoke sensors. | |
General Assistant | General questions | What can you do? | Ask questions on common topics and receive AI responses. |
Translation | Translate Chinese to English | Translate between supported languages. | |
Weather updates | How's the weather today? | Request current weather information for selected locations. | |
Writing assistance | Help me write an email | Generate drafts, summaries, or edited text content. | |
Device Settings | Volume adjustment | Turn up the volume | Increase or decrease the device volume. |
Brightness adjustment | Make it brighter | Adjust the screen brightness level. | |
Language switching | Switch device language | Change the device system language. | |
User Management | Add administrators | Add an admin | Grant administrator permissions to trusted users. |
Check administrator list | Show admin list | View users with access permission. |
Skills
Skills are functional execution modules that extend AKClaw's capabilities, enabling device control, smart home integration, monitoring, automation, and third-party service interactions.
Skill Categories
Built-in Skills (Ready to Use)
The following skills are available out of the box and can be used without additional third-party setup:
All skills prefixed with openclaw- (such as configuration, monitoring, sensor management, relay control, and administrator management).
Skills Requiring Additional Configuration
The following skills require external devices, services, or software before use:
Skill | Requirement |
|---|---|
AI Alarm Push | AI alarm review and push notification configuration. |
common-homekit | Apple Home setup and paired HomeKit devices. |
sonoscli | Sonos speakers available on the same local network. |
stock-monitor | Internet access for stock data retrieval. |
google-calendar | Android CalendarBridge and Google Calendar account. |
AKClaw-Smart-Home | Integration with akubela Smart Home devices and services. |
openhue | OpenHue environment and Philips Hue devices. |
notion | Notion API integration for creating and managing pages, databases, and blocks. |
Skill Enable/Disable Control
Some skills provide an independent toggle switch and can be enabled or disabled as needed, including:
AKClaw-Smart-Home
AI Alarm Push
Only enabled skills will be available for execution by AKClaw.
Security and Privacy Notes
WhatsApp bot account: The account linked to AKClaw will process all incoming messages via the AI model. Avoid using a personal account with sensitive conversations.
Telegram Allow From: Restrict access to trusted Telegram user IDs only to prevent unauthorized control of your device.
Discord bot permissions: Grant only the permissions listed in this guide. Avoid enabling Administrator permissions.