Akuvox offers different intercom kits with a combination of different device models. The kit usually contains an indoor monitor and a door phone, which can be deployed conveniently for single-family projects.
Regardless of whether devices use a local network(LAN) or are connected to the Internet, users can use devices for calls, door access, and monitoring.
This article takes the indoor monitor C313W V3.0 and E12 as examples.
Note
The following device models with specific firmware versions or higher support the latest kit feature described in the article:
Indoor Monitors:
C313W V2/C313W V2-2: 213.87.13.43;
C313W V3: 313.87.14.123;
S562W: 562.87.10.25;
S562W-2: 5622.87.15.104;
S563W: 563.87.12.902;
S567W: 567.87.13.103;
C316W: 316.87.13.402;
IT88A: 88.87.13.203.
Door Phones:
E12V2: 312.87.10.204;
E12S-2: 312.87.10.114(Not support adding cards on the indoor monitor);
R20 series/R20-2: 320.87.10.201.
Watch the Video Guide
Prefer a visual walkthrough?
Watch: [Video]Akuvox 2-Wire Intercom Kit Easy Initial Setup
For Distributors
If devices are deployed on the SmartPlus Cloud, the device MACs should be added to the distributor’s MAC library.
If devices are used on-premise, simply skip this step.
Add Device MACs to the MAC Library
Log in to the SmartPlus Cloud platform with a distributor account.
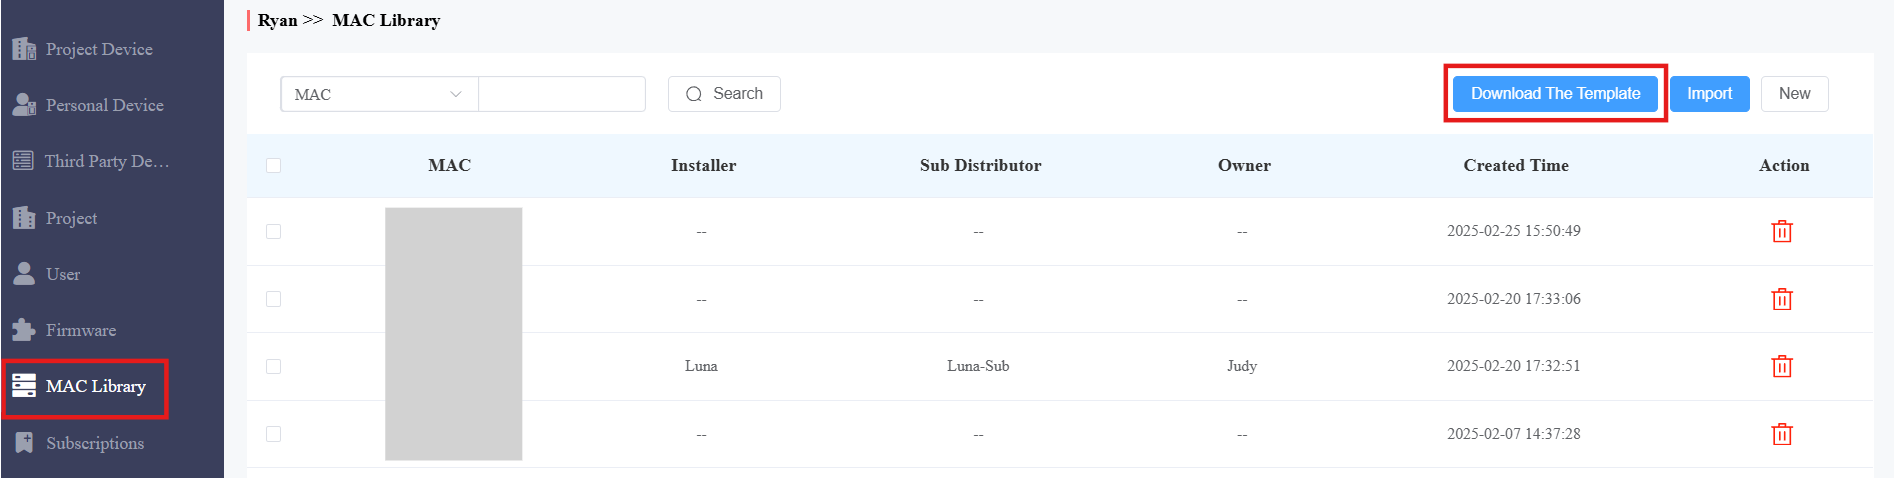
Click MAC Library on the left column.
Click Download The Template on the right.
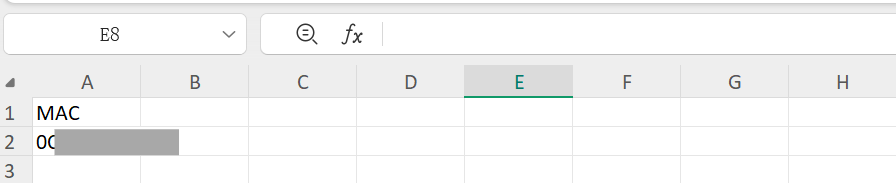
Fill in the device MAC addresses in the template.
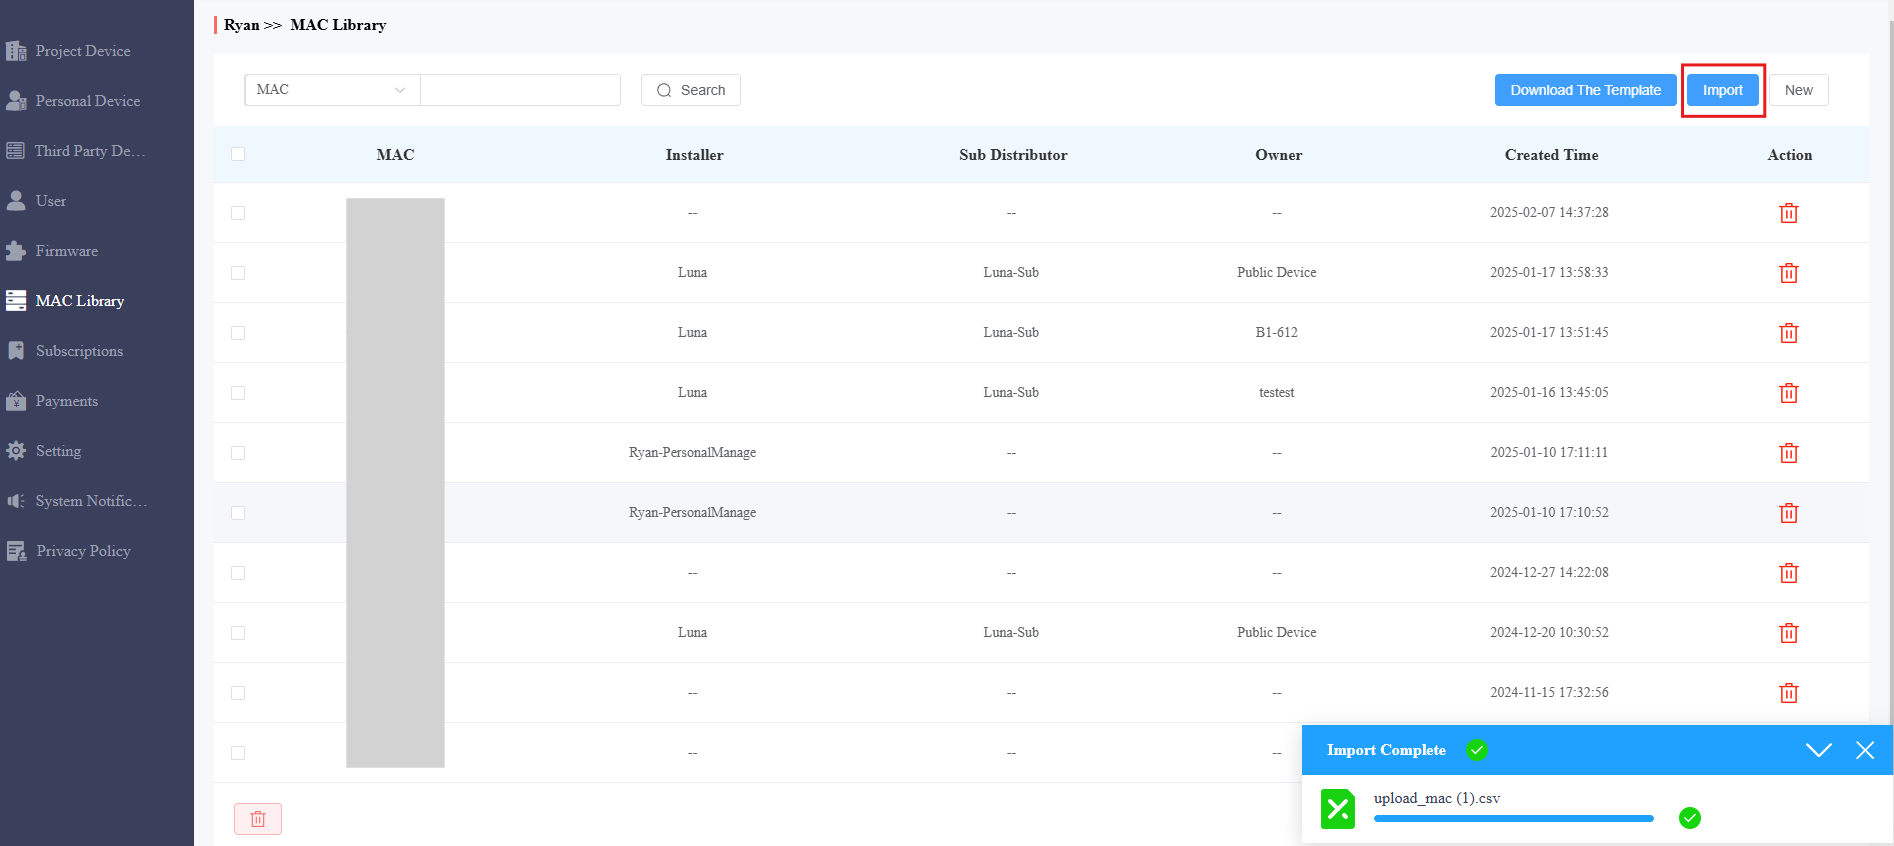
Click Import and upload the file. A prompt will inform you whether the import is successful or not.
For Installers
If devices are deployed on the SmartPlus Cloud, you need to create single-family projects on the cloud. You can create projects with the app AK-Partner.
Click here to view the steps.
Set up the Indoor Monitor and Door Phone
Before starting the indoor monitor, make sure all devices are installed properly and powered on, and on the same local network(LAN).
If devices are deployed on the SmartPlus Cloud, make sure that they can access the Internet.
Select the device language, time zone, and network on the initial startup screen.
In the fourth step, the indoor monitor will scan other Akuvox devices on the same network.
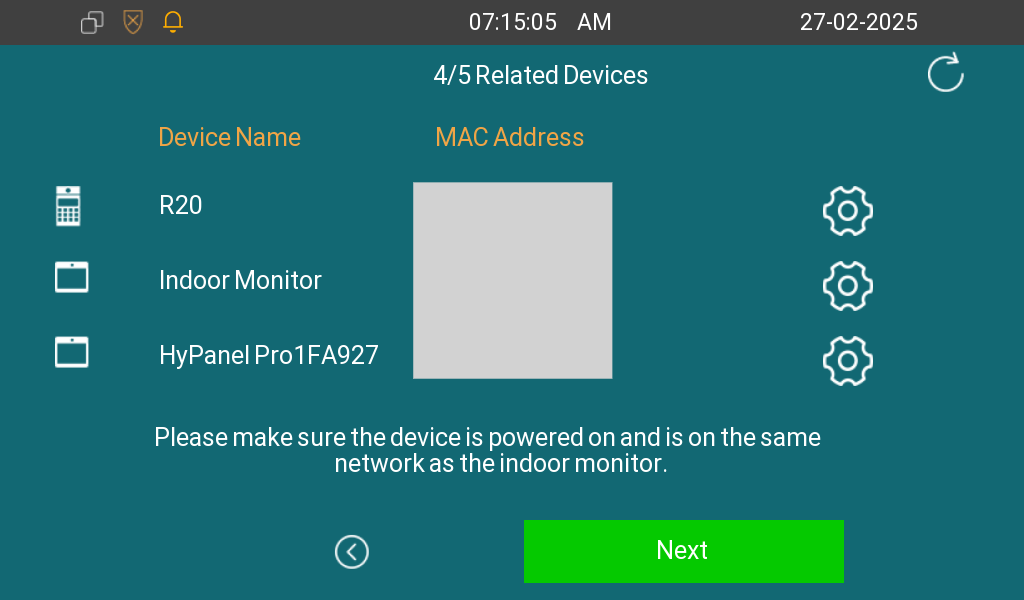
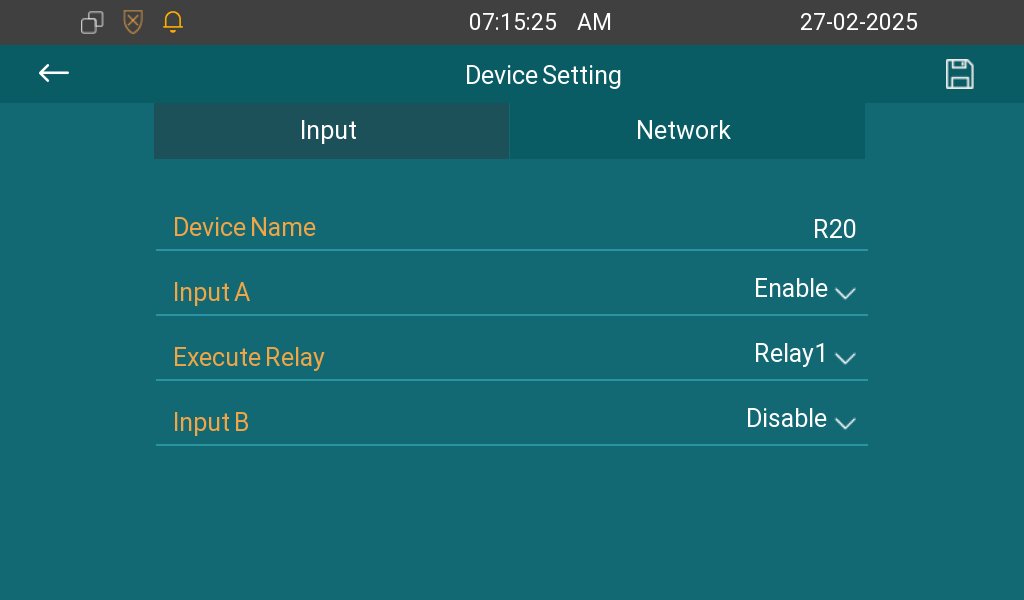
You can the device to configure its input, relay, and network.
Tap Next, and you can choose to add IC cards.
Tap +Add and place the card on the door phone. The door phone will play a “ding” sound, indicating that the card has been added successfully.
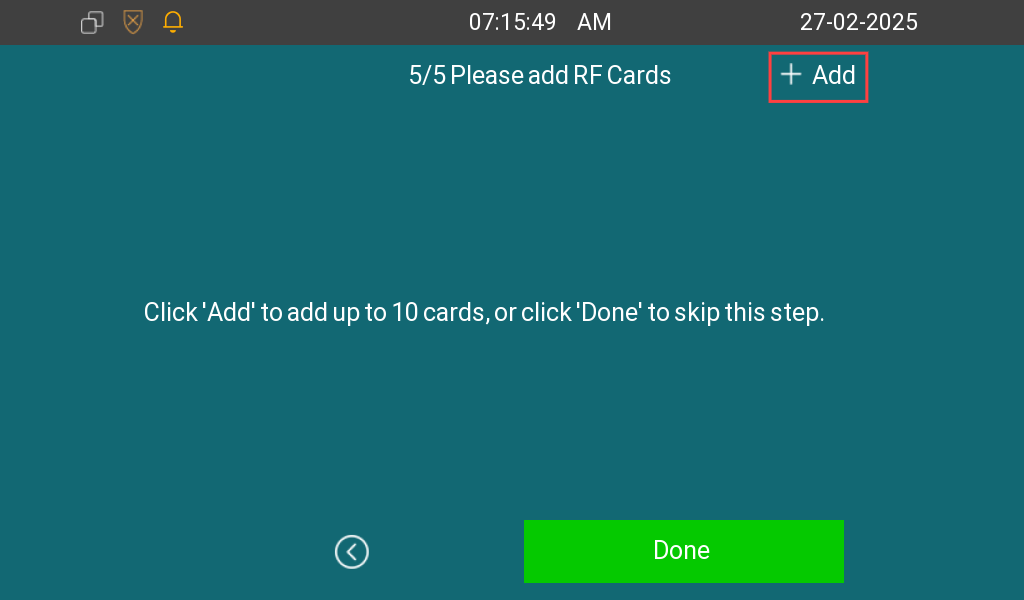
The added card codes are displayed on the door phone’s Intercom > User interface. The username is the same as the card code.
Users can swipe the cards to open doors.

After the configuration, the door phone will display as a contact on the indoor monitor’s call list.
Users can:
tap the contact name to call the door phone;
press the push button of the door phone to call the indoor monitor;
view the monitoring stream of the door phone.
When devices are deployed on the SmartPlus Cloud and access the Internet, users can scan the QR code on the indoor monitor to download and register the SmartPlus App account.
.bmp)
Tip
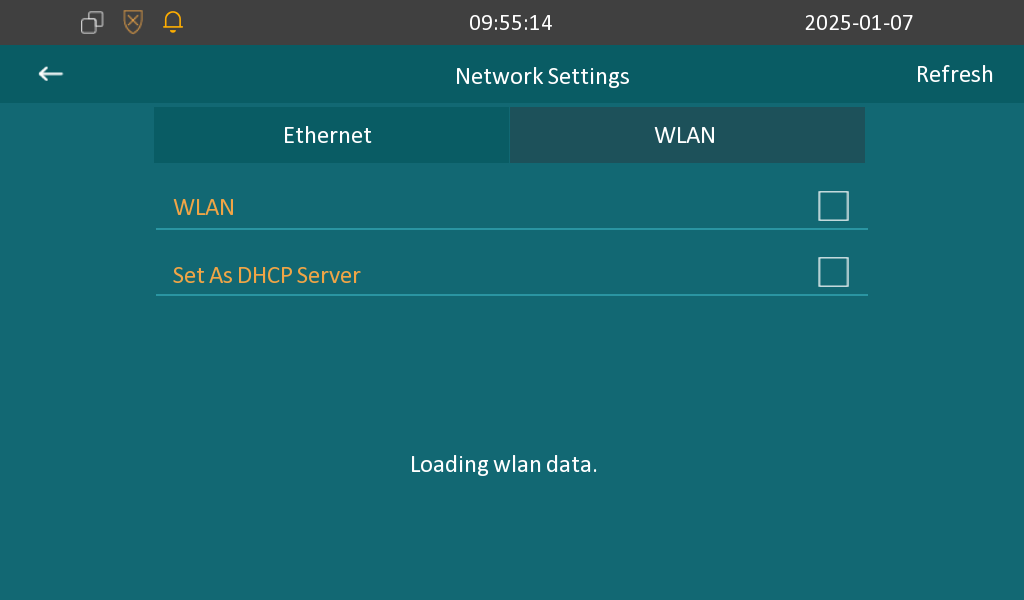
To connect the indoor monitor to a Wi-Fi, tap More > Settings > Advance > Network. The default password to access the advanced settings is 123456.
Enable WLAN and select the desired Wi-Fi.
Enter the password for connection.