Motion Detection identifies moving objects in the camera's field of view and triggers an alarm when motion is detected. Detection zones can be set, so monitoring can be focused on the areas that matter.
Common scenario: an entrance or perimeter needs to catch every real intrusion, but swaying trees, traffic, or shadows keep triggering false alarms — or the opposite, real motion goes unnoticed because sensitivity is too low. This guide shows how to configure the detection area, sensitivity, and schedule to solve both problems.
Compatible Models
VC50T and VC50B. The configuration steps below apply to both models.
Before You Begin
The camera is powered on and connected to the network.
You can access the camera's web interface from a browser on the same network.
If you plan to use the Trigger Recording linkage action, an SD card must be installed in the camera beforehand.
Configure Motion Detection
Navigate to the camera’s IP in a browser. Log in with the username and password(admin/admin by default).
Go to Event > Basic Event > Motion Detection.
Enable Motion Detection.
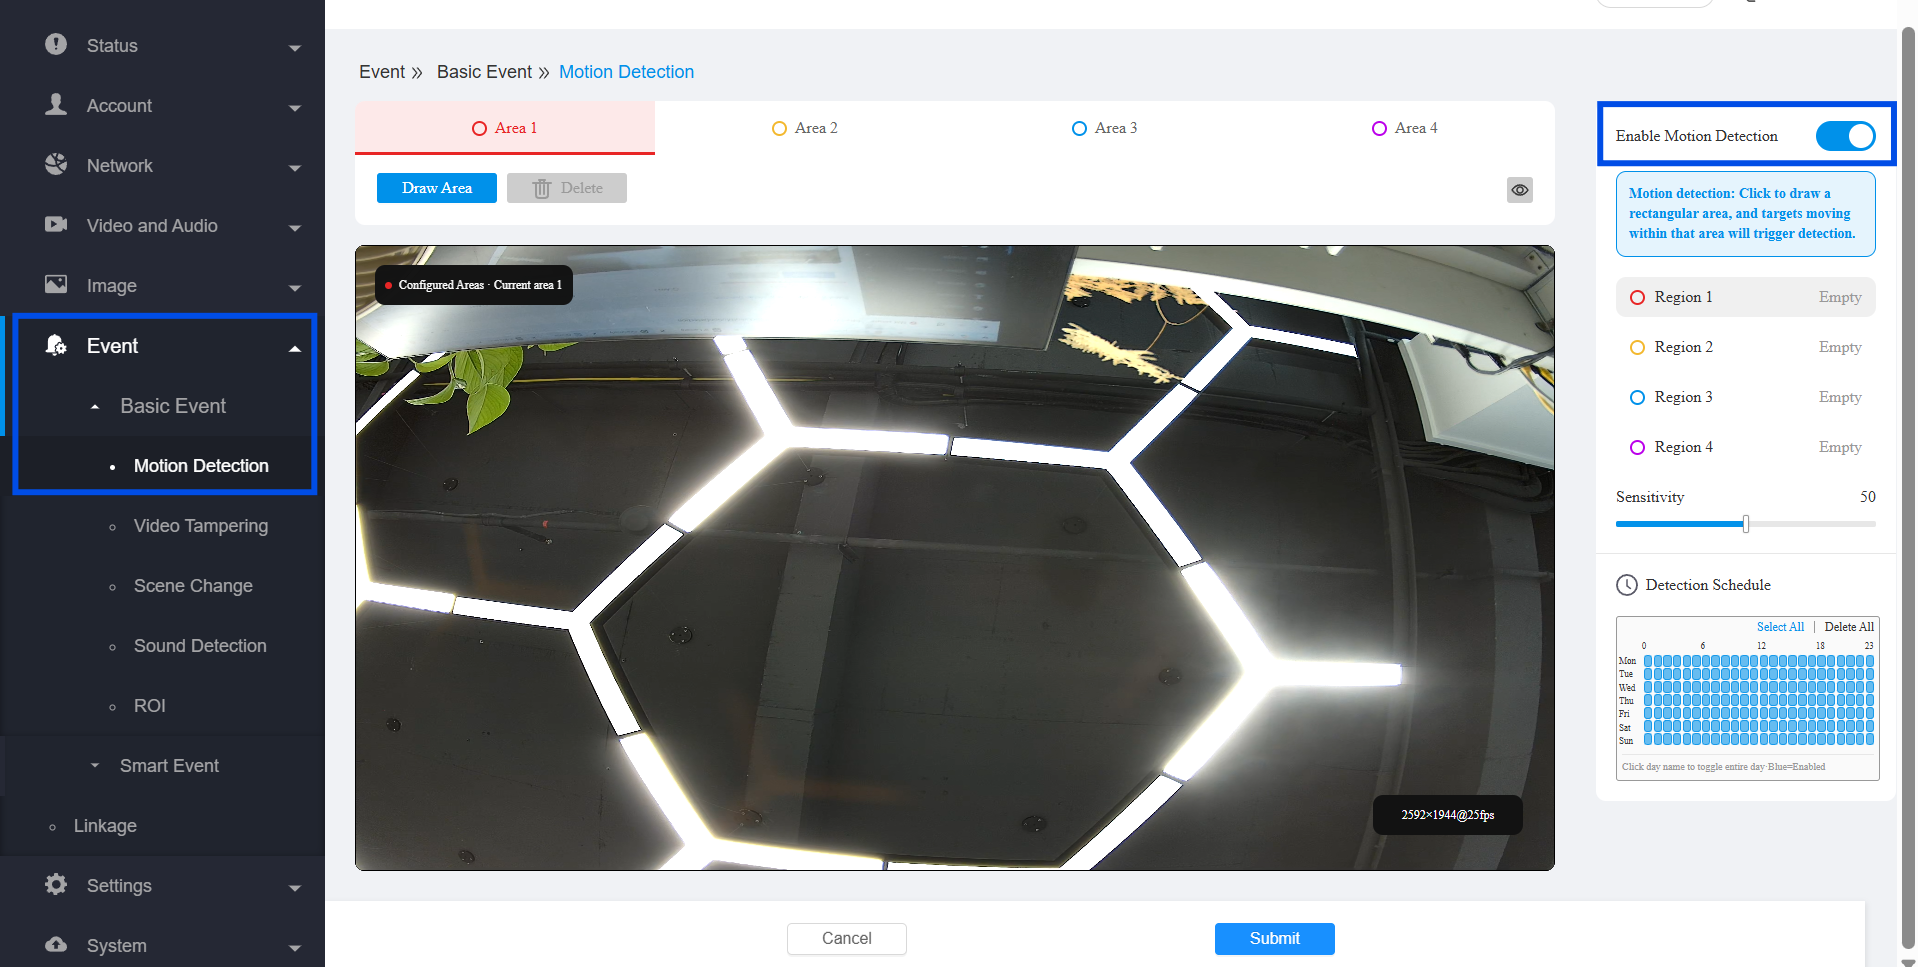
Click Draw Area to select the zones in the video frame you want monitored. A detection area must be drawn before the settings can be saved — without it, Motion Detection cannot be enabled. Excluding irrelevant areas (such as roadways or foliage) reduces false alarms. Up to four detection areas can be configured.
Set the Sensitivity level. Increase this value to detect smaller or subtler movements; decrease it in scenes with frequent background motion to reduce false triggers.
Set the Detection Schedule to define when the feature is active. The default is 24/7; adjust this if detection should only run during specific hours (for example, after business hours).
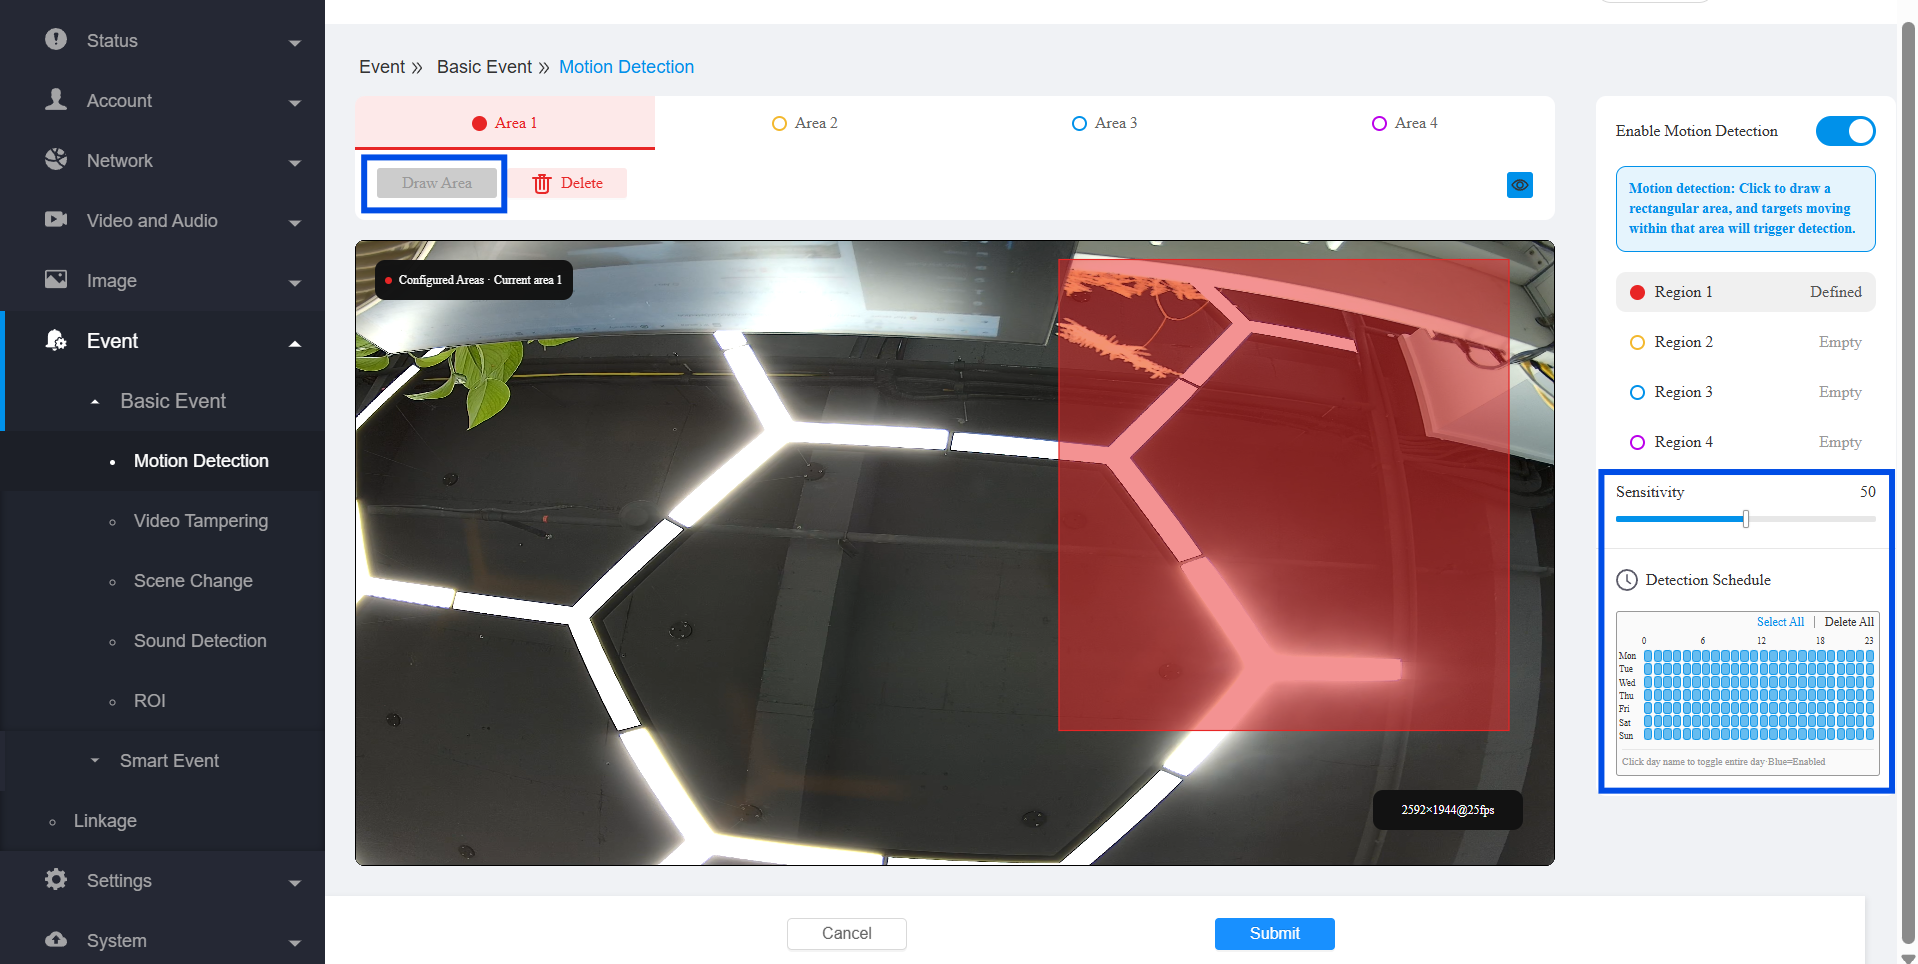
Click Submit.
Configure Linkage Actions
Motion Detection on its own only flags an event. To have the camera respond automatically (record, notify, or sound a warning), configure a linkage rule.
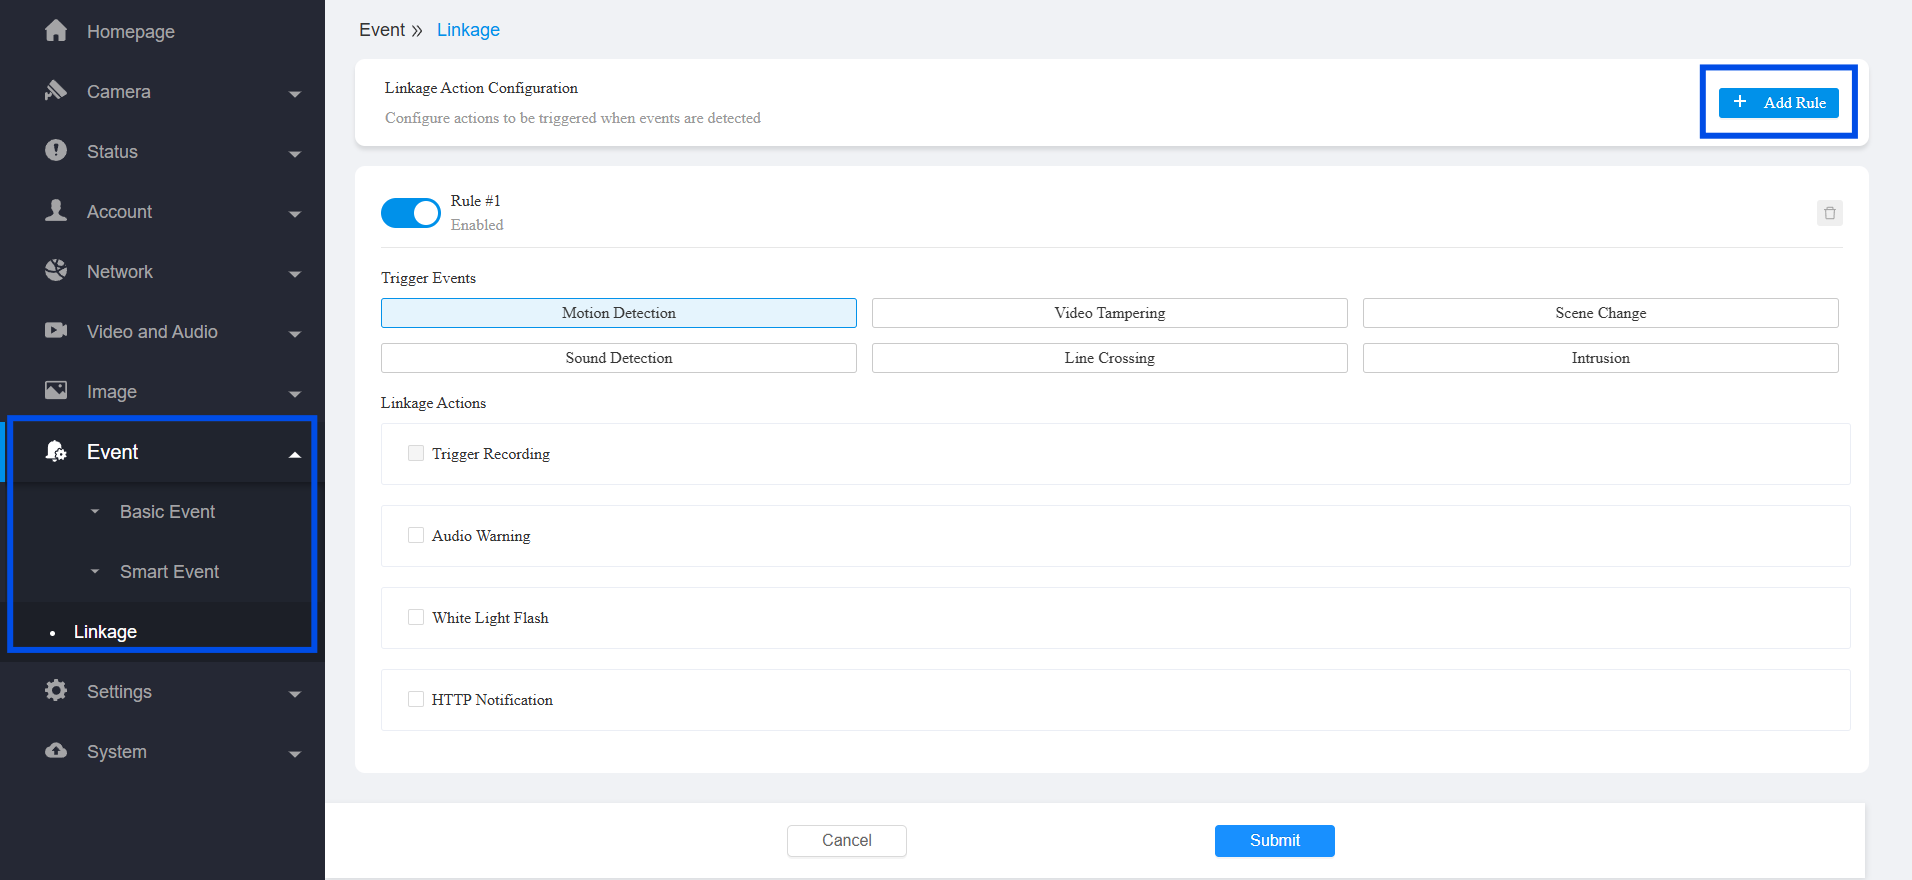
Go to Event > Linkage.
Click Add Rule to create a new rule, or select an existing rule to edit. Up to 10 rules can be configured.
Enable the rule to make it active.
Under Trigger Events, select Motion Detection as the event source.
Under Linkage Actions, select one or more responses. Take the Trigger Recording action as an example. For configuration details on other actions, see Event Linkage.
Select the recording channel: Main Stream or Sub Stream.
Set the Pre-Record. It defines the duration recorded before the event.
Set the Post-Record. It defines the duration recorded after the event ends.
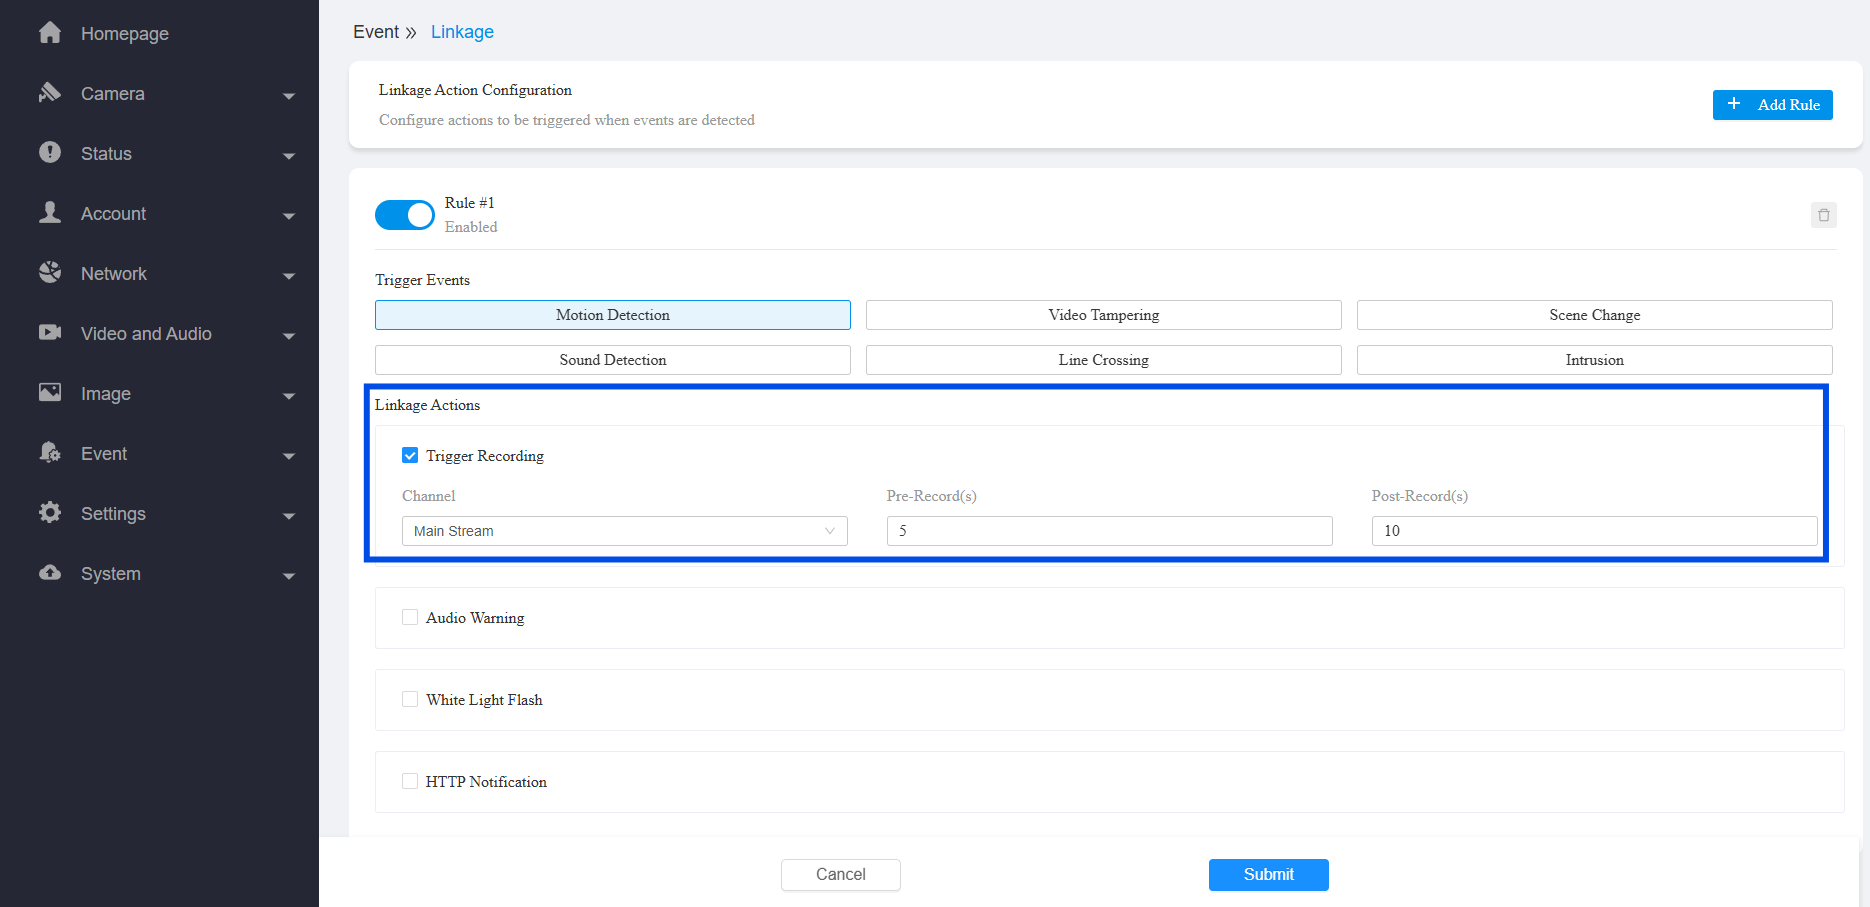
Click Submit.
Note
The recordings are saved to the SD card. Therefore, the Trigger Recording option is only available when an SD card is installed on the camera.
Verification
Move within a configured detection area and confirm that motion detection is triggered.
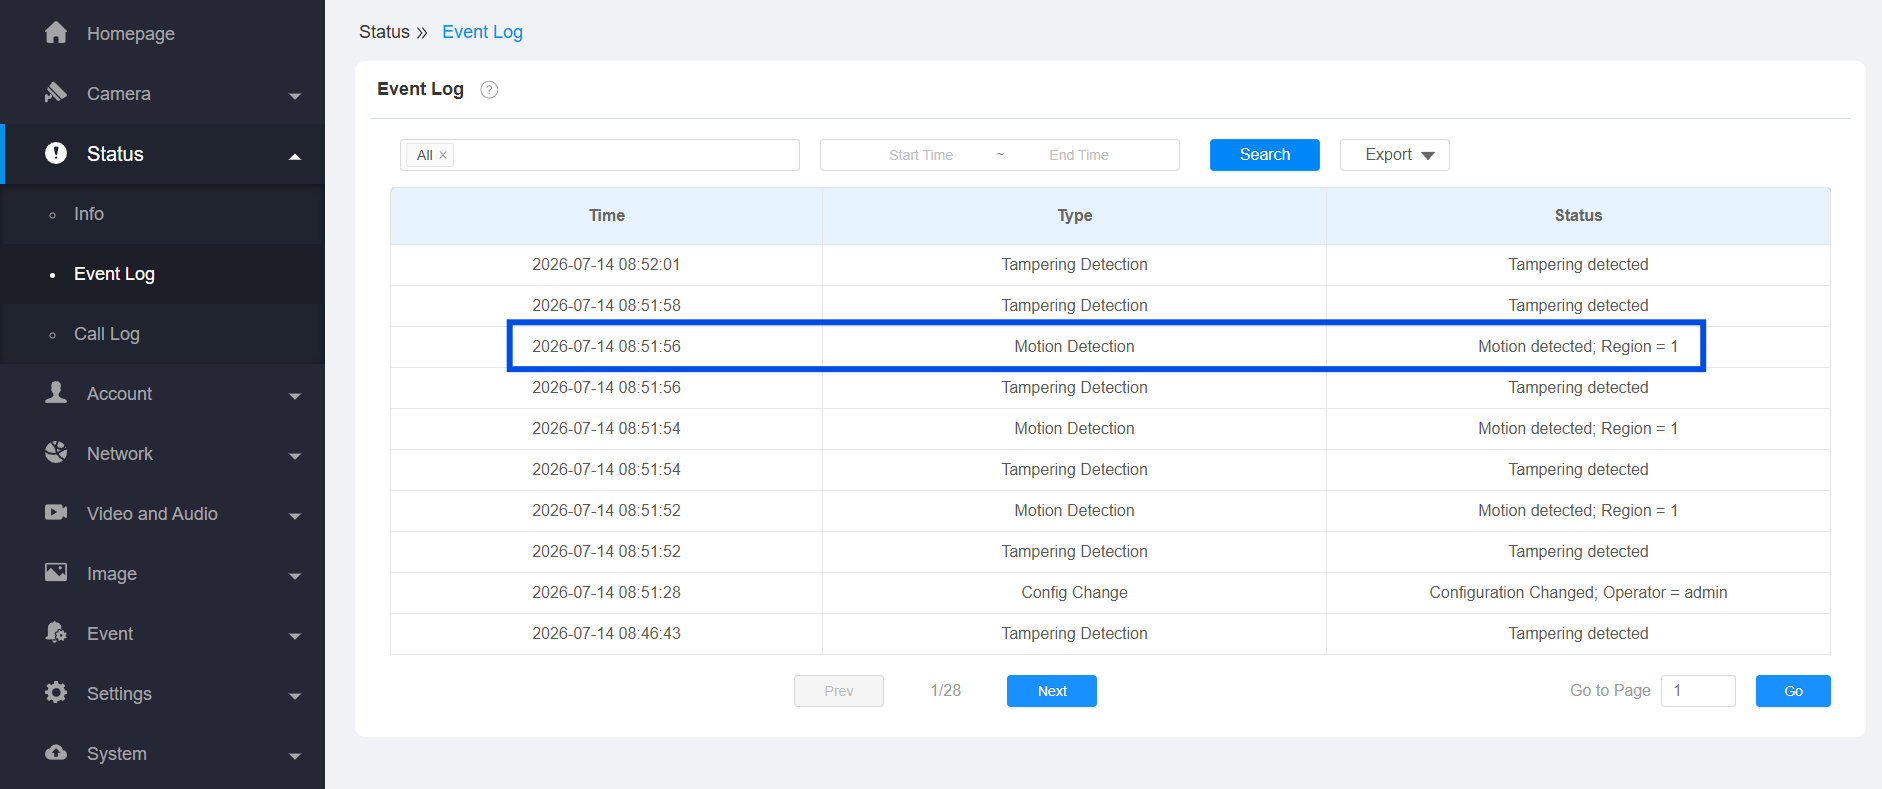
Check the event log to confirm the motion event was recorded.
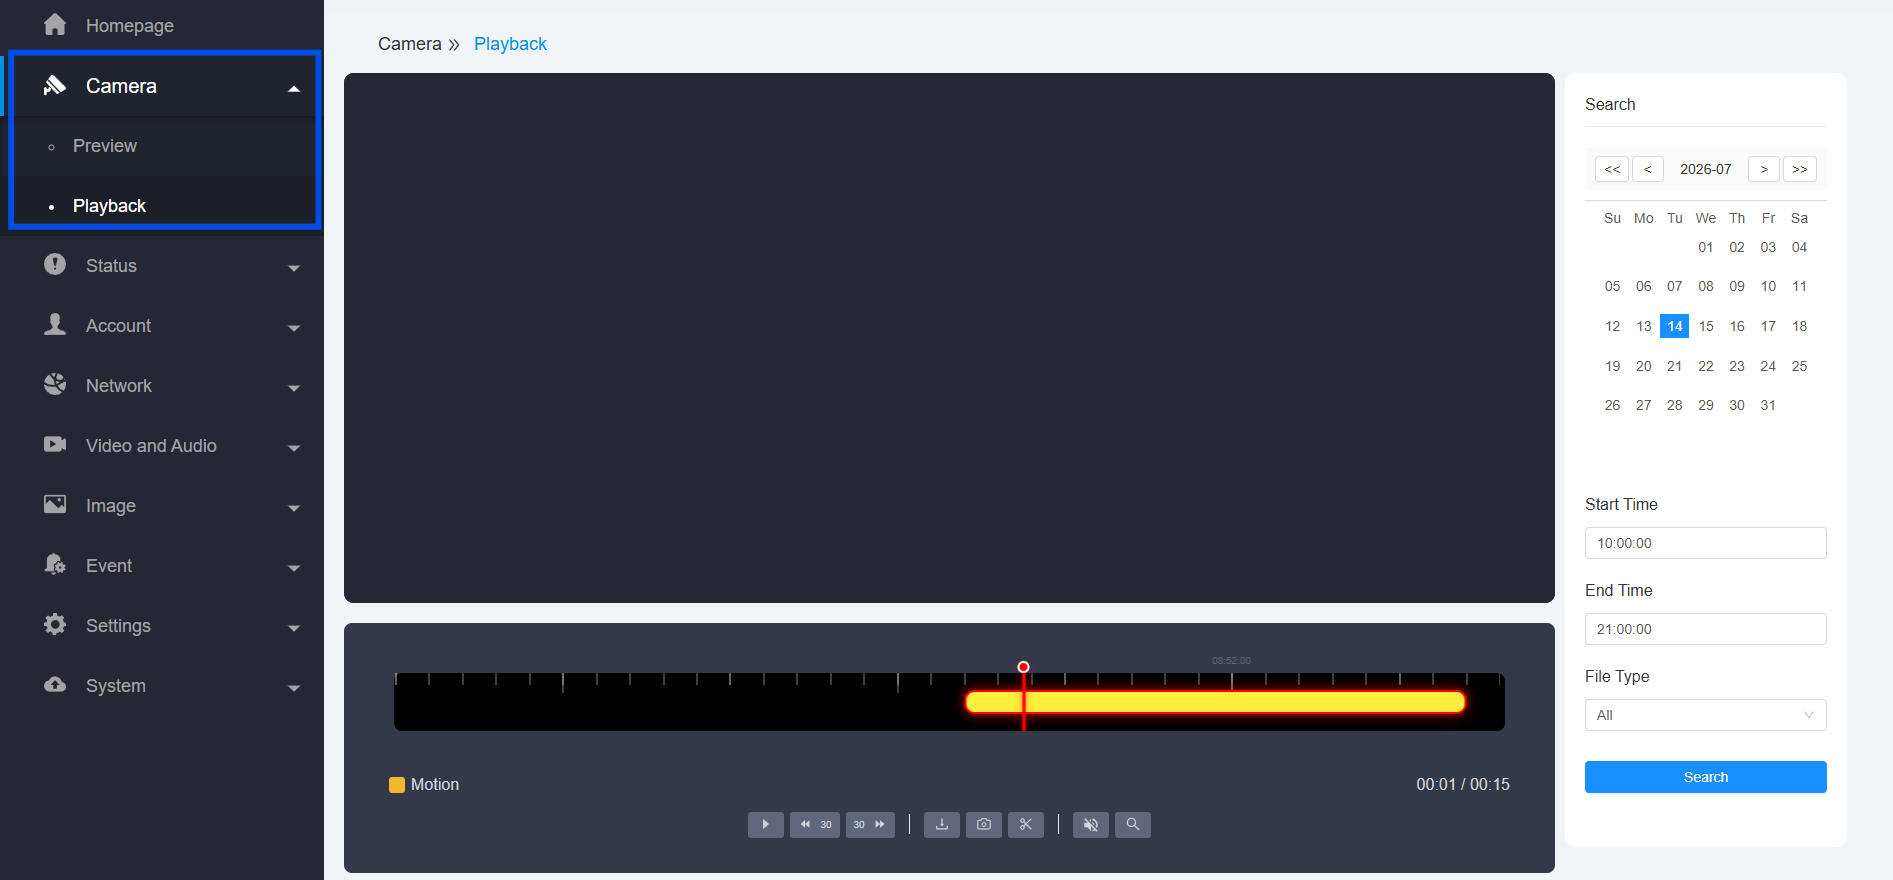
Go to Playback and confirm a recording was generated for the triggered event, covering the configured pre-record and post-record duration.
Troubleshooting
Issues | Possible Causes | Solutions |
|---|---|---|
No action triggered despite visible motion. | Motion occurred outside the configured detection area. | Adjust the Detection Area to cover the relevant zone. |
No action was triggered despite visible motion. | Detection Schedule does not cover the current time. | Update the Detection Schedule. |
Frequent false alarms. | Sensitivity set too high for the scene. | Lower the Sensitivity value. |
Subtle motion was not detected. | Sensitivity set too low. | Raise the Sensitivity value. |
Action triggers, but no recording appears in Playback. | No linkage rule is configured, or the rule is disabled. | Create or enable a linkage rule with Motion Detection as the trigger event and Trigger Recording as the action. |