Akuvox door phones can record videos when users open doors, make calls, monitor, etc. The videos can be checked on the SmartPlus Cloud or the indoor monitor, helping single-family project end users, community residents, and property managers track what happened.
This requires devices to be connected to the SmartPlus Cloud.
Note
The following door phones with specific firmware versions or higher support recording videos:
X915 V2: 2915.30.10.319;
X912: 912.30.11.119;
X910: 2910.30.10.240;
E12 V2: 312.30.10.228;
R20 V5: 320.30.11.27;
R25: 25.30.11.117;
R29: 29.30.10.336;
S539: 539.30.10.306;
S538: 538.30.10.705;
S532: 532.30.10.256;
A05: 205.30.11.4(The model has no intercom feature, thus not supporting recording videos during a call).
The following indoor monitors with specific firmware versions or higher support displaying videos:
S567: 567.30.13.303;
S563: 563.30.13.404;
C316: 316.30.13.302;
C319: 119.30.13.602;
X933: 933.30.13.702;
X937: 937.30.14.104;
IT88: 88.30.13.704.
When the feature is turned off or its subscription expires, videos stored cannot be watched.
This article takes X915 V2 as an example.
Watch the Video Guide
Prefer a visual walkthrough?
Watch: [Installer][PM]Set up Video Storage on SmartPlus Cloud
Set up the Video Storage Feature
Installers and property managers can set up the video storage feature.
For Installers
Log in to the SmartPlus Cloud platform with an installer account.
Navigate to the desired project.
Single-family Projects
Click
 of the target user, or click New to add a new user.
Click Next to access the Advanced Info page.
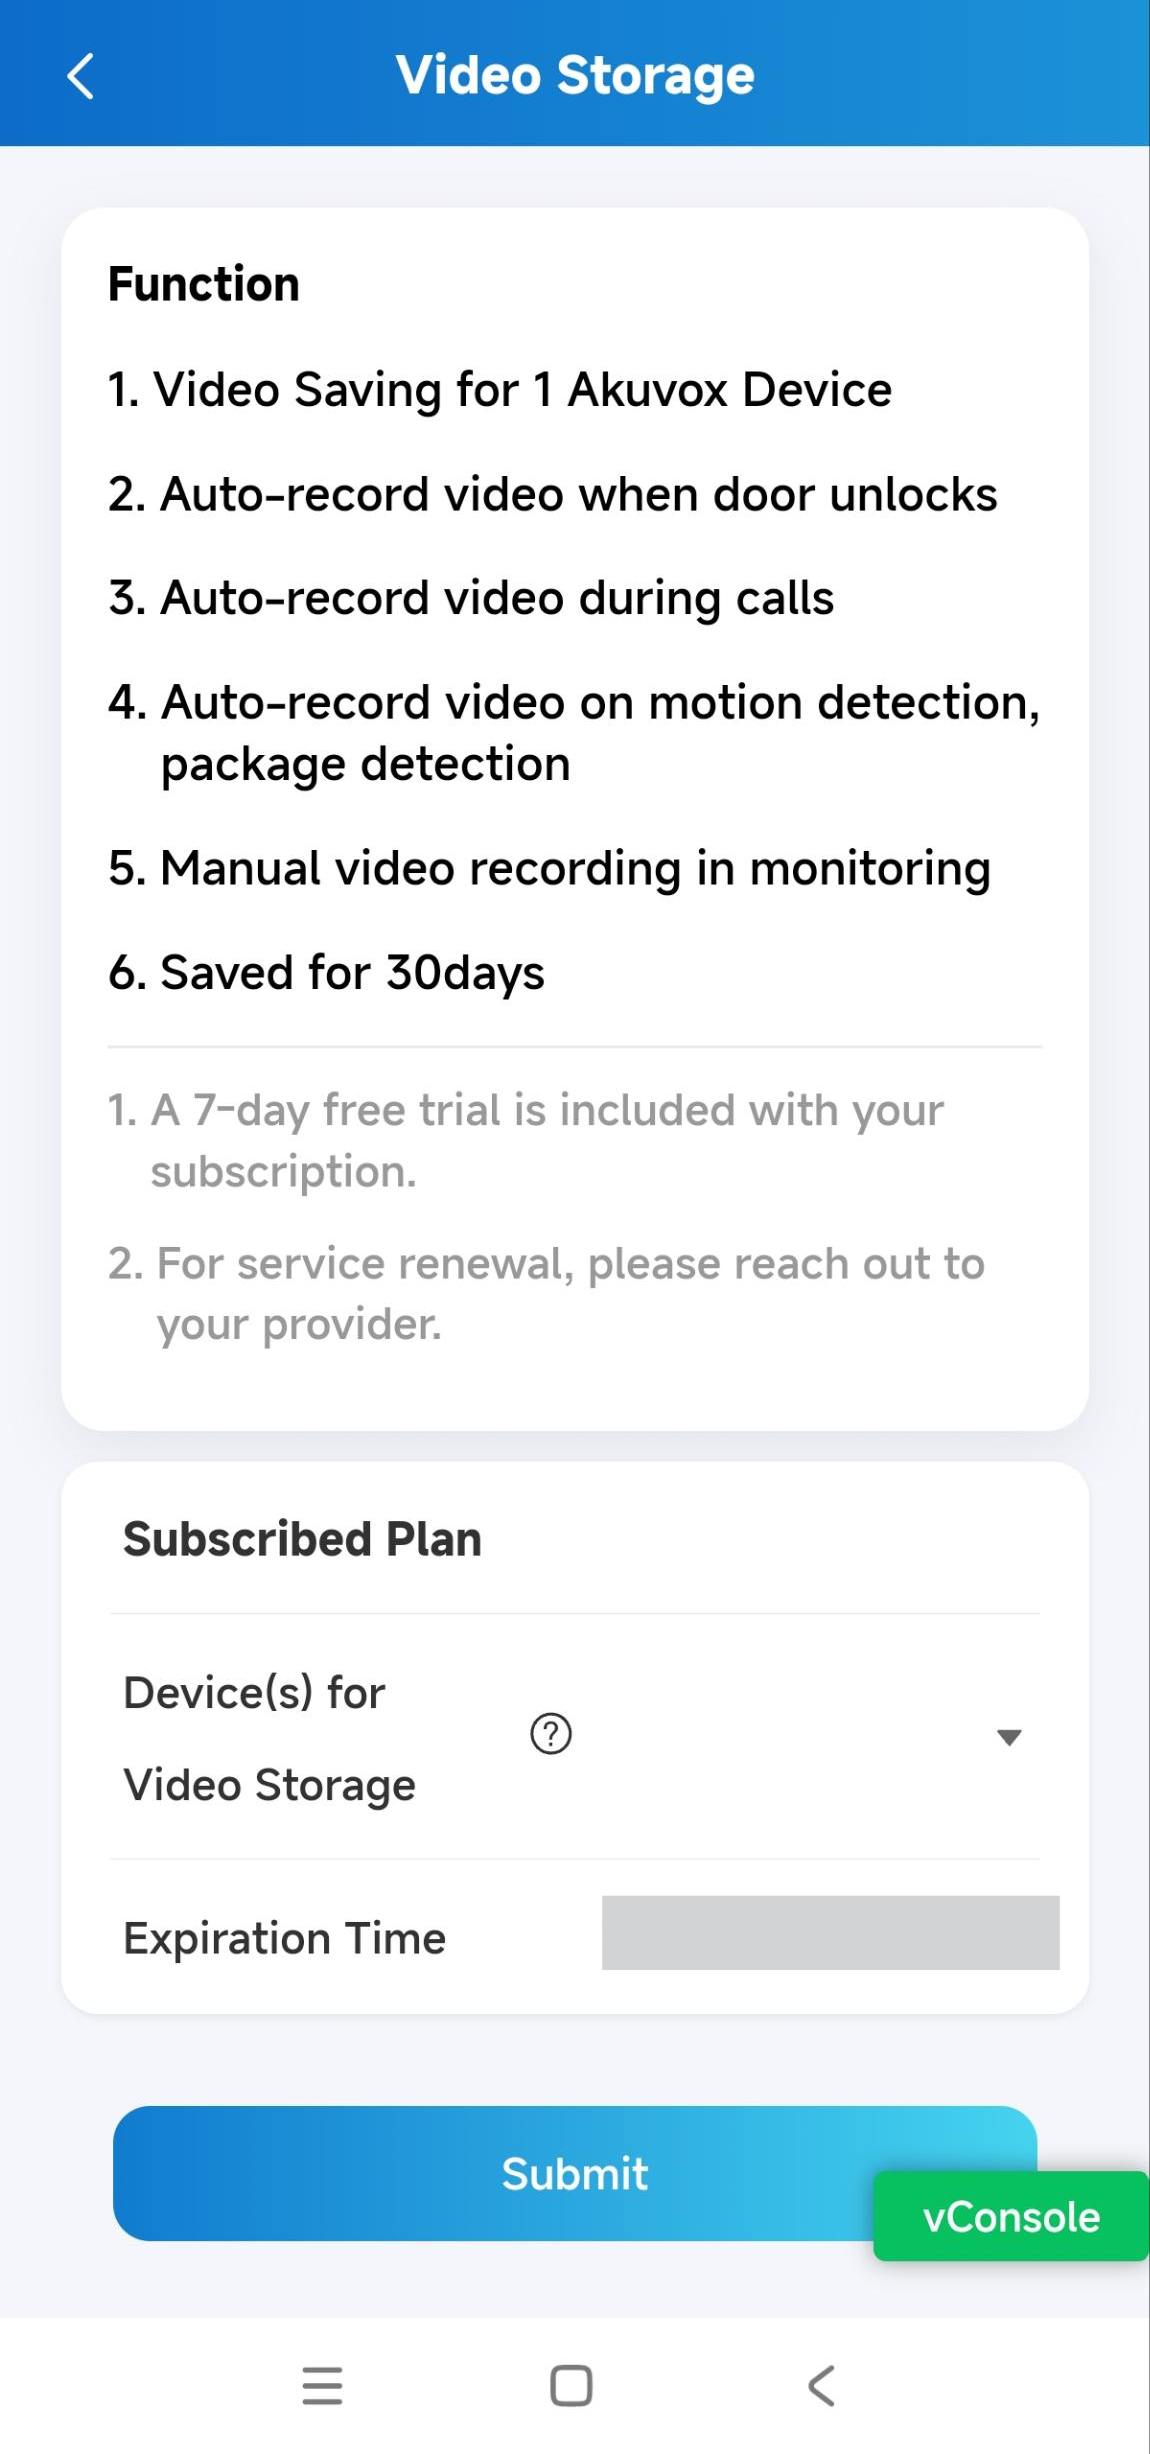
Turn on Video Storage. First-time activation includes a 7-day free trial.
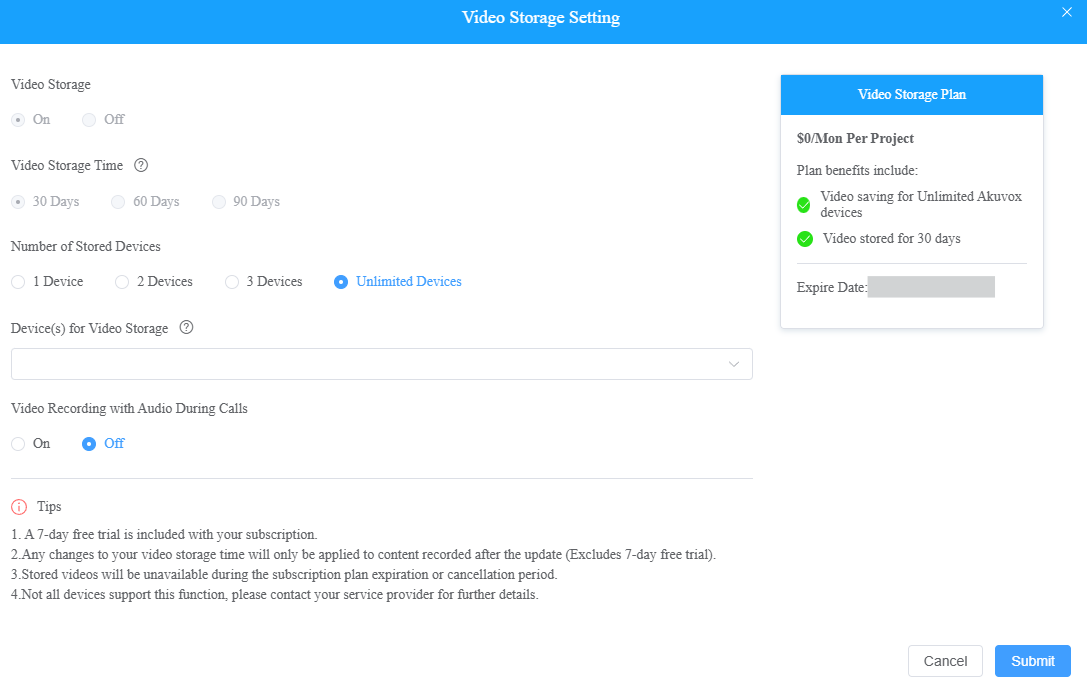
Set up the video storage feature based on actual needs.
Video Storage Time: 30 Days, 60 Days, and 90 Days are available. It is 30 days by default.
Number of Stored Devices: Choose the number of devices that record videos.
Device(s) for Video Storage: Select the specific device(s).
Video Recording with Audio During Calls: Decide whether to record videos with audio during calls.

Click Submit.
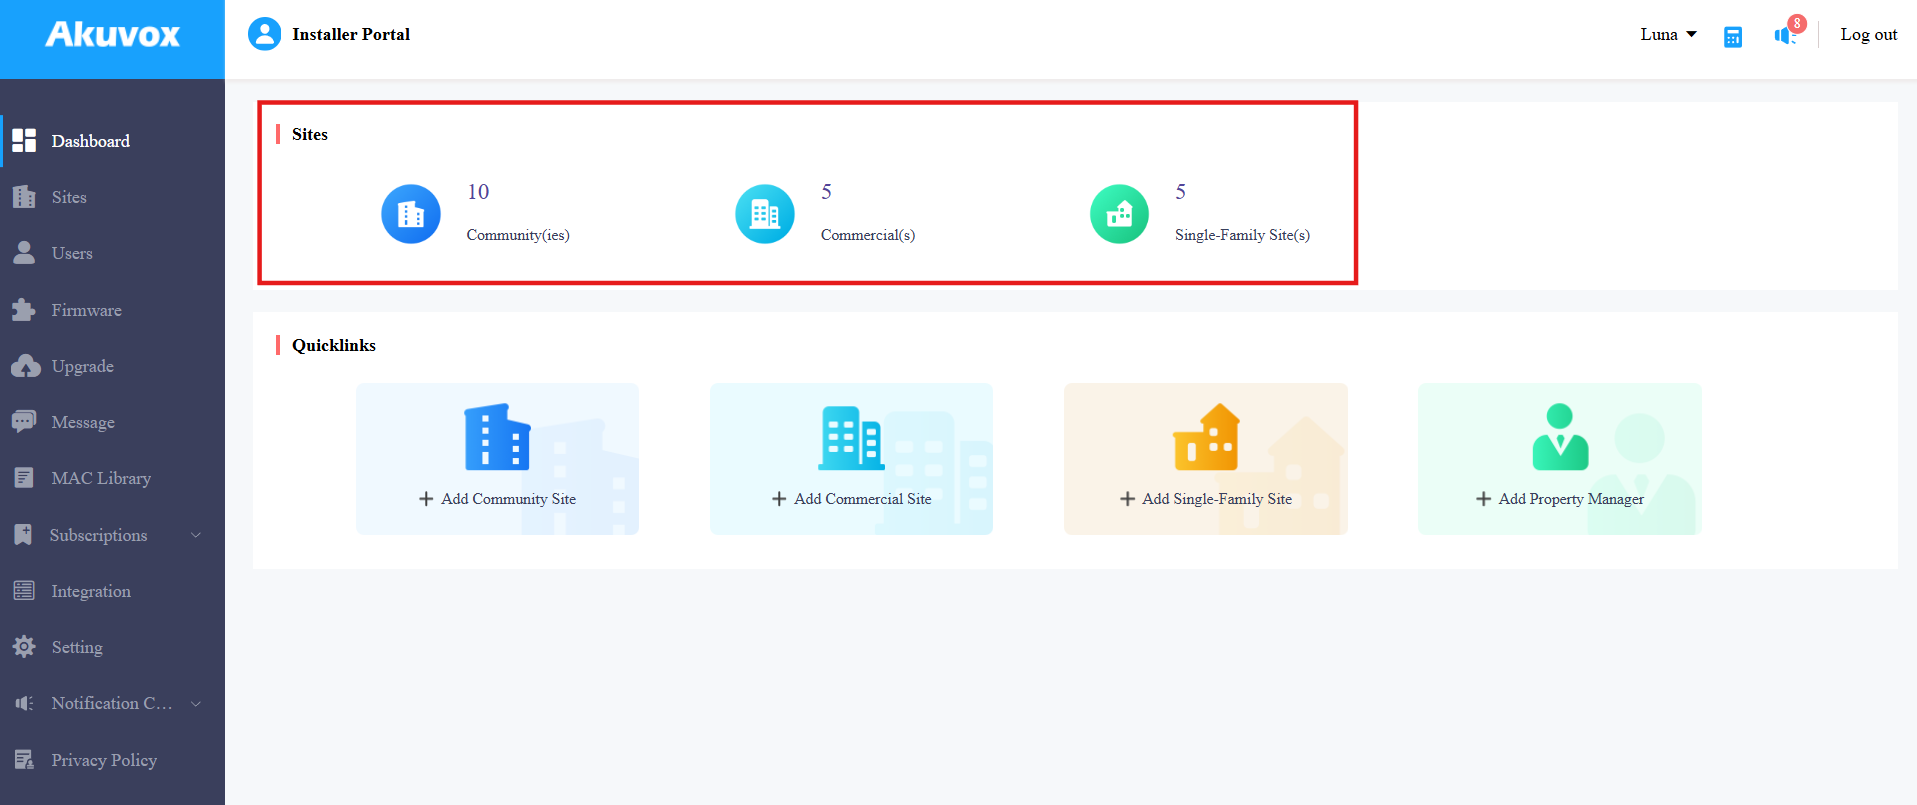
Community Projects
Enable Video Storage for Public Devices
Click
of the target community, or click New to create a new community.Click Next to access the Advanced Info page.
Turn on Video Storage to access the settings. First-time activation includes a 7-day free trial.
Or, click
 to change the settings.
Set the Video Storage Time for all public devices in the community.
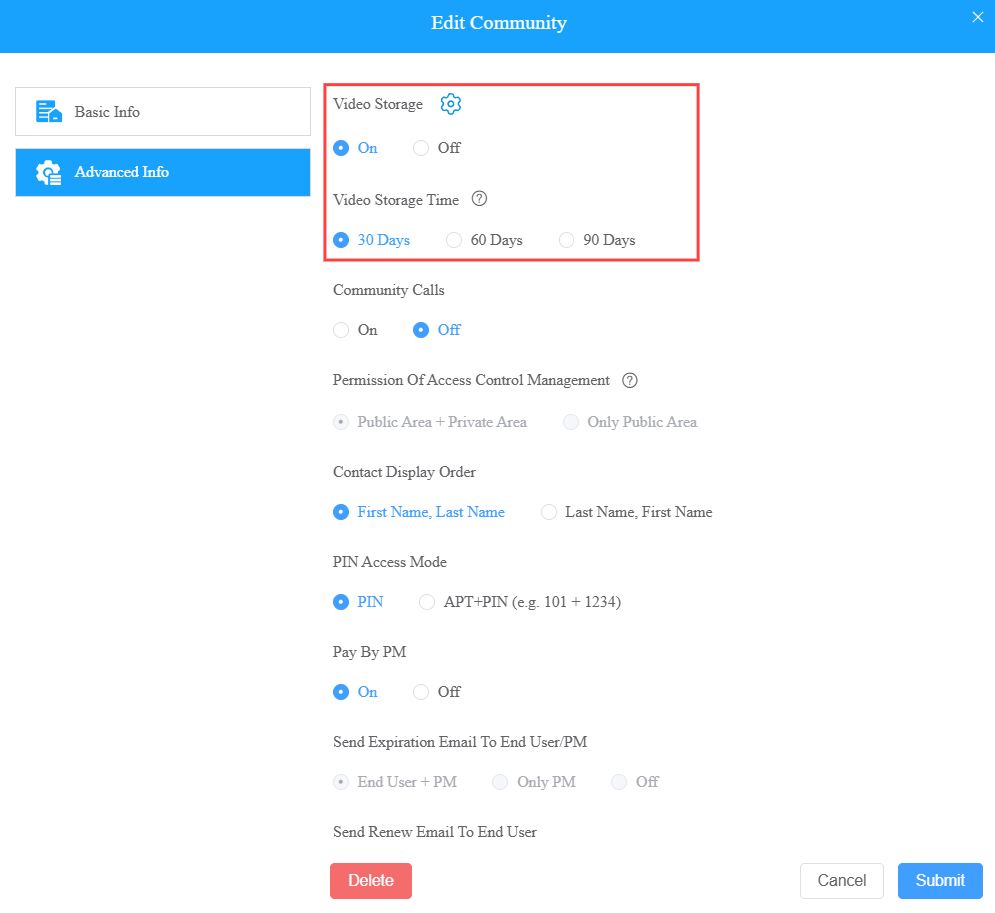
Set up the feature based on actual needs.
Video Storage Time: The same as the option on the Advanced Info page. It is 30 days by default.
Number of Stored Devices: Choose the number of devices that record videos.
Device(s) for Video Storage: Select the specific device(s).
Video Recording with Audio During Calls: Decide whether to record videos with audio during calls.
Click Submit.
Enable Video Storage for Private Devices
Click
 of the target community on the Sites module.
Click
 of the desired apartment, or click New to add a new apartment.
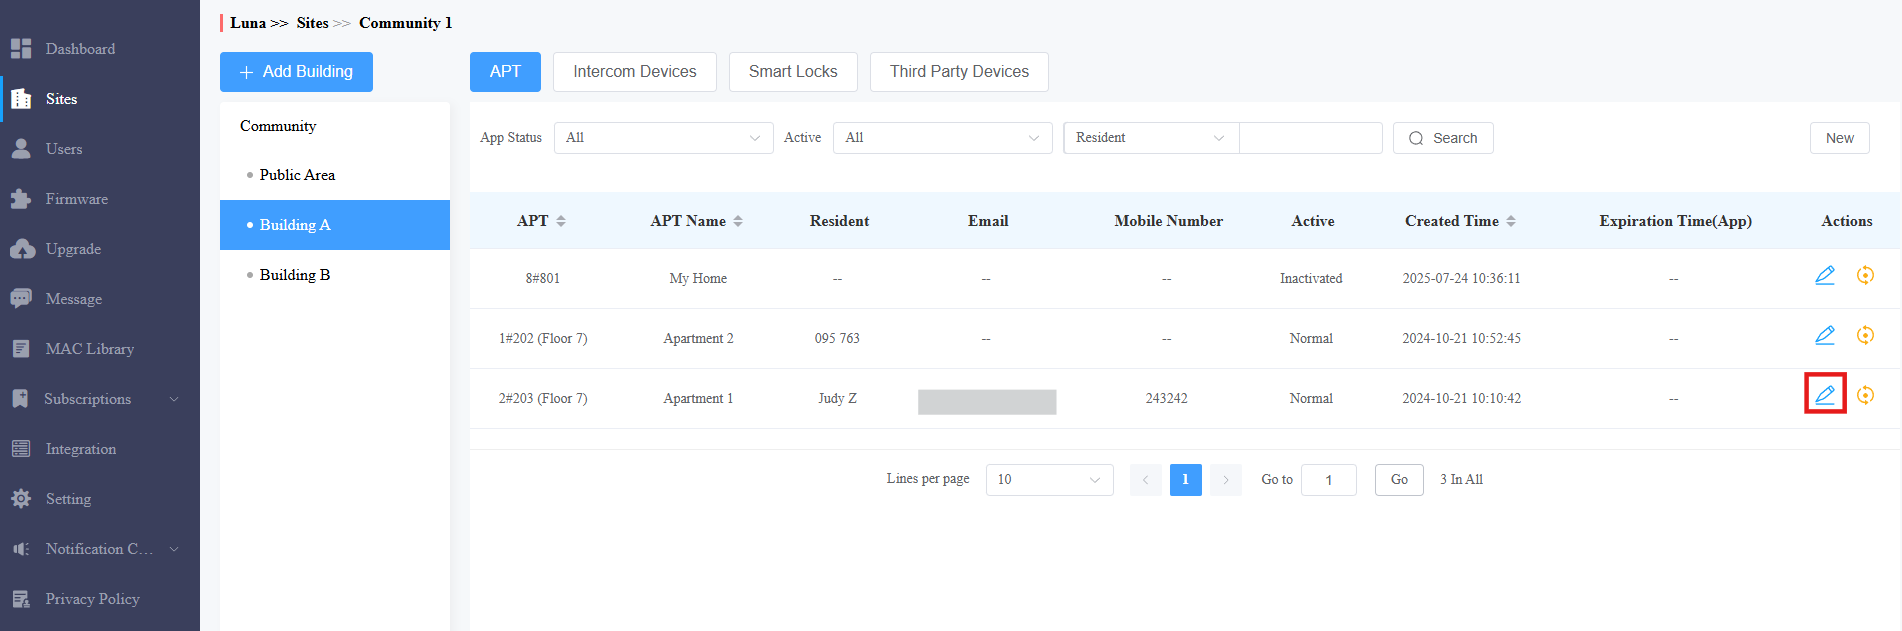
Click
 on the right.
Turn on Video Storage to access the settings. First-time activation includes a 7-day free trial.
Or, click
to change the settings.
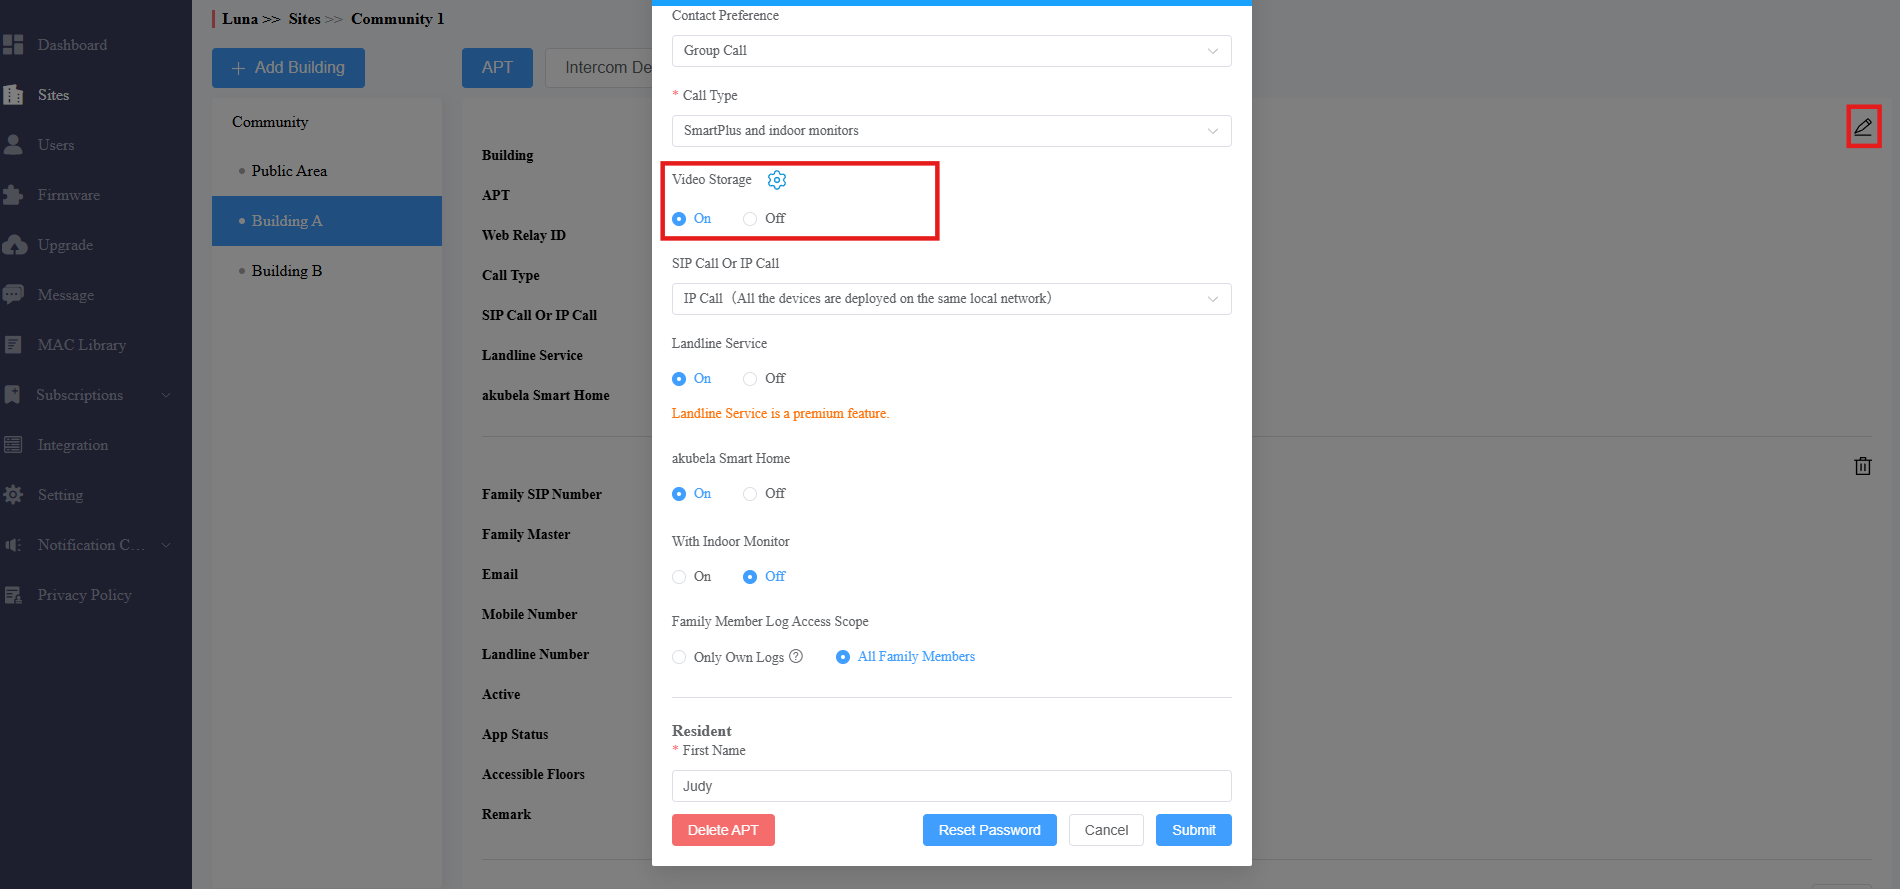
Set up the feature based on actual needs.
Video Storage Time: The same as the option on the Advanced Info page when modifying the community. It is 30 days by default.
Number of Stored Devices: Choose the number of devices that record videos.
Device(s) for Video Storage: Select the specific device(s).
Video Recording with Audio During Calls: Decide whether to record videos with audio during calls.
For Property Managers
Note
Only when installers set the Charge Mode to Pay by PM, can you pay for this feature.
Log in to the SmartPlus Cloud platform with a property manager account.
Click Settings > Advanced Settings.
Turn on Video Storage and set up relevant settings based on actual needs. First-time activation includes a 7-day free trial.
Video Storage Time: 30 Days, 60 Days, and 90 Days are available. It is 30 days by default.
Number of Stored Devices: Choose the number of devices that record videos.
Device(s) for Video Storage: Select the specific device(s).
Video Recording with Audio During Calls: Decide whether to record videos with audio during calls.
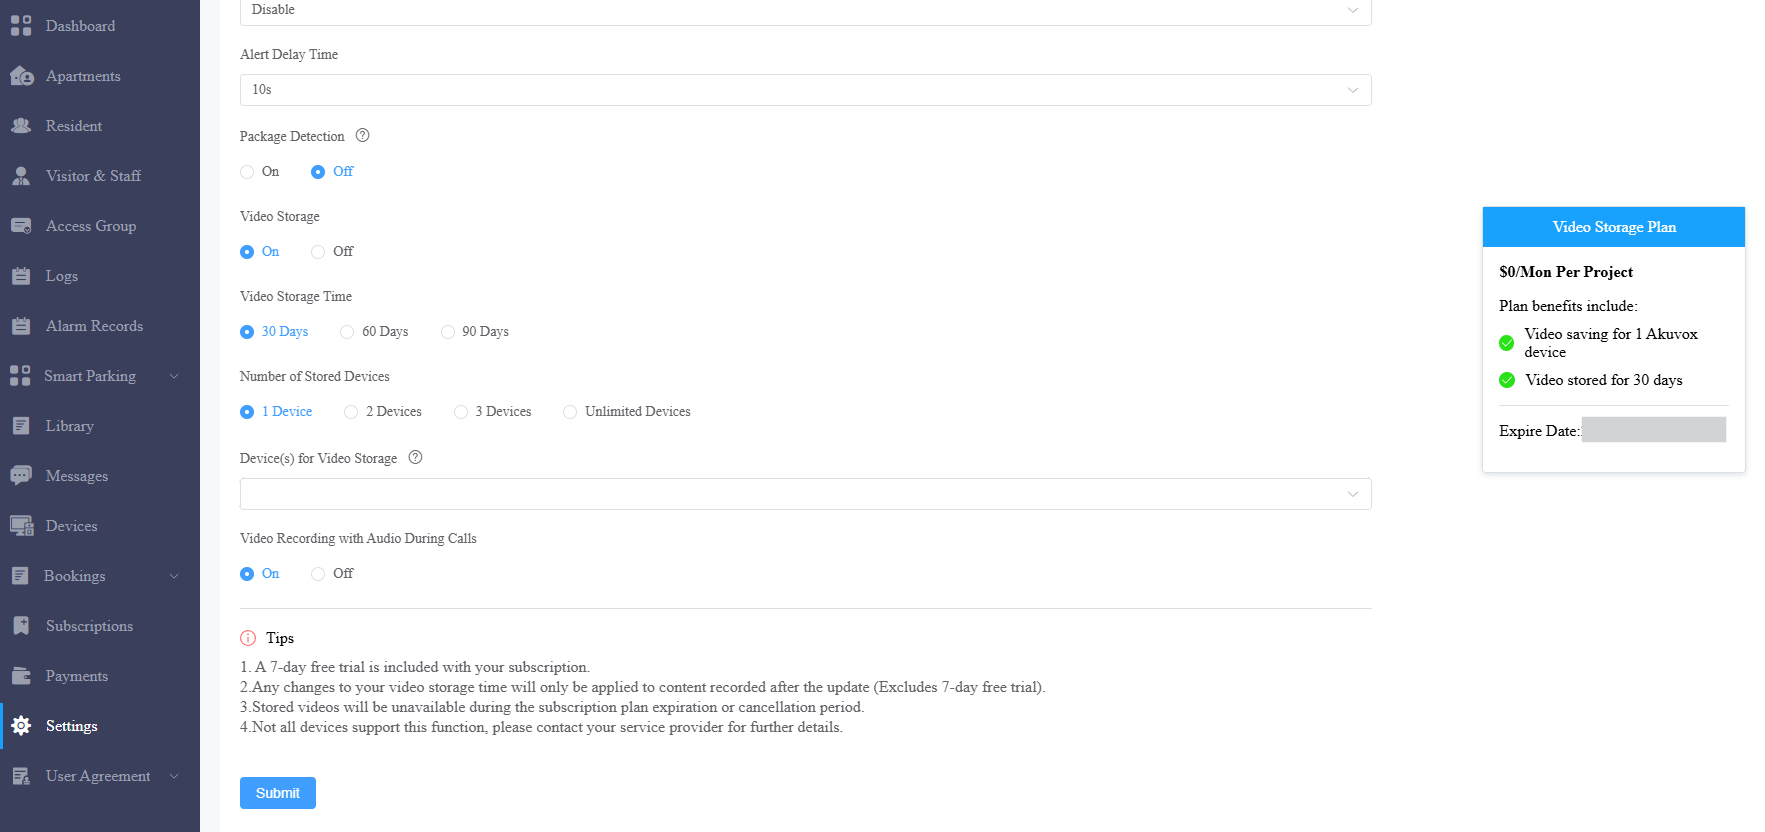
Click Submit.
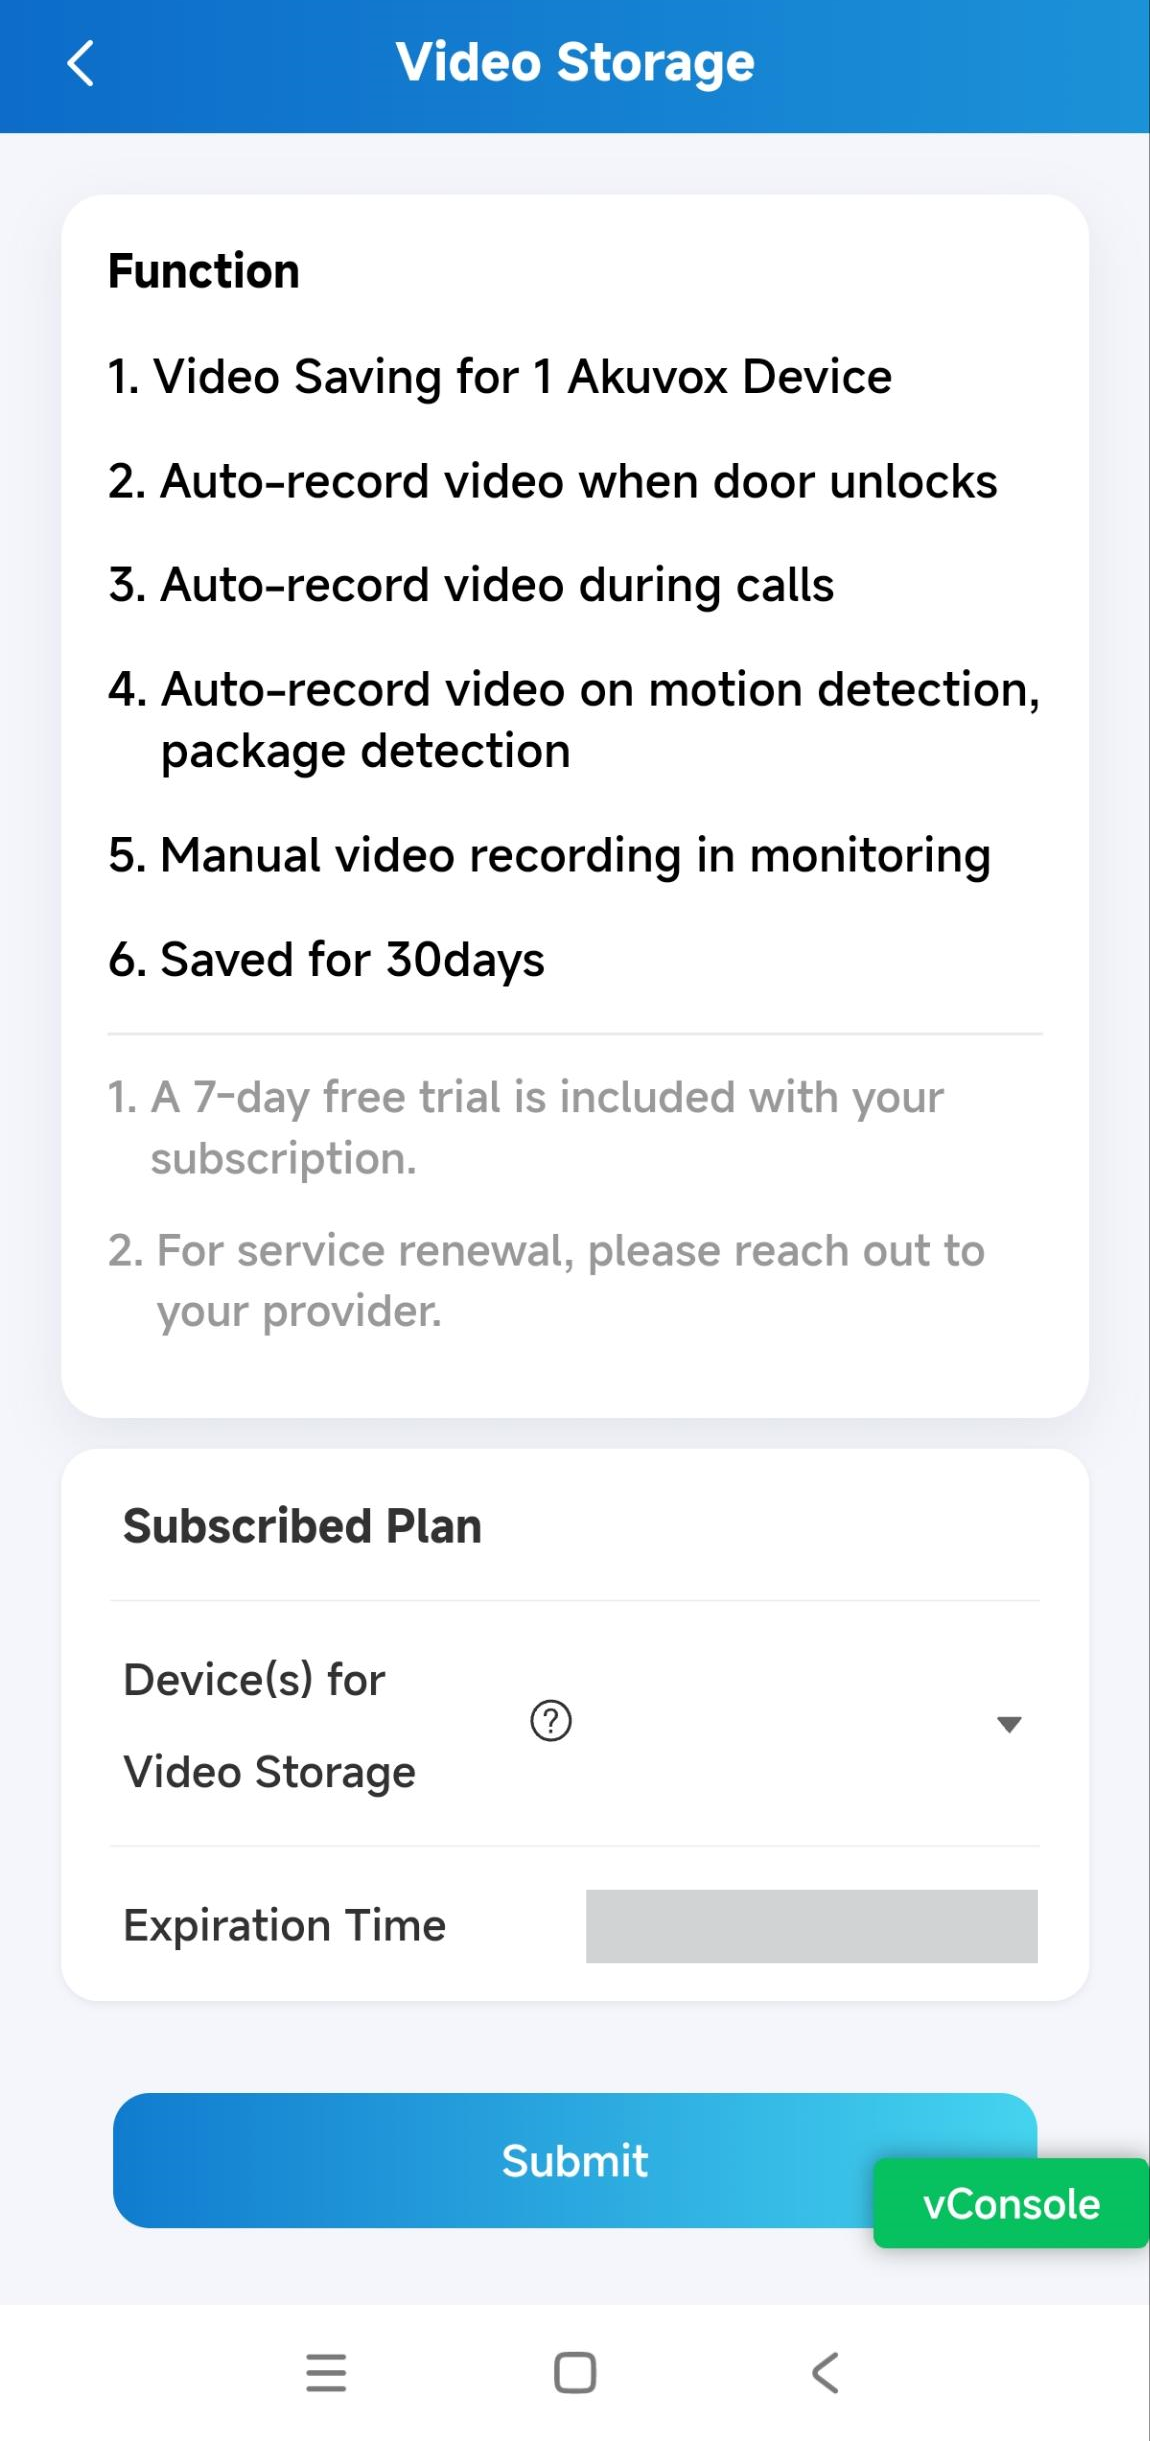
You can also change the device for video storage on the SmartPlus App if the app service is activated by your installer.
Tap Me > Discover > Video Storage.
For End Users
You can select the device for video storage with your SmartPlus Apps after your installer or property manager activates the video storage service.
Tap Me > Discover > Video Storage.
Select the desired device to apply the feature.
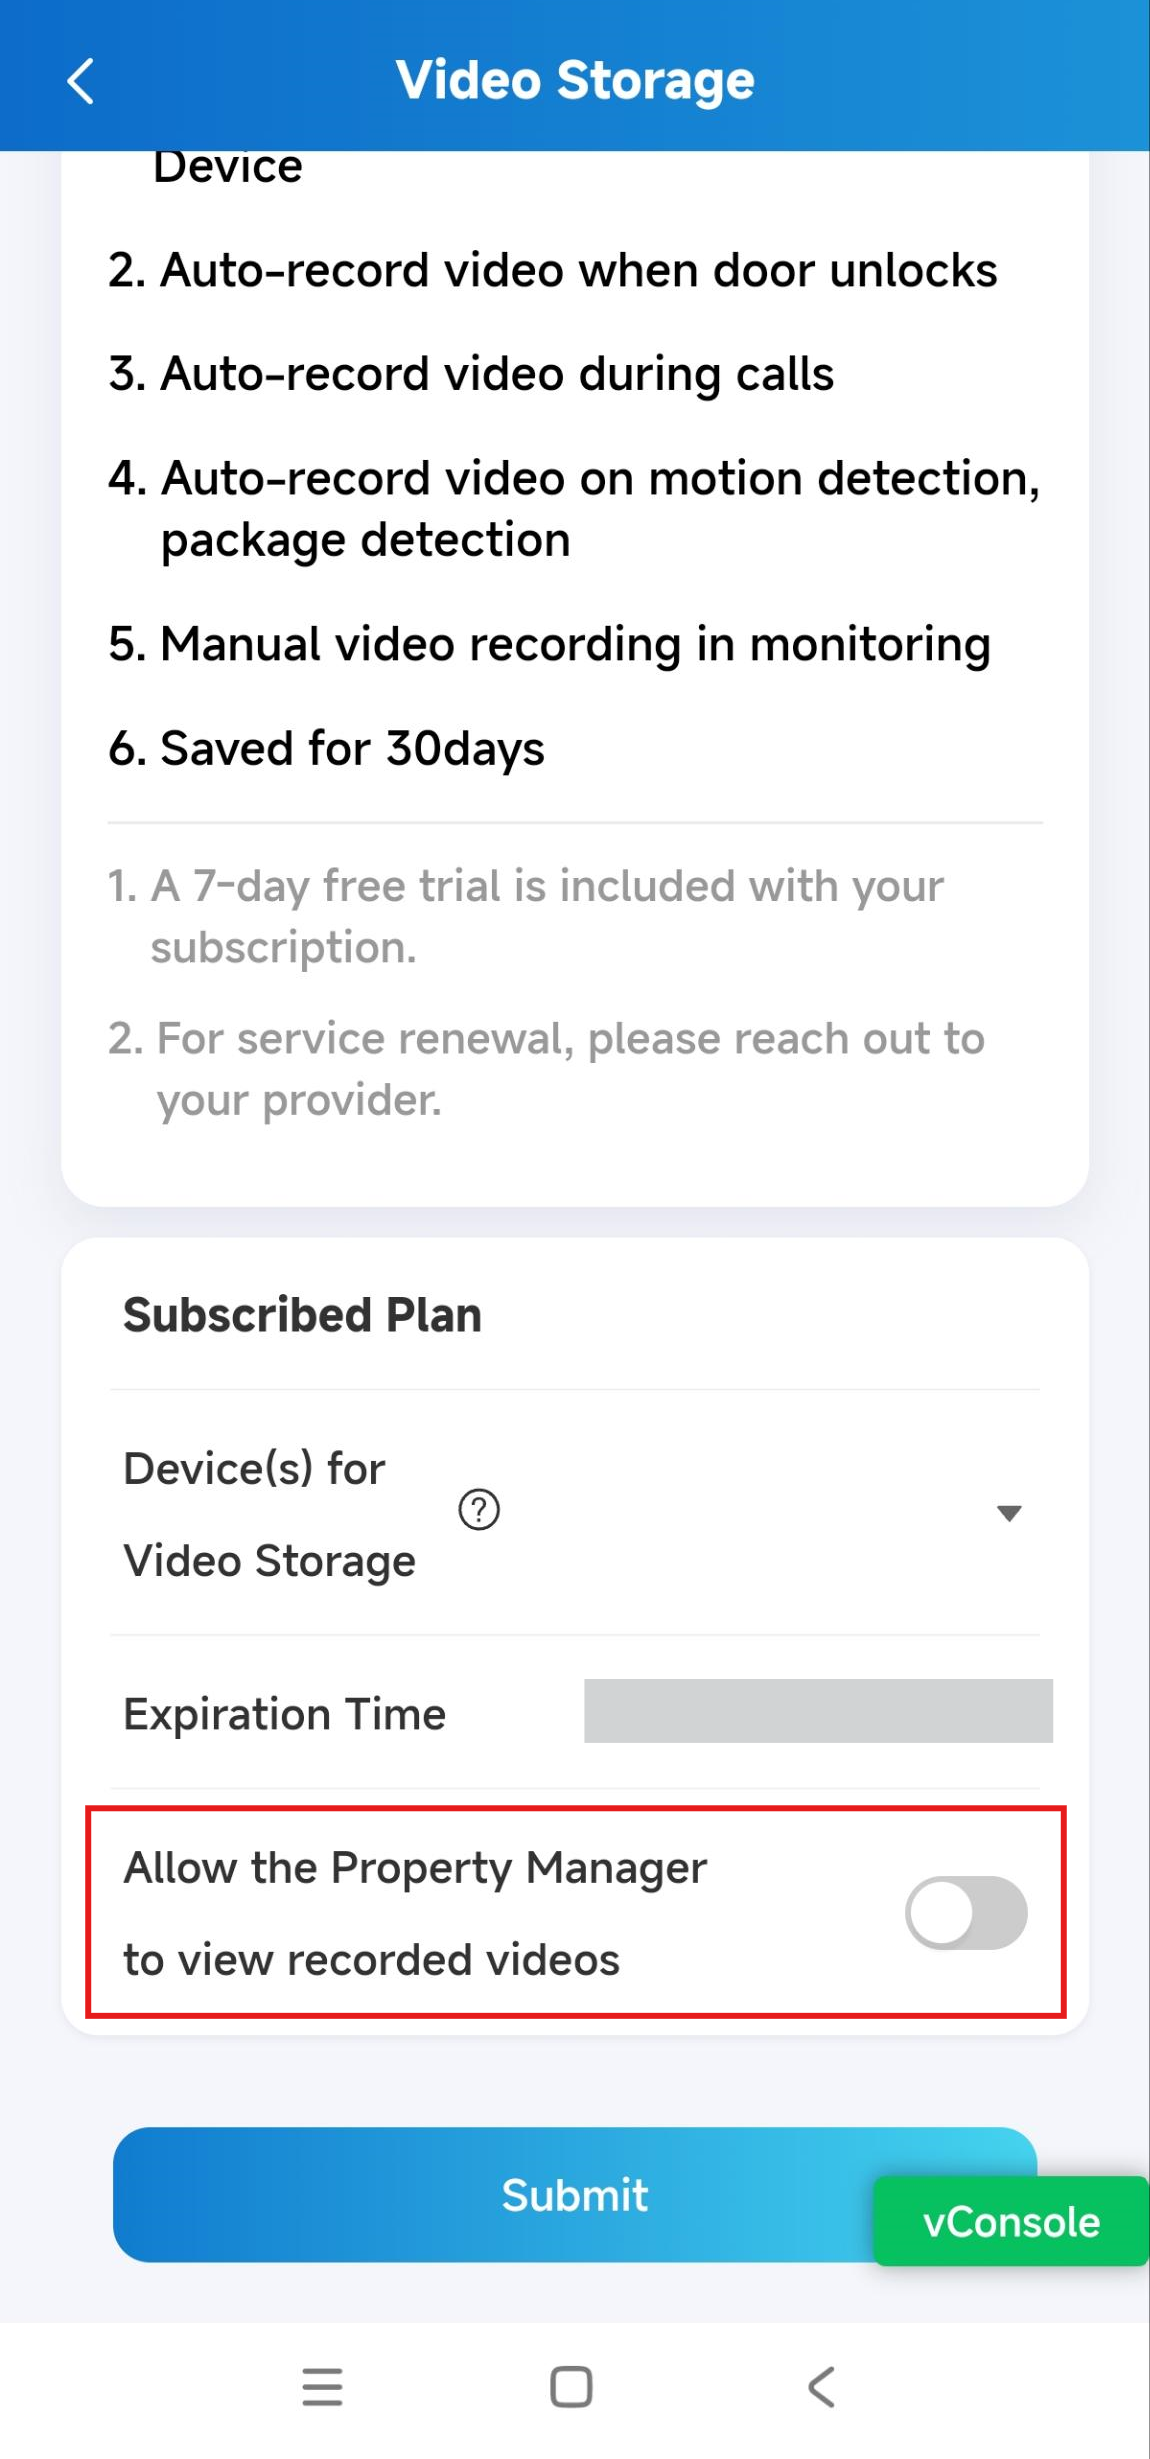
If you are a community resident, you can decide whether the property manager can view the recorded videos of door phones installed at your apartment.
Record Videos Automatically
The door phone will record 10-second videos automatically when:
users open doors;
users make or receive calls;
The door phone detects motion.
If the door phone is X910, it will also record videos when package detection occurs.
Record Videos Manually
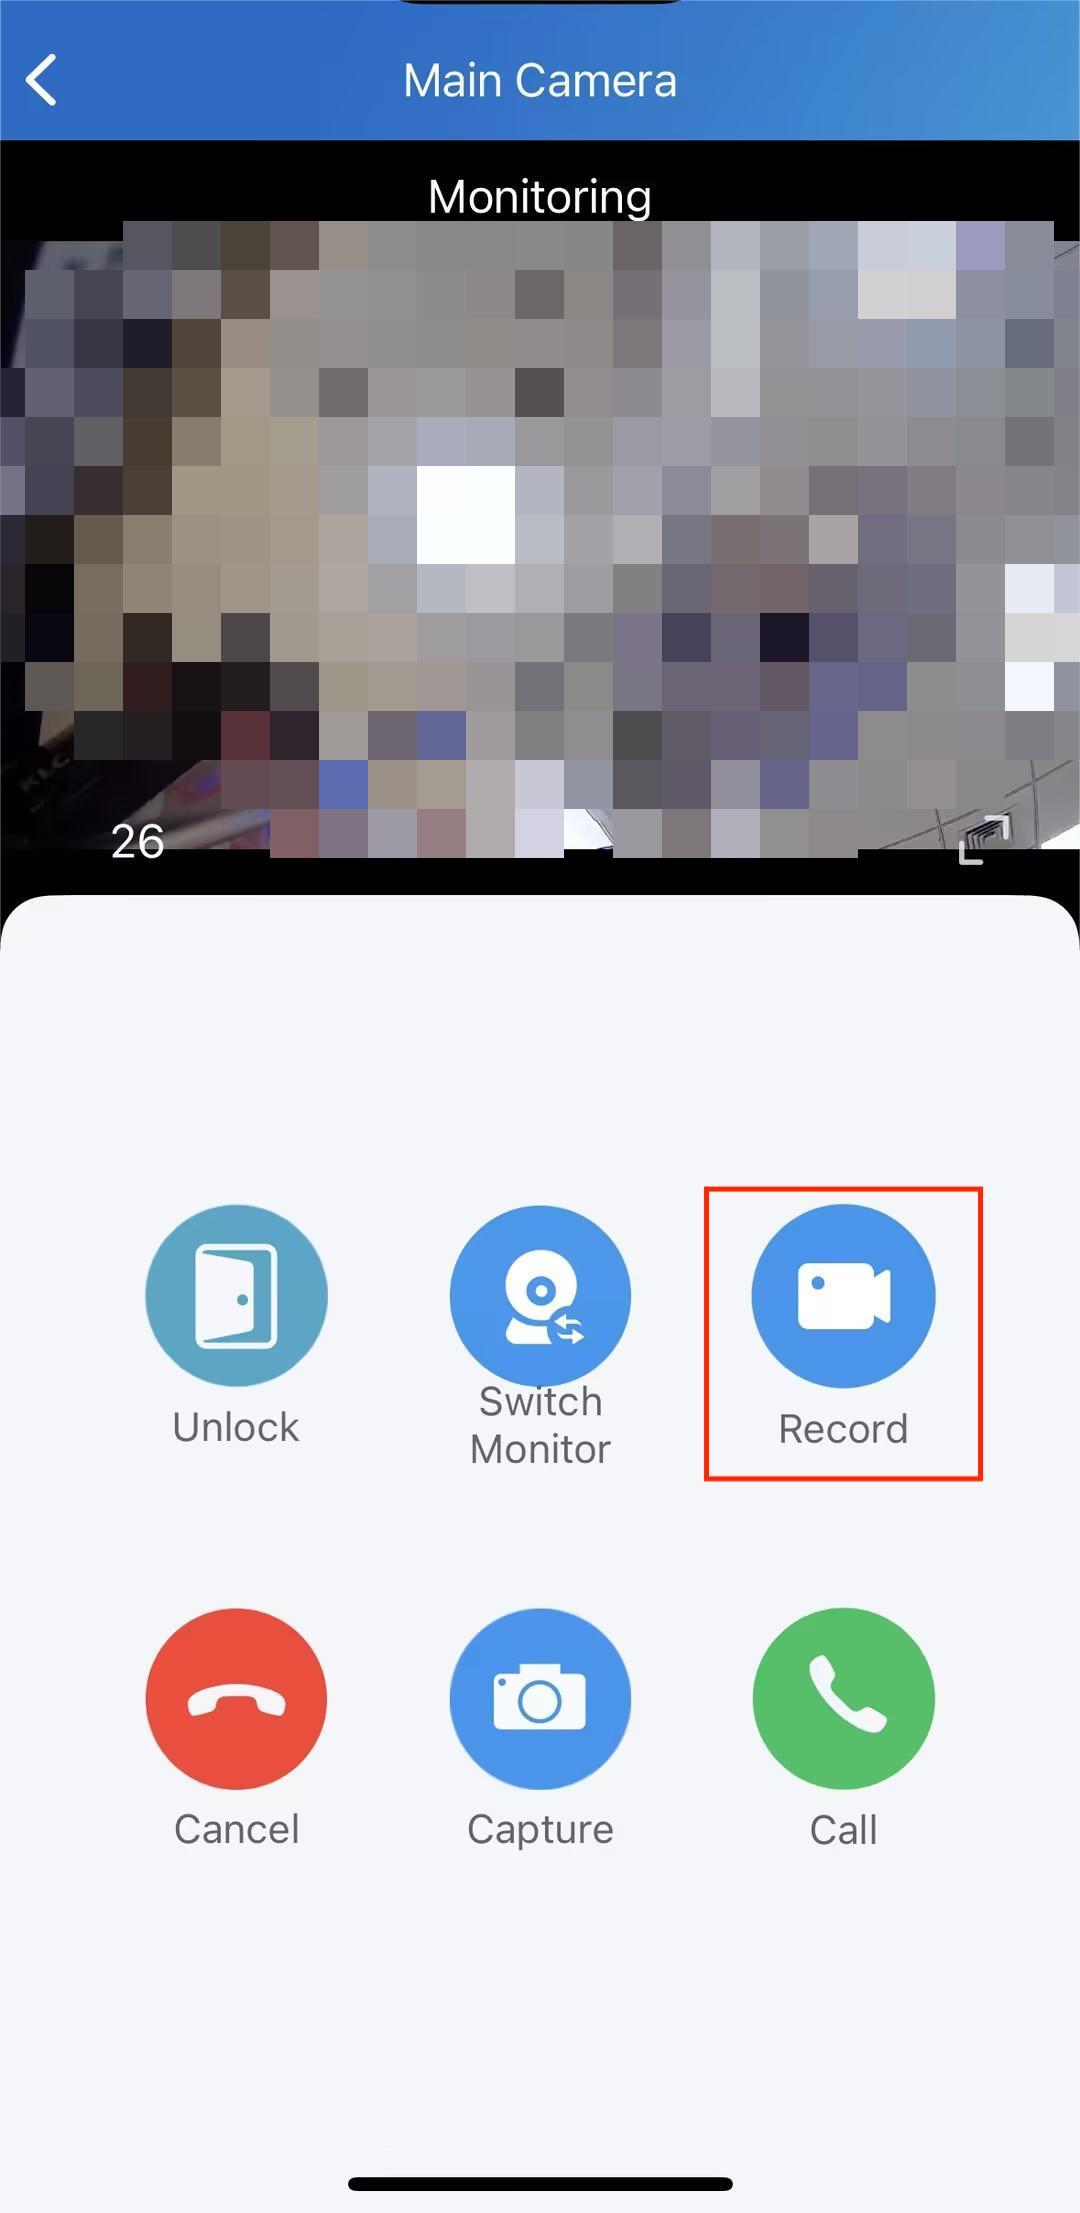
End users and property managers can record videos with SmartPlus Apps.
Tap Record to start recording when viewing the device’s monitoring stream.
Check Video Logs
On SmartPlus App
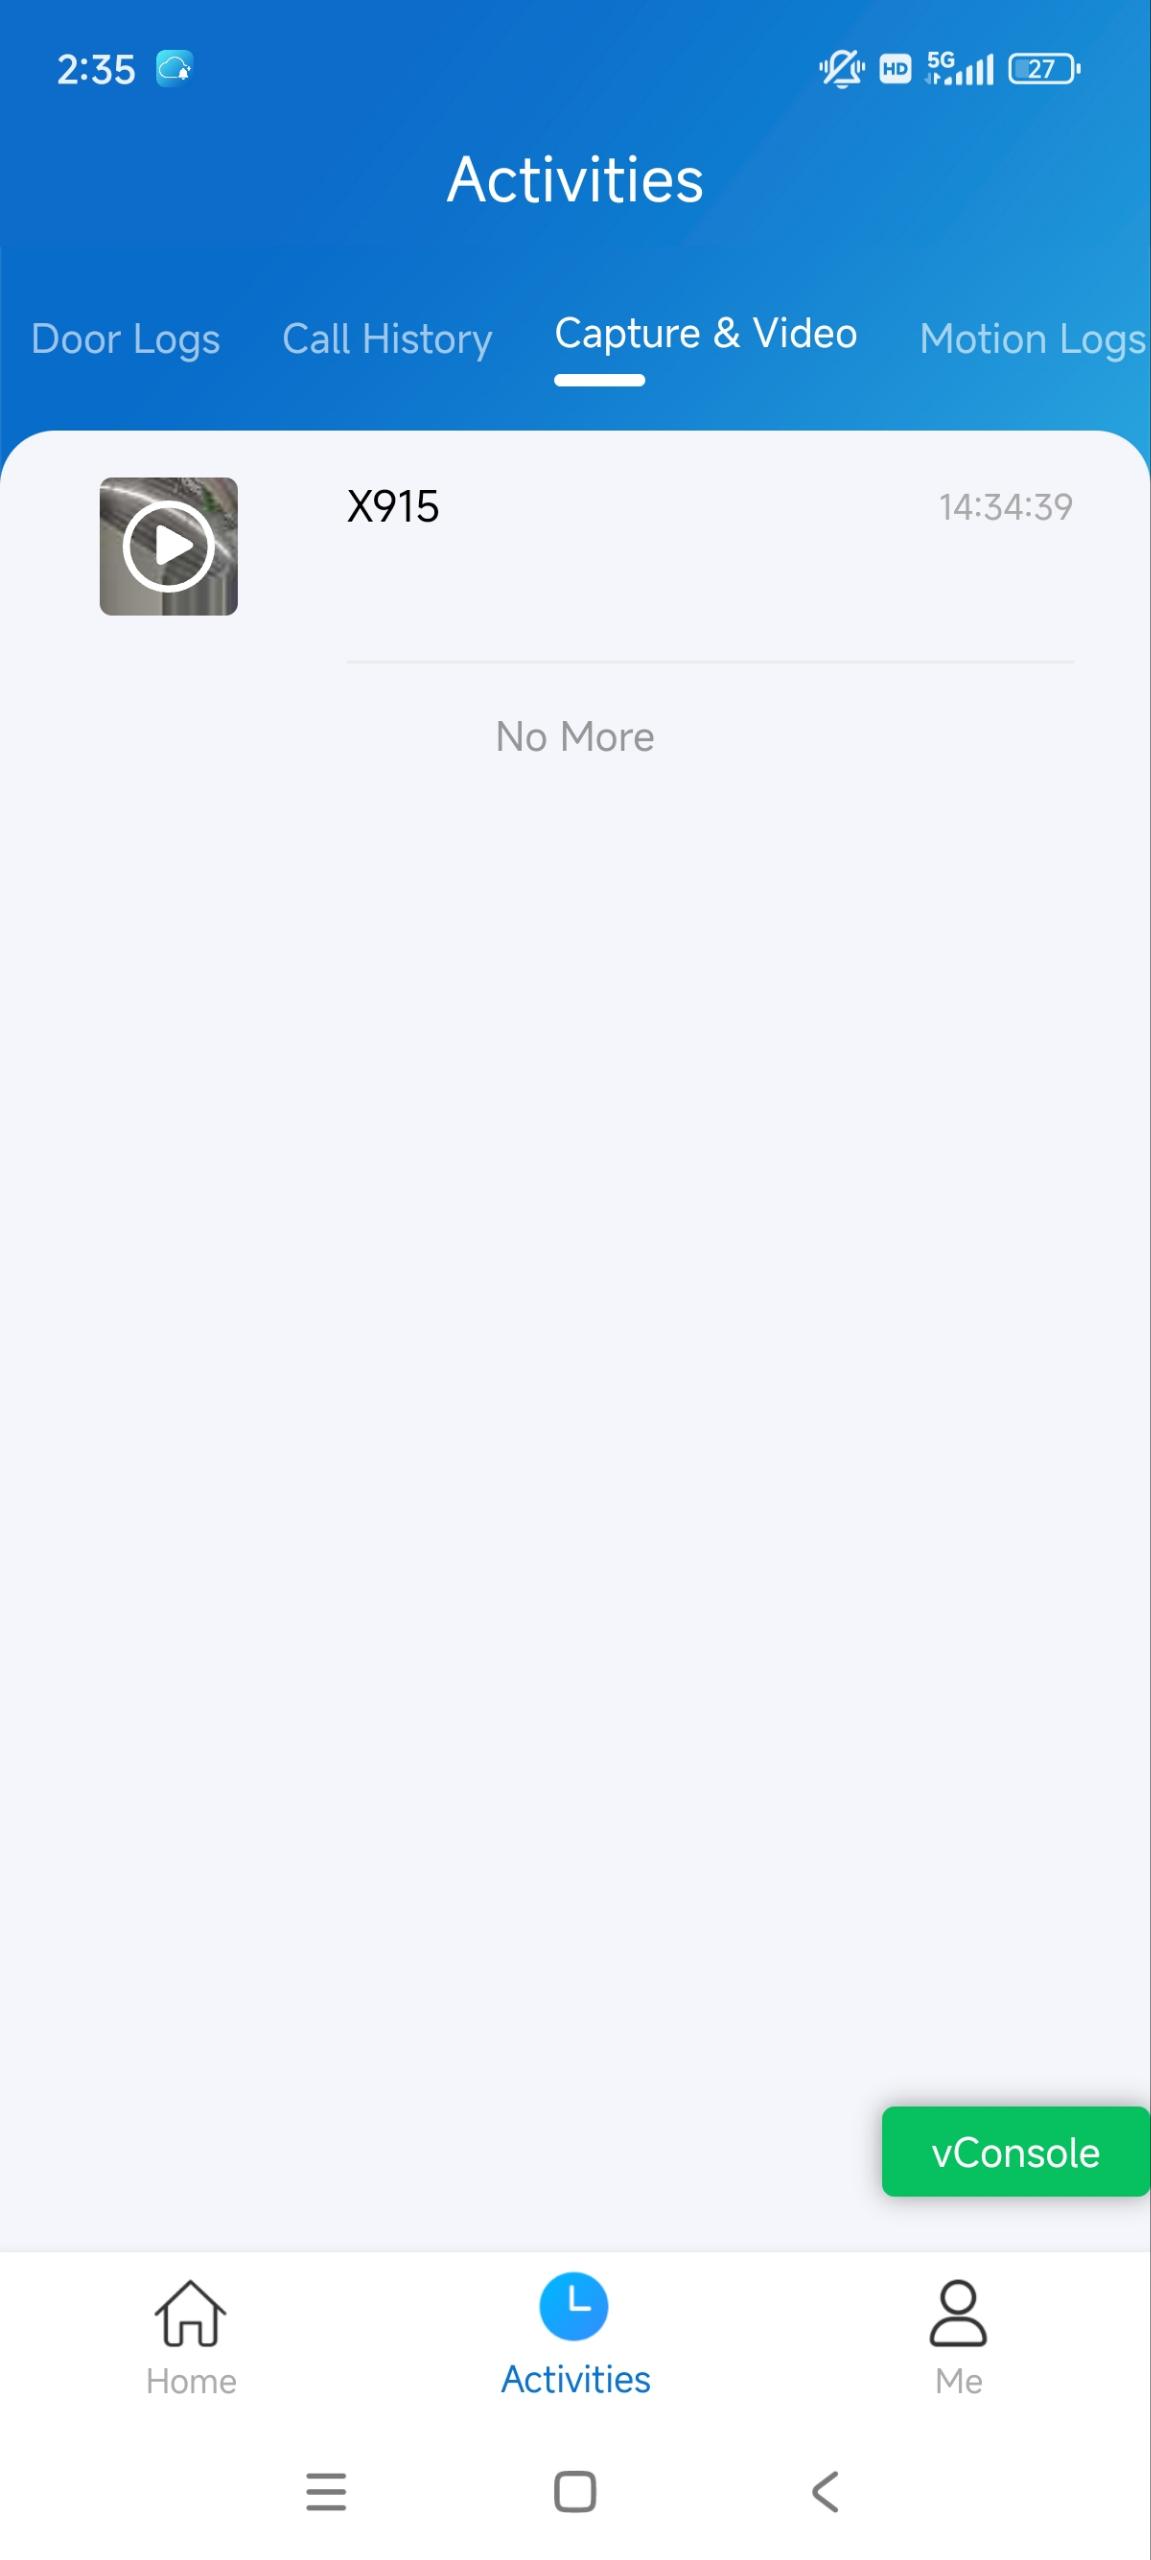
End users and property managers can check the videos with SmartPlus Apps.
Tap Activities and tap the log type.
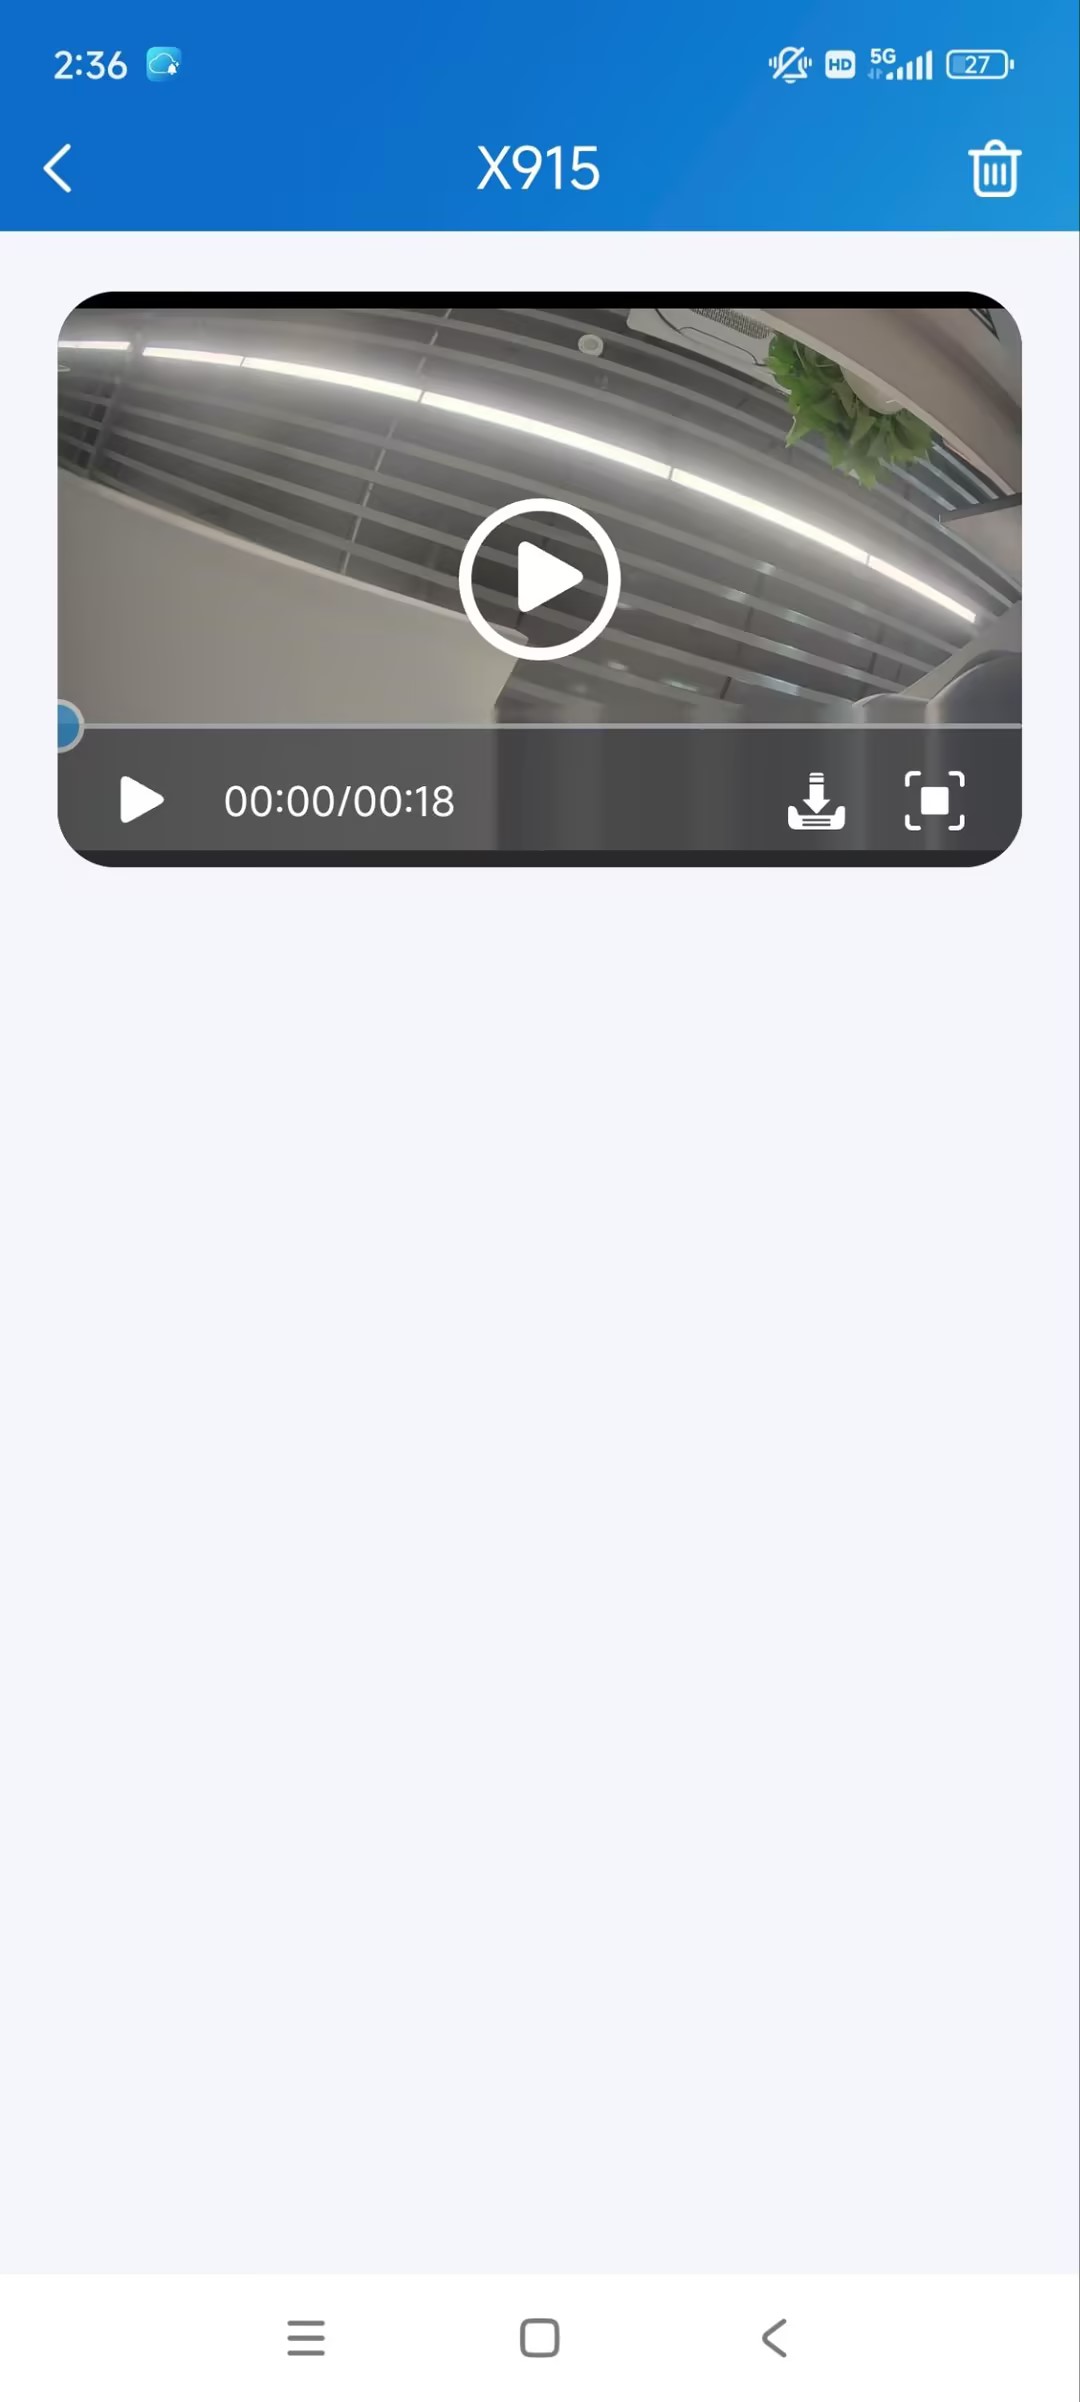
Tap a specific log.
Tap the video to play it.
Tap
 to download the video to the local album.
Tap
 to enlarge the video.
On the SmartPlus Platform
Property managers can check the videos on the SmartPlus platform.
Log in to the SmartPlus Cloud platform with a property manager account.
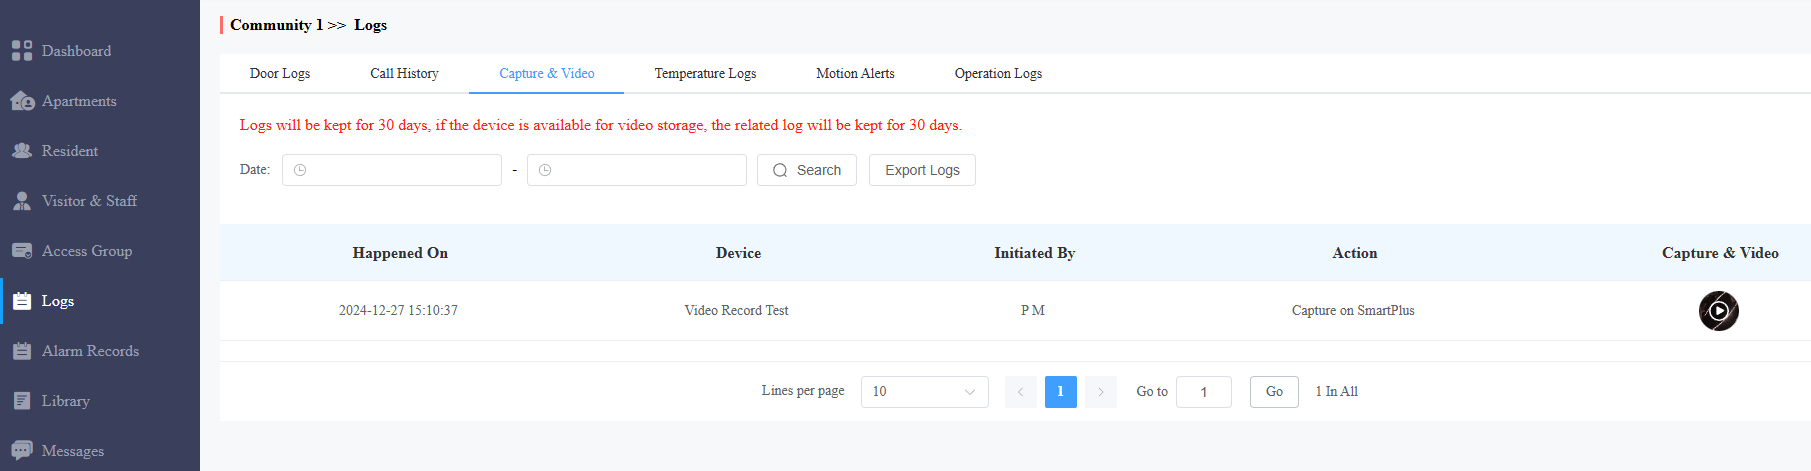
Click Logs on the left column and select the log type.
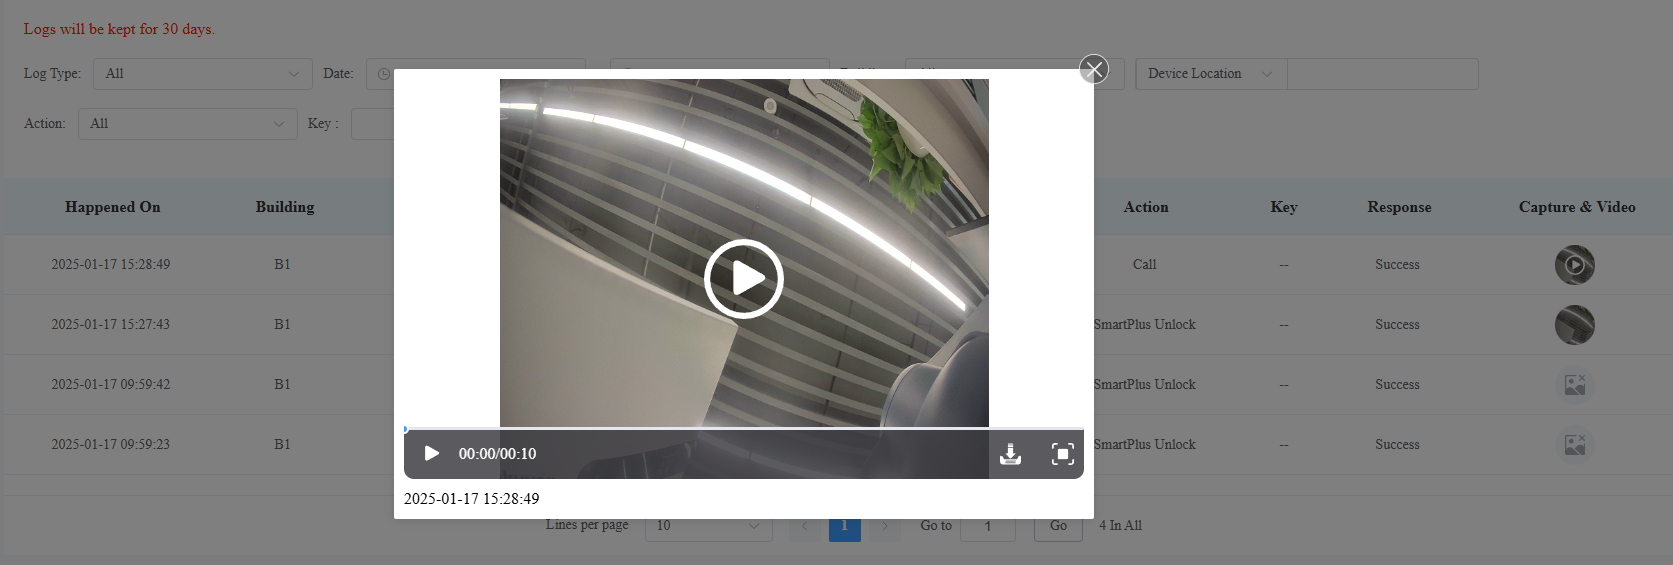
Click the image in the Capture & Video column.
Click the video to play it.
Click
to download the video to the local drive.Click
to enlarge the video.
On the Indoor Monitor
The indoor monitor can store the videos automatically recorded by the door phone when:
The devices are in a call or a call preview.
Opening doors.
Note
Please note that the indoor monitor only stores the latest video from the door phone.
Examples:
During a call preview with one door phone, open the door of another door phone. The indoor monitor will only store a 10-second video of the door opening.
While on a call with a door phone and opening its door, the indoor monitor will only save a 10-second video of the door opening.
If users pick up the call while the indoor monitor is in a call preview with a door phone, it will only store a 10-second video of the call, not the preview.
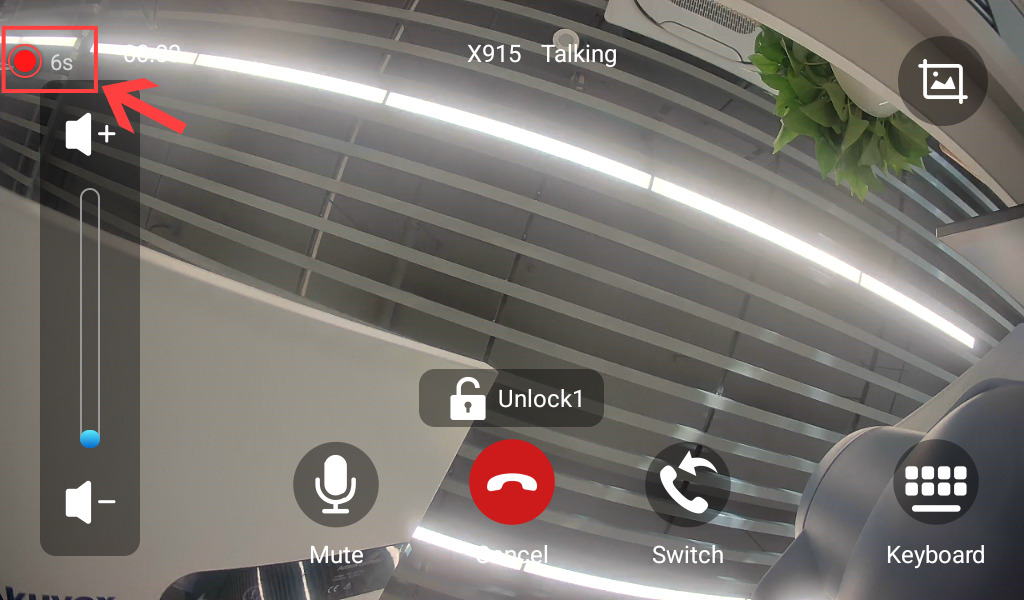
When the door phone is recording, a recording icon will display on the indoor monitor.
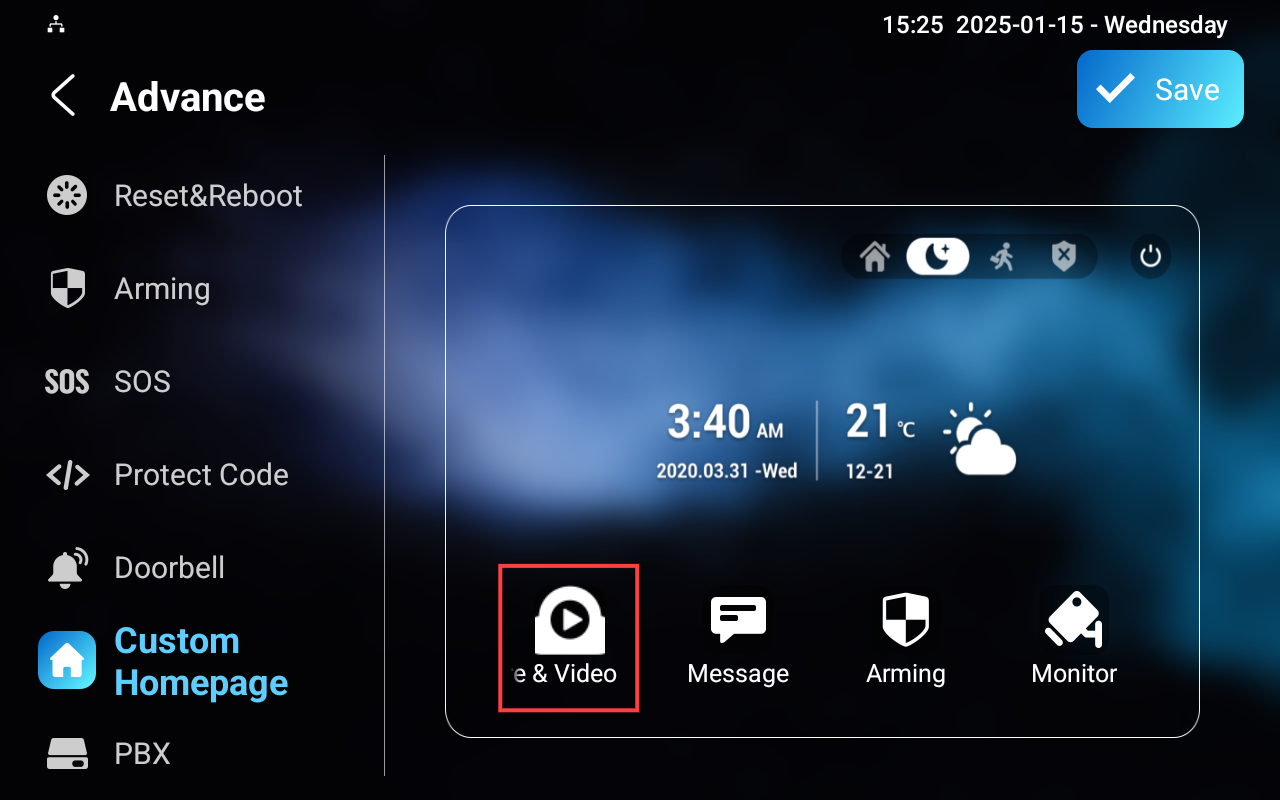
Tap Setting > Advance.
Enter the system code and confirm it. The default is 123456.
Tap Custom Homepage. Select an area to display the Video & Capture tab.
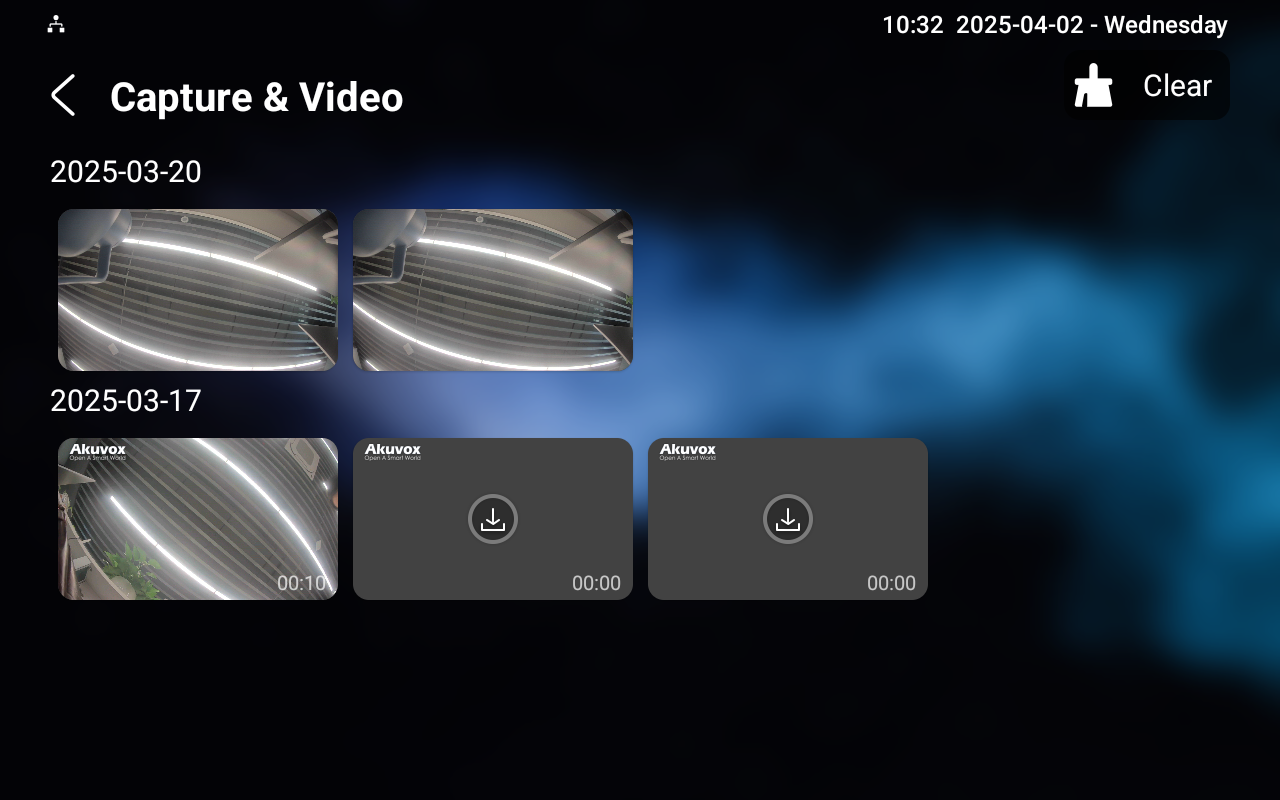
Tap it on the home screen to check captured images and videos. To delete them, tap Clear in the upper right corner and select the desired item(s) to be deleted.
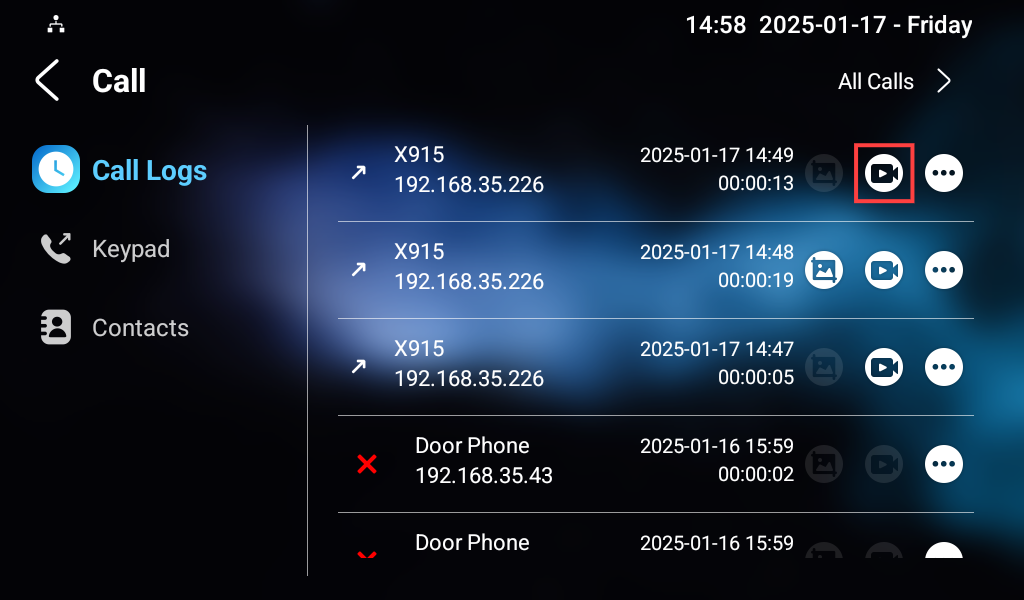
You can also check videos on the Call > Call Logs screen. Tap the video icon to view it.