Web Relay is an electrical relay with a built-in web server. It is controlled remotely by HTTP command, enhancing access control security.
This article takes R20A as an example.
Set up Web Relay
Use the device IP to log into its web interface. The default username and password are admin.
Navigate to the Phone > Web Relay interface.
Select Web Relay or Both in the Type field.
Web Relay: Trigger the Web Relay to open the door.
Both: Trigger the local relay or Web Relay to open the door, and the local relay takes priority over Web Relay.
Enter the IP Address, User Name, and Password provided by the Web Relay service provider.
Enter the HTTP command in the Web Relay Action field. One of the supported formats is state.xml?relayState=2.
Note
If you want to control more than one web relay using the HTTP Get method with a complete HTTP command, leave the IP address field blank. You can configure up to 50 commands.
If you did not enter the IP address, username, and password, you need to enter the complete HTTP command in a format such as http://{Username}:{Password}@{IP address}/state.xml?relayState=2.
For detailed instructions on Web Relay, please refer to the Web Relay manual on the WebRelay’s official website.

Optional Configuration:
In the Web Relay Key field, enter the DTMF code. Then, the door can ONLY be opened via DTMF code and RF card. Otherwise, it can be opened using all the device-supporting methods.
Note
The DTMF code should be the same in the Web Relay Key field and DTMF settings.
The Action ID should be the same in the Web Relay Settings and local access methods settings or the SmartPlus Cloud configuration.
If you want a specific device to trigger Web Relay via DTMF code, enter its SIP/IP number in the Web Relay Extension field.
Trigger Web Relay
Different device models support various access methods. This section provides examples of door-opening via DTMF and RF cards.
Trigger Web Relay via DTMF Code
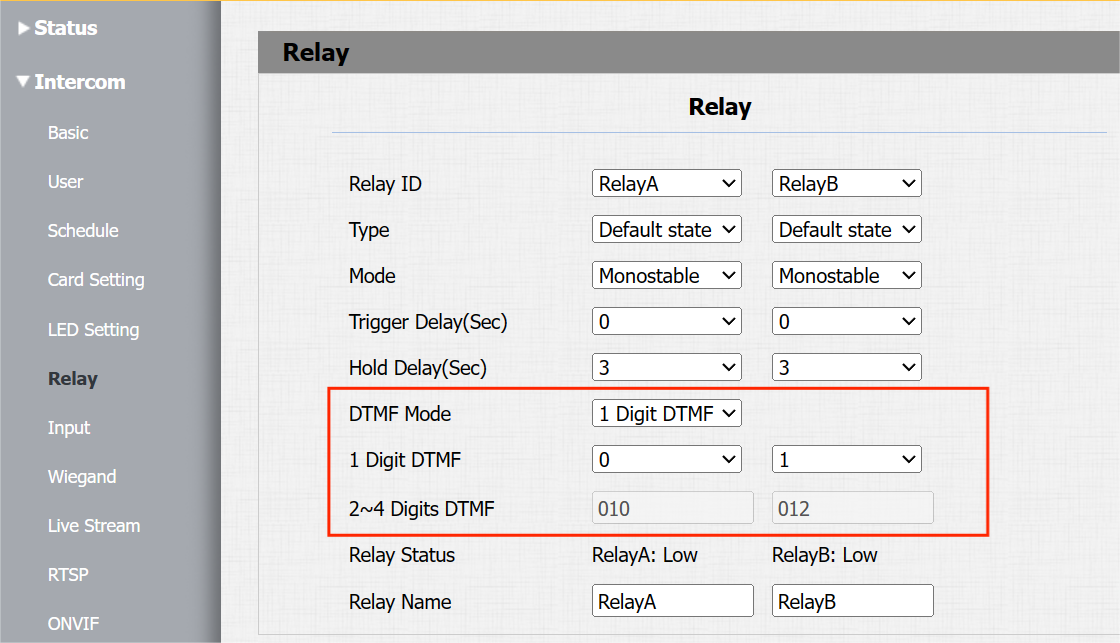
Navigate to the door phone’s Intercom > Relay interface.
Configure the DTMF code of RelayA or RelayB.
Select the DTMF Mode that determines the number of the DTMF code.
Select 1-digit DTMF or enter the code of 2 to 4 digits.
After the configuration, users can press the unlock button to trigger the relay.
Trigger Web Relay by RF Cards
Navigate to the door phone’s Intercom > User interface and click Add.
Enter the user name and select the user role.
Place the card on the device card reader and click Obtain to acquire the card code.
Select the web relay number according to the Web Relay Action ID. Only one web relay can be selected.
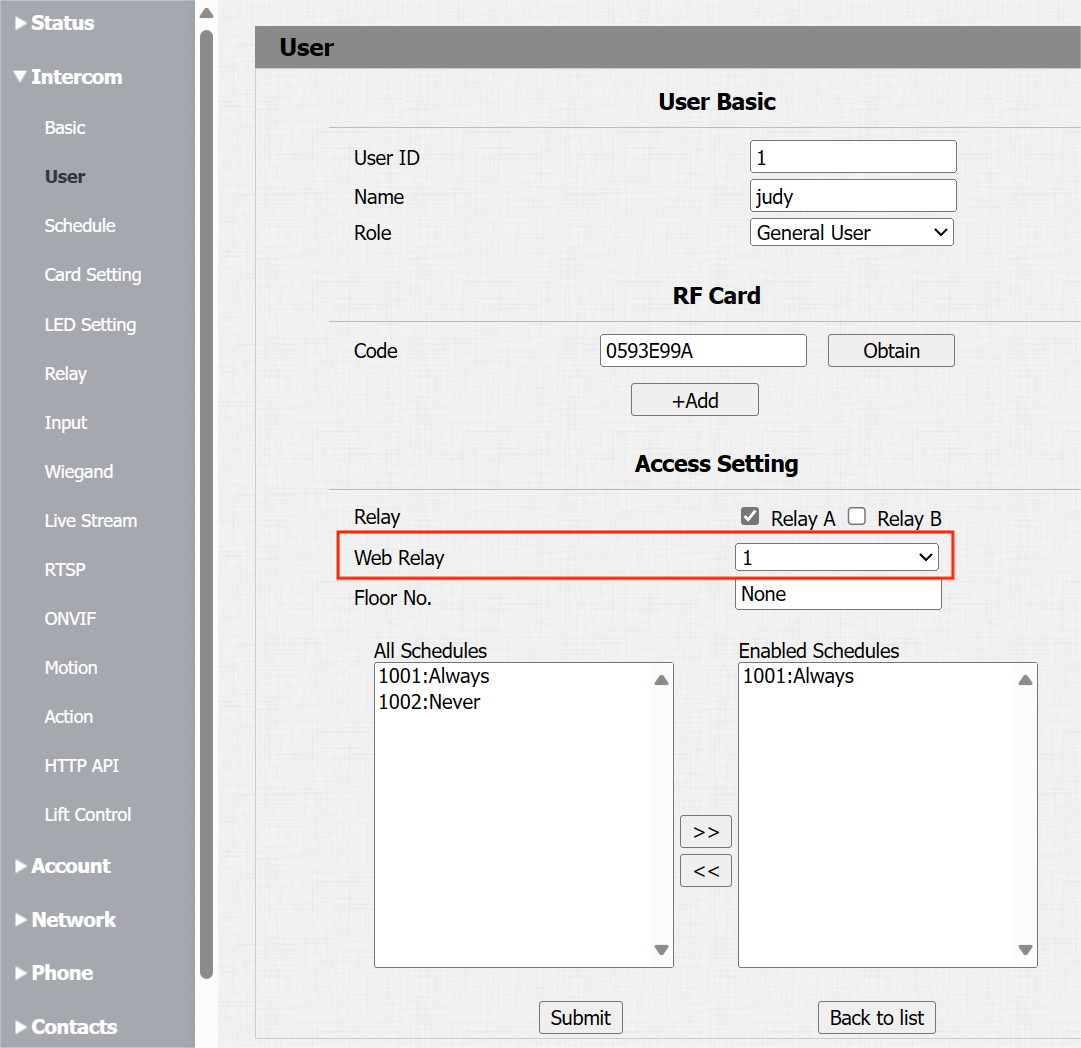
Click Submit to save the configuration.
After the configuration, users can swipe cards on the door phone to trigger the relay.
Trigger Web Relay via Cloud Configuration
When the device is deployed on the SmartPlus Cloud, you can set up the Web Relay Action ID on the Cloud when adding or editing an apartment.
Note
The following models support Web Relay ID synchronization from the Cloud:
X915 V1 / V2, X910, R29, R28 V2.0, X916, S539, S538, S535, S532, X912, R20 V5.0, A094/A092, A01/A02, A03, A05 V2, A08, A095
E18 (firmware 18.30.10.236 or later)
E16 V2 (firmware 216.30.11.3 or later)
E12 (firmware 312.30.10.237 or later)
R25 (firmware 25.30.10.117 or later)
Log in to the SmartPlus Cloud platform with an installer account.
On the Sites module, go to the target community by clicking
 .
.

Click New to add an apartment or click
 to modify one.

Find and select the Web Relay ID. Please note that one apartment can only have one web relay.

Click Submit to save the settings.
The Web Relay will be triggered when users use the Cloud-based credentials.
Note
ONLY Android door phones(S539, S538, X916, X915V2, and R29) support triggering the web relay via the SmartPlus App(unlocking on the homepage or monitoring page).
Since version 205.30.10.203, A05V2 supports unlocking the web relay on SmartPlus’s homepage.