This guide applies to version 3.1.1 of akubela Cloud and covers the process of creating a community project that integrates intercom and smart home functions.
Floor Plan and Device Selection Example
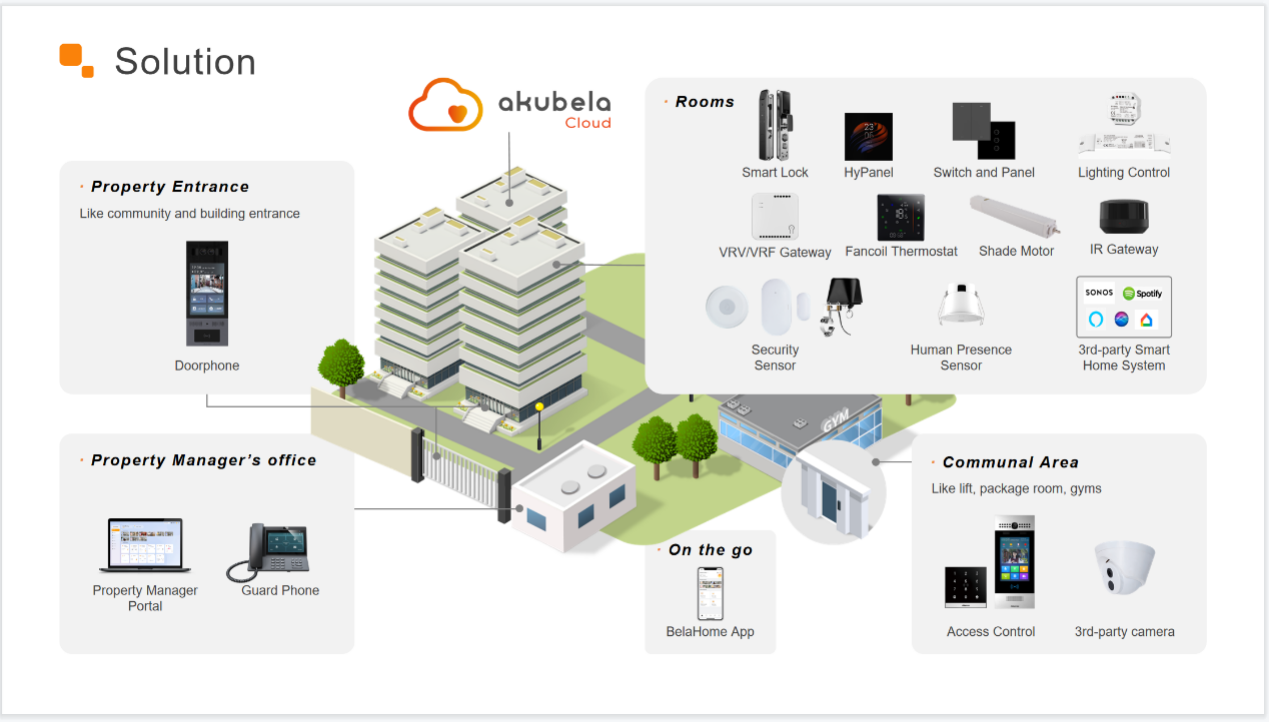
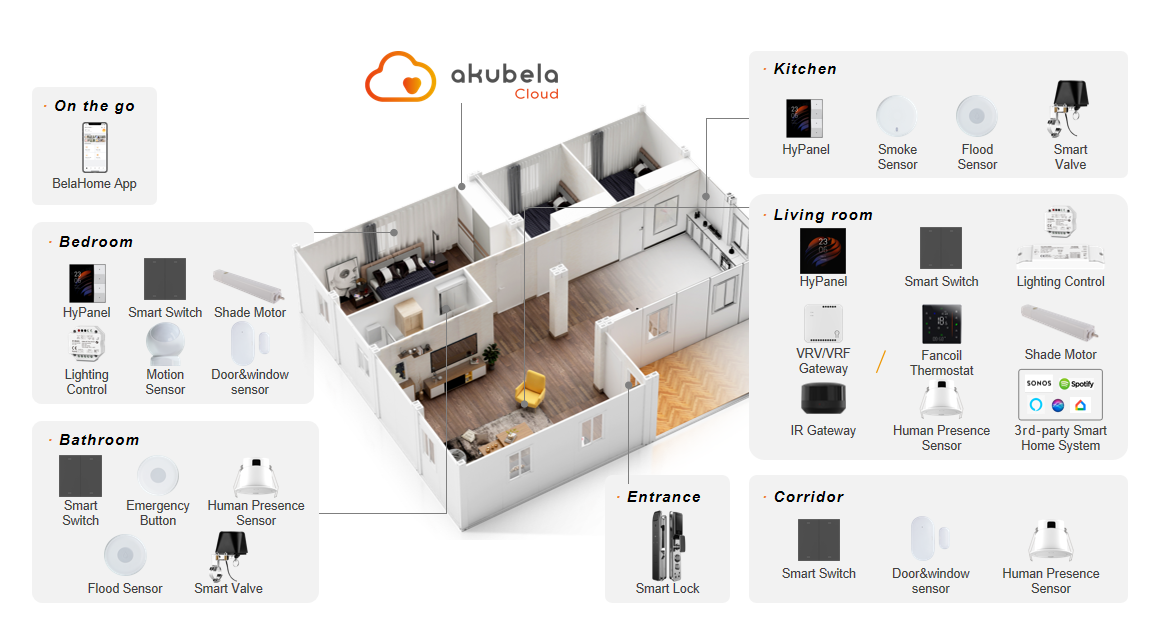
We will use the floor plan and devices shown in the image below to guide you through the project creation process.
Floor plan: Three-bedroom, one-living-room layout.
Device placement locations: Entryway, hallway, living room, dining room, kitchen, primary bedroom, secondary bedroom, bathroom, and balcony.
Device types: Switches, lighting, thermostats, curtains, security devices, and intercom devices.
Communication protocol: ZigBee.
Before Getting Started
Obtain Cloud Accounts
Distributor account: Contact akubela technical support to obtain.
Installer account: Obtain this account from your distributor.
TIP:
Check the necessary platform permissions are enabled for the installer account:
GRMS
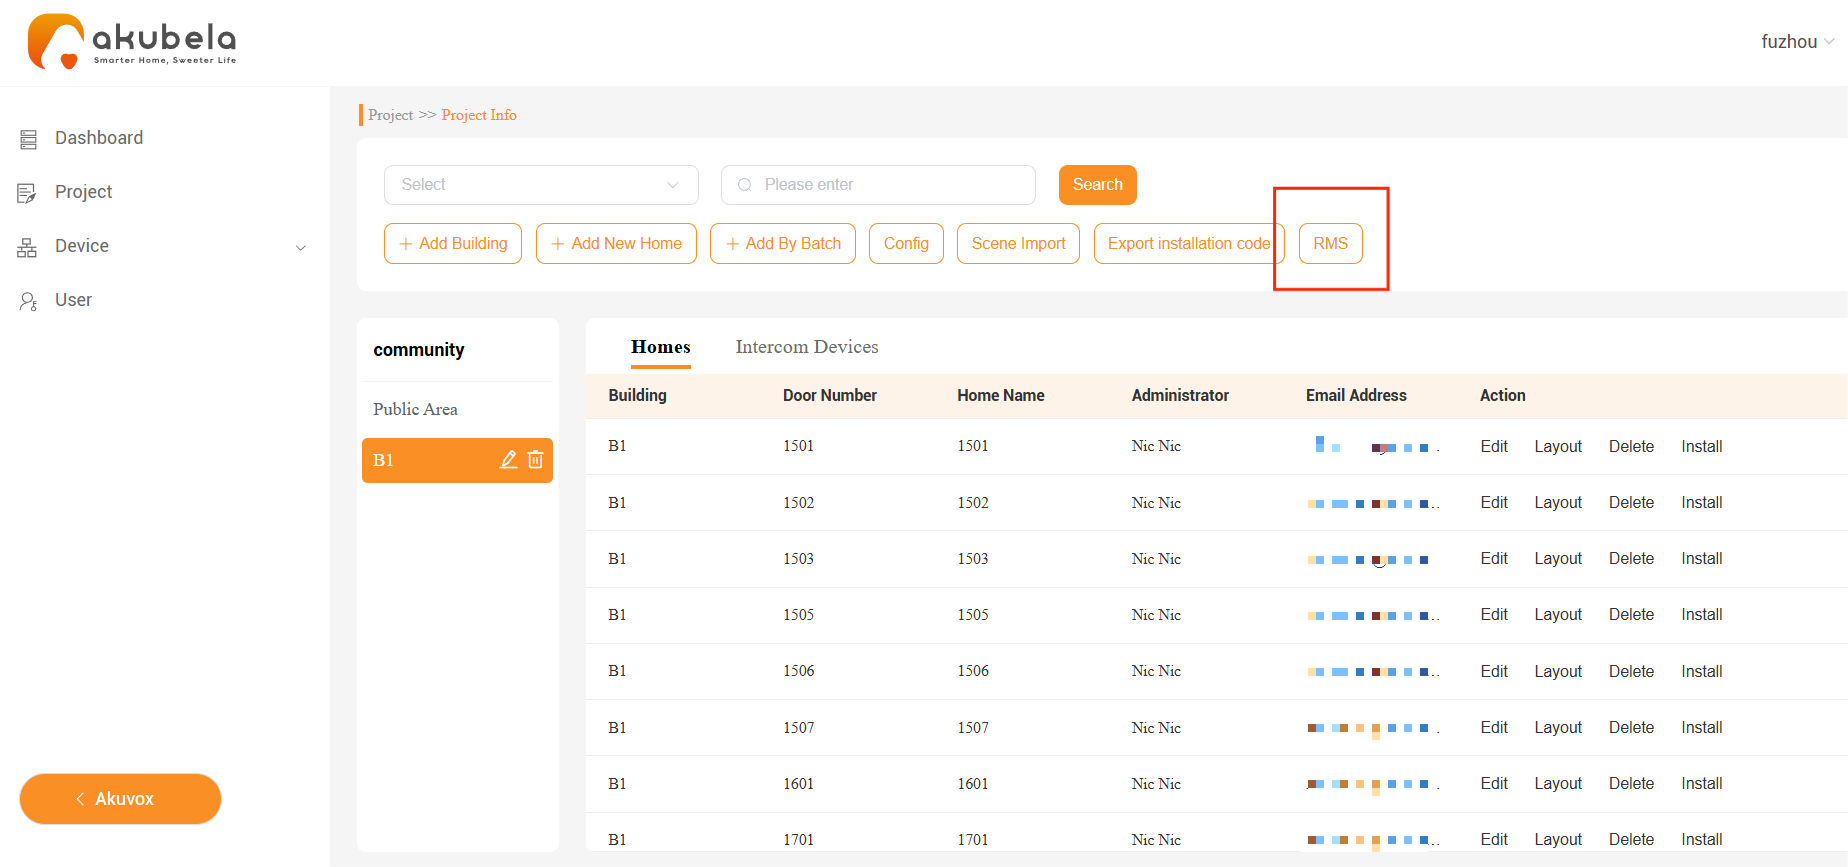
If enabled, the RMS button will be visible in the project details of the community project.
If not available, contact akubela technical support to enable it.
PM
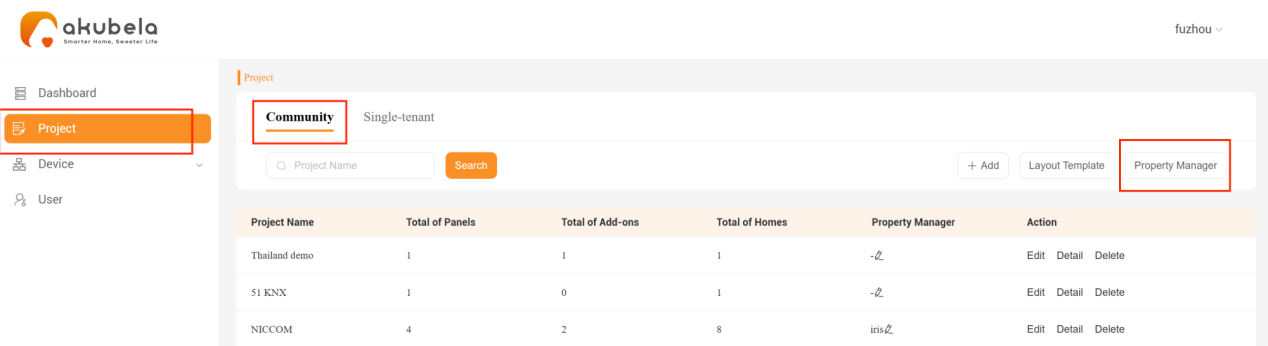
If enabled, the Property Manager button will appear in the upper-right corner of the Community project interface.
If not available, contact your distributor to enable it.
Property manager account: Obtain this account from your distributor.
Collect Device Models and MAC Addresses
To proceed with the project setup, collect the necessary device information:
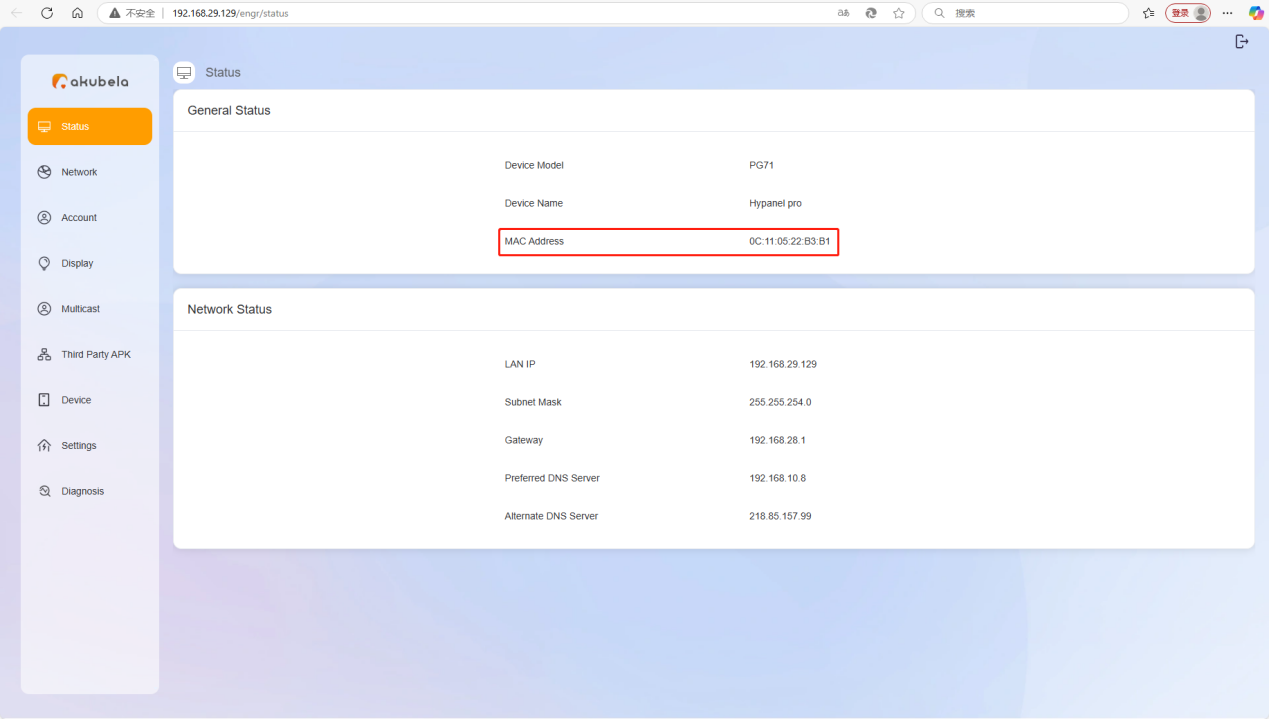
Device models: Found on the label of the packaging or device panel.
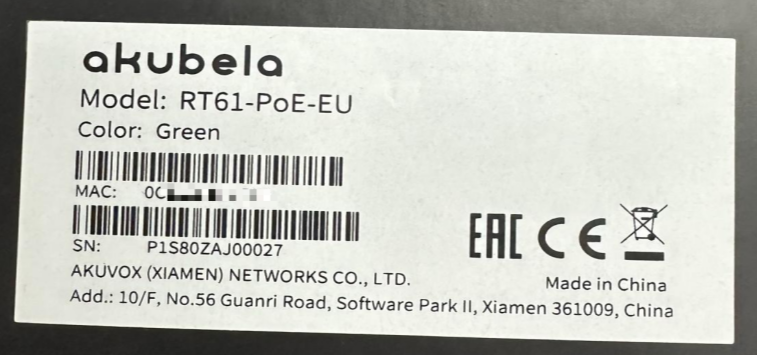
MAC addresses: Available on the packaging label and through the device’s web portal.
TIP:
You can use the following table format for device information collection.
Device | Model | MAC address |
HyPanel | PS51-R2-EU | MAC1 |
HyPanel Lite | PS41-R2-EU | MAC2 |
HyPanel Lite | PS41-R2-EU | MAC3 |
Update Devices
Collect device firmware versions
You can use the following table format to record firmware versions:
Device | Current Version | Latest Version |
HyPanel | 51.1.36.417 | 51.1.36.417 |
HyPanel Lite | 41.1.36.55 | 41.1.36.55 |
HyPanel Lite | 41.1.36.55 | 41.1.36.55 |
Update device firmware
(1) Download the latest firmware from the Knowledge Base.
(2) Update the devices on the cloud by following the guide.
Project Creation and Configuration
You can set up your project in two ways:
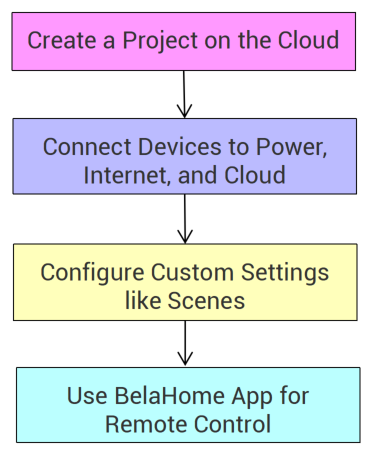
Create a project directly on the cloud
Set up a project on the akubela Cloud, configure devices and scenes. Once connected to the cloud, devices can be controlled remotely via the app.
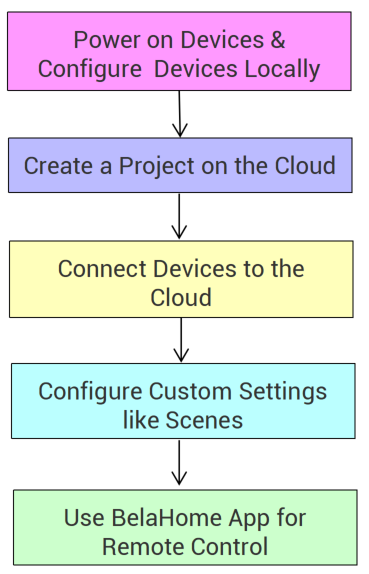
Configure devices locally, then connect to the cloud
Connect and configure devices within the LAN network, then link them to akubela Cloud for remote management.
Creating a Project Directly on the Cloud
1. Creating a Community Project
(1) Log into the Cloud Platform
① Use your installer account to log in to the cloud platform. Refer to the regional login portals below:
② Click the akubela image on the right.

(2) Create a Project
① Create a project
1) Select Project > Community > Add.

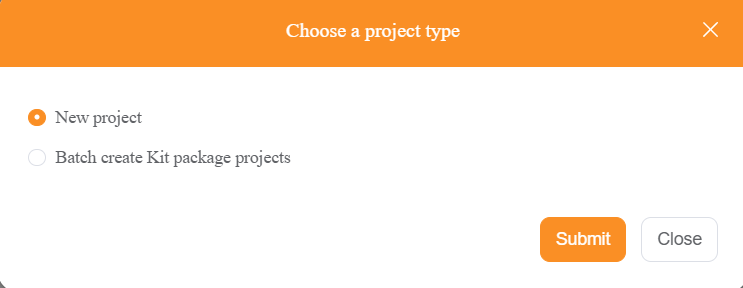
2) Select New project from the pop-up window.
3) Specify the project name, time zone, and address.
NOTE:
Ensure the address and time zone are correct for accurate weather data.
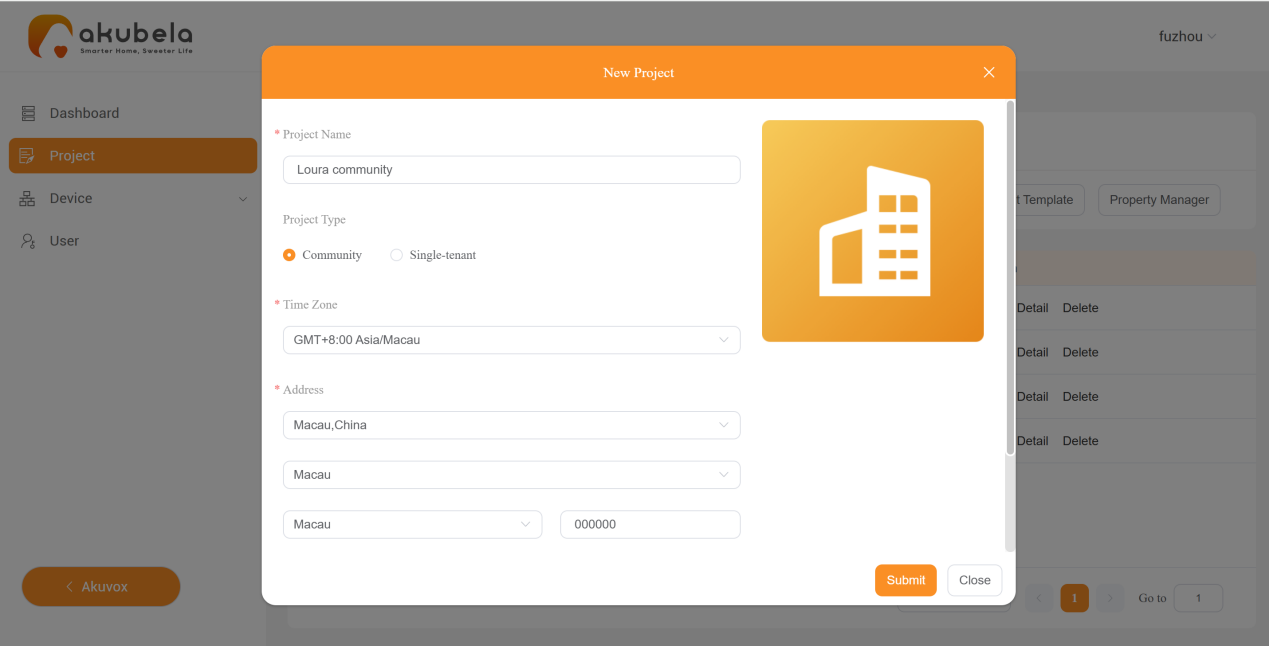
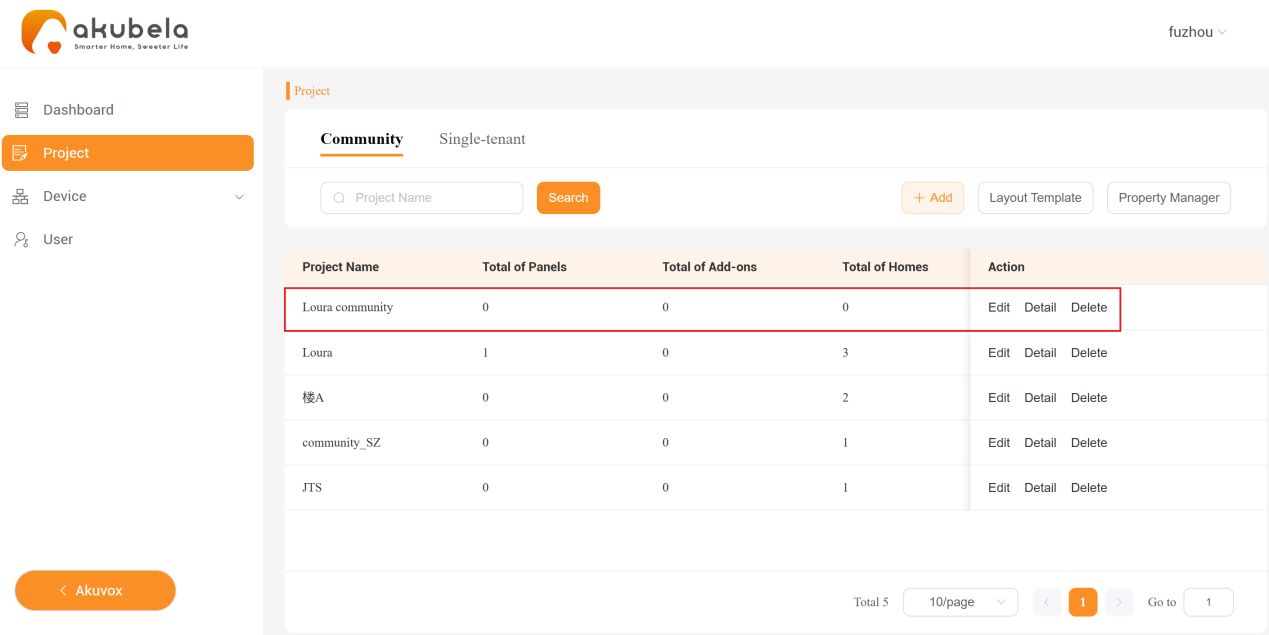
4) Click Submit. The newly-created project will be displayed in the project list.
② Add homes
You can add homes to the project individually or in batches, and add intercom devices for buildings and public areas.
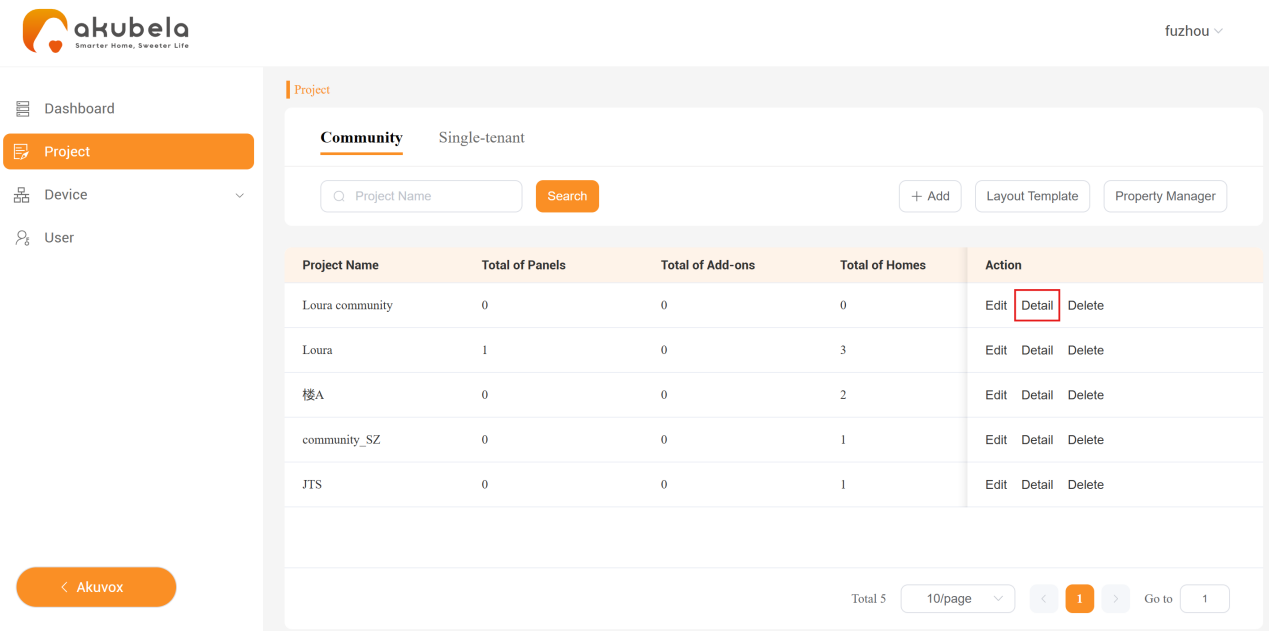
1) On the Project screen, click the Detail button of the project.
2) Click ![]() and name the building.
and name the building.
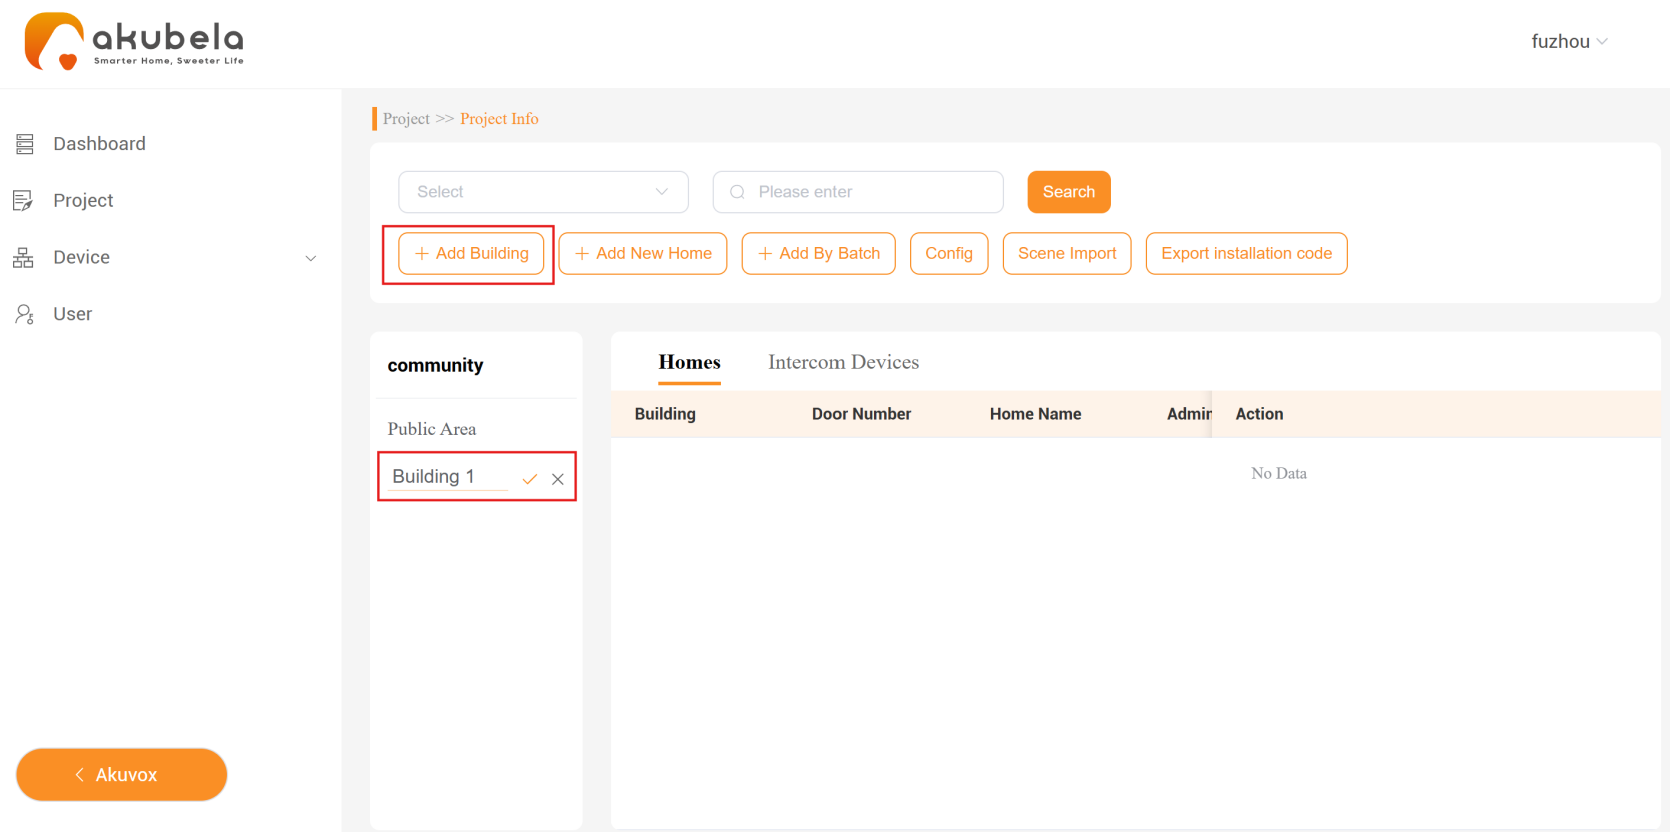
3) Select the building and add homes. You can add them one by one or in batches.
To add a home individually, click
 . Fill in the required information based on the selected installation mode.
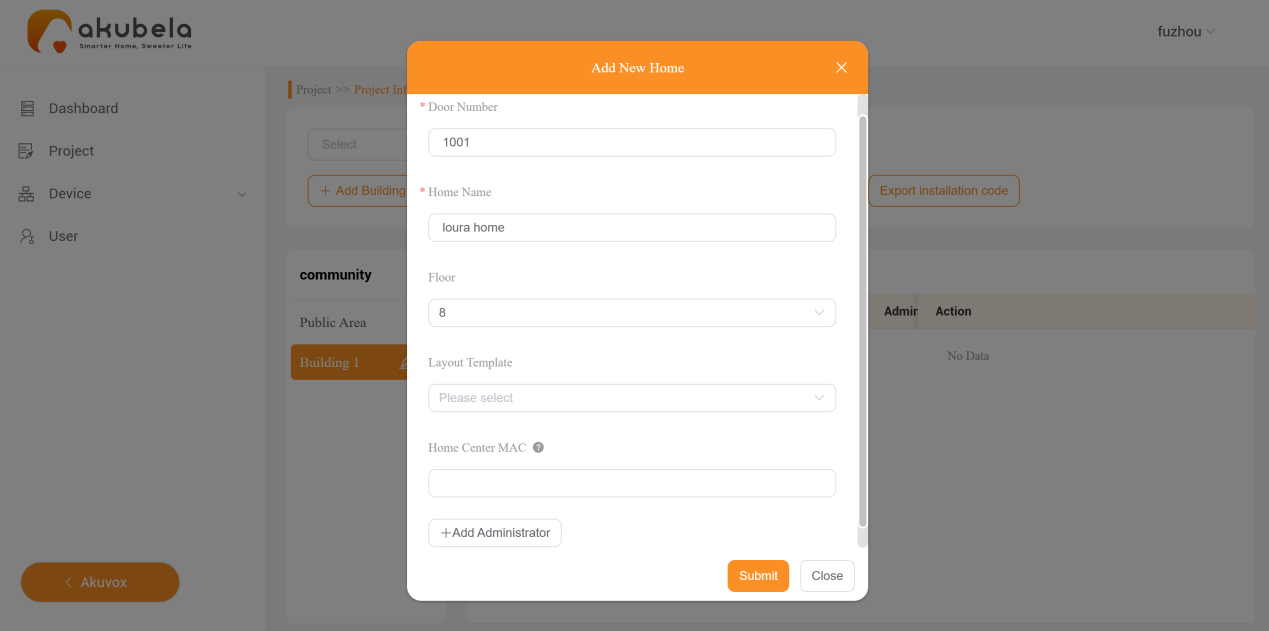
Enter the room number
Name the home
(Optional)Enter the floor number
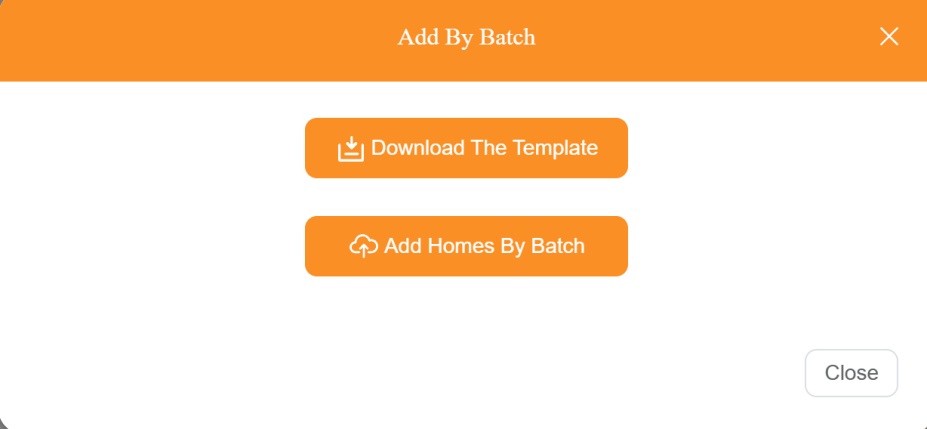
To add homes in batches, click
 .
.
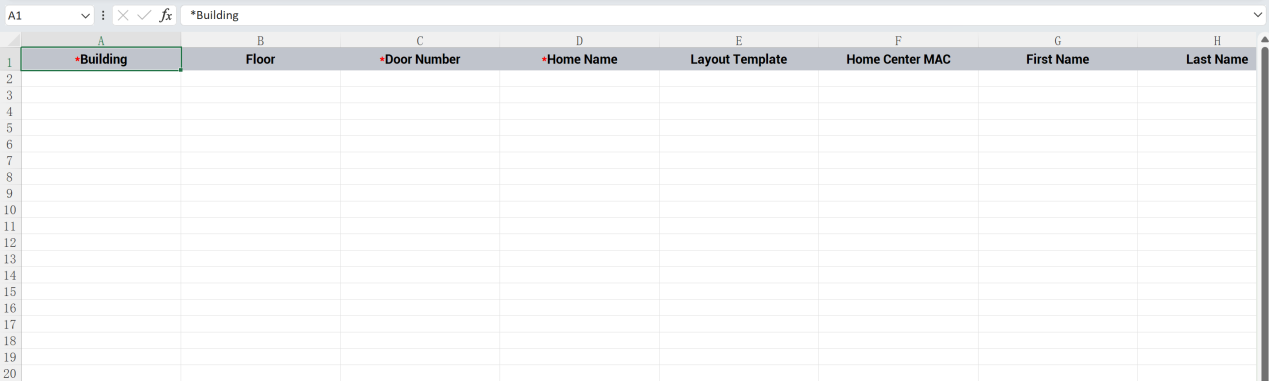
Click
 to download the template in Excel format.
Fill in the information. Fields marked with * are necessary. Save the file after completion.
Click
 to upload the template.
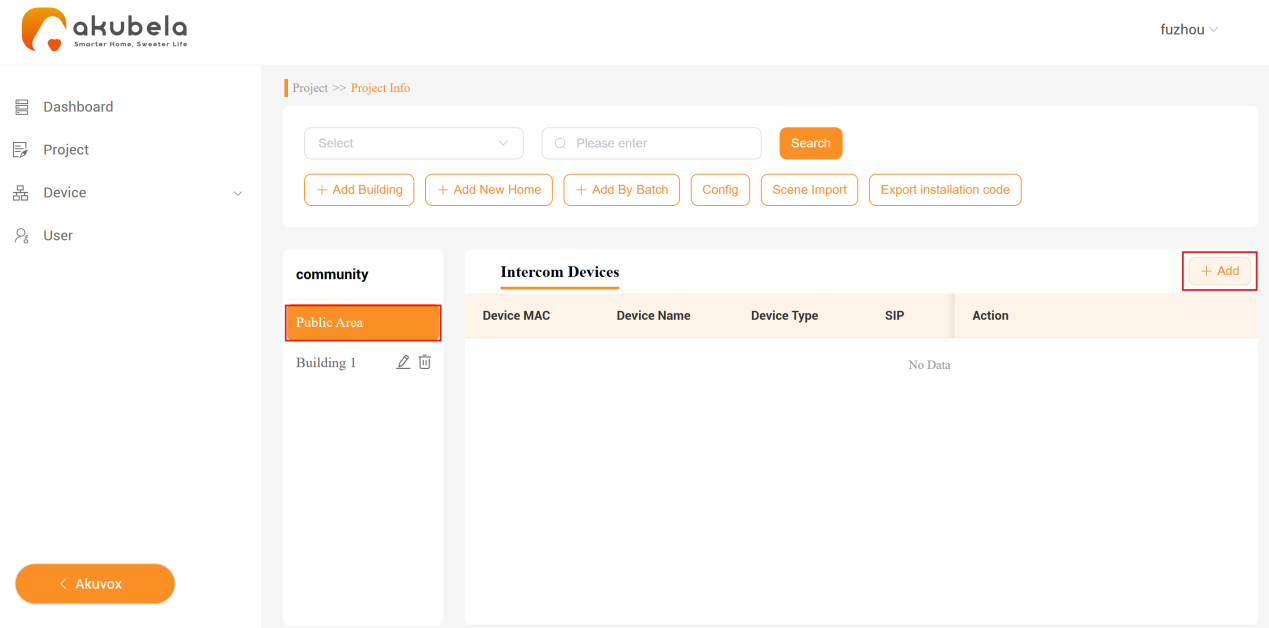
4) Add public intercom devices
To add intercom devices in the public area, click Public Area >
 .
.
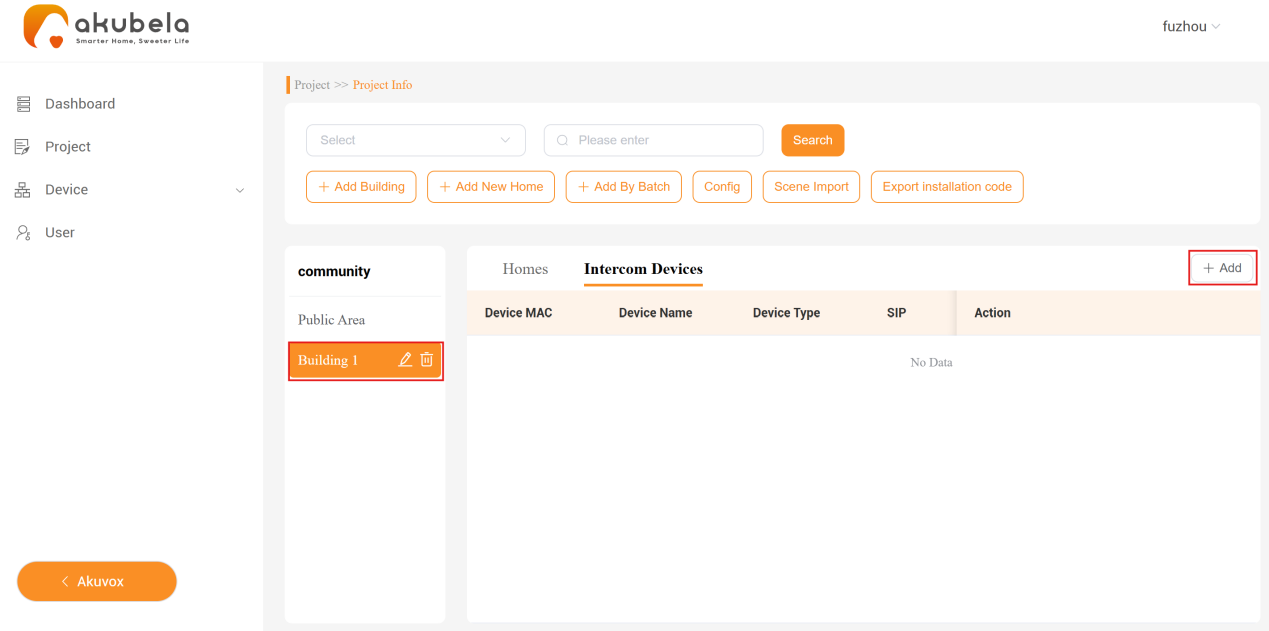
To add intercom devices for buildings, select the desired building and then click Intercom Devices >
 .
.
NOTE:
Before adding the device, make sure the door phone’s MAC address is included in the distributor’s MAC library on the SmartPlus Cloud.
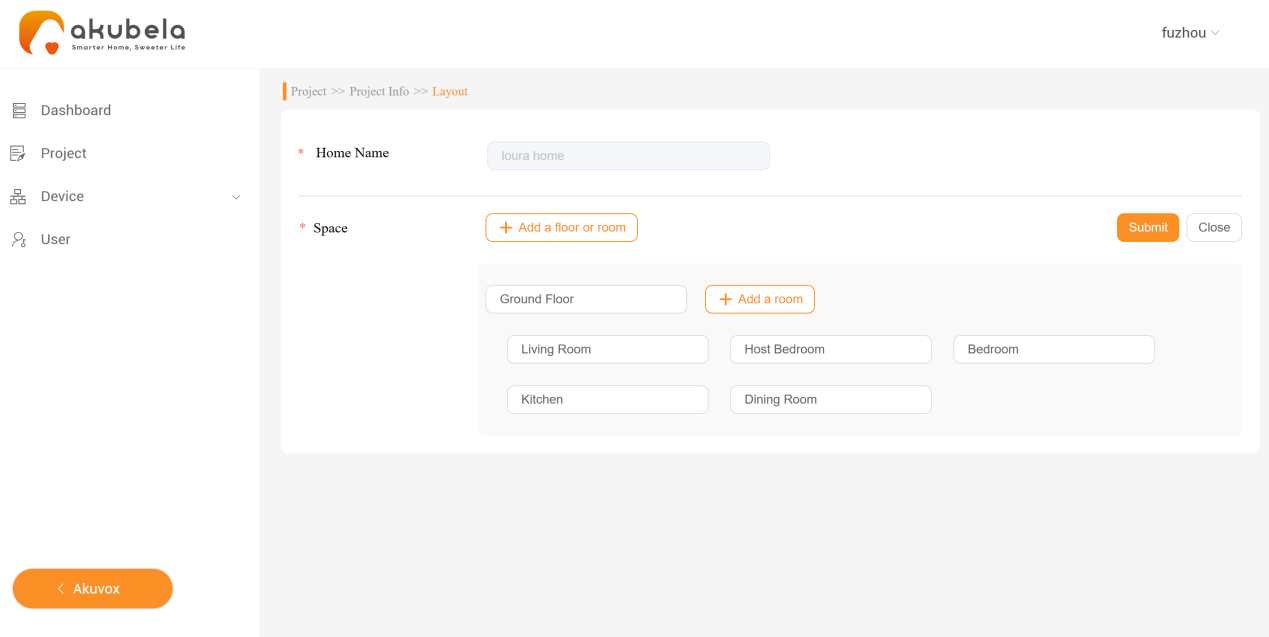
③ Add a house layout
1) To customize a layout exclusively for a specific home, go to Project > Community> Detail > Layout.
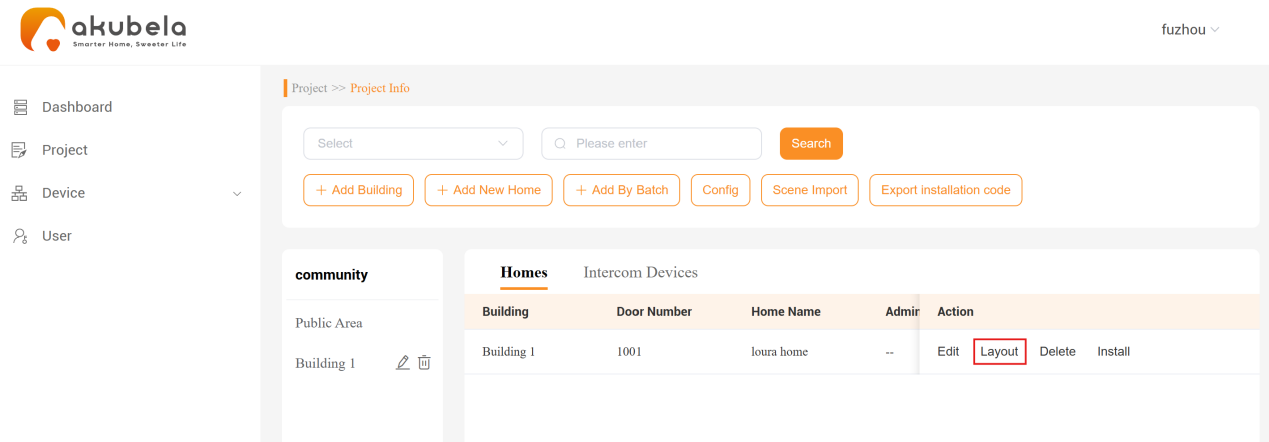
2) Edit, add, or delete the room or floor options, and then click Submit.
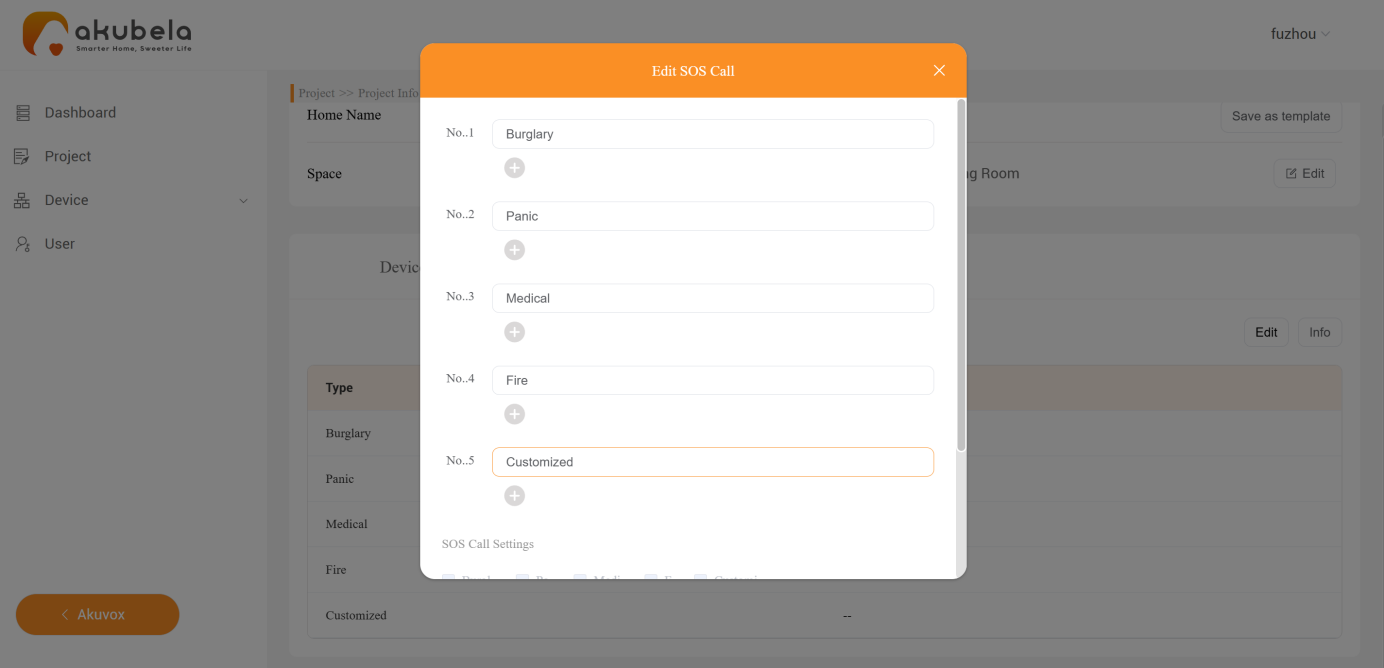
3) While on the same page, you can add akubela panels, door phones, SOS numbers(can only be filled in after adding the devices) and more.
NOTE:
SOS settings will appear after adding an akubela panel.
Configure SOS settings in advance, as they cannot be modified in the cloud once the devices are cloud-connected. After connection, SOS settings can only be set up via the user web portal.
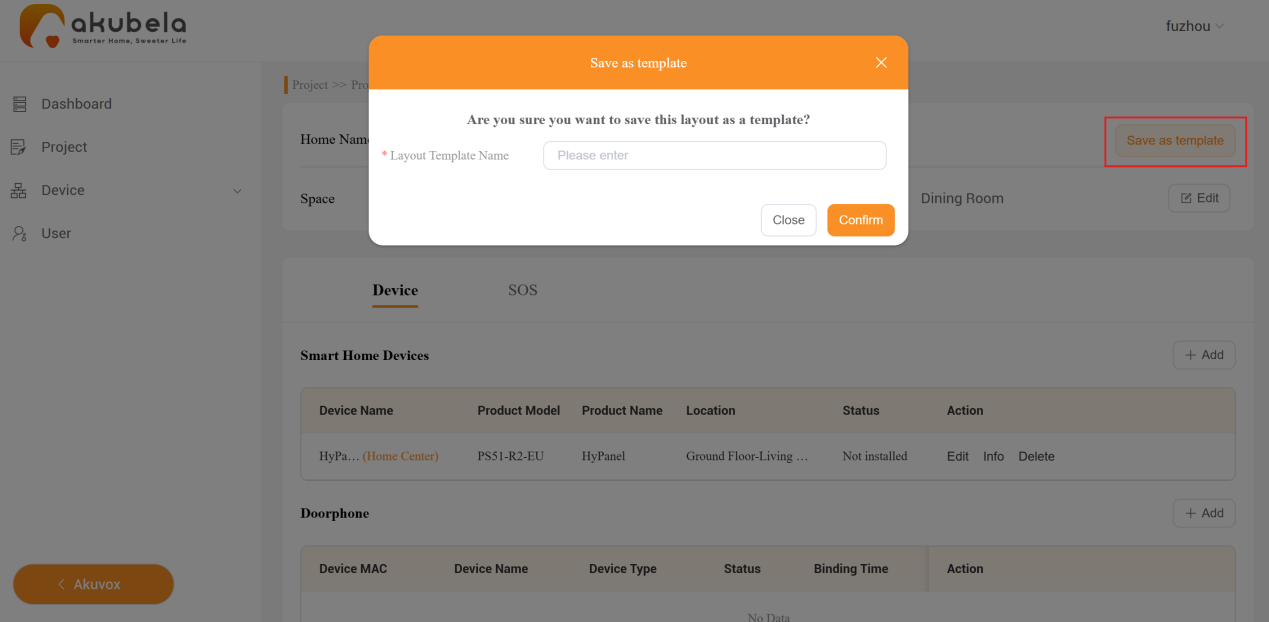
TIP:
Once all required devices and settings are configured, save the layout as a template for future use if needed for other homes.
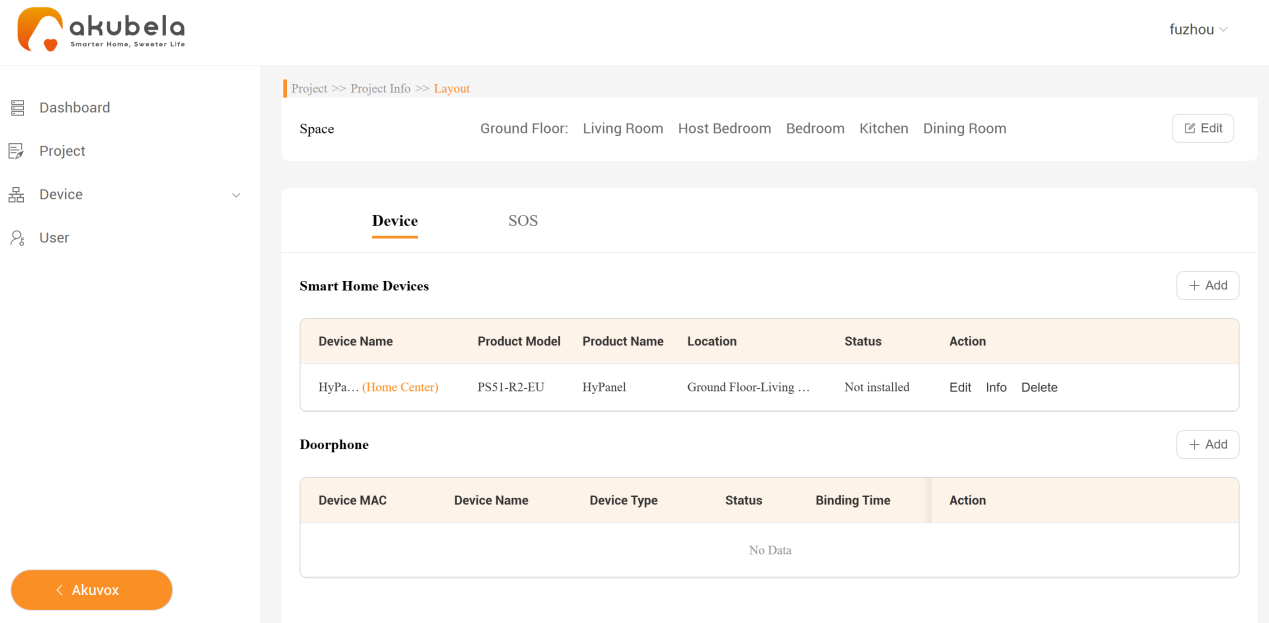
④ Add akubela panels
TIP:
Device models can be found on the label of the device panel or packaging.
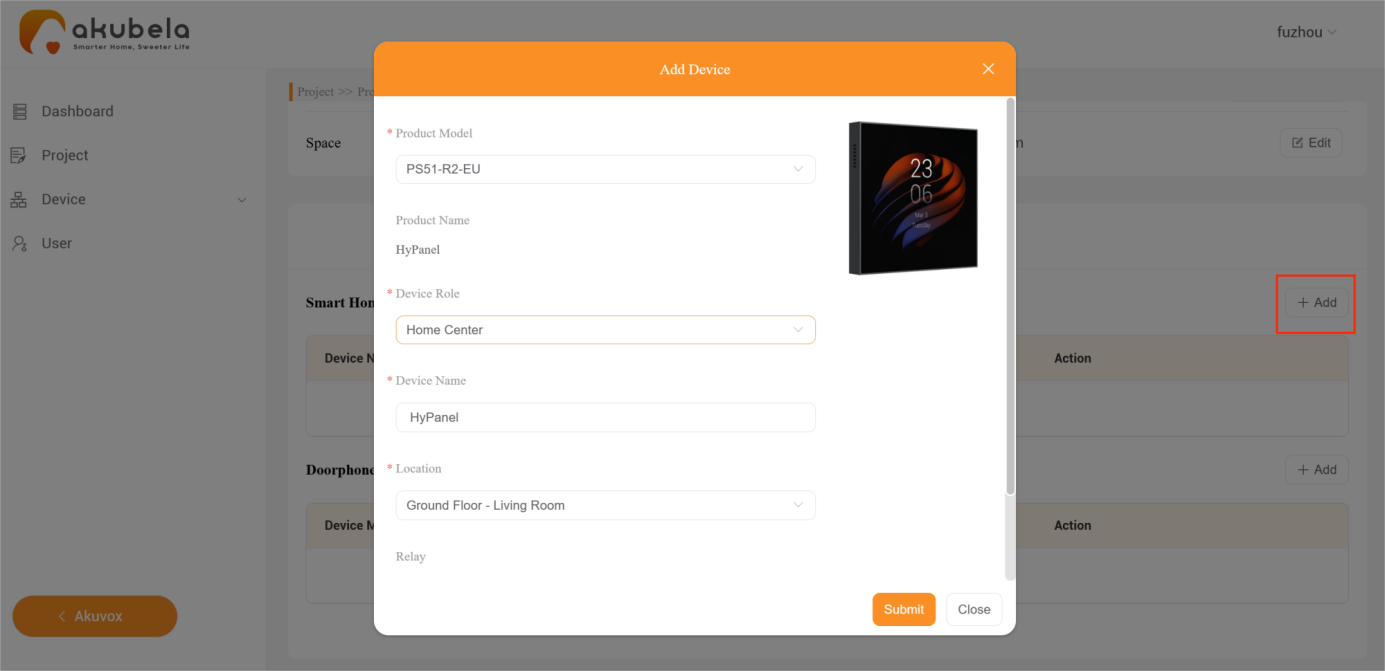
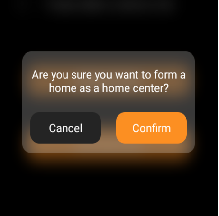
1) Set HyPanel as the home center
On the Layout interface, click Device > Smart Home Devices >
 . A new window opens.
Select the device model. In this example, it is PS51-R2-EU.
NOTE:
The selected model must match the panel’s actual flush-mounted module version; otherwise, it will not connect to the cloud.
c. Set the device role as Home Center.
NOTE:
Each home must have exactly one home center, serving as both a gateway and the central hub for managing all devices and automation scenes.
A sub-gateway(except CT61-PoE) can connect ZigBee devices like sensors and switches.
d. Name the device.
e. Select its installation location.
f. Choose the connected relay type. Note that not all models have this option.
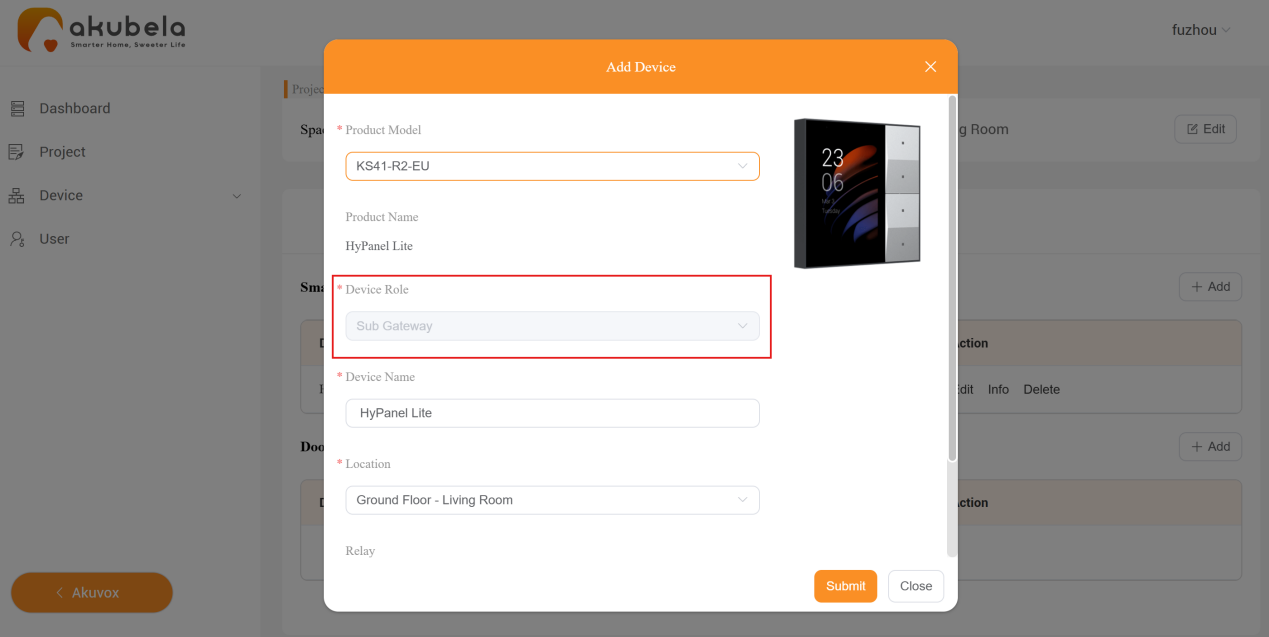
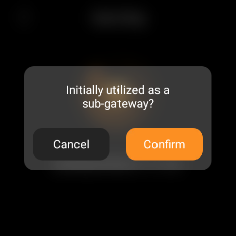
2) Set HyPanel Lite as a Sub-Gateway
Add the two HyPanel Lites following the same steps as above. Their models are KS41-R2-EU.
NOTE:
If the home center is already set up in a home, any additional devices will automatically be assigned as sub-gateways.
(3) Add Administrator Account in the Home
① Go to Project > Community > Detail > Edit, scroll down the pop-up window, and click![]() .
.
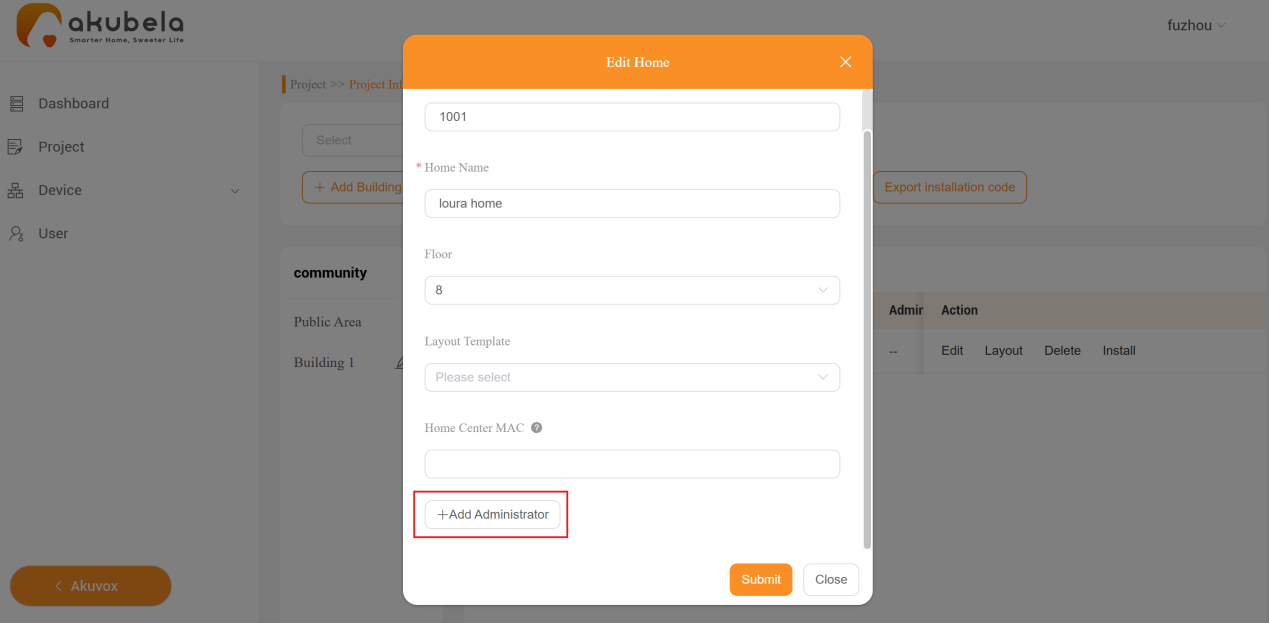
② Enter an email address or select an existing account, then click Submit. The account login credentials will be sent to the provided email.

2. Connect Devices to Power and Internet
(1) Connect devices to power
Refer to the instructions below to power on devices. For other devices, please refer to their user manuals for detailed guidance.
Device | Operation |
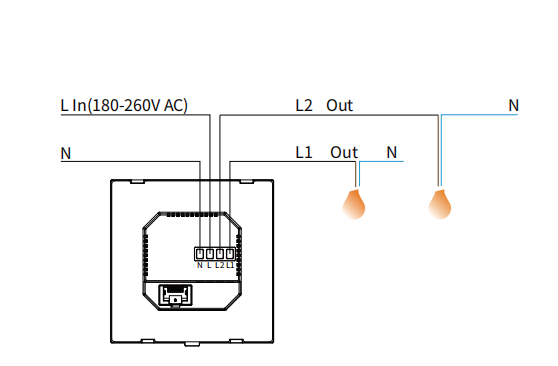
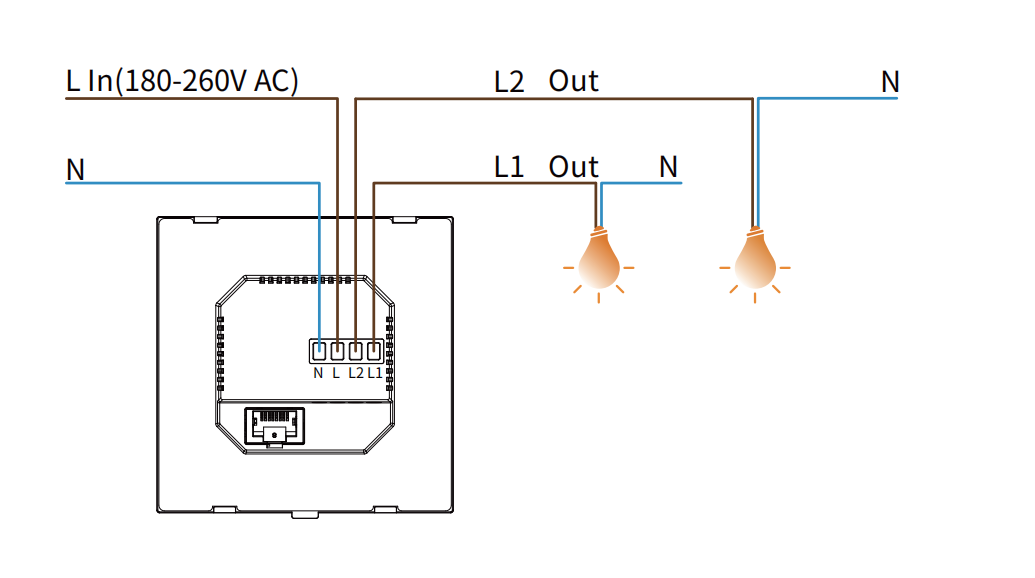
HyPanel(PS51-R2-EU) |
|
HyPanel Lite(PS41-R2-EU) |
|
Smart Lock SL50 | Powered by battery |
Door Phone E12S | Powered by PoE |
Smart Motion Sensor | Powered by CR123A battery |
(2) Connect devices to the Internet
Refer to the instructions below to connect devices to the internet.
Device | Operation |
HyPanel(PS51-R2-EU) | Use an Ethernet cable or connect to Wi-Fi |
HyPanel lite(PS41-R2-EU) | Use an Ethernet cable or connect to Wi-Fi |
Smart Lock SL50 | Refer to the smart lock connection section below |
Door Phone E12S | Plug in a PoE network cable to access the internet |
4. Connect Devices to the Cloud
(1) Connect HyPanel devices to the cloud
① Go to Project > Community > Detail > Install to display the installation code, which is required for cloud connection.
② Export the installation codes for use during the device’s initial setup.

③ During the device’s initial setup, enter the installation code to connect to the cloud.
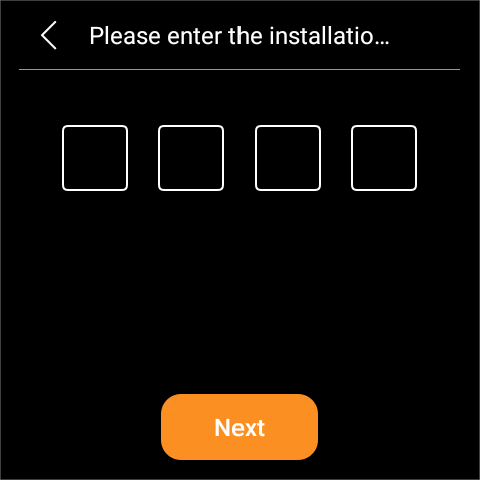
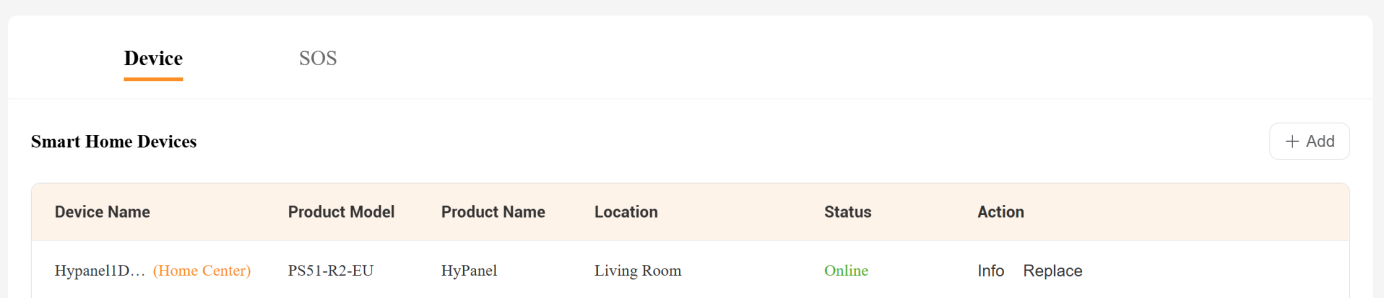
Once connected, the device status will change to be Online.
(2) Connect intercom devices to the cloud
NOTE:
Before adding the device, make sure the door phone’s MAC address is included in the distributor’s MAC library on the SmartPlus Cloud.
① Scroll down to the Doorphone section and click Add.

NOTE:
This section is not available for universal templates. To add door phones to a home using a universal template, find the home in the Community page and go to Detail > Layout.
② Select the door phone’s type.
③ Enter its MAC address, which can be found on the device’s back label.
④ Select Yes or No for internet connection. Choose No if the door phone only connects to a local network.
⑤ Name the door phone.
⑥ Name the relay controlled by the door phone.
⑦ (Optional) Set a DTMF code for door opening.
⑧ (Optional) Add more relays or security relays by clicking the buttons at the bottom.
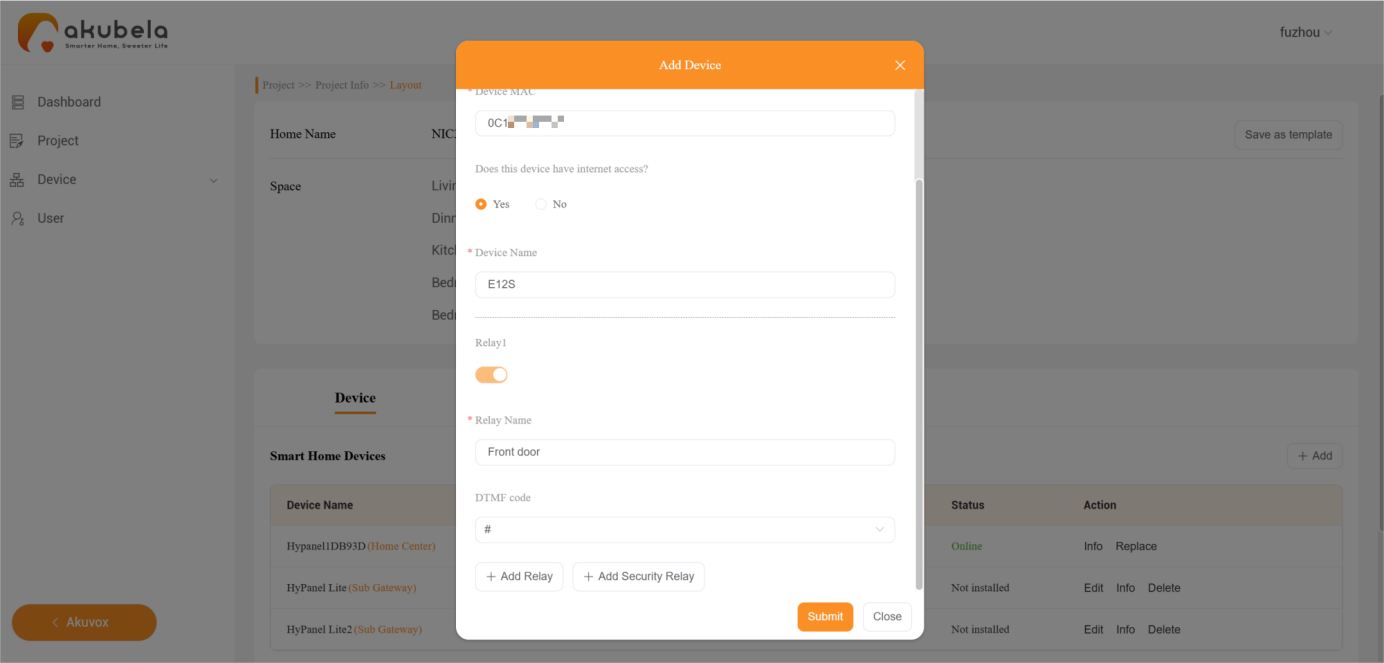
Once connected, its status will change to Online on the cloud.
(3) Connect smart lock SL50 to the cloud
Smart lock SL50 support two connection methods: AP hotspot and QR code scanning. We will use the AP hotspot method as an example.
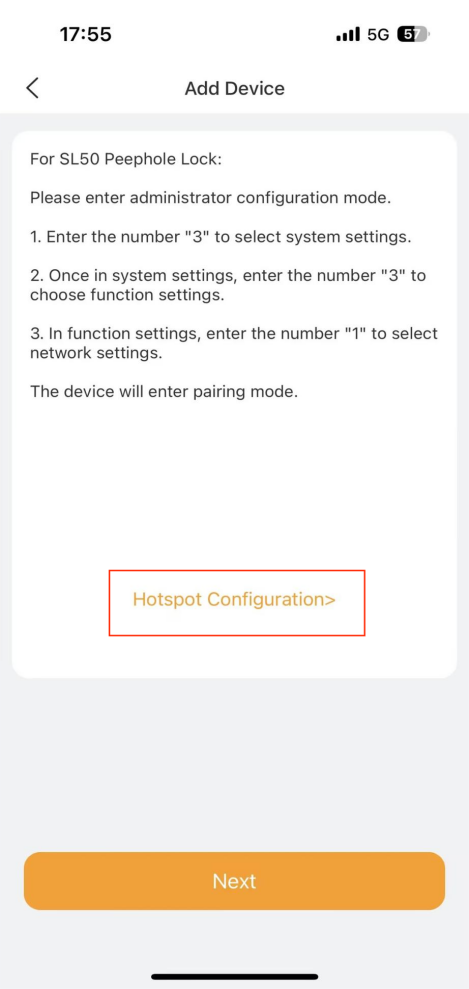
① Before adding the smart lock to the app, enable the network settings on the SL50 by following these steps:
Wake up the screen. Press * and # in sequence. Enter the administrator password, then press # to open the menu.
Select 3.System Settings > 3. Function Settings > 1. Network Settings.
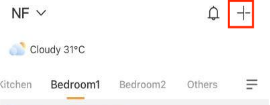
② Log into the BelaHome app, and click ![]() in the upper right corner to enter the device addition page.
in the upper right corner to enter the device addition page.
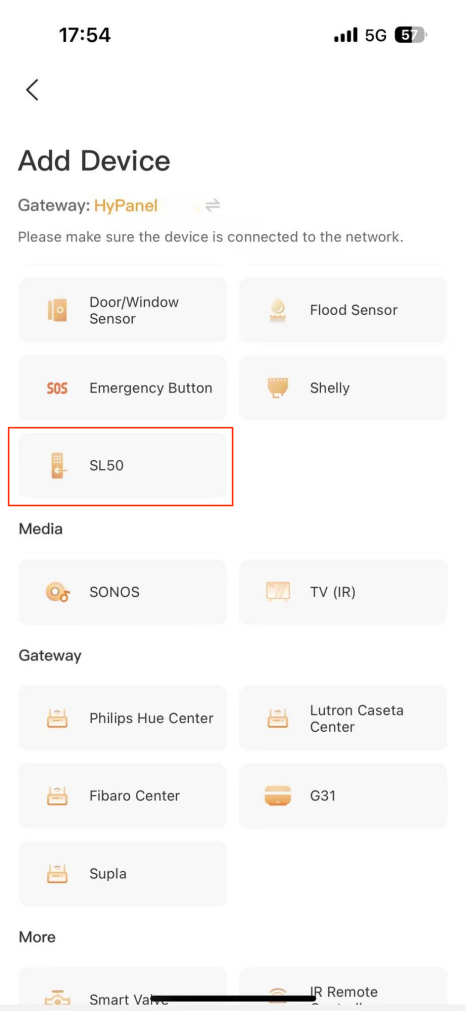
③ Select SL50 from the device list.
④ Tap Hotspot Configuration.
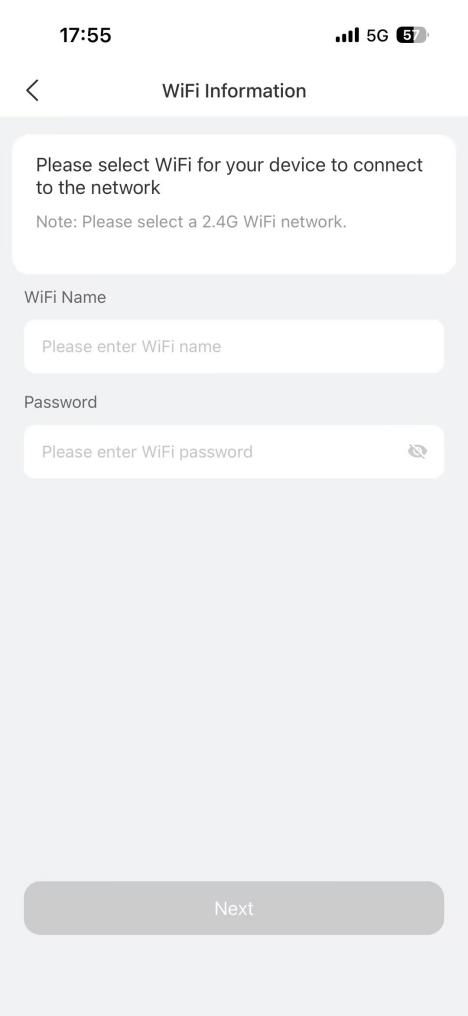
⑤ Tap Go Immediately to the Wi-Fi network list, and connect your phone to the hotspot named “SL50-macxxxx(the last 4 digits of its MAC address)”.

⑥ Select a Wi-Fi network. Note that the Wi-Fi network must be 2.4G. Otherwise, the subsequent network connection will fail.
TIP:
If your phone is Android system, tap to automatically open the Wi-Fi list. For iOS devices, click Next to enter the Wi-Fi name and password manually.
Once connected, its status will change to Online on the cloud.

4. Add ZigBee Devices
HyPanel can connect to various ZigBee devices, including sensors, emergency buttons, IR controllers, thermostats, smart switches, and more.
Let's take the Smart Motion Sensor as an example.
(1) Put devices in pairing mode
Before pairing ZigBee devices with HyPanel, you should know how to put them into pairing mode. Here are a few examples to guide you.
TIP:
For more help pairing additional devices, check our guide on Put ZigBee Devices into Paring Mode, or refer to their manuals.
ZigBee Device | Put it to Pairing Mode | |
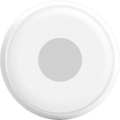
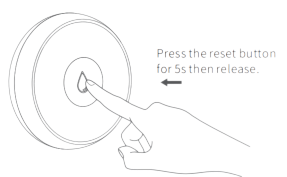
Smart Emergency Button
| Insert a pin into the reset hole at its back cover for at least 5s until the green light flashes quickly. |
|
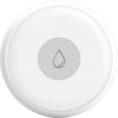
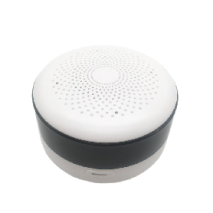
Smart Flood Sensor
| Press and hold the reset button on the front for at least 5s until the green light flashes quickly. |
|
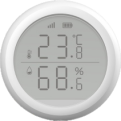
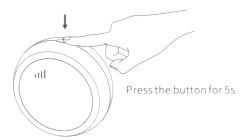
Smart Temperature and Humidity sensor
| Press and hold the reset button on the side for at least 5 s until the signal icon flashes quickly. |
|
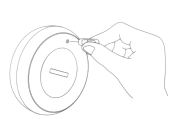
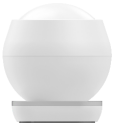
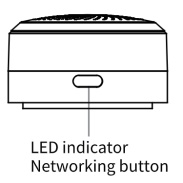
Smart Motion Sensor
| 1. Rotate the battery cover anticlockwise to open. 2. Press and hold the reset button for at least 5s until the green light flashes quickly. |
|
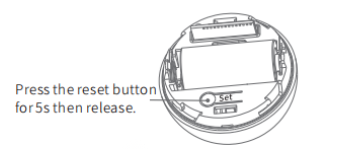
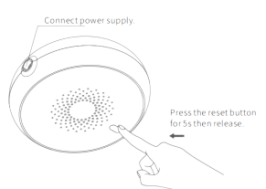
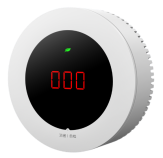
Smart Gas Sensor
| Press and hold the reset button on the front for at least 5s until the green light flashes quickly. |
|
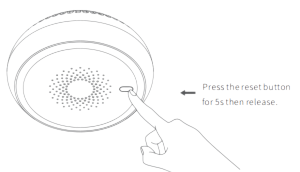
Smart Smoke Sensor
| Press and hold the reset button on the front for at least 5s until the green light flashes quickly. |
|
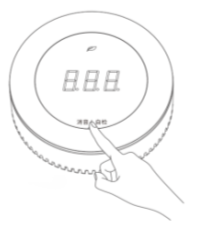
Smart CO Sensor
|
|
|
IR Controller
|
|
|
Smart Motion Sensor - Design B | 1. Rotate the battery cover anticlockwise to open. 2. Press and hold the reset button for at least 5s until the green light flashes quickly. |
(2) Add ZigBee devices
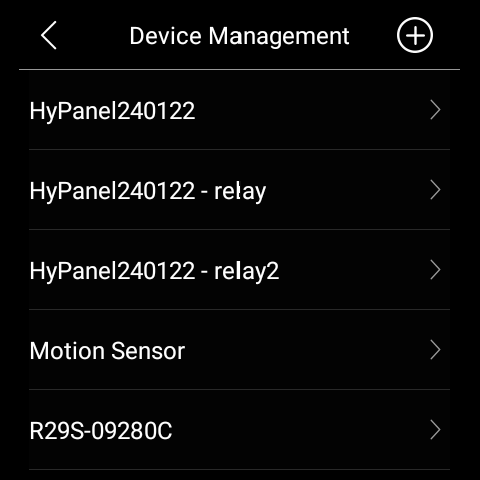
① Swipe down from top edge of any screen, and tap  > Device Management >
 to search for nearby ZigBee devices automatically.

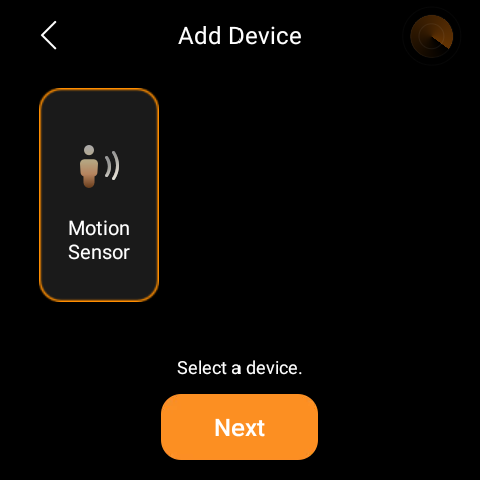
② Put the desired Zigbee device into pairing mode. The screen displays the searched device. Select it, and tap Next.
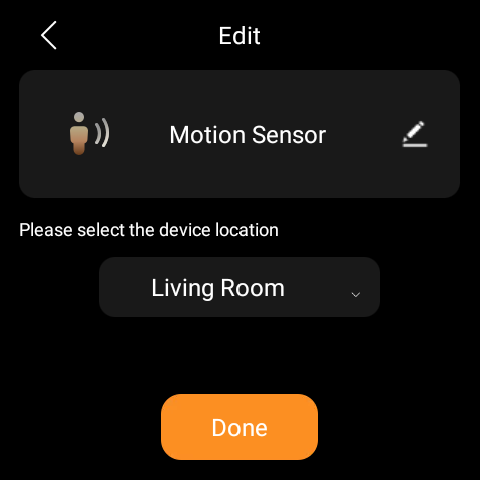
③ Name the device and choose its installation location and tap Done.
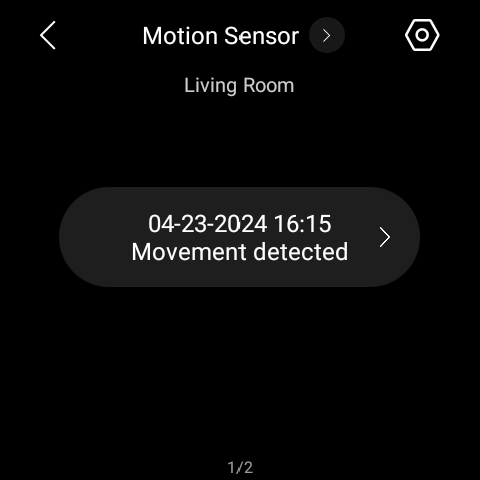
④ The newly added device will be shown on both Device Management screen and the corresponding category screen.

5. Add Third-party Smart Devices
You can add or delete third-party smart home devices, such as Philips Hue, Ring video doorbell, Ecobee thermostat, Lutron Caseta, TP-Link Kasa, Sonos, and more, via the user web portal (click ![]() > Add Device > Select device type, choose a panel, and then the device type) or the BelaHome App (tap the Add button on the Home screen, then select the device type).
> Add Device > Select device type, choose a panel, and then the device type) or the BelaHome App (tap the Add button on the Home screen, then select the device type).
6. Custom Settings
(1) Configure Scenes
For the home, we can configure the following scenes:
Entryway: Set up scenes for Welcome Home, Leave Home, and All off.
Bedrooms: Set up scenes for Reading and Sleep.
The following are two types of scenes:
A scene only with auto condition(s) is a scene set to be activated based on a schedule or an event.
NOTE:
This type of scenes are not displayed on the HyPanel screen.
A scene with the manual condition is a scene set to be activated based on a tap or click on the scene card.
Example:
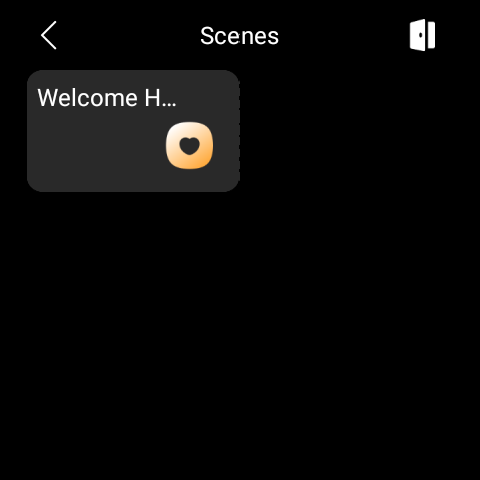
Scene name: Welcome Home
Condition: Press the designated scene card on the HyPanel’s Scenes screen
Task: Turn on the living room light, activate the thermostat, and open the shades
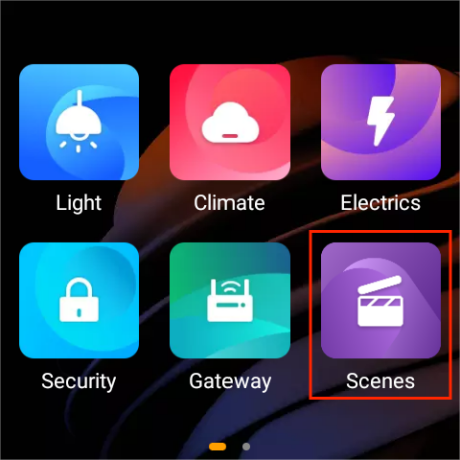
Configuration path: On the user web portal, click
 > Add Scene
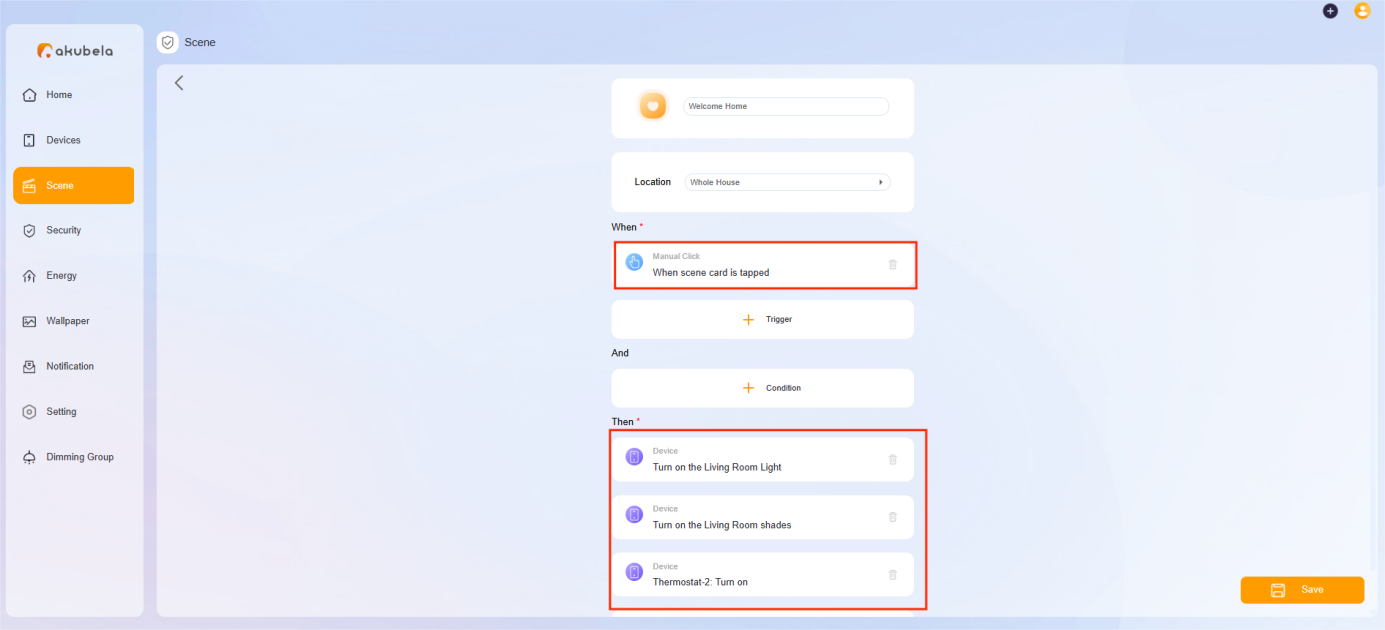
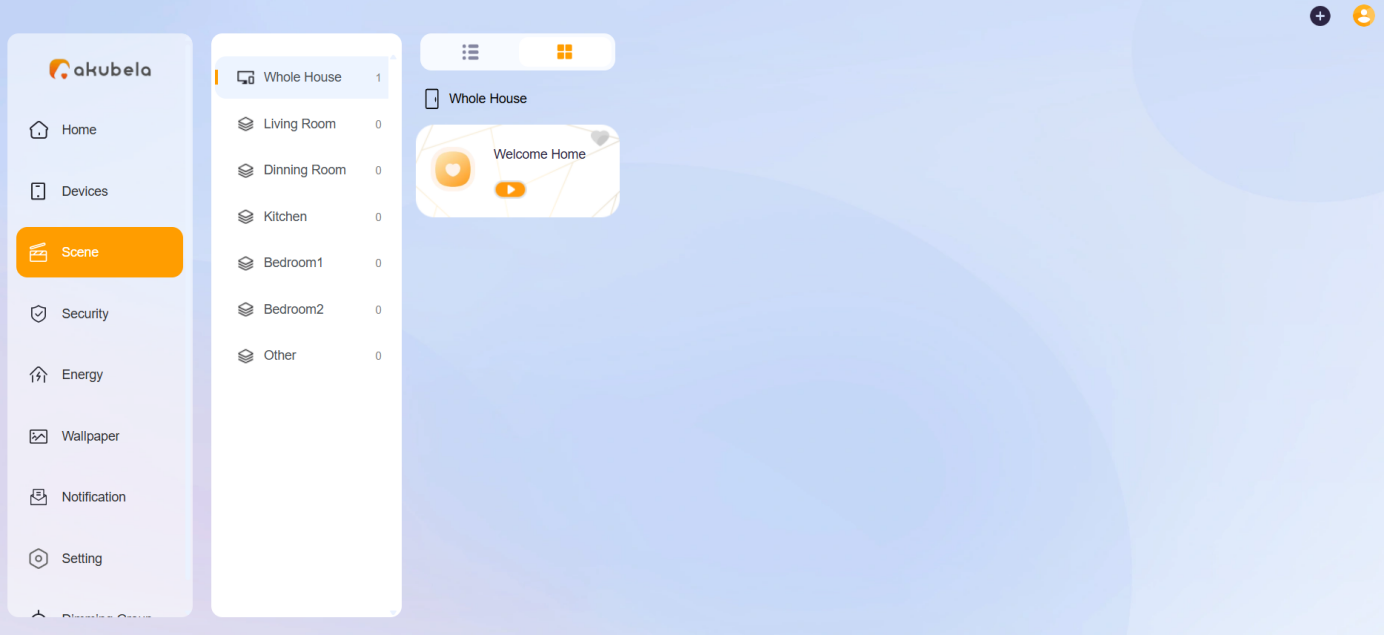
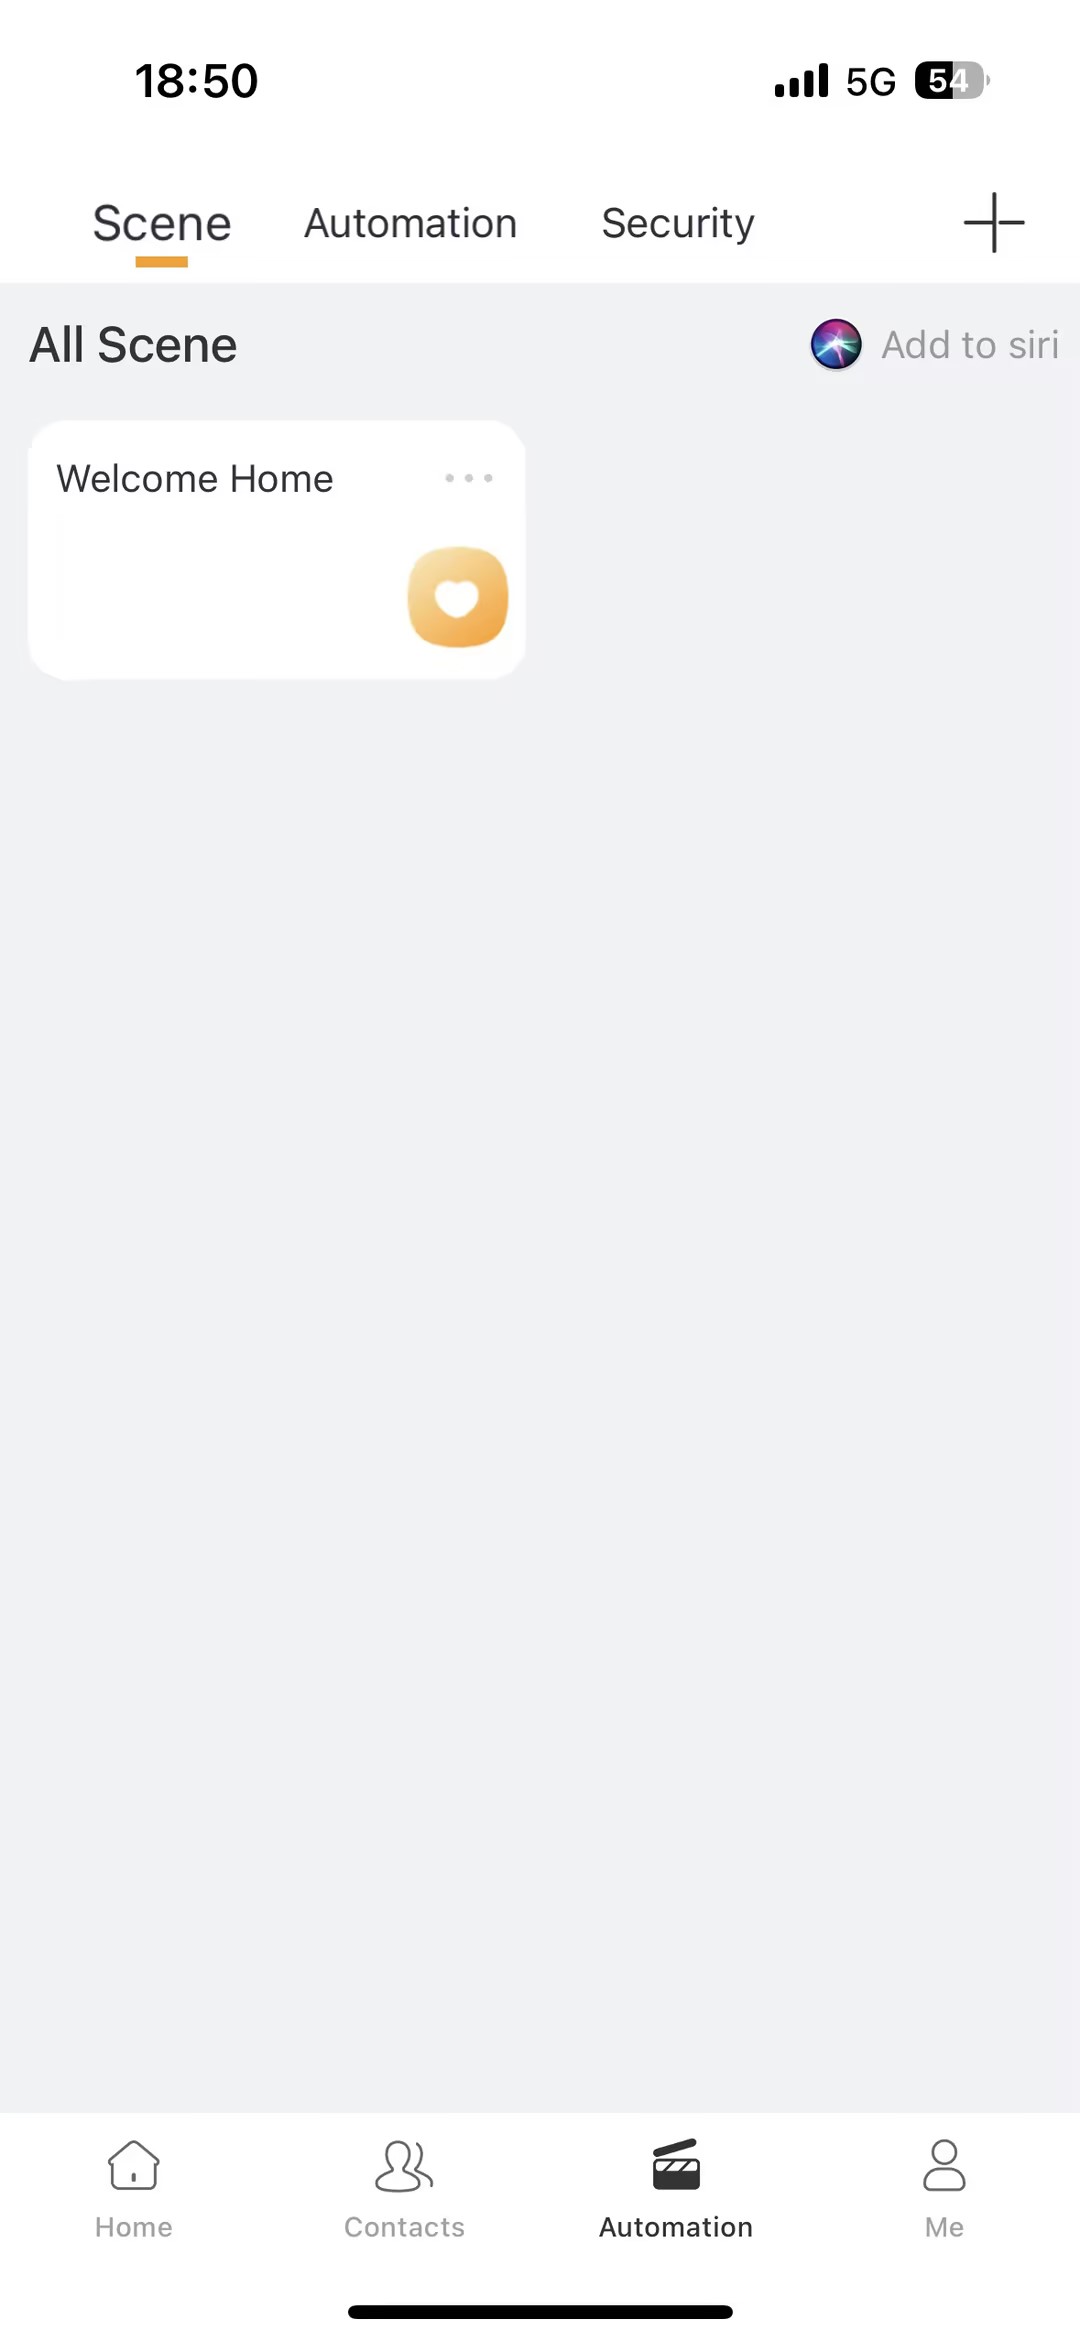
Once completed, the scene will appear in the user web portal’s Scene interface, Scene screen of HyPanel devices, and the BelaHome app’s Automation screen. You can click it to trigger the tasks.

(2) HyPanel UI Configurations
The settings include hiding unnecessary devices or spaces, as well as displaying family photos.
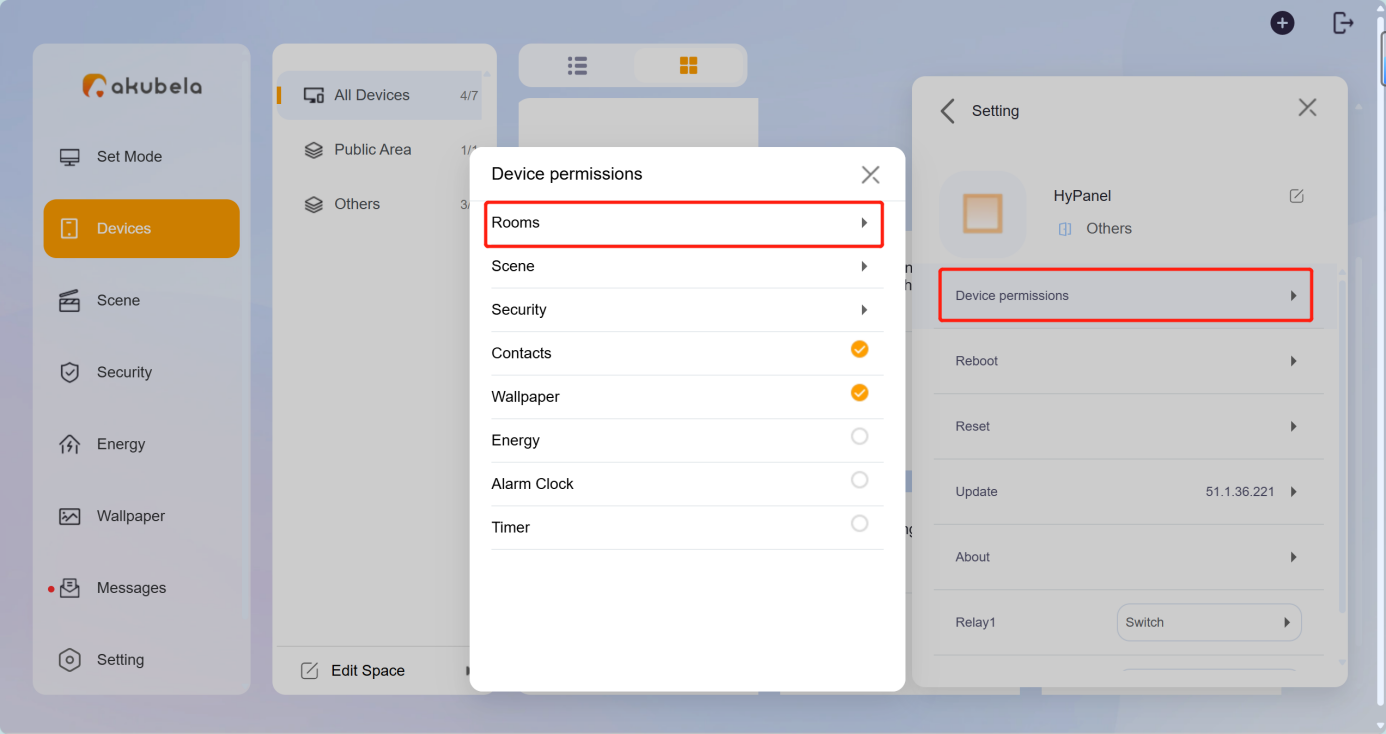
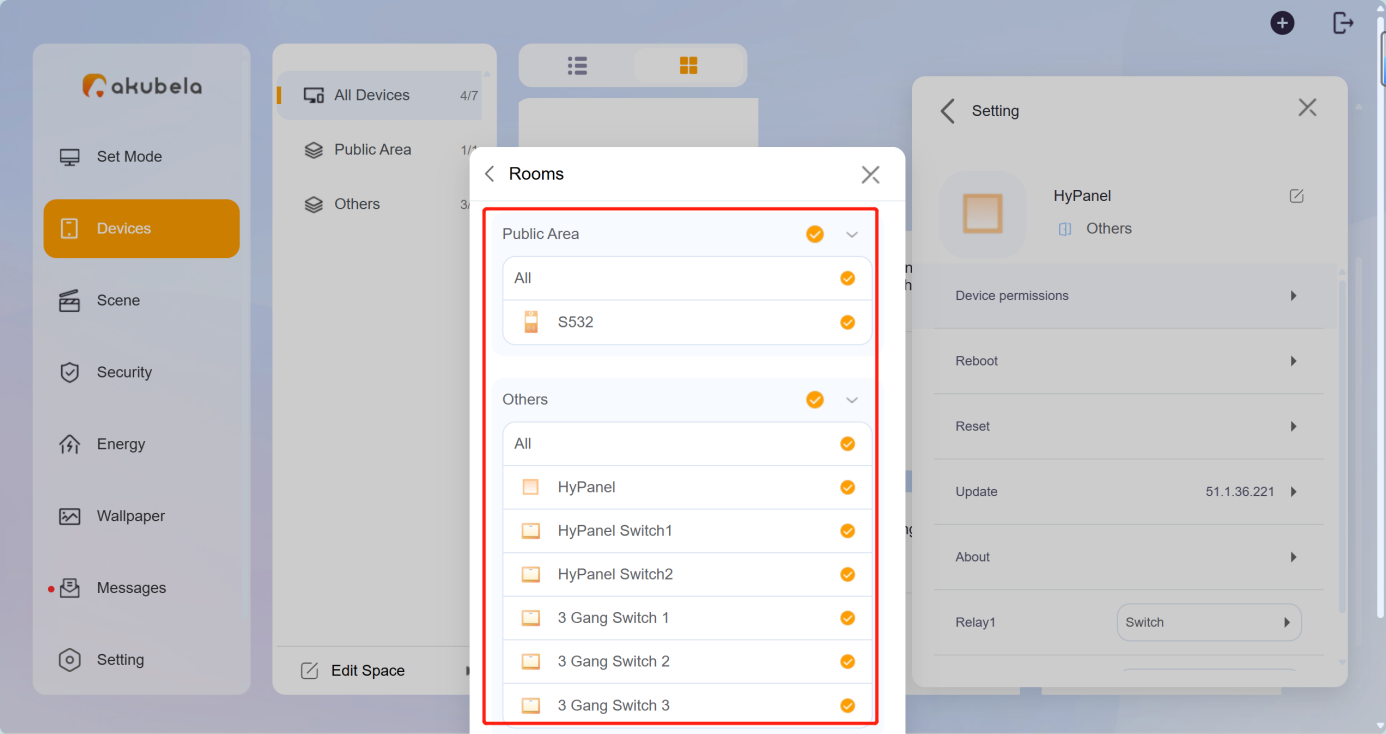
① Hide unnecessary devices or spaces
To display or hide rooms or devices in a room via the device web portal: Select the desired HyPanel device, and click > Device Permissions > Rooms.
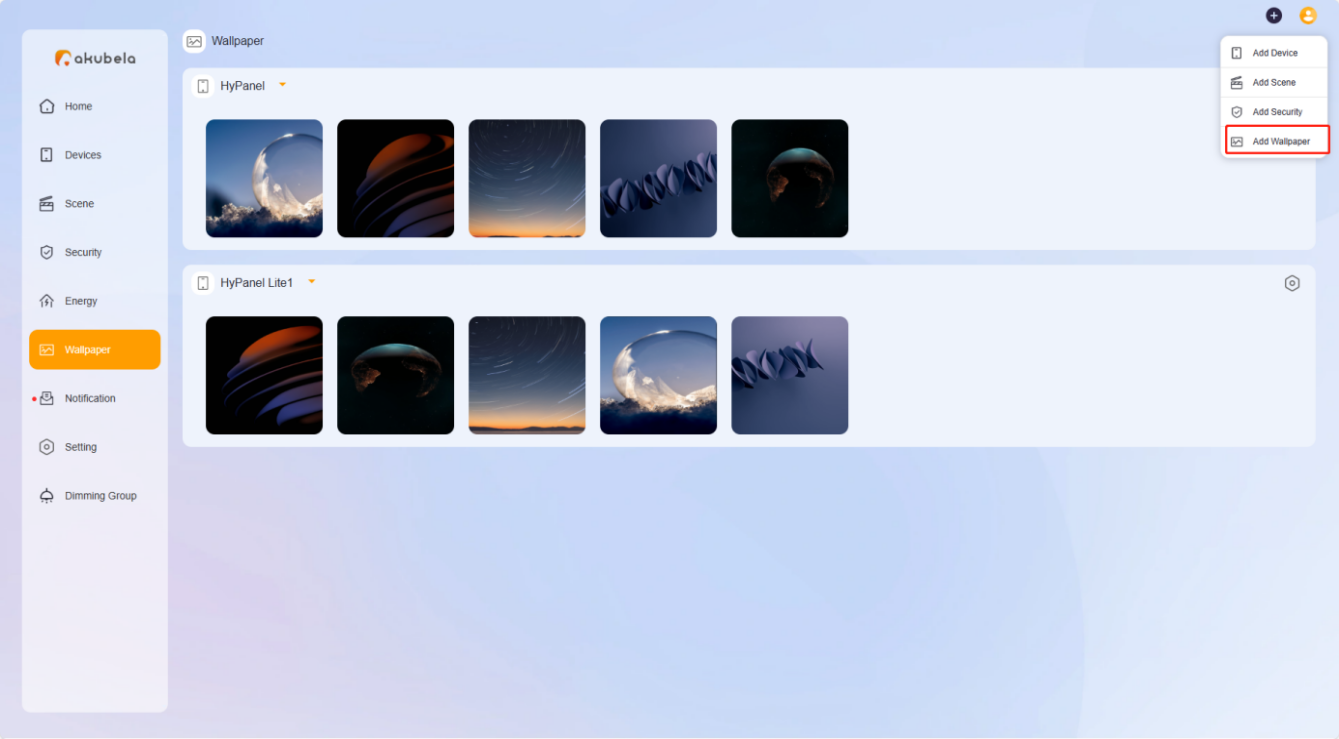
② Display family photos
Click ![]() > Add Wallpaper, and add the photos to the desired panel.
> Add Wallpaper, and add the photos to the desired panel.
③ The added photos will appear in the Wallpaper interface of the user web portal, and be sent to the selected panel.
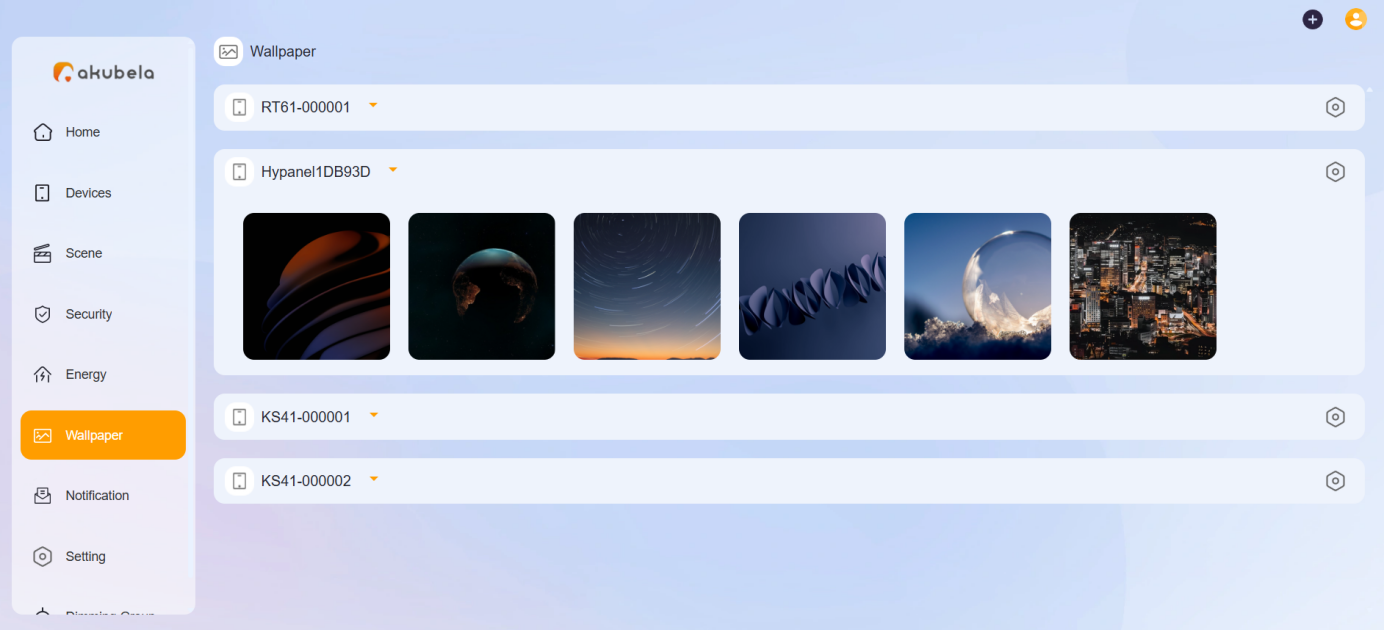
NOTE:
To send the added photo to other devices of the same model, click
> Send to Device on the Wallpaper interface of the user web portal.
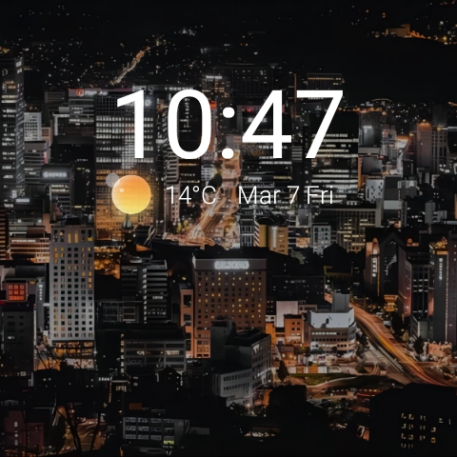
To display photos on the selected panel, go to the panel’s
> Display > Screen Saver Style, and select the Photo Wall style.
7. Download App and Use
(1) Download BelaHome App
Android: Search BelaHome in the Google Play Store.
iOS: Search BelaHome in the App Store.
(2) Log into the App
The login credentials will be sent to the administrator's email address registered on akubela Cloud. Users can log in using the following methods:
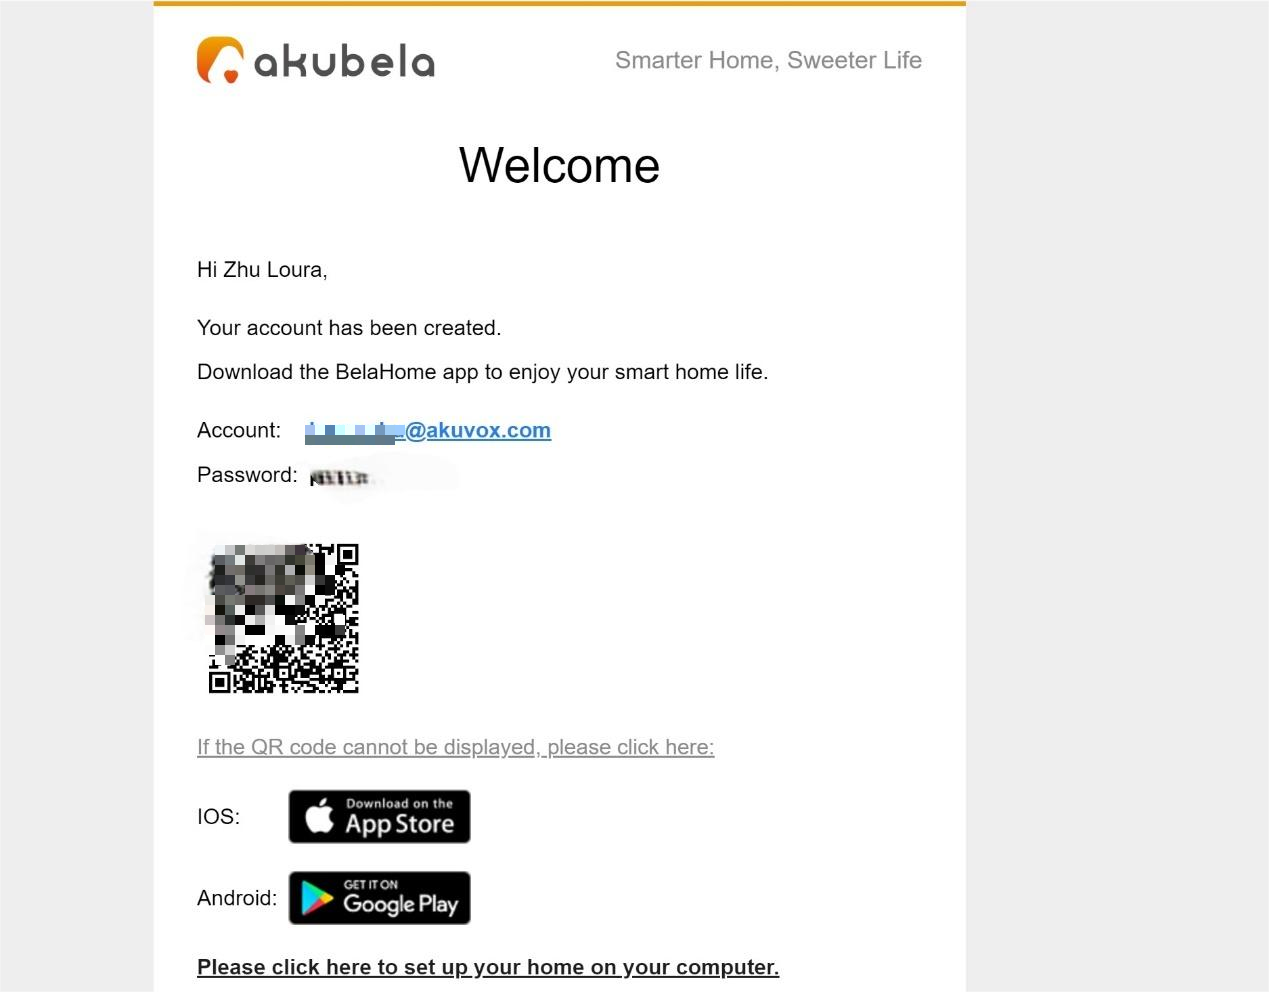
Scan the QR.
Log in with the account credentials.
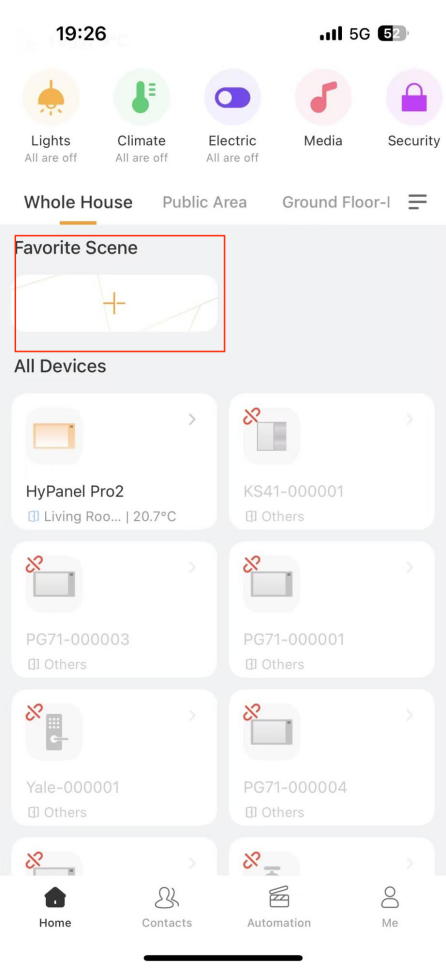
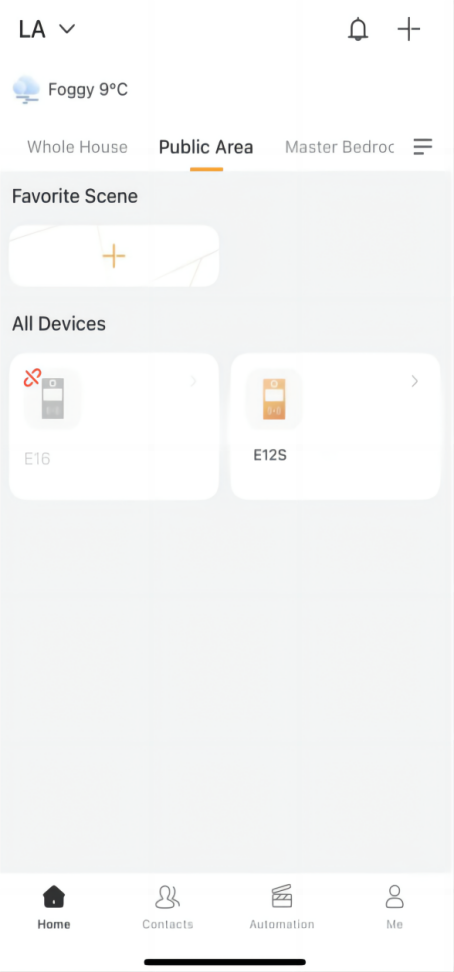
(3) Use the App
Here are some frequently used functions, which can be saved for quick access.
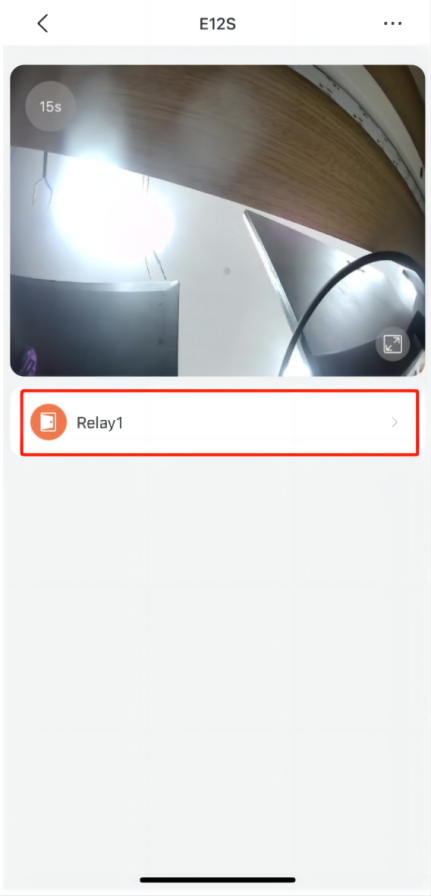
Unlock the door.
For door phones
① Tap the corresponding device on the Home screen.
② Tap the unlock button.
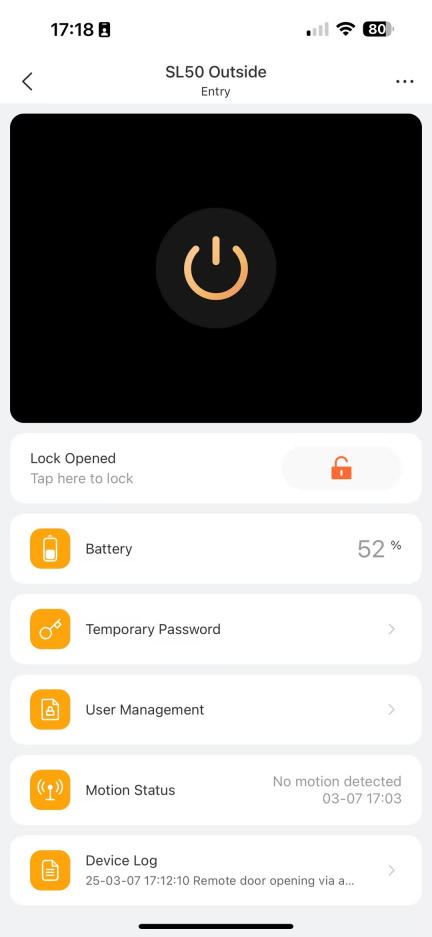
For SL50
Select the SL50 device and tap the unlock button.
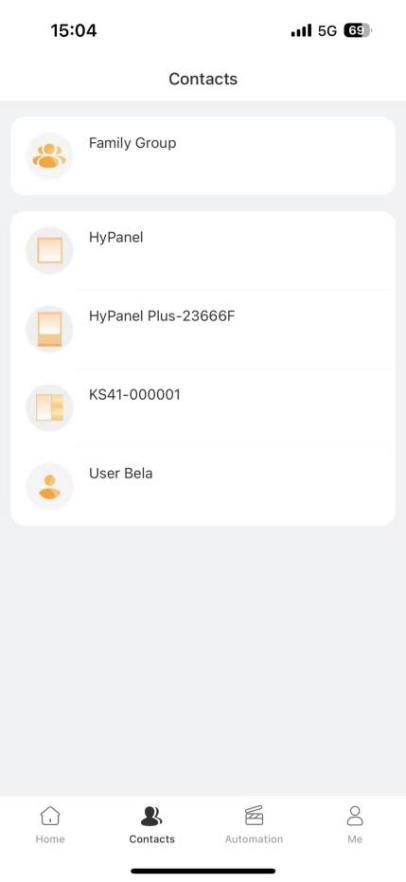
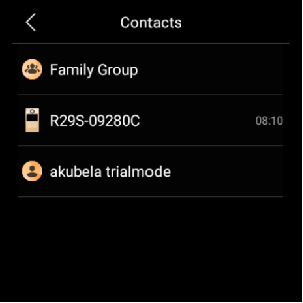
Make calls
Tap Contacts, enter the desired device, and tap  .
.
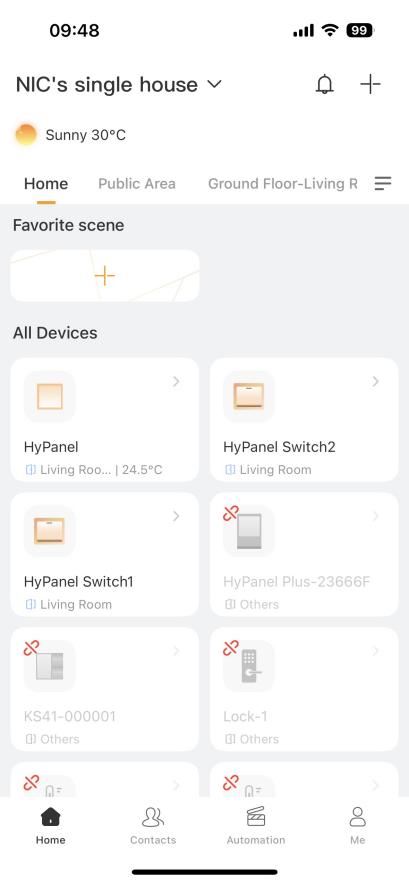
Turn on/off devices
Tap the desired device on the Home screen.
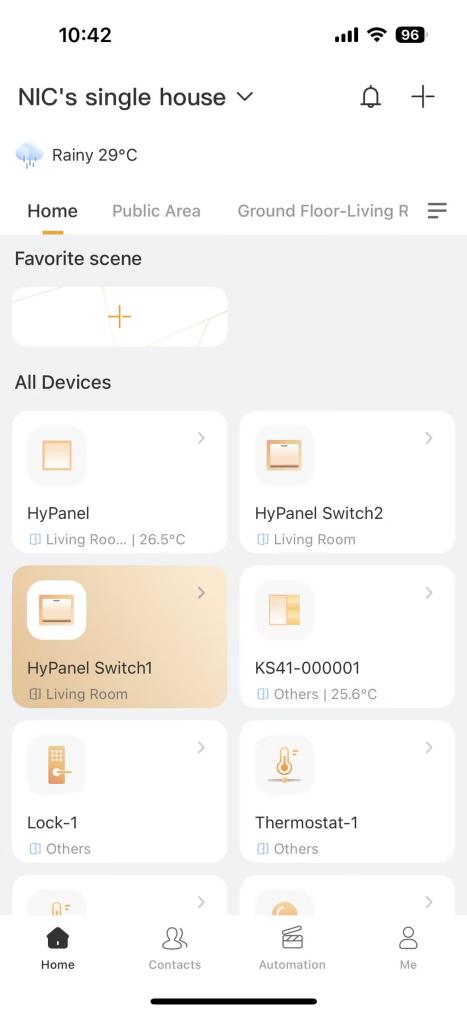
Activate scenes
Tap Automation, and tap the scene card to trigger the task, which can be added to the home screen for quick access.

Check Notifications
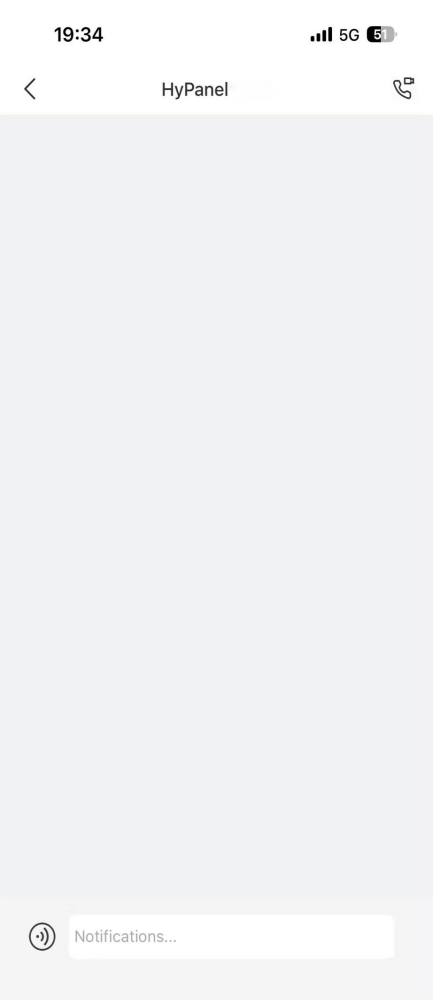
To view contact’s messages
Go to Contacts, select a contact, and the messages and call logs display.
To view system notifications
Go to the Home screen, and tap![]() in the upper right corner.
in the upper right corner.
TIP:
For more functions, refer to the BelaHome App User Guide.
Configure Devices Locally, then Connect to the Cloud
When devices are not connected to the akubela Cloud, you can choose Local mode during initial setup. In this mode, all devices in a home connect within the same local area network.
1. Configure devices locally
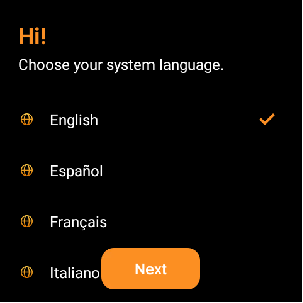
(1) Select the language.
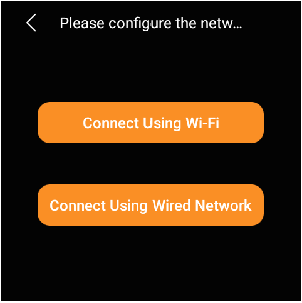
(2) Connect the panel to either a wireless or wired network.
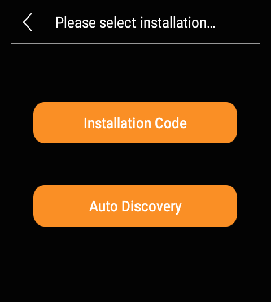
(3) Select Local Installation Mode (or Auto Discovery Mode in the some versions).
(4) Select a device role.
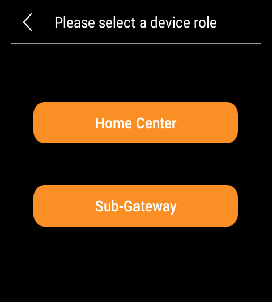
Home Center:
Only one in a home, serving as the main control hub for all devices.
Sub-gateway:
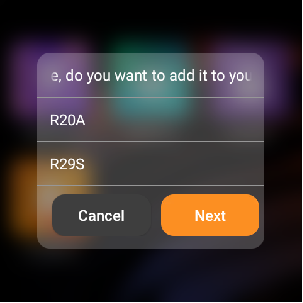
When selecting it, the system will automatically detect the existing home in the same LAN, then select and join it. If no home is detected or you choose to skip, the device will function as an independent sub-gateway.


After installation, the HyPanel will automatically detect door phones within the same LAN, and click the detected one to add.
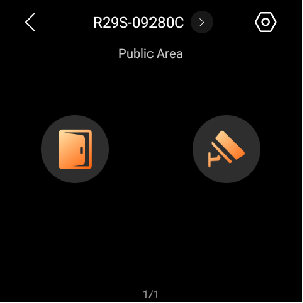
The added door phone will appear in Security screen(for unlocking doors and monitoring) and Contacts screen(for one-on-one calls).
2. Connect Devices to the Cloud
You can connect the devices in the Local mode to the cloud:
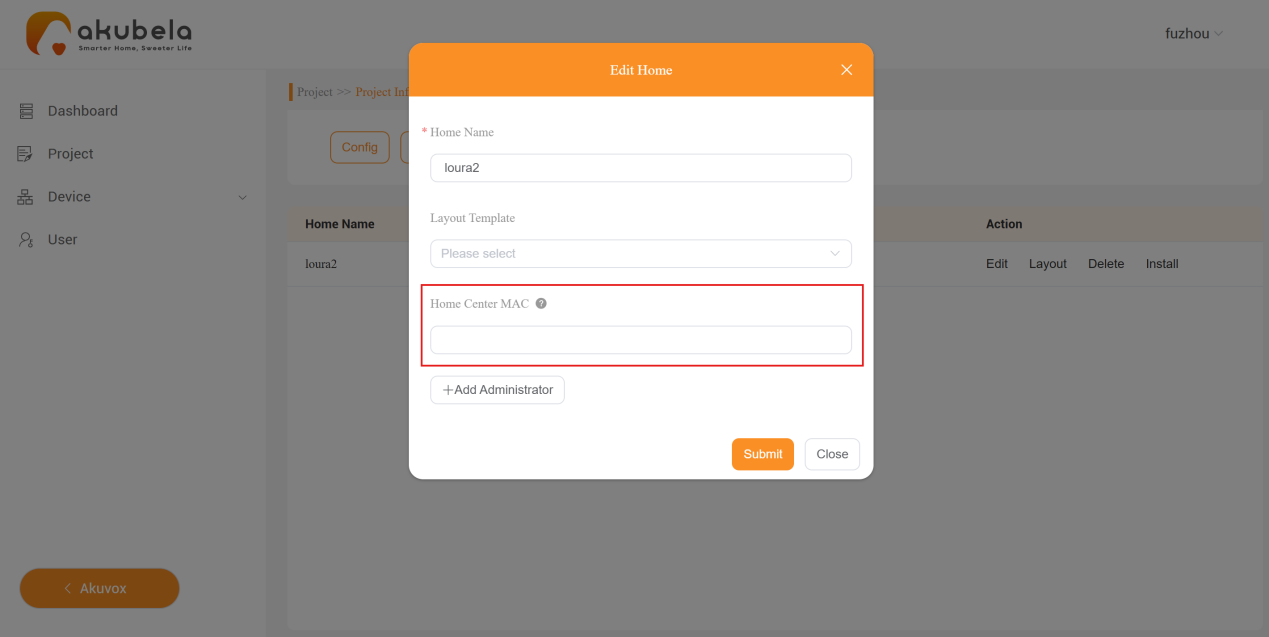
(1) Go the akubela Cloud.
(2) Click Project >Community > Detail > Edit, enter the home center device’s MAC address, the devices will be connected to the cloud automatically without installation codes. For other settings, follow the same process above.
TIP:
To create family member accounts, refer to this guide.