This manual is intended for installers who need to manage companies, personnel, devices, and more on the MySmart Server.
Update Time: September 2026
System Overview
You can use this platform to:
Add, edit, and delete companies, devices, administrators, and personnel.
Deploy and set up devices and doors for access control.
Check and upgrade device firmware.
Check and manage the MAC library.
Conduct remote operations such as auto-provisioning, device reboot, transmission type modification, and remote maintenance.
Manage sub-installer accounts.
Login
You can log in to the cloud platform using the account obtained from your distributor.
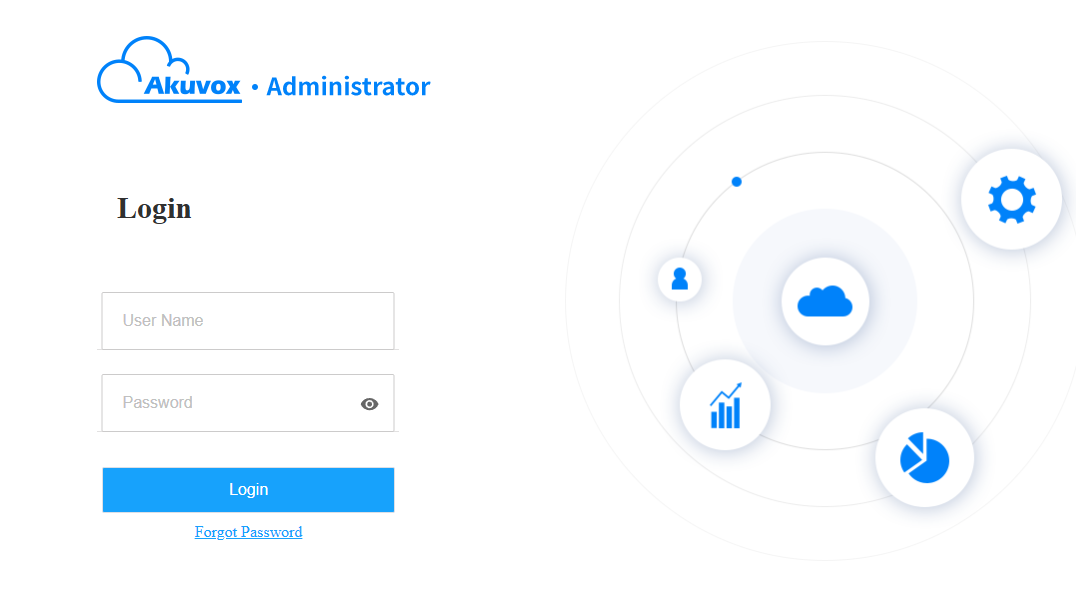
Navigate to the server address in a browser.
Enter your username and password.
Click Login.
Note
Enter a verification code for login if your distributor enables two-factor authentication.
Log Out
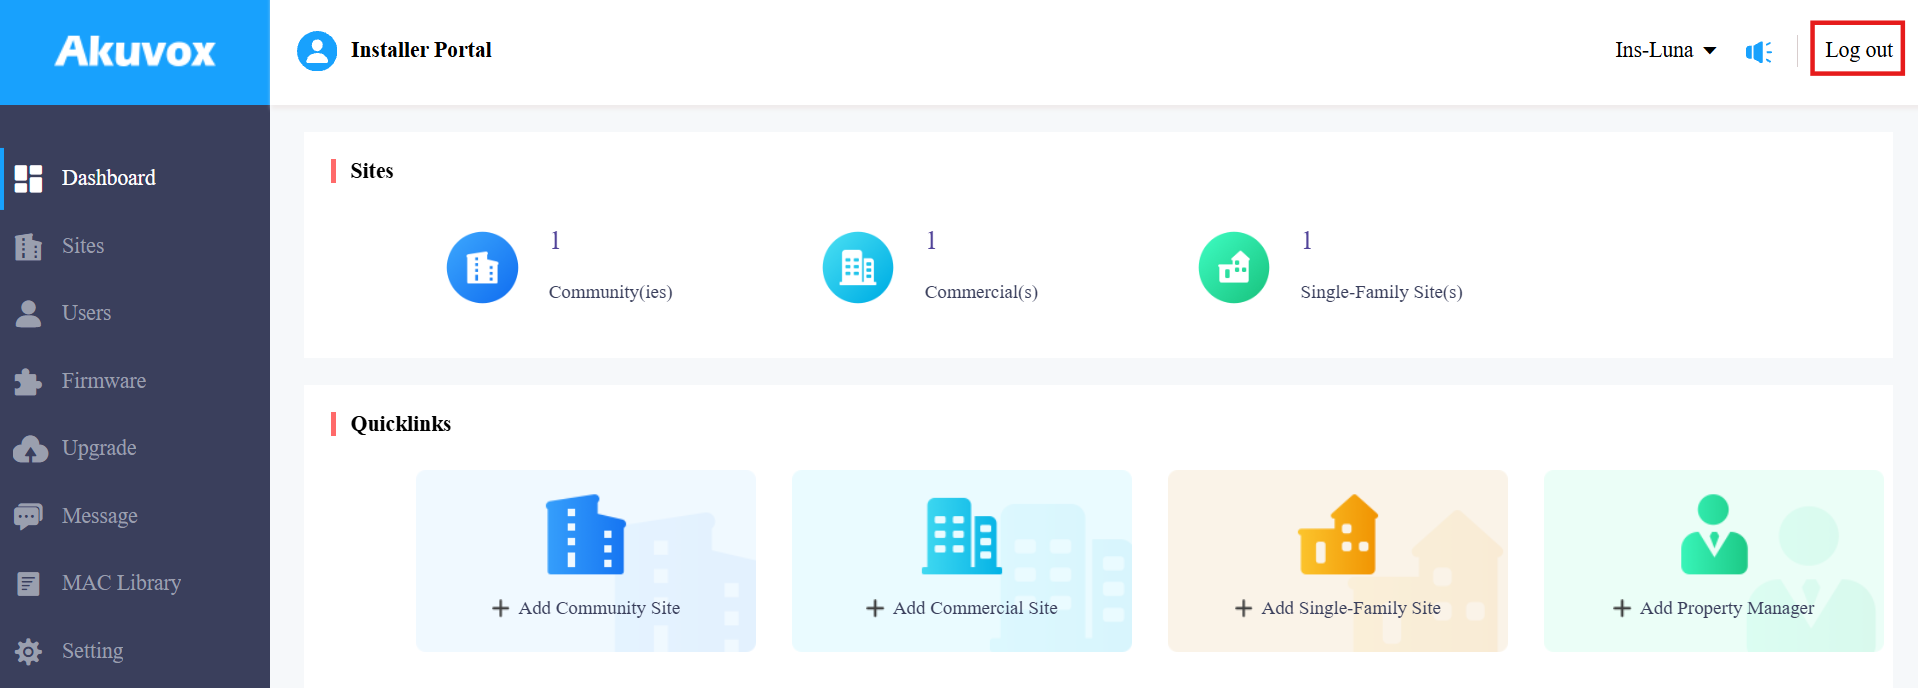
Click Log out in the upper-right corner to exit the system.
Email Confirmation
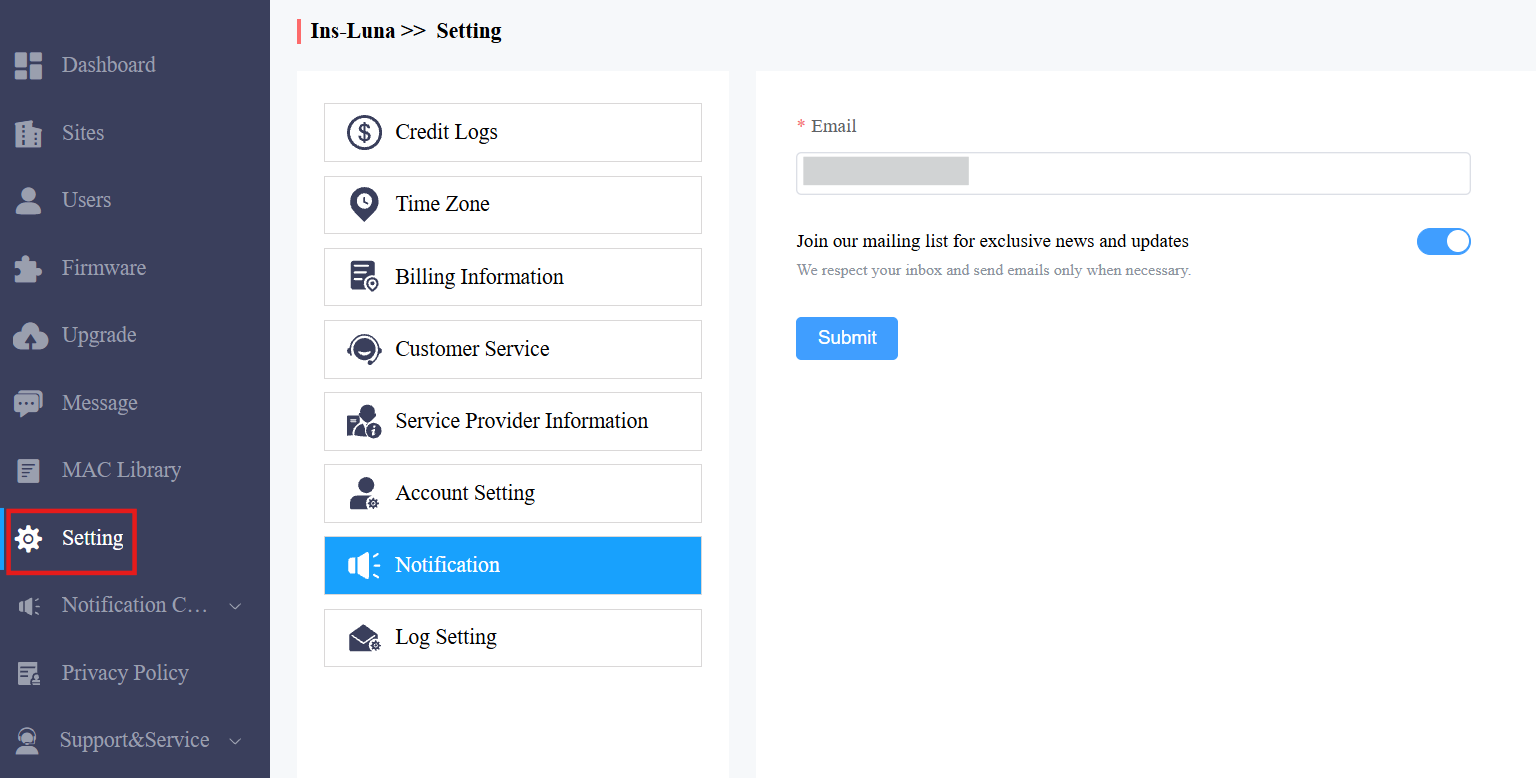
You are required to enter an email address when you log in for the first time.
The email address is used to reset your login password and to receive notifications from Akuvox.
You can change the email address and turn off the notification push on the Setting > Notification interface.
Prior to Management
It is advised that you go through what is listed below before starting your management.
Check if all device MAC addresses have already been registered by your distributor.
Check if the device is powered on and is connected to the internet, and make sure that the network is normal.
Check and make sure that the user information and device information are correct.
Dashboard
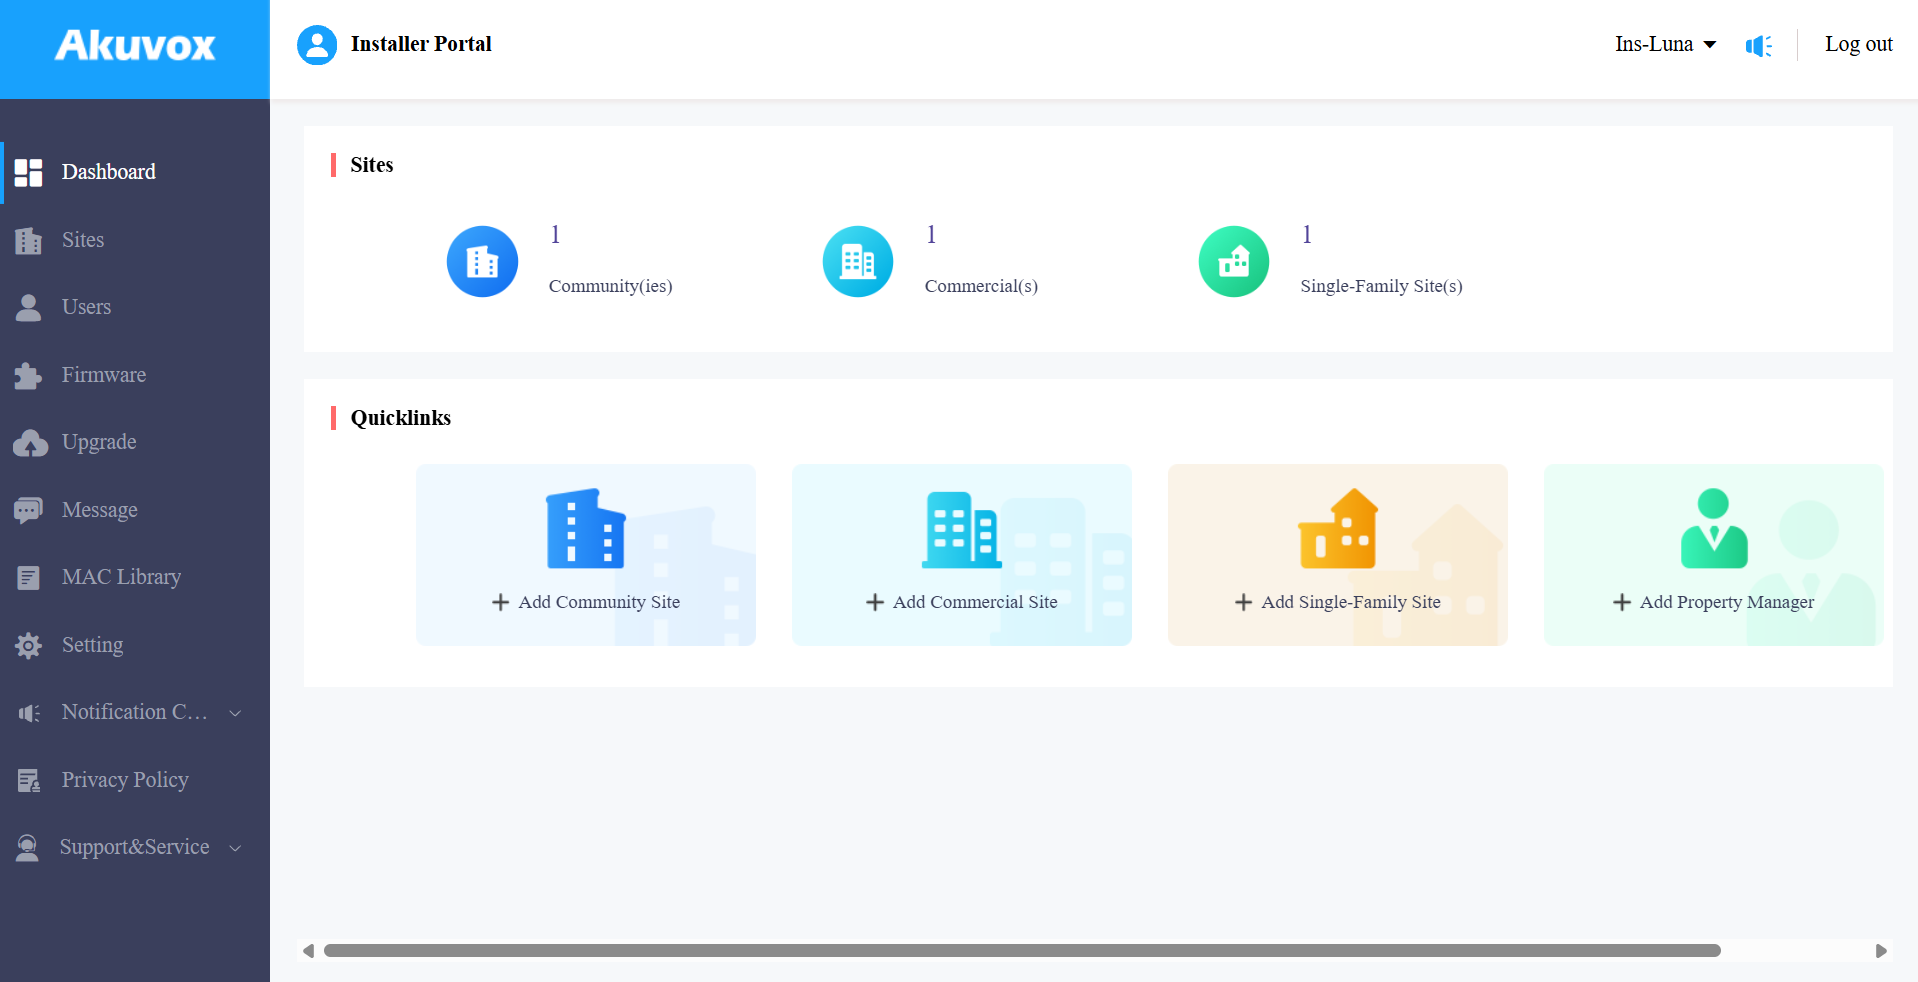
The functional columns allow you to manage sites, users, devices, and account settings in an organized manner.
Module Description:
Modules | Description |
Dashboard | Have quick access to create projects and project manager accounts, and a quick view of devices and MySmart App account status. |
Sites | Click to go into specific project management. |
Users | Add, edit, and delete property managers and sub-installer accounts. |
Firmware | Check the available firmware versions and their information. |
Upgrade | Upgrade the firmware version for a specific device. |
Message | Create messages and send them to target users. |
MAC Library | Check the device MAC registered by your distributor. You can remove the desired MAC. |
Setting | Set up time, account settings, etc. |
Site Management
Add a Site
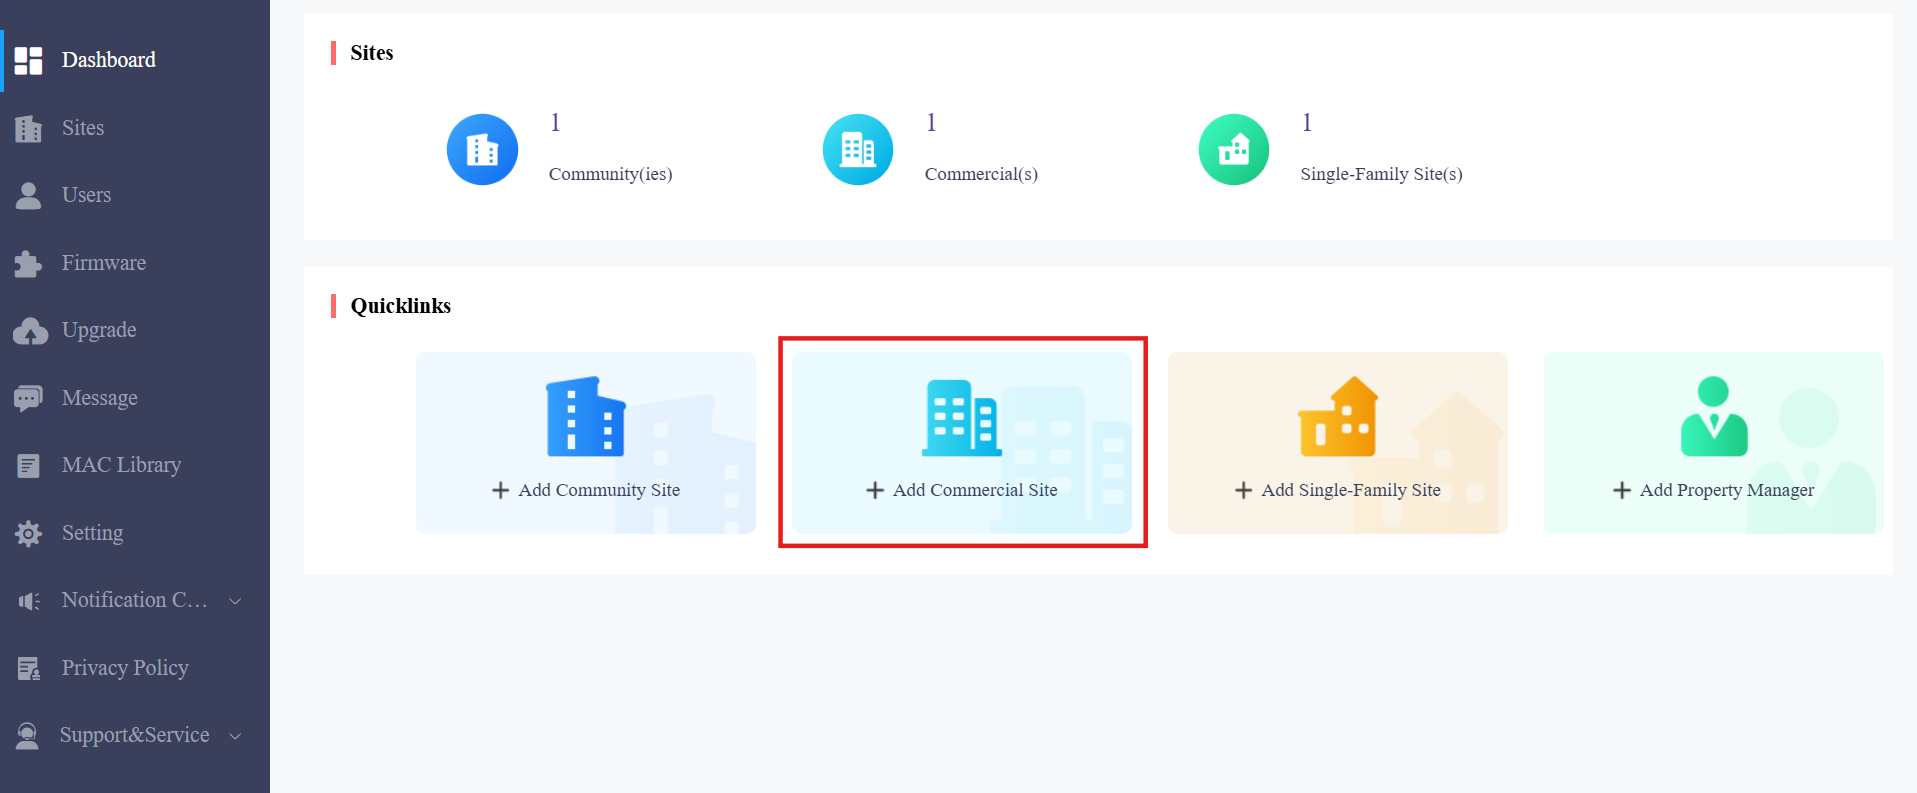
Add sites on the Site module or through the Quicklinks on the Dashboard.
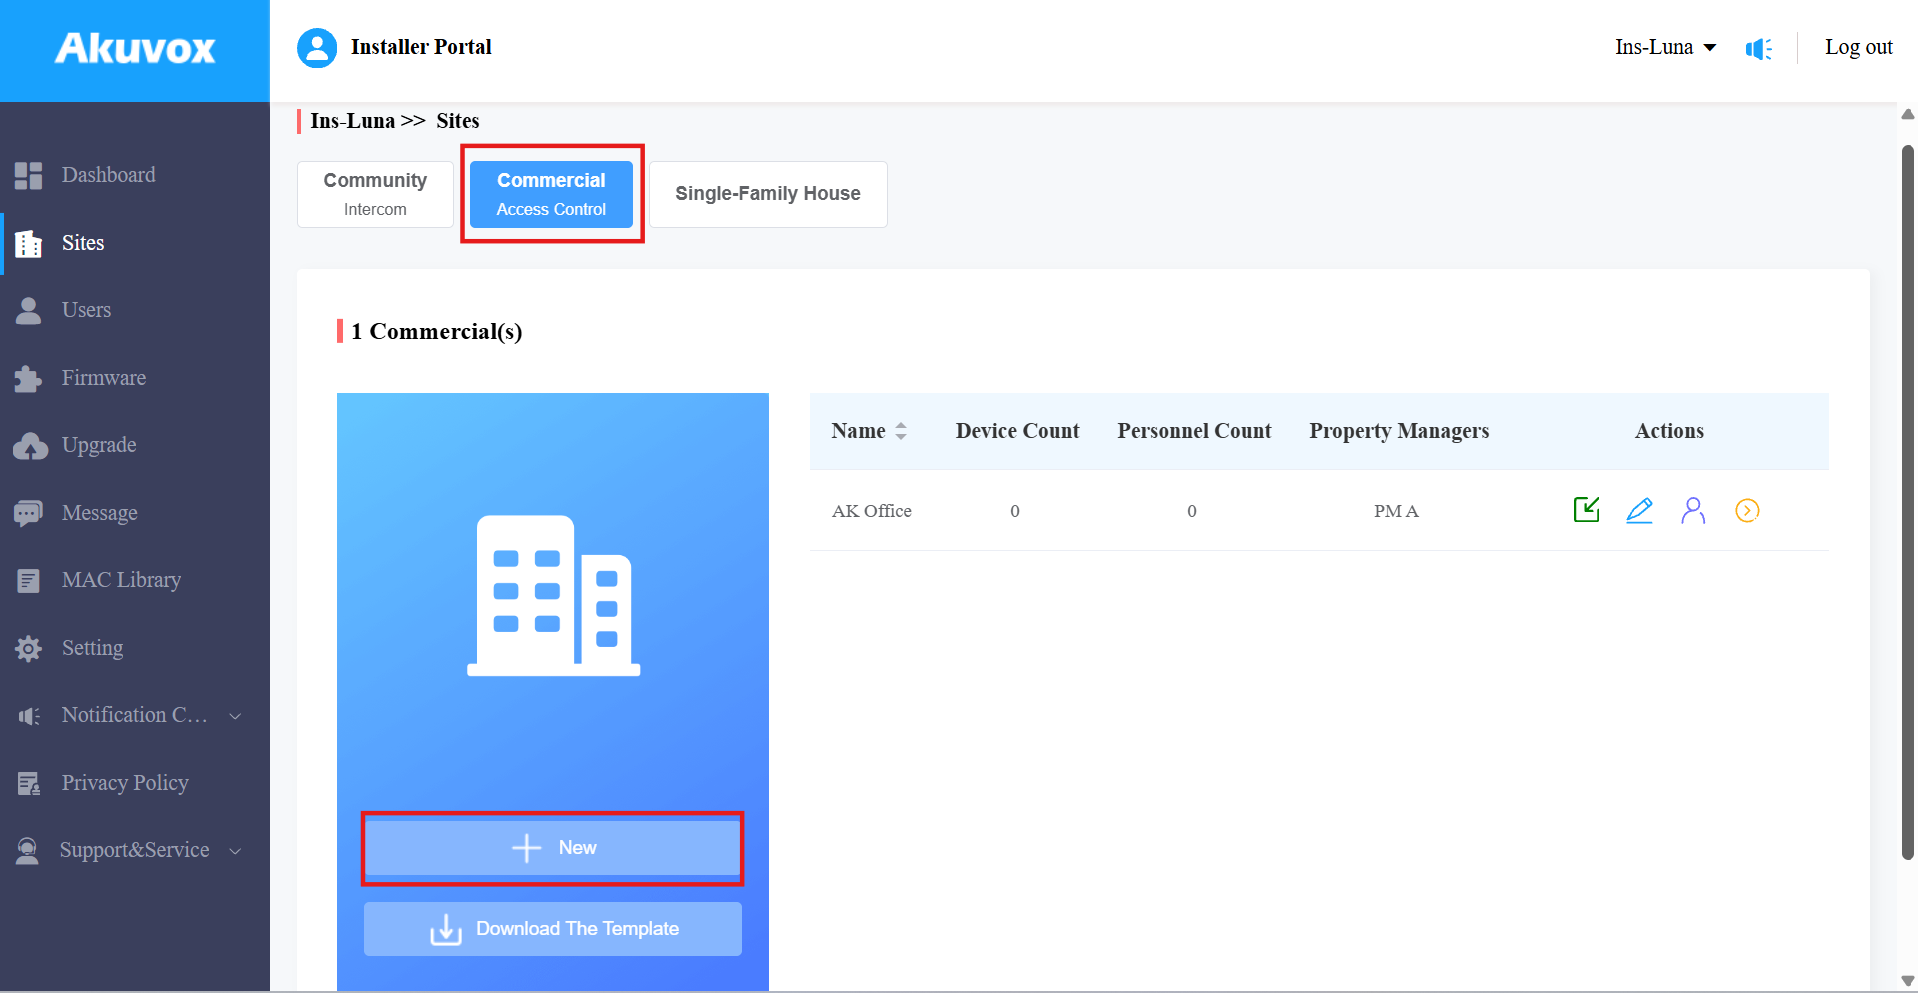
On the Sites module,
Select Commercial and click +New.
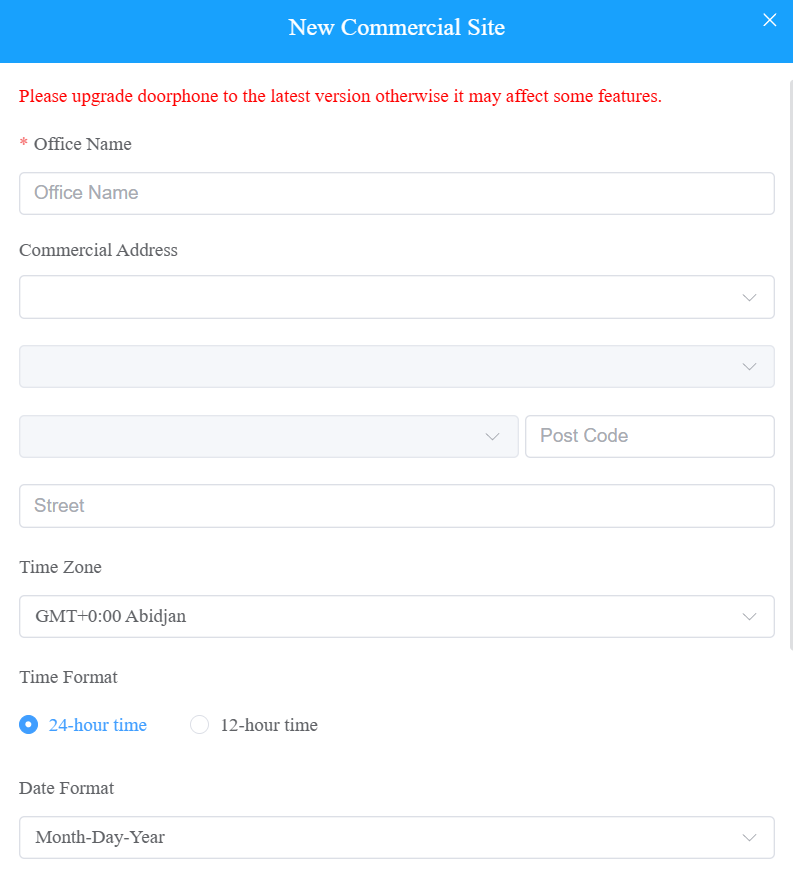
Set up the project. See details in the chart below.
Item Name | Description |
|---|---|
Office Name[Mandatory] | The site name. |
Commercial Address | The site address. |
Time Zone | The time zone of the site. |
Time Format | Select the time format. |
Date Format | Select the date format (Y/M/D; M/D/Y; D/M/Y). |
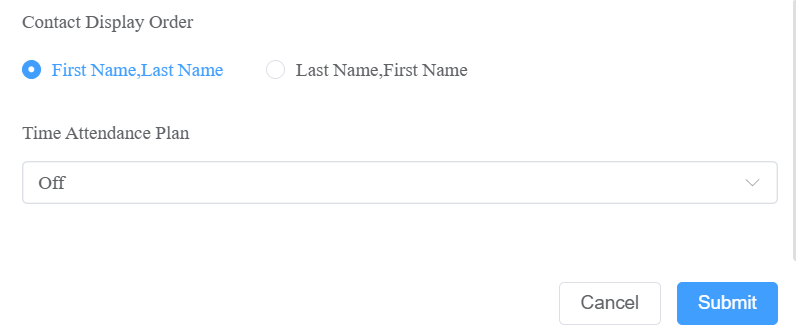
Contact Display Order | Select First Name, Last Name, or Last Name, First Name to determine the display order of usernames on the device contact list. |
Time Attendance Plan | Time Attendance Plan:
|
Submit the setting.
Edit and Delete Sites
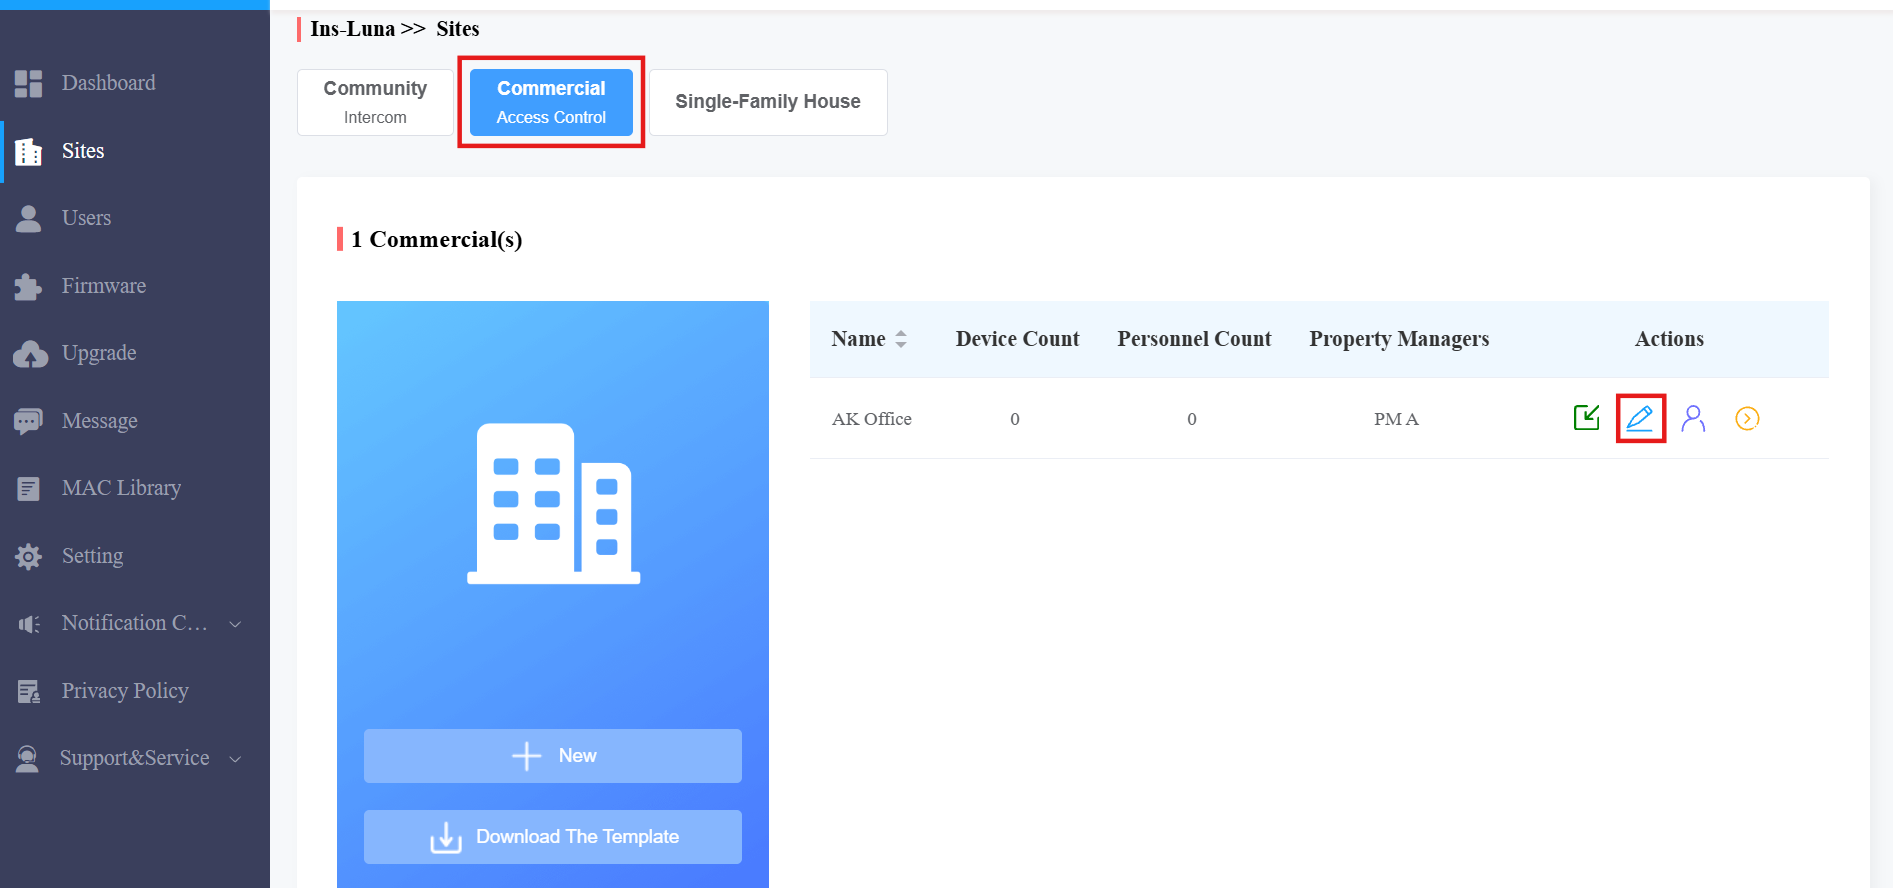
On the Sites module, click
 of the desired site.
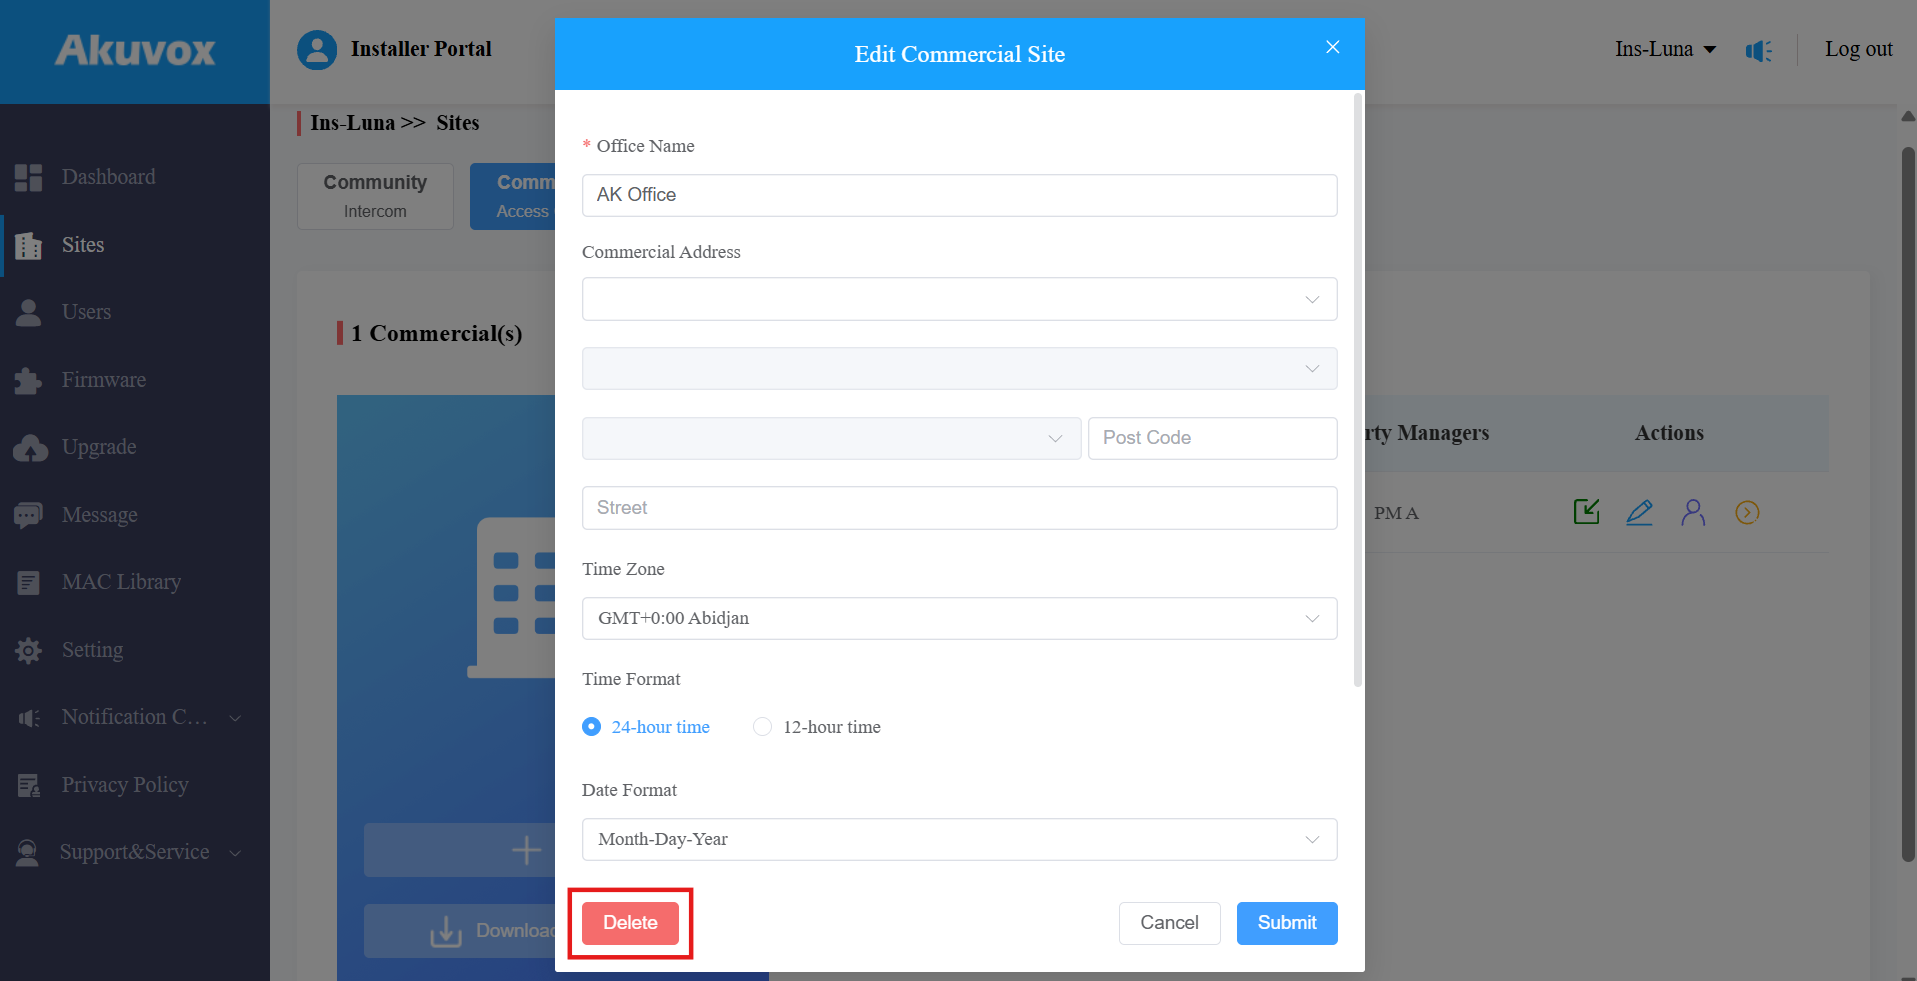
To delete the site, click Delete at the bottom.
Batch Import Devices and Personnel to Sites
You can use templates to improve the efficiency of adding devices and personnel to sites.
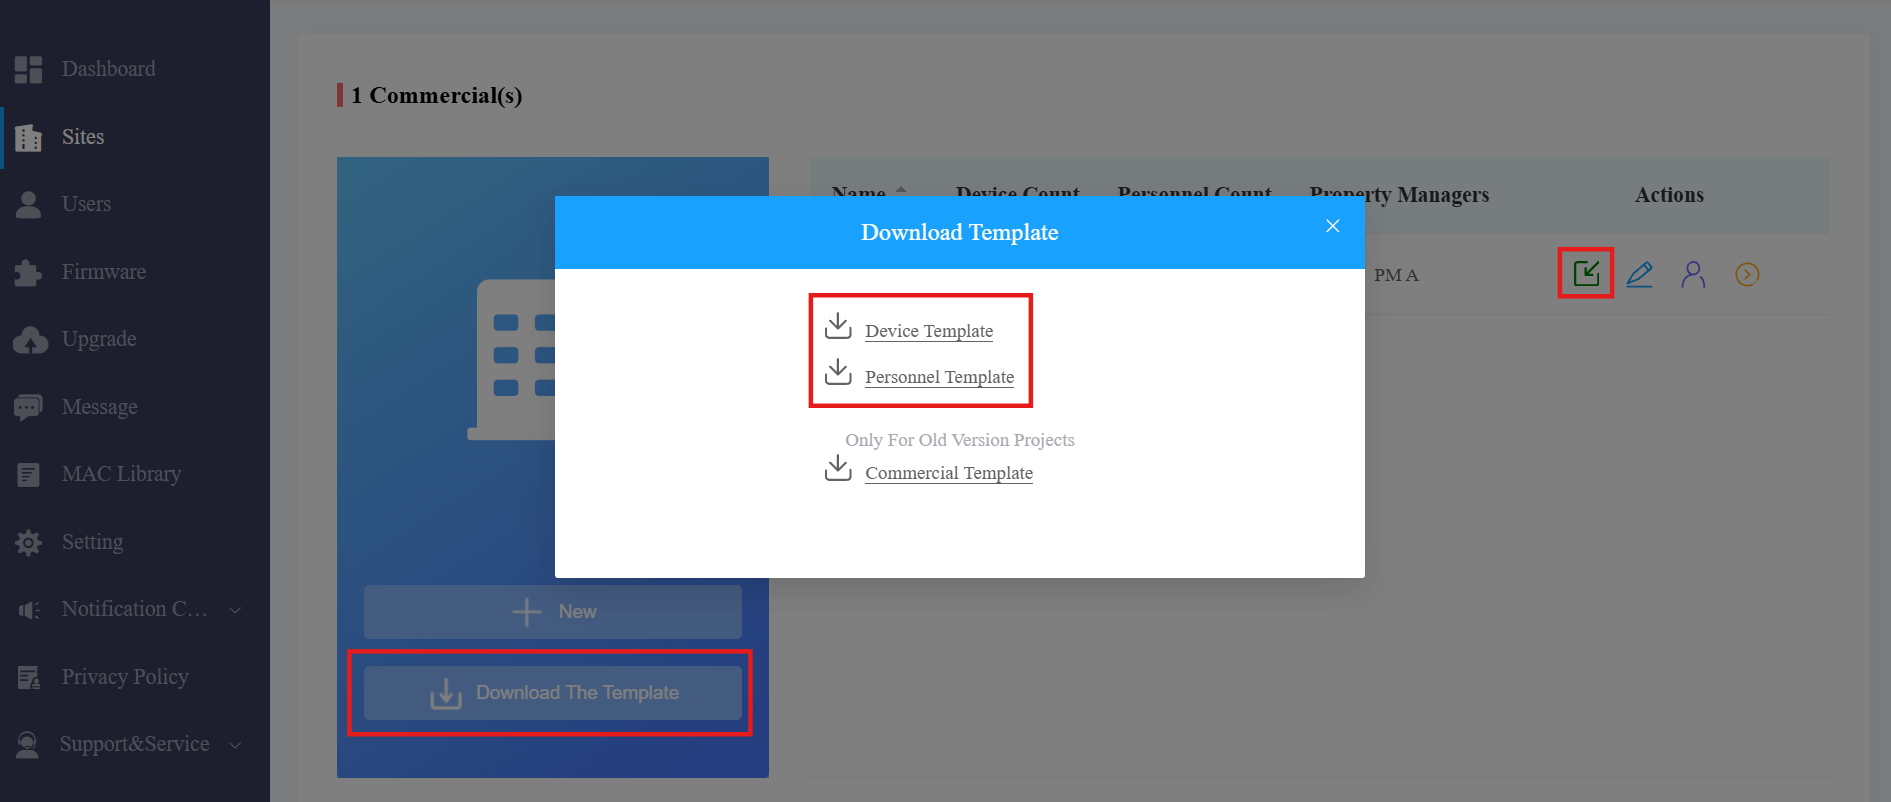
Click Download The Template on the Sites module.
Download the Device Template and Personnel Template.
Enter the information in the templates. See input instructions by hovering your mouse cursor over specific columns.
Click
 to import the template.
Project Management
After creating sites, click  of the specific project to manage the companies, personnel, administrators, devices, etc in the project.
Please refer to the following manual for instructions.
Add Project Manager Account
You can create a project manager account and assign it to a specific commercial project.
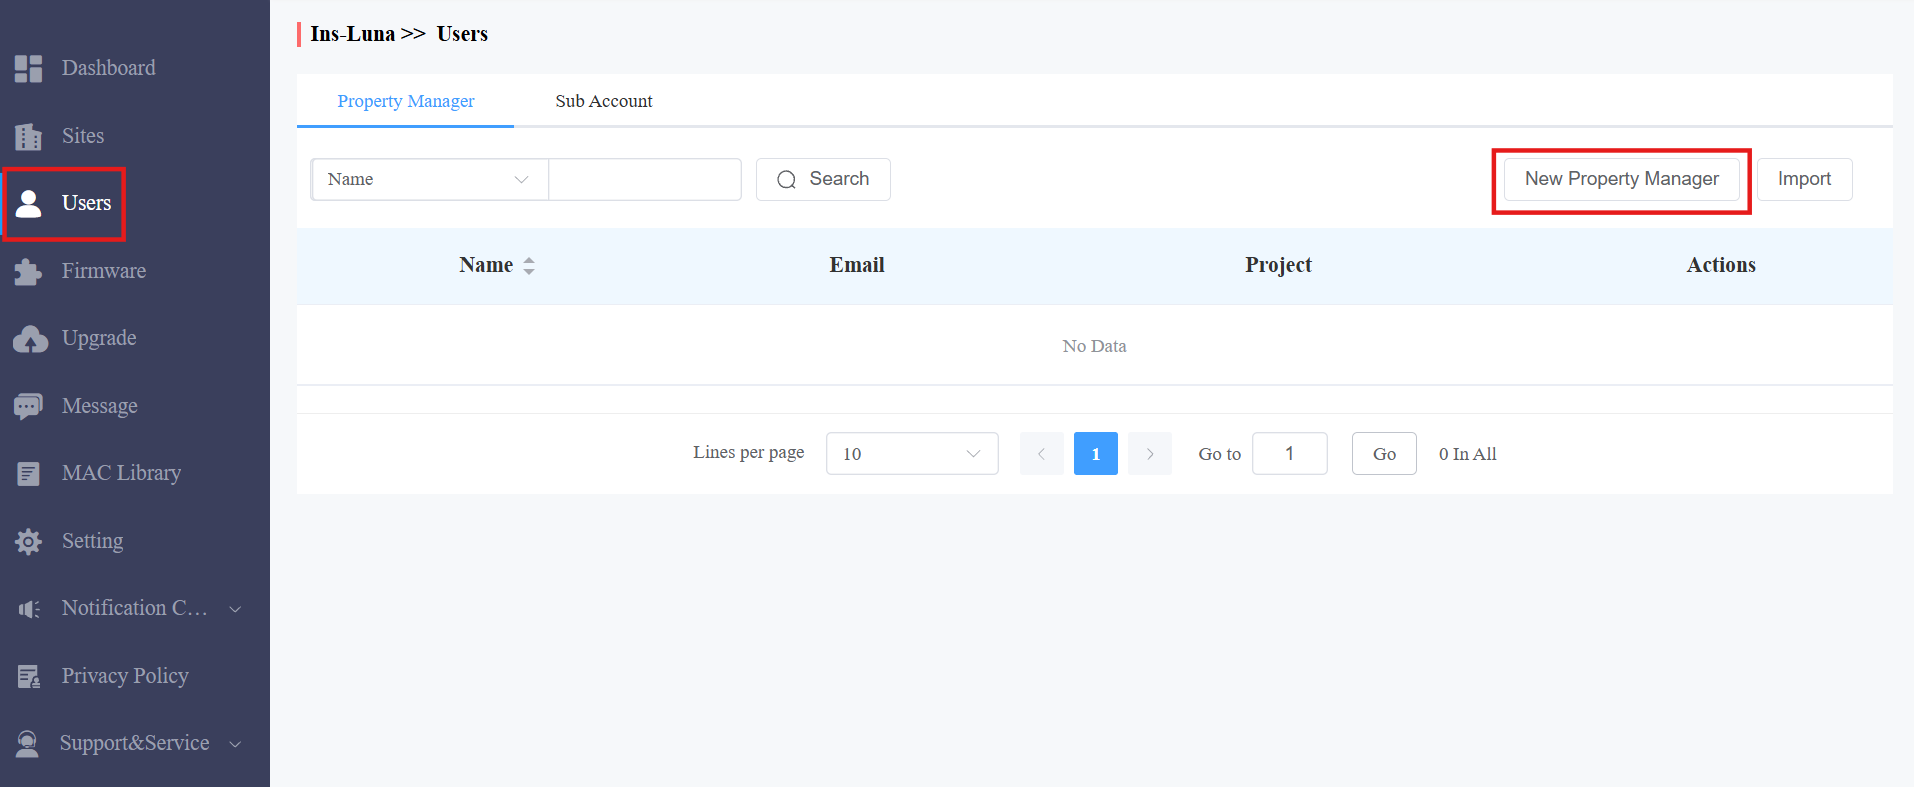
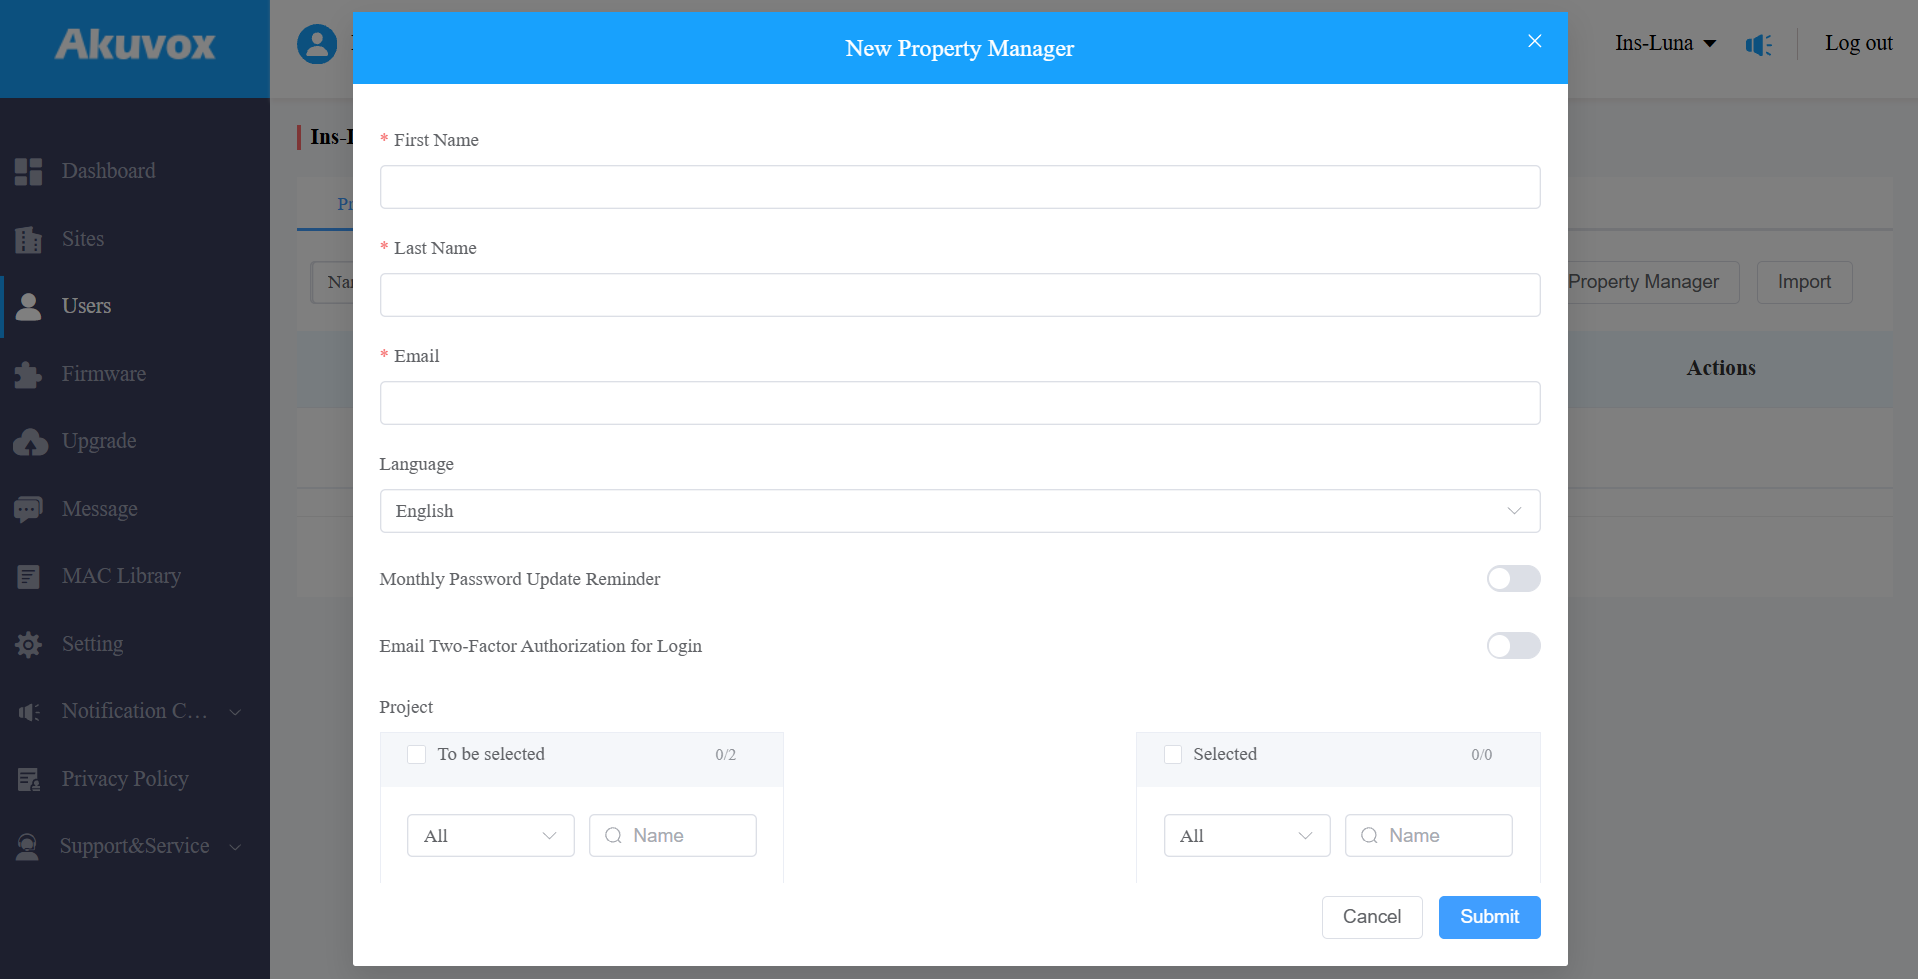
Click Users > New Property Manager.
Fill in the PM information and select the language of the email sent to the PM.
Enable or disable the Monthly Password Update Reminder and Email Two-Factor Authorization for Login.
Monthly Password Update Reminder: If enabled, when PMs log in to the cloud platform, they will see a prompt every month reminding them to change their MySmart login passwords. This feature is used to enhance the security of PM accounts.
Email Two-Factor Authorization for Login: If enabled, when PMs log in to the cloud platform, they need to enter their email addresses and fill in a verification code for login.
Choose the project(s) that are managed by the PM. Move them from the left to the right box.
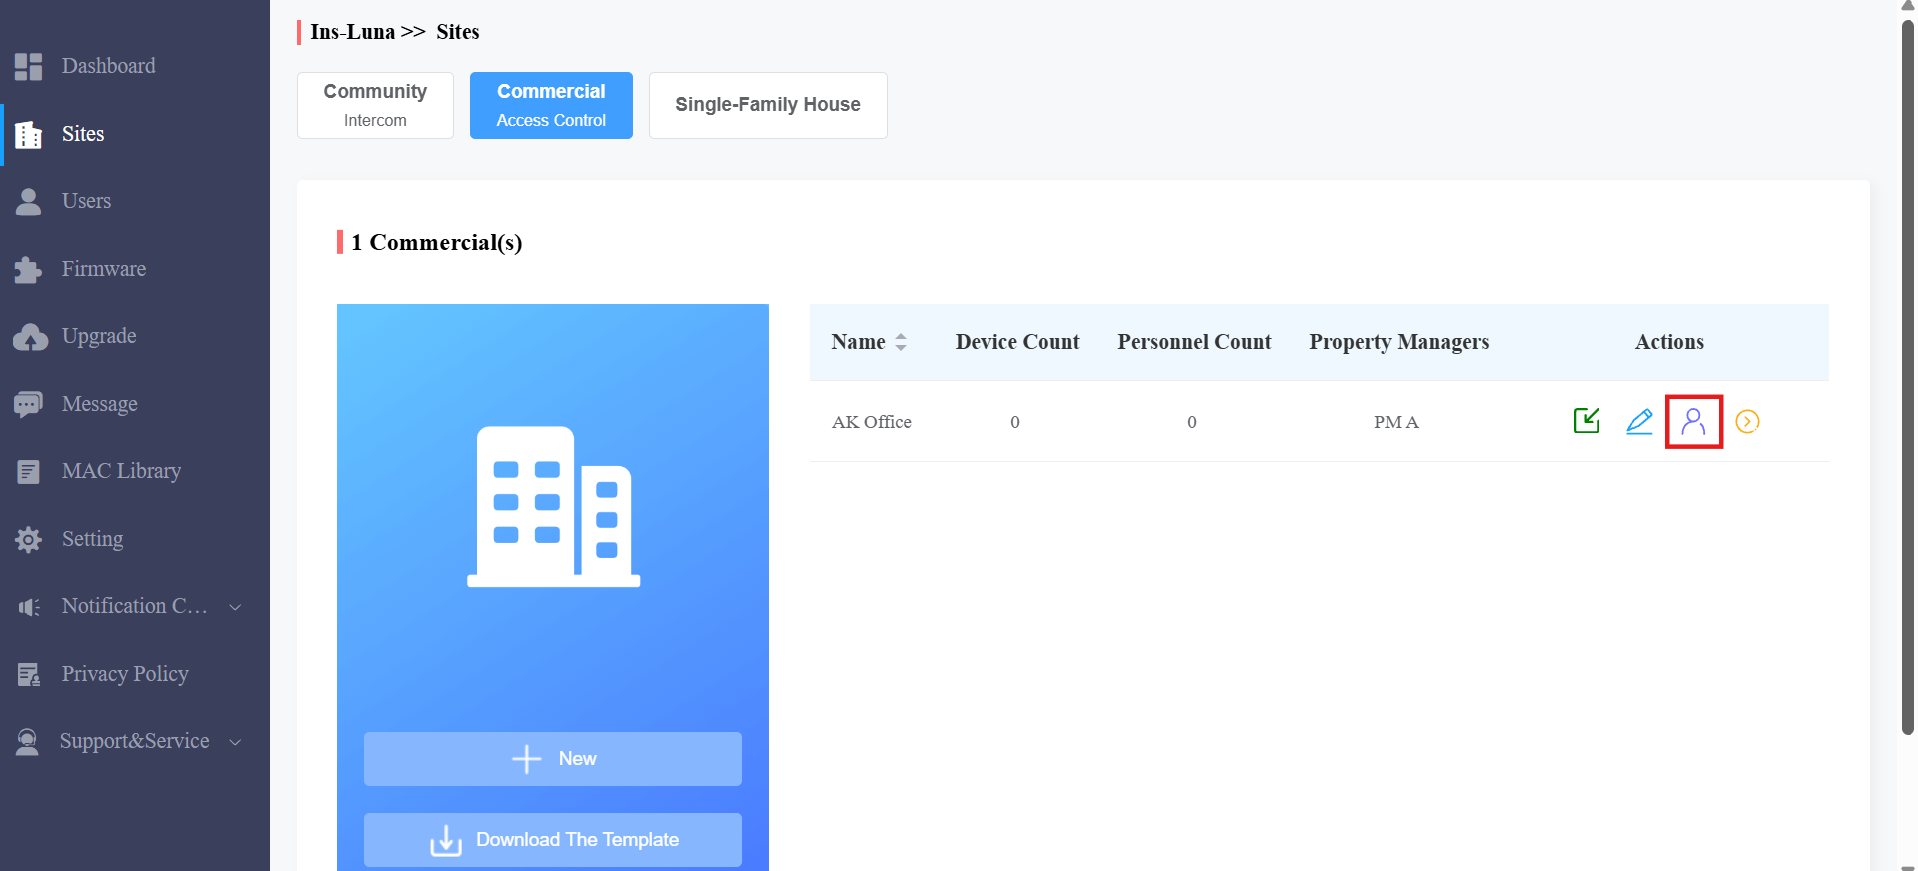
You can also assign PMs to projects on the Sites interface.
Click
 of the project.
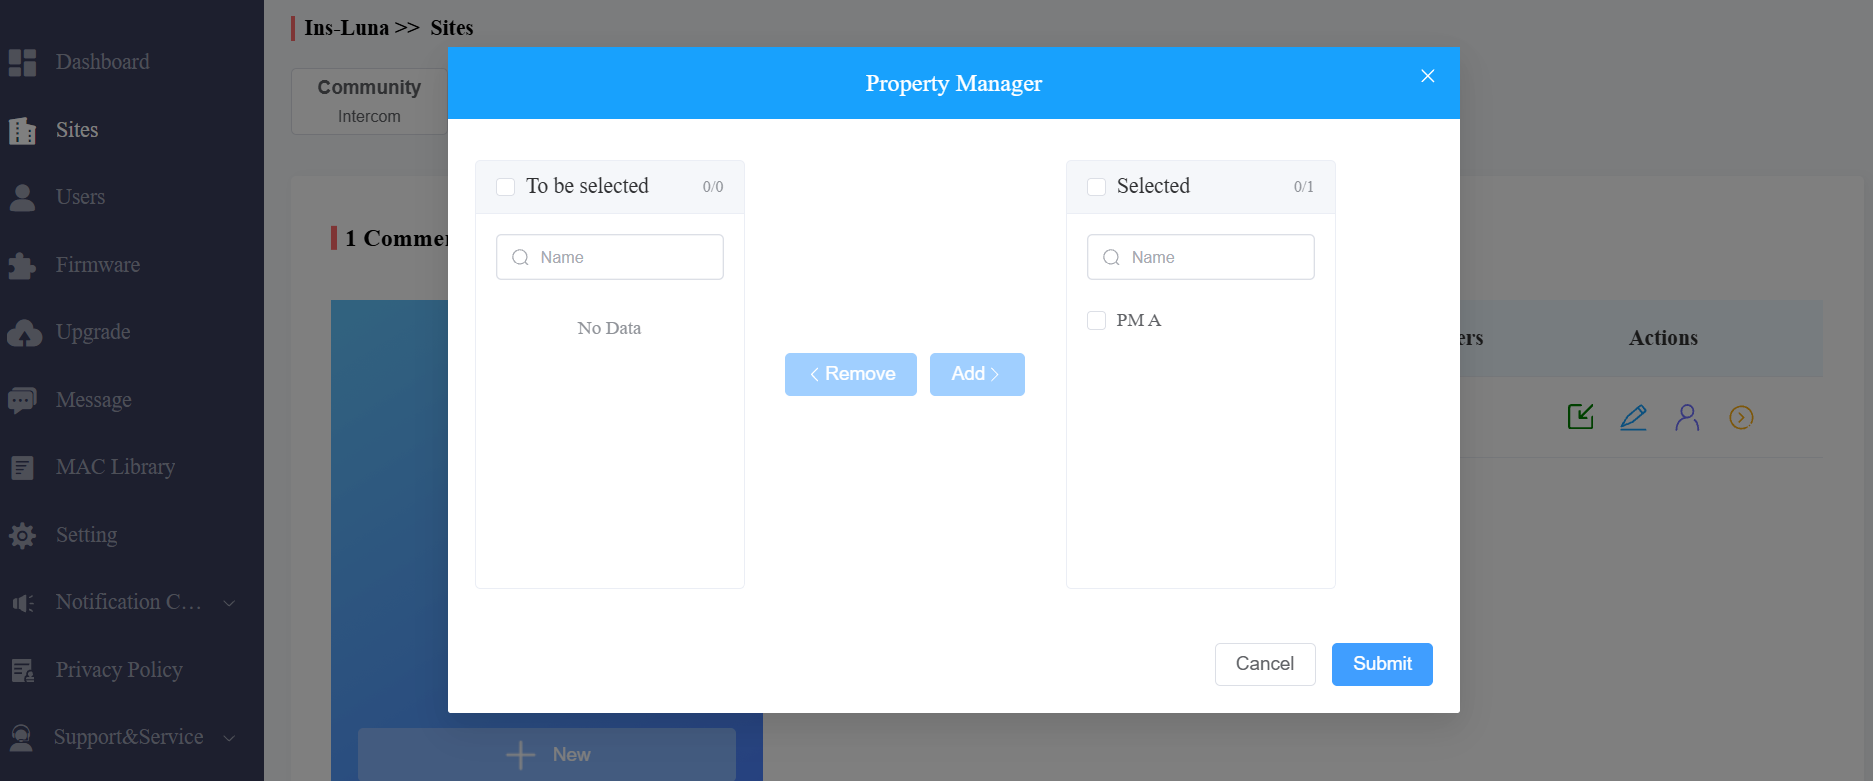
Select PMs from the dropdown menu.
Edit/Delete Project Manager Account
You can edit and delete the PM account.
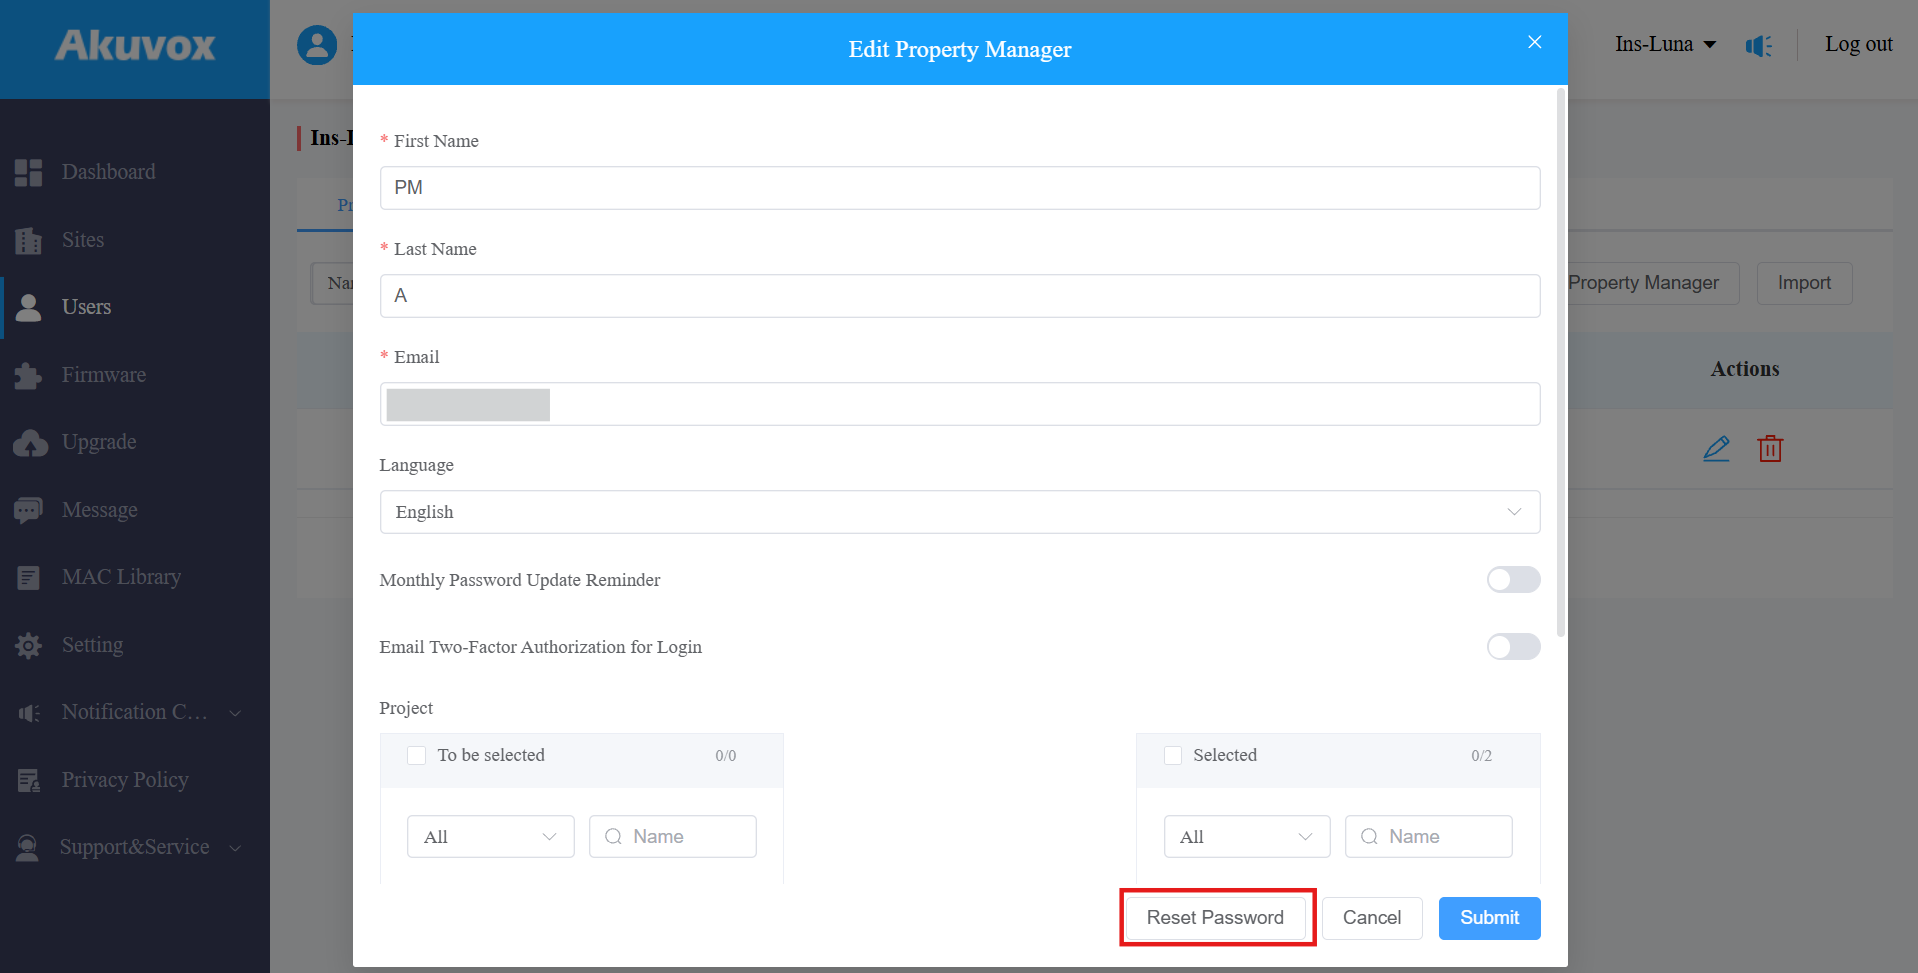
Go to the Users module and select PM.
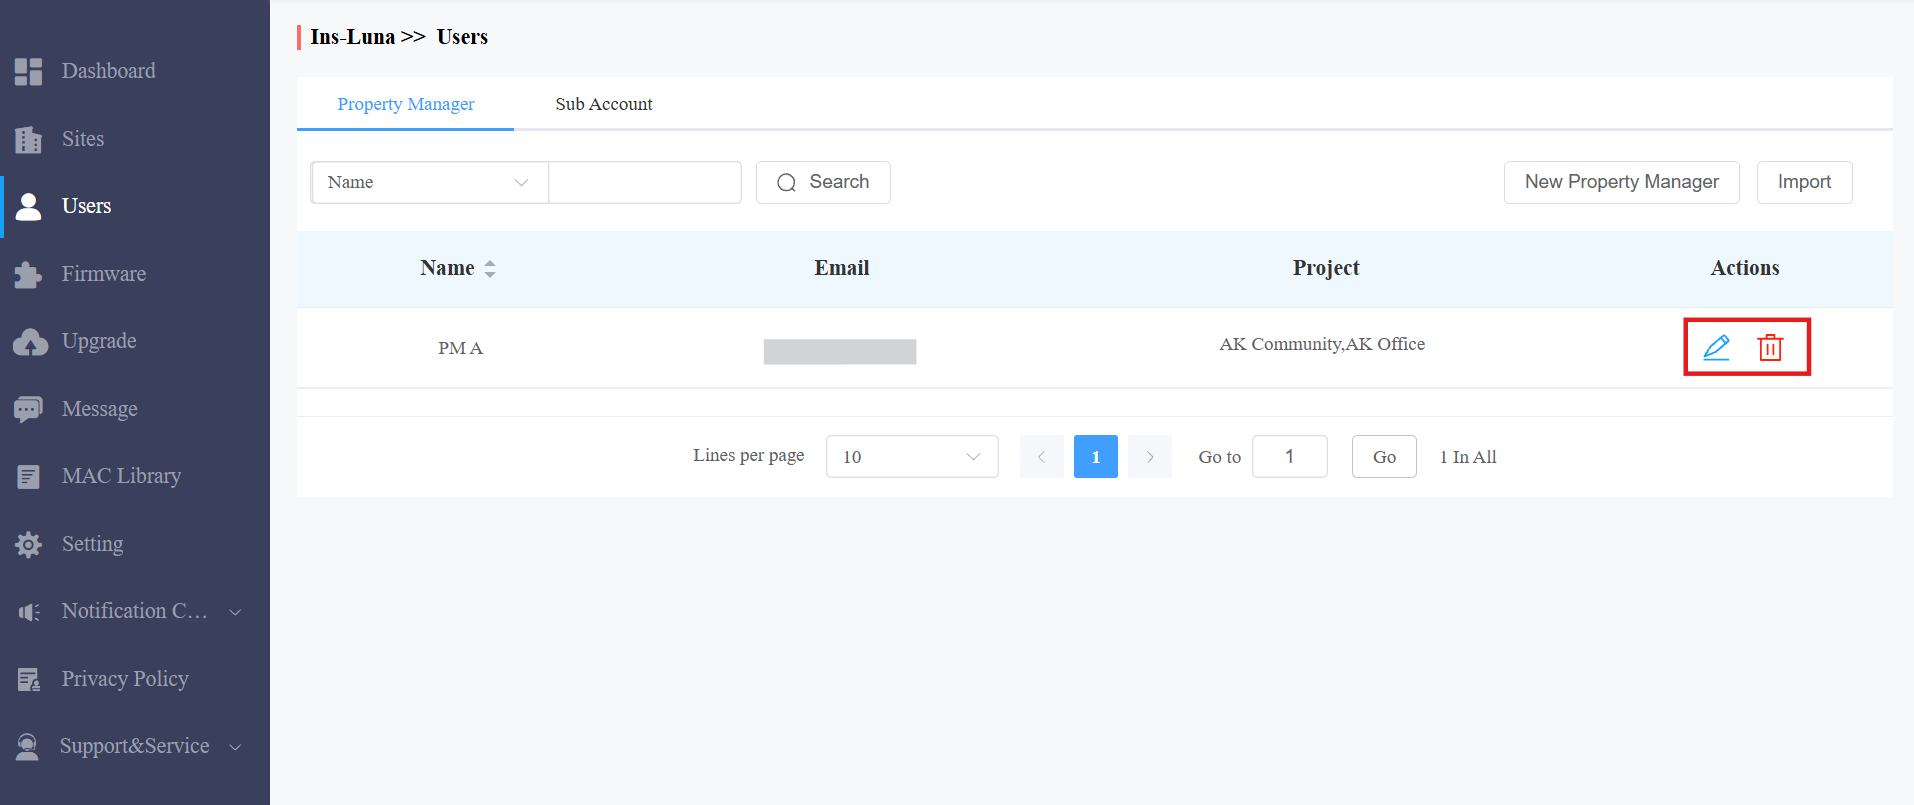
Click
 to edit the PM account information and reset its password.
Batch Import Project Manager Accounts
You can add/edit PM accounts in a batch to improve efficiency.
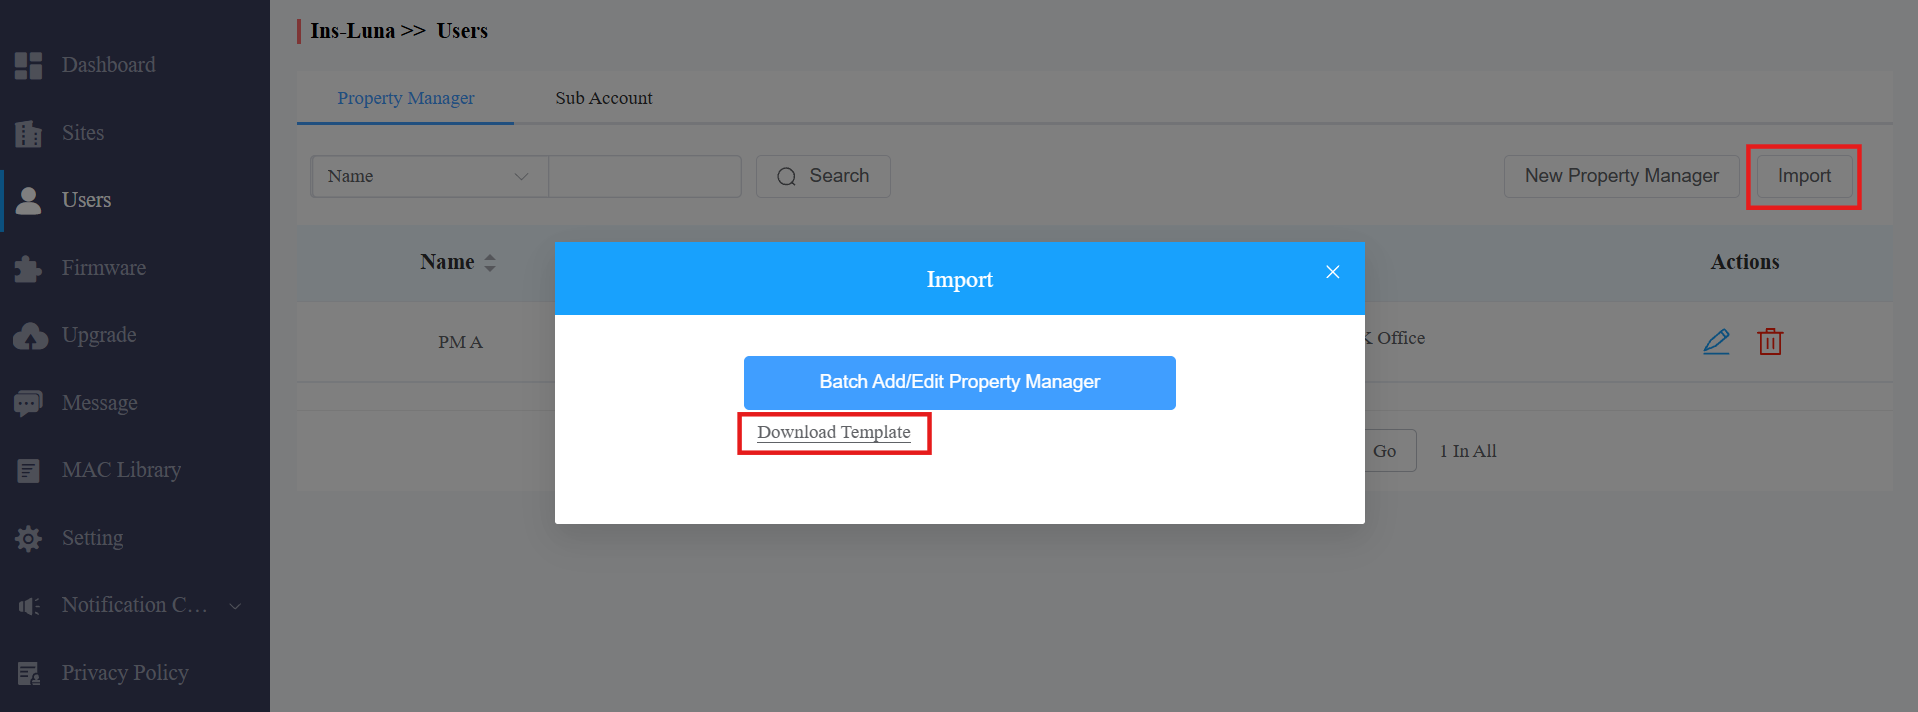
On the Users module, click Import on the right.
Click Download Template.
Note
The email is a credential corresponding to the existing PM account and cannot be modified.
For example, if you want to change the language of a certain account while keeping other items unchanged, select the target language in the file, enter the email of that account, and leave other items blank.
Edit the template. Enter the first name and last name of the PM.
Enter the email address to receive the account activation email. It is mandatory and cannot be modified for the existing PM.
Select the language of the email from the available options.
Enter the commercial project name(s) to be managed.
You can ONLY fill in one project name in one row. If the PM manages multiple projects, use separate rows.
You can ONLY enter the project(s) that have been created.
You can check the instructions by moving your mouse cursor to the columns.

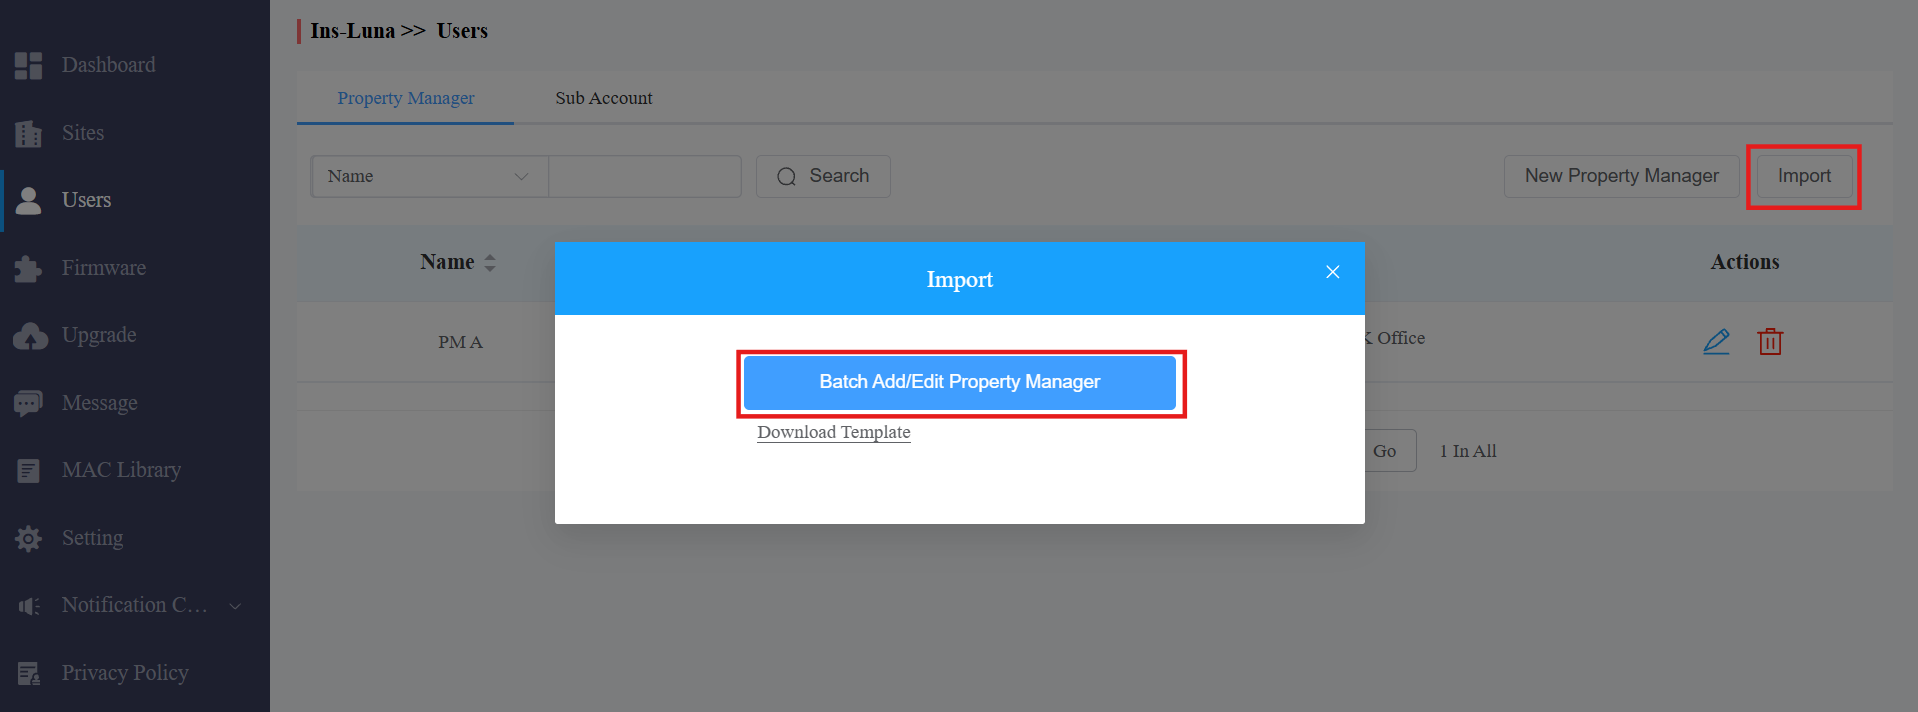
Click Batch Add/Edit Project Manager and upload the file. The importing result will then display.
Firmware Management
You can check and update the device firmware version in the Firmware module and Upgrade module, respectively.
Check Firmware List
Before upgrading device firmware, you can go to the Firmware module to check the latest available for uploading.
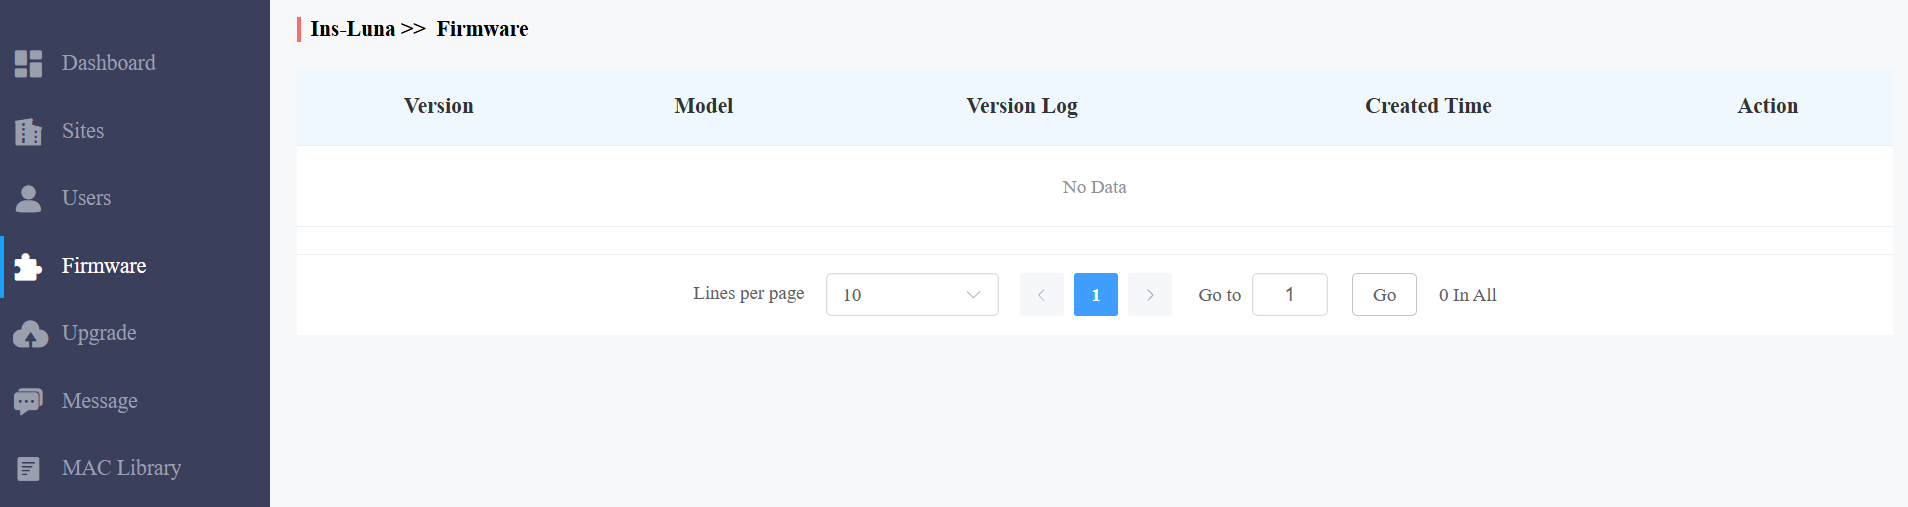
Firmware List Description
Field Name | Description |
Version | Displays the firmware version number. |
Model | Displays the device model. |
Version Log | Generally displays remarks on the version. |
Created Time | Displays when the firmware is uploaded. |
Action | Click to check the detailed firmware information. |
Upgrade Firmware
You can upgrade the device firmware to the selected version according to the update timing defined.
Go to the Upgrade module.
Click New.
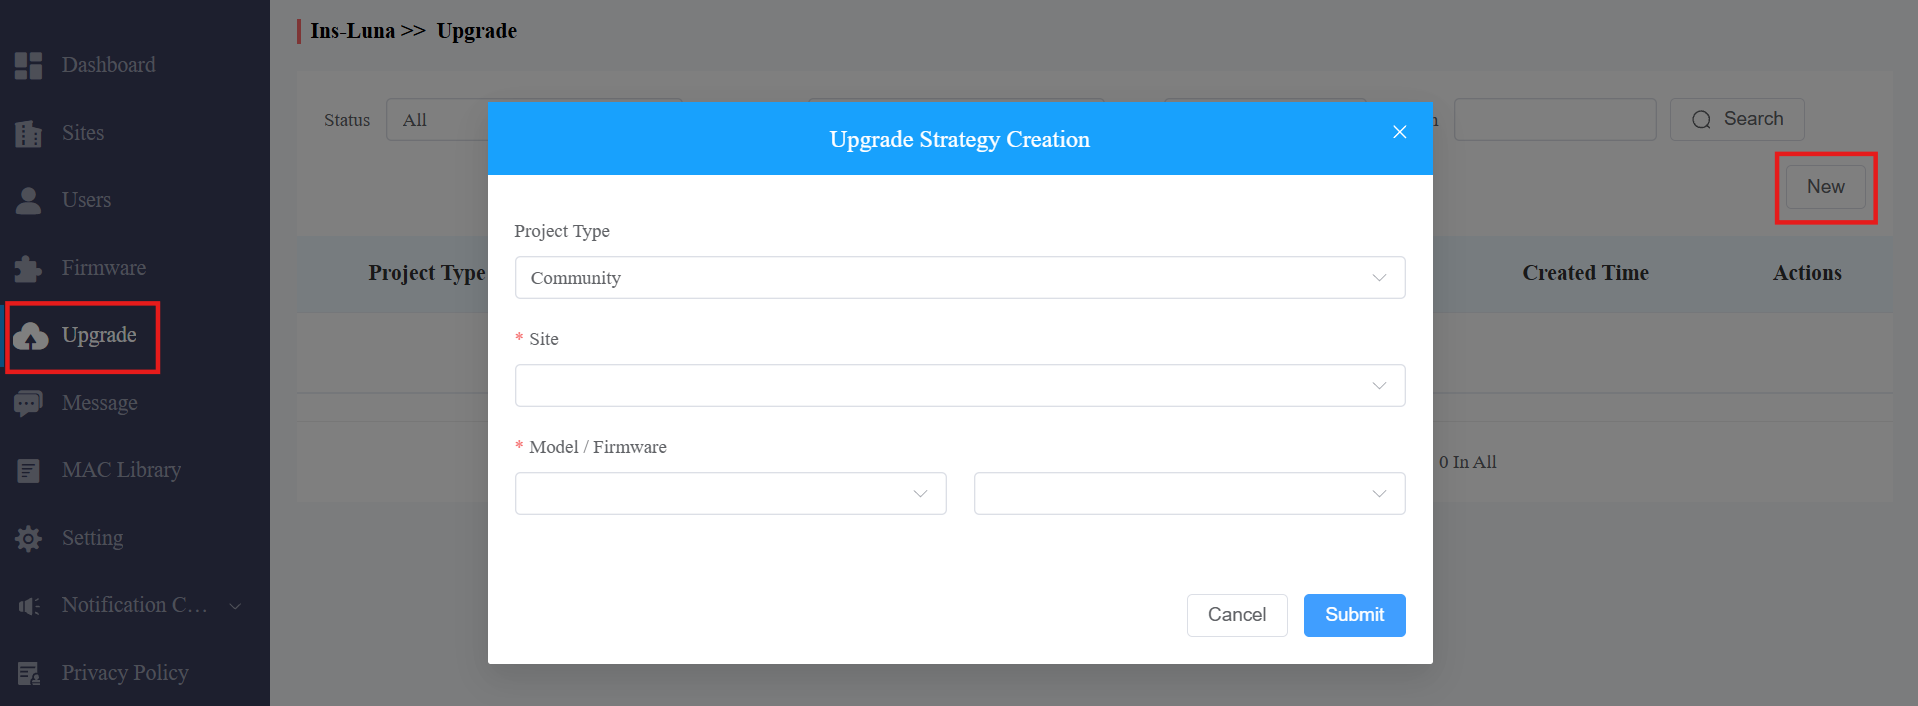
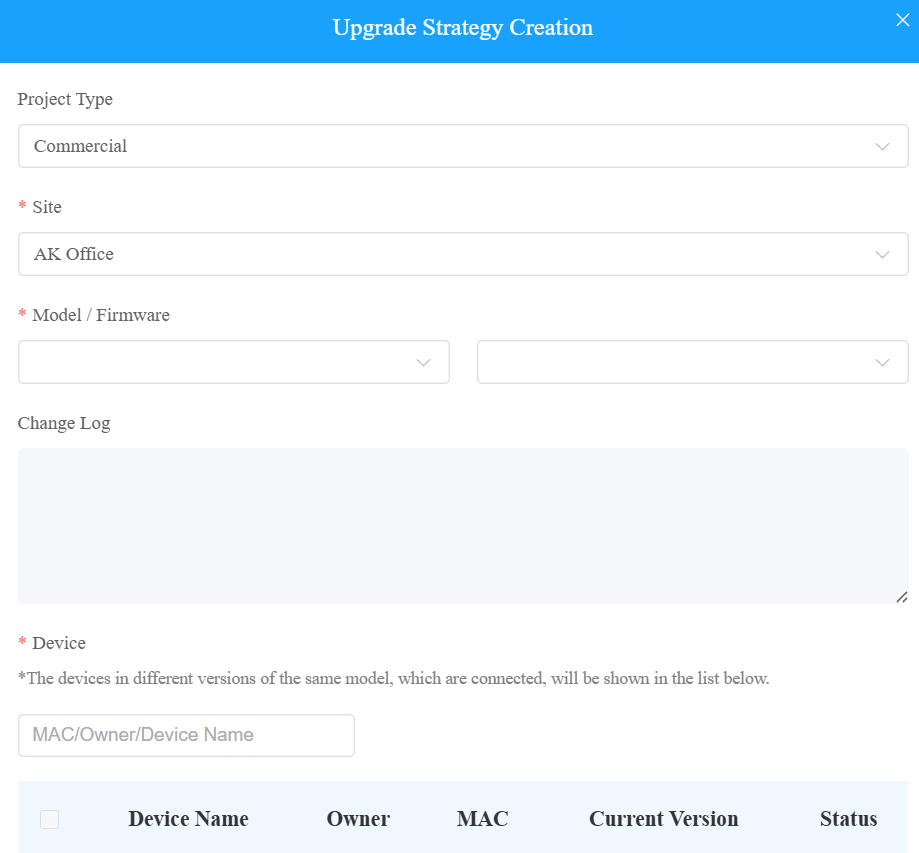
Select Commercial as the project type and choose the site.
Select the firmware version and the device to be upgraded.
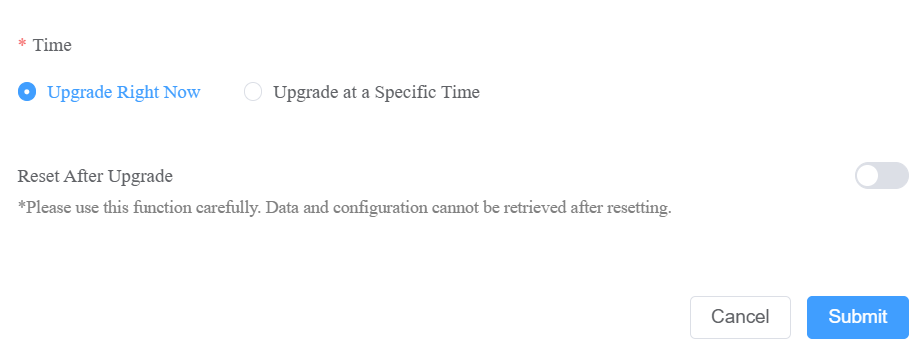
Select the time to upgrade the device.
You can check Reset After Upgrade to reset the device's configuration after upgrading finishes.
Check and Edit the Firmware Upgrade List
After upgrading the device firmware, you can not only check your firmware update status but also edit the update settings for devices pending the upgrade. You can delete the specific record as well.
Search the firmware status by All, Pending, Processing, and Executed.
Edit the update set for the devices pending the update.
Delete the specific update record if needed.
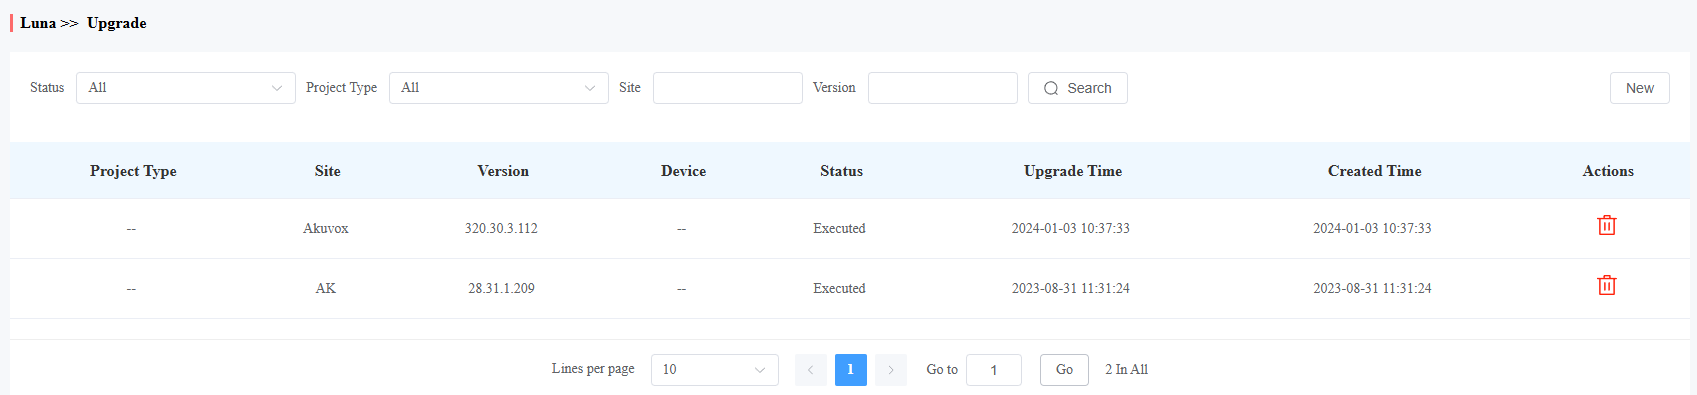
Update List Description
Field Name | Description |
Version | Displays the firmware version number in the update list. |
Device | Displays the device model in the update list. |
Status | Displays update status: Pending for the firmware that will be updated according to the updating timing. Executed for the firmware that has finished updating, and Processing for the firmware that is being updated. |
Update Time | Displays when the firmware is updated. |
Created Time | Displays when the update setting is created. |
Action | Action involves the update setting alteration and the update record removal. |
Note
After initiating the specific firmware update, refresh the window to update the firmware list.
Sub-Installer Account Management
When several people are responsible for one project, you can create and log in to different sub-installer accounts of the same main account at the same time. The data shown is the same.
Add Sub-Installer Account
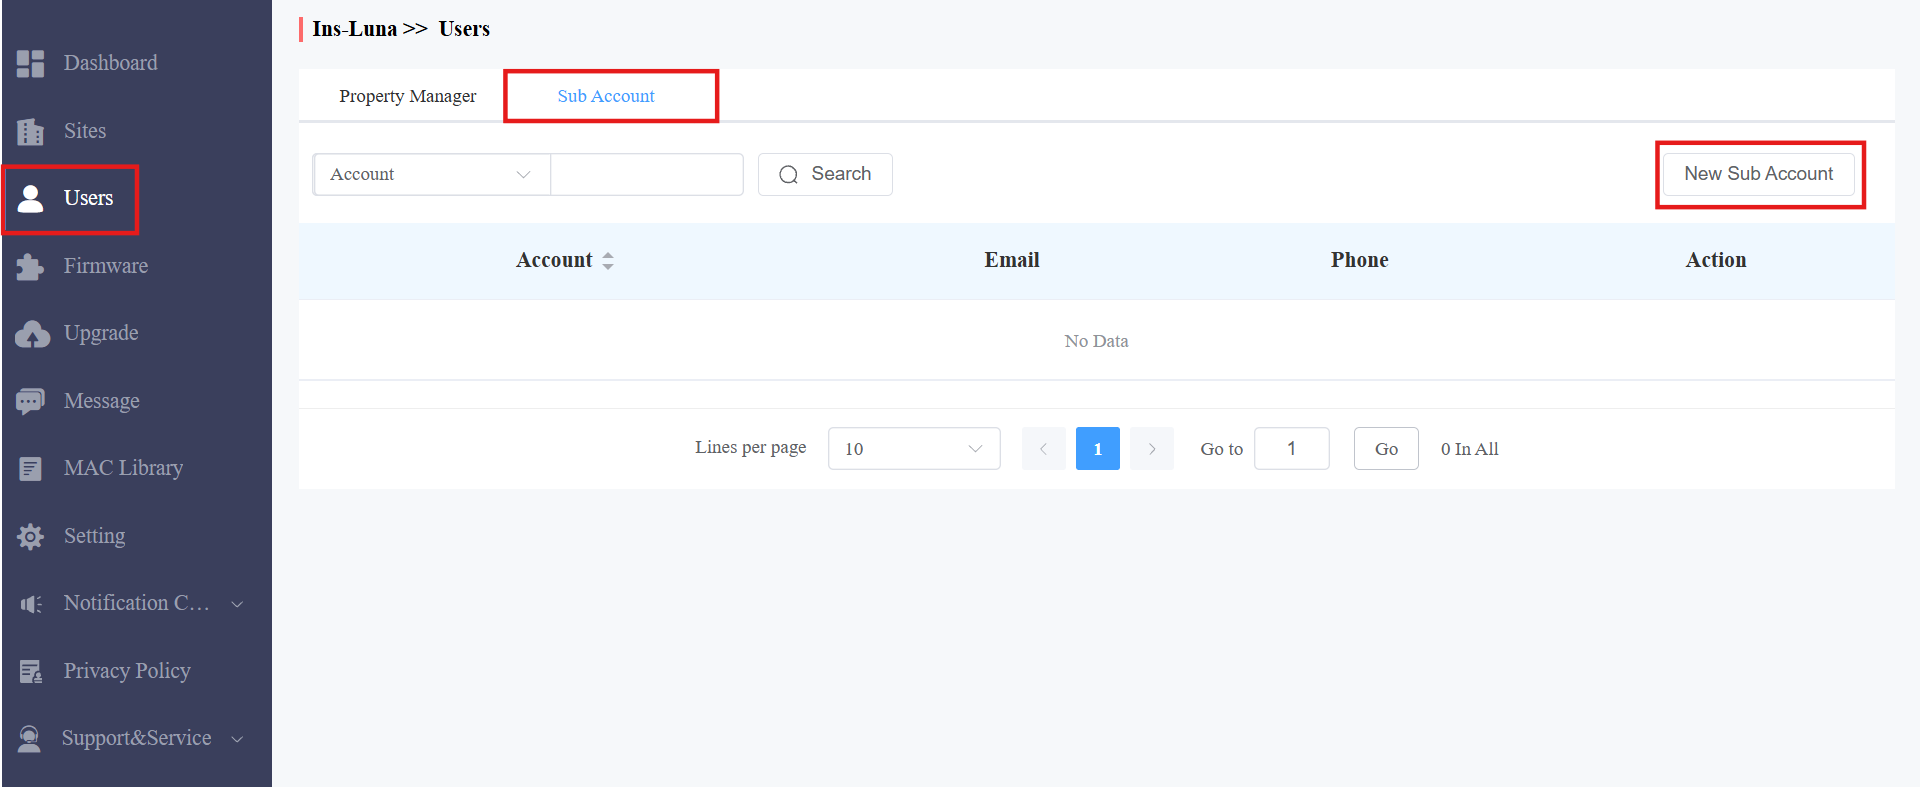
Click the Users module and click Sub Account.
Click New Sub Account on the right.
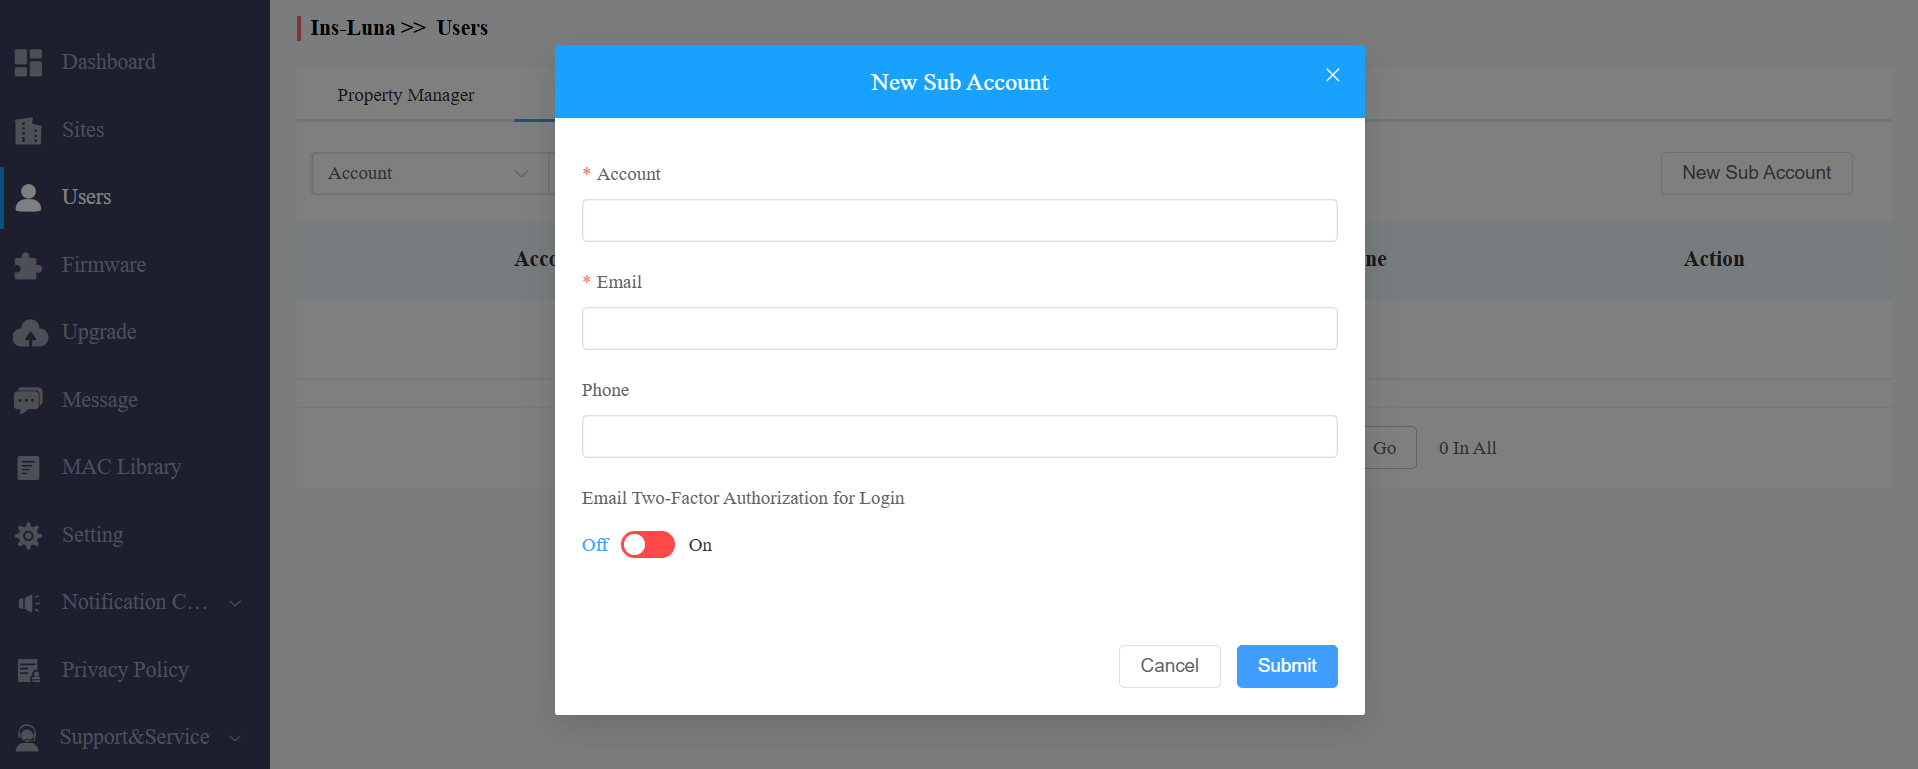
Enter the account's information. The server login password will pop up after you create the account. You can copy and send it to the sub-installer. They can use the email address and password for login.
Email Two-Factor Authorization for Login: Disabled by default. If enabled, when the sub-ins log in to the MySmart Cloud platform, they need to enter a verification code for login.
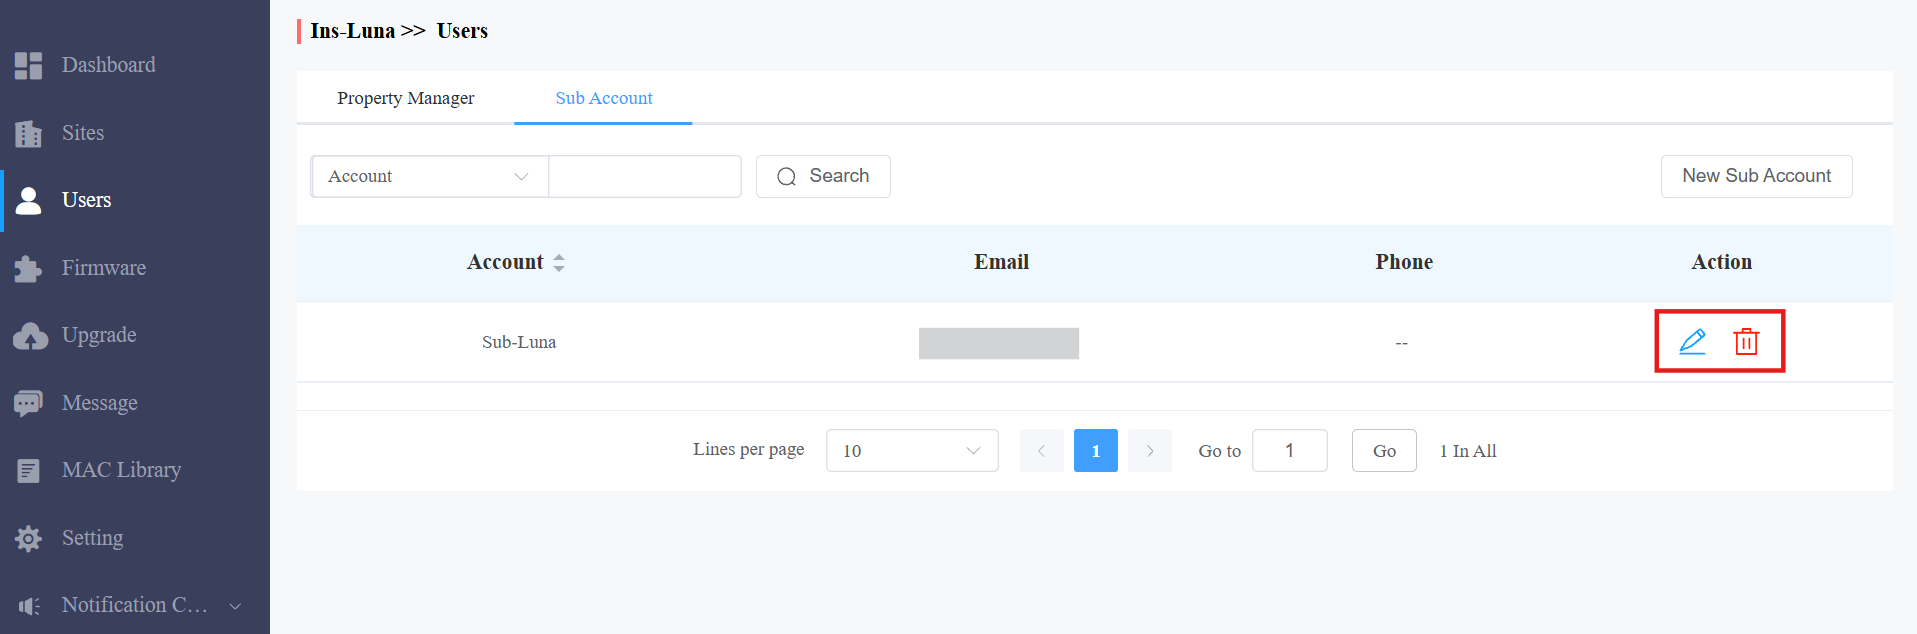
Edit/Delete Sub-Installer Account
Click
to edit the sub-account information and reset the password.Click
.png) to delete the account.
to delete the account.
Installer Account Management
You can change the account password, time zone, and billing information.
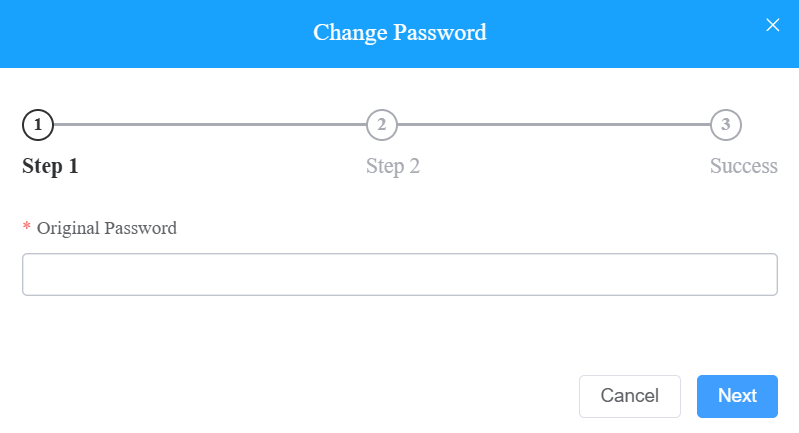
Change Installer Account Password
Click your account name in the upper right corner.
Click Change Password.
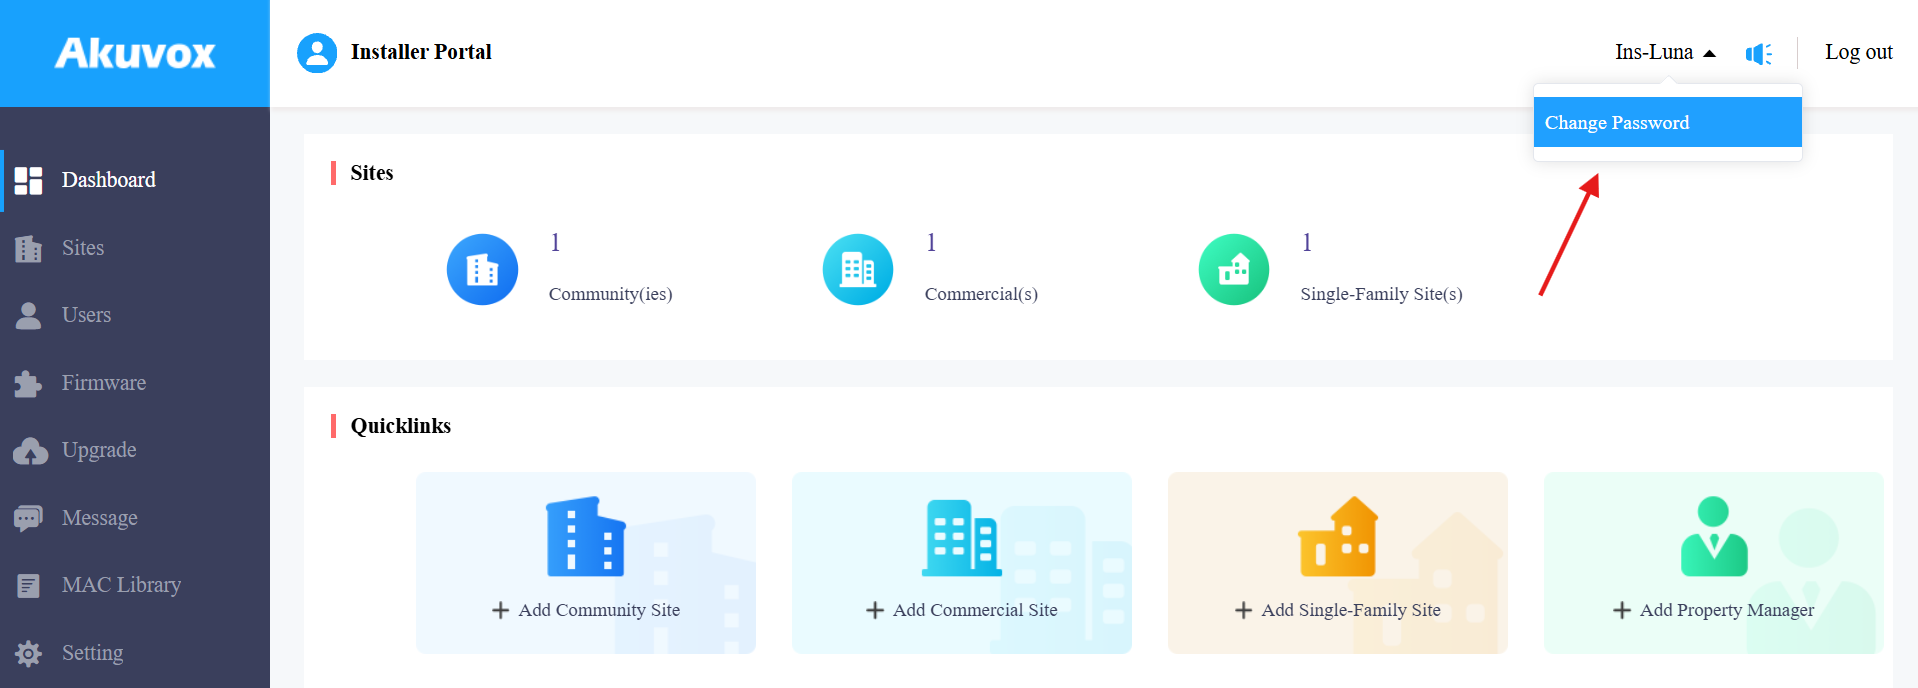
Change the password.
Change Time Zone
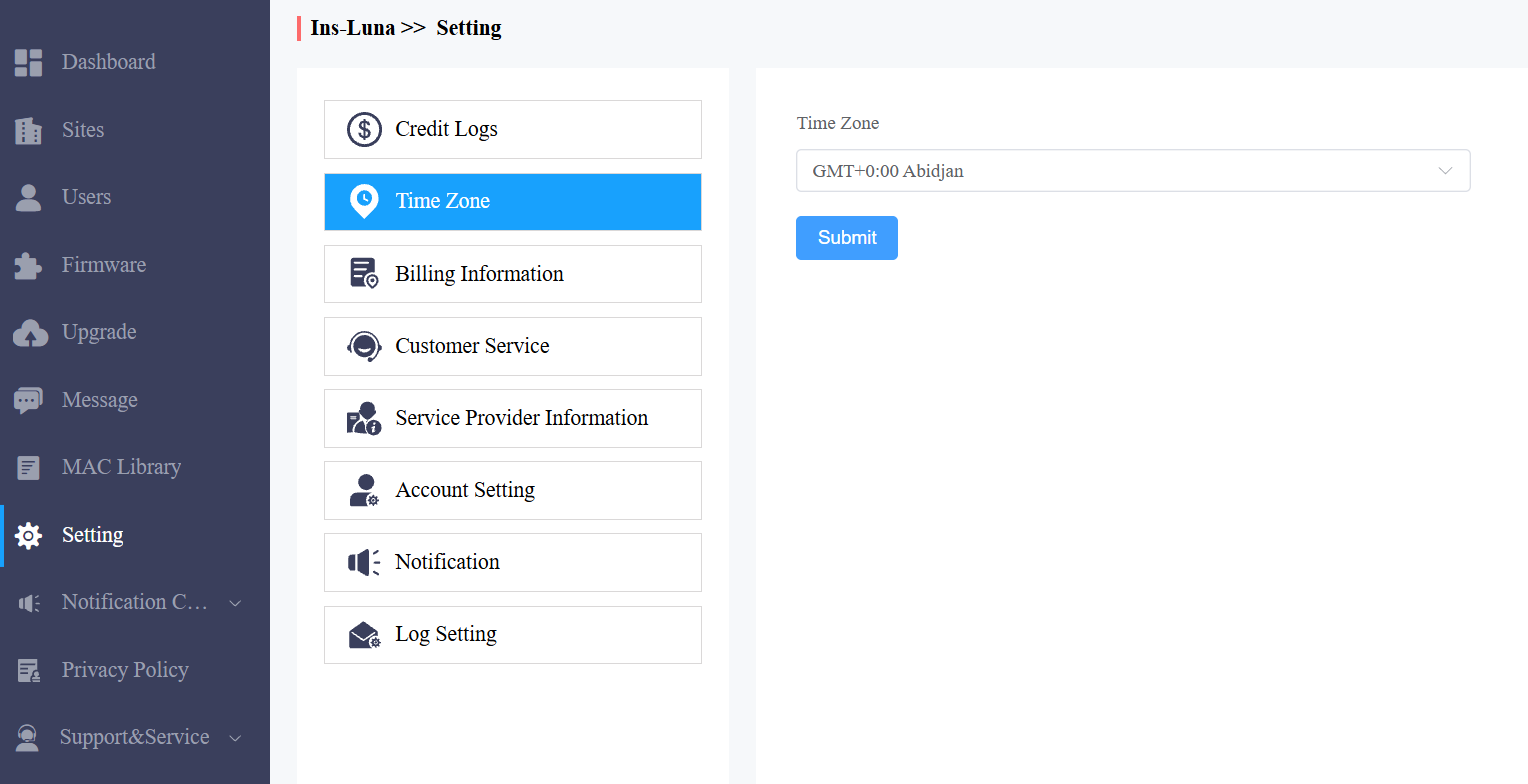
Click Setting > Time to select the time zone.
Set Account Access Permission
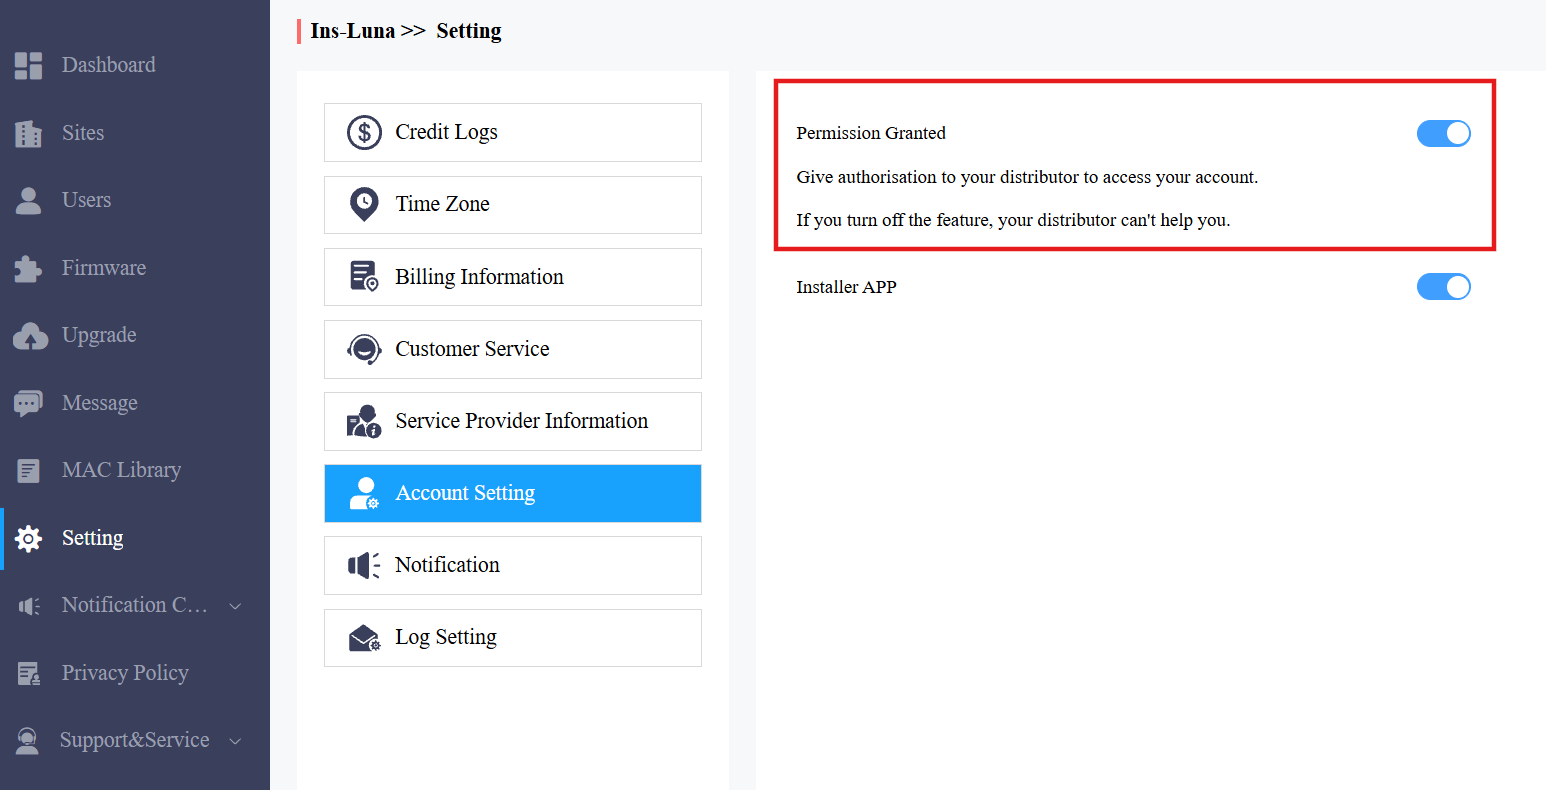
You can grant permission to your distributor to log in to your account without a password. With permission, distributors can switch to your account from their web portal to give you support or assistance. The account settings will be displayed in the drop-down list once the distributor enables the account access feature.
You can turn on or off the permission whenever you need.
Click Setting and select Account Setting.
Disable/enable the permission.
Note
The account setting will only appear once your distributor enables the account access feature. By default, the Permission Granted feature is turned on.
Log Control
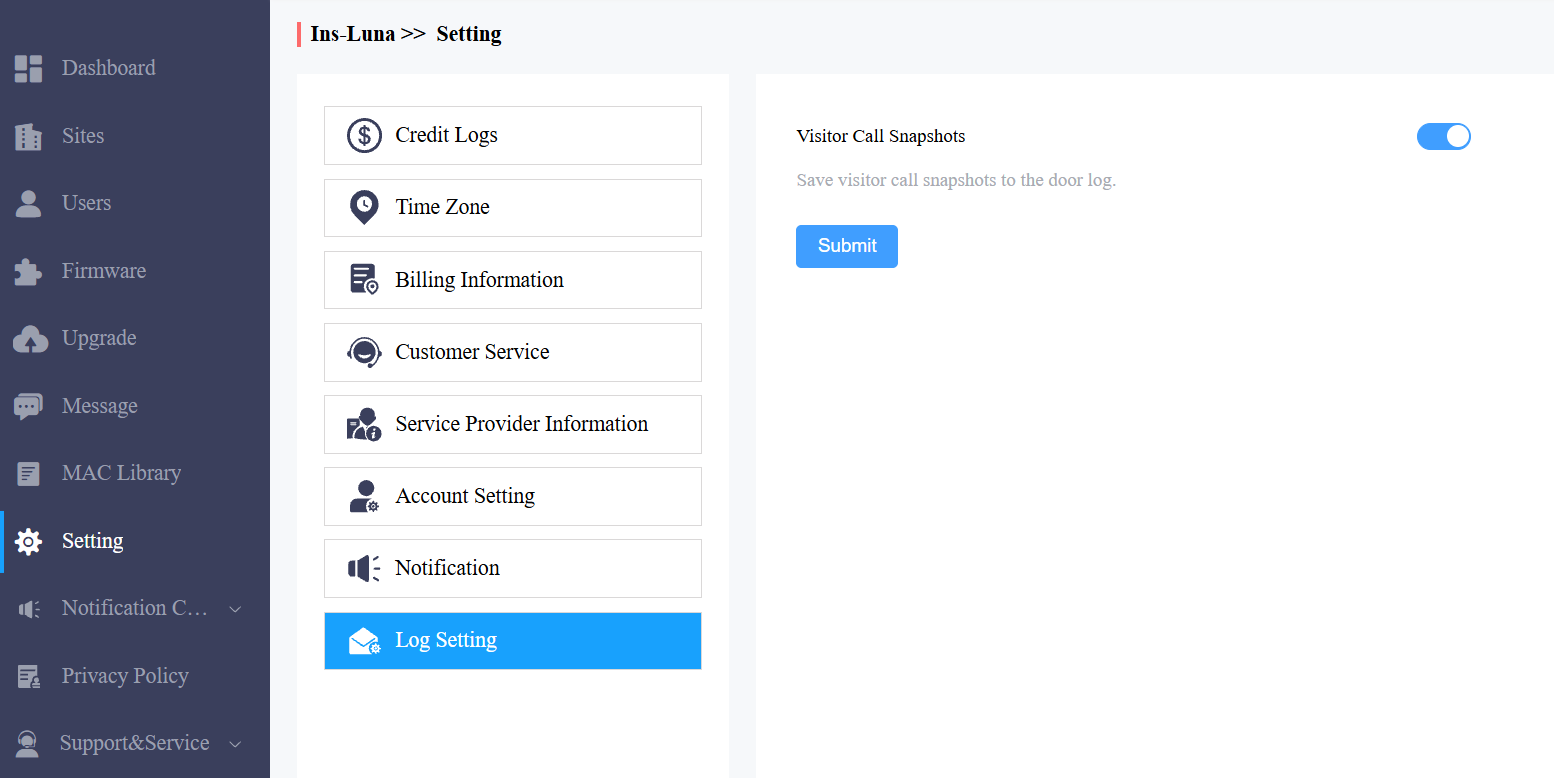
You can control whether to display captured images or recorded videos in call logs.
Click Setting > Log Setting to set it up. Enable/disable Call History Snapshots. It is enabled by default.
Customer Service
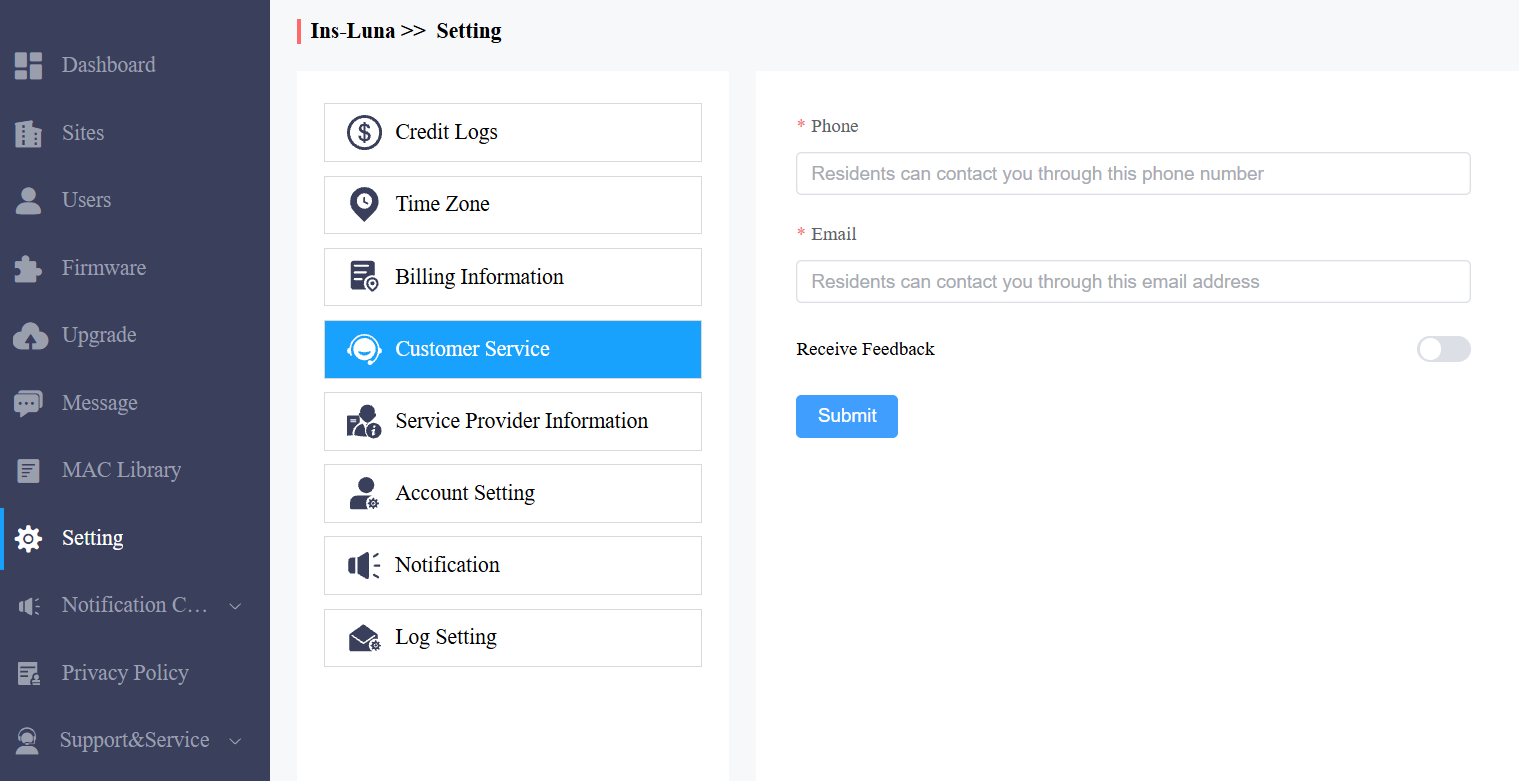
Customer service allows customers to contact you through the information you entered on the MySmart installer portal.
Click Setting and select Customer Service.
Enter or modify your phone number and email address.
Enable Receive Feedback if needed, and end users' feedback will be sent to the email address that you fill in.
Privacy Policy
You will see the Privacy Policy window when you log into the platform for the first time.
The Privacy Policy tells you how the user data is collected, used, and protected.
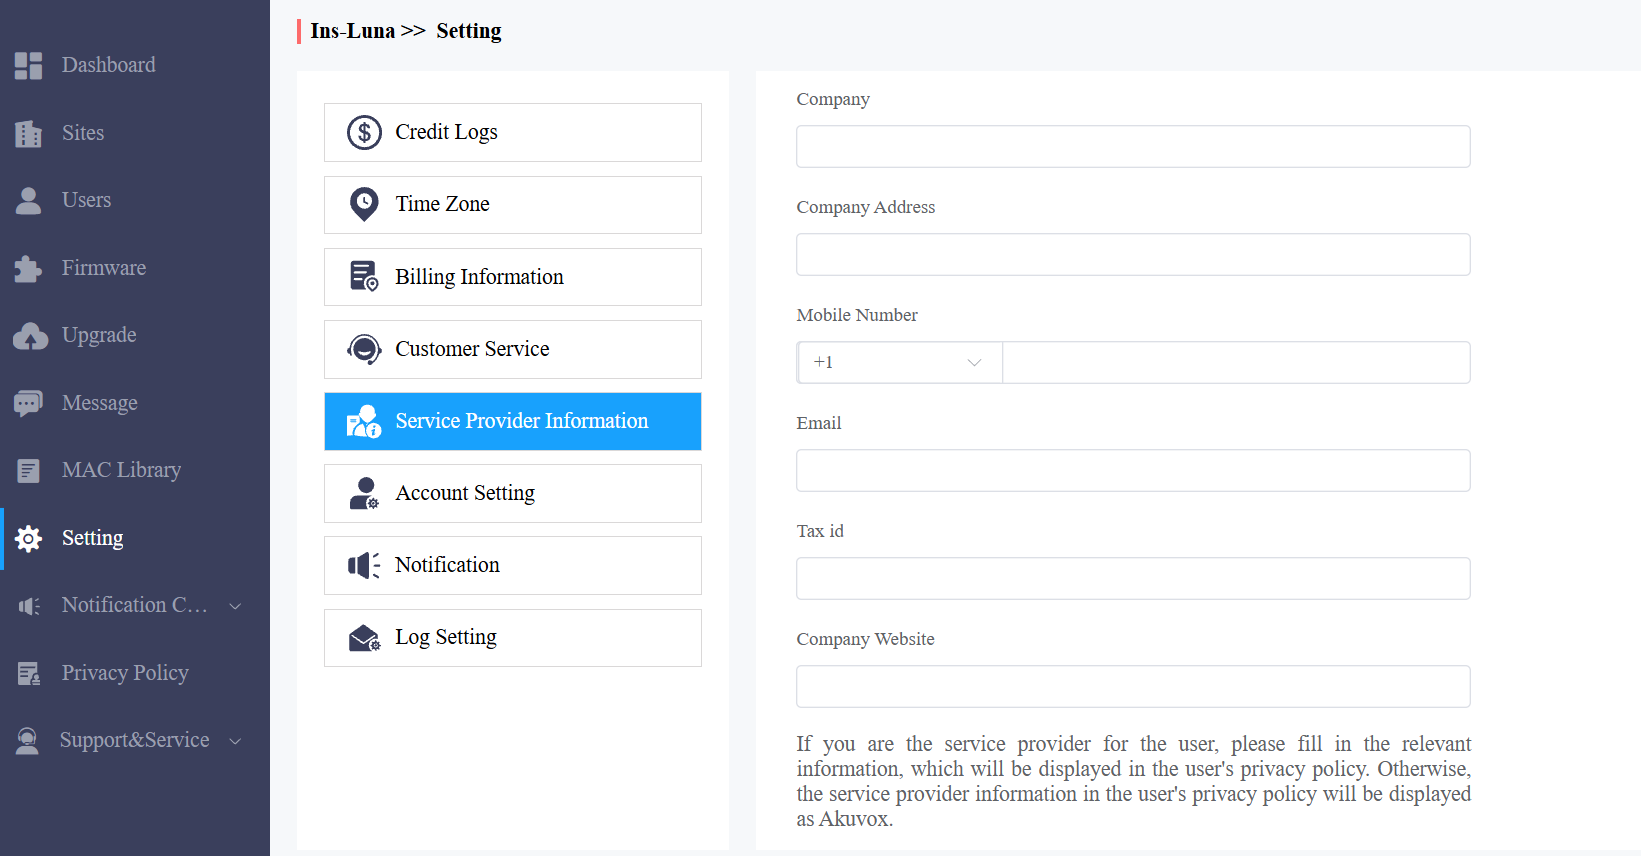
When you click Agree, you will be guided to the Service Provider Information interface to fill in your information. The information will be displayed in the privacy policy for end users. It is not mandatory to fill it out. Not filling it in will not affect your use of MySmart cloud services.
When you click Disagree, you cannot log in to the MySmart platform.
Technical Support & Service
Support&Service module offers you the link to the Akuvox ticket system, in which you can not only get access to a variety of technical information, such as feature guides, FAQ, etc., but also log in to the system where you can raise your questions that will be taken care of by Akuvox technical support team.
View MySmart User Guide
Click Support&Service module.
Click Knowledge Base sub-module.
Click Product Manual and then Tool & Software.
Ticket System
Click Support&Service > Technical Support sub-module.
Click Go to Helpdesk to enter the Akuvox ticket system page.
Sign up and log in to the Akuvox ticket system for technical information and support.
CAP System
Click Support&Service > CAP sub-module for information about how to become a certified Akuvox Partner.
Sign up and log in to the Akuvox CAP system for sales and technical information and support.
Contact Us
For more information about the product, please visit us at www.akuvox.com, or feel free to contact us by
Sales email: sales@akuvox.com
Technical support email: support@akuvox.com
Telephone: +86-592-2133061 ext.7694/8162
We highly appreciate your feedback about our products.