Akuvox SmartPlus Cloud supports integration with the iTec lock, which allows users to unlock the lock conveniently on their SmartPlus Apps.
To realize the integration, installers need to have an iTec account first, then link the account to the SmartPlus installer account and assign locks to the desired projects on the SmartPlus platform.
Note
For community projects, only communities created upon Cloud version 6.1 or higher support the integration.
For Installers
Link the iTec Account
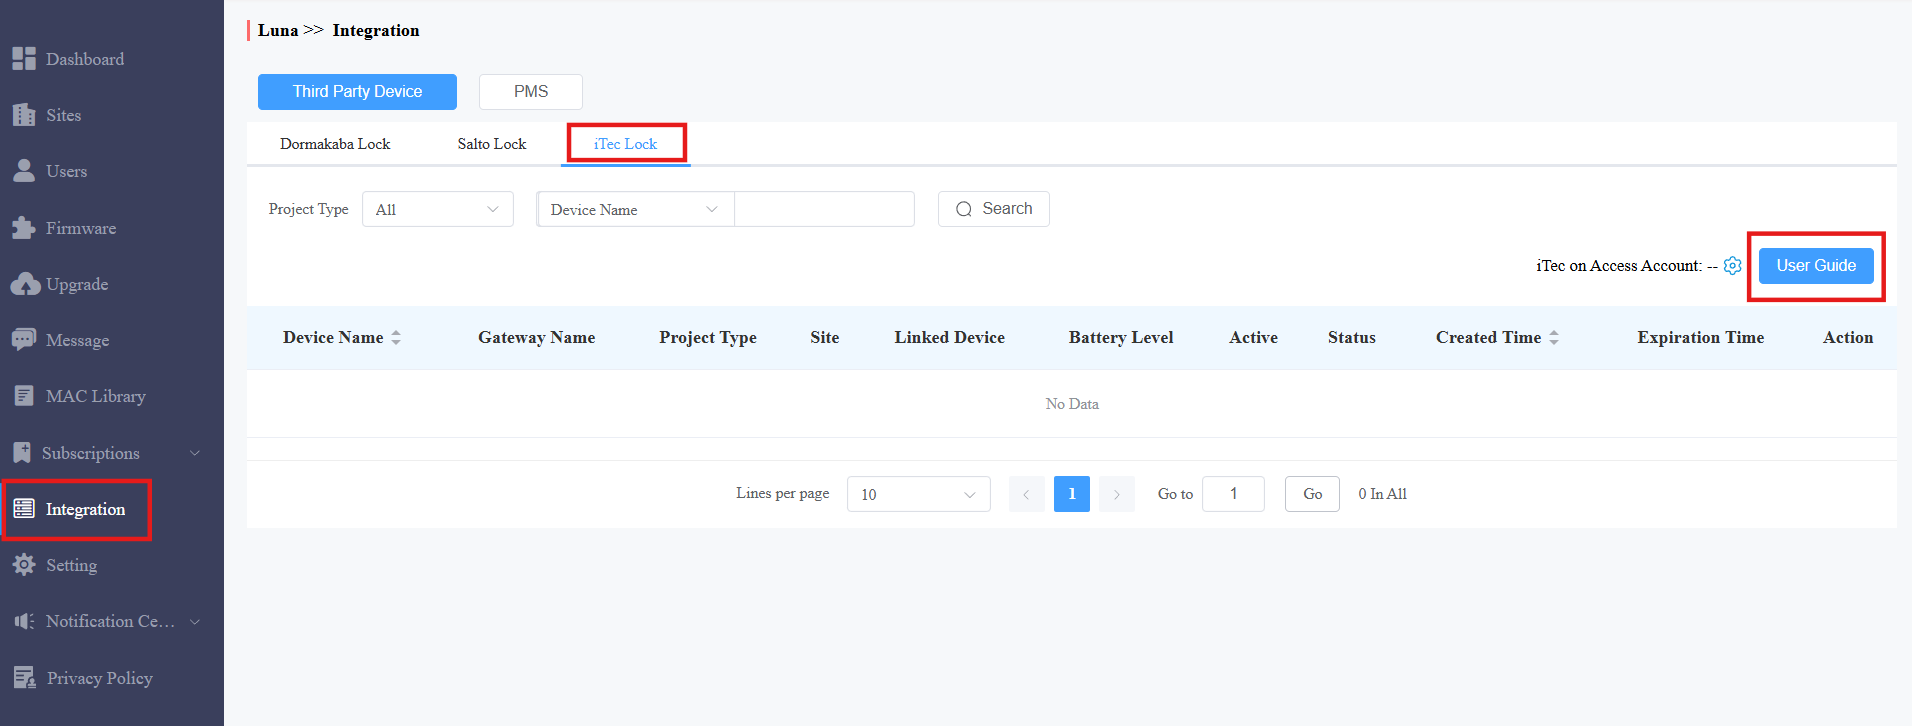
Log in to the SmartPlus Cloud platform with an installer account.
Click Integration on the left column and select iTec Lock. You can click User Guide on the right to view the integration steps.
Click
 to link the iTec account.
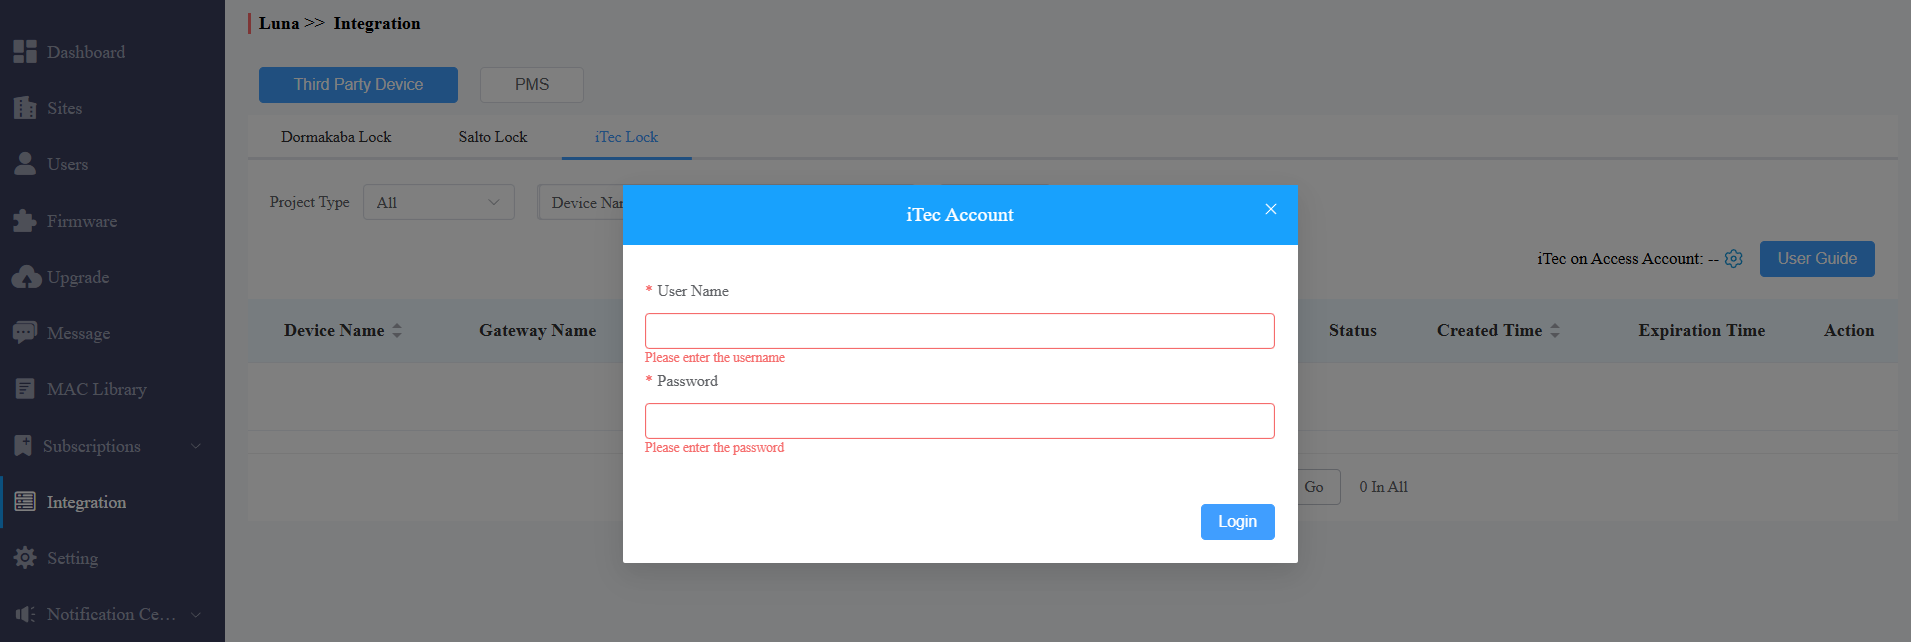
Enter the iTec account username and password.
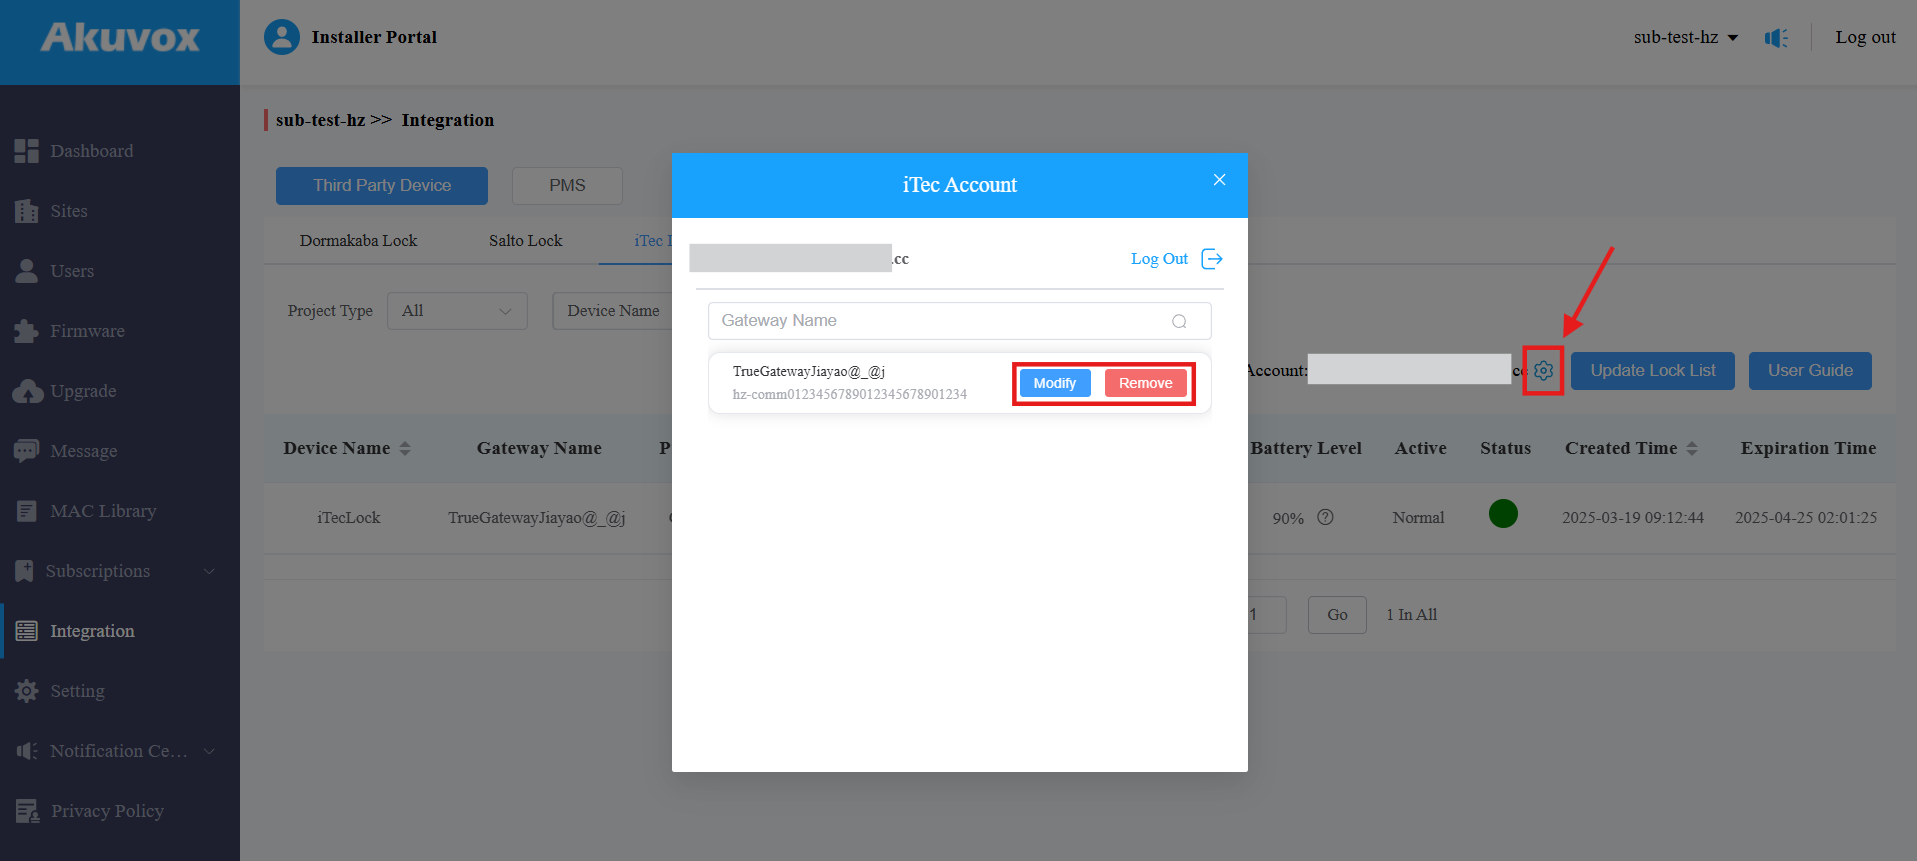
After linking, the linked account will display and you can click to cancel the linking and view the gateway list.

Assign Locks
Move your mouse cursor to the target gateway. An Add tab will display. Click it to assign the gateway.
Select the project type, site, and the building where the lock is installed.
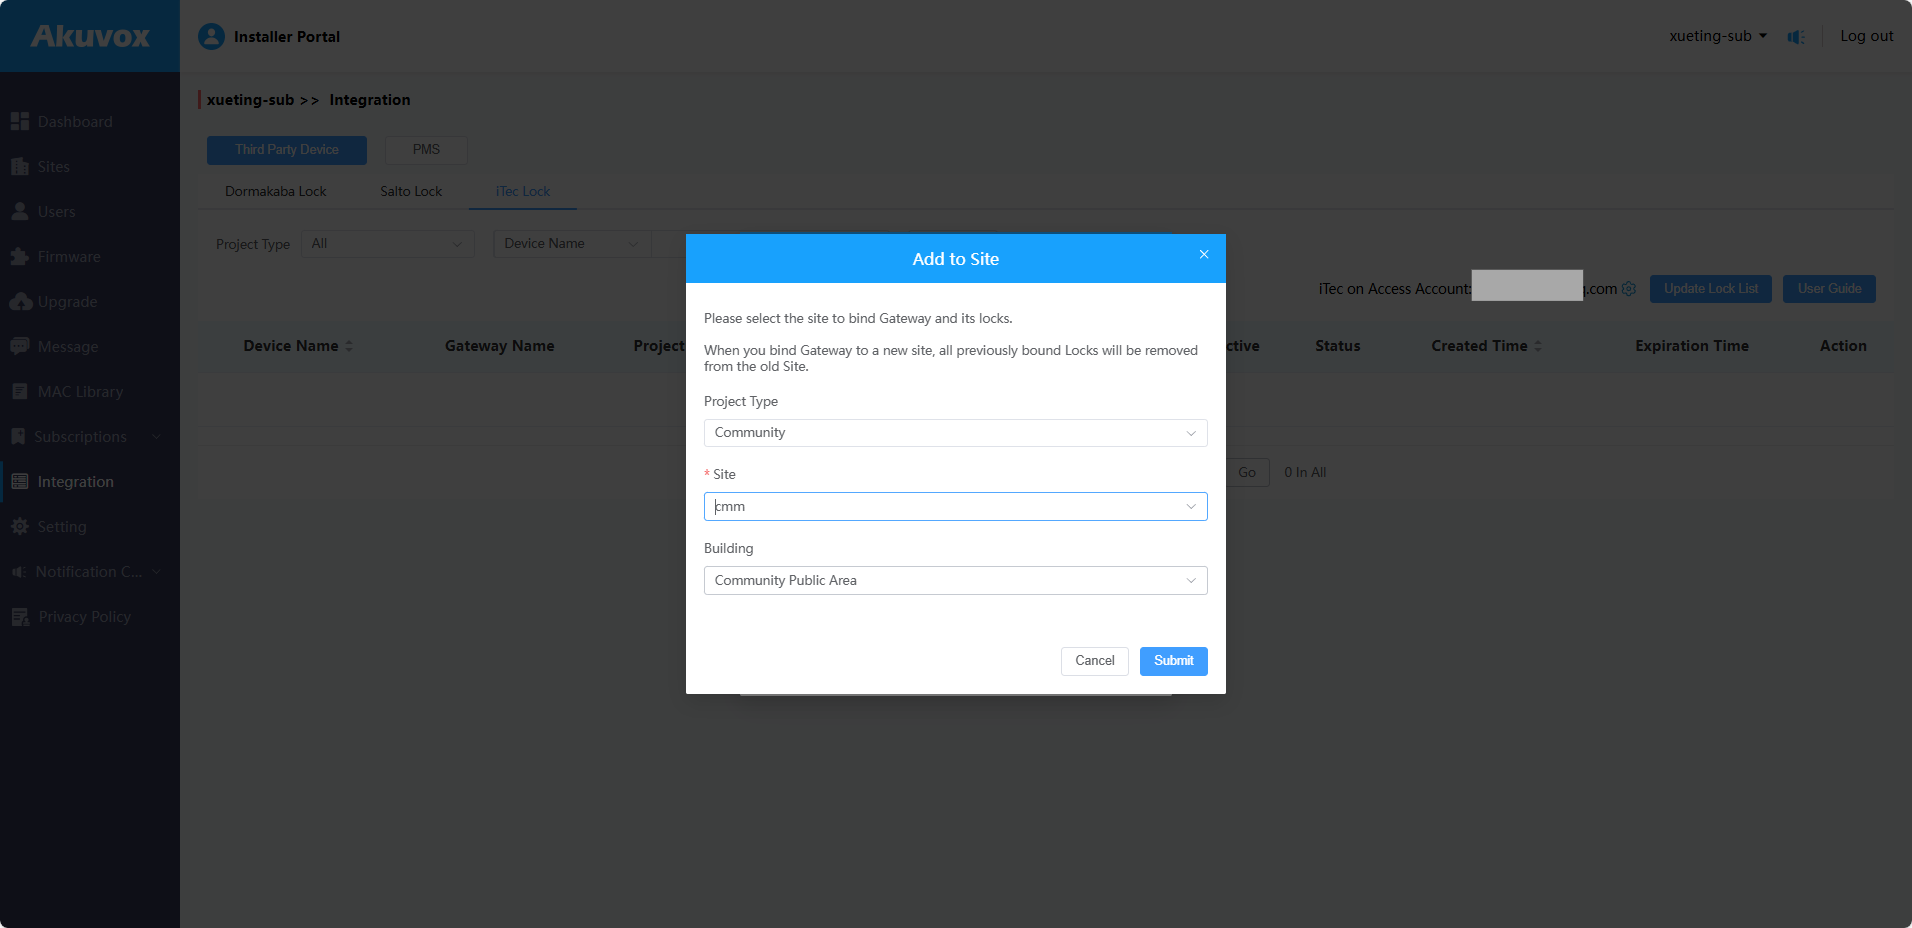
Click Submit.
Modify Locks
After assigning the gateway, locks will display.
You can modify and remove the gateway by clicking
.
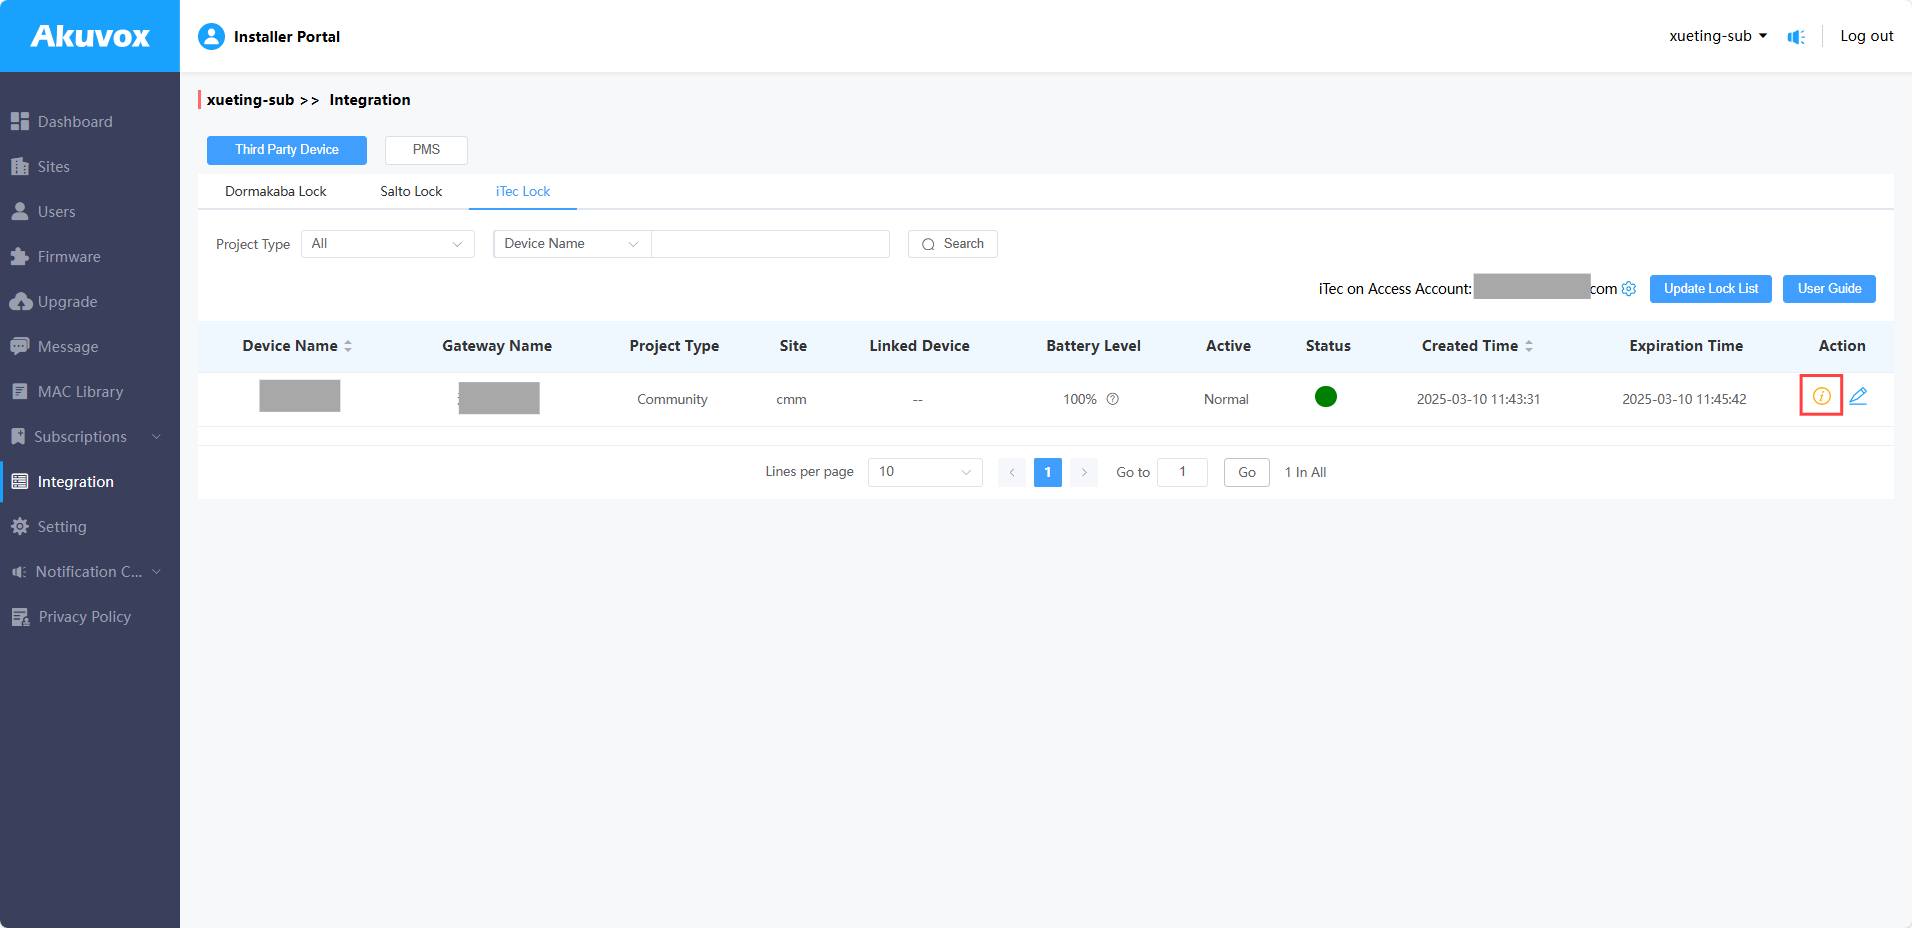
Check the lock’s battery level and view the detailed information by clicking
 .
.When the battery level is lower than 10% and 5%, notifications will be sent to the SmartPlus Apps of property managers or end users.
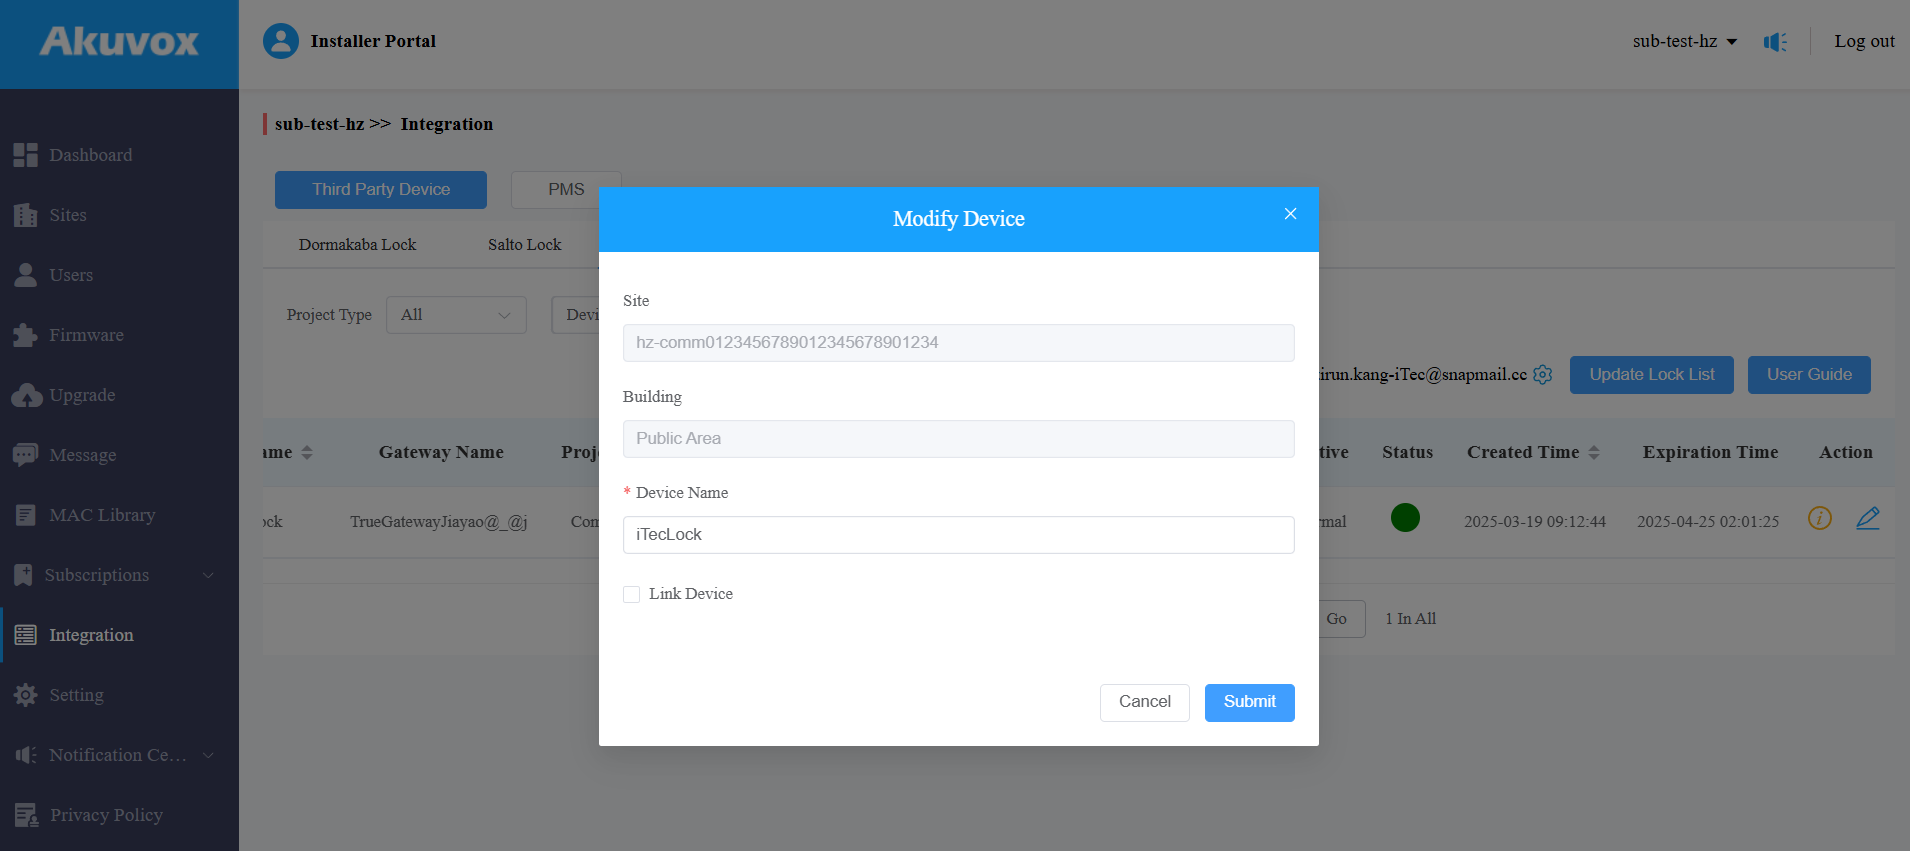
Change the lock name and link it to an Akuvox door phone by clicking
 . After linking, the lock will be displayed on the door phone’s Relay list instead of the homepage of the SmartPlus App. It will be unlocked each time with the relay trigger.
Note
S539, S532, X912, X915 V1/V2, X916, R29, R28 V2.0, E16 V2.0, E18, R20 V5.0, E12 V2.0, A092, A094, A08, A05 V2.0, A01, A02, and A03 supports linking to locks.
Check the Assigned Locks
After adding the iTec lock, you can check its information and unbind it in a specific project.
In a Single-family Project
Go to a specific single-family site and click
 of the desired user.

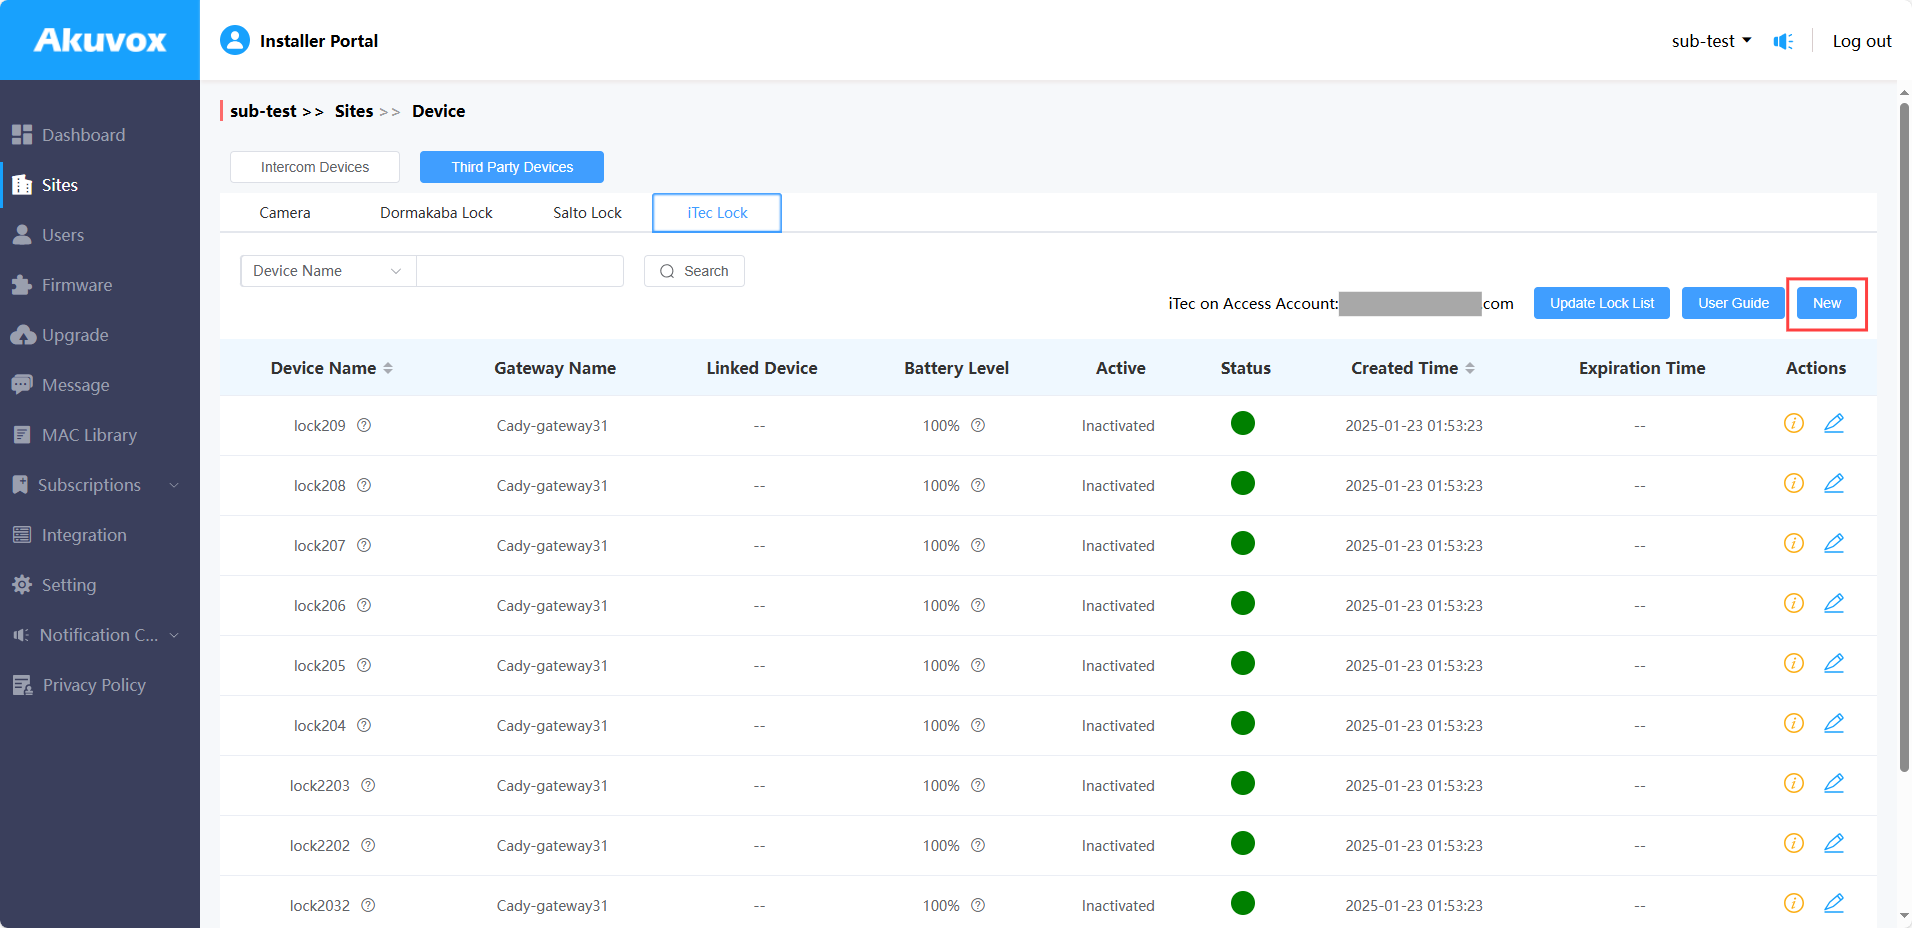
Click Third Party Devices.
Click iTec Lock where the assigned gateways will be displayed.
You can click New to assign the added gateway to the site. All locks under the gateway will be added to the site.
Click
to modify the device name or link it to a door phone.
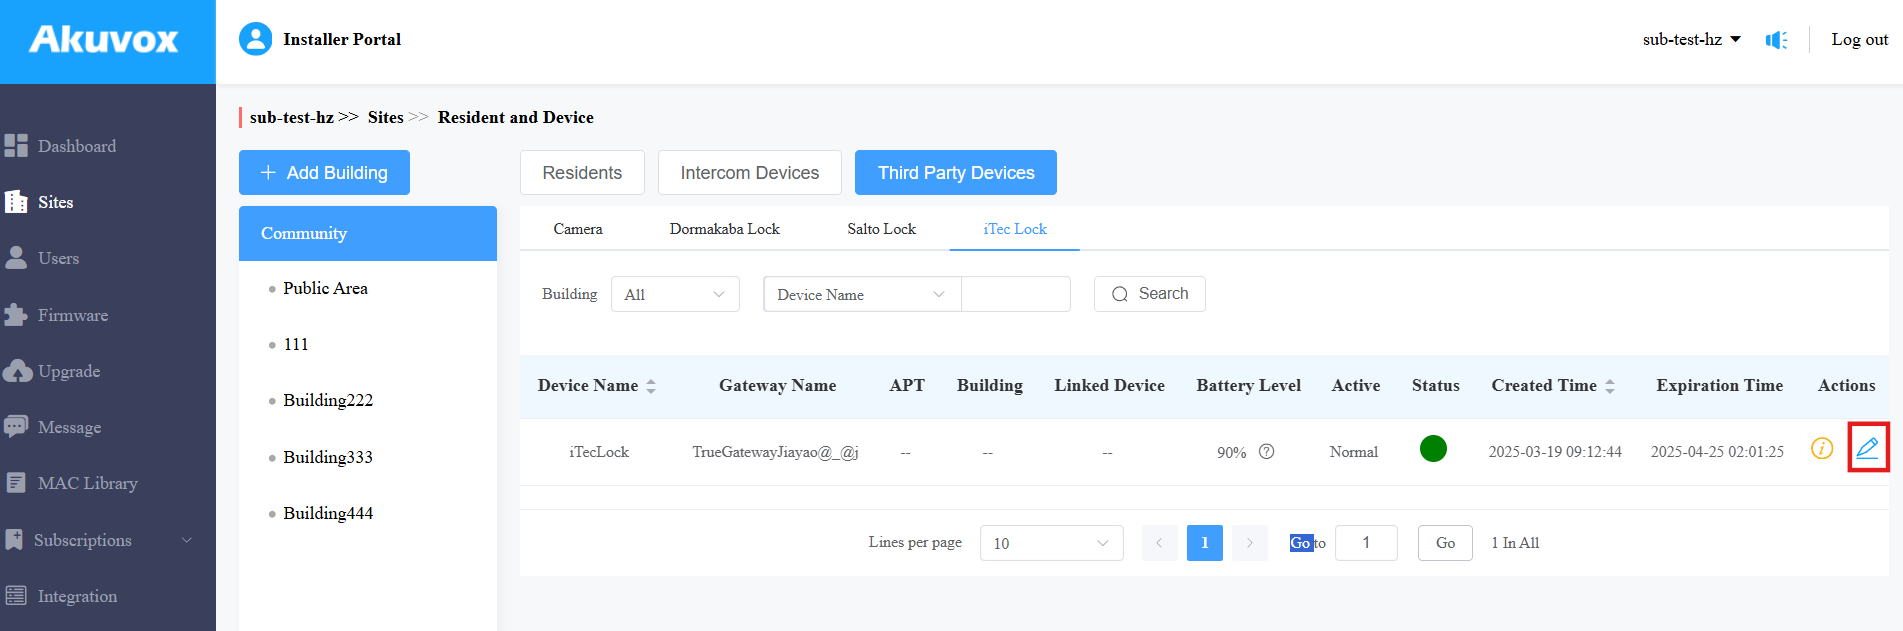
In a Community Project
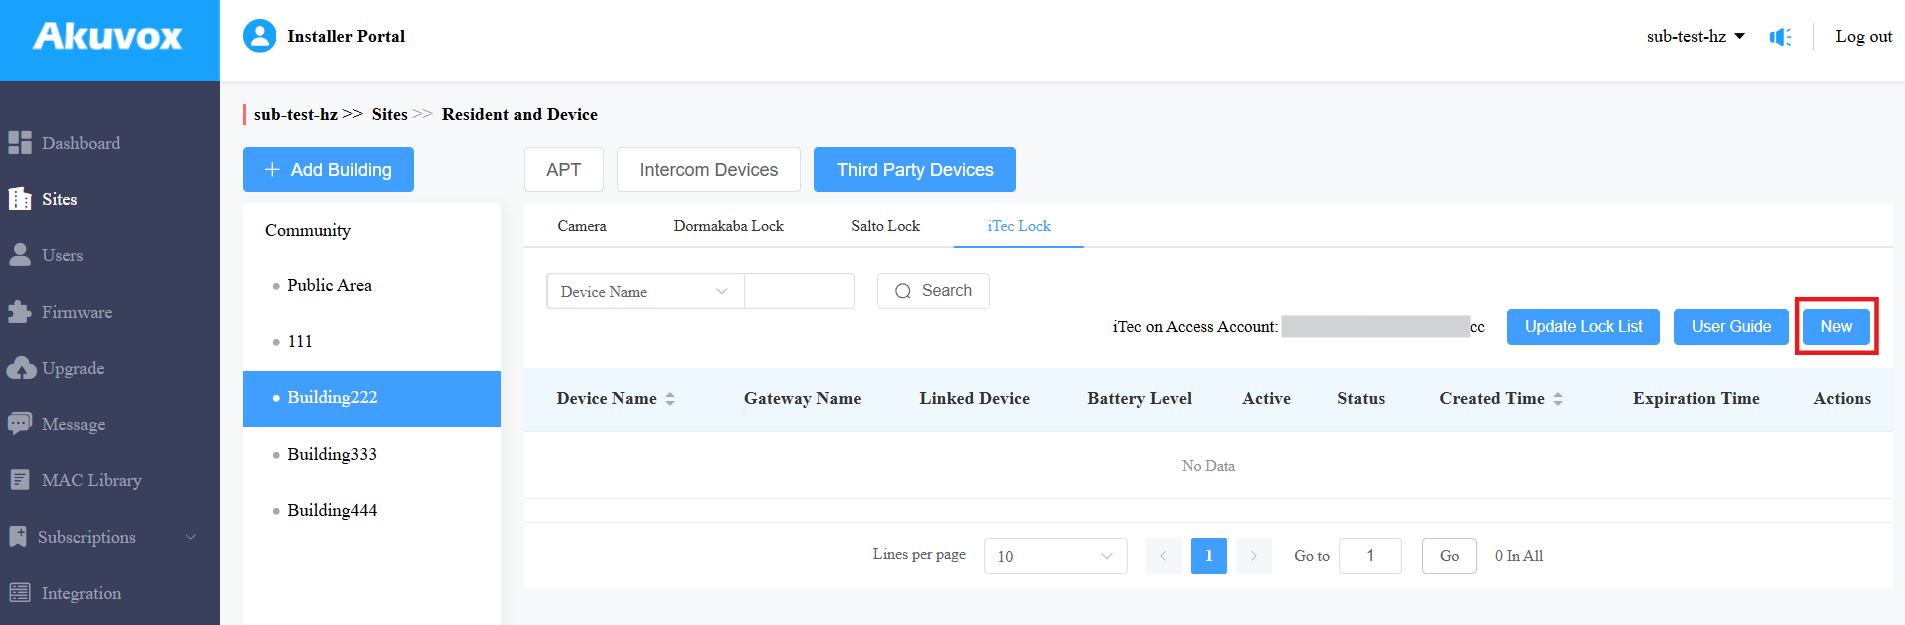
Go to a specific community project and click the desired area or building where the lock is installed.
Click Third Party Devices and select iTec Lock where the assigned gateway will be displayed.
You can click New to assign the added gateway to the area/building. All locks under the gateway will be added.
Click
to modify the device name or link it to a door phone.
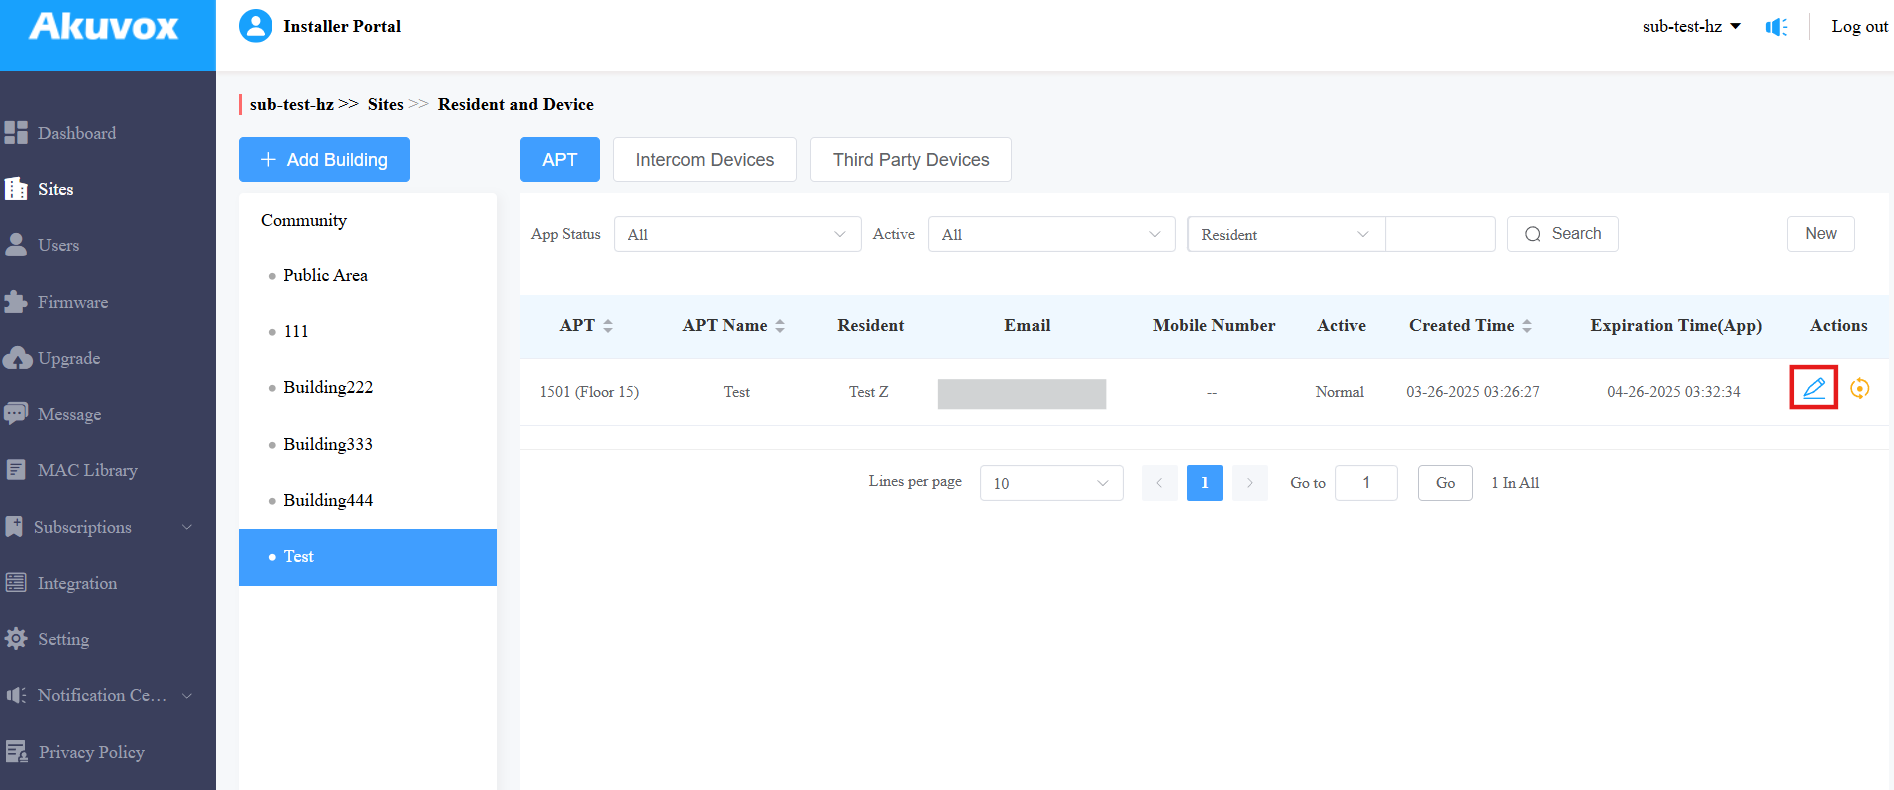
If the lock is assigned to a specific user, click![]() of the user and scroll to the Third Party Devices section.
of the user and scroll to the Third Party Devices section.
Pay for the Integration
The integration requires payment.
For community projects, you can pay for it if the project charge mode is By Installer that is selected when you create the community.
For single-house family projects, you need to be granted permission by your distributor to pay fees.
Click Subscription on the left column.
Select the project type and click Activate.
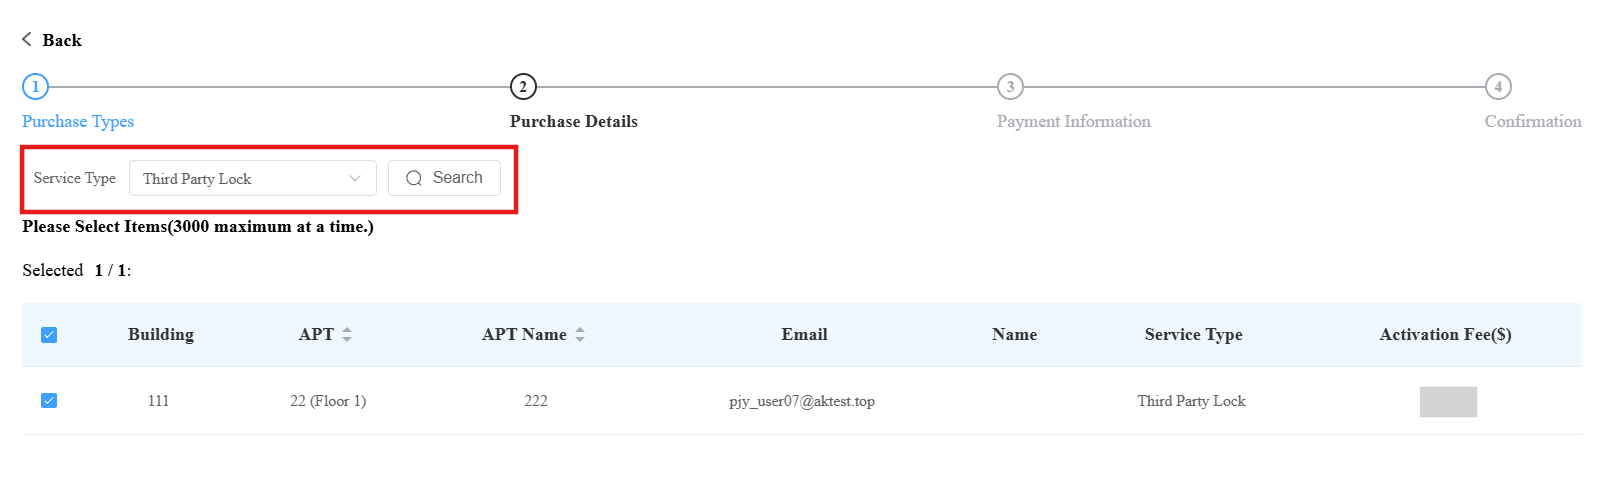
Select the target project and choose Third Party Lock service type.
Check the desired item.
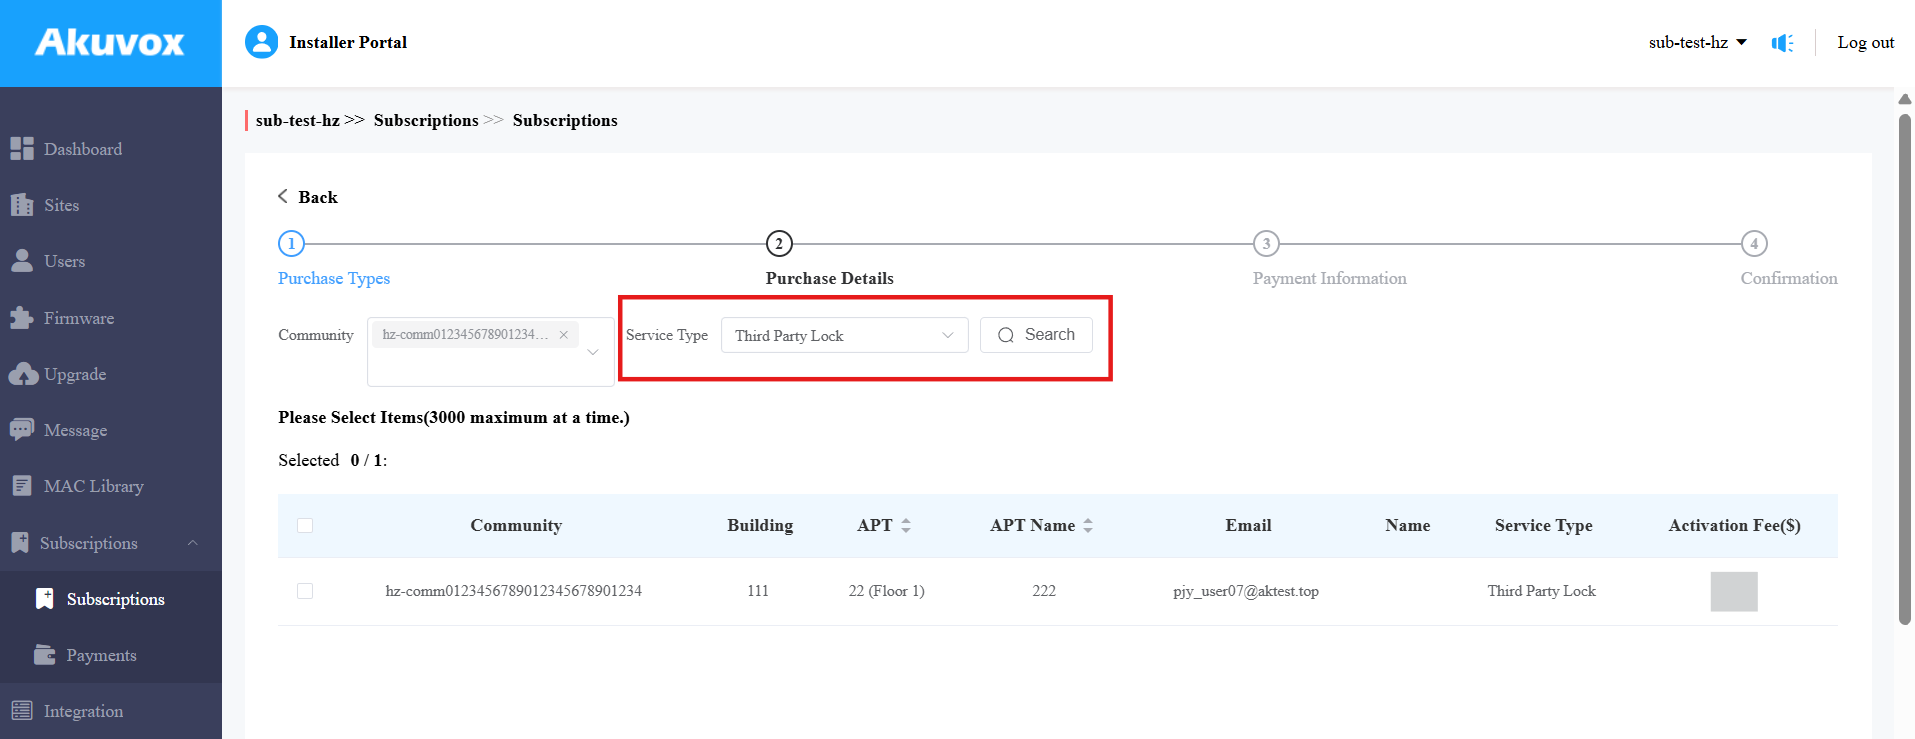
Click Next and complete the billing information.
Click Pay, and follow the on-screen instructions to finish the payment.
After the activation, a notification email will be sent to property managers(community projects) or end users(single-house family project).
For Property Managers
After installers assign locks to projects, you can manage locks.
Pay for the Integration
If your installers have set the Charge Mode to By Property Managers, you need to pay for the integration before using the locks.
If the Charge Mode is By Installer, the Subscription module will be hidden on the SmartPlus property manager web portal.
Log in to the SmartPlus platform with a property manager account.
Click Subscription on the left column.
Click Activate.
Choose Third Party Lock service type.
Check the desired item.
Click Next and complete the billing.
Click Pay, and follow the on-screen instructions to finish the payment.
After the activation, a notification email will be sent to you.
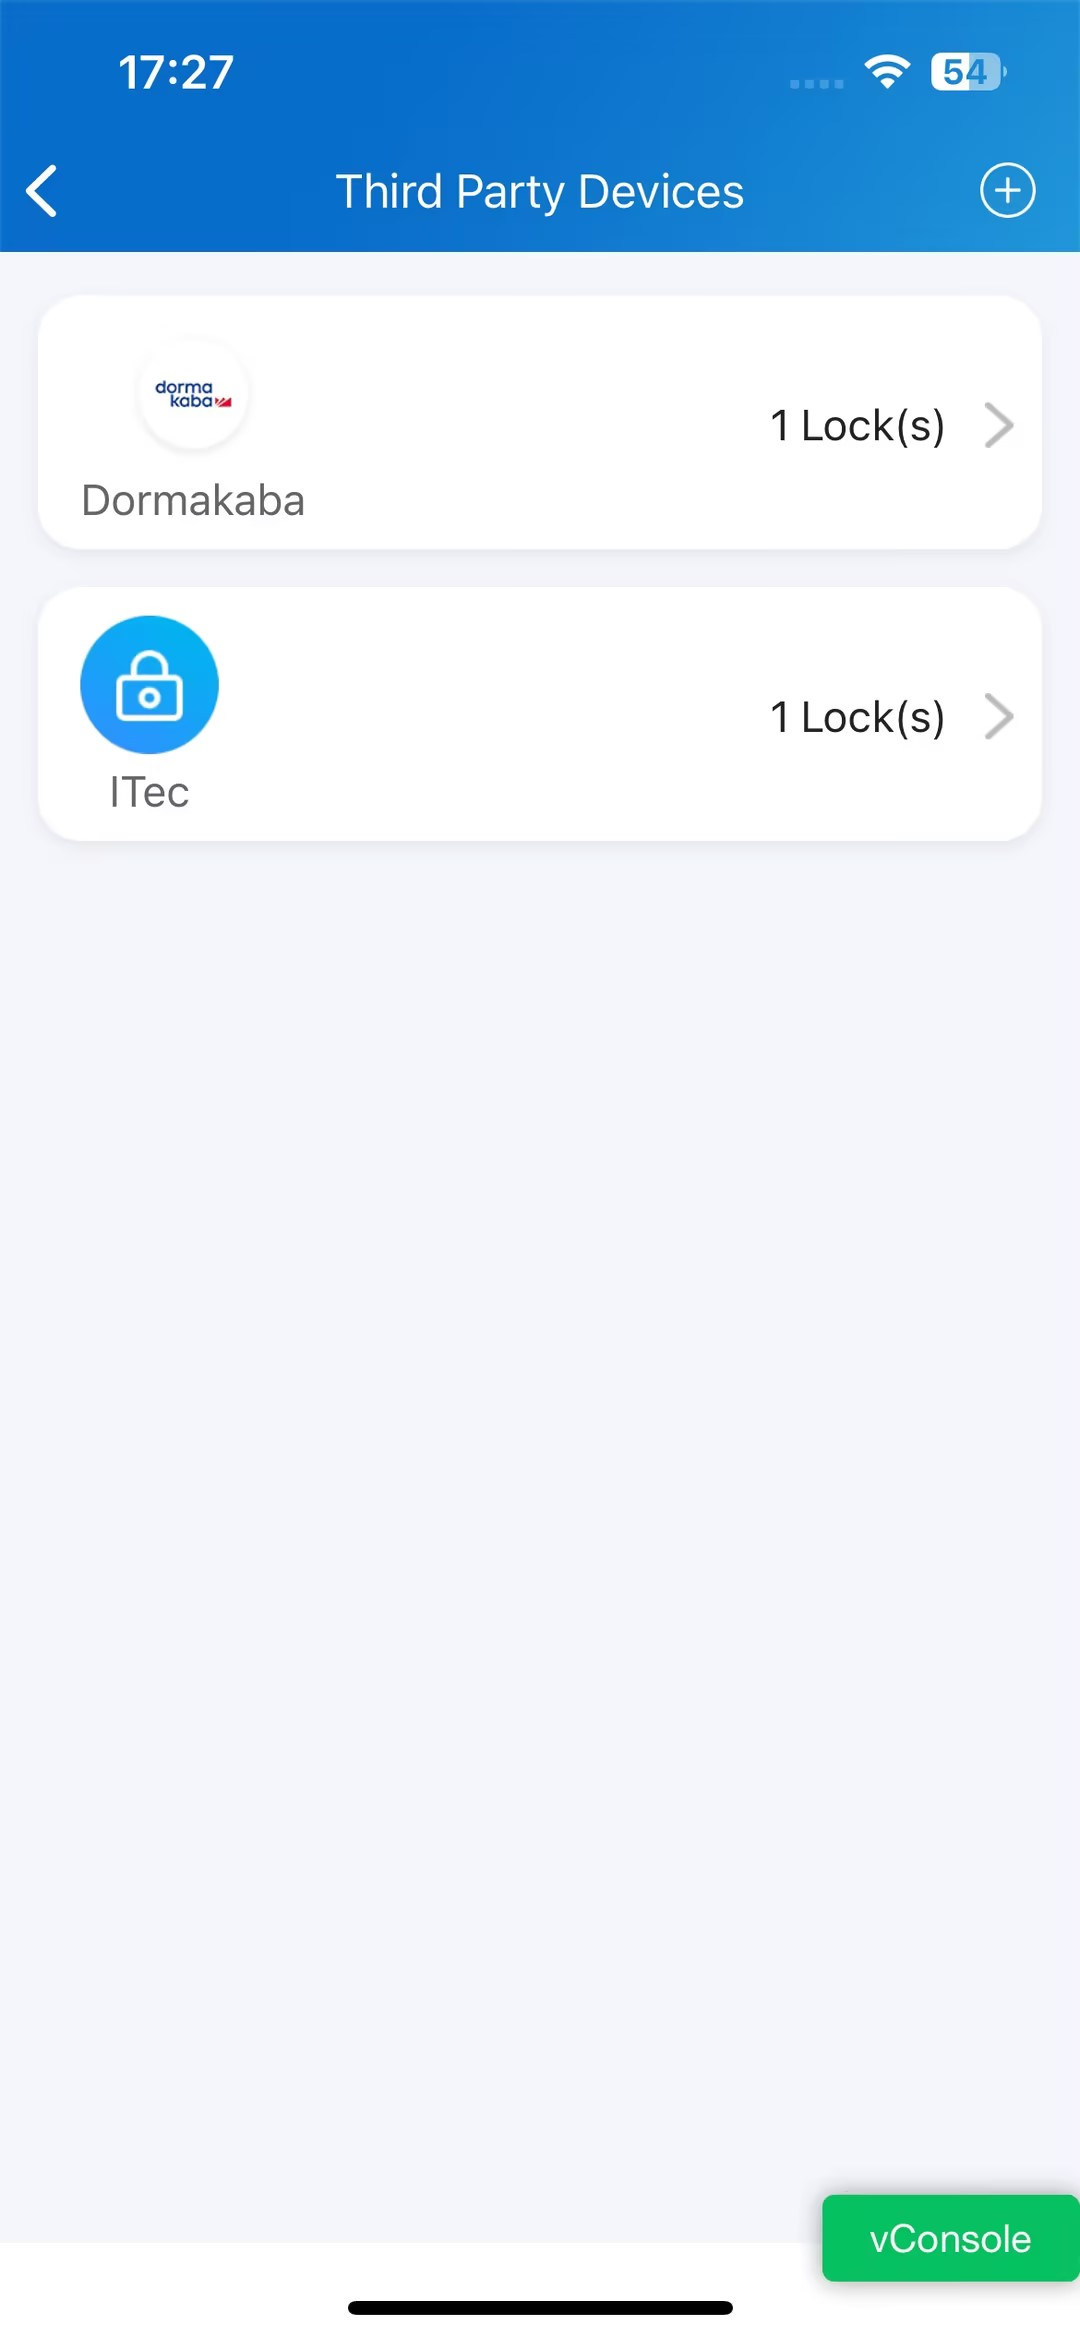
Check and Set up Locks
Click Devices on the left column.
Click Third-party Devices > iTec Lock.
You can:
check the lock’s battery level;
view the detailed information by clicking
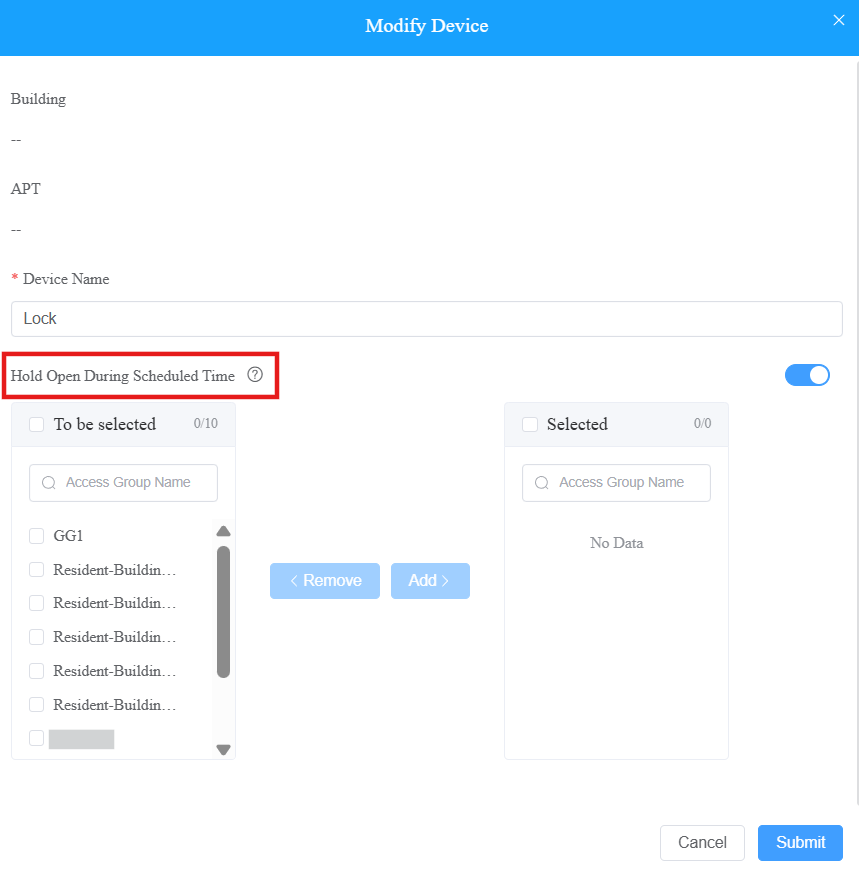
;modify the device name by clicking
;keep the lock open during scheduled times by clicking
.

To keep the lock open during scheduled times, select an access group and move it from the left to the right box.
Note
ONLY one access group can be applied.
During the scheduled time, the lock keeps open after it is unlocked. It will NOT automatically open when the time arrives.
Click here to view how to set up an access group.
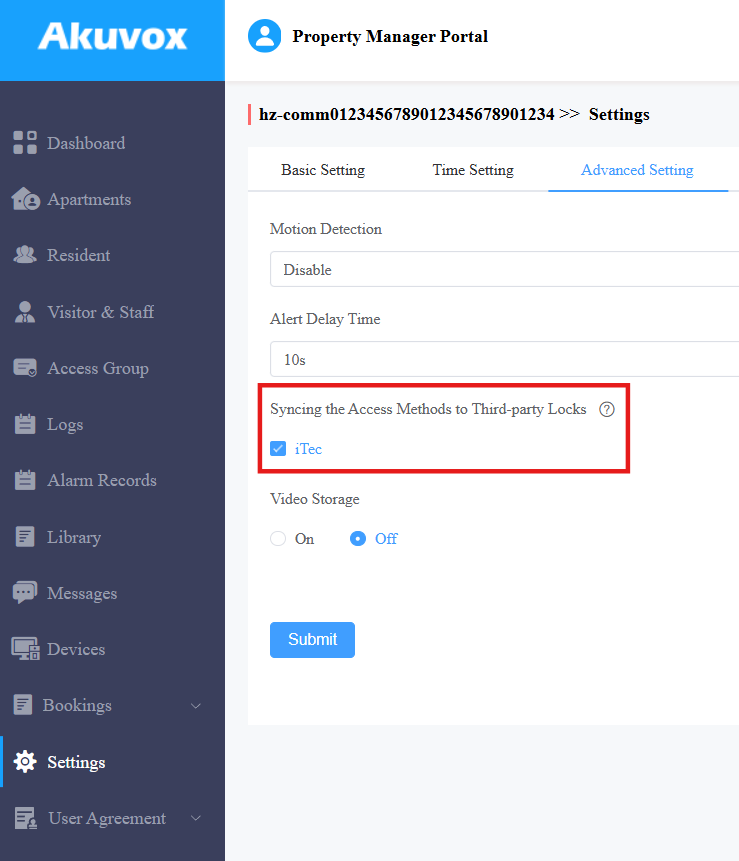
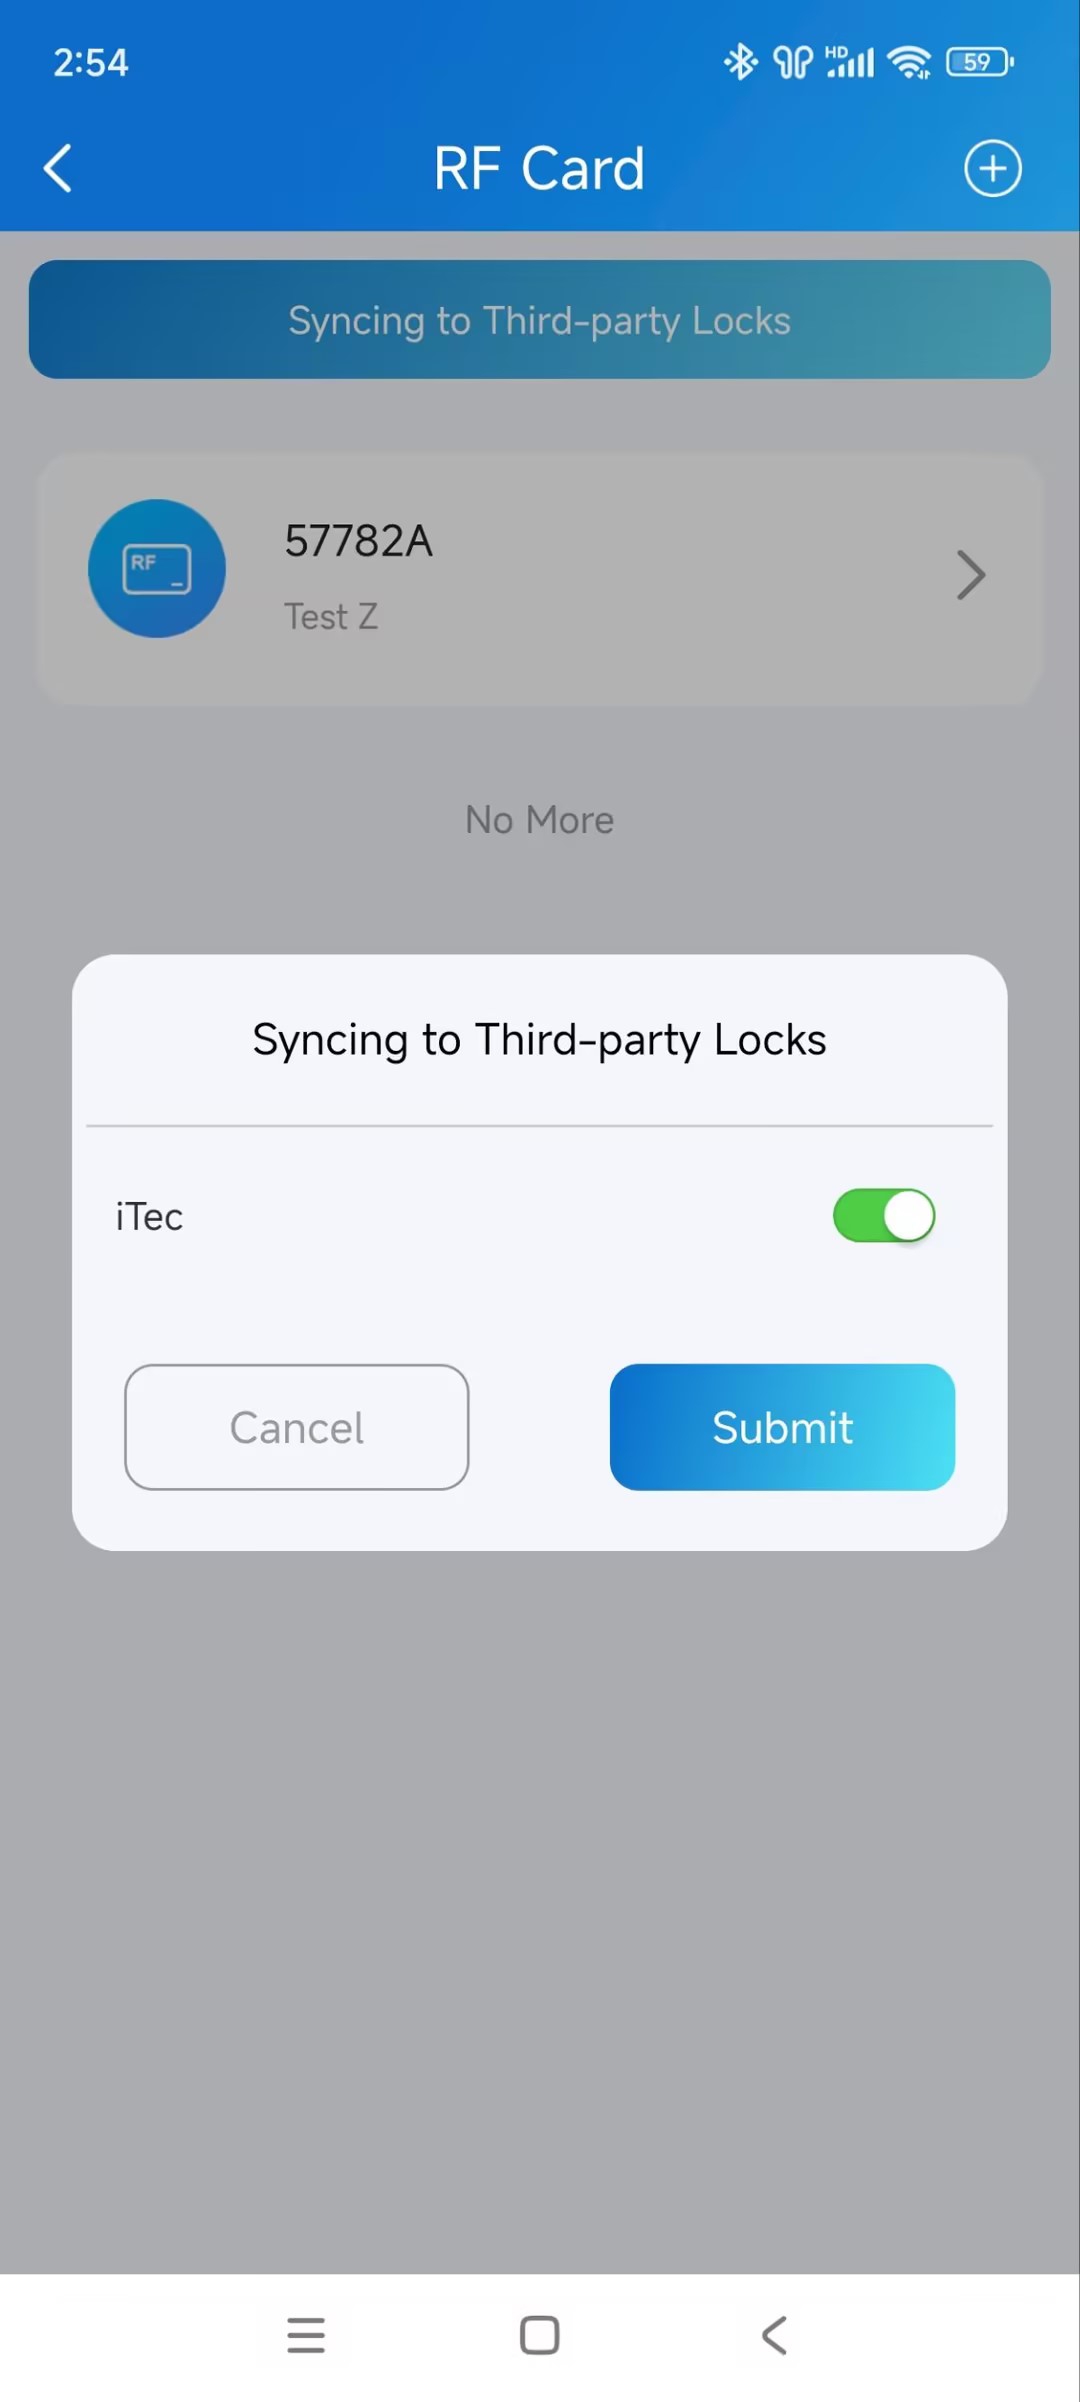
Sync User PIN and RF Card to Open Locks
You can control whether to synchronize user PIN and RF card to open iTec locks. Once enabled, users can directly open locks with their PINs and RF cards created by you on the SmartPlus Cloud.
To enable the feature, click Settings on the left column.
Click Advanced Setting.
Check the iTec option.
Note
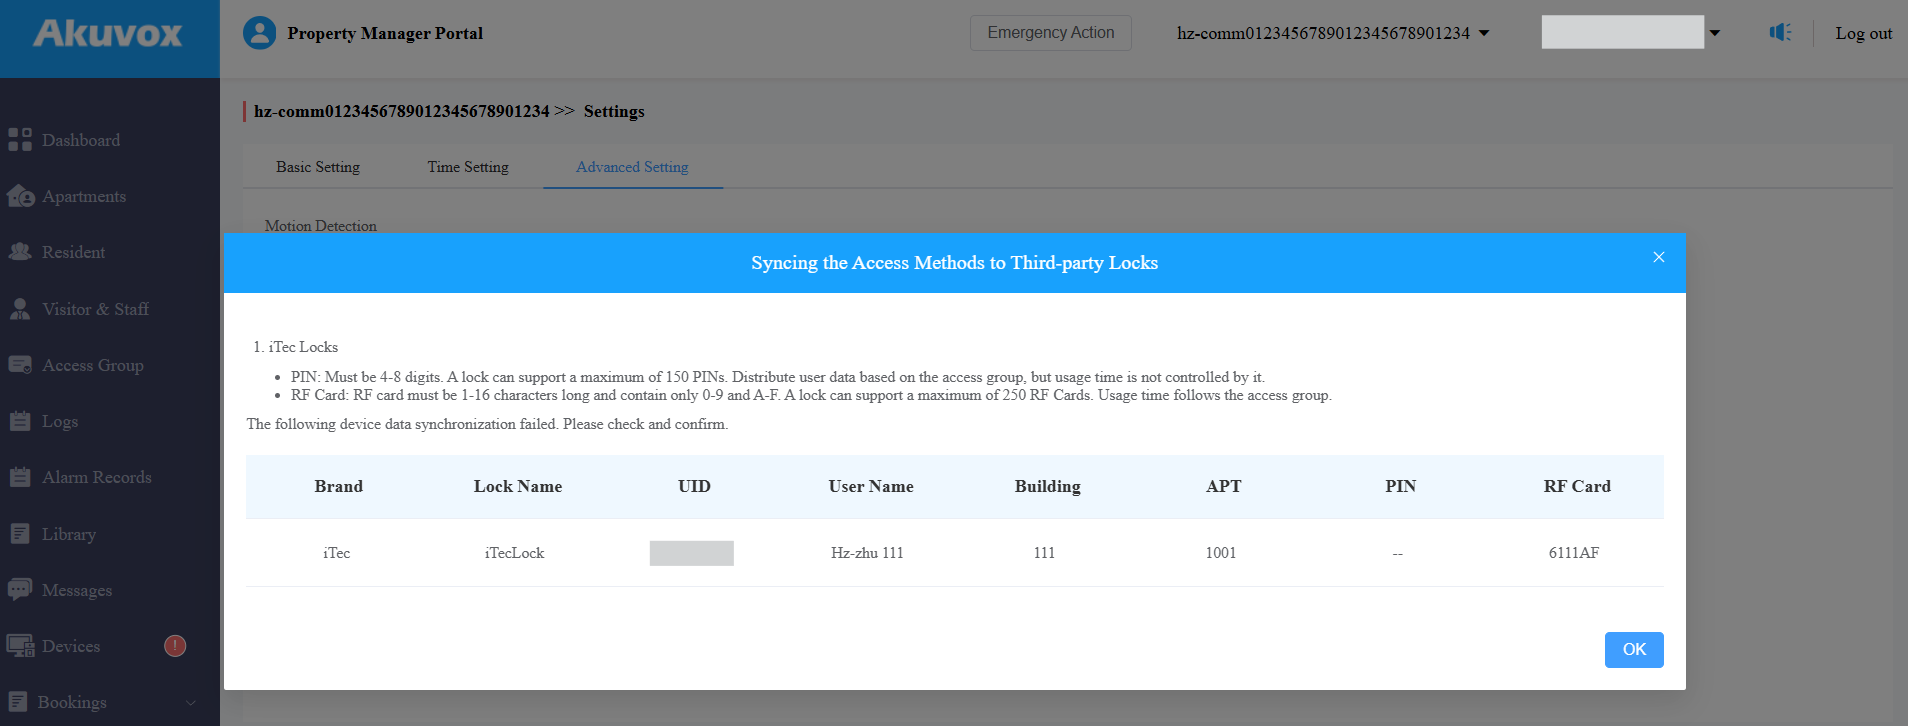
PIN: Must be 4-8 digits. A lock can support a maximum of 150 PINs. Users can use their PINs to open the iTec lock at any time unlimited by the access group.
RF Card: Must be 1-16 characters long and contain only 0-9 and A-F. A lock can support a maximum of 250 RF cards. Using RF cards to open the locks is limited by the access group.
For example, if a user is added to an access group with the door opening time limited from 8:00 a.m. to 22:00 p.m. The user can use the RF card to open the door during this time while use the PIN at any time.
Click Submit to start the synchronization. It may take a few seconds.
After the progress reaches 100%, the failed synchronization will display.
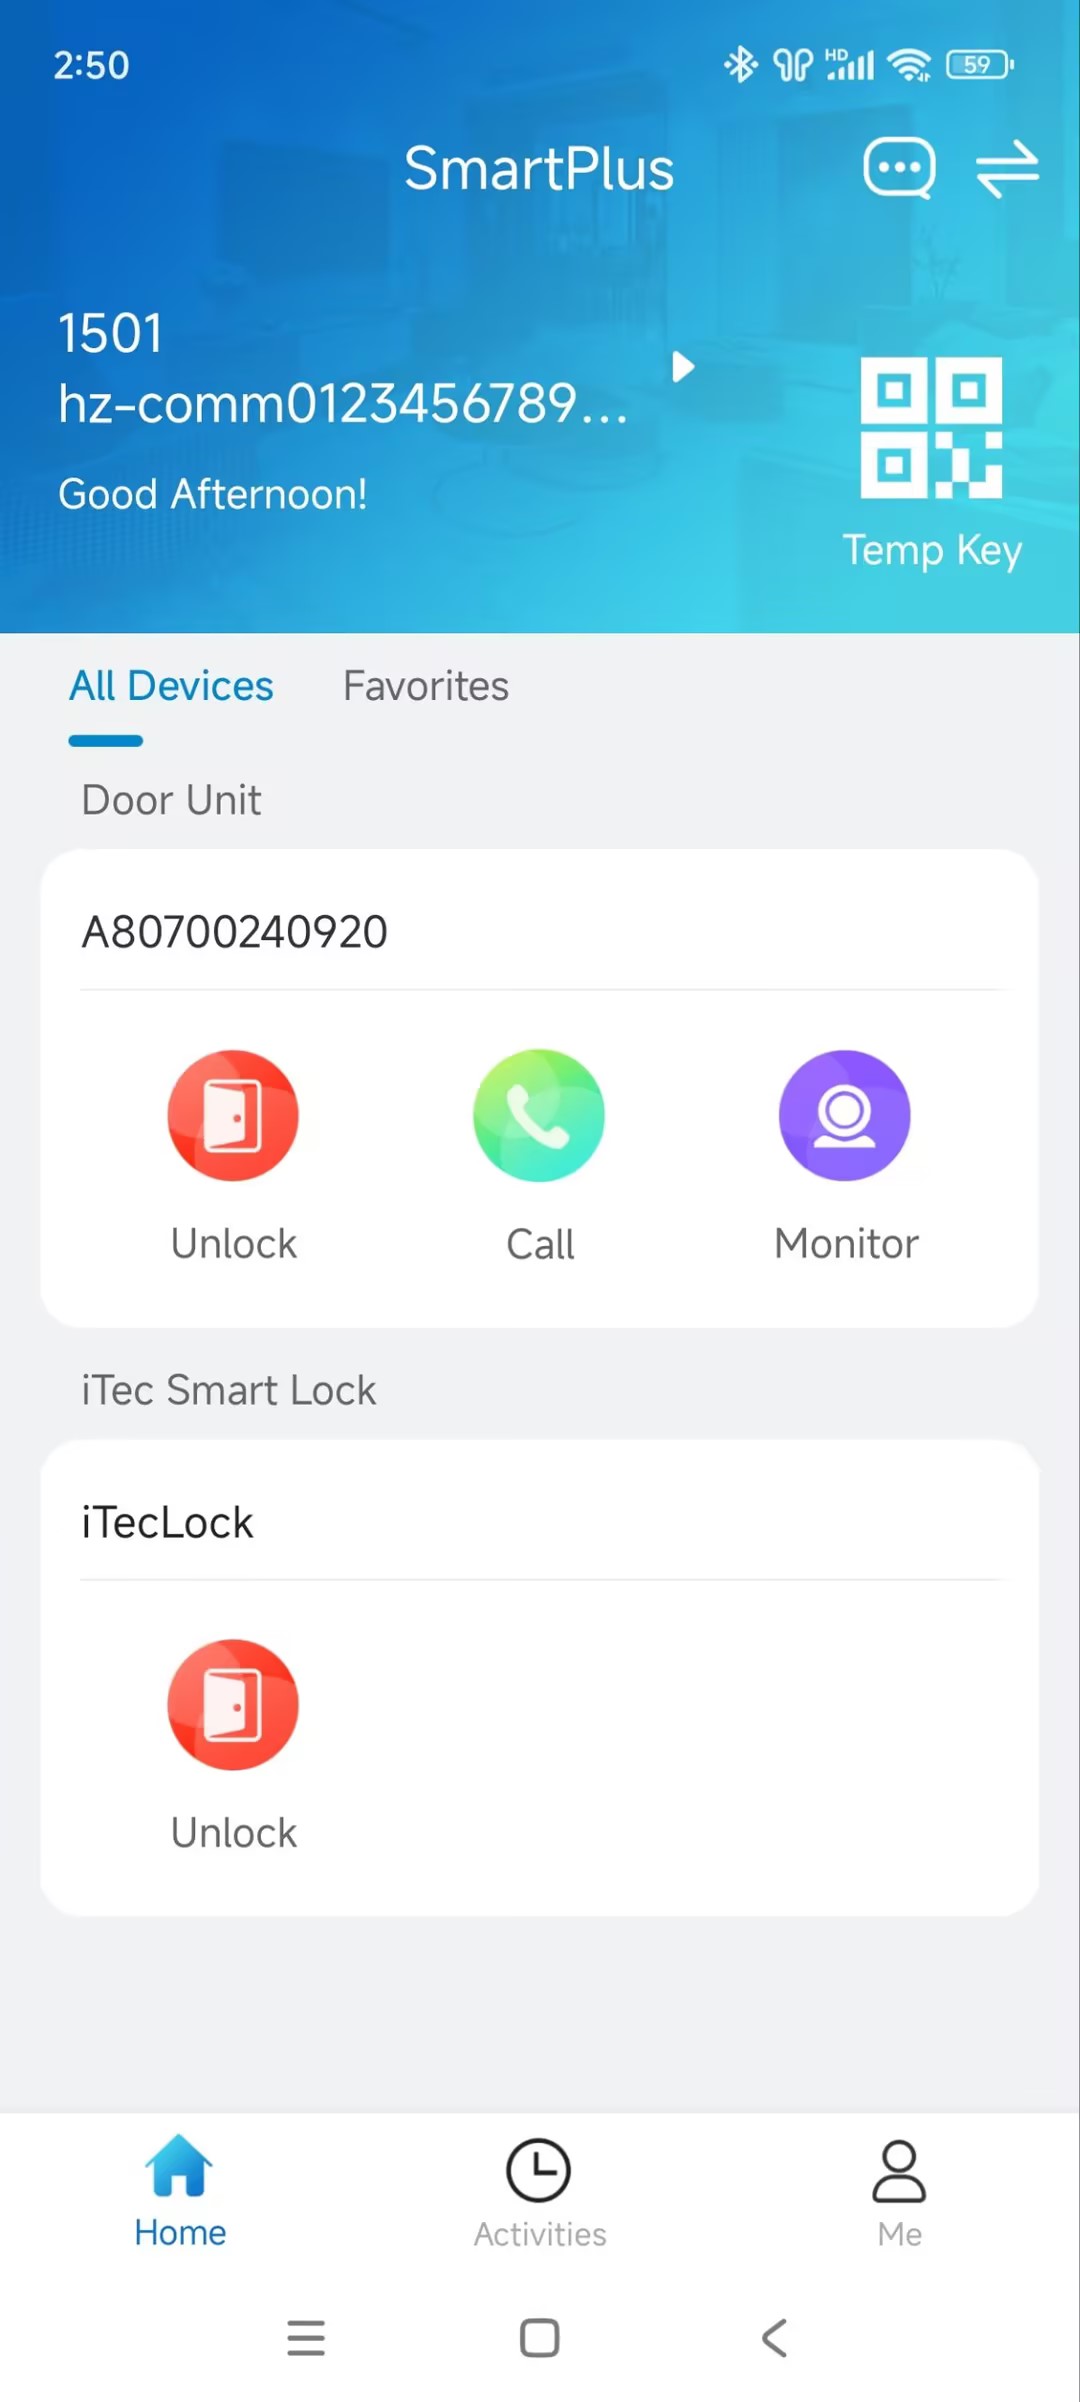
Open Locks with the SmartPlus App
You can open locks that are used in the public area.
Tap Unlock on the homepage when it is not linked to a door phone.
When it is linked, it will be opened with the door phone’s relay. Tap Unlock of the linked door phone and see the door lock option. The lock will also be opened when you tap Unlock during monitoring and calling.
.jpg)
For End Users
You can unlock and manage iTec locks with SmartPlus Apps after installers assign the locks.
Note
SmartPlus App with the version 7.10.0008(Android)/7.10.9(iOS) or higher support controlling iTec locks.
Unlock the Lock
Unlock the lock on the homepage when it is not linked to a door phone.
When it is linked, tap Unlock of the linked door phone and see the door lock option. The lock will also be opened when you tap Unlock during monitoring and calling.
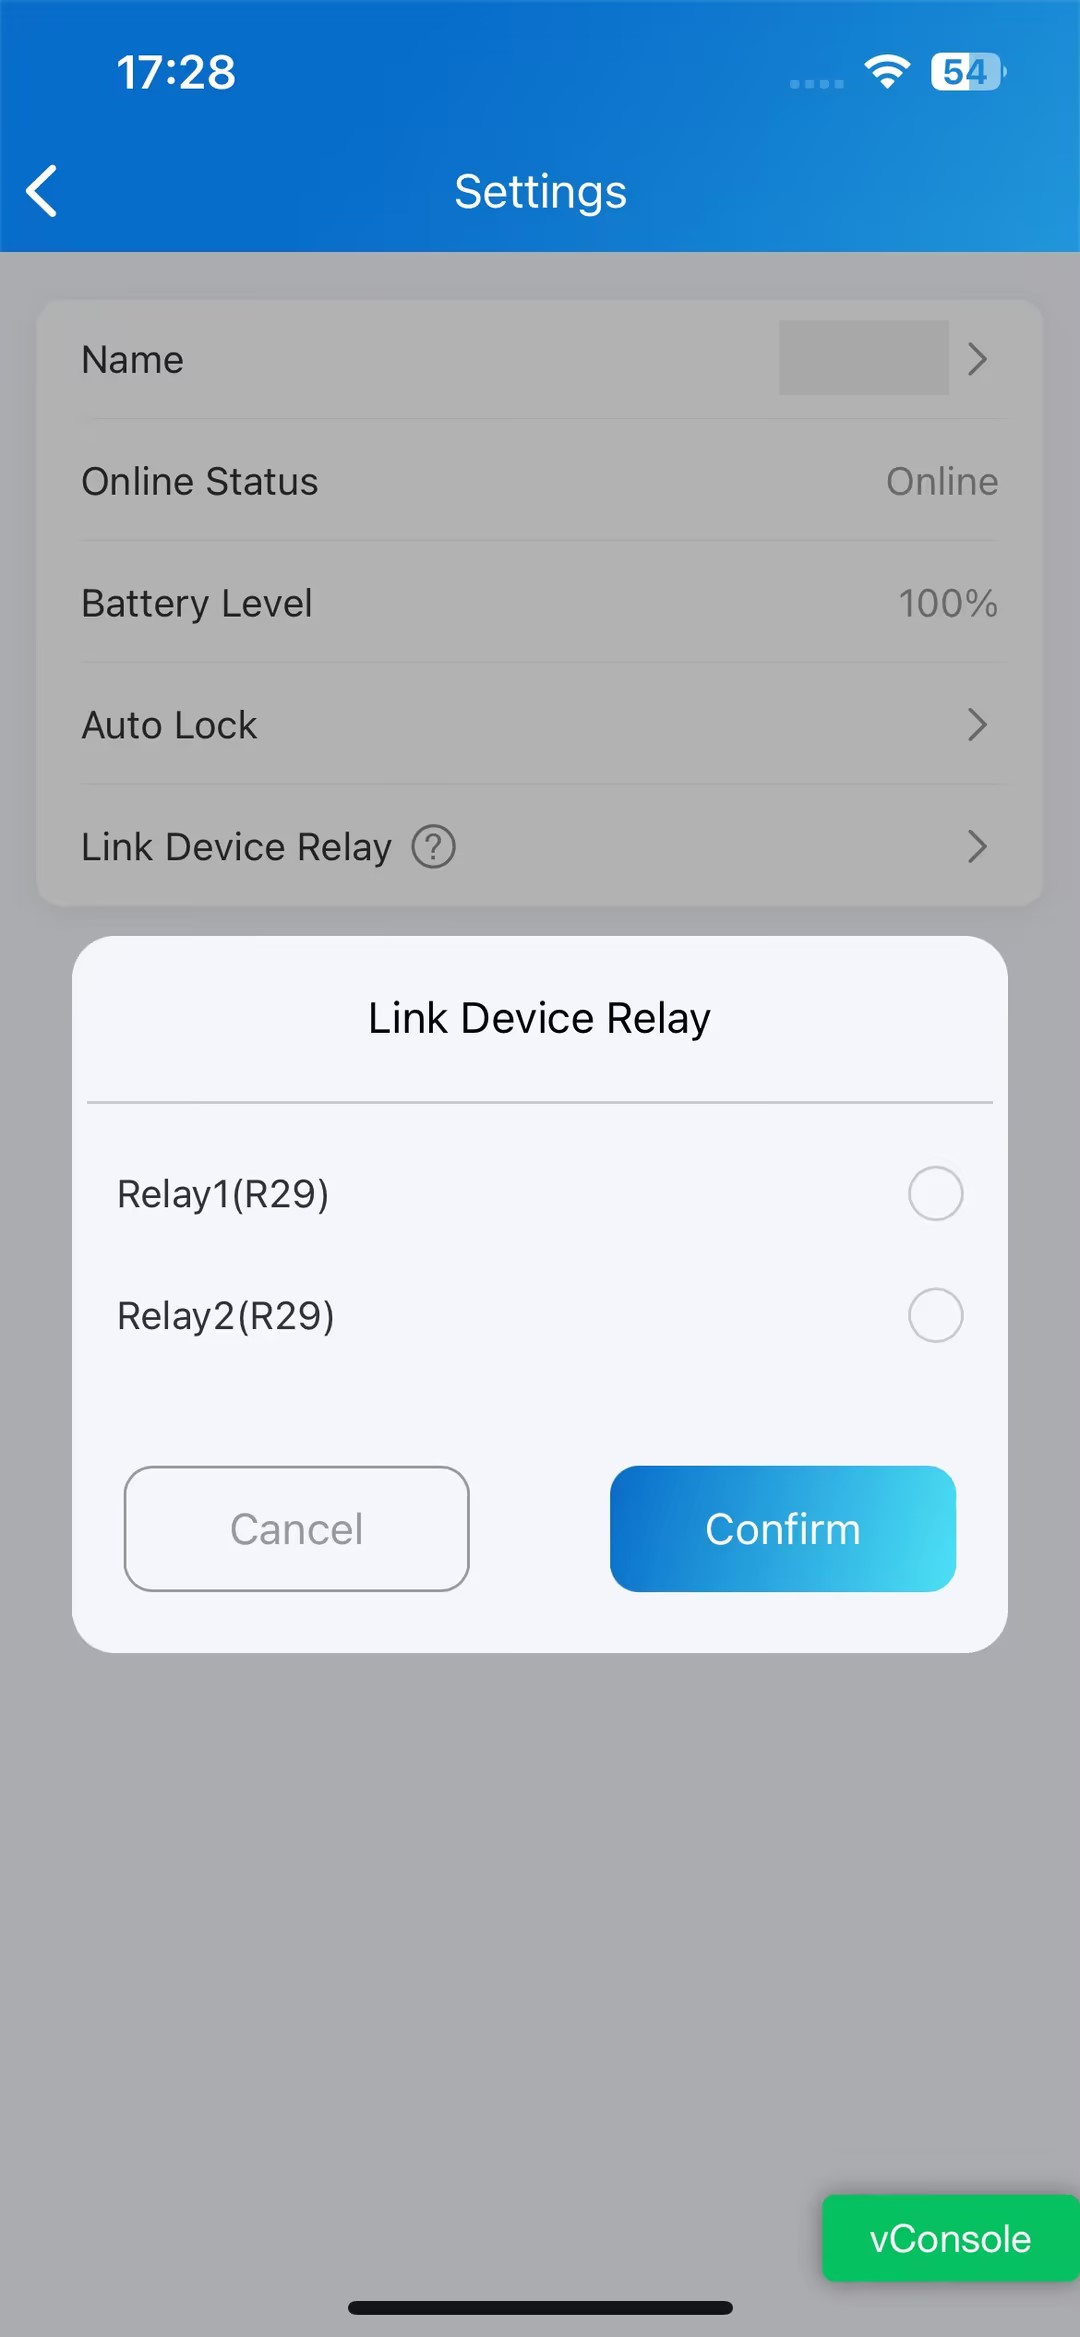
Set up the Lock
When the lock is assigned to your apartment, you can set it up. For locks used in public area, you can check its status, battery level, and linked device but not make modifications.
Go to the Me > Discover > Third-Party Devices page.
Tap iTec and select the specific lock to be configured.
On the Settings page, you can:
check the status of the lock.
check the battery level. SmartPlus App will send low-battery notifications when the battery level is 15%, 10%, and 5%.
enable/disable Auto Lock function and set the auto lock time. This feature locks the lock automatically after a certain time.
link the lock to a door phone’s relay.
Sync PIN and RF Card to Open Locks
You can control whether to synchronize your PINs and RF cards to open iTec locks. Once enabled, you can directly use PINs and RF cards created on the SmartPlus App to open iTec locks.
Tap Me > Authorization.
Select Door Release PIN or RF Card.
The PIN should be 4-8 digits.
The RF card code should be 1-16 characters and contain only 0-9 and A-F.
Enable iTec.
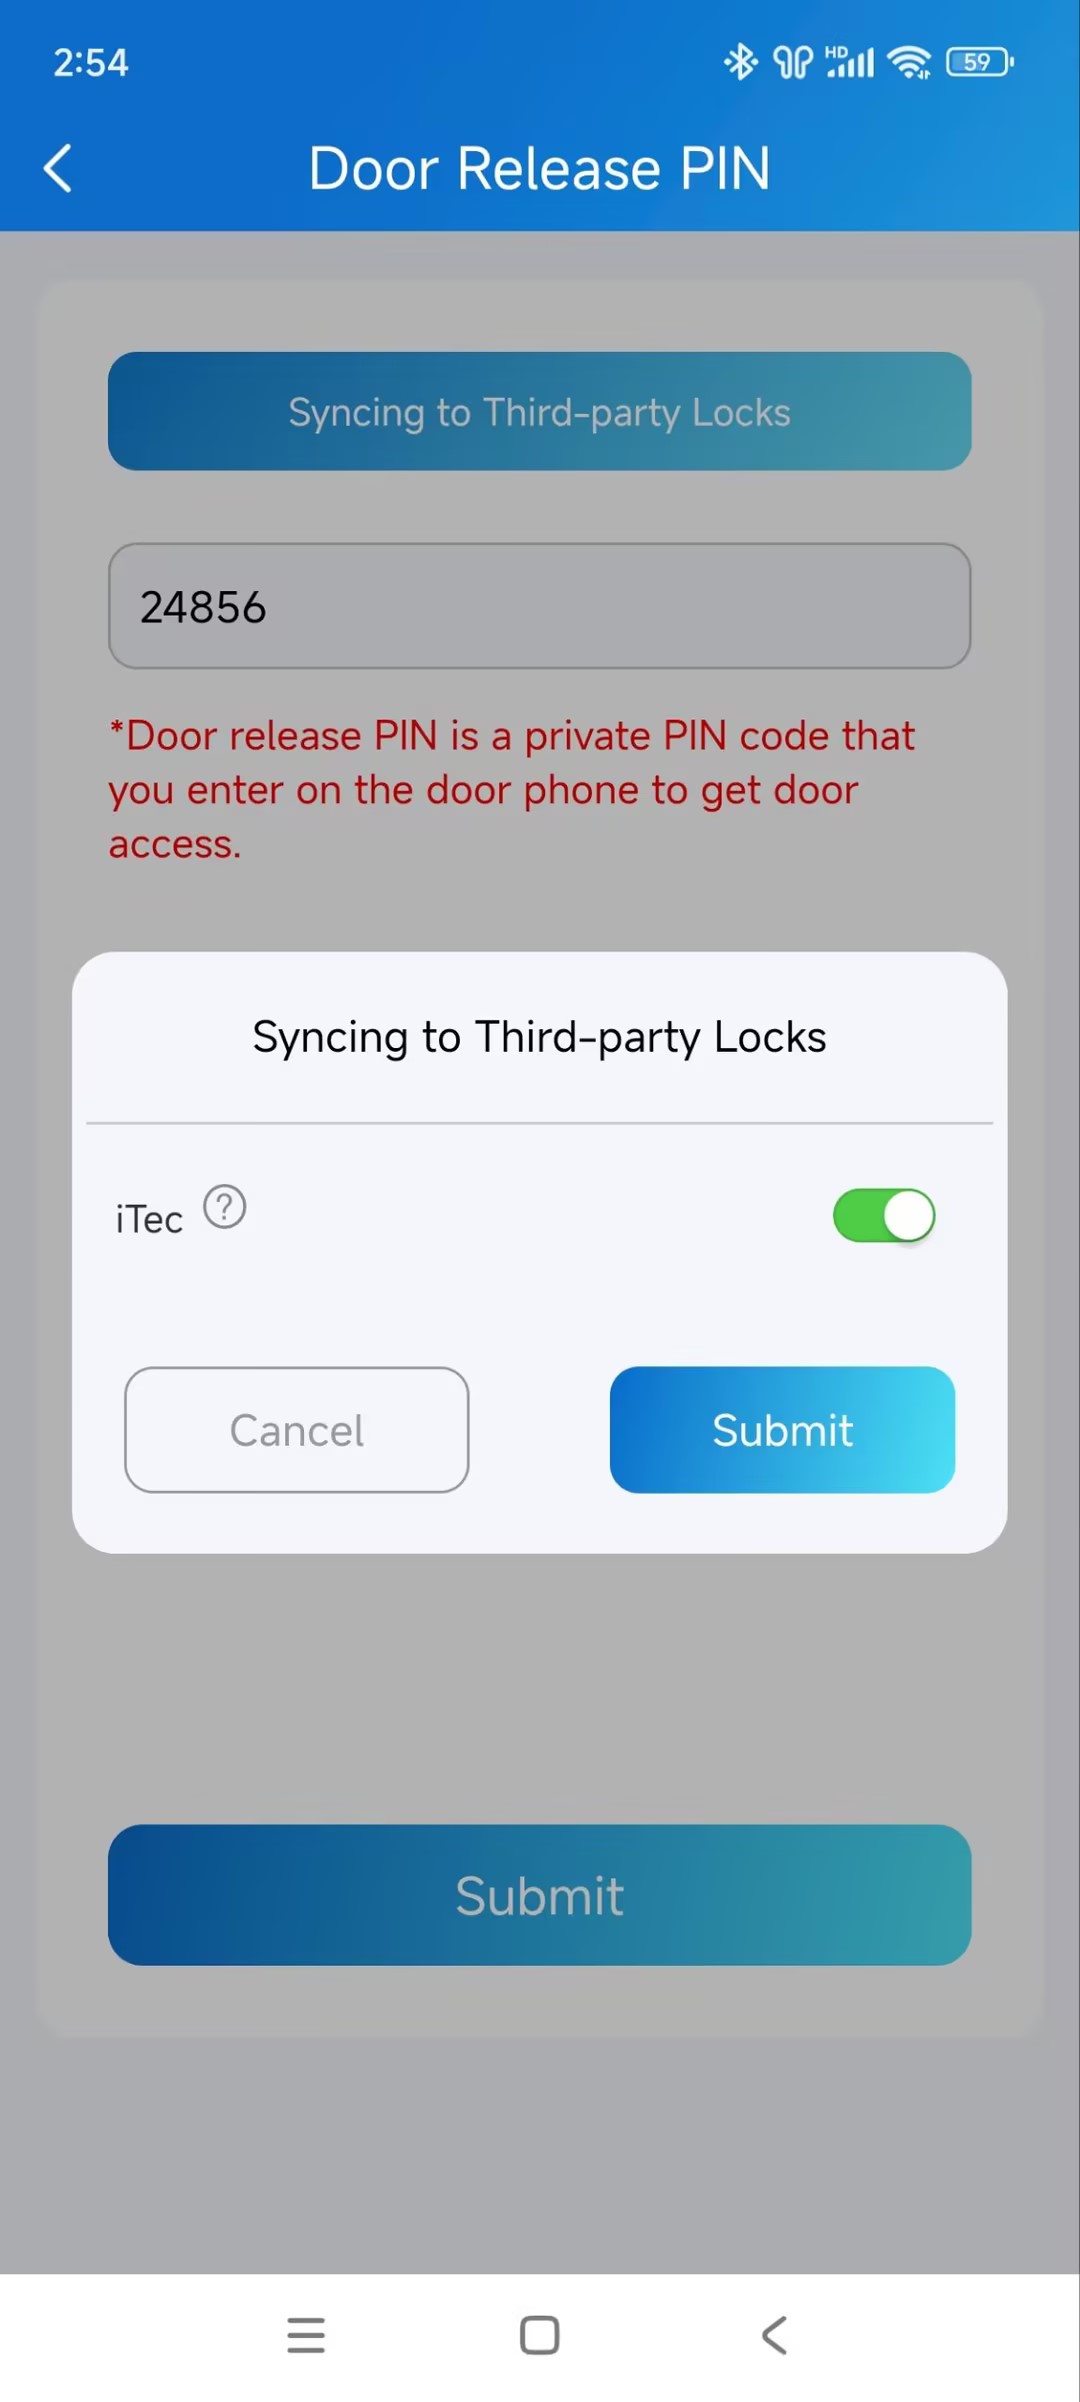
Click Submit.