Check Network Information
Check the device’s network status on the Device > Status interface.
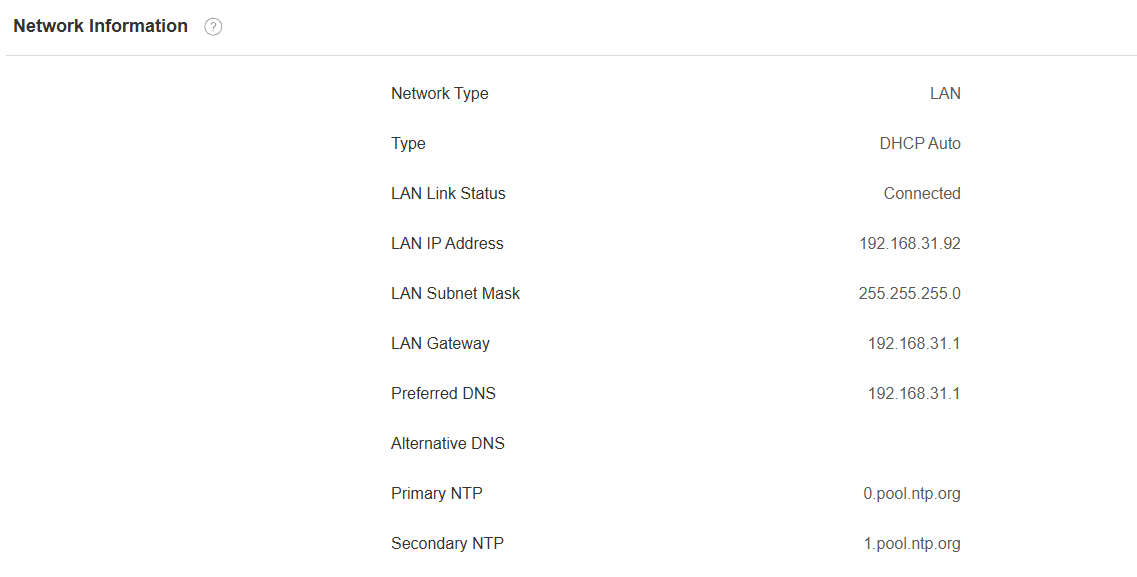
Device Network Configuration
Para garantizar un funcionamiento normal, asegúrese de que el dispositivo tenga su dirección IP correctamente configurada o obtenida automáticamente desde el servidor DHCP.
Set it up on the Network > Basic interface.
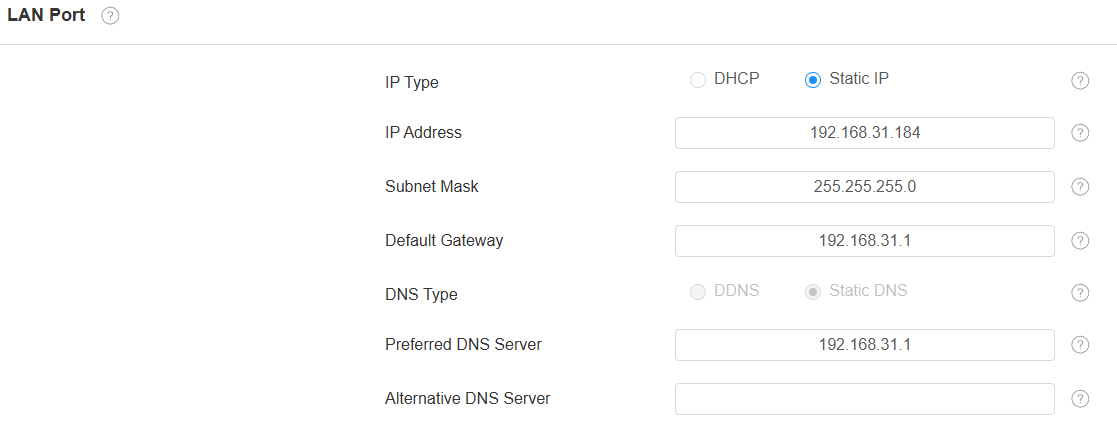
IP Type: DHCP mode is the default network connection. The device will be assigned by the DHCP server with an IP address, subnet mask, default gateway, and DNS server address automatically. In static IP mode, the IP address, subnet mask, default gateway, and DNS server address have to be manually configured according to the actual network environment.
IP Address: Set up the IP address when the static IP mode is selected. To access the device’s web settings, your computer should be on the same local network as the device.
Subnet Mask: A subnet mask tells your device which IP addresses are part of your local network and which ones are not. For example, if the subnet mask is 255.255.255.0, it means that devices with similar starting IPs (like 192.168.1.x) are in the same network.
Default Gateway: The gateway is like a bridge between your device and other networks, such as the internet. Usually, it’s the IP address of your router.
DNS Type: Domain Name System(DNS) is the overall system or network that handles the translation of domain names (like www.example.com) into IP addresses (like 192.0.2.1), which computers use to identify each other on a network.
DDNS: Dynamic DNS. It is obtained automatically through the DHCP server.
Static DNS: When selected, you need to enter the DNS manually.
Preferred & Alternative DNS Server: The preferred and alternative Domain Name Server(DNS). The device will connect to the backup server when the primary server is unavailable.
Wi-Fi Connection
Connect the device to a Wi-Fi network on the Network > Basic interface.
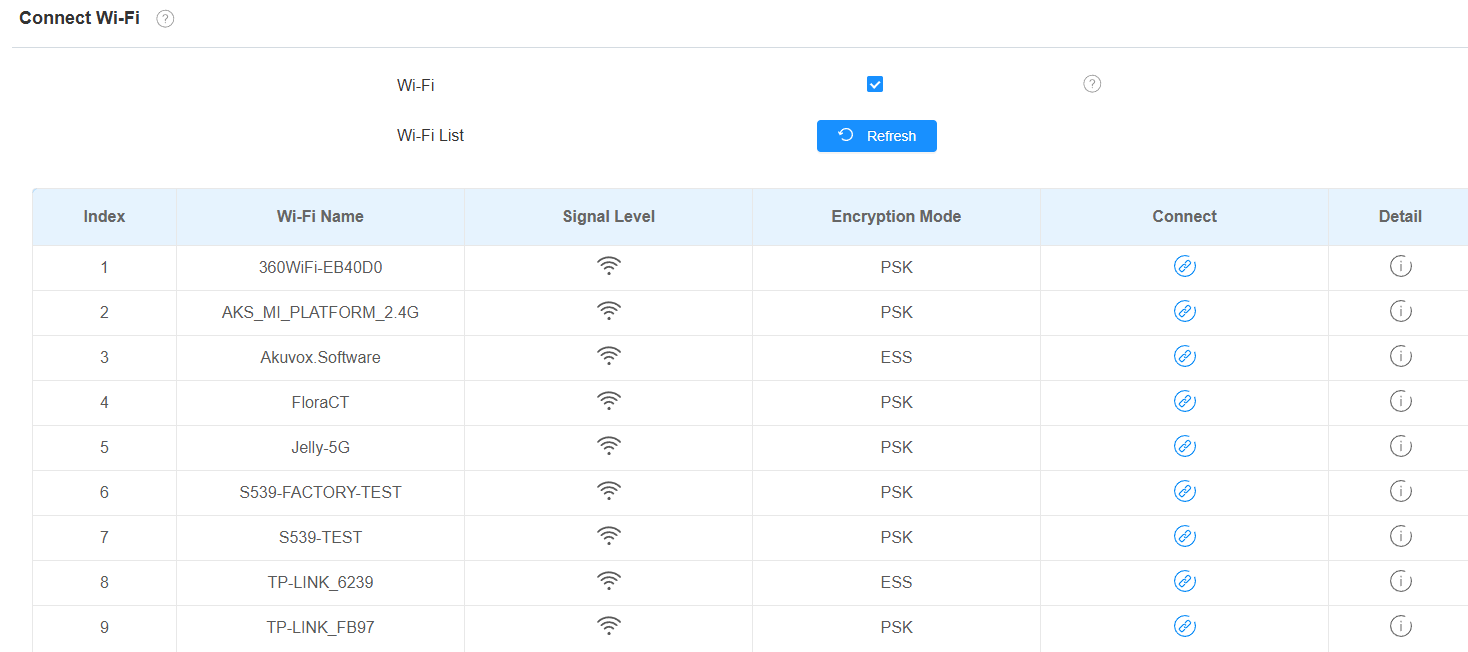
The available Wi-Fi networks will display after Wi-Fi connection is enabled. Connect to the desired Wi-Fi by clicking its Connect icon and entering the password.
Wi-Fi AP Setting
The device supports AP mode, allowing it to function as a Wi-Fi hotspot for other devices to connect for configuration or network access.
Set it up on the Network > Basic interface.
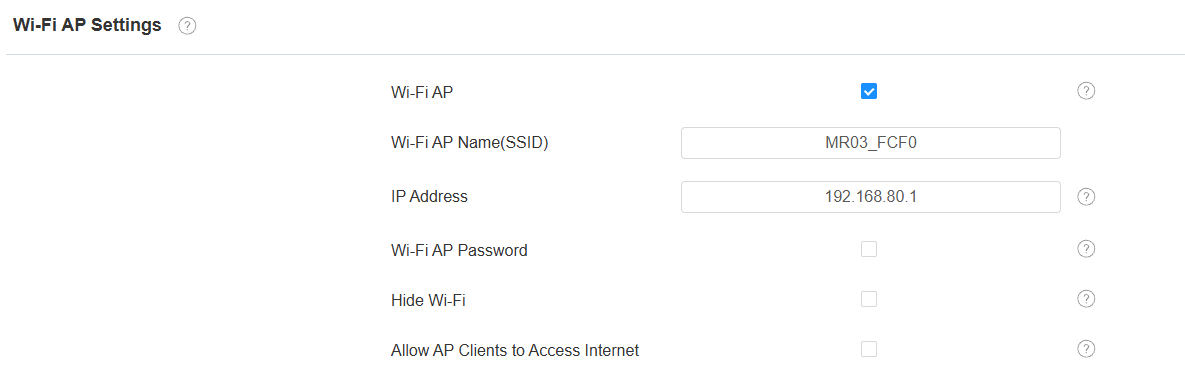
Wi-Fi AP: Enable/disable the feature.
Wi-Fi AP Name(SSID): The device’s Wi-Fi name.
IP Address: The management IP address of the device when AP mode is enabled. After connecting to the device Wi-Fi hotspot, enter this IP address in a web browser to access the configuration page.
Wi-Fi AP Password: Set the Wi-Fi password if needed.
Hide Wi-Fi: If enabled, this Wi-Fi will not be scanned by other devices.
Allow AP Clients to Access Internet: Set whether devices connected to the MR03 Wi-Fi AP can access the Internet through the device. When enabled, AP clients can access the Internet; when disabled, AP clients can only connect to the local AP network without Internet access.
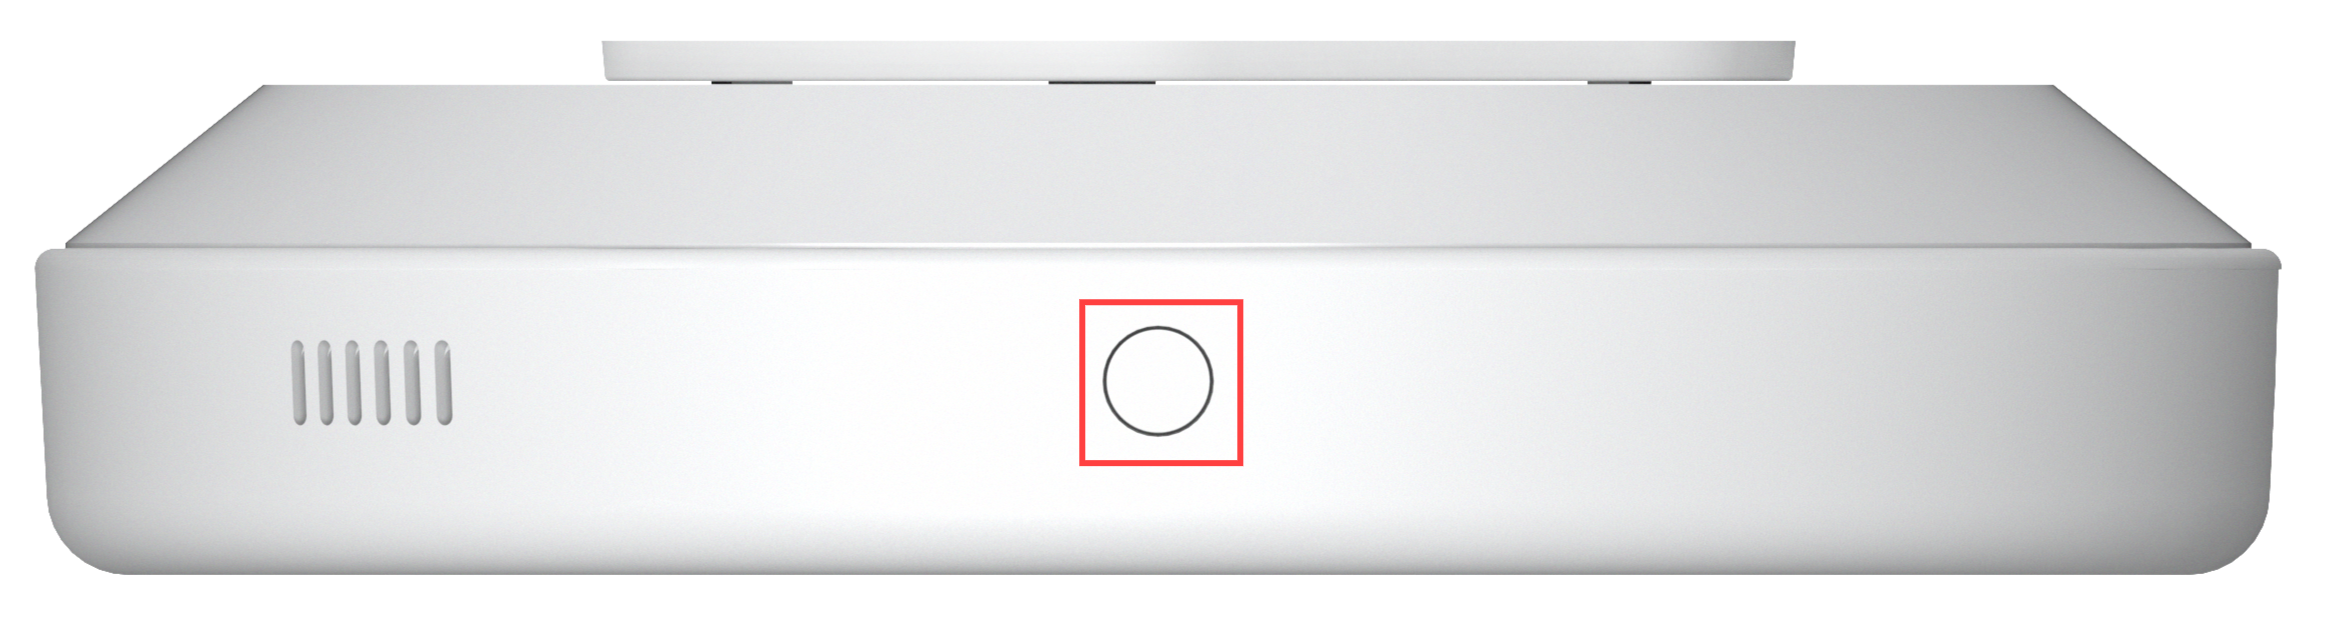
You can also enable the device’s AP mode by holding its physical button for 3 seconds.
Hold it for 3 seconds again to turn the mode off.
Device Deployment in Network
Para facilitar el control y la gestión de dispositivos, configura dispositivos de intercomunicación Akuvox con detalles como ubicación, modo de operación, dirección y números de extensión.
Deploy the device in the network on the web Network > Advanced > Connect Setting interface.
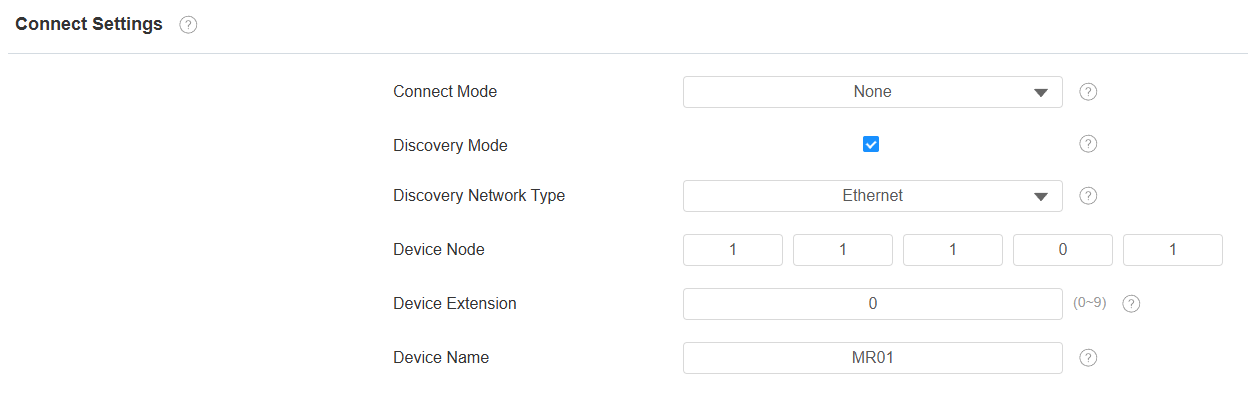
Connect Mode: It is automatically set up according to the actual device connection with a specific server in the network, such as SDMC, Cloud, or None.
Ninguno: Ninguno es la configuración predeterminada de fábrica, lo que indica que el dispositivo no está en ningún tipo de servidor. Los dispositivos se conectan directamente entre sí o dentro de una red local (LAN) sin depender de servidores externos.
Nube: El dispositivo está conectado a SmartPlus Cloud, un sistema basado en la nube que simplifica la gestión del acceso a la propiedad. El modo Cloud permite que los dispositivos interactúen inteligentemente entre sí y con la aplicación móvil SmartPlus, haciendo copias de seguridad diarias y en diferentes hosts. Se adapta a proyectos que requieren un despliegue y gestión inteligentes, flexibles y seguros.
SDMC: El dispositivo está conectado al SDMC, una plataforma de gestión diseñada para proyectos locales. El modo SDMC gestiona y hace copias de seguridad de datos de forma remota en una red local. También cuenta con muchas características adecuadas para proyectos que requieren alta privacidad, menor coste y gestión centralizada.
Discovery Mode: Enabled by default. Available for None server mode. The device can be discovered by other devices in the network. When disabled, the device will be concealed and not be discovered by other devices.
Device Network Type: Specify the preferred network connection, WLAN or Ethernet. It is Ethernet by default. When Ethernet is unavailable, the device will automatically switch to a WLAN connection and vice versa.
Device Node: Available for None server mode. Uneditable in Cloud and SDMC mode. It can be used to call the device. Specify the device address by entering device location information from left to right: Community, Building, Unit, Floor, and Room in sequence.
Device Extension: Available for None server mode. Uneditable in Cloud and SDMC mode. The device extension number ranges from 0 to 10.
Device Location: The location in which the device is installed and used. Available for None server mode. Uneditable in Cloud and SDMC mode.
Device Local RTP Configuration
El Protocolo de Transporte en Tiempo Real (RTP) permite a los dispositivos transmitir datos de audio y vídeo a través de una red en tiempo real.
Para usar RTP, los dispositivos necesitan una variedad de puertos. Un puerto es como un canal de datos en una red. Configurando puertos RTP en tu dispositivo y router, puedes evitar interferencias de red y mejorar la calidad de audio y vídeo.
Set it up on the Network > Advanced interface.

Starting RTP Port: Set the port value to establish the start point for the exclusive data transmission range.
Max RTP Port: Set the port value to establish the endpoint for the exclusive data transmission range.
Device Web HTTP Setting
This function manages device website access. This device supports the HTTPS remote access method.
Set it up on the Network > Advanced interface.

HTTPS Port: Specify the web server port for accessing the device web interface via HTTPS.
SNMP Setting
El Protocolo Simple de Gestión de Red (SNMP) es un protocolo para gestionar dispositivos de red IP. Permite a los administradores de red monitorizar dispositivos y recibir alertas para condiciones que llamen la atención. SNMP proporciona variables que describen la configuración del sistema, organizadas en jerarquías y descritas por Bases de Información de Gestión (MIBs).
Set it up on the Network > Advanced interface.

SNMP Port: Set a specific port for data transmission from 1024 to 65535.
Trusted IP: Enter the third-party IP address.
NAT Setting
La Traducción de Direcciones de Red (NAT) permite a los dispositivos en una red privada usar una única dirección IP pública para acceder a internet u otras redes públicas. NAT guarda las direcciones IP públicas limitadas y oculta las direcciones IP internas y los puertos del mundo exterior.
Para registrar cuentas SIP en servidores de terceros en una Red de Área Amplia (WAN), necesitas activar la función RPort en los dispositivos de intercomunicación para establecer una conexión estable.
To set it up, navigate to the web Account > Basic > NAT interface.

STUN Server Address: Set the SIP server address in the Wide Area Network(WAN).
Port: Set the SIP server port.
Then enable RPort on the Account > Advanced > NAT interface.

RPort: Enable RPort when the SIP server is in the WAN.