Le moniteur intérieur est équipé d’un serveur PBX intégré qui permet à l’appareil de servir de moniteur d’interphone et de PBX SIP, afin que les utilisateurs ne prennent pas la peine de préparer un PBX SIP supplémentaire. Le PBX prend en charge les fonctions de call forward, transfert, conférence, groupe de sonnerie, etc. Vous pouvez le configurer sur l’écran de l’appareil ou l’interface web.
To set it up on the device, go to Advanced Settings.
PBX Configuration on the Device
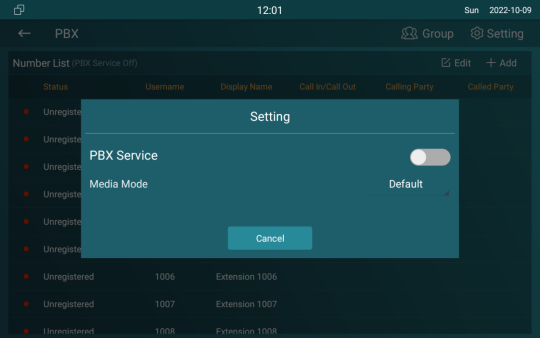
Vous devez activer la fonction PBX avant de pouvoir créer des numéros PBX et gérer les comptes SIP, etc.
Enable PBX Service
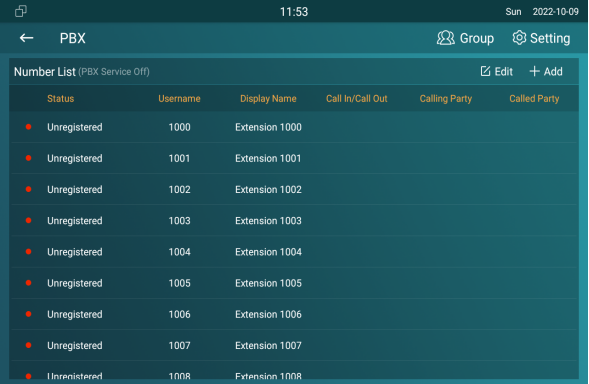
In the PBX interface, tap  on the upper right corner to enable the PBX.
Parameter Set-up:
- Media mode: select Default if the intercom devices are deployed in the same LAN network. Select Bypass if the devices are deployed in the different LAN networks where PBX serves as a bridge or a media for the network data.
Manage PBX Accounts
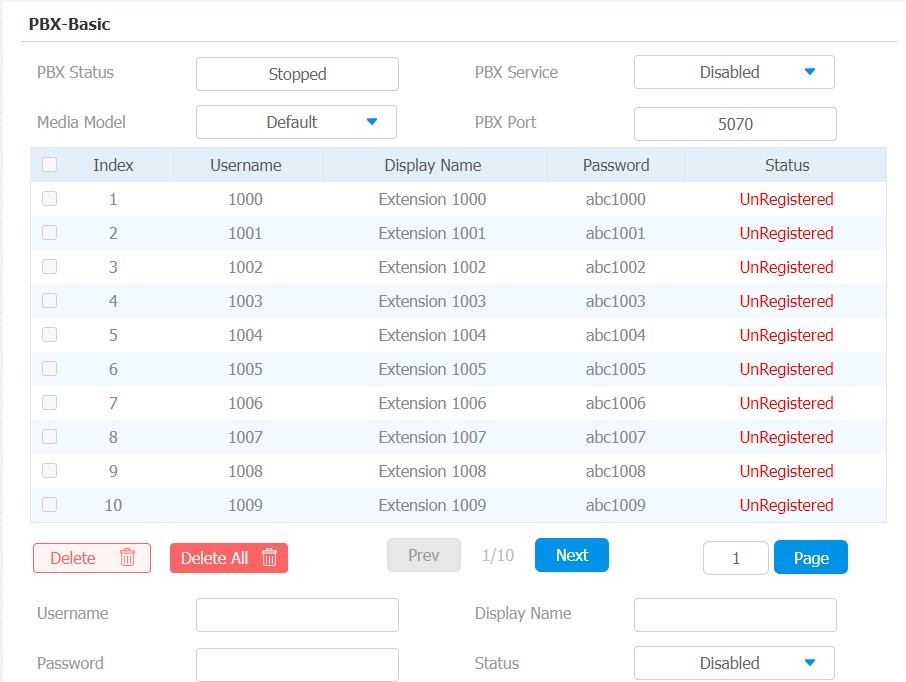
You can check the basic PBX information like PBX server and port and accounts status.
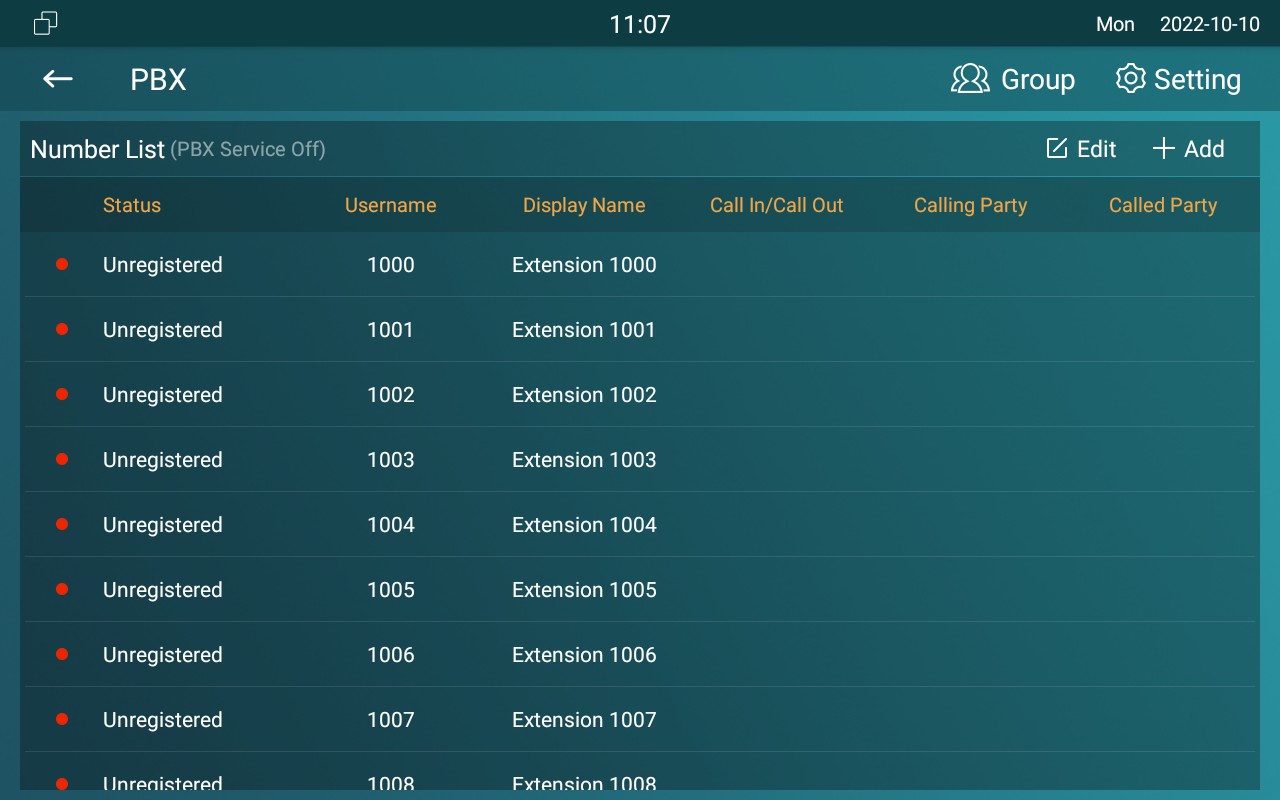

Parameter Set-up:
- Status: to show whether the account is registered or not.
- Username: to enter the extension number registered onto the SIP server
- DisplayName: enter the display name of this account, which will be shown on other devices when making calls.
- Password: enter the password of the corresponding users.
- Enabled Status: to activate the SIP account
- Call IN/Call Out: the calling status of this account
- Calling Party: the calling party number
- Caller Party: the caller party number.
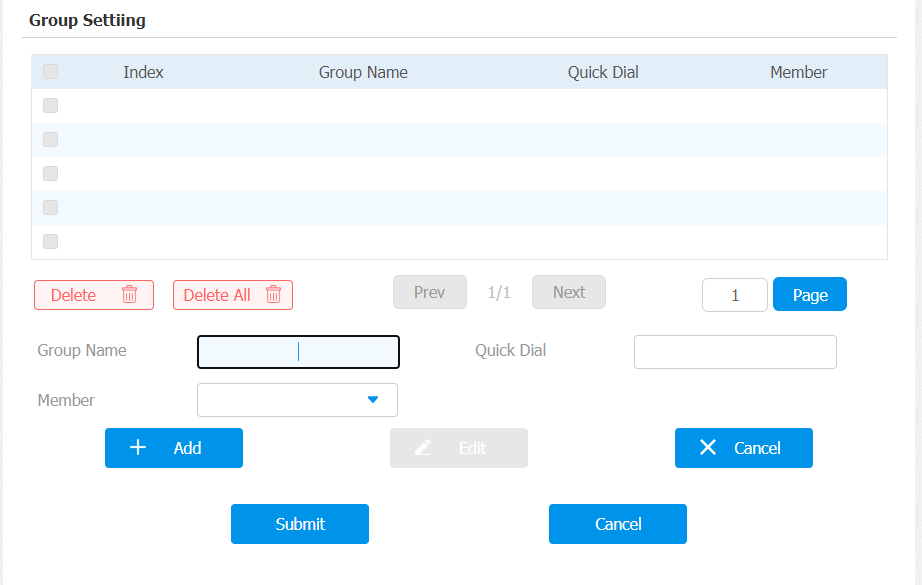
Manage PBX Groups
Click Group  on the right top corner to add a new ring group or edit the existing group. One number can be added to different ring groups. Once receiving an incoming call, the numbers in one group will ring up at the same time.

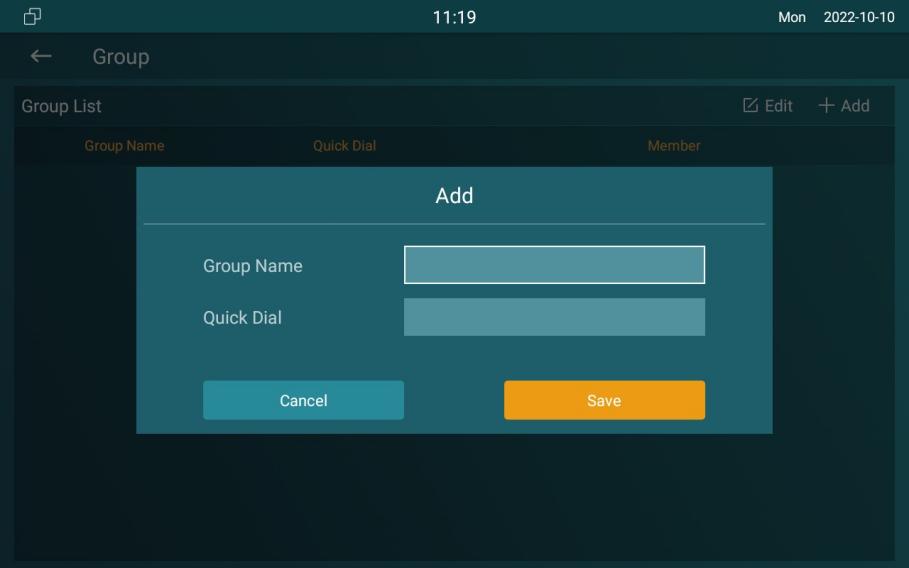
Parameter Set-up:
- Group Name: the name of a ring group.
- QuickDial: a number of this ring group.
PBX Configuration on the Web Interface
You can do the same configuration on web PBX > Basic and PBX > Ring Group interface.