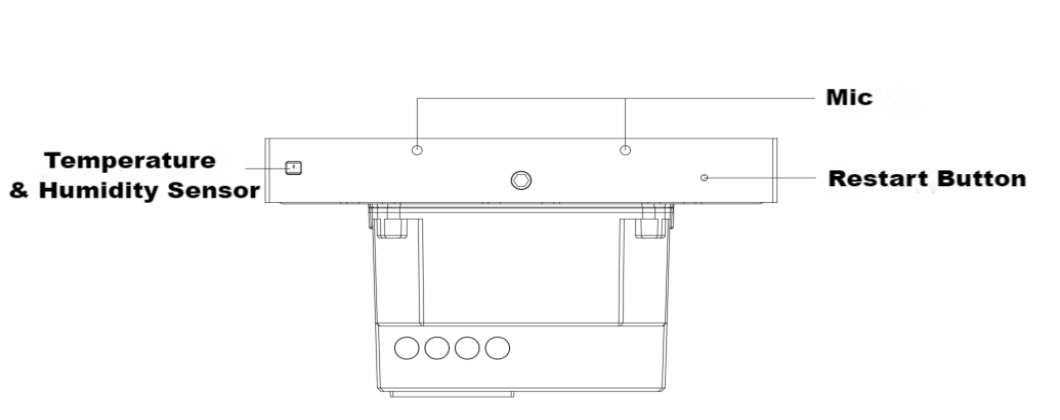
Your HyPanel Plus

Touch buttons
The HyPanel Plus features two touch buttons at the bottom of the device. They let you control connected devices or trigger scenes with manual conditions.
The following screen displays every time when you wake up the HyPanel Plus, displaying the functionality of the touch buttons.
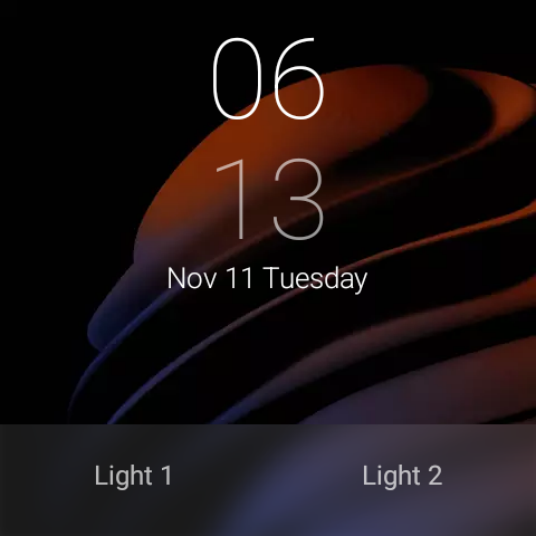
To quickly configure the unconfigured buttons, simply tap them to open the setup screen.
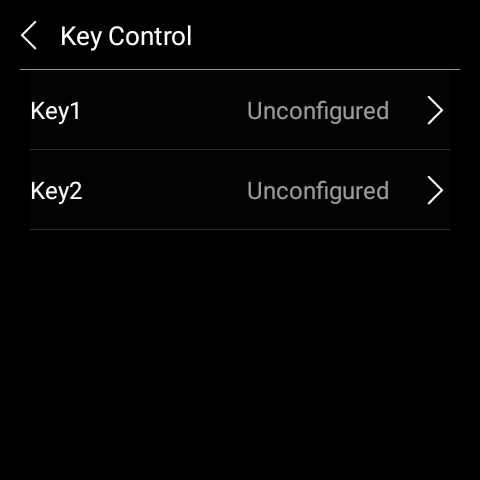
To customize or change a button's function:
Swipe down from the top edge of any screen.
Tap
 > System Settings > Key Control.
Select the desired button and assign it to the control object.
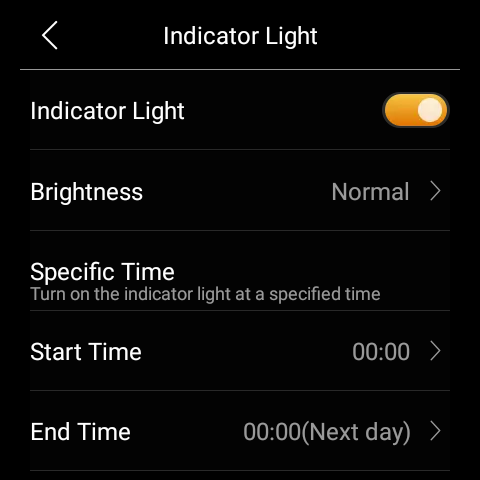
To adjust indicator light settings:
Go to
 > Display > Indicator Light.
Toggle on or off the indicator light, adjust its brightness, or set a schedule.
Control center
To open the Control Center for quick setting, swipe down from the top edge of any screen.
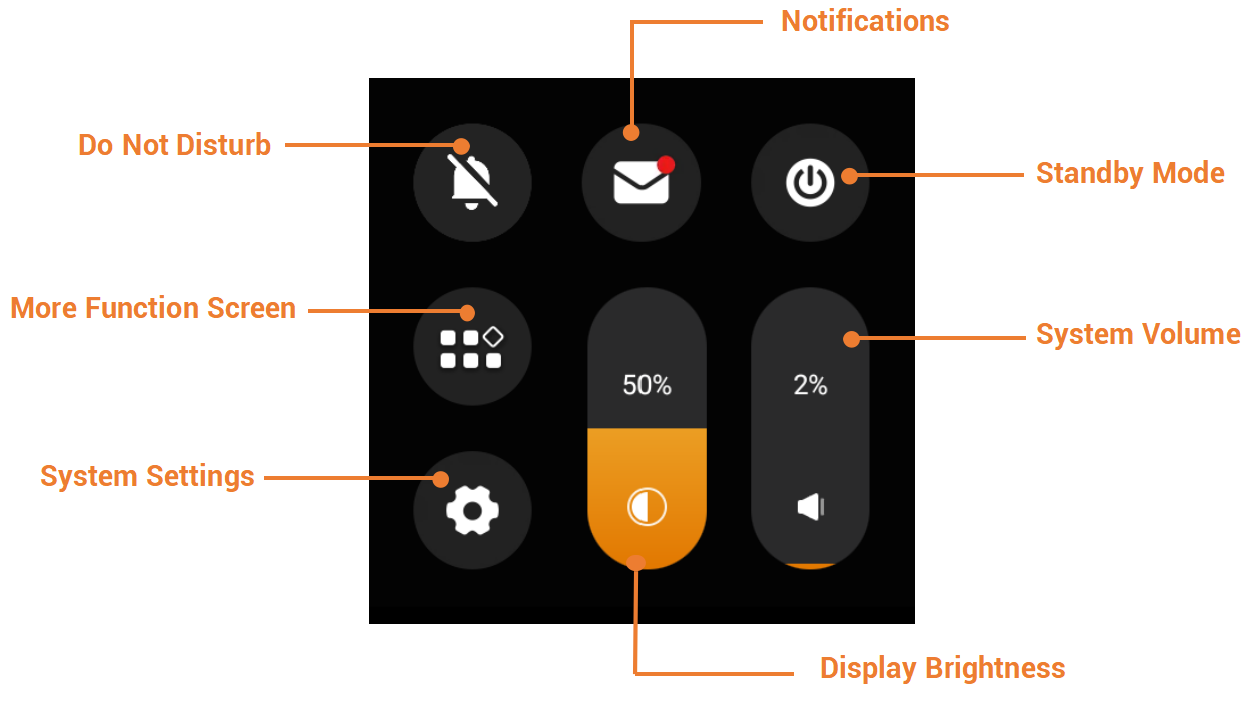
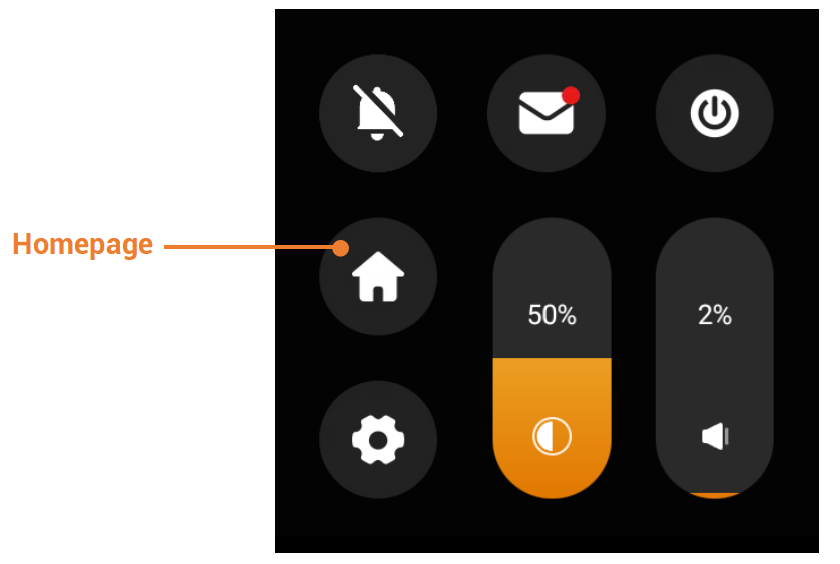
Swipe down from the top edge on non-home screens to open the Control Center. More Function is replaced by Homepage; other buttons remain unchanged.
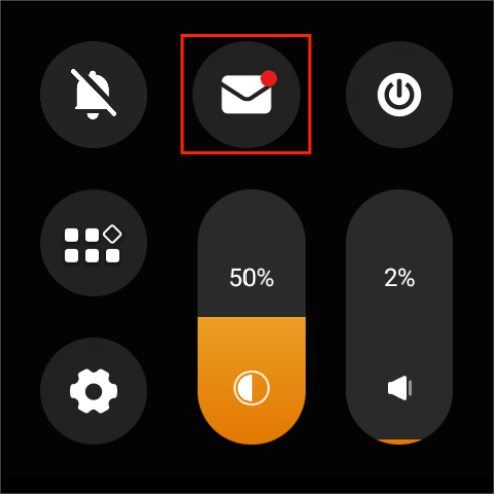
Notification center
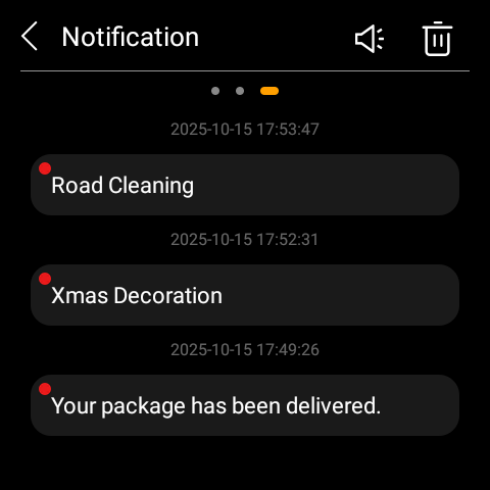
To access the notification center, swipe down from the top edge of any screen and tap ![]() . All alerts, alarms, and system notifications appear here, including the false attempt and loitering alarms from SL50 and SL60 smart locks.
. All alerts, alarms, and system notifications appear here, including the false attempt and loitering alarms from SL50 and SL60 smart locks.
If your HyPanel is part of a community project, you can also receive notifications from the property managers, such as package deliveries, community voting, upcoming events, and more.
TIP :
To mute notification sounds and prevent pop-ups, simply tap
>
.
Home screen
Every time you wake up the HyPanel Plus, the homepage appears, offering up to 30 customizable pages where you can add quick access cards for easier control of your smart home.
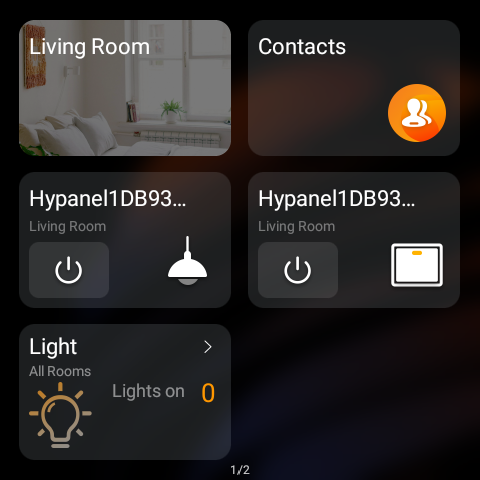
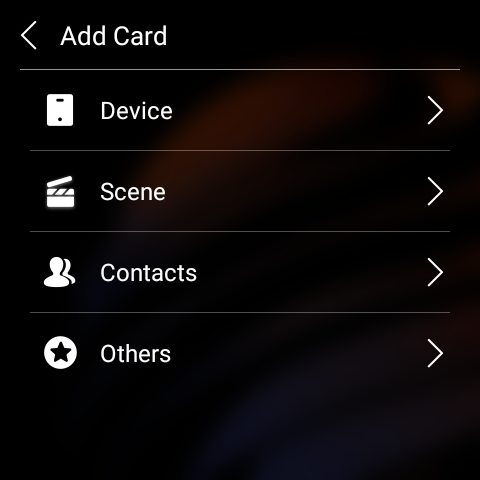
Add shortcut cards
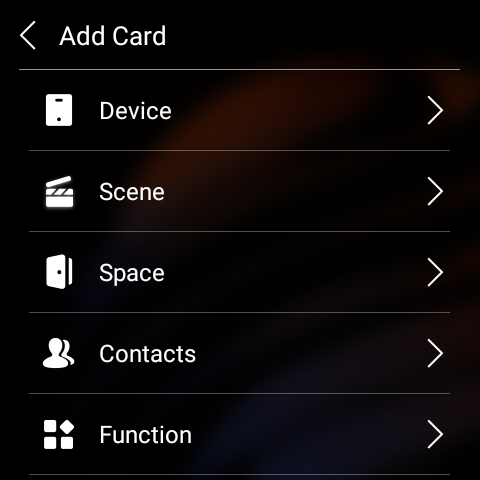
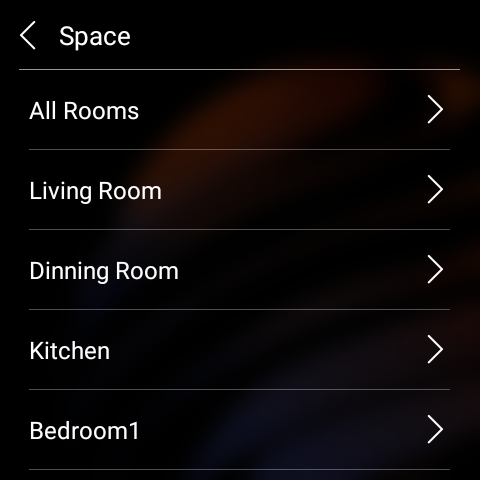
You can add cards for devices, scenes, contacts, rooms, function tabs, third-party apps, and more.
On the homepage, press and hold a blank area, or press and hold any existing card and tap Homepage Edit.
Tap
 .
.

Choose a card type, then select the specific card you want to add.
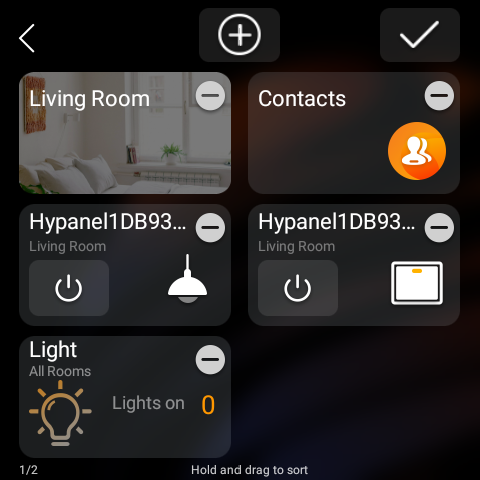
Replace, delete, or rearrange cards
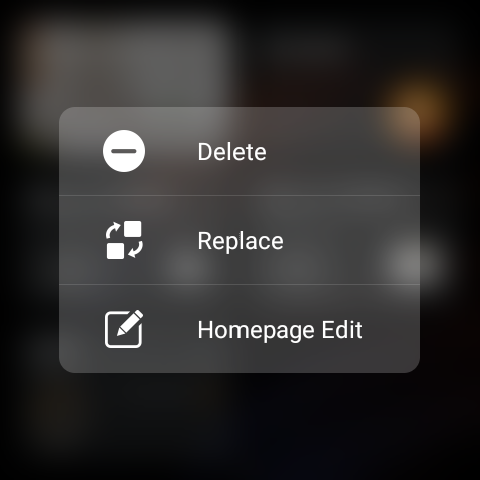
Remove a card: Press and hold a blank area on the homepage, and tap
 . Or press and hold the card, then select Delete.

Rearrange cards: Press and hold a blank area on the homepage, then press and hold the card you want to move, and drag it to a new position.
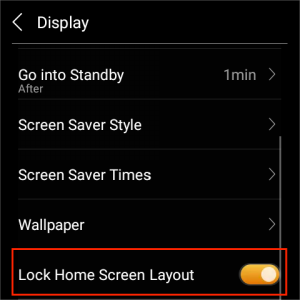
Lock Home screen
To prevent unauthorized or accidental changes to the Home screen, swipe down from the top edge of any screen, go to ![]() > Display, and enable Lock Home Screen Layout.
> Display, and enable Lock Home Screen Layout.
Once enabled, the following actions will be disabled:
Adding, removing, replacing, or rearranging shortcut cards
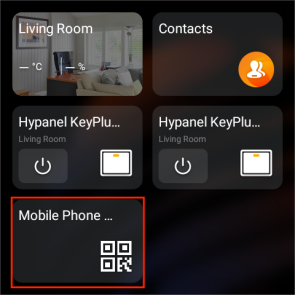
Guest room control QR code
NOTE:
This feature is only available on panels used in hotel guest rooms for GRMS projects.
For panels in GRMS setups, a QR code will appear on the Home screen. Hotel guests can scan the code to control their room devices via an H5 web interface without downloading any app.
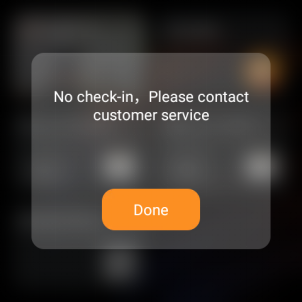
The QR code is active only during the guest’s stay.
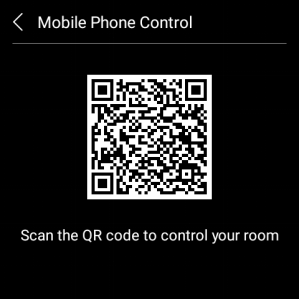
Once the guest checks out, the QR code becomes unavailable.
Display orientation
You can set the screen to vertical or horizontal based on how the device is installed.
To change the direction:
Swipe down from the top edge of any screen, and go to ![]() > Installer Settings > Installation Direction.
> Installer Settings > Installation Direction.

Learn the server status
If you notice that some features aren’t working, first check whether your device is properly connected to the server.
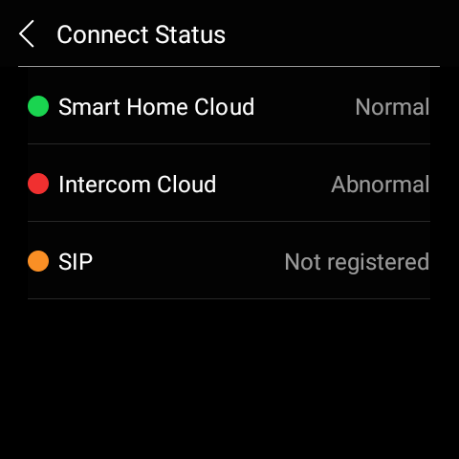
Swipe down from the top edge of any screen, and tap
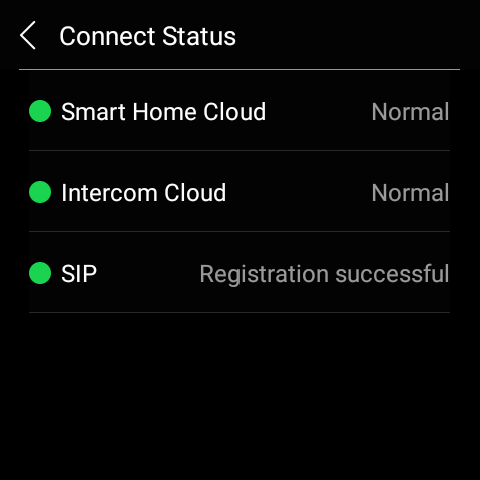
 > System Settings > Connect Status.
The connection status will display in the center of the screen.
The green icon indicates that your device is successfully connected to the cloud server and communication is normal.
The yellow icon indicates that your device is being used locally without the cloud connection.
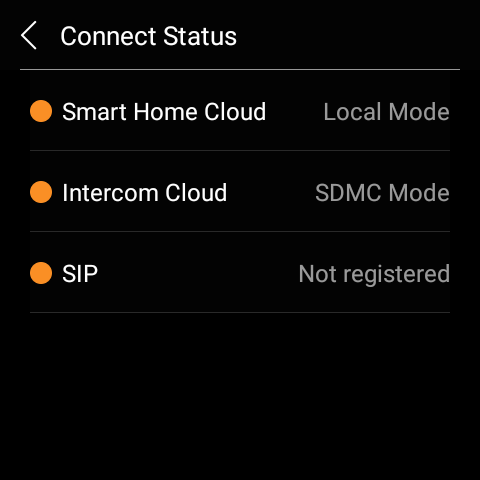
The red icon indicates an issue such as cloud connection failure, SIP registration error, or other system abnormalities.
Please contact your service provider or the akubela technical team for assistance.