This section covers the customization of the GRMS platform to align with your hotel’s branding, power-saving policies, and guest experience standards.
Basic Hotel Information
Change Hotel Name
By default, the hotel name is inherited from the akubela Cloud project name.
To change the hotel name in the GRMS platform:
Go to Setup > Hotel Information > Basic Information.
In the Hotel Name field, enter the new hotel name.
Click Submit.
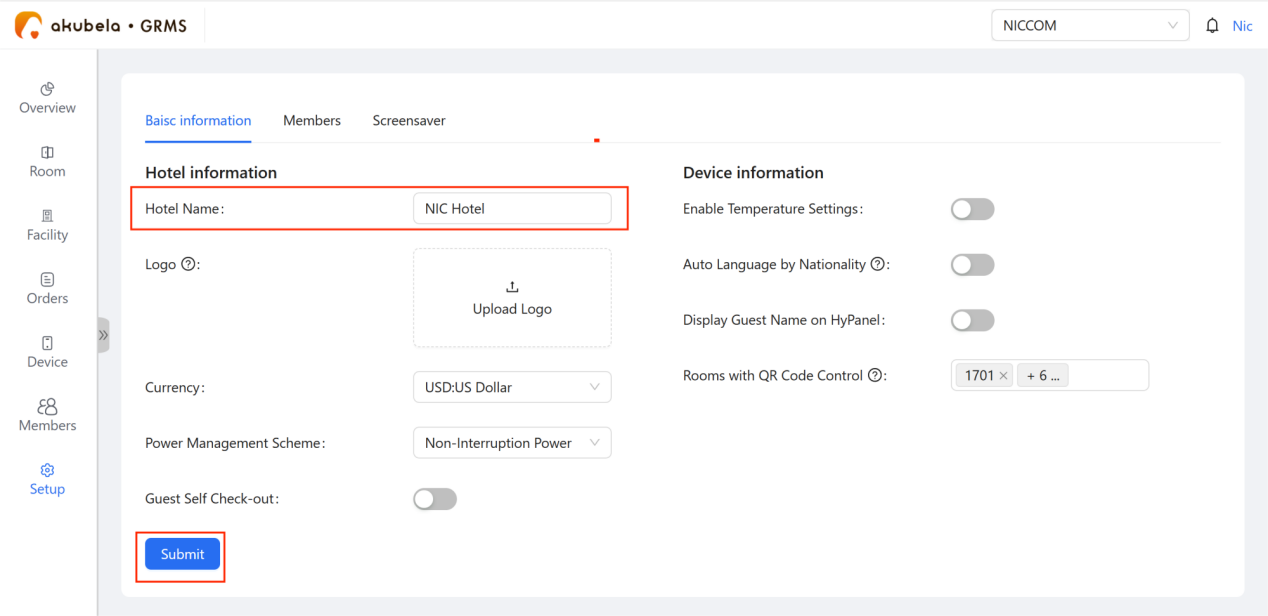
After the change is saved, the new hotel name is applied to:
The hotel name displayed in the upper-right corner of the GRMS platform
System-generated emails
Guest and member H5 control interfaces
Customize Hotel Logo
Hotel managers can upload a custom hotel logo for branding purposes. The uploaded logo is displayed in:
The upper-left corner of the GRMS platform
System-generated emails
In-room large-screen panels
Customize a Logo
Go to Setup > Hotel Information > Basic Information.
In the Logo section, click Upload Logo.
Select an image file.
TIP:
Max 300x180 pixels.
Supported formats: GIF, ICO, BMP, PNG, JPG, JPEG, WEBP.
Click Submit.
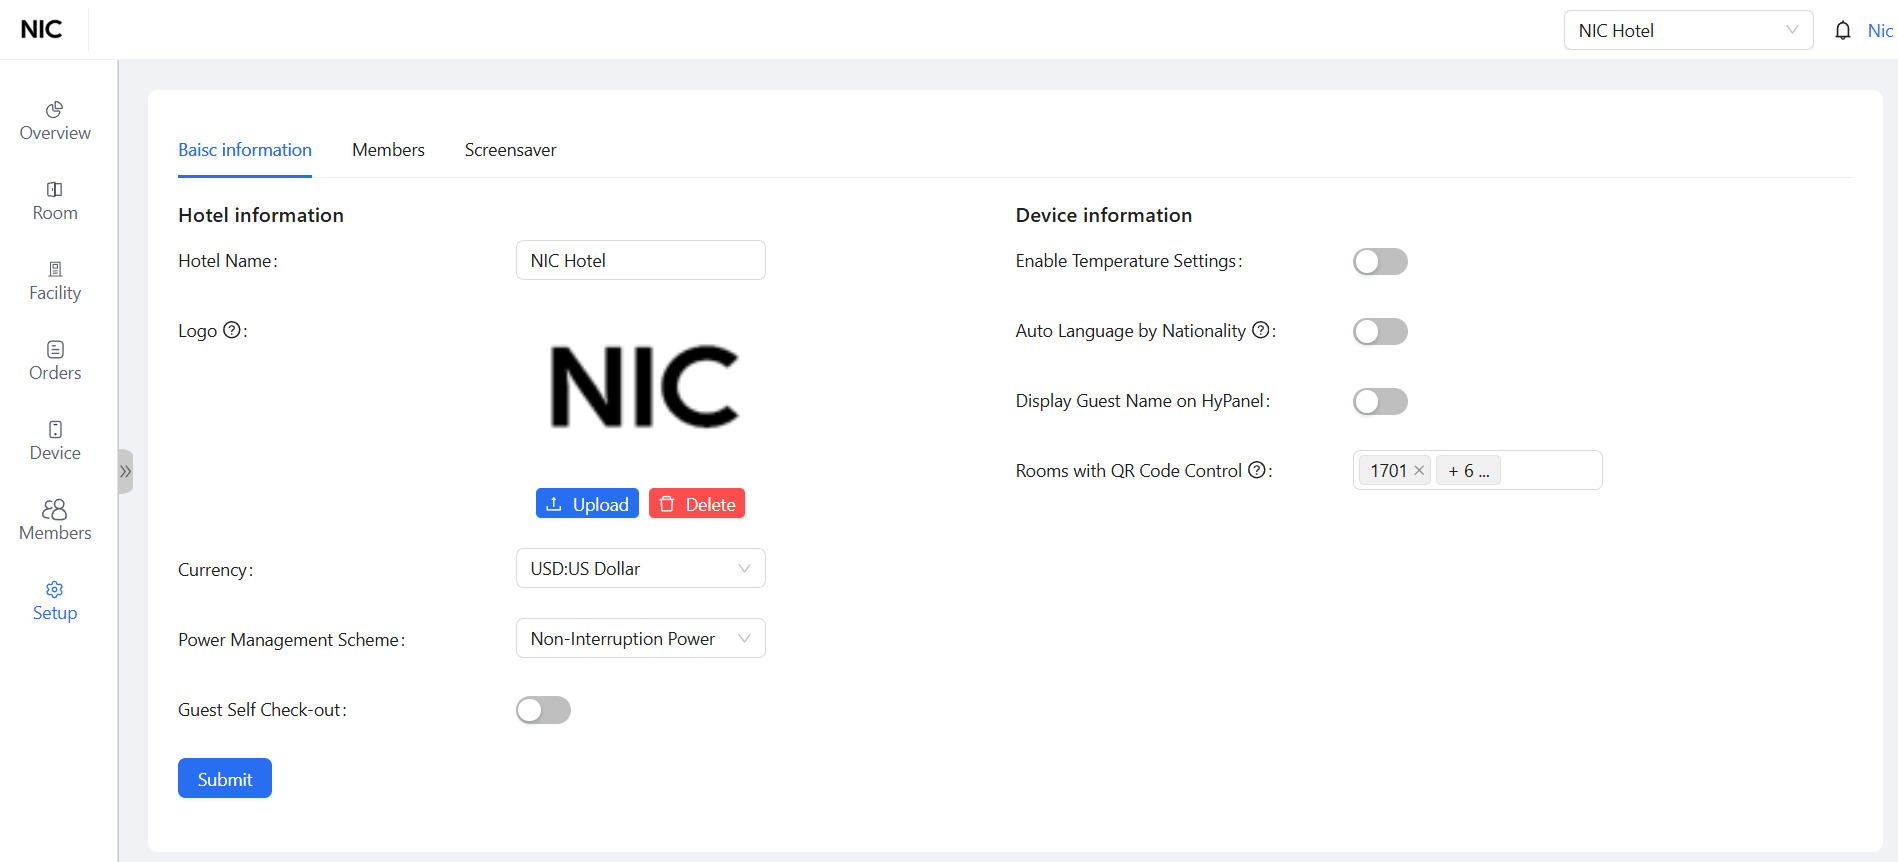
Replace or Remove a Logo
To replace the current logo, upload a new logo and click Submit.
To remove the logo, click Delete, then click Submit. The system restores the default logo automatically.
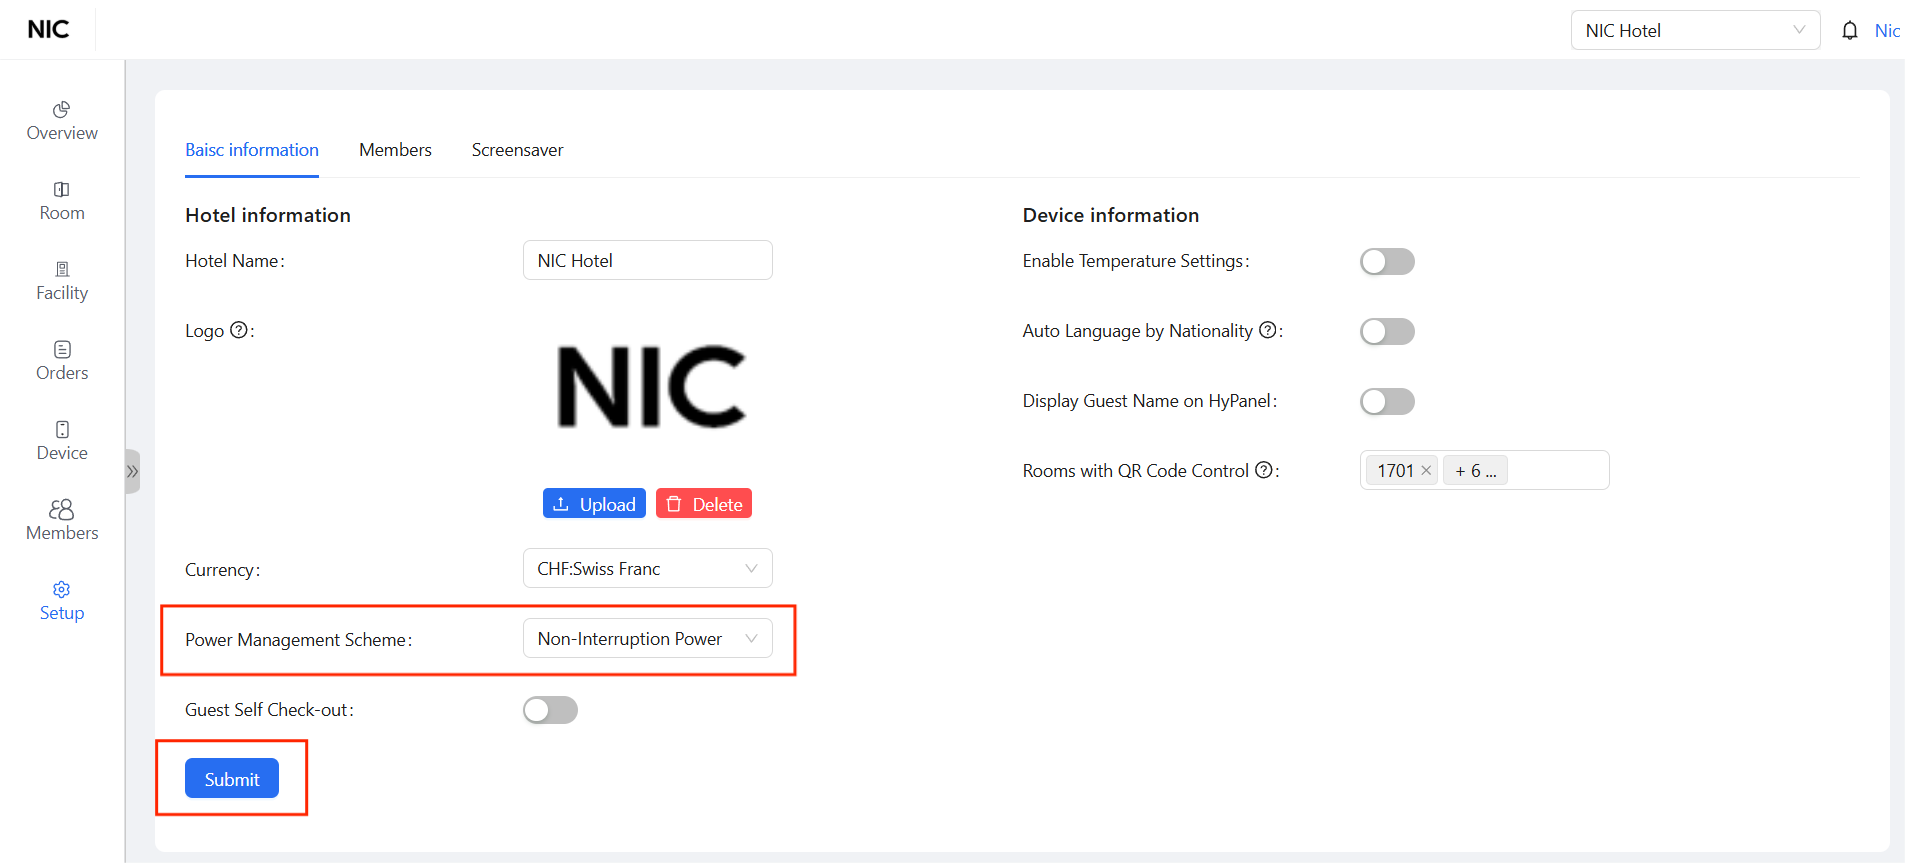
Define Currency
The platform defaults to USD.
To change the local currency for billing and reporting:
Go to Setup > Hotel Information > Basic Information.
Select the desired currency from the Currency drop-down list.
Click Submit.
Power Management
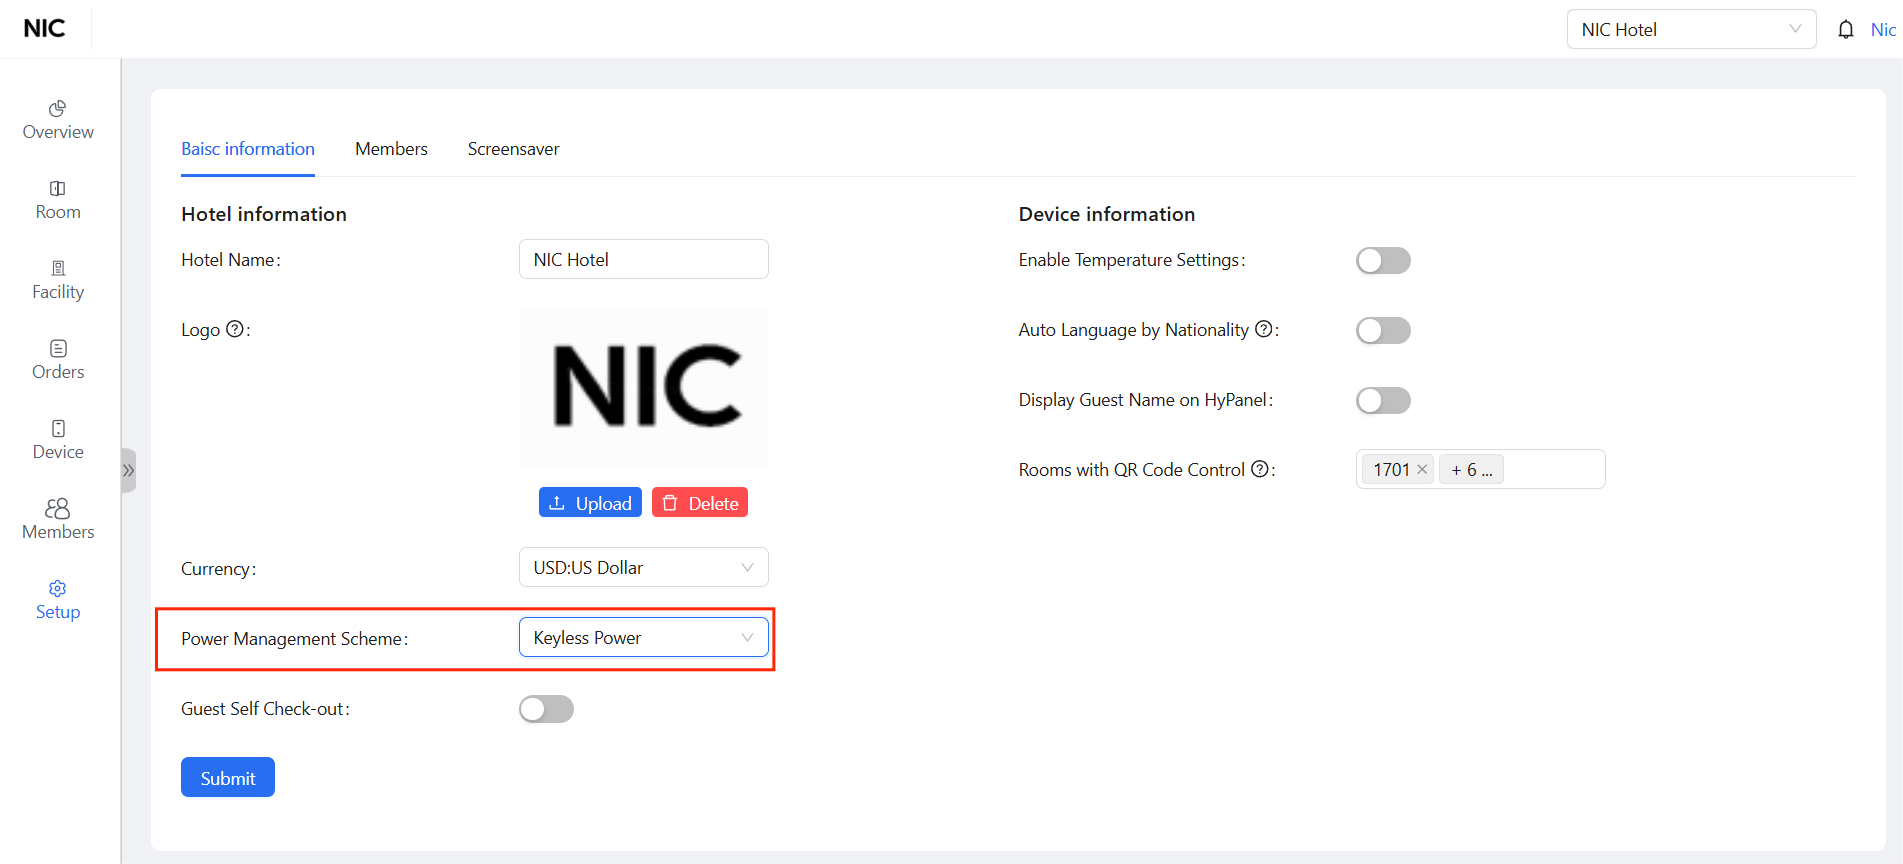
The GRMS offers three schemes to balance guest comfort with energy efficiency. Configure this under Setup > Hotel Information > Basic Information > Power Management Scheme.
Card-Key Power: Requires a physical key card to be inserted into the wall switch to activate room power.
No-Card Power Control:
Staff can enable Away Mode from the panel’s user web portal to reduce energy consumption while outside the room.
In unoccupied rooms, devices remain in screensaver or powered-off status and cannot be operated.
No-Interruption Power (Default): Power remains constant regardless of occupancy or card status.
In-Room Panel Display Settings
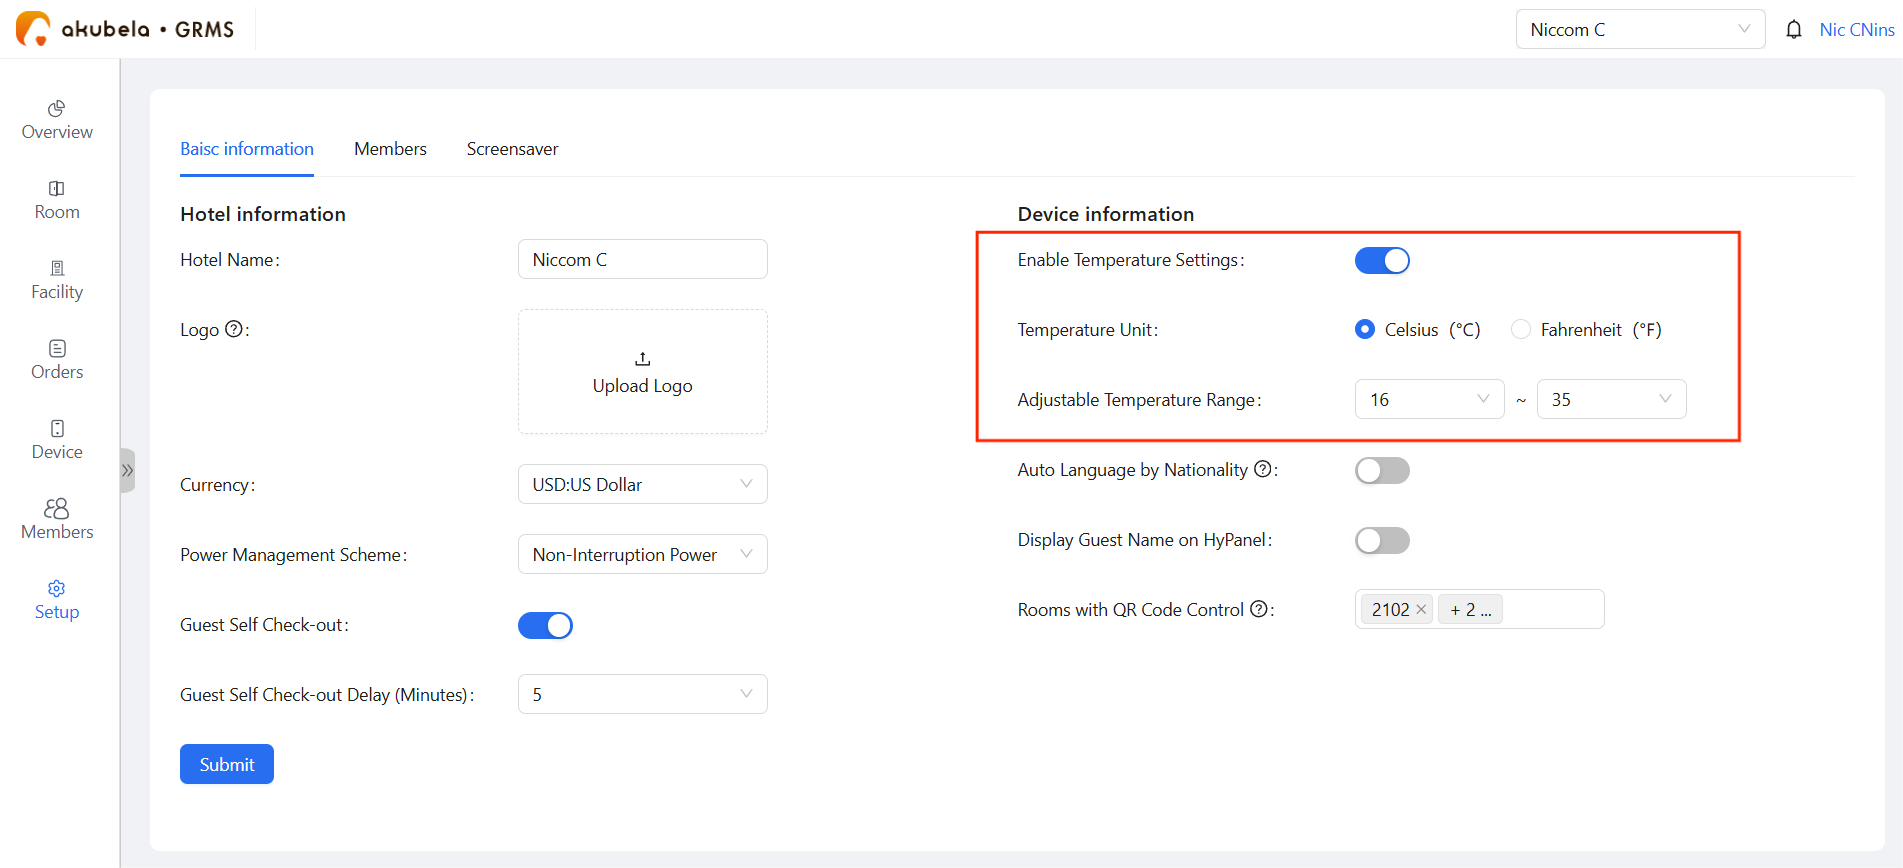
Temperature Settings
Global settings for panels(firmware version 4.0.1 or later required) and temperature control devices across the project:
Go to Setup > Hotel Information > Basic Information.
Toggle Enable Temperature Settings on.
Define the allowed adjustable range (Min/Max) and the unit (Celsius/Fahrenheit).
Click Submit.
Guest Personalization
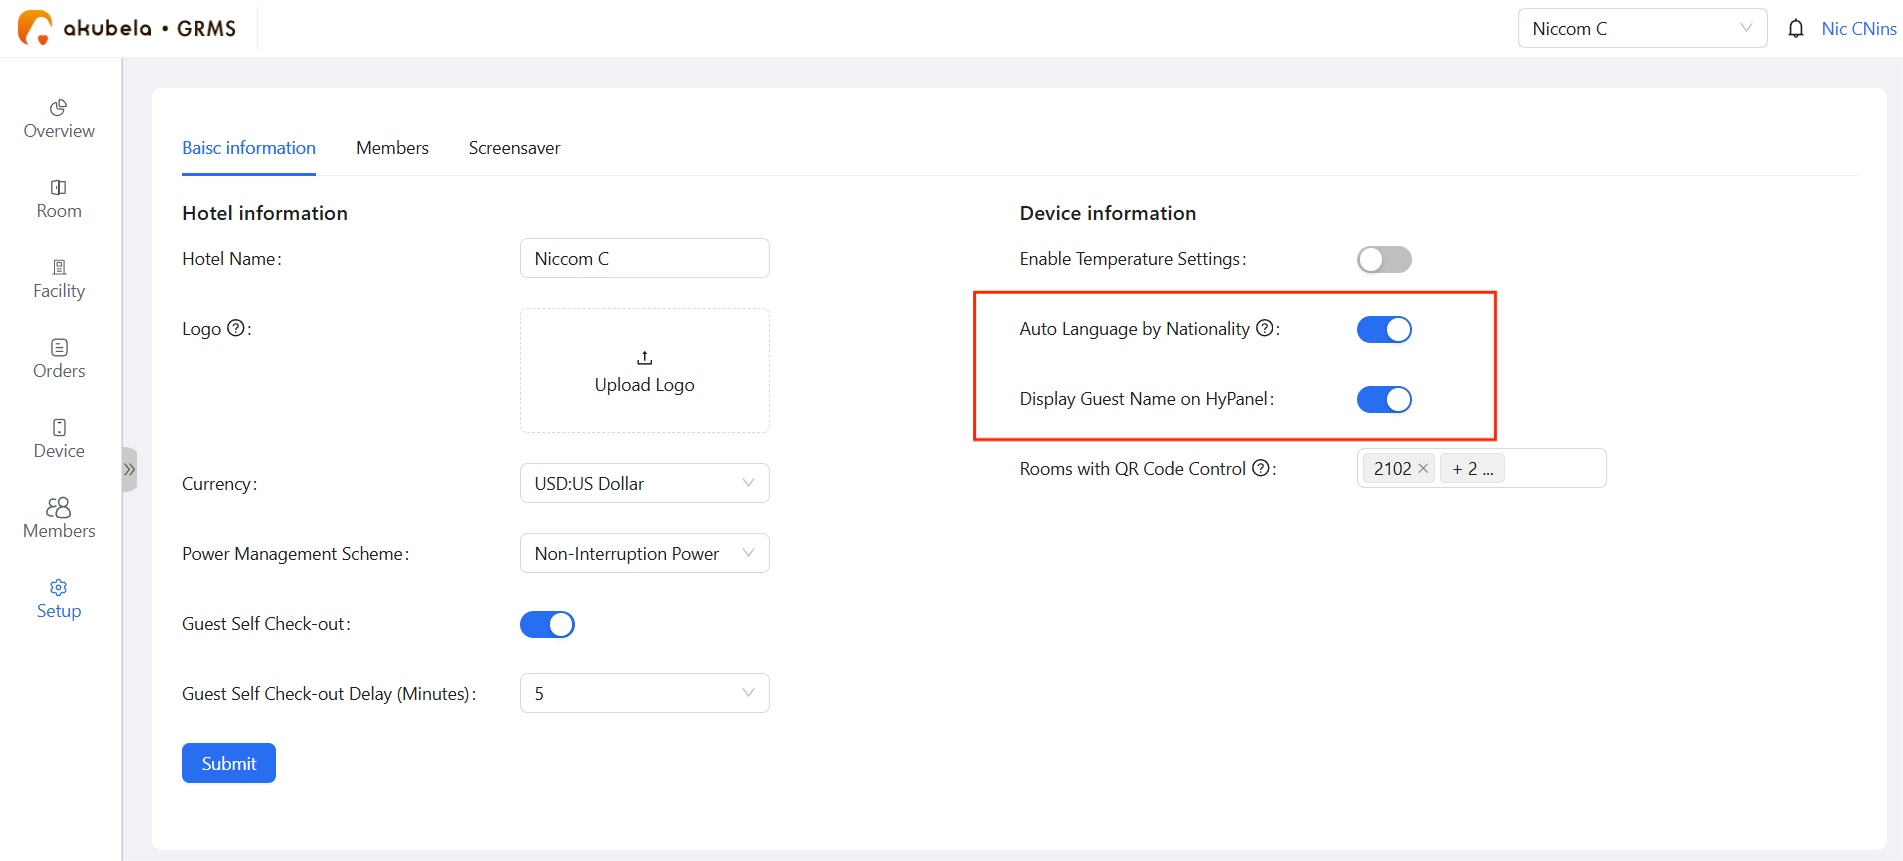
Enhance the stay experience by enabling these features under Setup > Hotel Information > Basic Information:
Auto Language by Nationality: The panel language automatically matches the guest's nationality (selected during check-in).
If no nationality is selected, the system uses the default language.
The language reverts to the default language upon check-out.
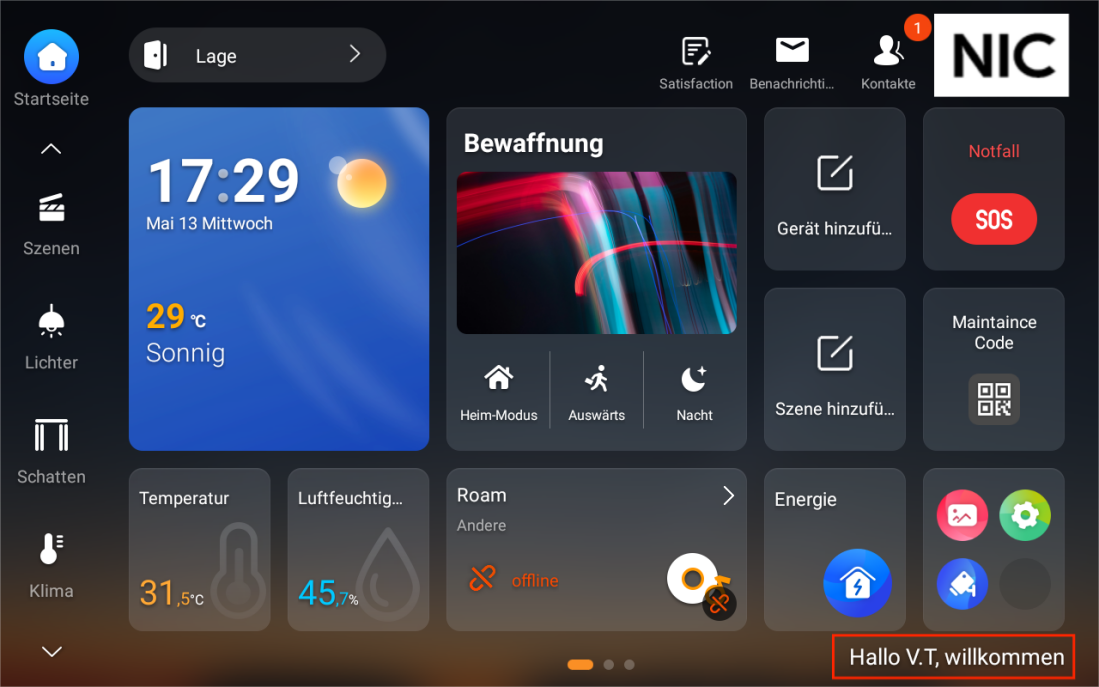
Display Guest Name on HyPanel: Shows a personalized greeting with the guest’s name on large-screen HyPanel devices.
NOTE:
Currently only supported on HyPanel Pro with version 71.1.40.156 or later.
H5 Interface QR Code Display
By default, in-room panels display an H5 QR code that allows guests to control the room and request services from their mobile devices.
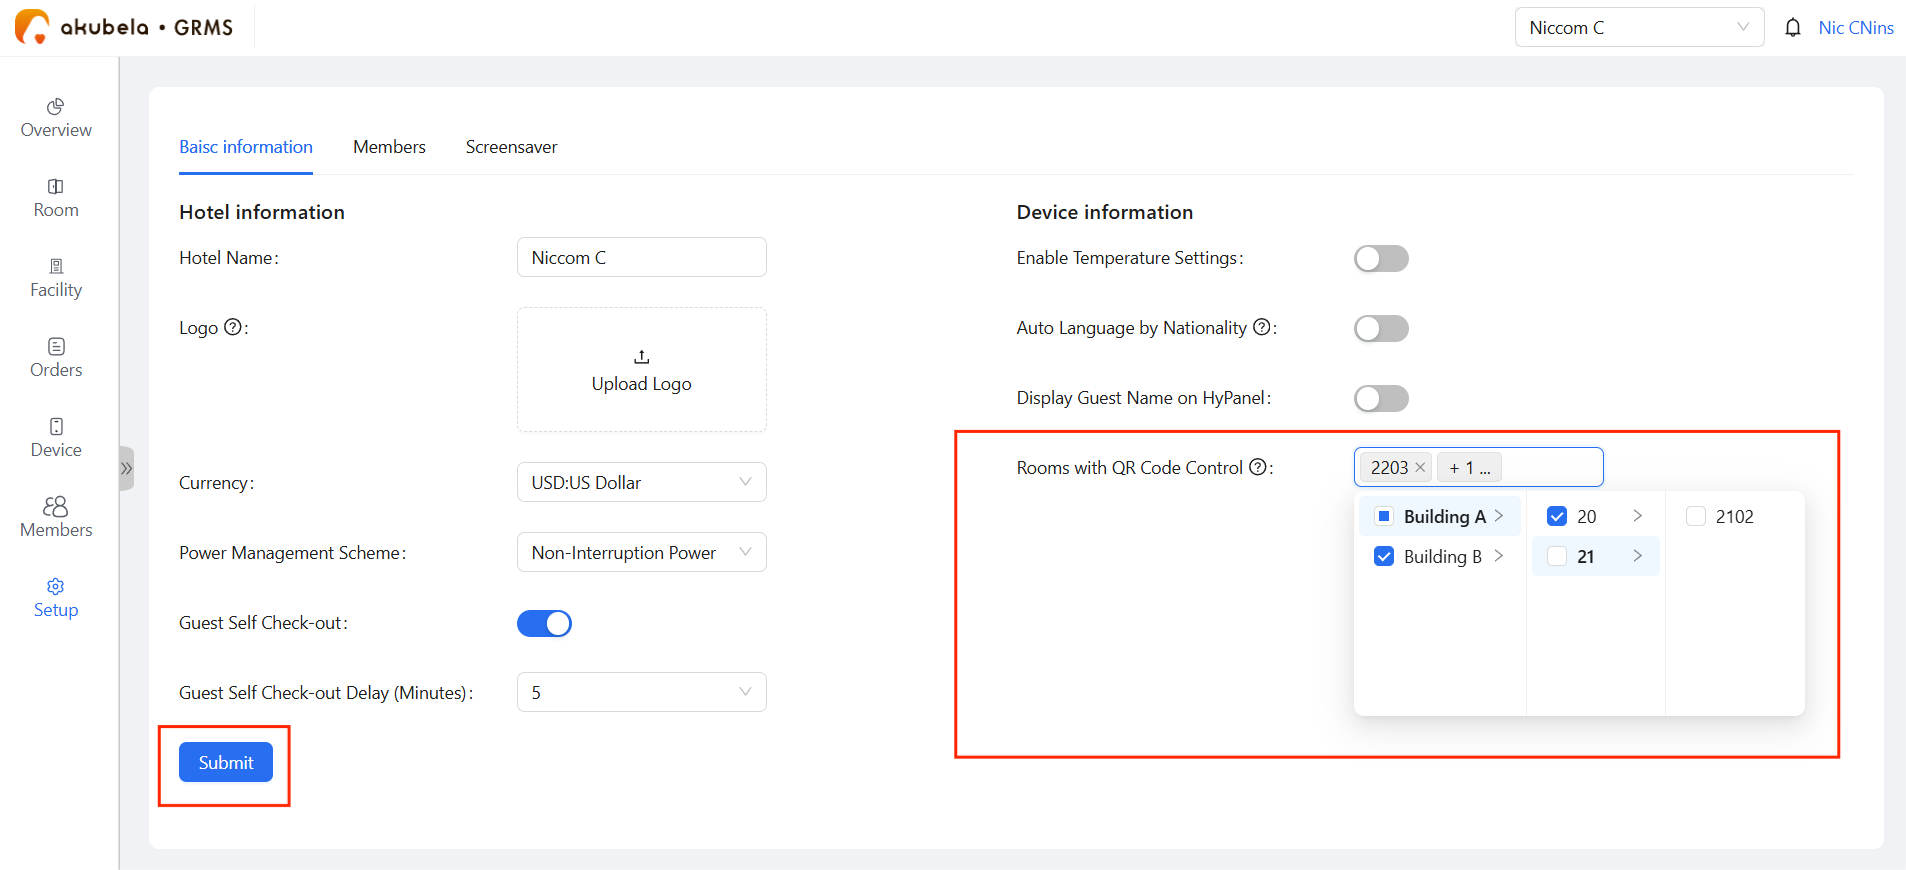
Hotel managers can specify which rooms display the QR code (only on supported large-screen HyPanel devices):
Go to Setup > Hotel Information > Basic Information.
In the Room with QR Code Control field, select the rooms that should display the QR code.
Click Submit.
Screensaver Configuration
The GRMS platform allows hotel managers to configure custom screensavers for supported in-room panels.
NOTE:
HyPanel devices support up to 9 screensaver wallpapers sent from GRMS, which override the default wallpapers.
When GRMS screensavers are applied, auto-brightness is automatically disabled on HyPanel devices.
All panel models used in the project are listed on the screensaver setup screen. Currently, only the following models with the required firmware versions support this feature.
Supported Panel | Required Version |
HyPanel (PS51) | 51.1.39.618 or later |
HyPanel V2 (PS51) | 251.1.39.609 or later |
HyPanel Plus (PS52) | 52.1.39.611 or later |
HyPanel KeyPlus (KS53) | 53.1.39.612 or later |
HyPanel Pro (PG71) | 71.1.39.621 or later |
HyPanel Ultra (PH81) | 281.1.39.604 or later |
HyPanel Supreme (PHX1) | 1001.1.39.603 or later |
SmartPanel (X933H) | 933.1.39.603 or later |
SmartPanel Elite 10 (PH58) | 119.1.39.603 or later |
Go to Setup > Hotel Information > Screensaver.
Select the panel model for which you want to set a screensaver.
Click Upload and select an image(maximum size: 3 MB).
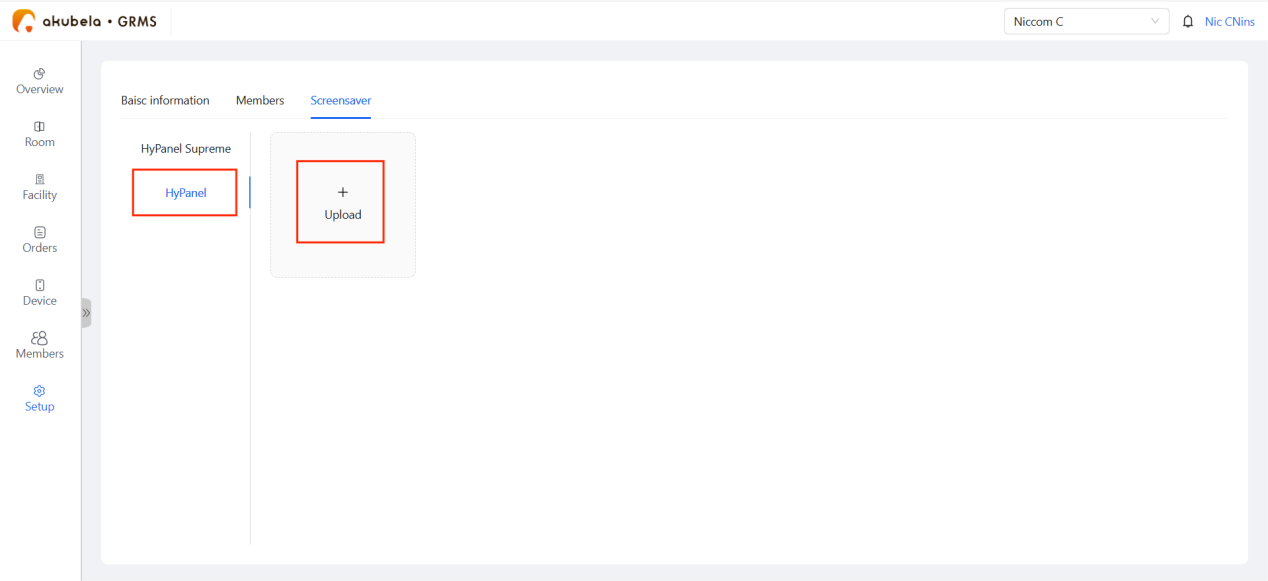
Crop the image to fit the screen, then click Submit.
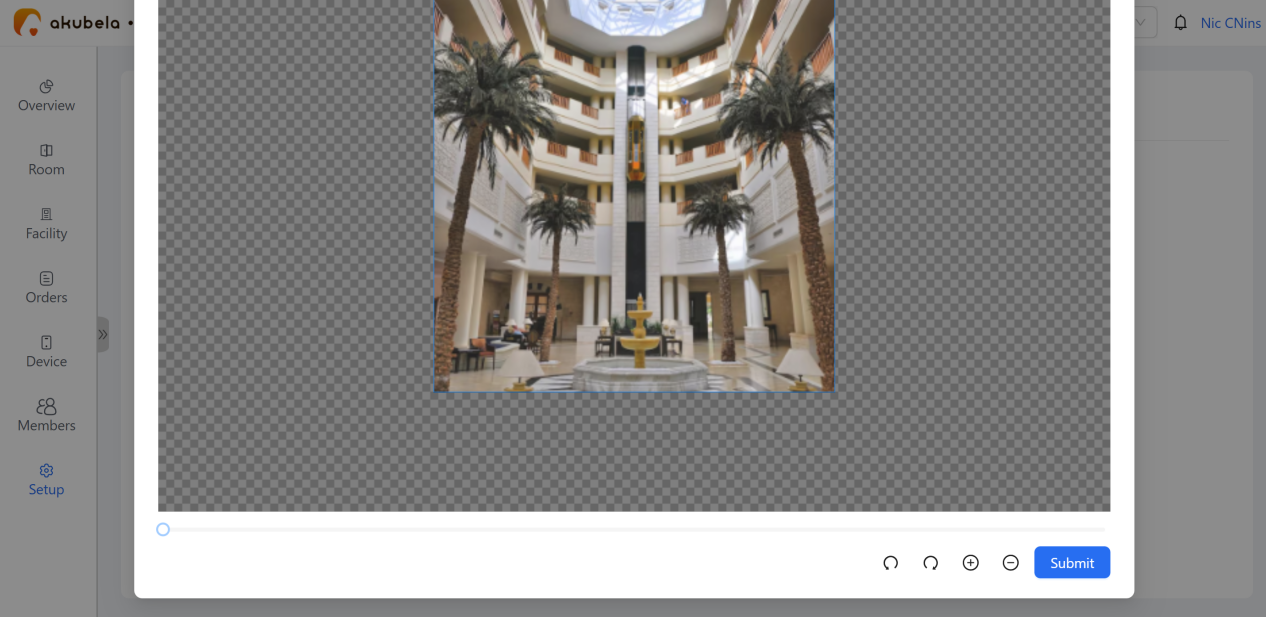
Once uploaded, the selected image will be applied to all panels of the same model in the project.
Guest Satisfaction Surveys
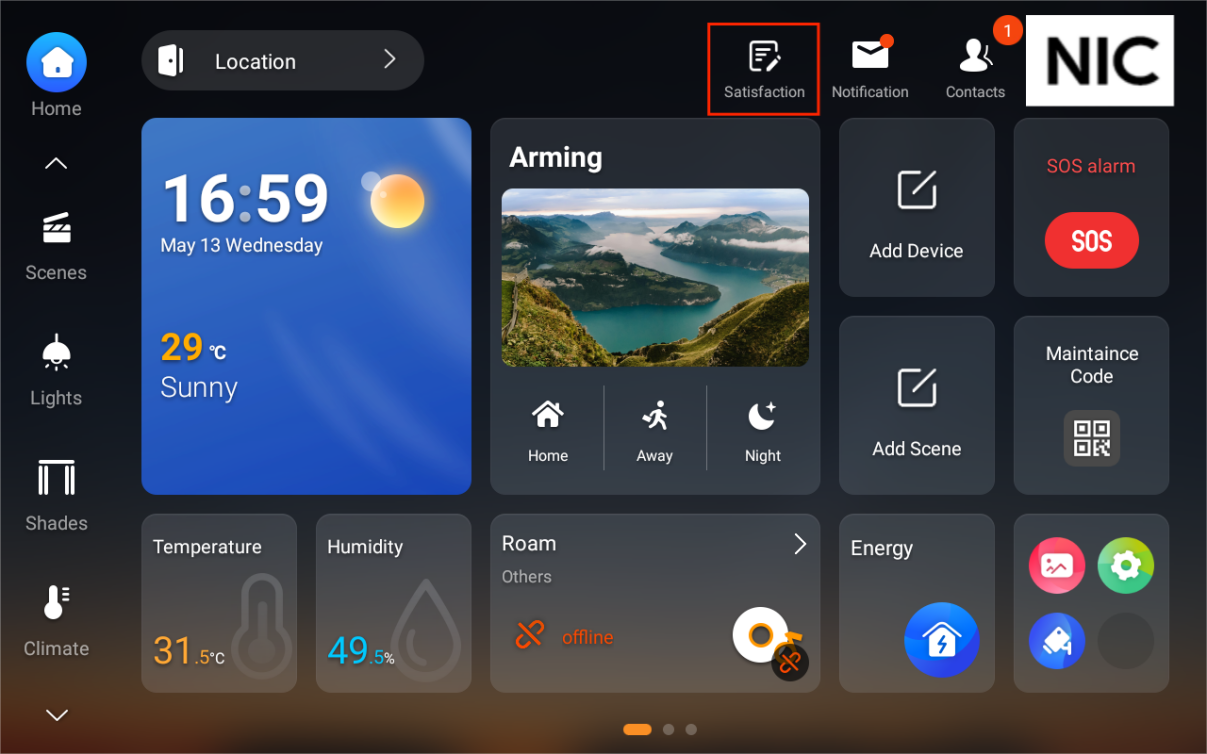
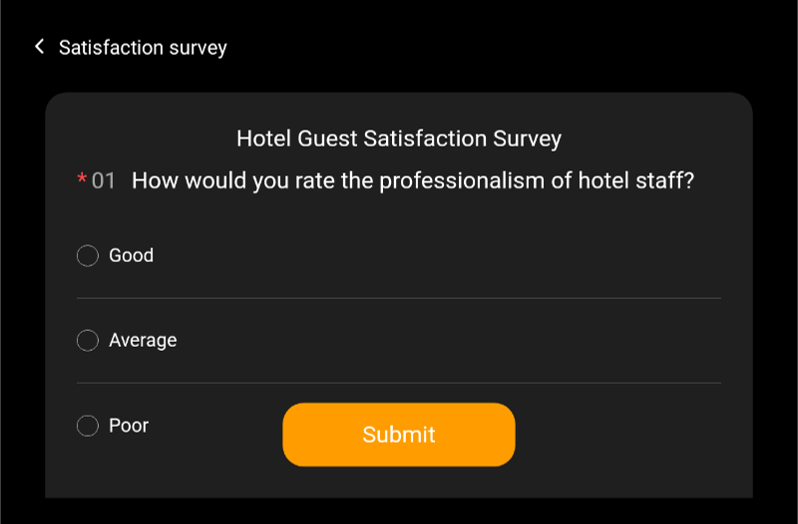
Hotel managers can create guest satisfaction questionnaires and assign them during guest check-in.
Create a Survey Questionnaire
Go to Orders > Guest Satisfaction.
Click New.
Enter the title and add questions (maximum: 10 questions).
Click Submit.
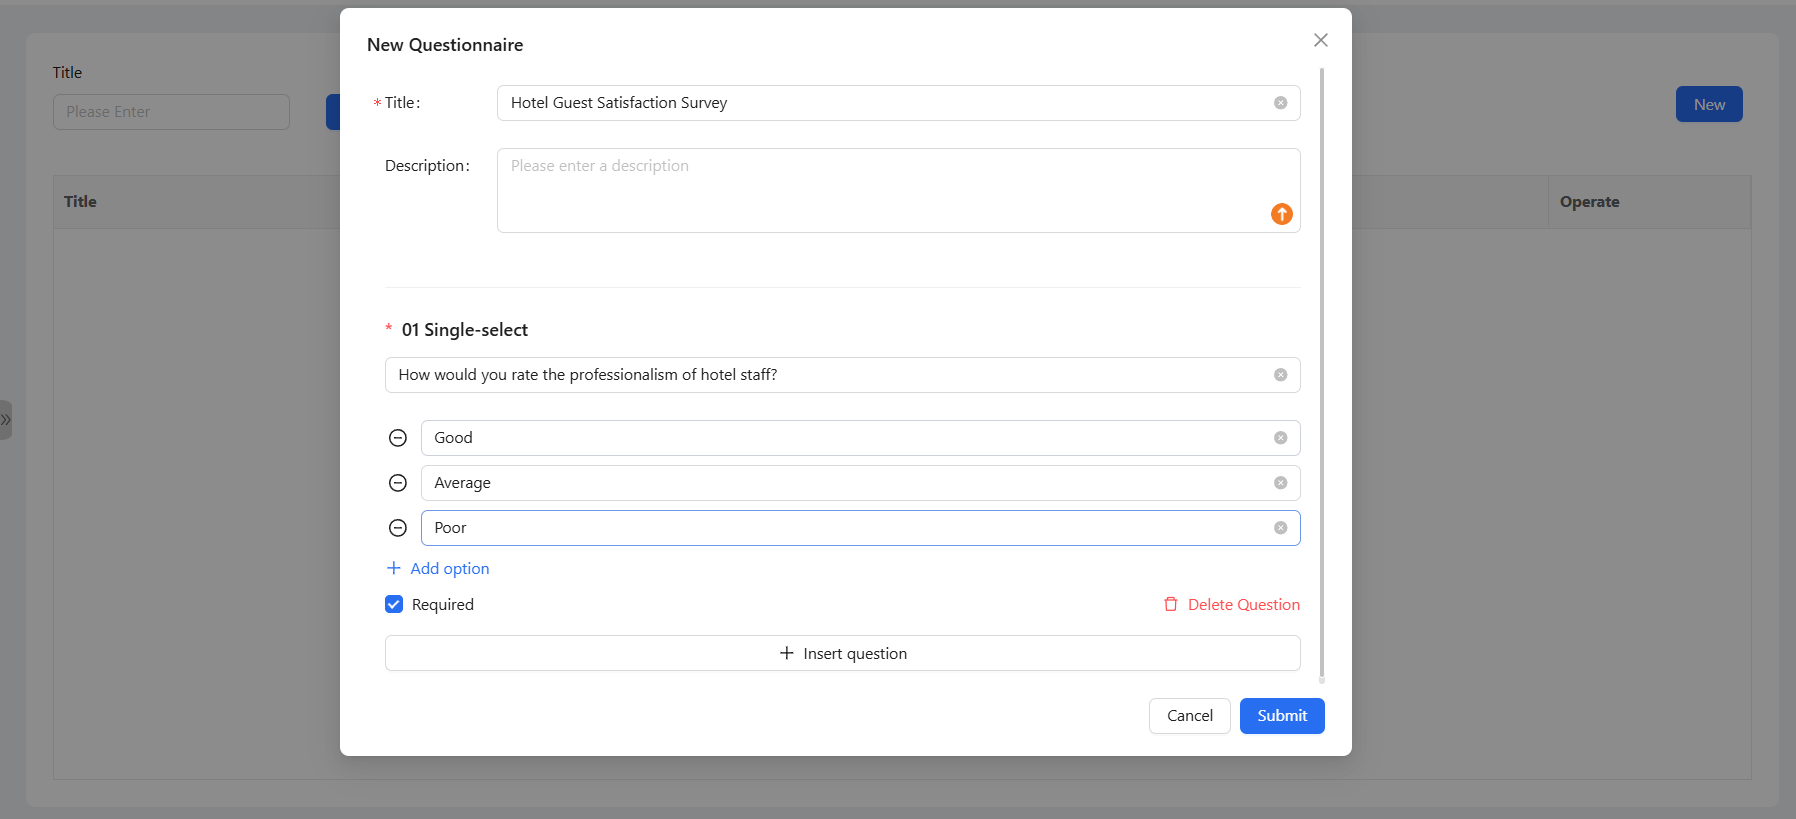
Apply a Survey During Check-In
During the Check-in process, staff must manually enable the Satisfaction Survey toggle and select the specific questionnaire for that guest room.
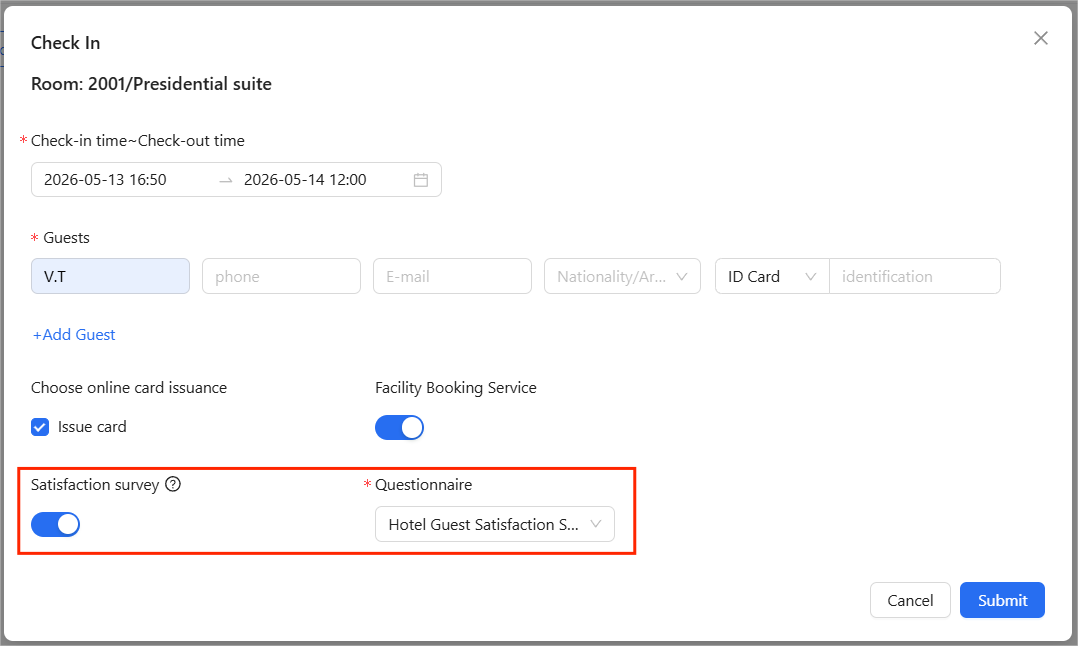
Once the guest checks in, the survey becomes available on supported in-room panels (currently supported on HyPanel Pro version 71.1.40.156 or later).
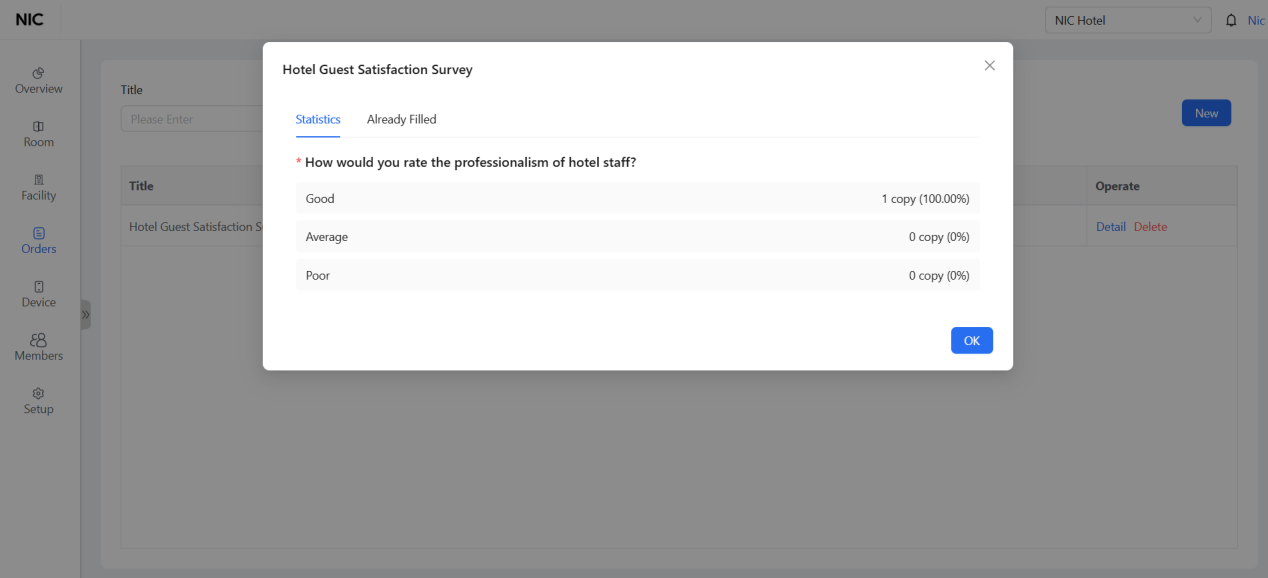
Survey results can be viewed directly on the GRMS platform.
Configure Alarm Notification Methods
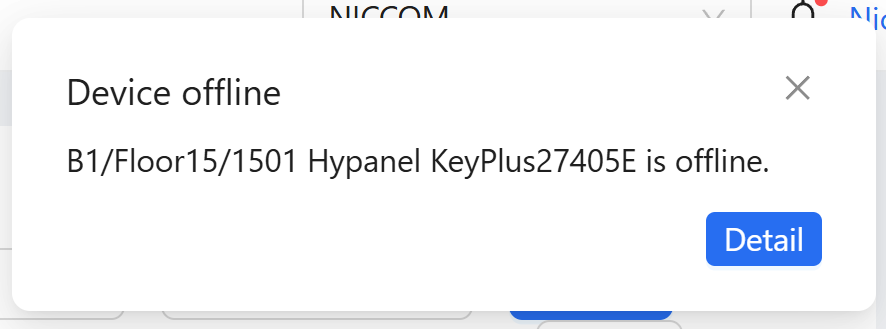
Define how alarms and notifications are delivered to staff under Setup > Notification Settings:
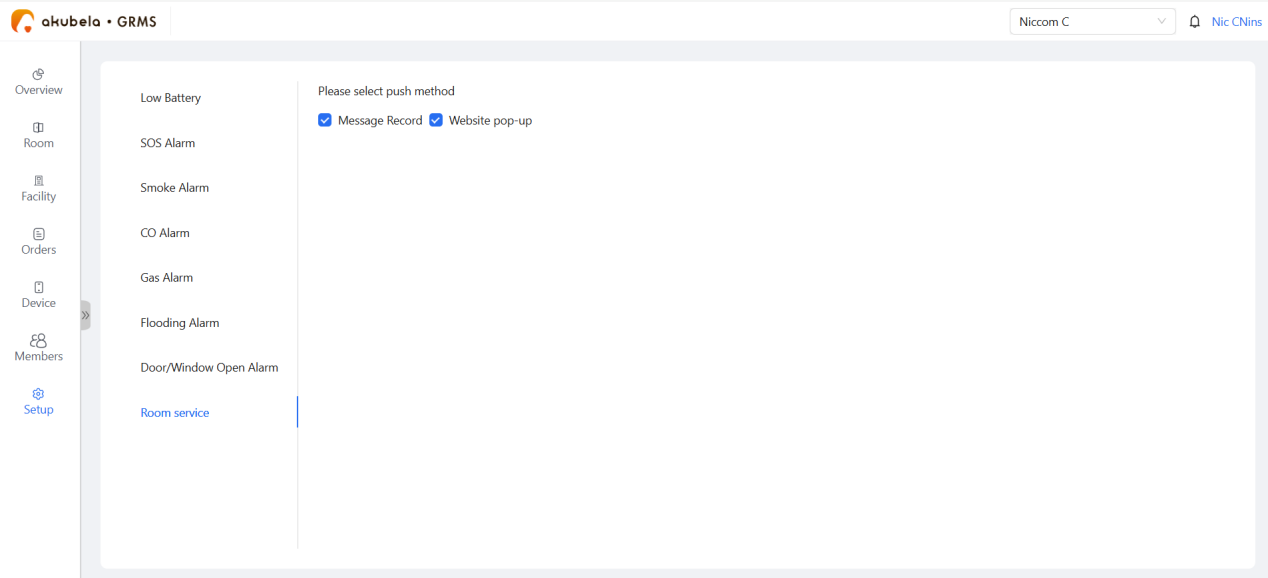
Message Record: Alarms will be listed under Setup > Message.
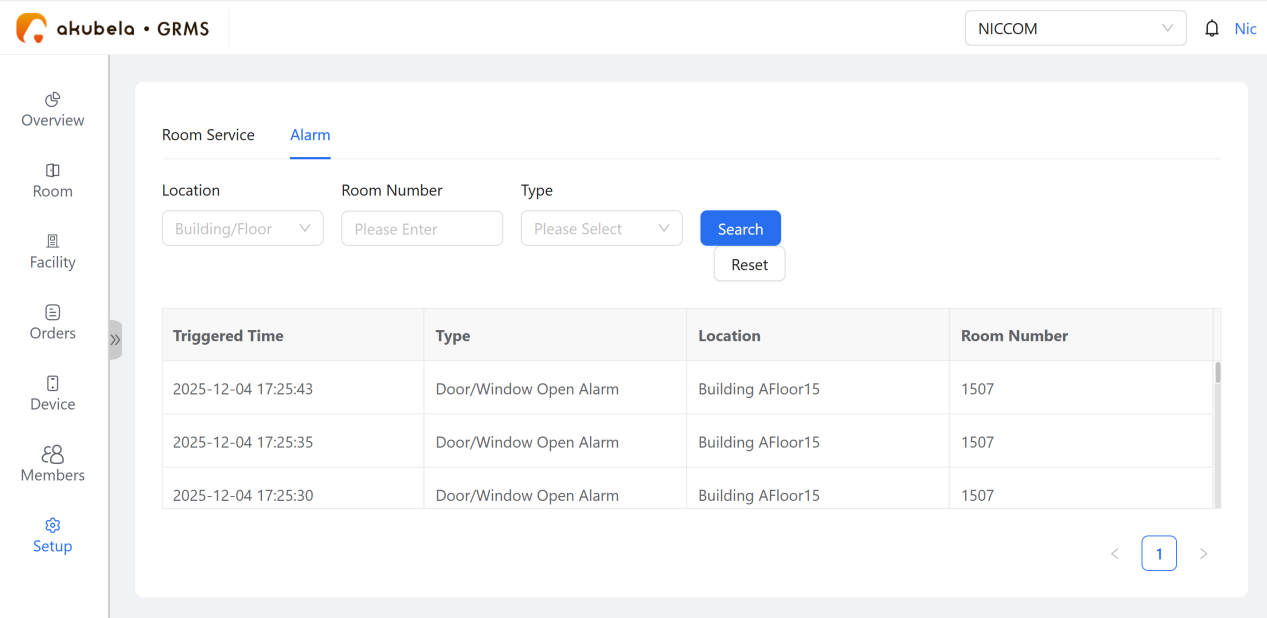
Website pop-up: Alarms will appear as pop-ups on the GRMS platform.
Third-Party Platform Integration
The GRMS platform supports integration with compatible third-party booking platforms (currently supporting Elektraweb only).
Preparations
Before enabling the integration connection, verify the following conditions:
Room numbers must exactly match between the GRMS platform and the third-party booking platform.
The GRMS platform must not contain any active booking orders. Otherwise, the integration configuration cannot be submitted.
Configuration
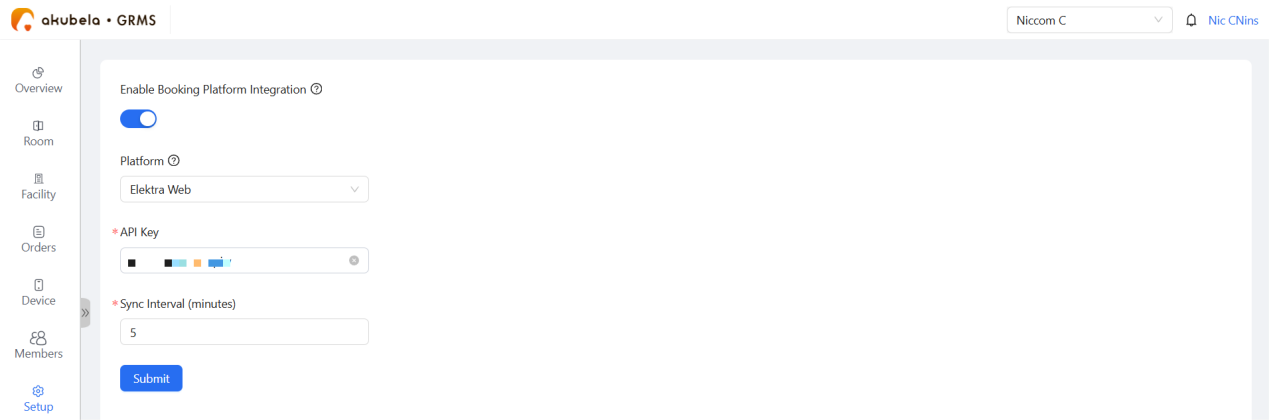
Go to Setup > Integration.
Toggle on Enable Booking Platform Integration.
Select the target platform (currently Elektraweb only).
Enter the API key provided by the booking platform.
Set the synchronization interval.
Click Submit.
NOTE:
After integration is enabled, booking orders are automatically synchronized from the connected booking platform.
Bookings synced from the external platform cannot be modified within the GRMS interface. The following operations are unavailable:
Cancellation
Check-out
Stay extension
Adding guests
Editing guest information
The check-in feature on the GRMS platform is disabled for these bookings.