Room Settings
Room data synchronizes automatically between the akubela Cloud and GRMS. However, specific hotel parameters must be defined within the GRMS platform.
Define Room Types
NOTE:
Rooms must be assigned a room type before they can appear on the Room page for reservations.
Create Room Types
Go to Setup > Room Type > New room type.
Enter the room details, assign rooms, and click Submit.
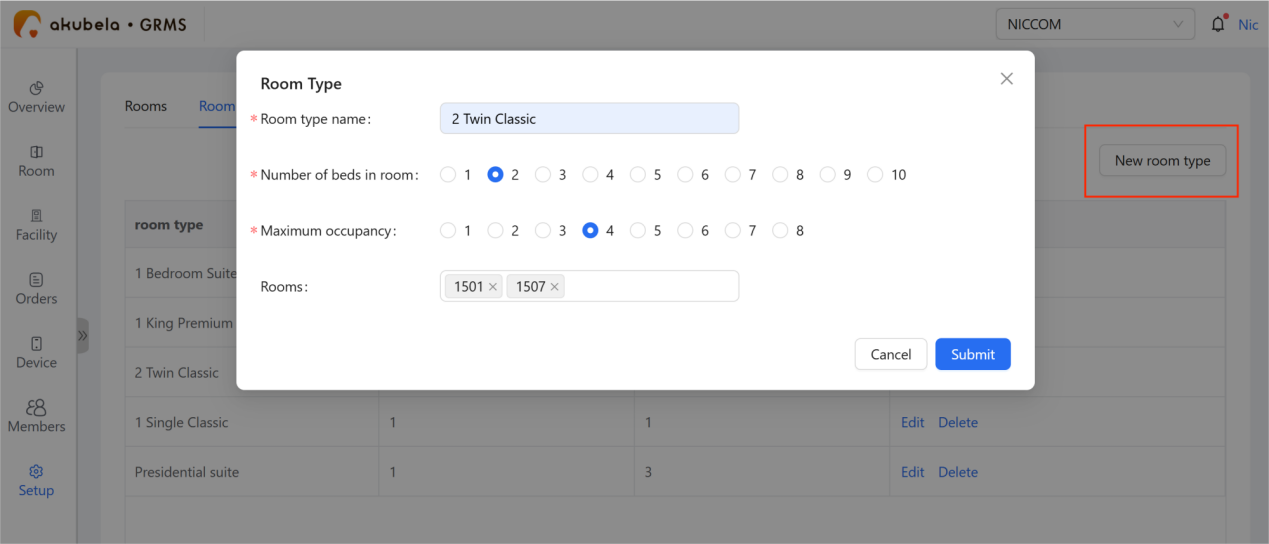
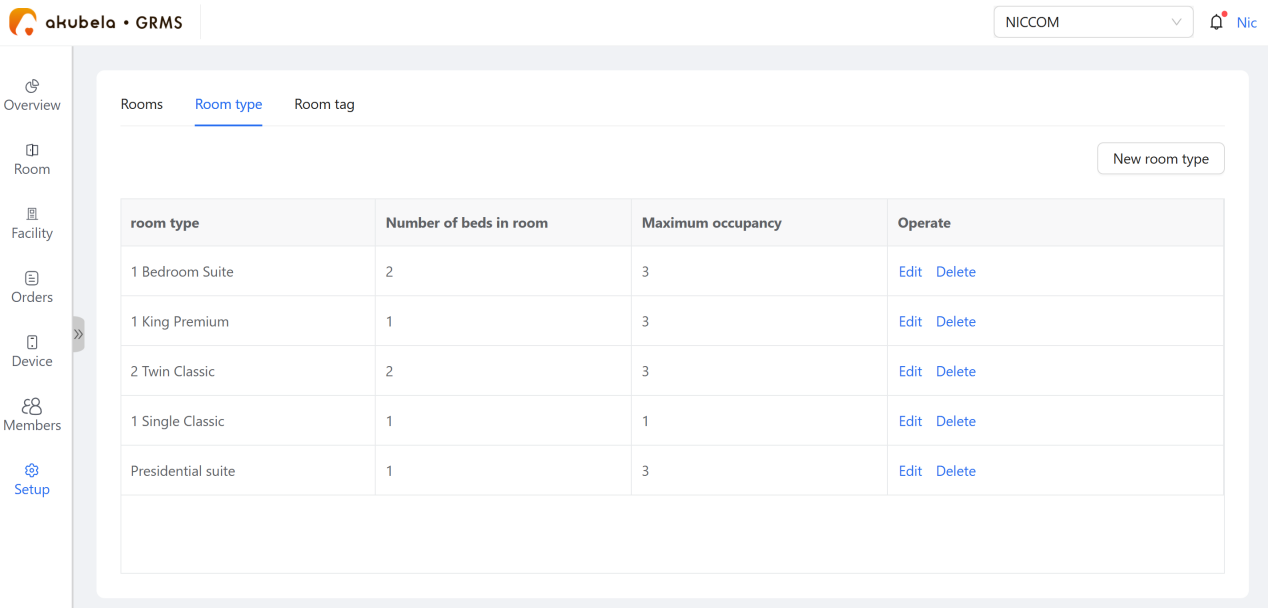
Repeat the process until all room types are added.
Assign a Room Type to Each Room
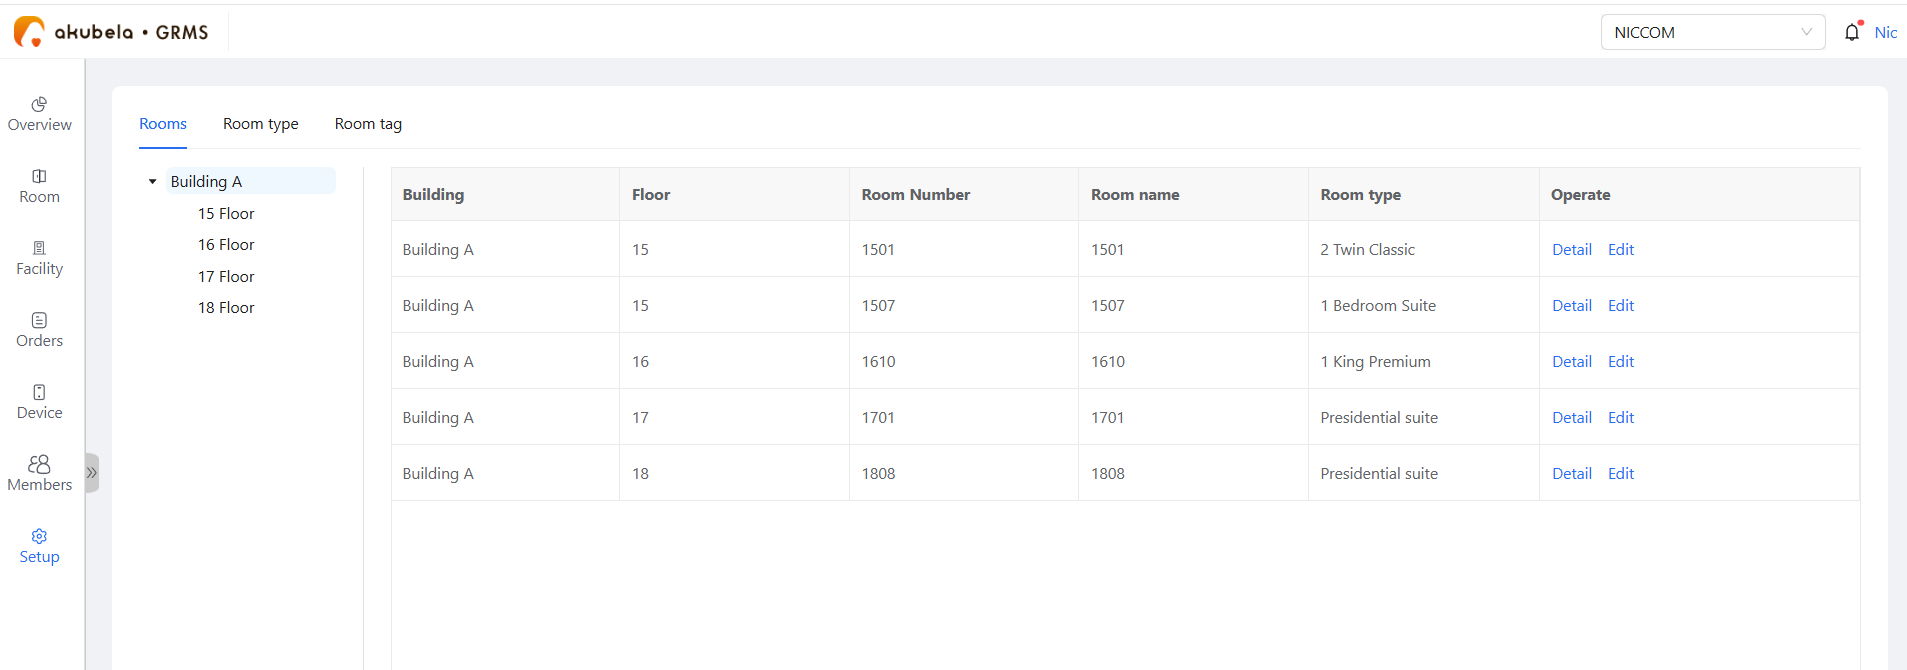
Go to Setup > Room List > Rooms > Edit.
Select a room type, and enter the landline number if needed.
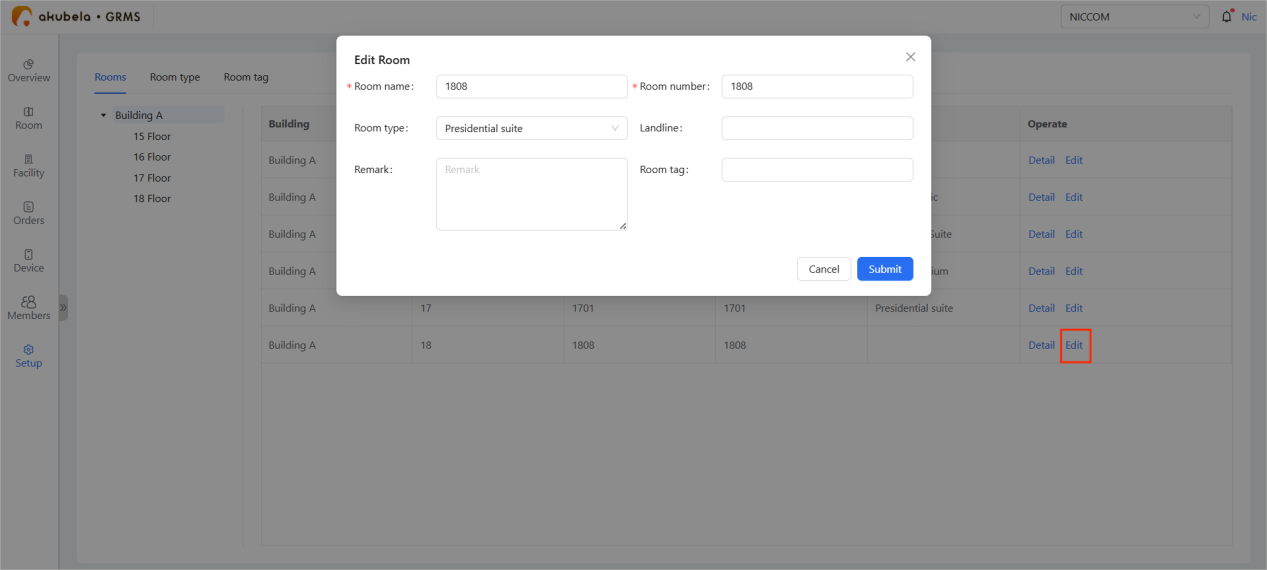
Repeat until all rooms have been assigned a type.
Add Room Tags
Room tags help you categorize rooms by their status or shared features. Tagged rooms can also be used as conditions in automation scenes.
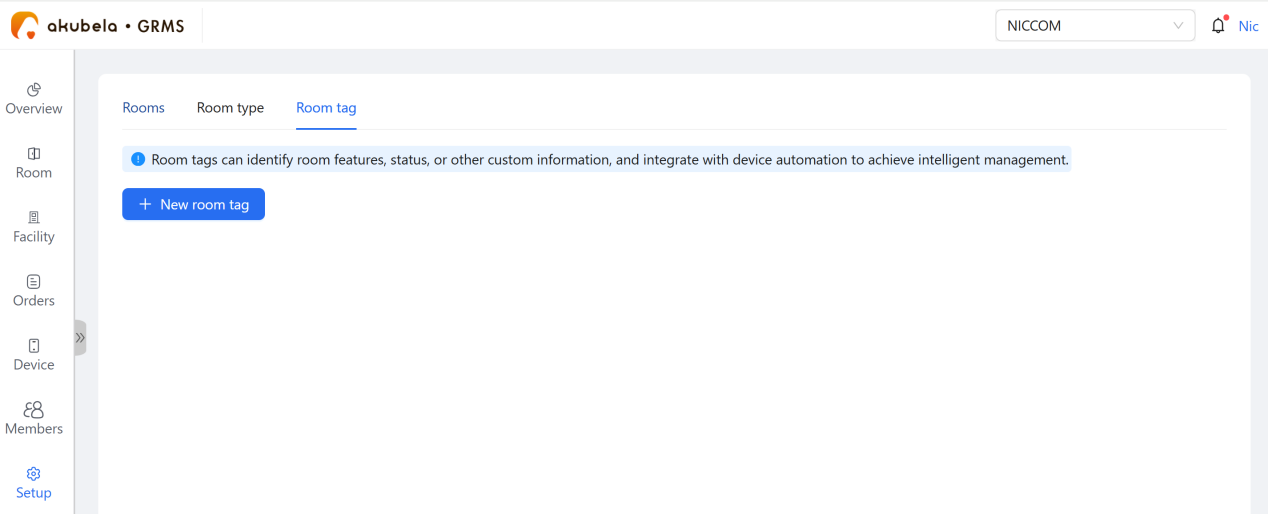
Create a Room Tag
Go to Setup > Room Tag > New room tag.
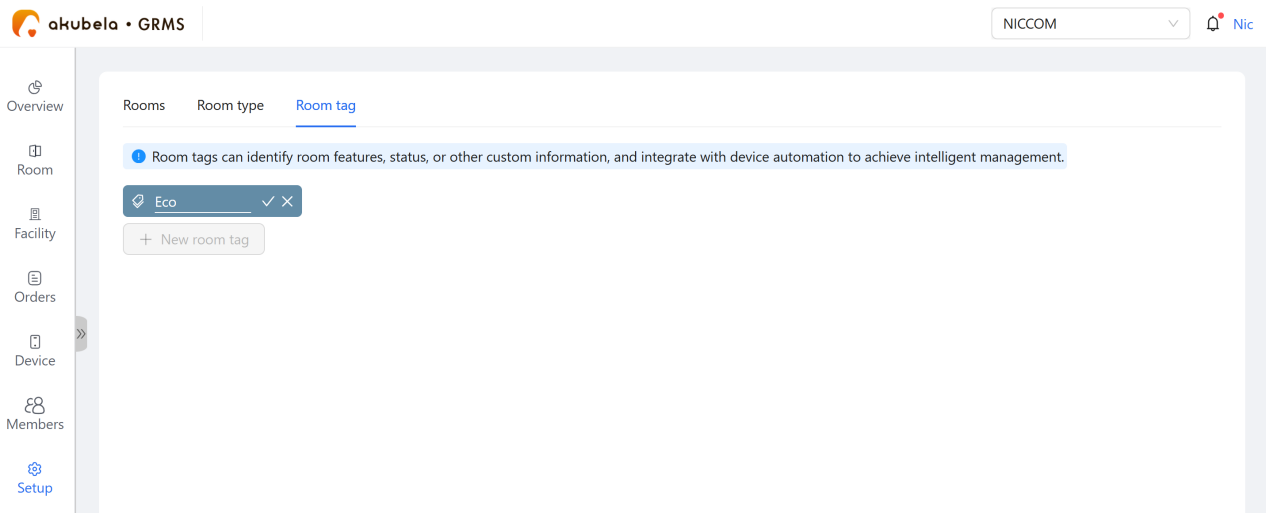
Enter the tag name, then click
 to confirm.
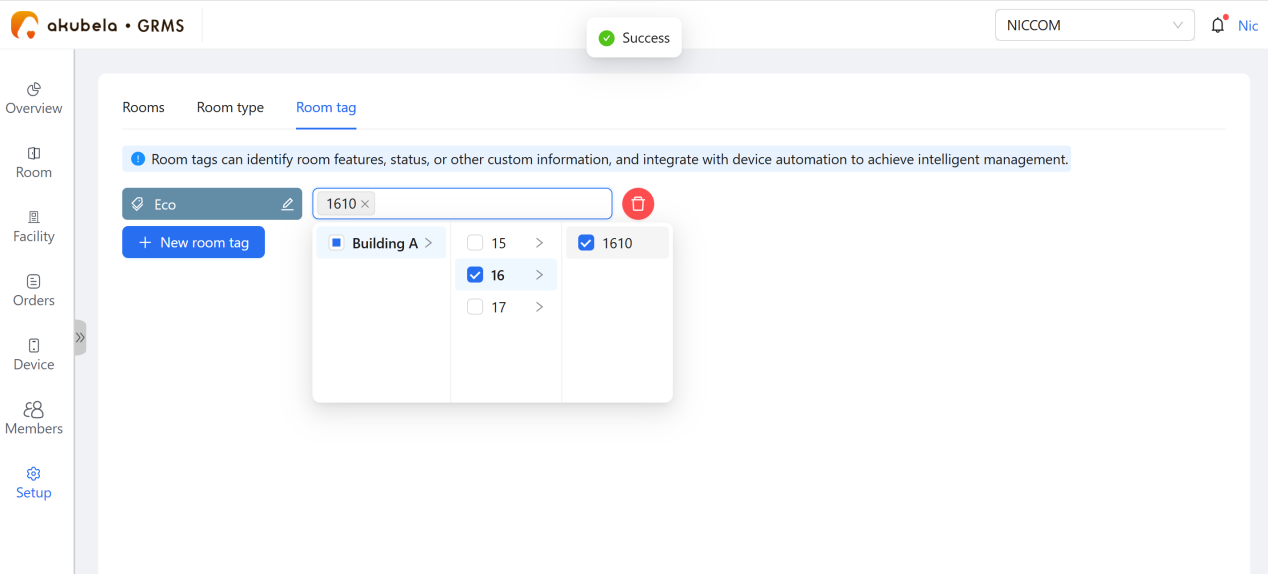
(Optional) Select the rooms you want to associate with the tag.
TIP:
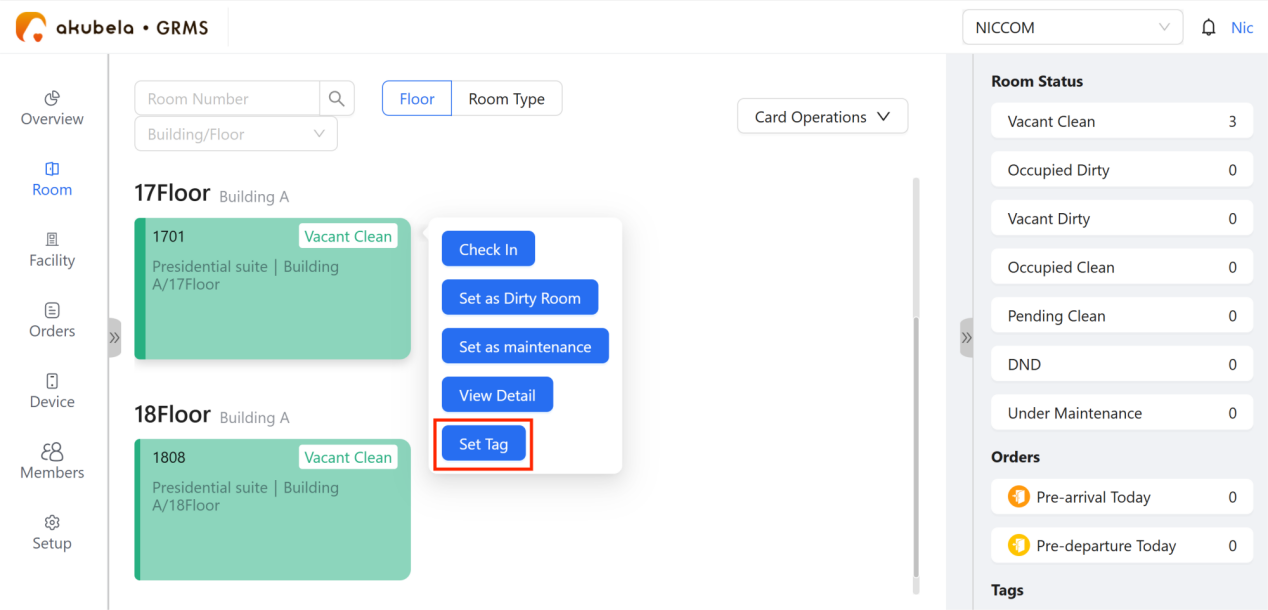
Room tags can also be assigned or modified from Room > Room Status > Set Tag.
View or Filter Rooms by Tag
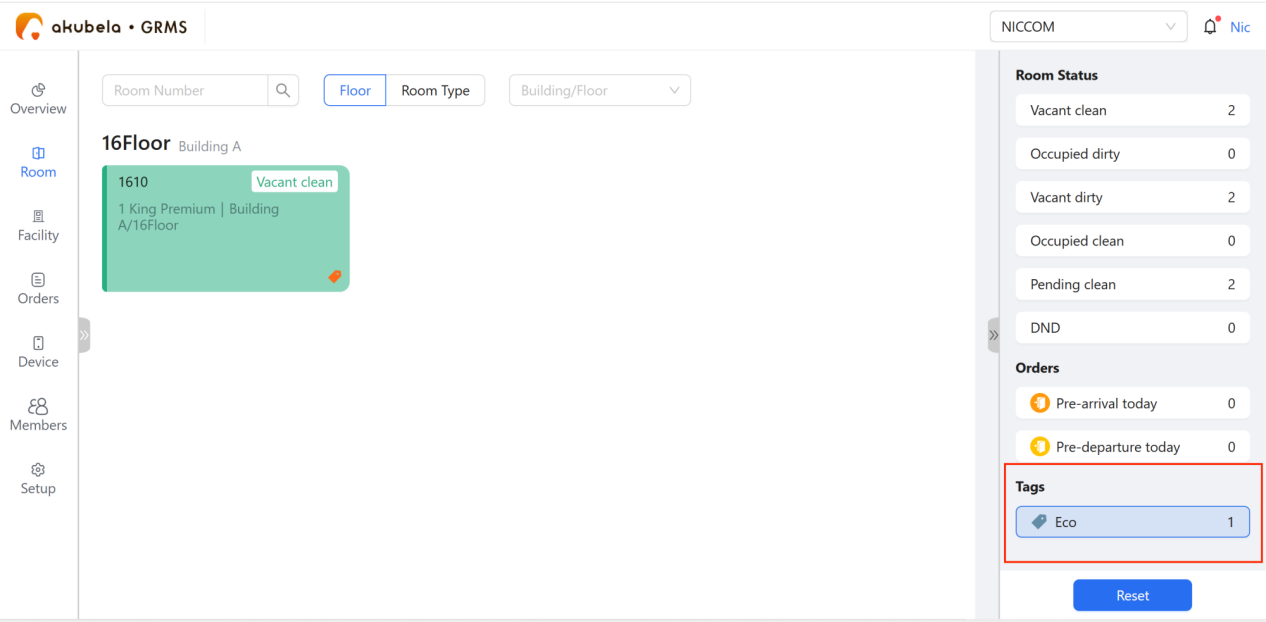
Go to Room > Room Status > Tags.
Click the target tag to filter rooms.
Click Reset to exit the filter.
Room Status Confirmation
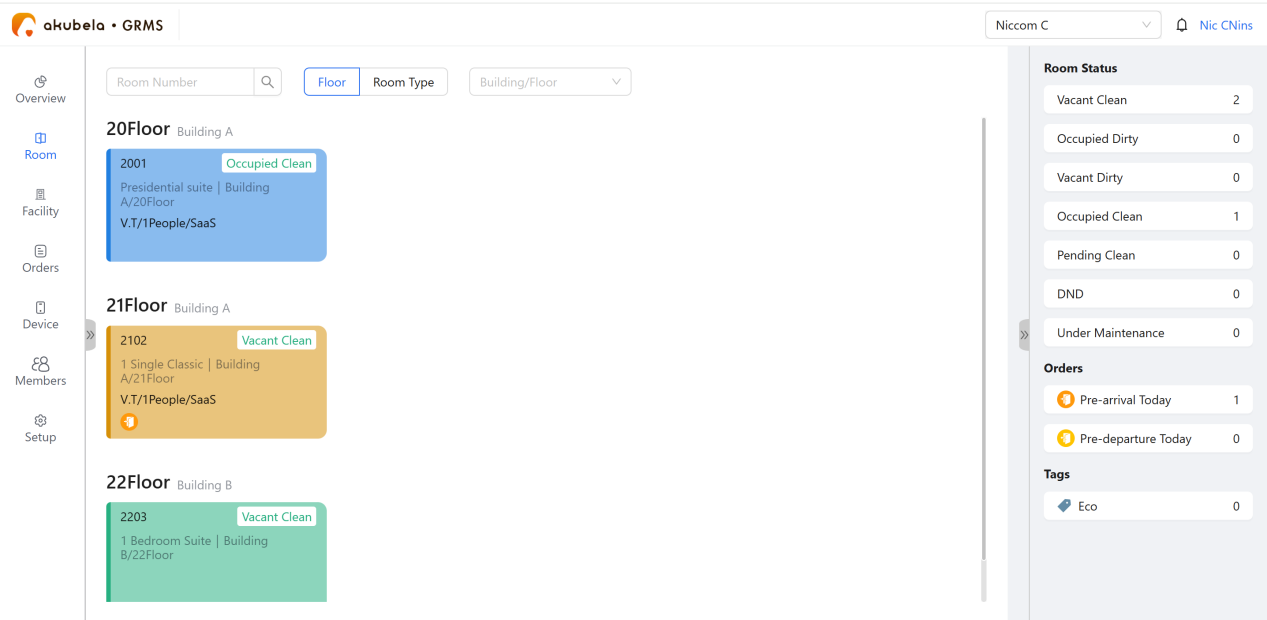
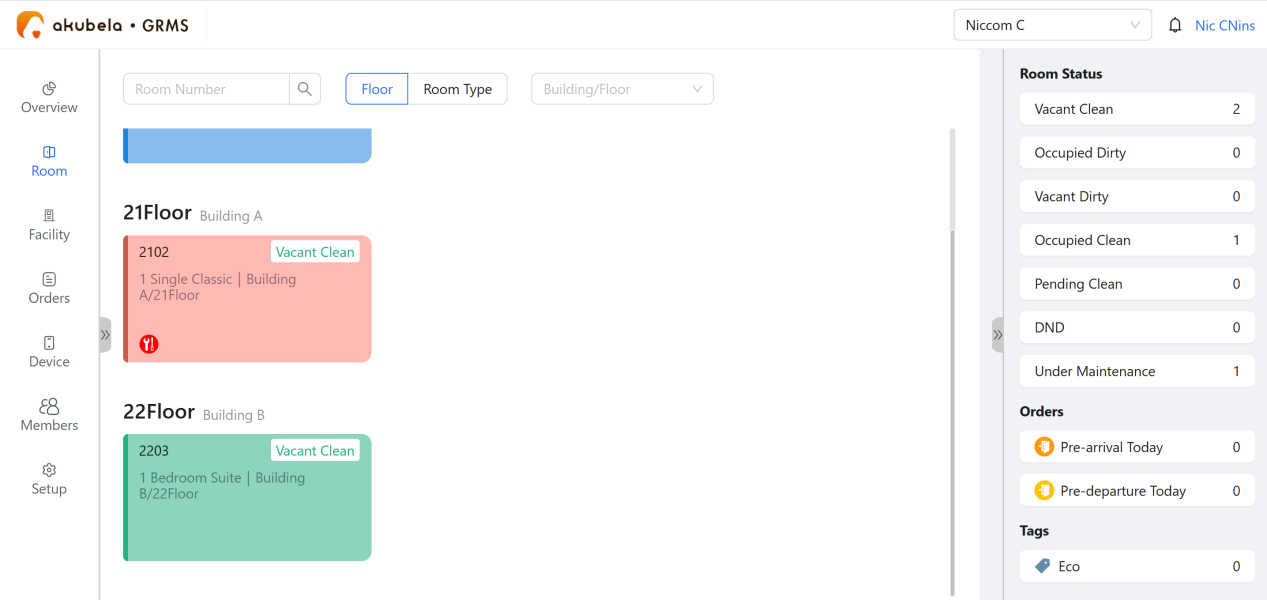
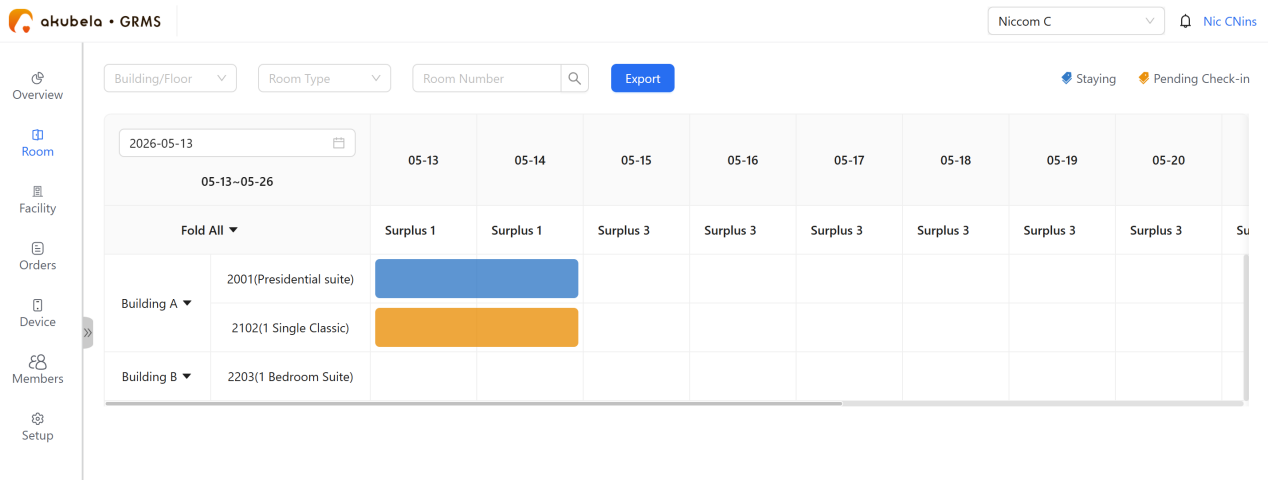
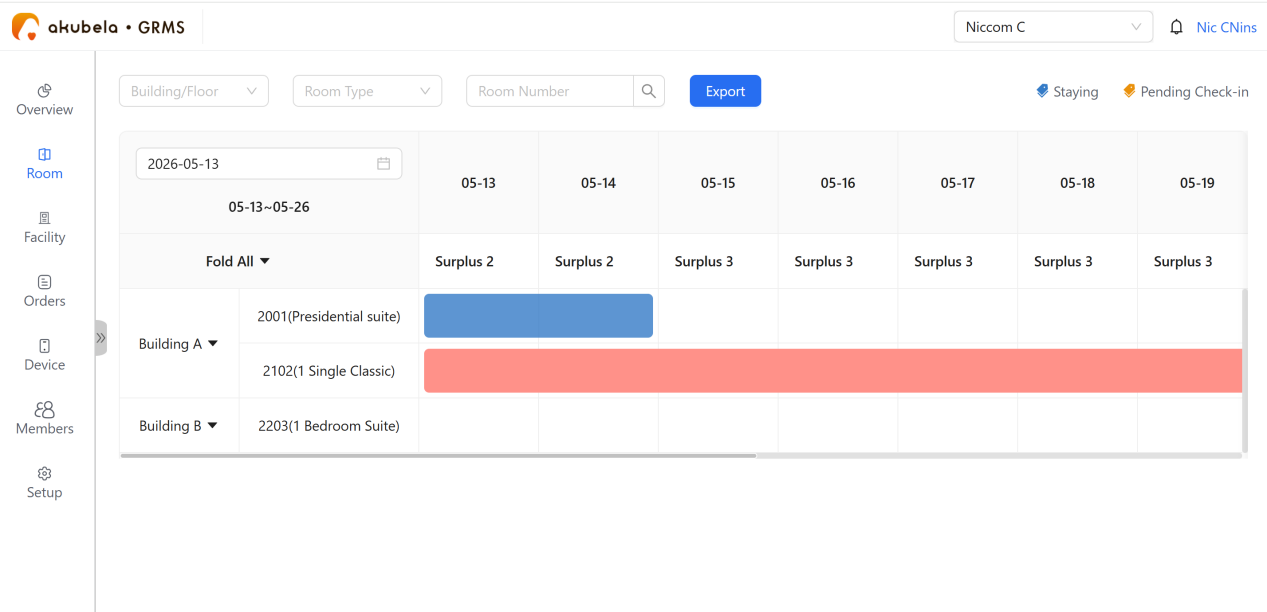
The Room Status and Room Calendar pages use color-coding for quick identification.
Green:Vacant and ready for booking
Blue:Currently Occupied
Yellow:Reserved but not yet checked in
Red: Under maintenance and unavailable for booking
Check Booking Orders
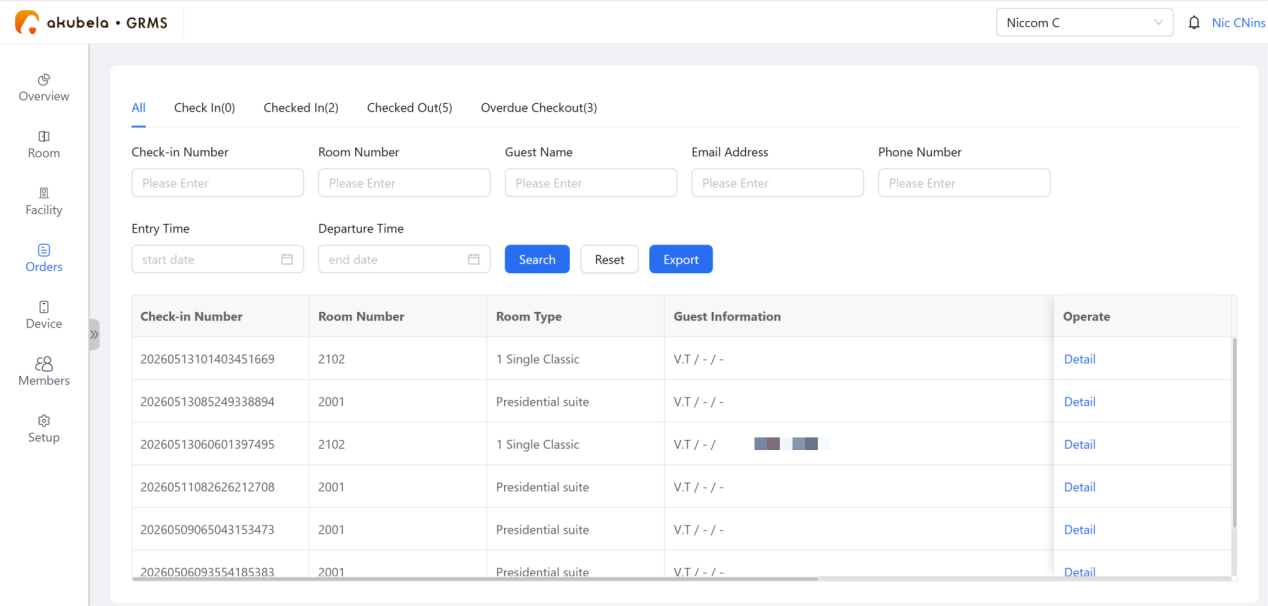
To search for a reservation, go to Orders > Order List to search using their name, booking number, or other provided details.
You can also browse all current and past orders directly from this page.
Check-in
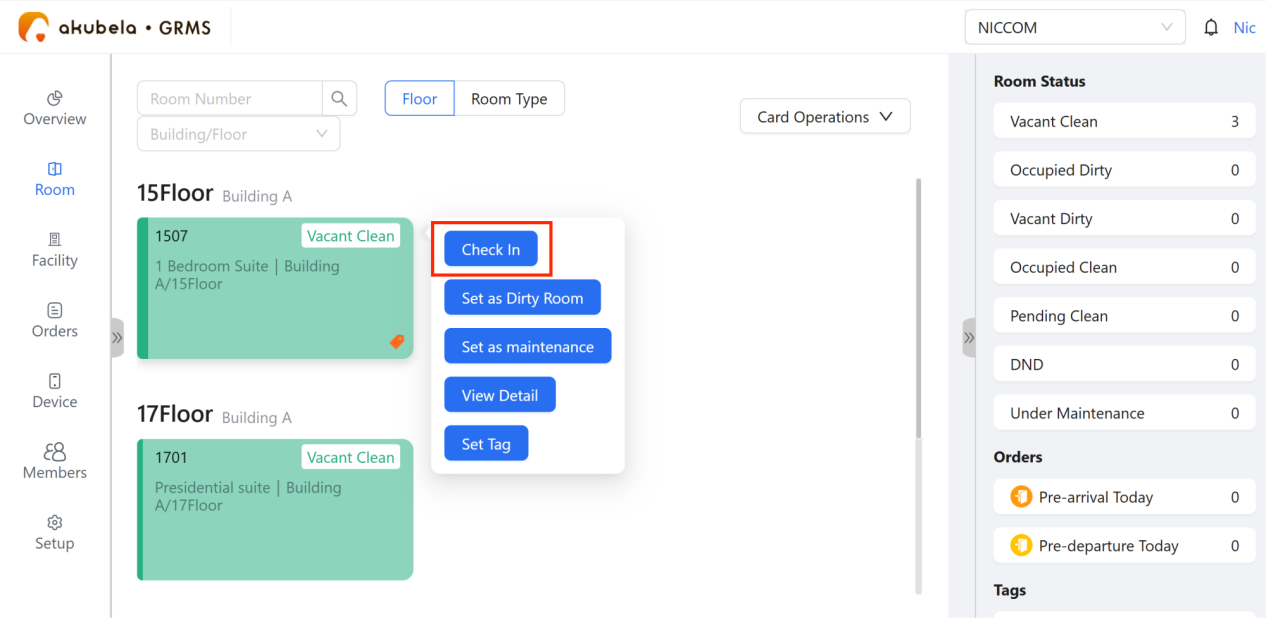
Guests can be checked in from either the Room Status page or the Room Calendar:
Go to Room > Room Status, hover your mouse over a green vacant room to display the menu, and then click Check in.
NOTE:
If the Check In button does not appear, ensure the room has a home center and all its devices installed. Once installation is complete, the button will be available.
Go to Room > Room Calendar, then click the desired date and room.
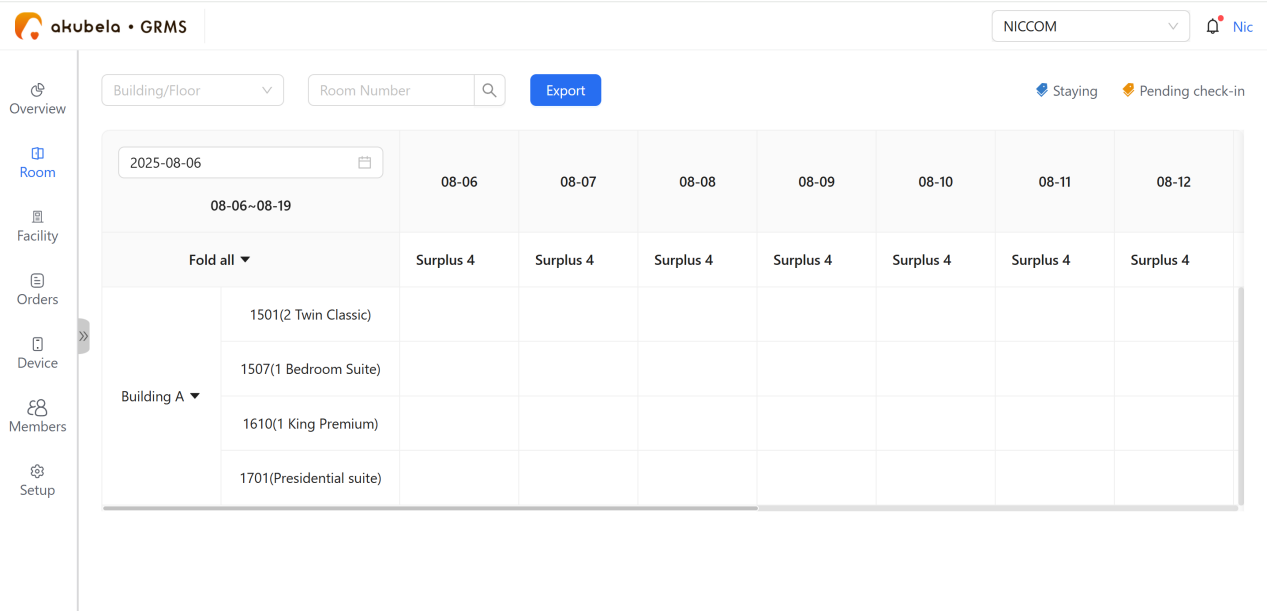
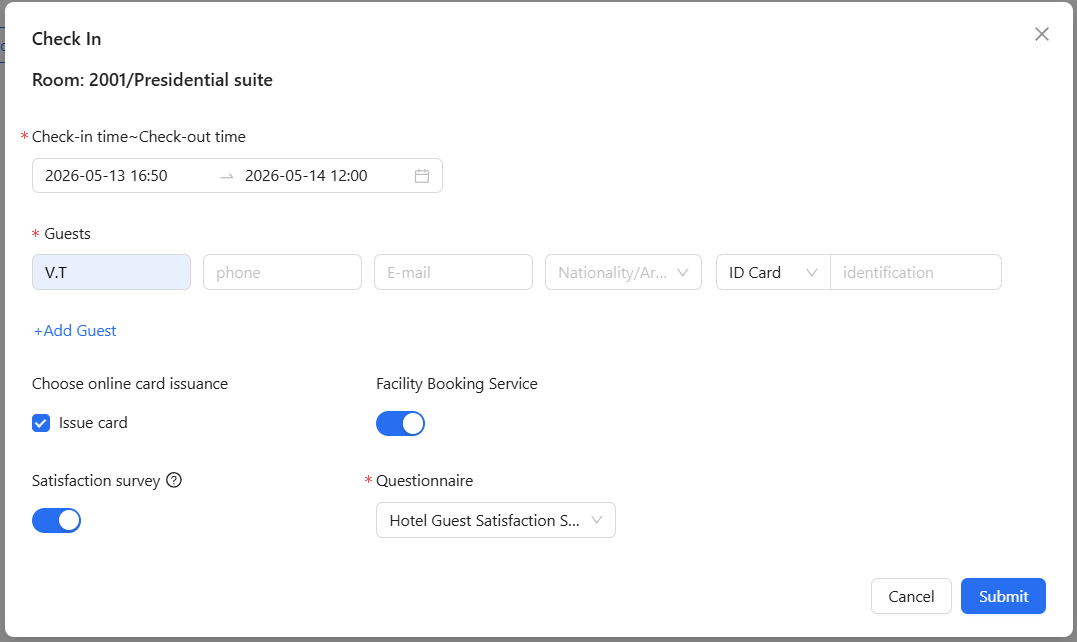
Fill in the following guest details, and click Submit.
Select the check-in and check-out times.
Enter the guest’s information.
(Optional) Click Add Guest to include additional guest(s).
(Optional) Issue a room card, PIN, and/or QR code for the guest. See detailed instructions here.
(Optional) Enable facility booking permissions for the H5 mobile interface.
(Optional) Available only when any questionnaire is created on under Order > Guest Satisfaction. Enable a guest satisfaction survey and select a questionnaire.
Add Access Credentials for Guests
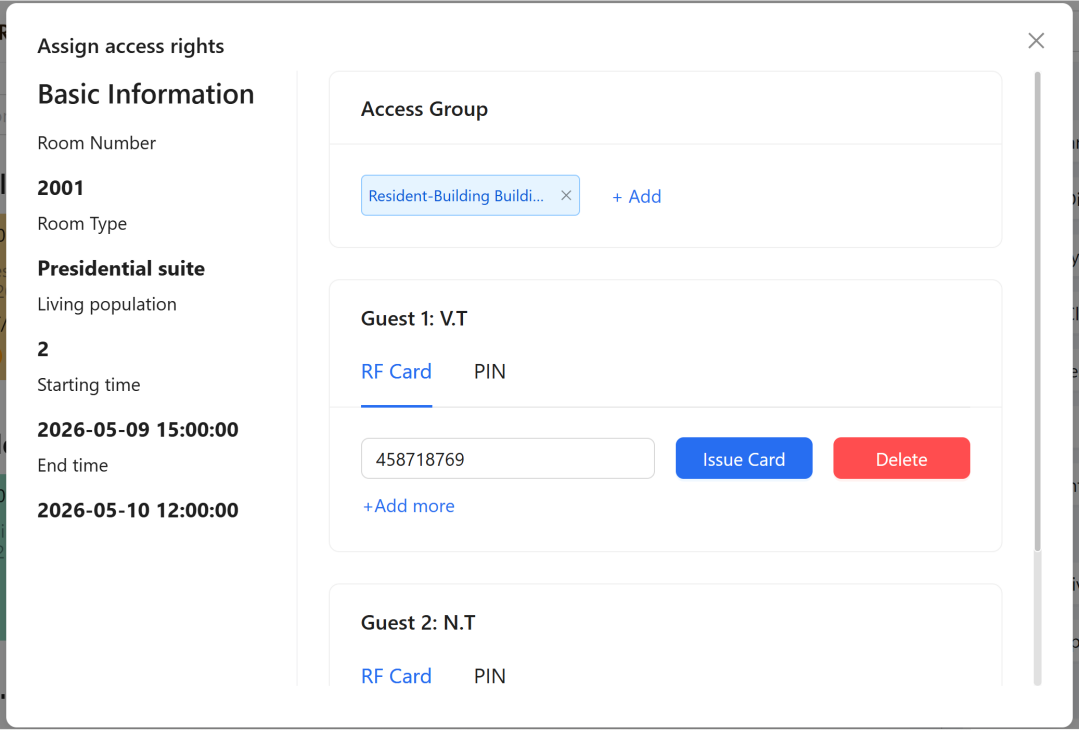
If Issue Card is selected during check-in, the system automatically redirects to the Assign Access Rights page.
You can also add credentials later from: Room > Room Status > [Desired Room Card] > Assign access rights.
NOTE:
The required intercom devices and/or smart locks must be installed for the specific room; otherwise, the system displays “No access control equipment for this room.”
Access credentials are valid from check-in and automatically expire upon checkout. If a guest checks out early, the credentials are instantly deactivated.
Assign Access Groups
Hotel staff can assign one or more access groups to room guests allowing them to access some places.
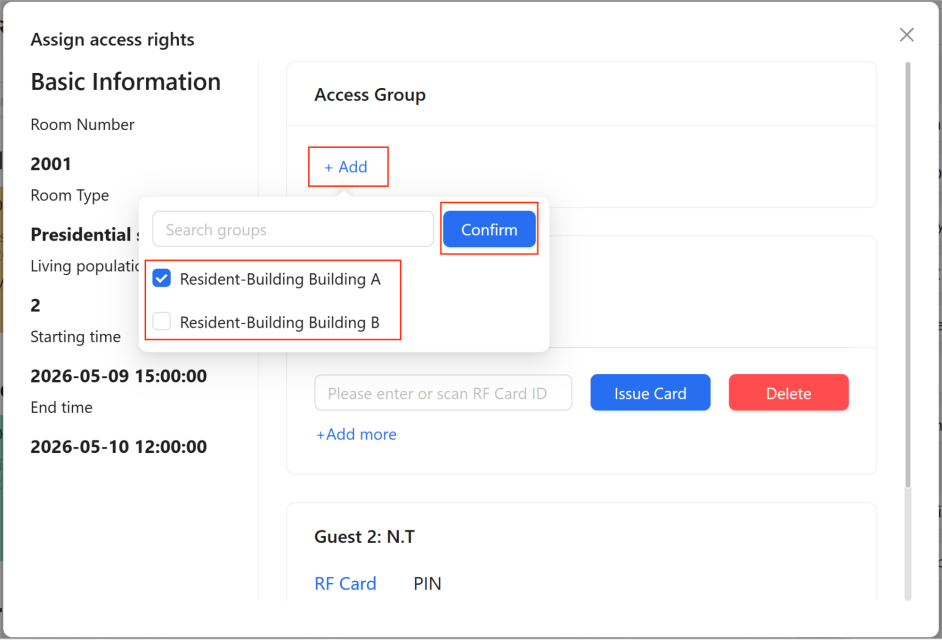
Method 1: Order-Specific Access (During Check-In)
This method assigns access permissions only to the current order. The assigned permissions are temporary and automatically expire after check-out.
Click Add.
Select the required access group(s).
Click Confirm.
Method 2: Room-Based Access (Global Configuration)
This method assigns an access group to a specific room as a default configuration.
During guest check-in, hotel staff can remove the assigned access group by following the steps in Method 1. This temporary change applies only to the current order and does not modify the original room-based configuration.
Go to Setup > Access Group.
Find the target access group.
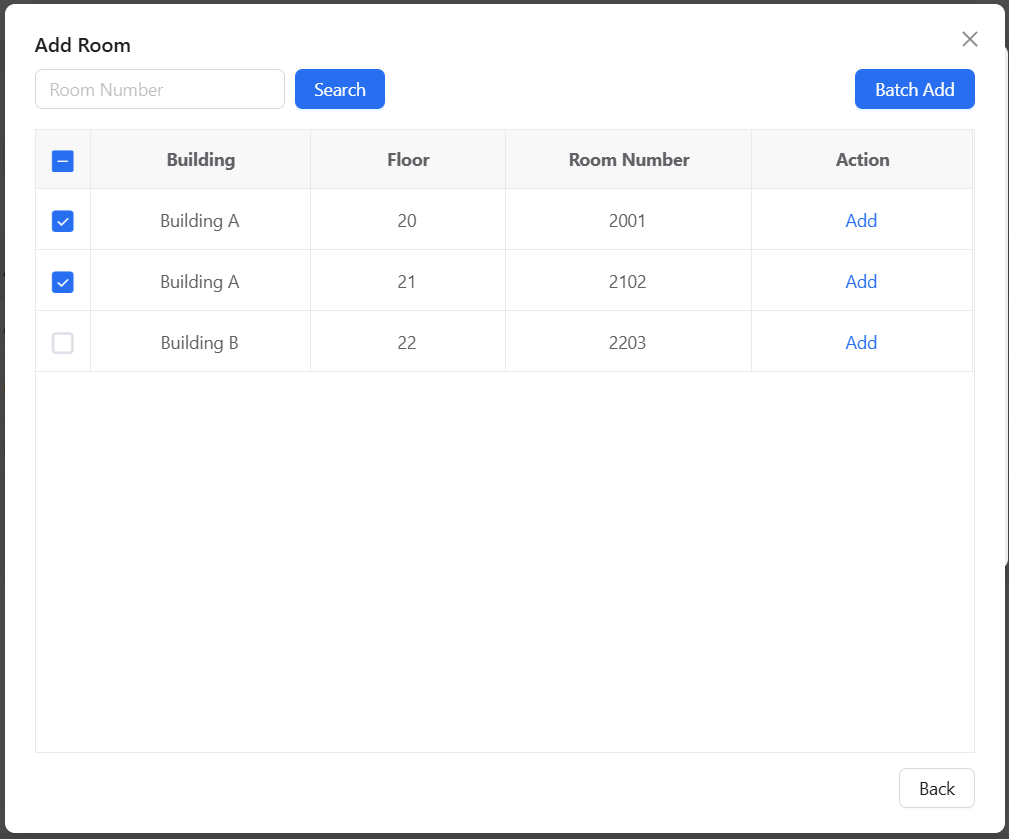
Click Room > Add Room.
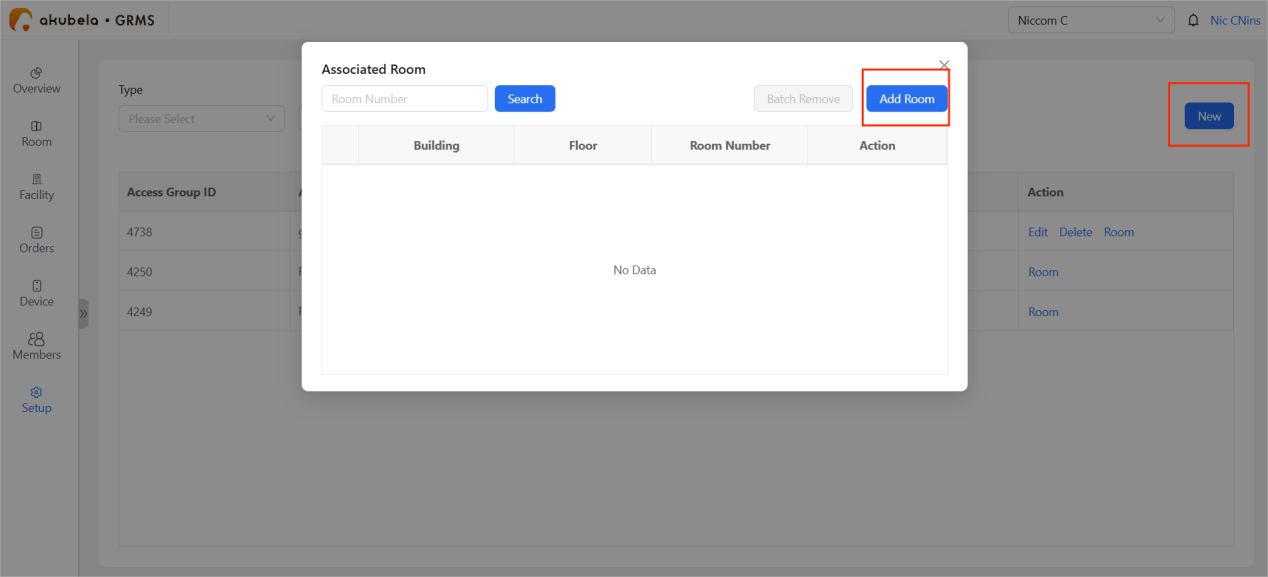
For an individual room, click Add. To add multiple rooms, select the desired room(s) to apply the access group, and click Batch Add.
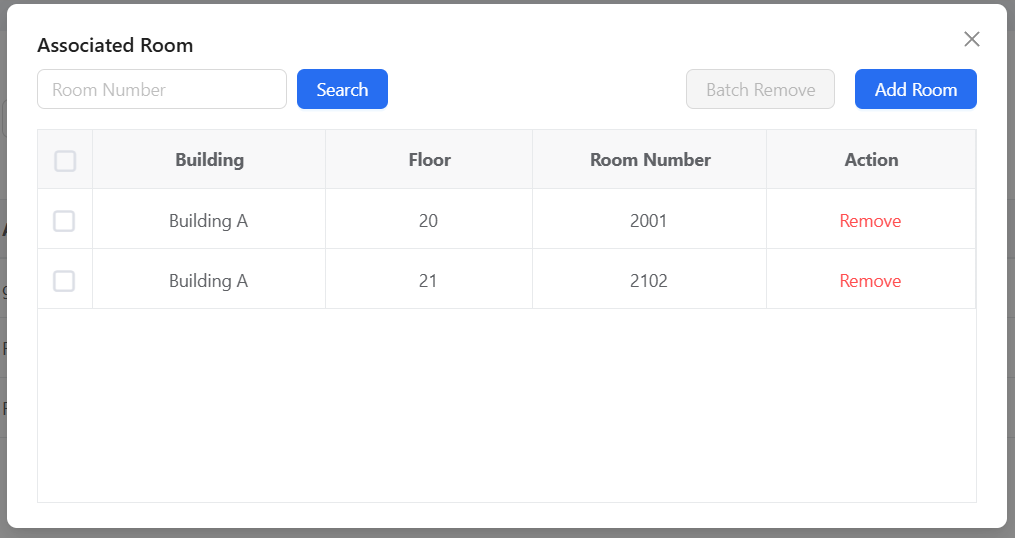
Click Back in the lower right corner to check or remove associated rooms.
Issue a Card
NOTE:
Cards can be issued only for rooms with a C6 smart lock or a door phone/access control device that supports card access.
It is strongly recommended to configure an admin code on the C6 lock before adding it to a room. Otherwise, the first cloud-issued RF card may become the lock’s first administrator and may be hard to remove.
GRMS issues cards as administrators on the C6 lock. The lock supports up to five administrators, so If all five slots are occupied, any new card issued via GRMS will not be added.
Always delete GRMS-issued cards from the GRMS platform rather than directly from the lock.
TIP:
Up to two RF cards can be assigned to each guest.
Click RF Card
Enter the card number, or swipe card on the card reader.
Click Issue Card.
Generate a PIN Code
NOTE:
PIN codes can be issued only for rooms equipped with a C6/F2/SL50 smart lock or a door phone/access control device that supports PIN code access.
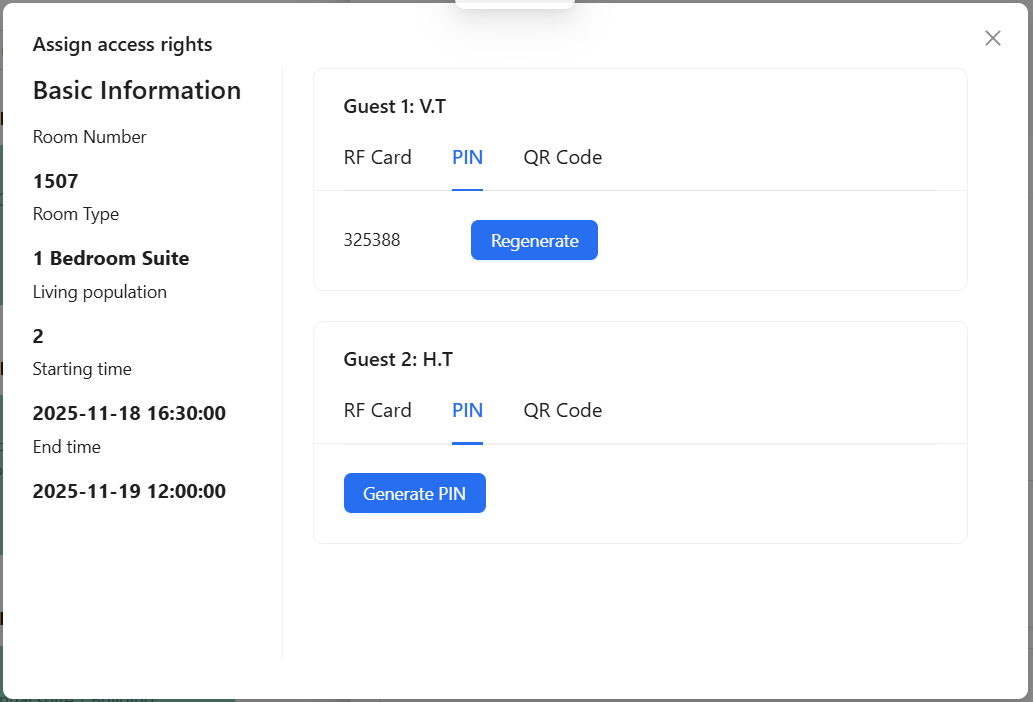
Click PIN > Generate PIN to automatically generate a PIN code. The system will then send the PIN to the guest’s email (if provided during check-in).
Generate a QR Code
NOTE:
QR code issuance is supported only on compatible Akuvox door phones and access control devices:
Supported Model
Required Firmware Version
S539
Version starting with 539
E16
Version starting with 116
E16V2
Version starting with 216
E18
Version starting with 18
X912
Version starting with 912
X915
Version starting with 915
X915S
Version starting with 2915
X916
Version starting with 916
R29
Version starting with 29
A08
Version starting with 108
QR codes only work for the door phone or access control device in the assigned room, not in public areas.
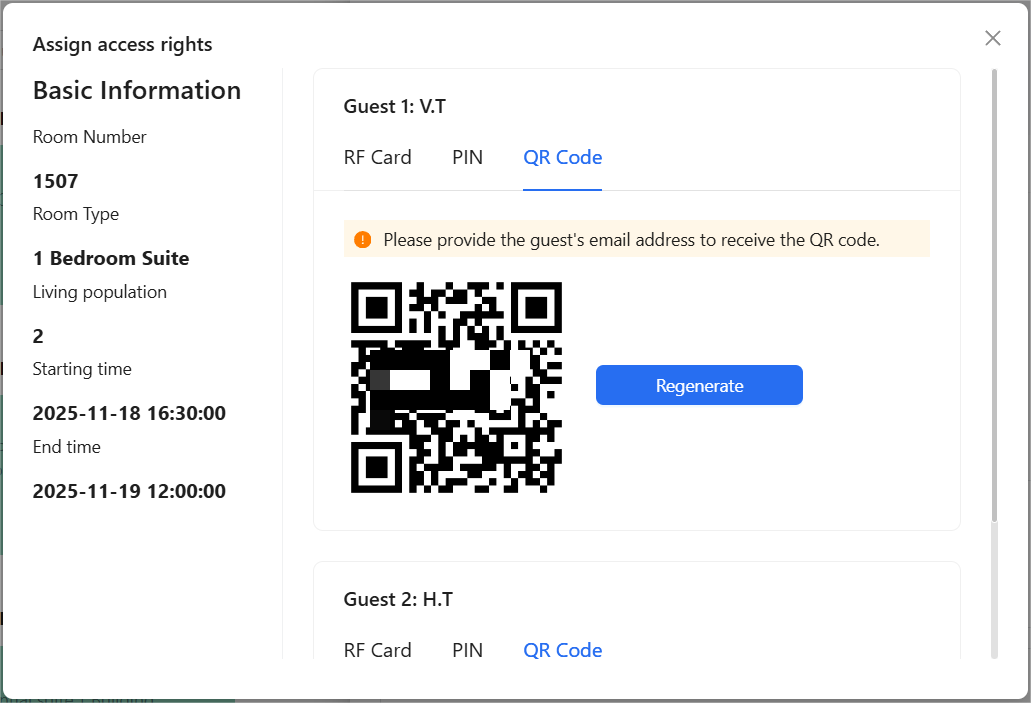
Ensure the guest’s email address is entered before generating the QR code. If not, go to Room > Room Status > [The guest’s room] > Modify Contact Information to add the email address.
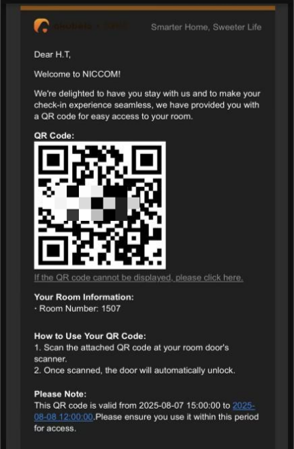
Click Generate QR Code. The system will automatically generate a QR code and send it to the guest’s email.
Check Credential Issuance Records
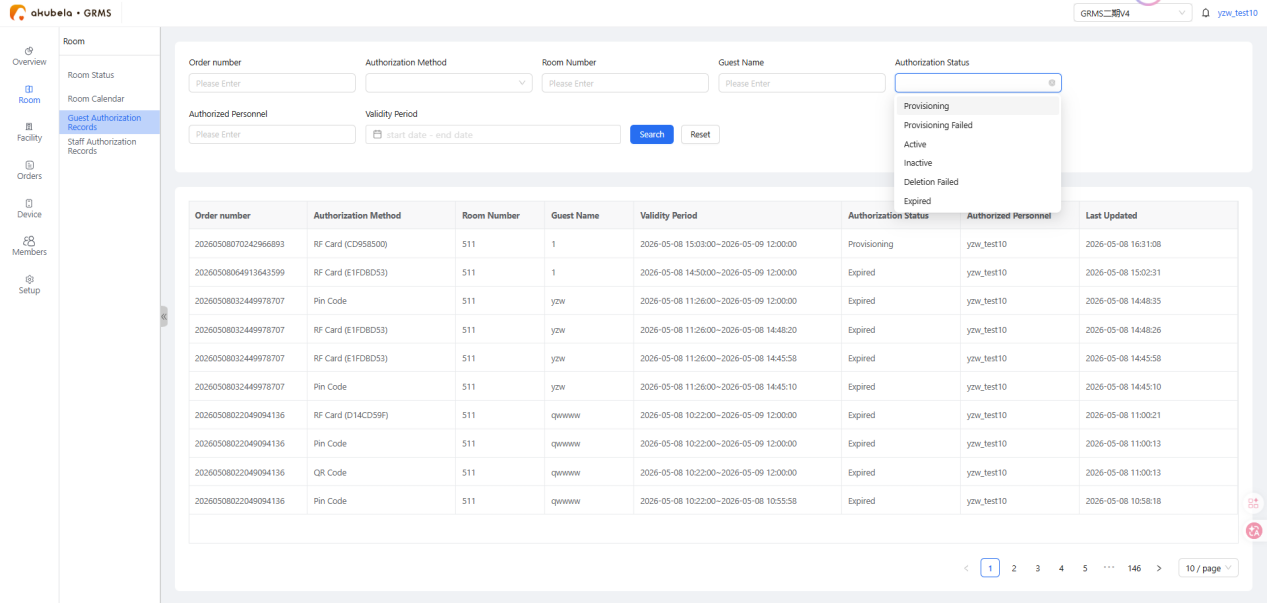
To verify whether access credentials were issued successfully or to view issuance records, go to Room > Guest Authorization Records.
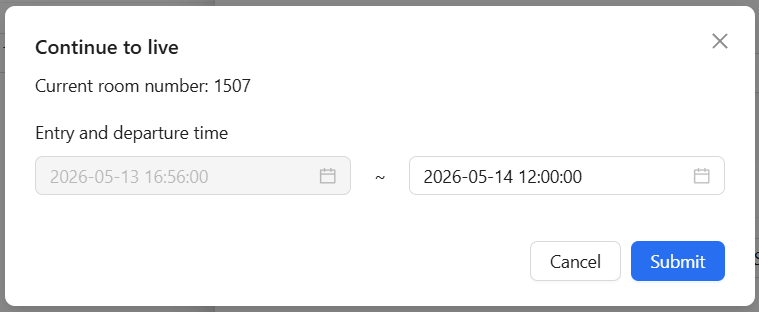
Extension of Stay
To extend a booking or delay check-out:
Click the room card and select Orders > Continuing.
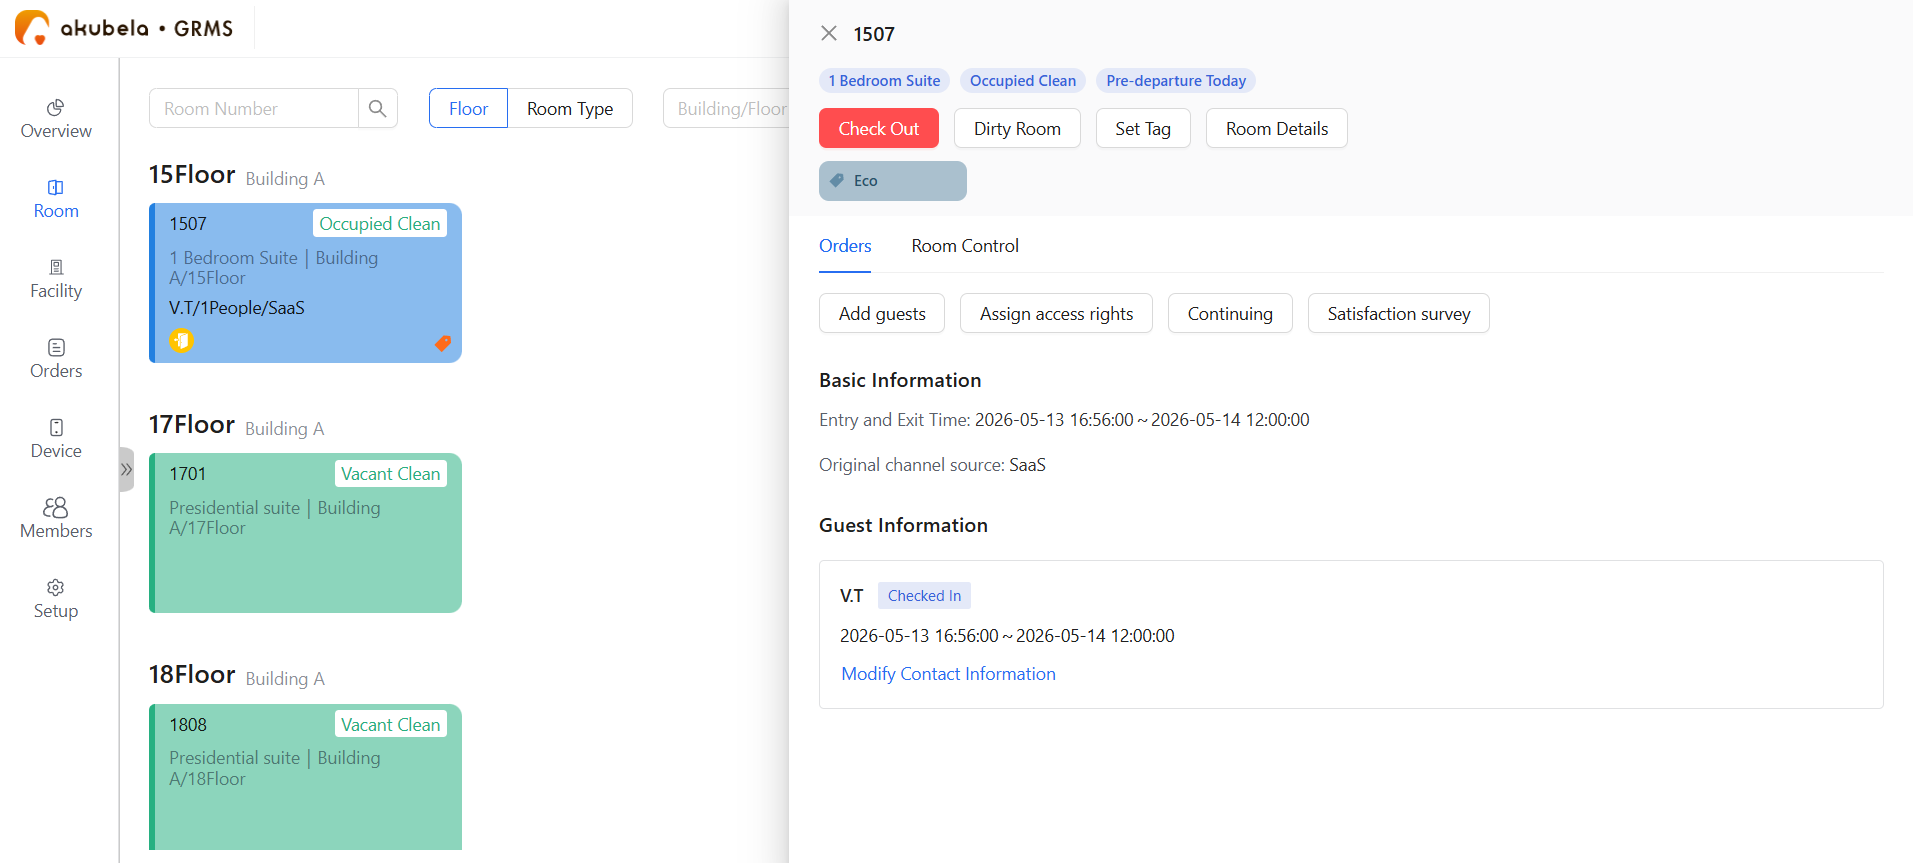
Select the new departure date or time, and click Submit.
Room & Guest Services
The GRMS platform supports housekeeping, room service, and laundry service requests, allowing guests to submit requests directly from in-room devices or the H5 mobile interface.
Room Cleaning
Room cleaning can be triggered by either guests or staff.
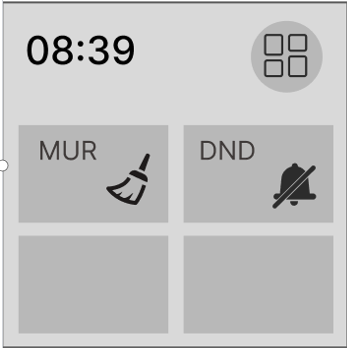
Initiating a request:
By guest: Tap the cleaning button on their in-room HyPanel.
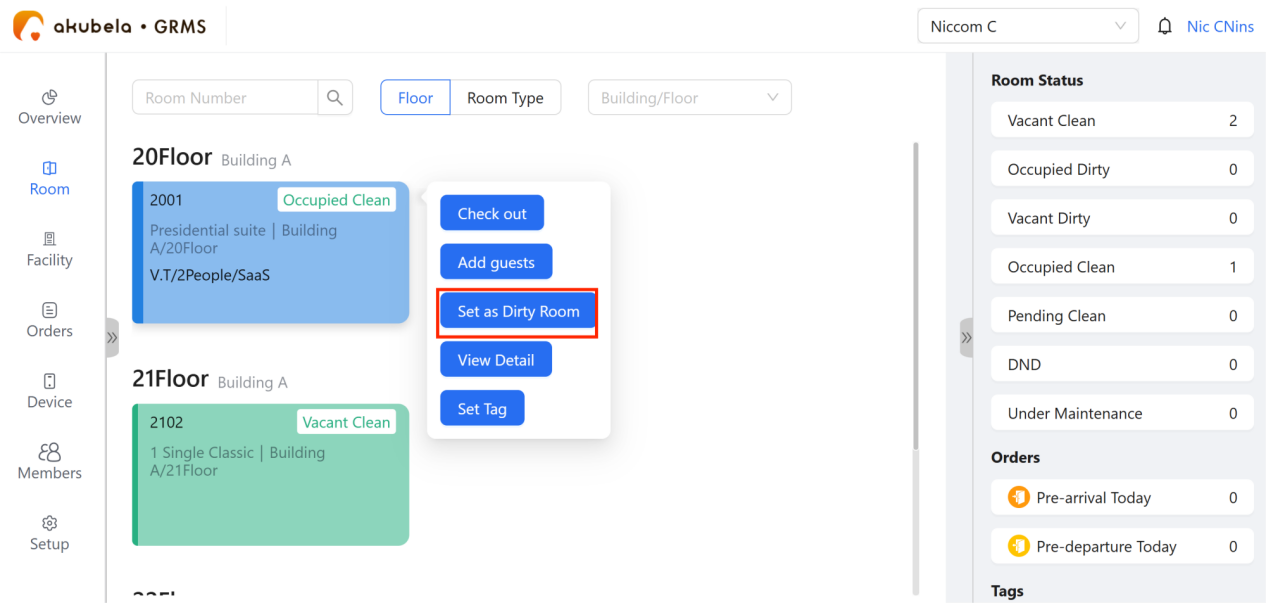
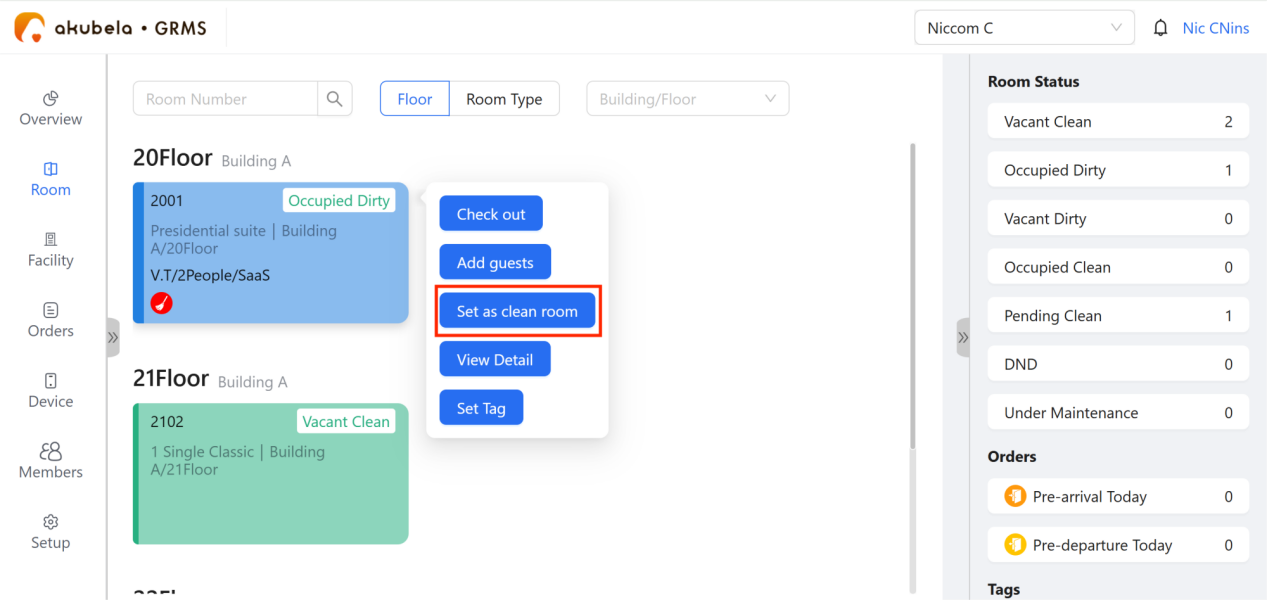
By hotel staff: Go to Room > Room Status, hover over the target room to display the menu, and click Set as Dirty Room.
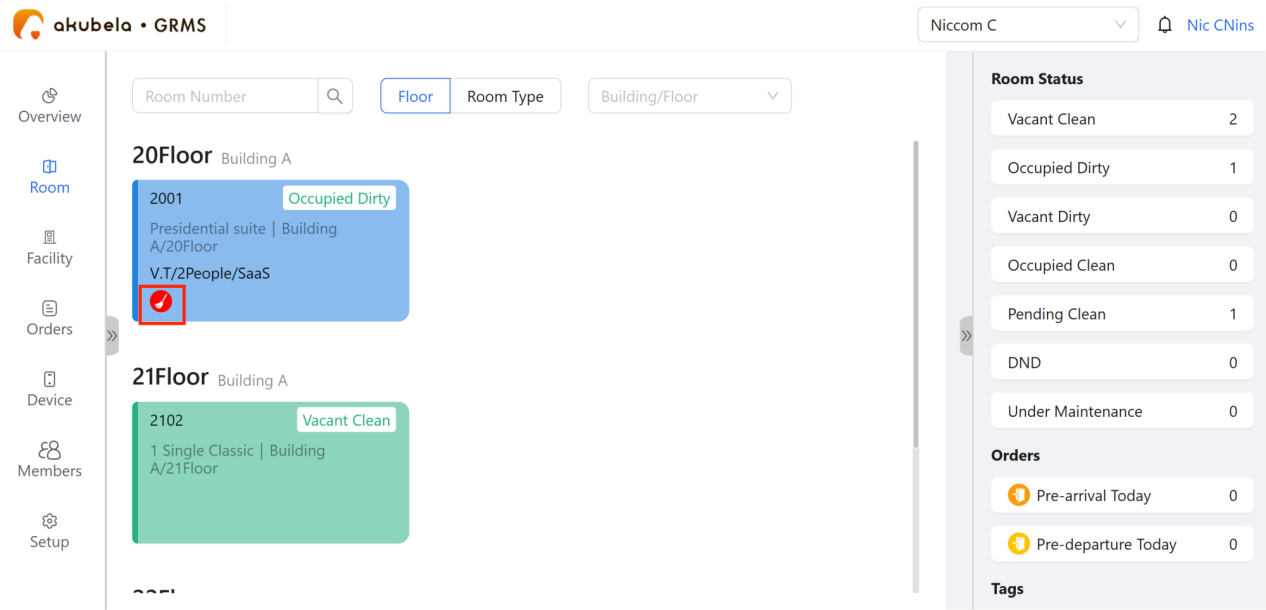
Once submitted, the room status changes to Dirty, allowing staff to identify rooms requiring cleaning.
After cleaning is completed, restores the room to normal status by clicking the Set as clean room button.
Room Service and Laundry
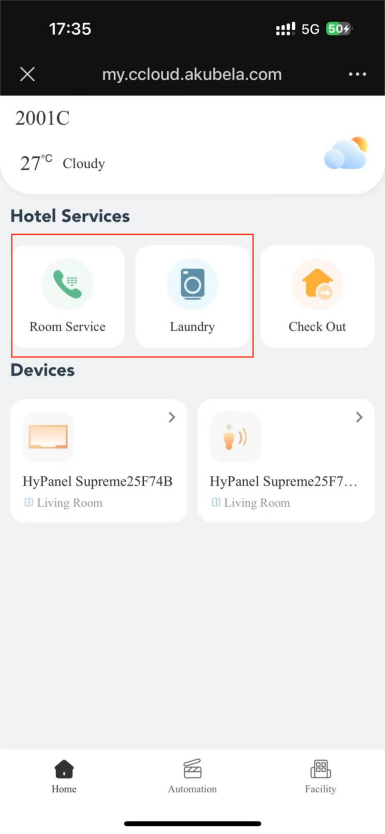
These services are guest-initiated via the mobile interface and managed through the GRMS messaging hub.
Guests scan the H5 QR code in their in-room HyPanel, and select the required service and submit the request.
When a request is submitted, a real-time notification appears on the GRMS platform.
Go to Setup > Message > Room Service to view the details.
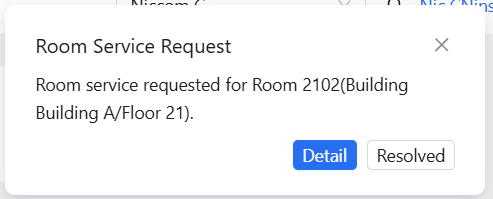
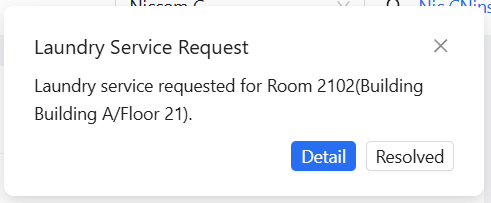
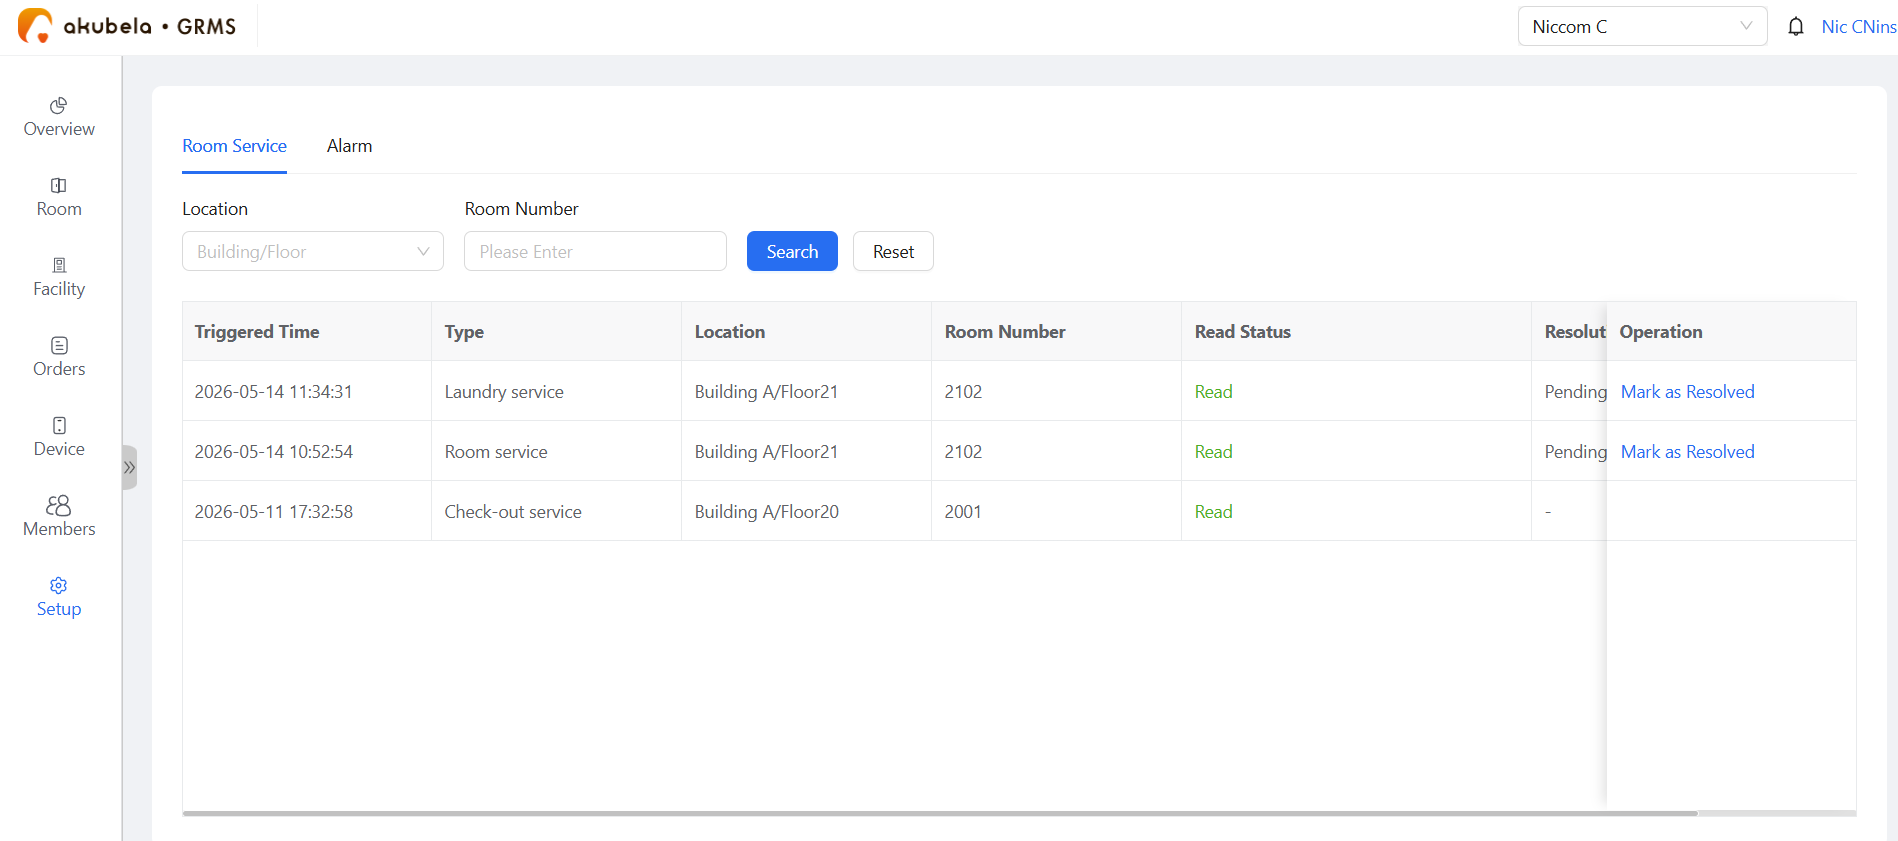
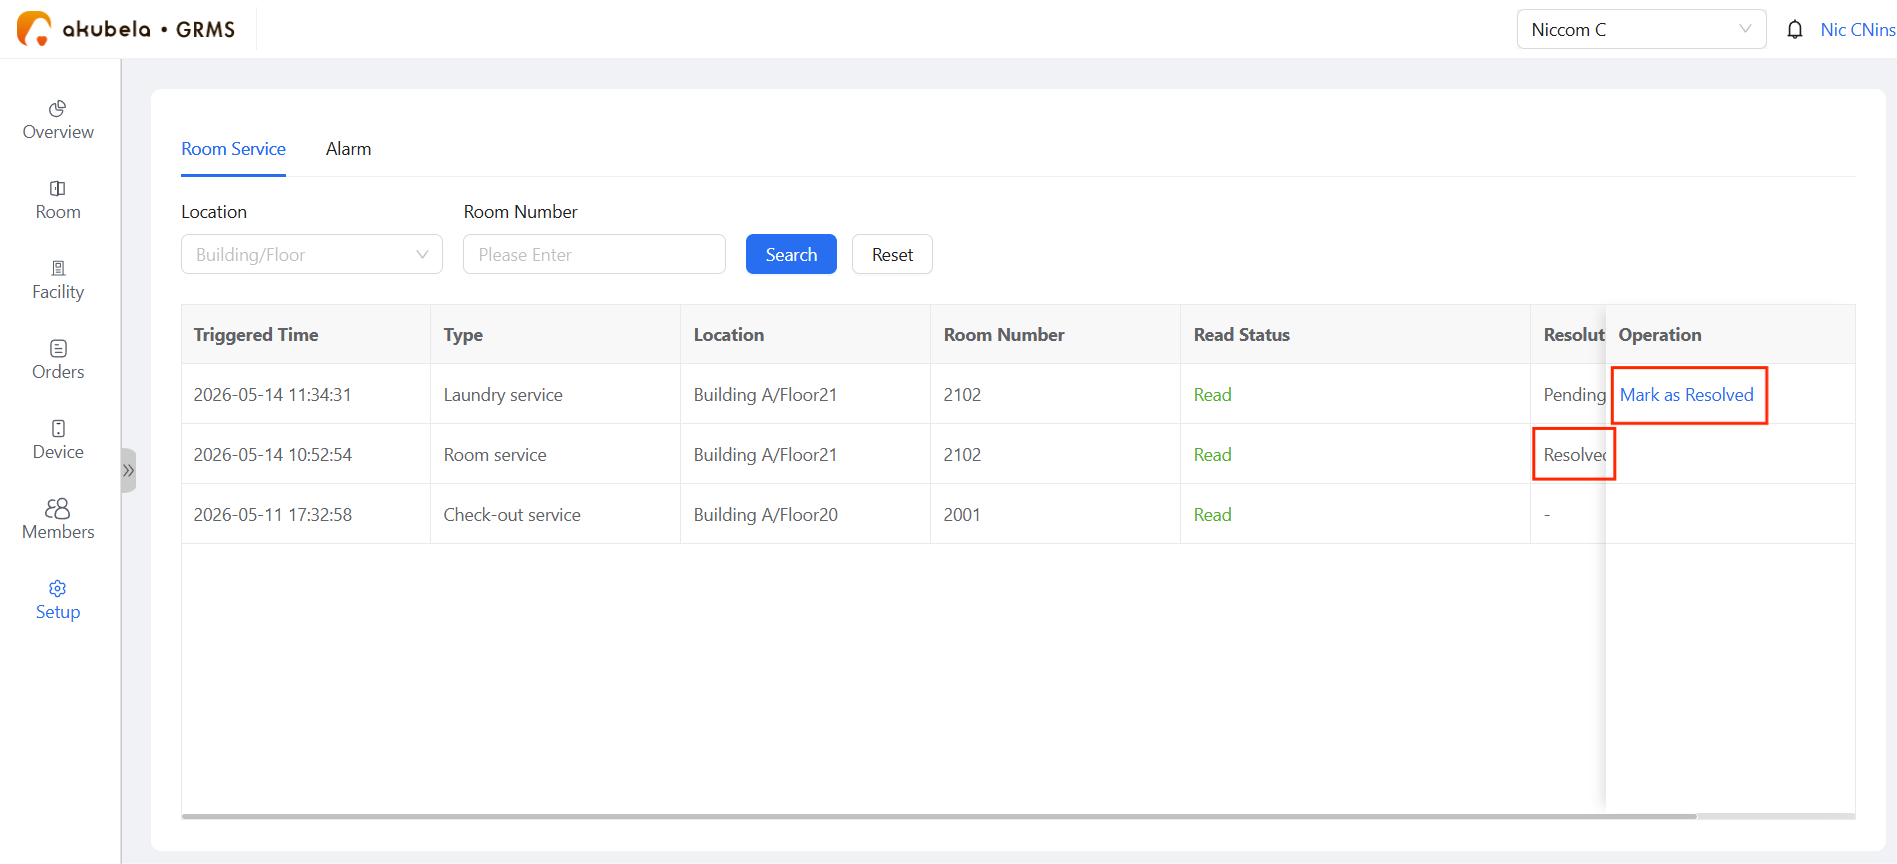
After the service has been delivered or the laundry has been collected/returned, click Mark as Resolved to close the ticket.
Early Departure
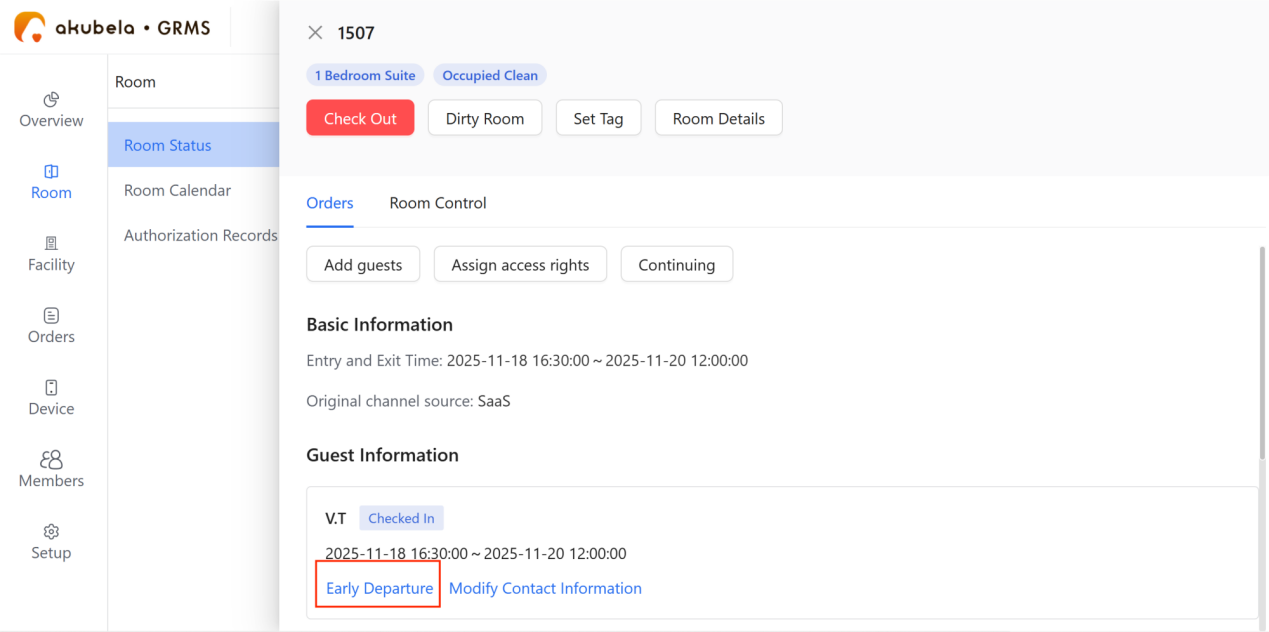
When a room has two or more guests, the Early Departure button will appear. If any guest checks out early, click this button and their access permissions will be automatically revoked.
If the room has only one guest, this button will not be available.
Check-out
The GRMS supports two check-out workflows: manual processing by staff via the dashboard, and an automated self-check-out option for guests.
Staff-Led Check-Out
To manually process a departure:
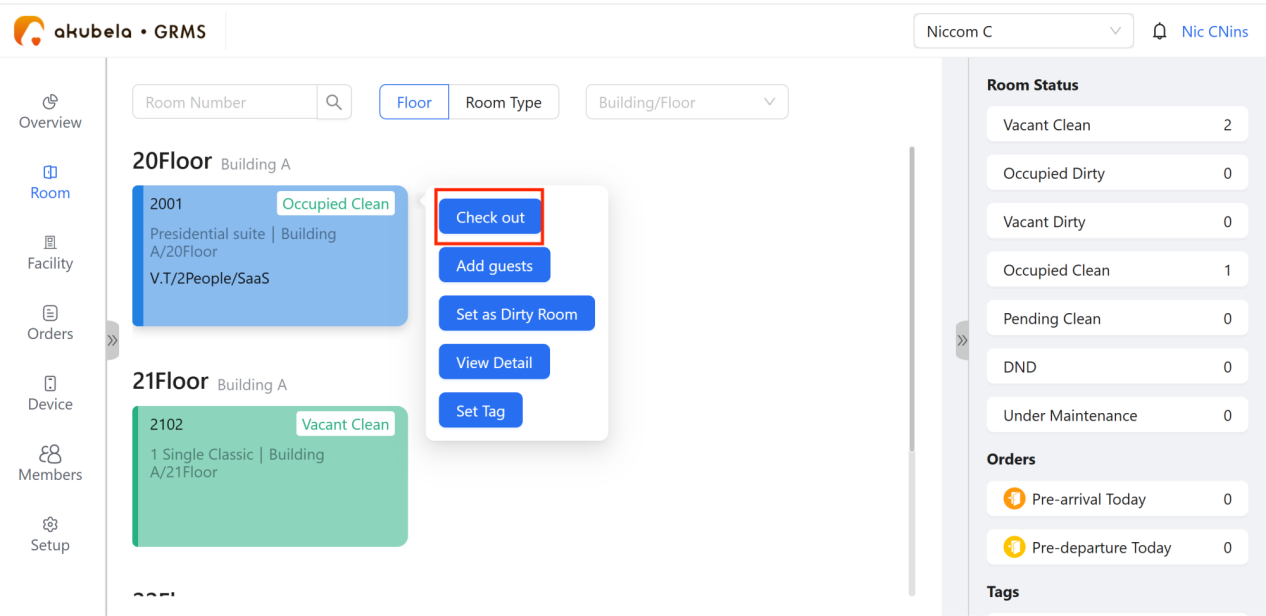
Go to Room > Room Status.
Find the room, and hover your mouse over it to display the menu.
Click Check out.
Guest Self Check-Out
This feature empowers guests to initiate their departure from the HyPanel (currently PS51) or the H5 mobile interface.
Setup and Configuration
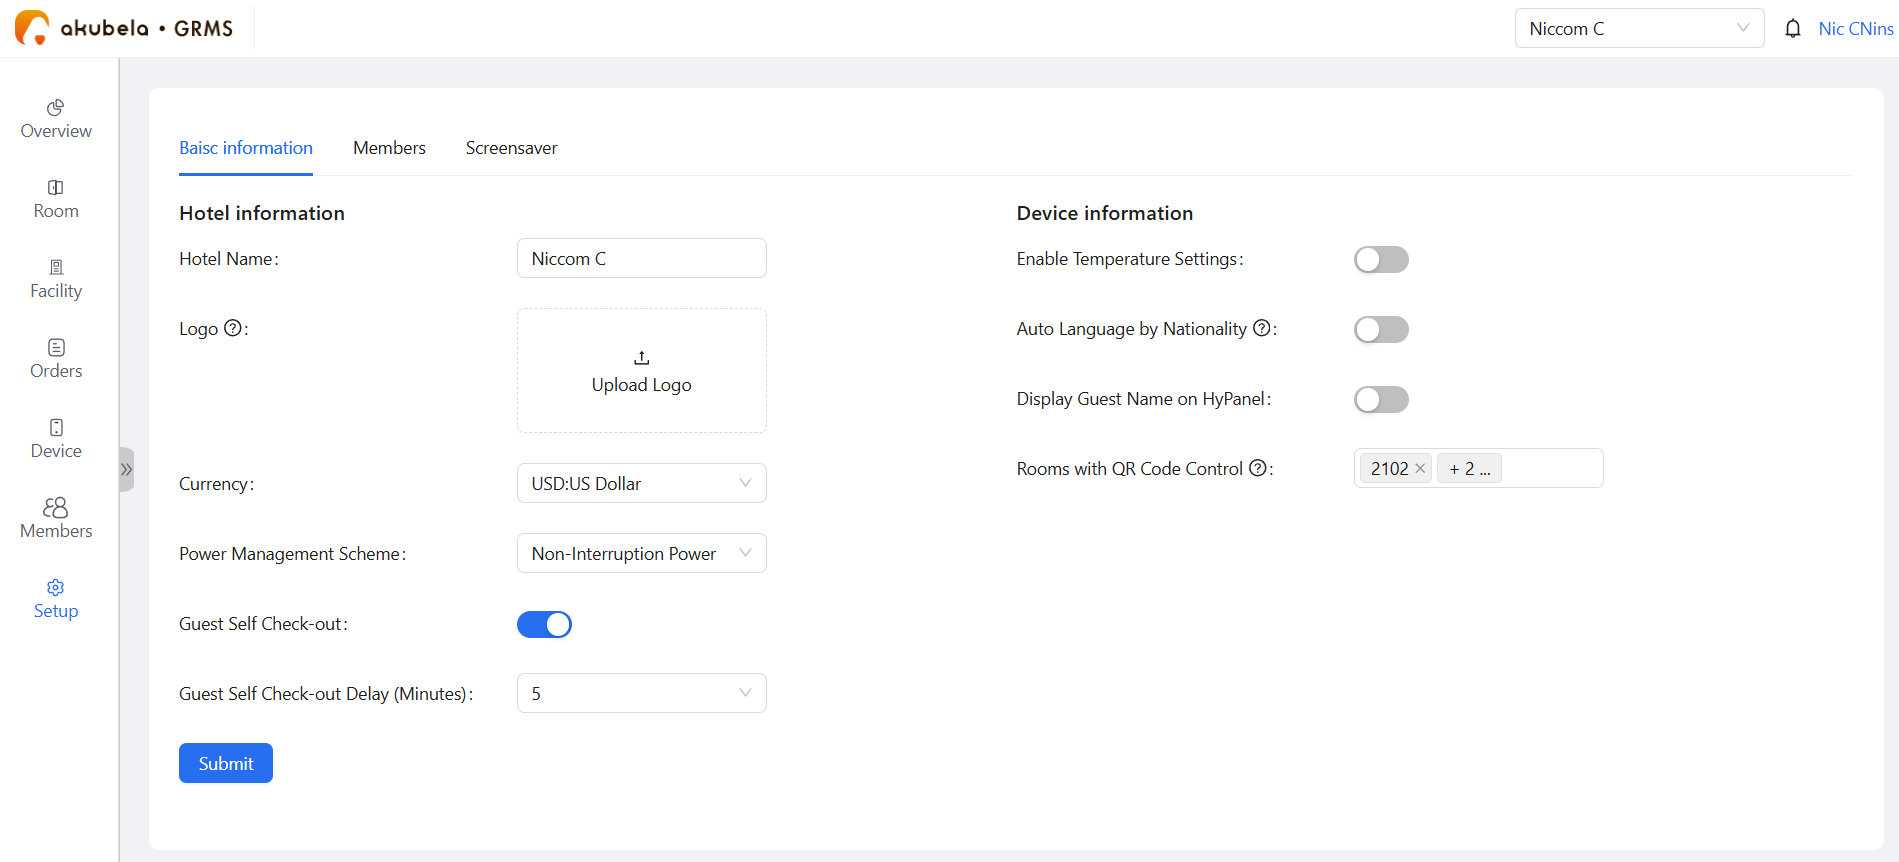
To enable this feature, the hotel manager must:
Go to Setup > Hotel Information > Guest Self-Check-Out.
Toggle the feature on.
Set the Guest Self Check-out Delay time: After the preset delay expires, the system executes a check-out identical to a manual staff operation.
Click Submit.
Guest Operation
Guests can tap Check Out on their panel or phone. The system waits for the preset delay, then automatically updates the room to "Checked Out."
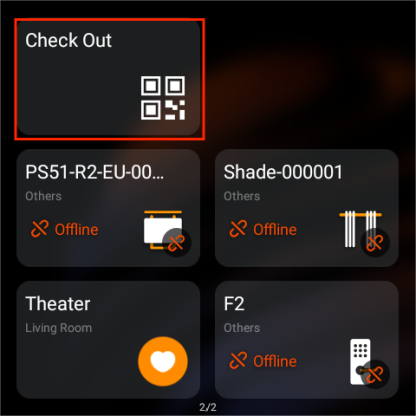
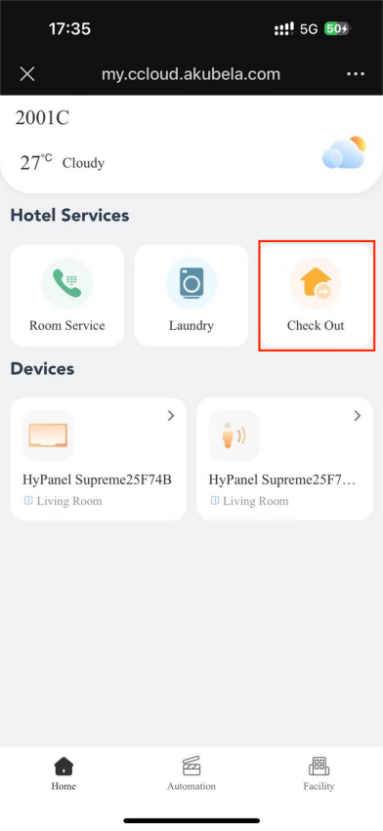
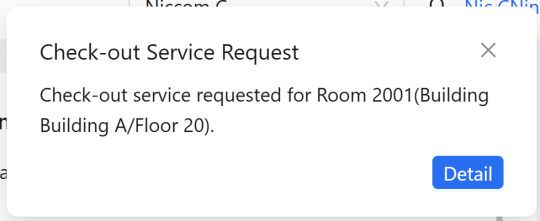
When Disabled: If a guest taps Check Out, the system will only send a service notification to the GRMS dashboard. Staff must then manually finalize the check-out.
NOTE:
For orders from third-party platforms, enabling this feature will only trigger a Check-Out Service Notification.
Maintenance
Set a Room to Maintenance Status
If a room requires repair, it must be set to Maintenance to prevent new bookings.
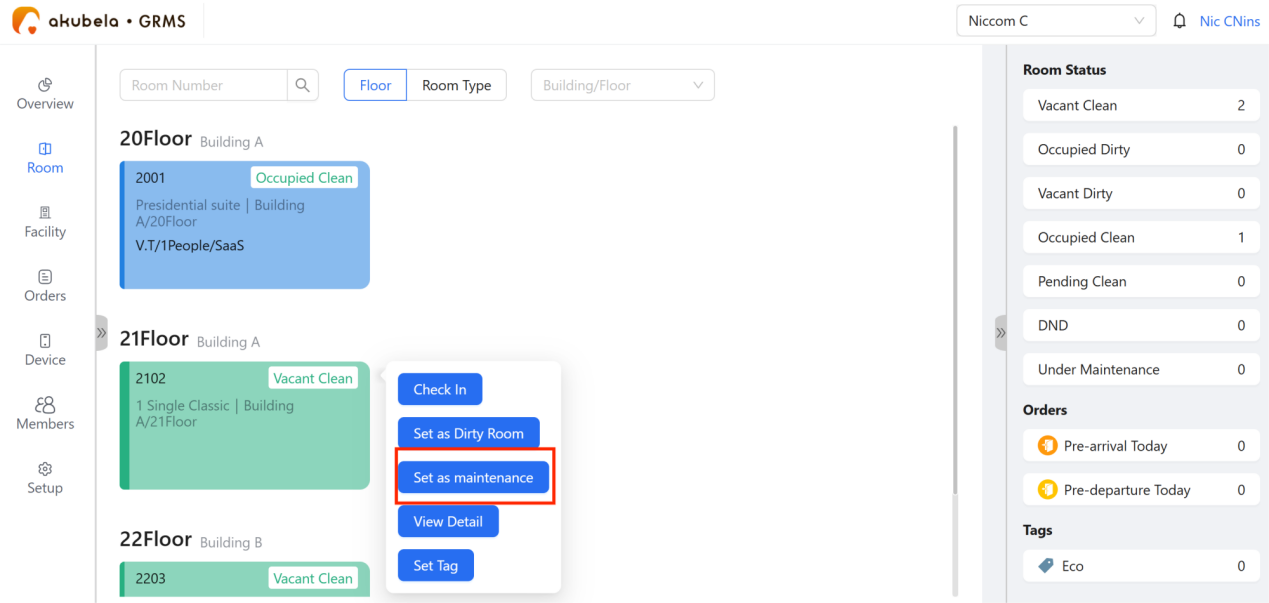
Go to Room > Room Status.
Hover over the target room, and click Set as maintenance.
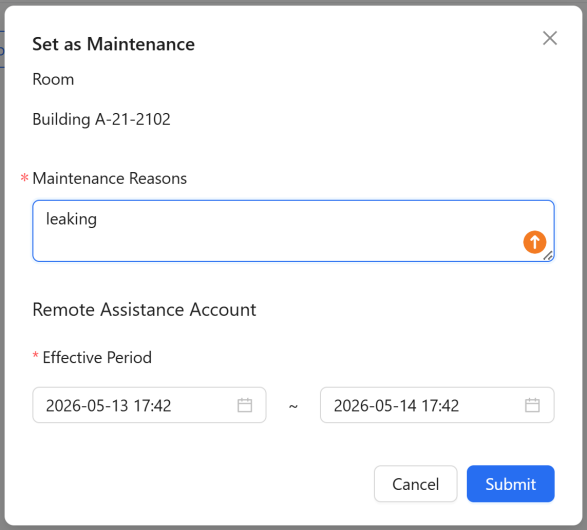
Enter the maintenance reason.
(Optional) Configure remote maintenance account validity.
Click Submit.
NOTE:
Any existing reservations for a room placed in Maintenance status are automatically canceled.
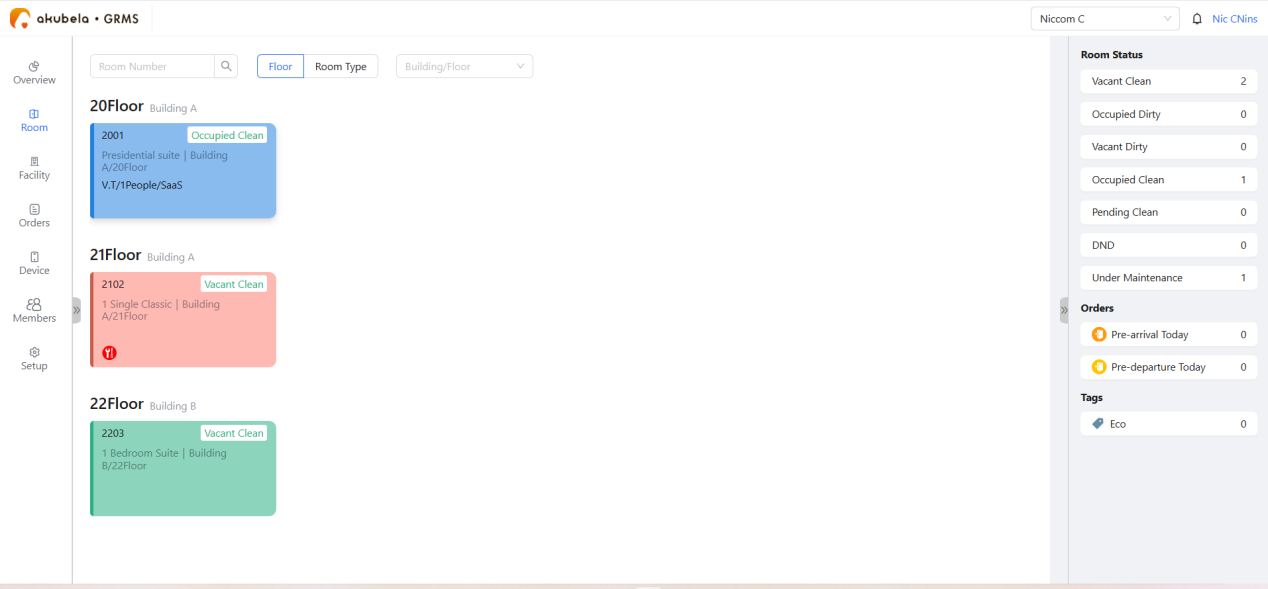
After activation, the room card changes to red.
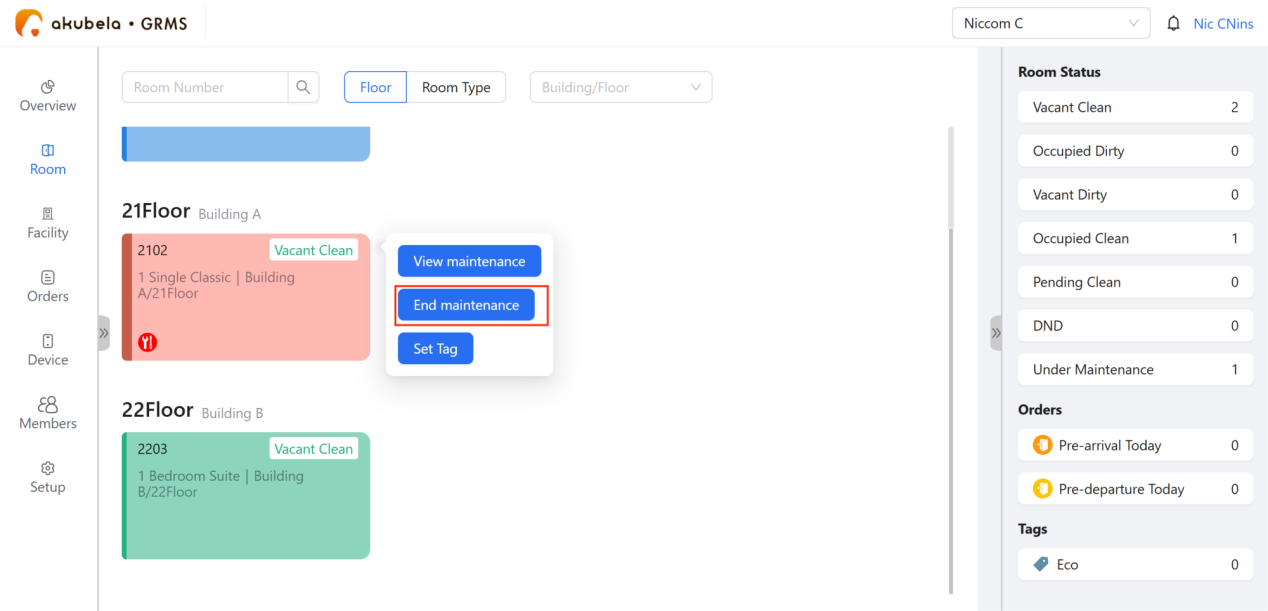
View Details
Hover over the room.
Click View Maintenance.
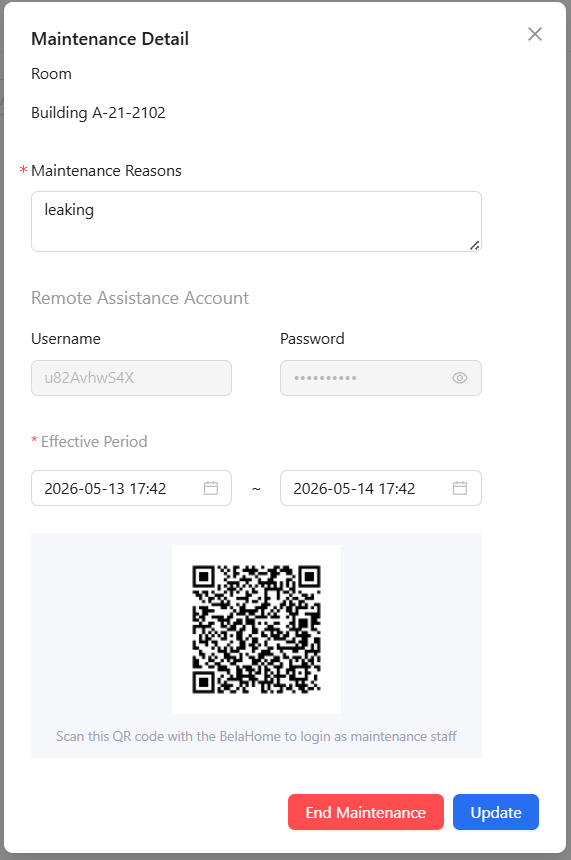
You can view:
Maintenance details
Remote assistance account credentials
QR code for remote maintenance access
Remote Assistance
Maintenance personnel can scan the QR code using the BelaHome app to begin troubleshooting.
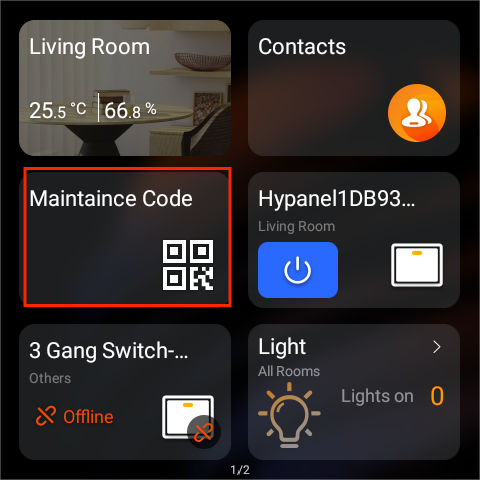
They can also scan the maintenance code directly from the in-room panel.
NOTE:
Accounts created on GRMS sync to the app. Closing the maintenance task on GRMS automatically revokes the technician's app access.
Enabling or disabling the remote maintenance feature in the BelaHome app does not change the room’s maintenance status on the GRMS.
Completion
Once repairs are finished, click End Maintenance. The room card will revert to Green (Vacant) and become available for booking immediately.