The Akuvox SmartPlus Cloud supports integration with the MRI Property Management System(PMS).
With this integration, the newly added tenants in MRI will be synchronized to SmartPlus Cloud. Property managers can easily maintain one database for tenant management.
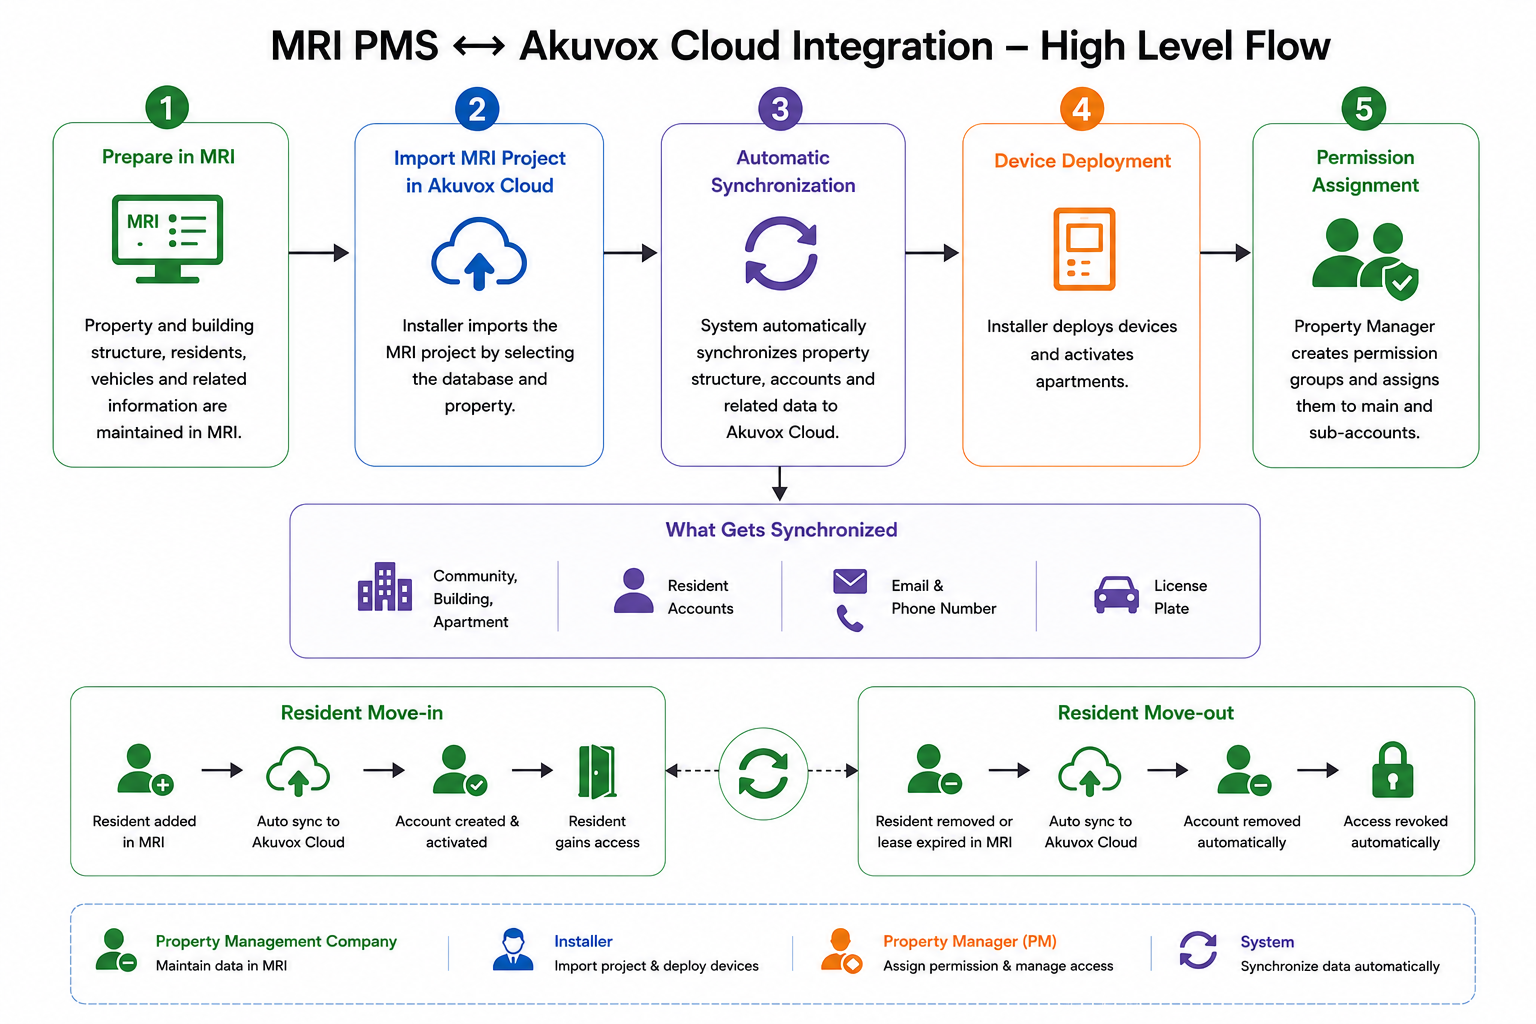
Overview
The integration synchronizes MRI property data into Akuvox Cloud automatically.
The synchronization includes:
Community structure (Property, Building, and Unit)
Resident accounts (name, email, phone number)
License Plate
Prerequisites
Before synchronization, the property management company must obtain the following information from the MRI company and provide it to the Akuvox team:
Partner ID
Database Name
Web Service Name
Password
API URL
The Installer account that will manage the project
Step 1: Create the Property Structure in MRI
Log in to the MRI system with your account.
Select Welcome SaaS.
Enter the Client ID.
Search for Setup and Maintenance.
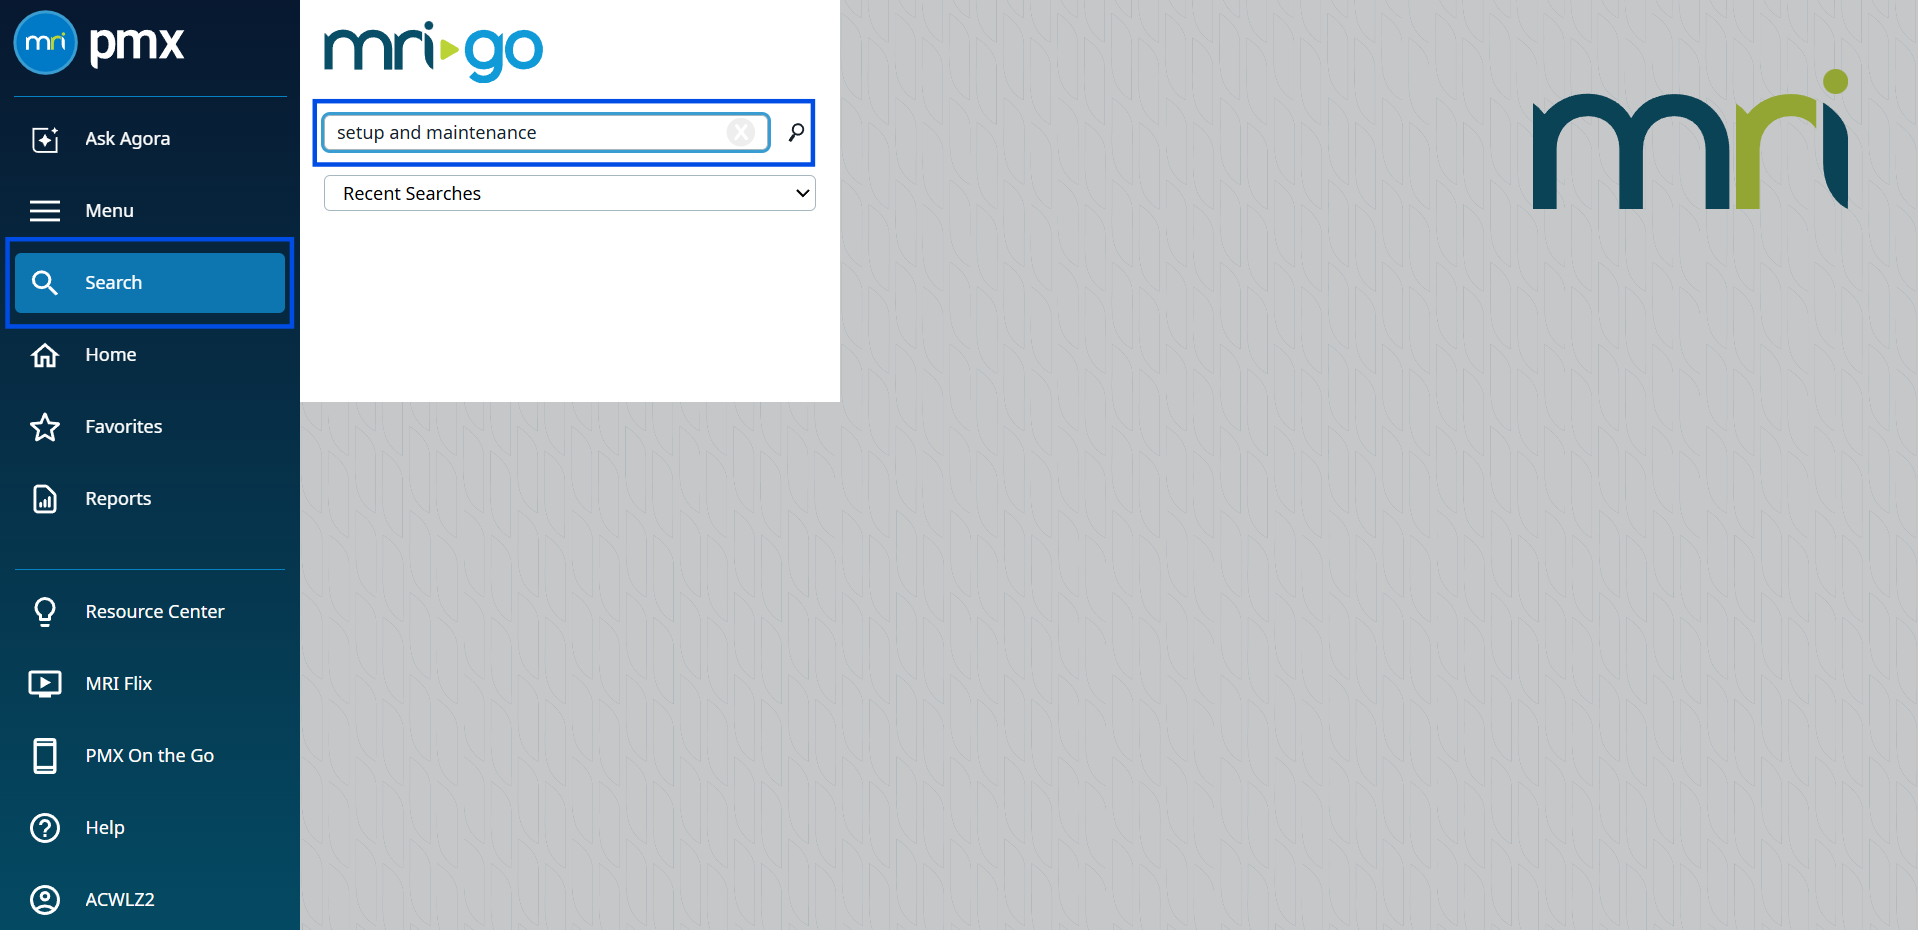
Select Property Setup under Residential Management.
Click Add Property.
.png)
Set up the property information.
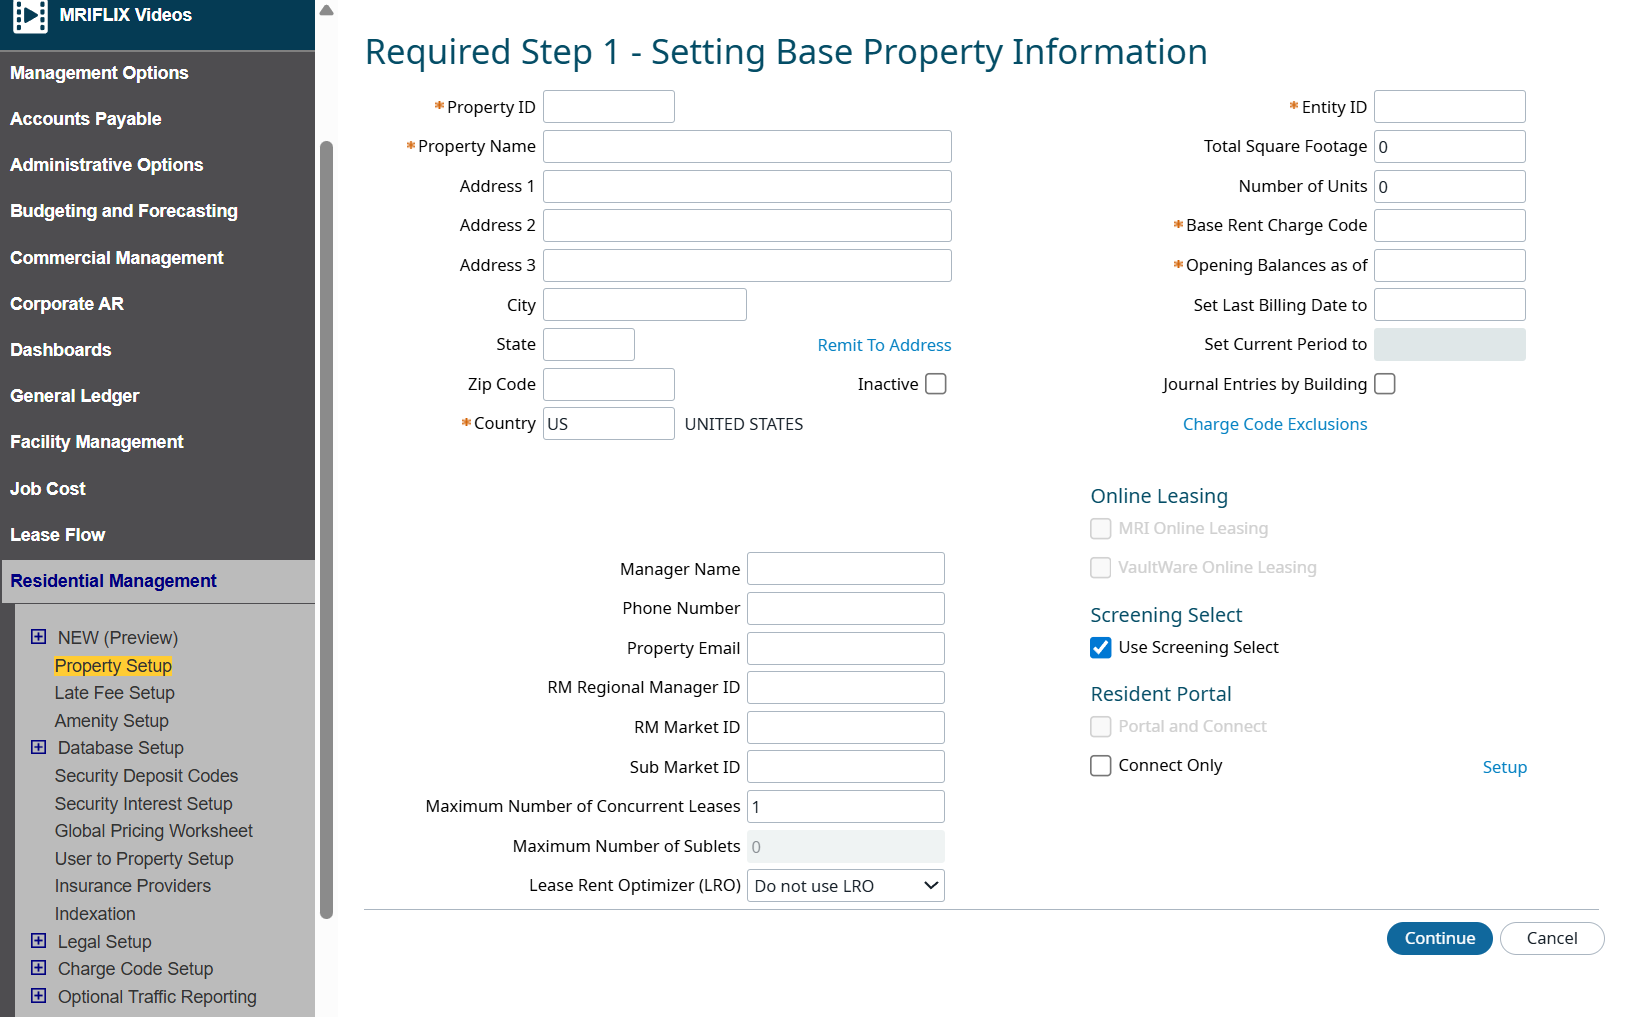
Click Continue to configure Buildings and Units.
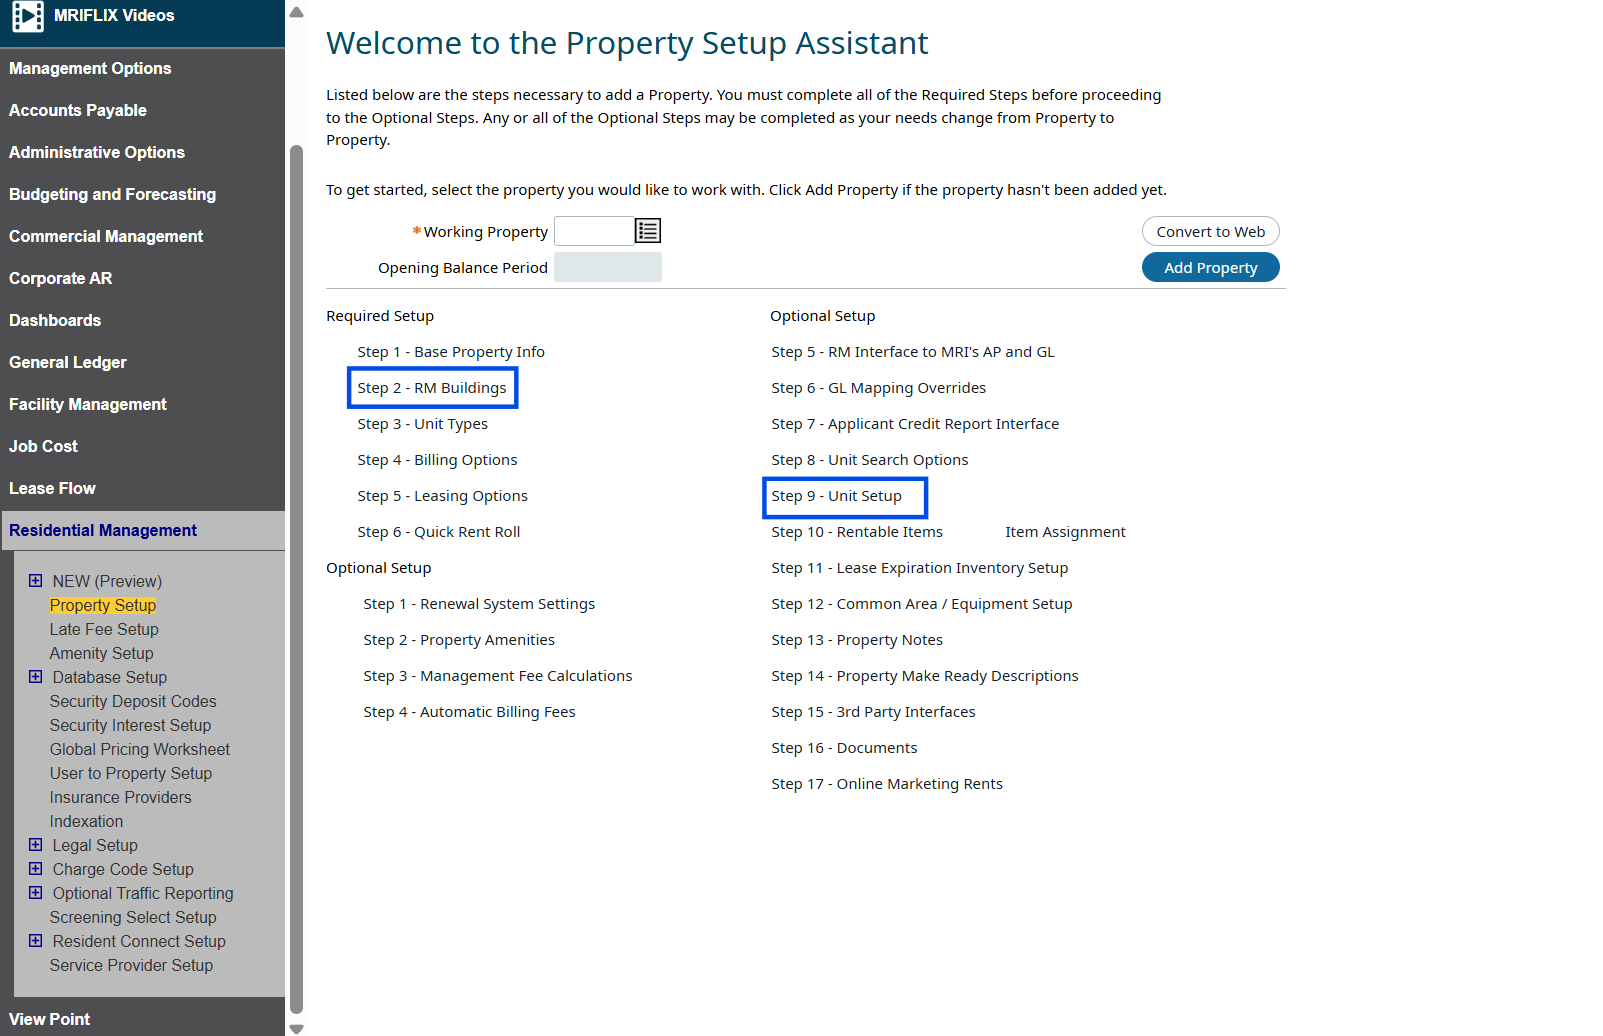
Select Step 2 - RM Buildings to create buildings.
Select Step 9 - Unit Setup to create units.
Step 2: Add Residents in MRI
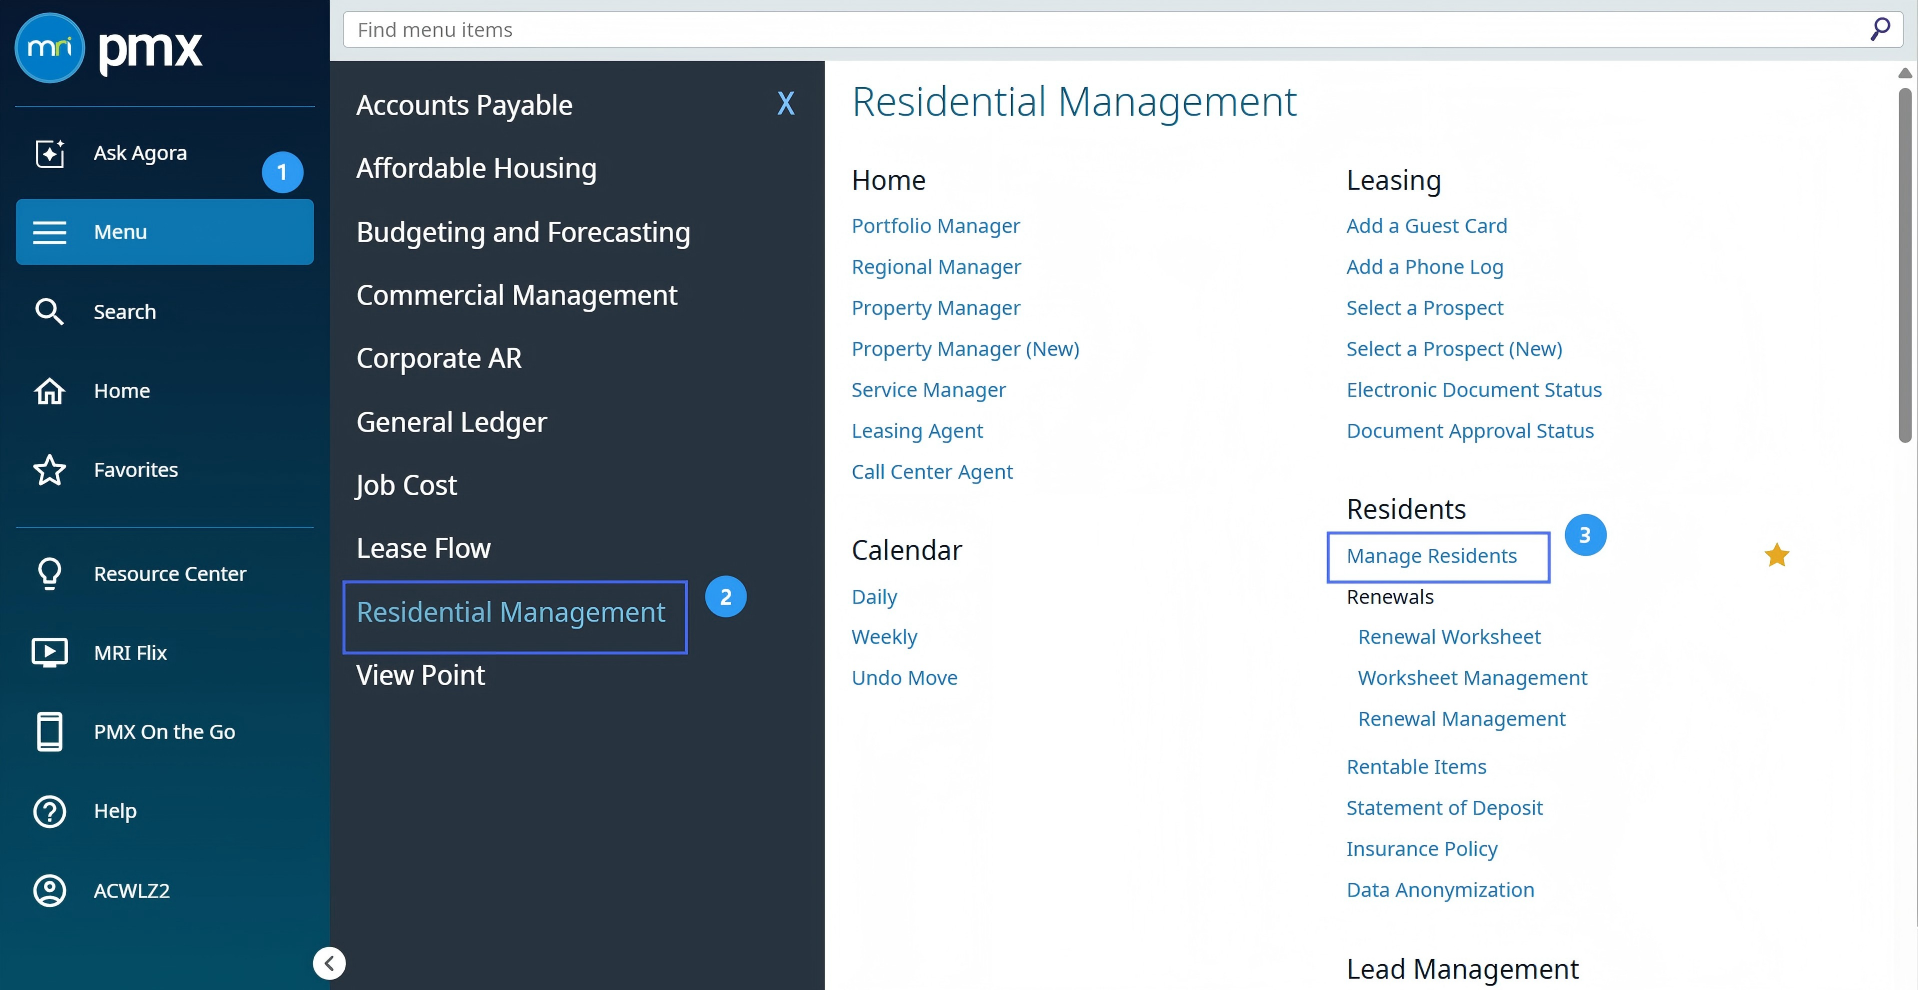
Click Menu > Residential Management > Manage Residents.
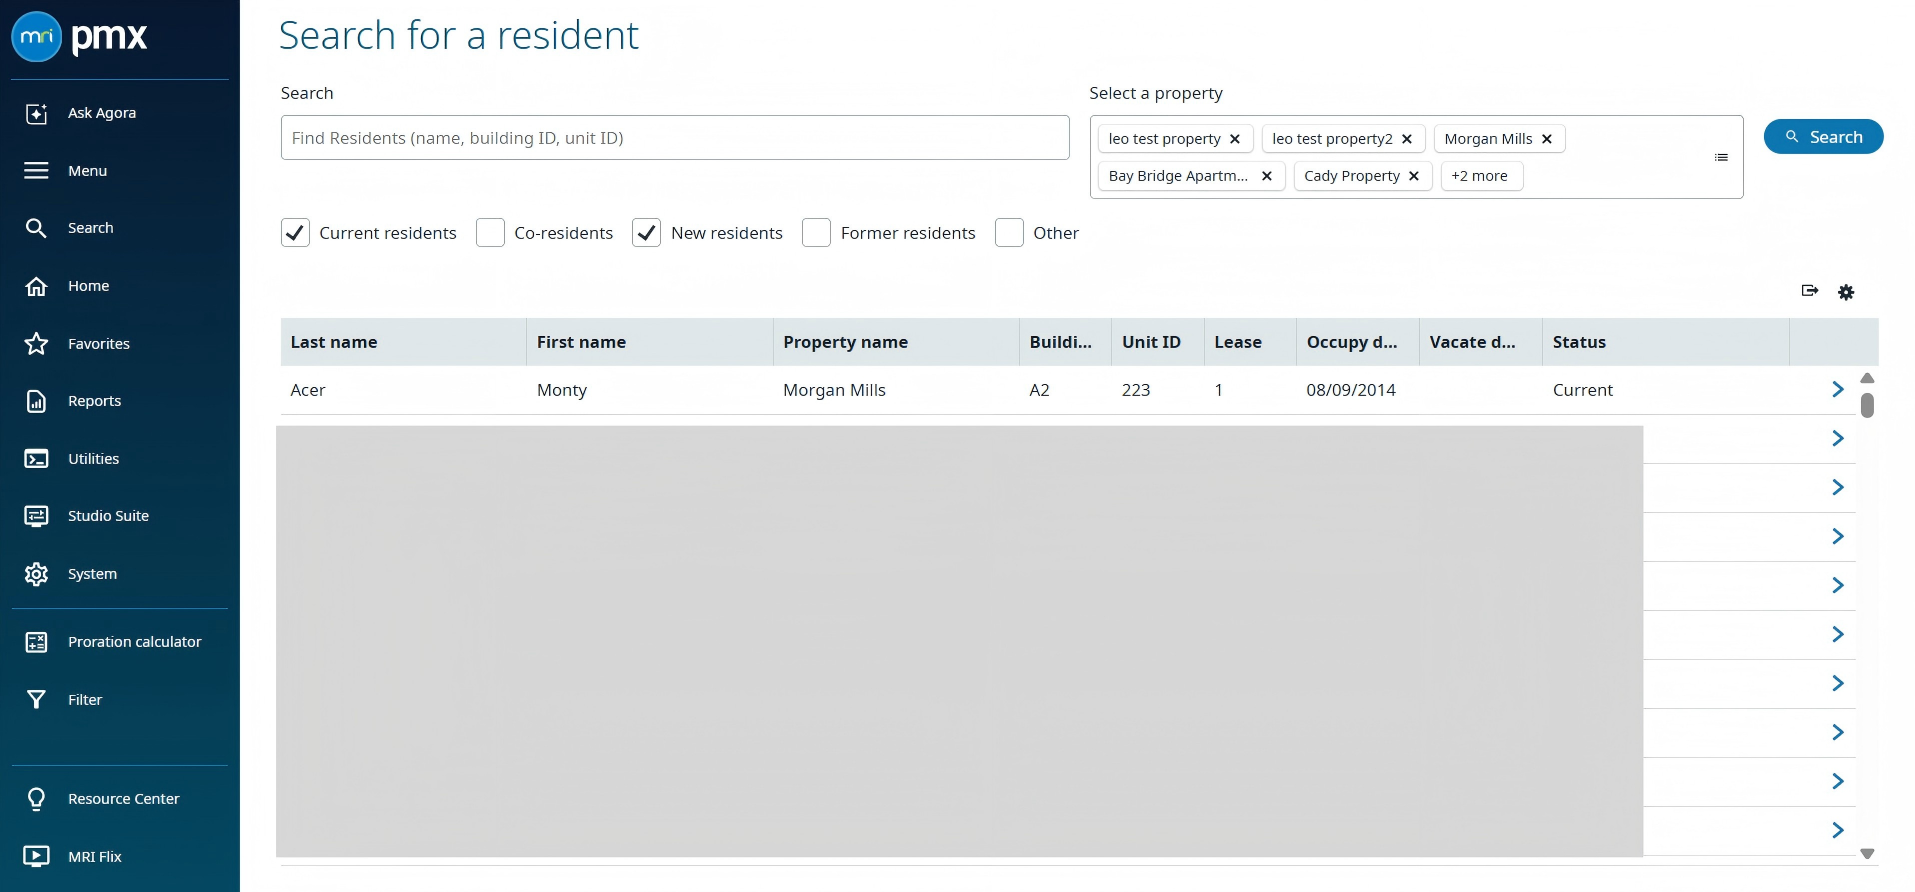
Select a target resident.
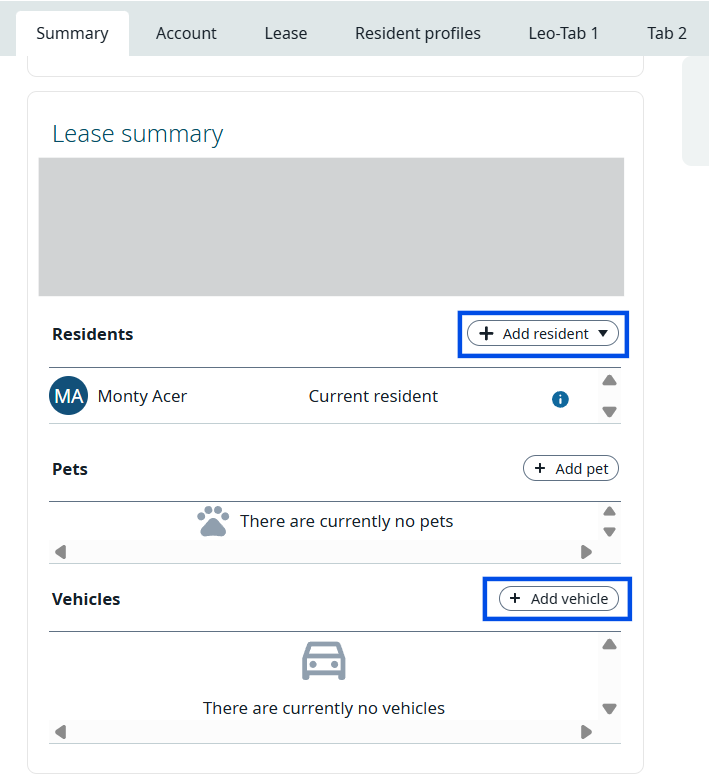
Click +Add Resident to add a resident.
Click +Add Vehicle to add the license plate.
Step 3: Install the Akuvox Integration Gateway Package
Before connecting the MRI project to Akuvox Cloud, install the Akuvox Integration Gateway package in MRI Web.
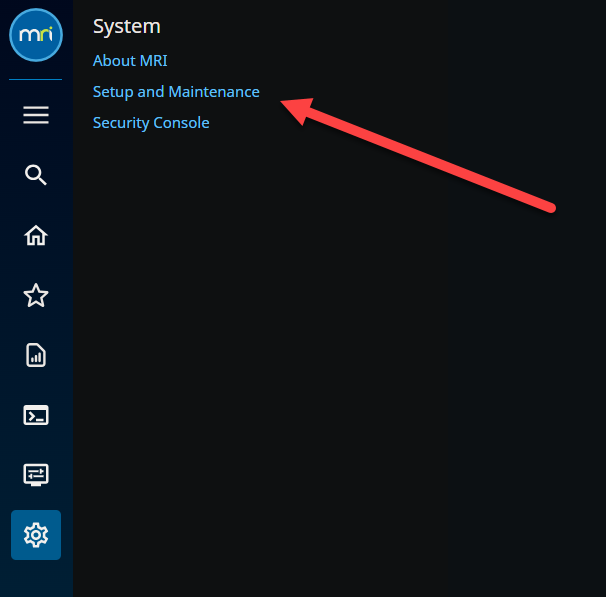
From the left panel on the main page, select the gear icon.
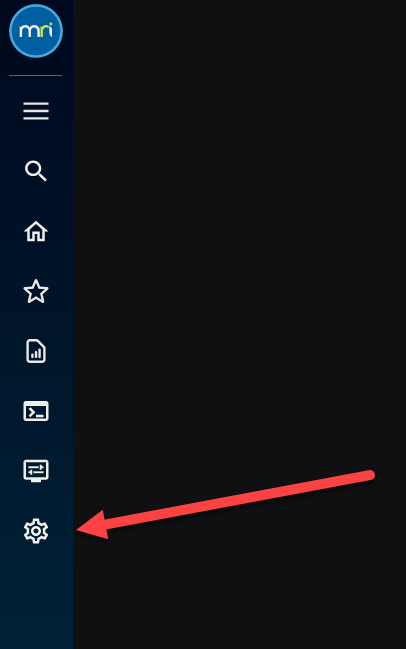
Select Setup and Maintenance.
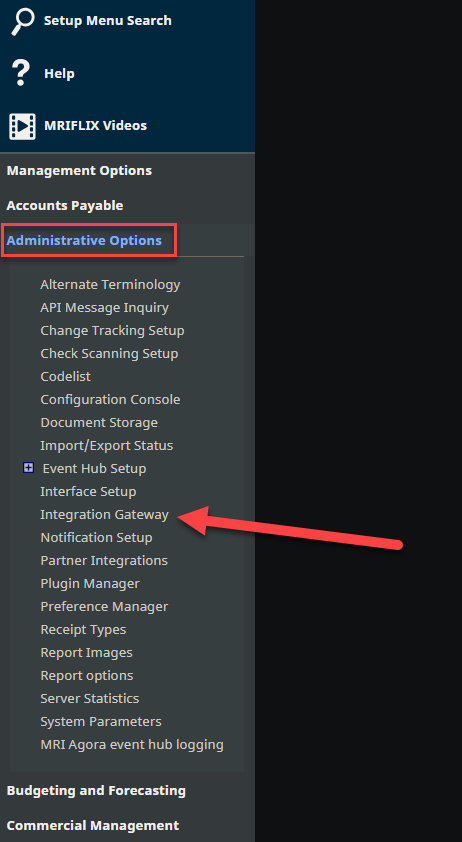
Select Administrative Options > Integration Gateway.
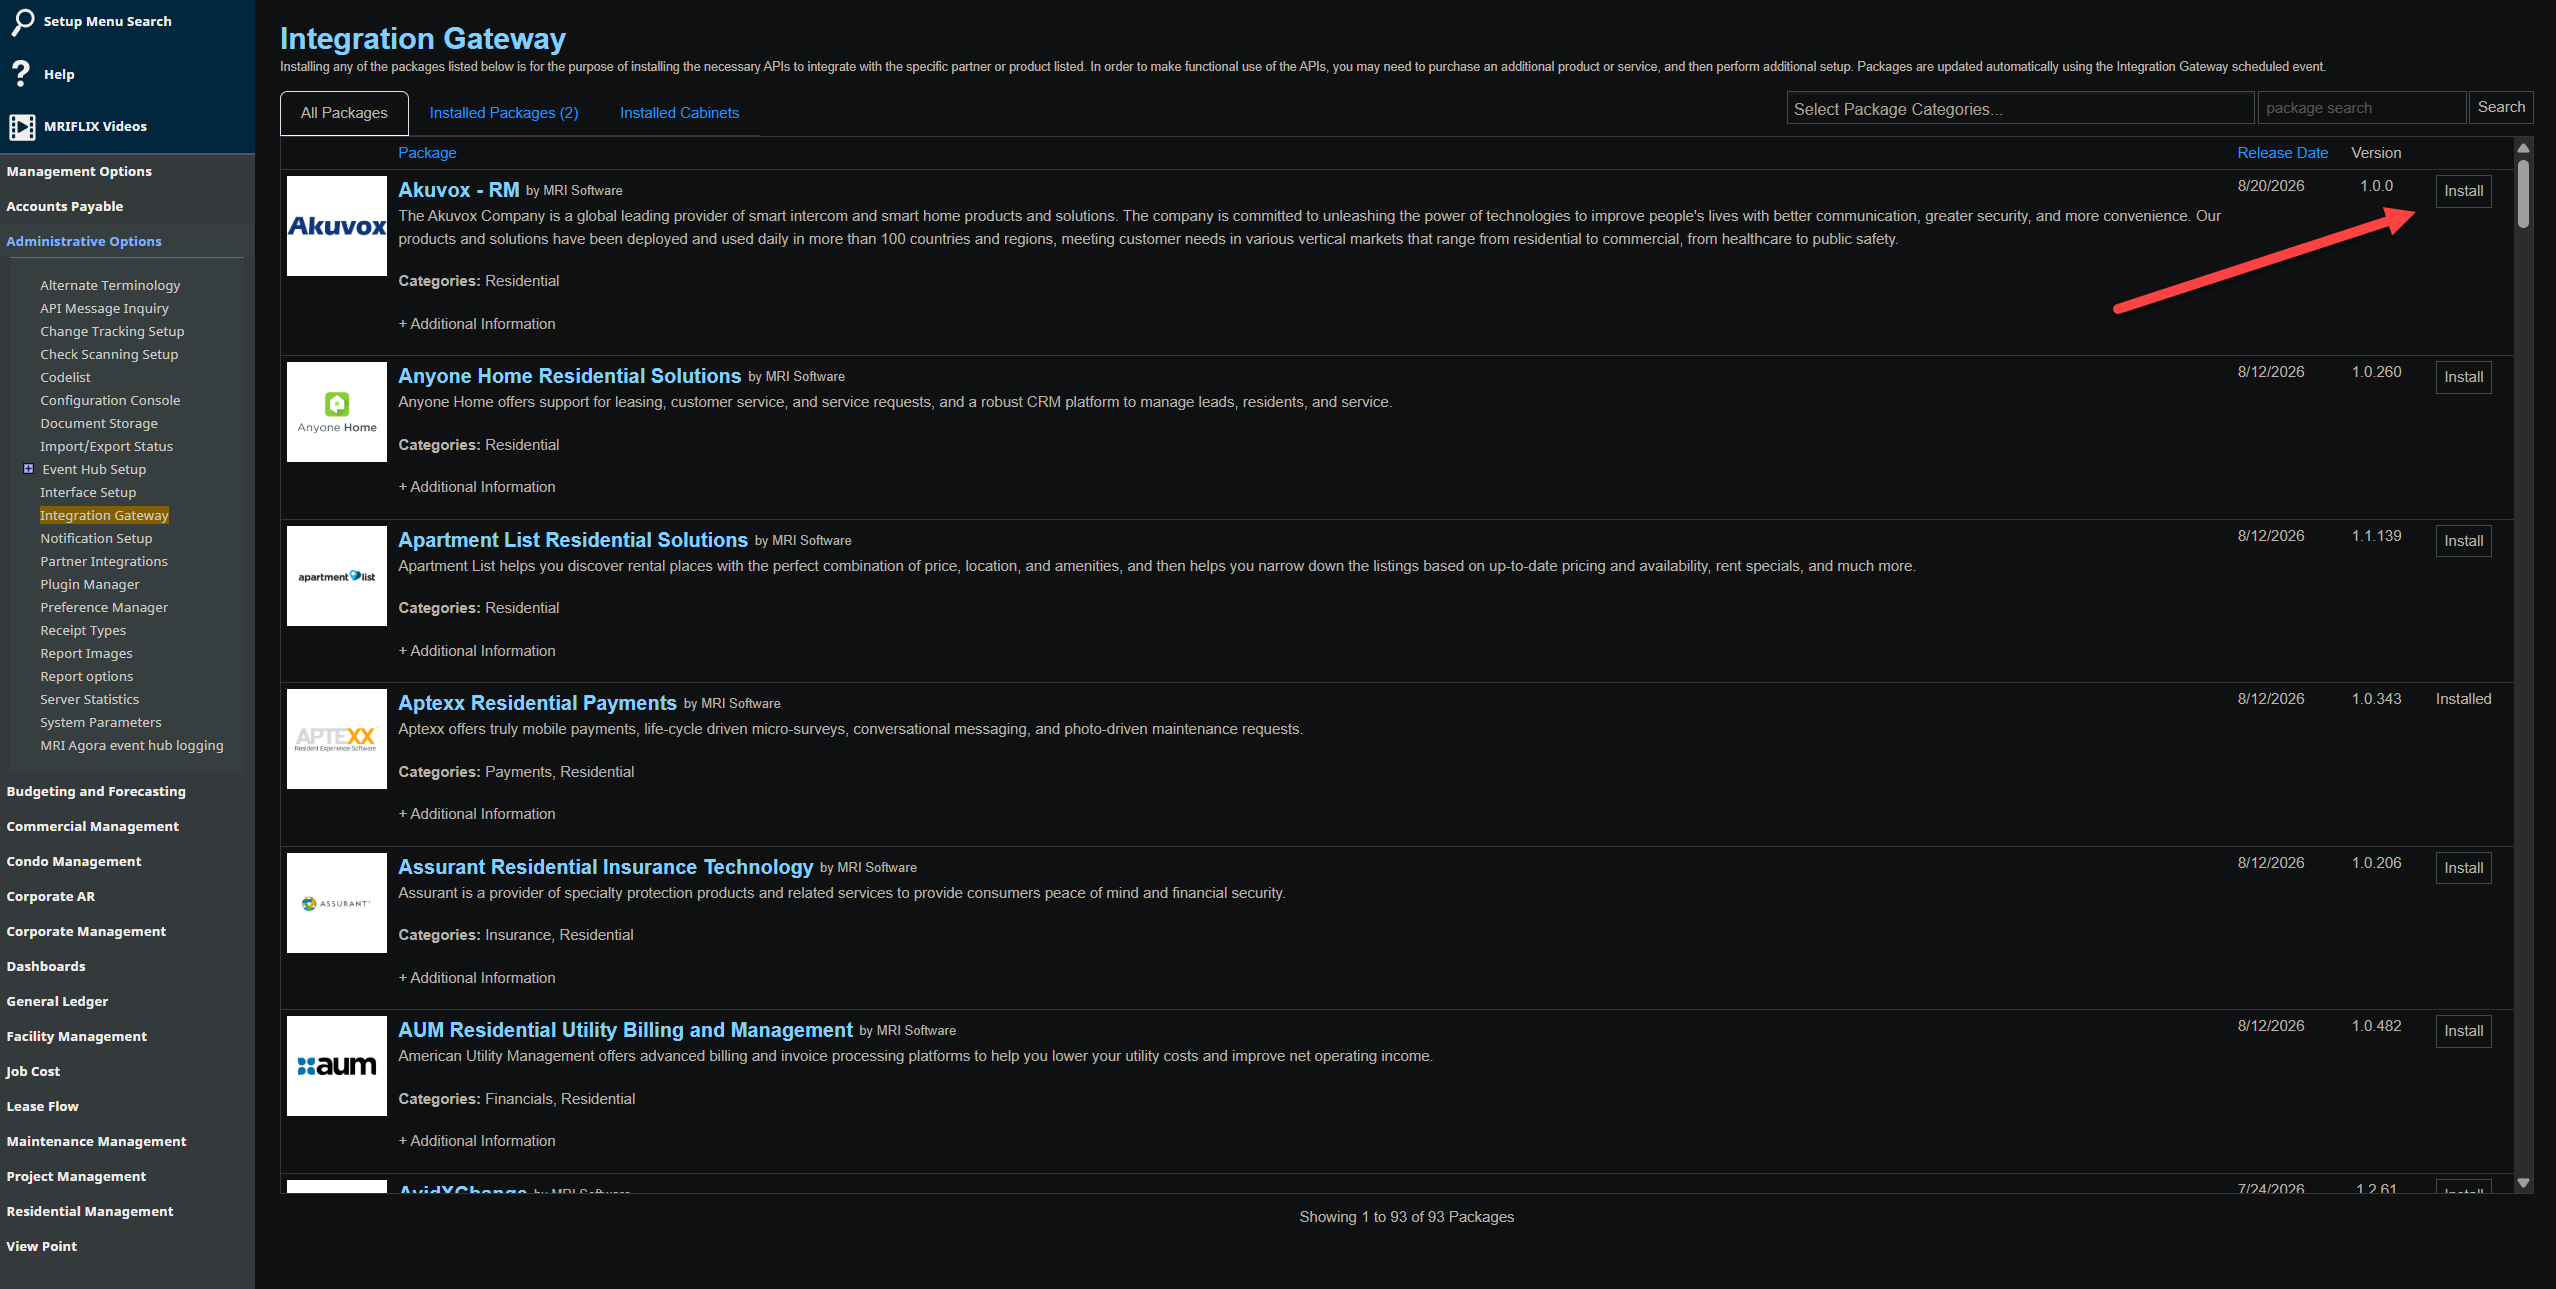
Select Install next to Akuvox – RM.
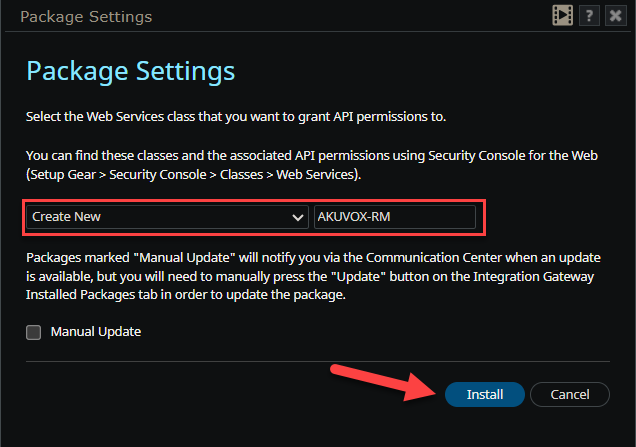
Click Confirm to proceed.
Allow the Integration Gateway to create the AKUVOX-RM class and select Install.
Wait until installation is complete.
Confirm that the status changes to Installed.

Note
You may need to open another page under Setup and Maintenance and then return to the Integration Gateway page to confirm that the package status has changed to Installed.
Step 4: Contact MRI Support
After installing the Akuvox Integration Gateway package, contact MRI Support to complete the required backend configuration for the Akuvox integration.
Akuvox Cloud Configuration
After the MRI project is ready, the Installer can import it into Akuvox Cloud.
Log in to the cloud platform with your installer account.
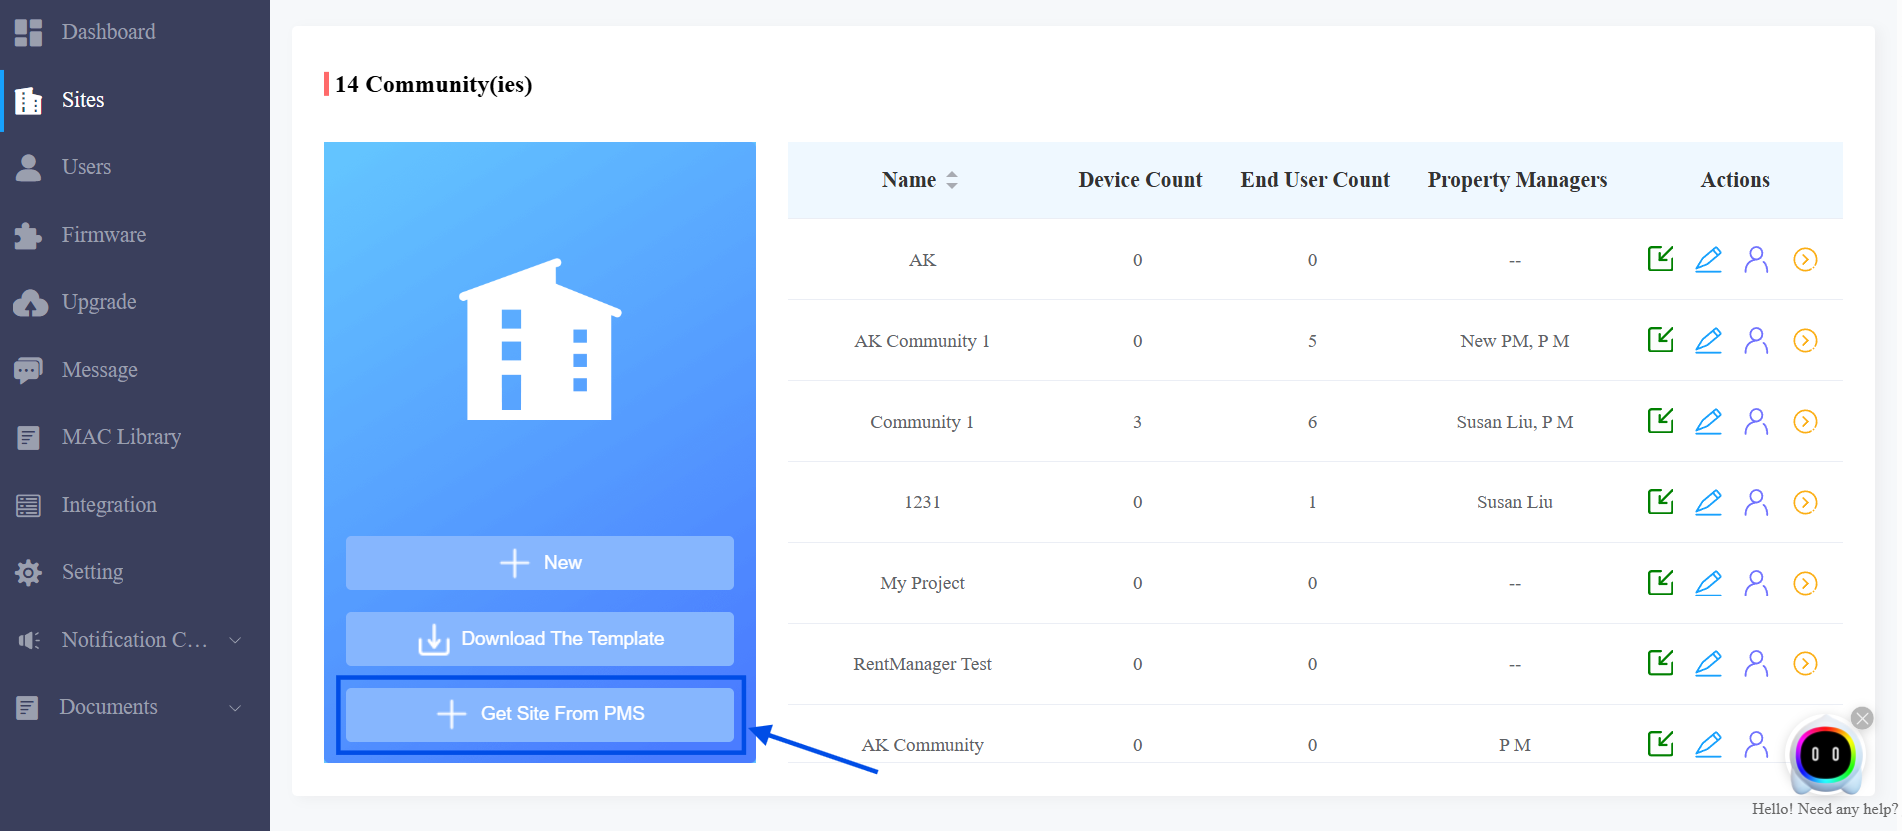
Select Communities on the dashboard.
Click Get Site From PMS.
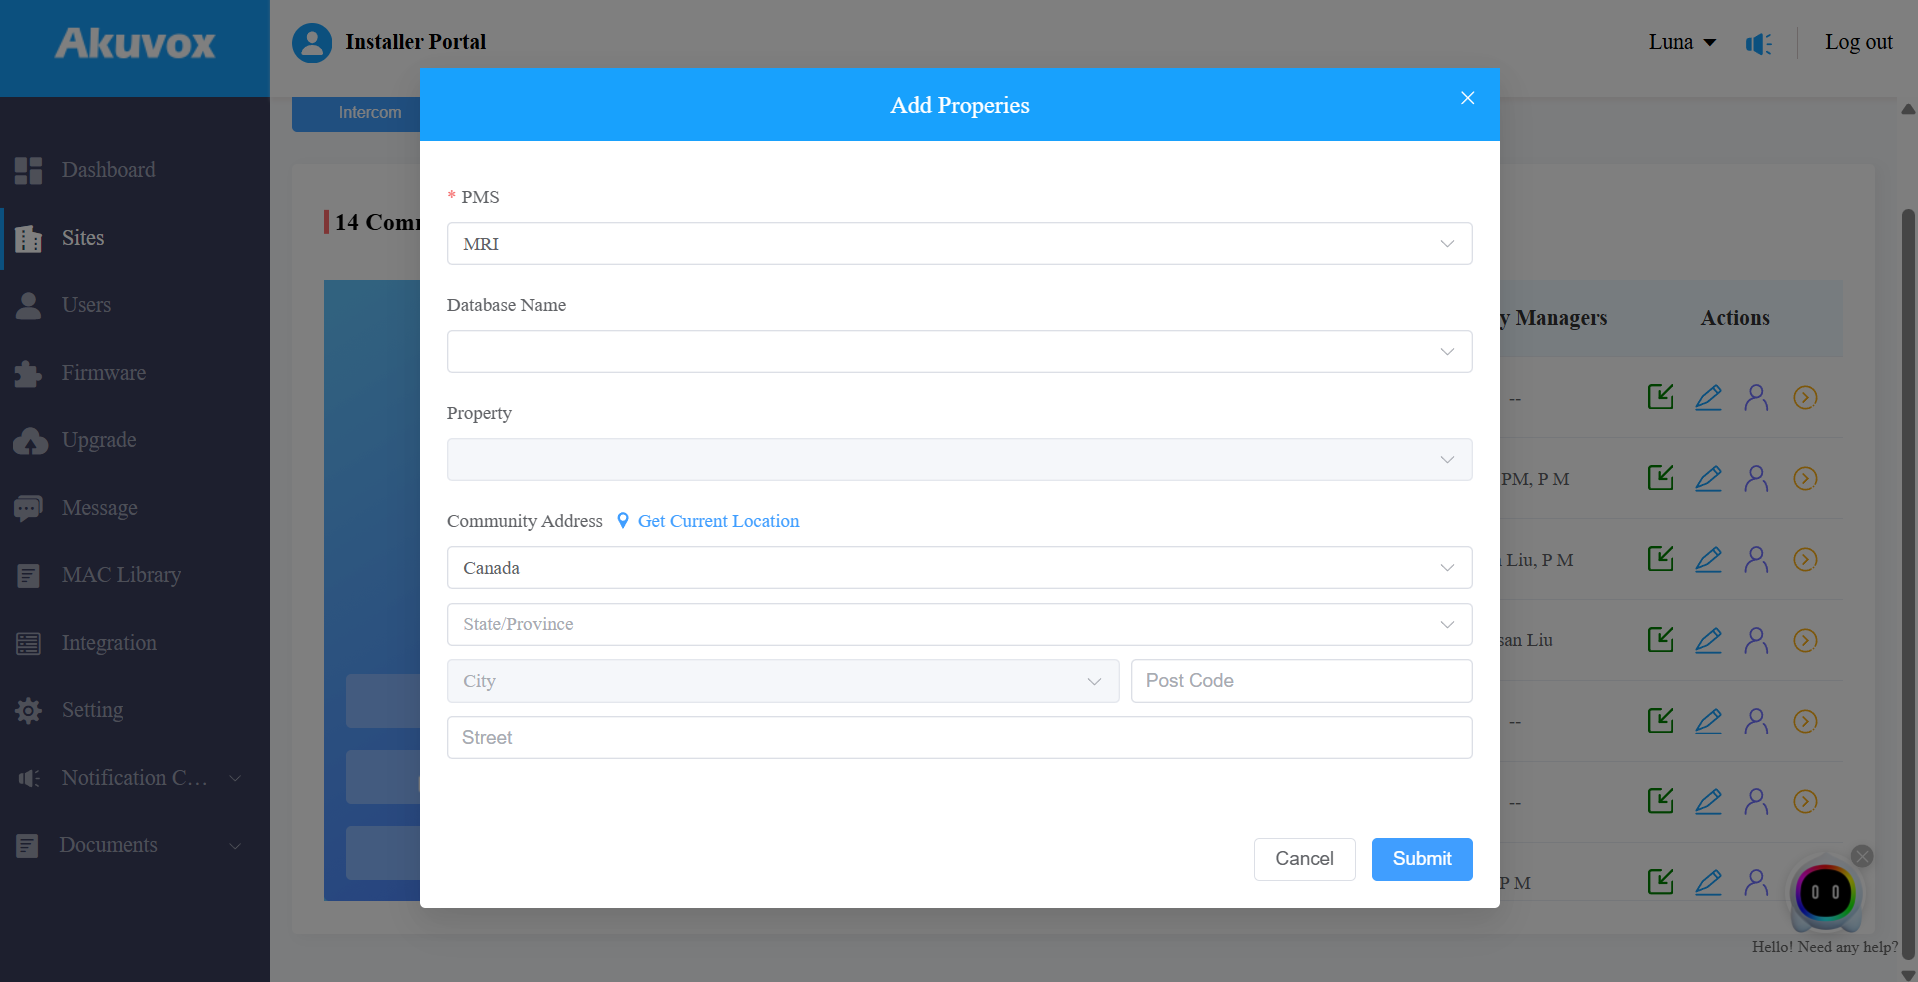
Select MRI.
Select the Database Name.
Select the target property.
The system will then automatically synchronize the MRI property based on predefined mapping rules.
Synchronization Rules
After the project is imported, the system synchronizes MRI data into Akuvox Cloud according to the following rules.
Community & Building Synchronization
The system automatically:
Creates a Community project
Creates Buildings based on the MRI building structure
Creates Apartments (APT) under the corresponding Buildings
Account Synchronization
Based on the relationship between Residents and Units:
One main account is automatically created for each Apartment
Residents with active leases are synchronized as sub-accounts
Residents are synchronized based on:
Last Update TimeIf empty,
ResidentNameIDin descending order
A Resident is considered active when the current date is within: OccupyDate ~ LeaseEnd
Device Deployment and Access Permissions
After synchronization is completed:
The Installer installs devices according to the project layout.
The Property Manager creates permission groups.
The Property Manager assigns permission groups to residents(sub-accounts).