Akuvox devices support the integration with KonNaD mailboxes. When the mail carrier delivers the letter, the door phone receives the message and sends a notification to the resident’s SmartPlus App and/or indoor monitor.
Note
This feature requires devices’ connection to the SmartPlus Cloud.
Compatible models and versions(or higher):
X915V2: 2915.30.10.527
EC33: 33.30.1.18
The tested compatible model is KonNaD A2-DDDC040-DD3.
Changelog
If X915V2’s version is 2915.30.10.532 or higher, it supports the following new feature:
Before You Start
Make sure devices are powered on and networked properly.
The door phone and the mailbox should be on the same local network.
For Installers
Configuration on the SmartPlus Cloud
Log in to the SmartPlus Cloud with your installer account.
Navigate to the desired site by clicking
 on the Site module.
Select the desired building.
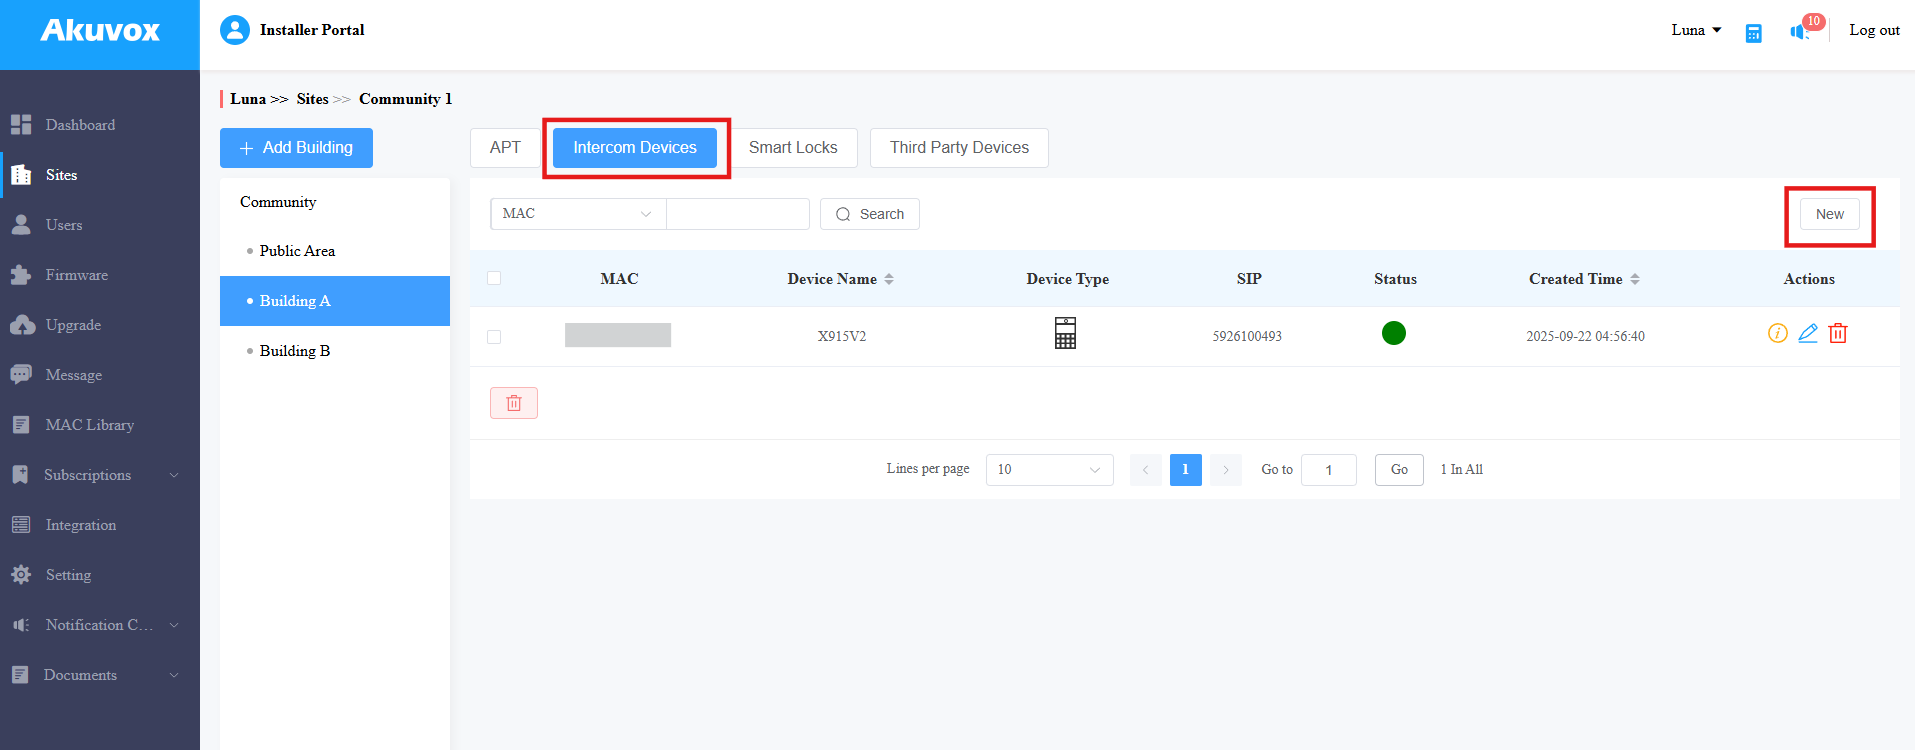
Click Intercom Devices > New to add the door phone.
Fill in the device’s MAC and name.
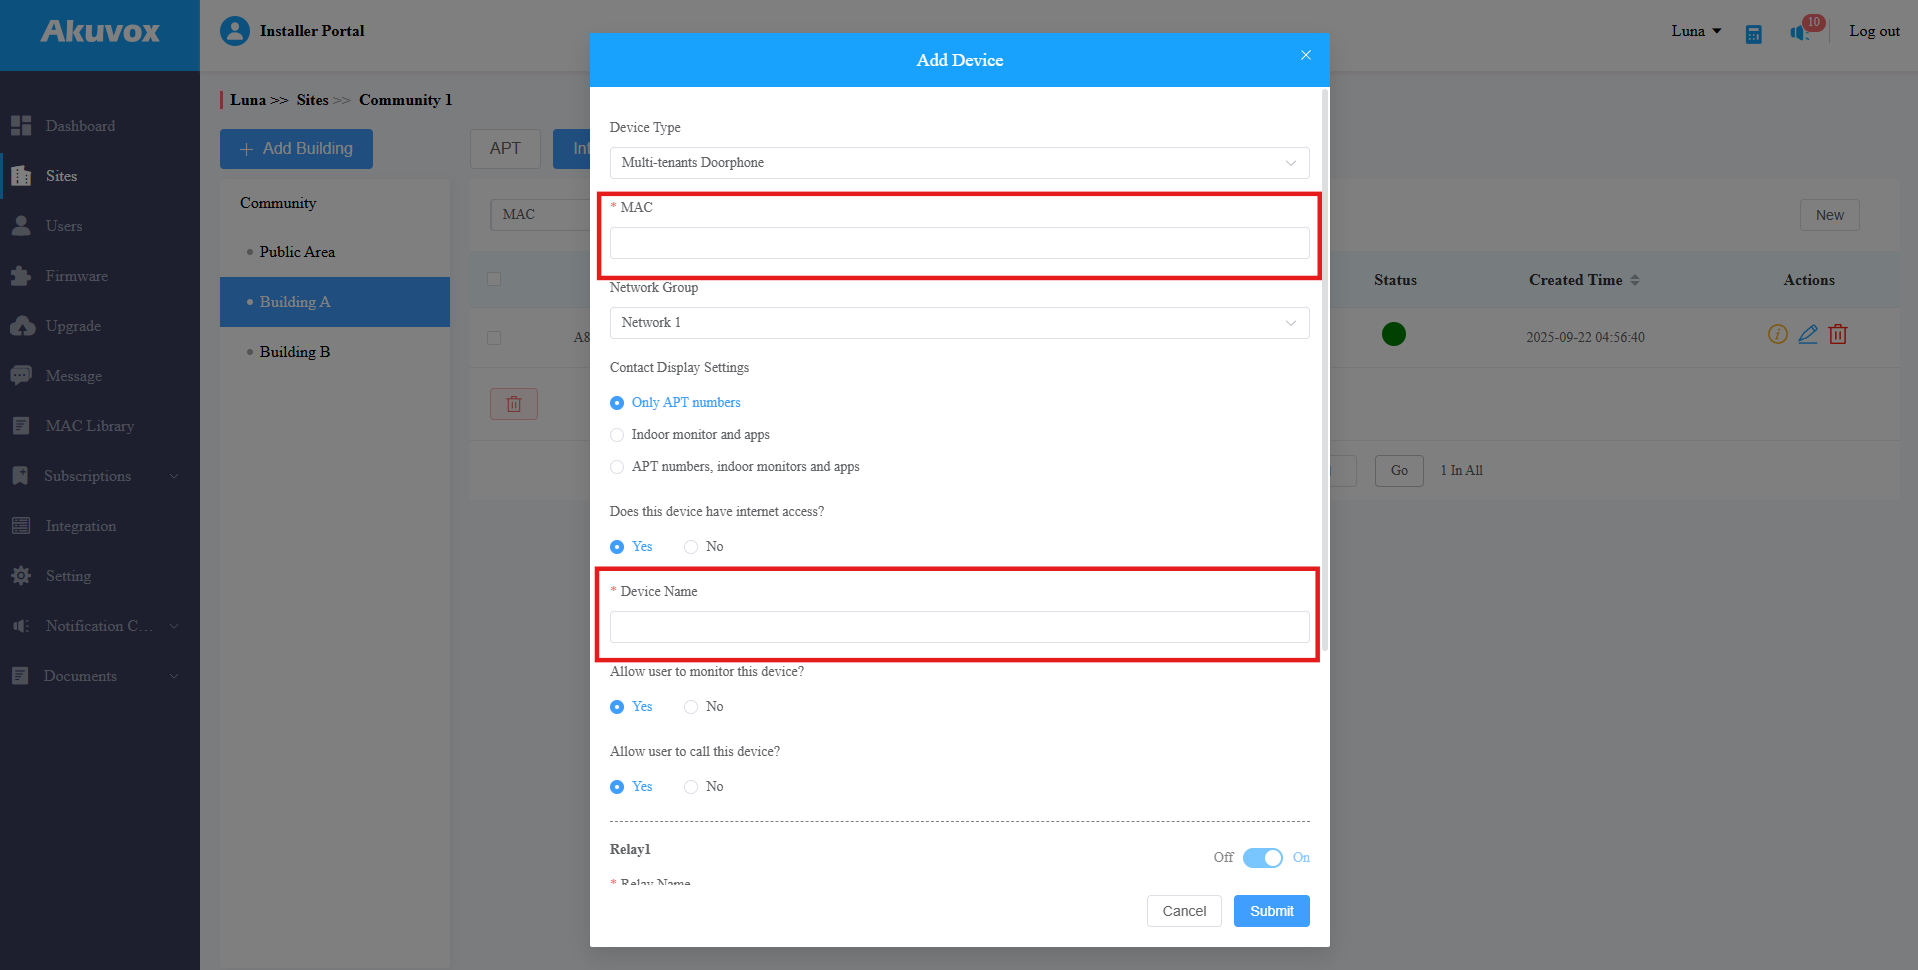
Click Submit.
Tip
Click here to view the explaination of other configuration items.
You may need to reboot the device to bring it online.
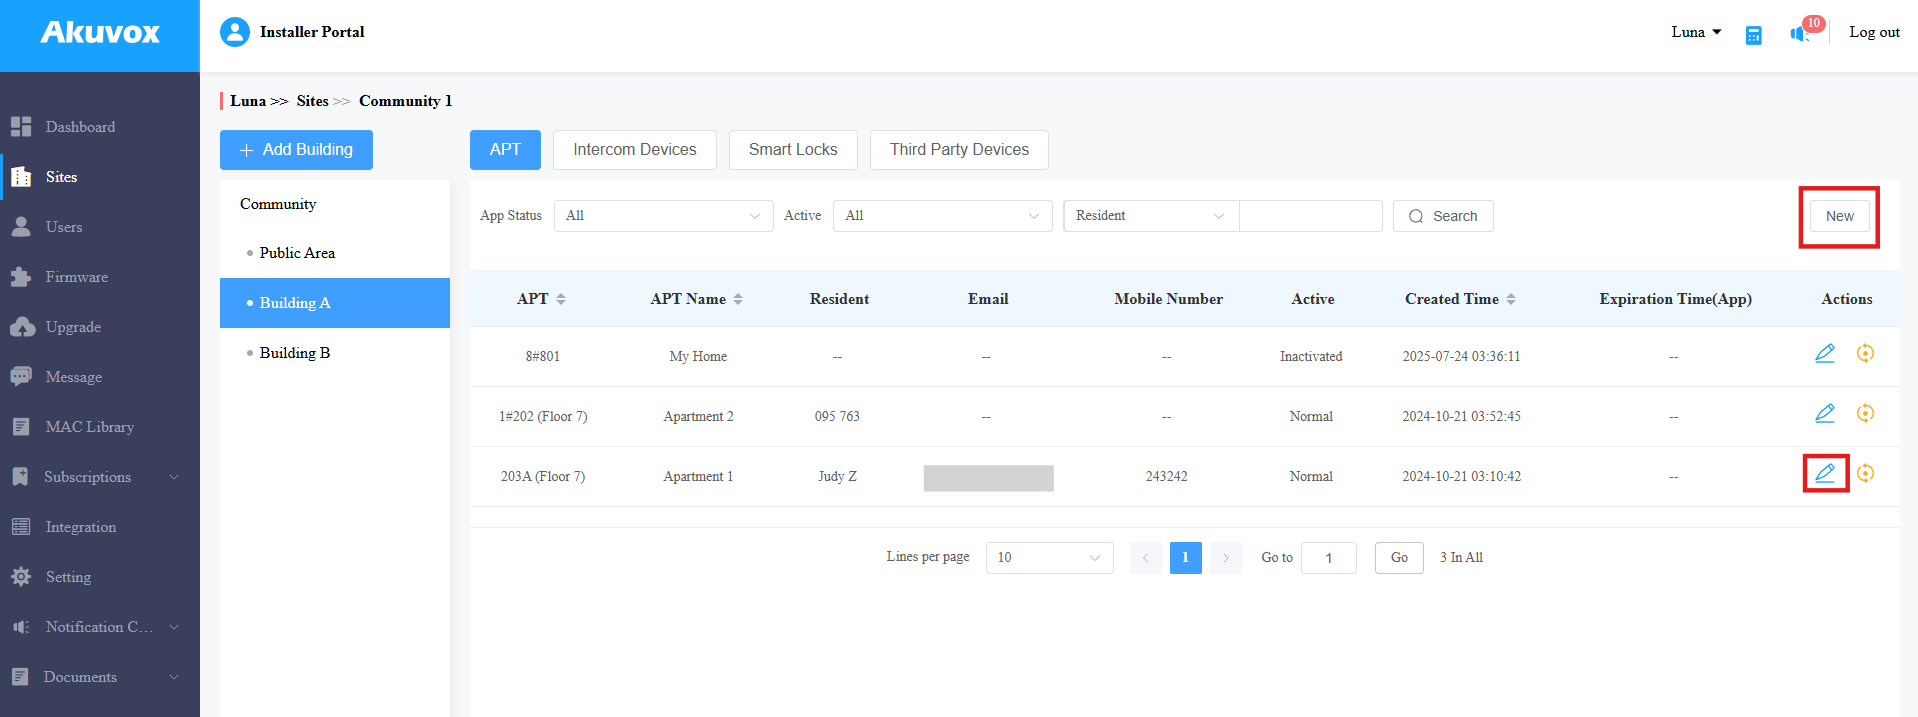
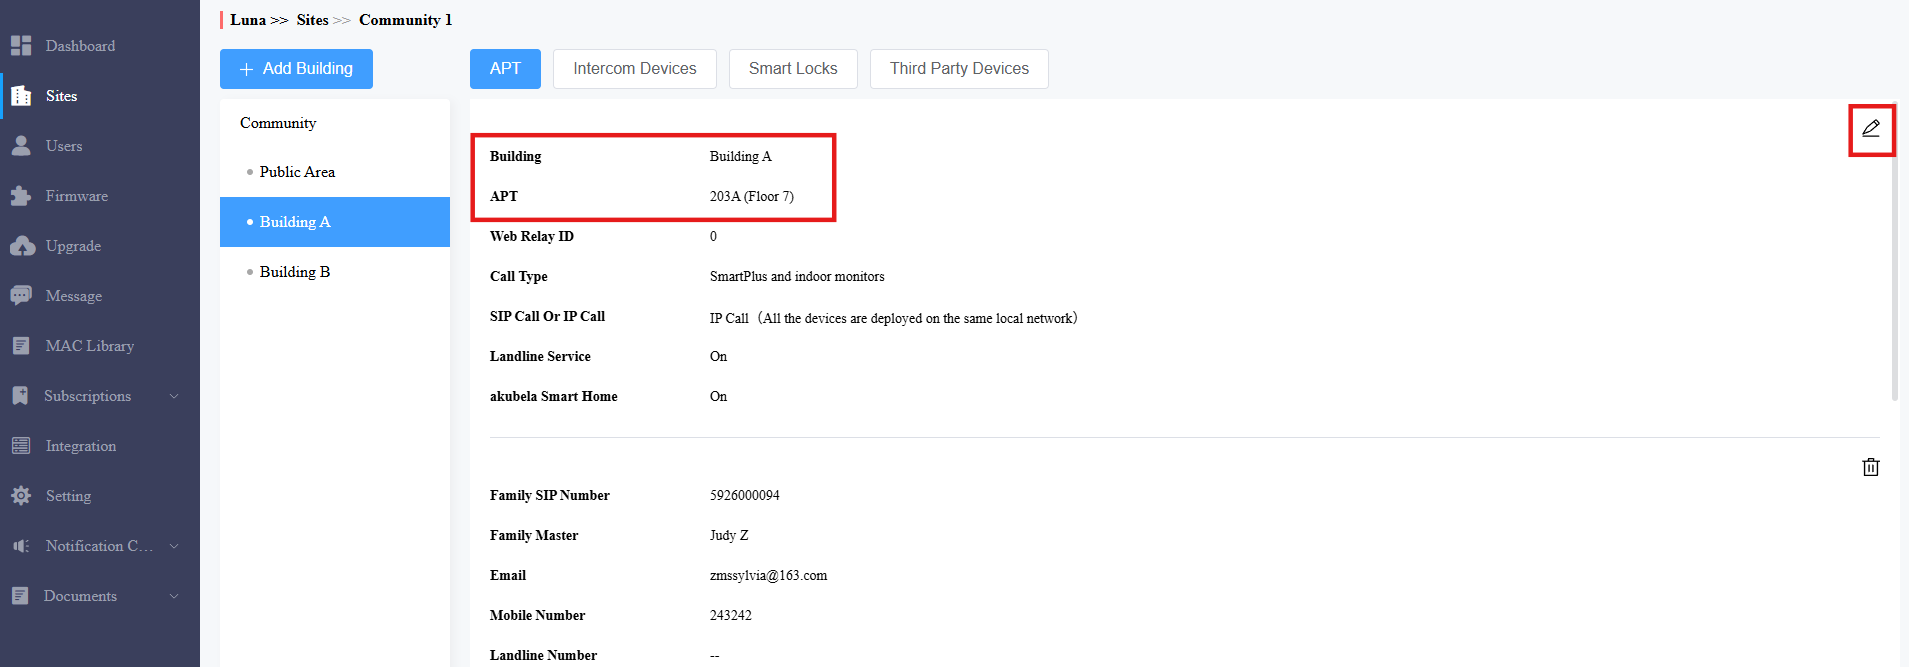
Next, to bind the apartment to the door phone, you need to use the building name and apartment number.
Click New to create a new apartment; click
 to edit an existing one.
The Building and APT information will be used in the door phone’s configuration.
You can click
 to change it.
Set up the Door Phone
Use the device IP(scanned by IP Scanner) to log in to its web interface. The initial username and password are admin.
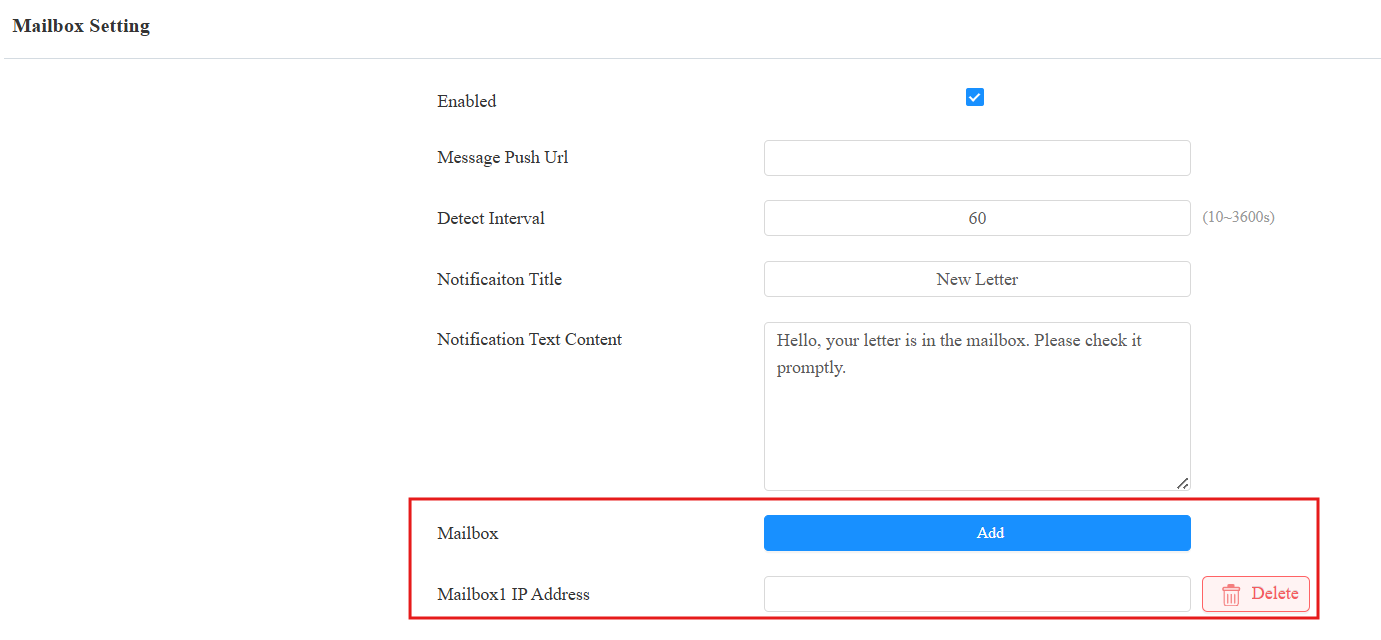
Go to Device > Mailbox.
Ensure the feature is enabled.
[Optional] Set the Message Push URL. When mails arrive, push messages through this URL; the message is a POST request that supports both HTTP and HTTPS.
Set the Detect Interval, which defines the interval for the door phone to detect the mailbox. The default is 60 seconds.
Customize the Notification Title and Text Content displayed on the SmartPlus App and indoor monitor.
Click Add to input the mailbox’s IP address. You can add up to 5 mailboxes.
The Mailbox Status will change to Connected when the door phone detects it.
Specify which DI to trigger when the mail is delivered.
Note
The DI number is marked on the third-party hardware being tested. Please select the DI to be triggered based on the actual wiring.
Fill in the Building Name#APT Number where the resident lives in the target DI field. For example, Building A#203.
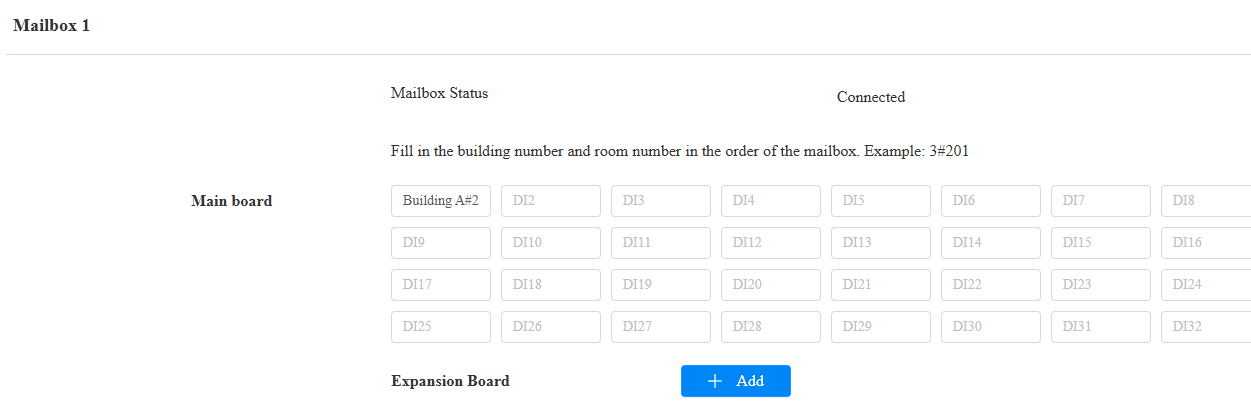
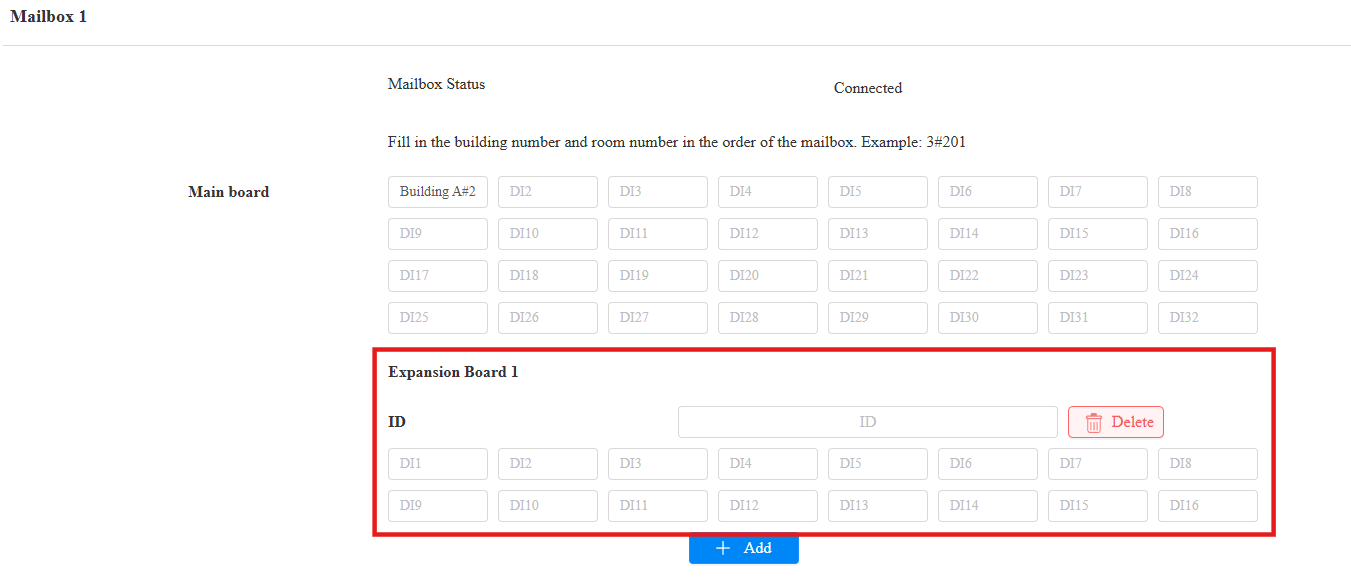
Additionally, if the mailbox’s mainboard is connected to an expansion board, click +Add to configure it.
You can add up to 16 expansion boards for one mainboard.
Enter the expansion board’s ID and fill in the Building Name#APT Number in the desired DI field.
Note
To confirm or customize the expansion board’s ID, please refer to the third-party device’s manual.
Click Submit.
For End Users
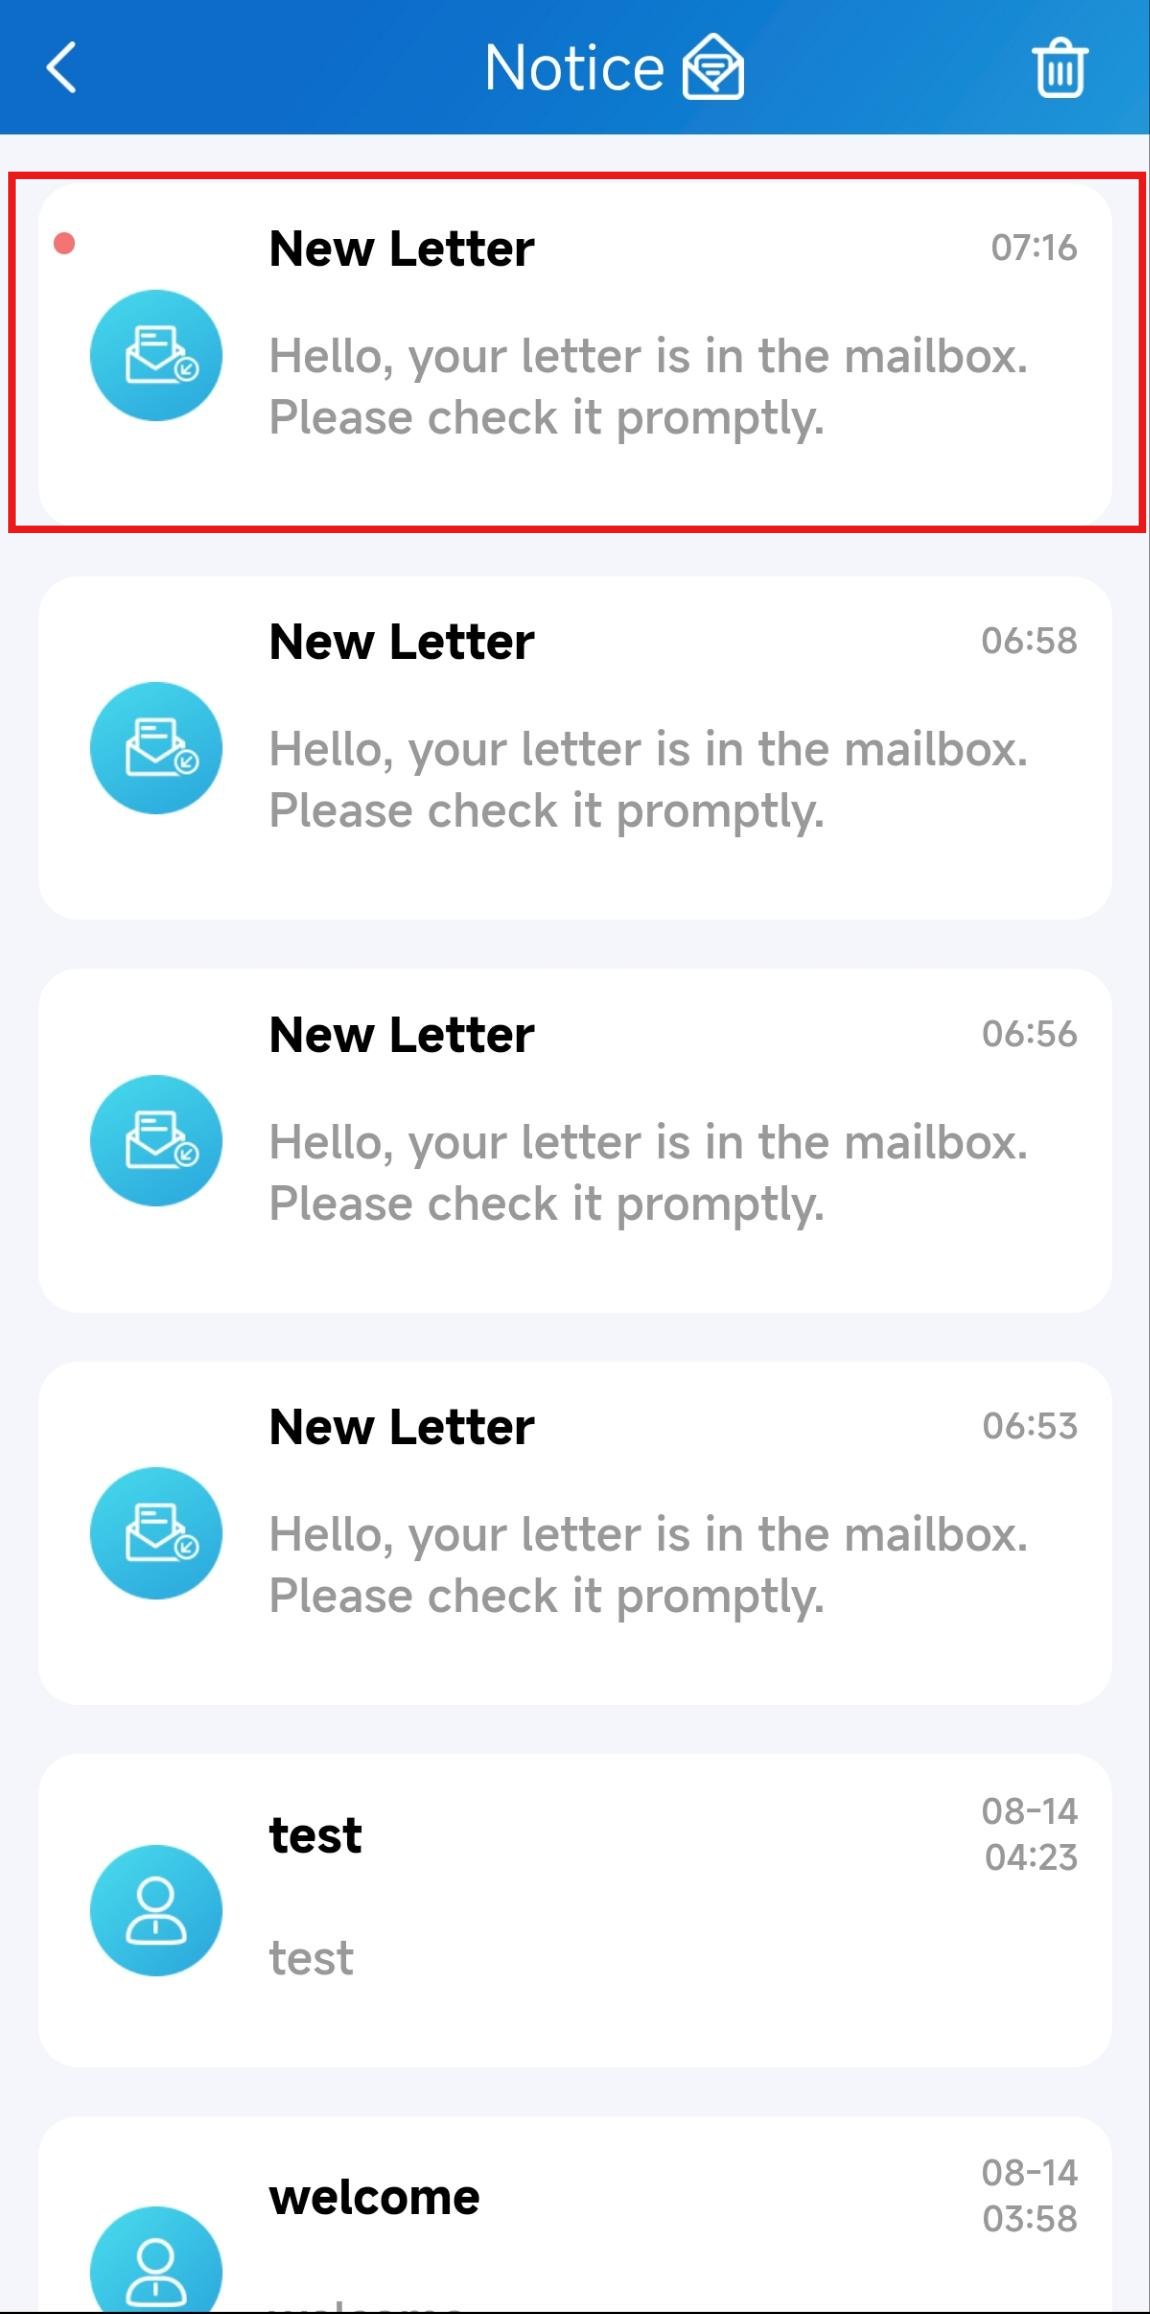
The SmartPlus App and indoor monitors will push notifications when your letters arrive.
Note
The SmartPlus App’s version should be 7.20.0006(Android)/7.20.5(iOS) or higher.
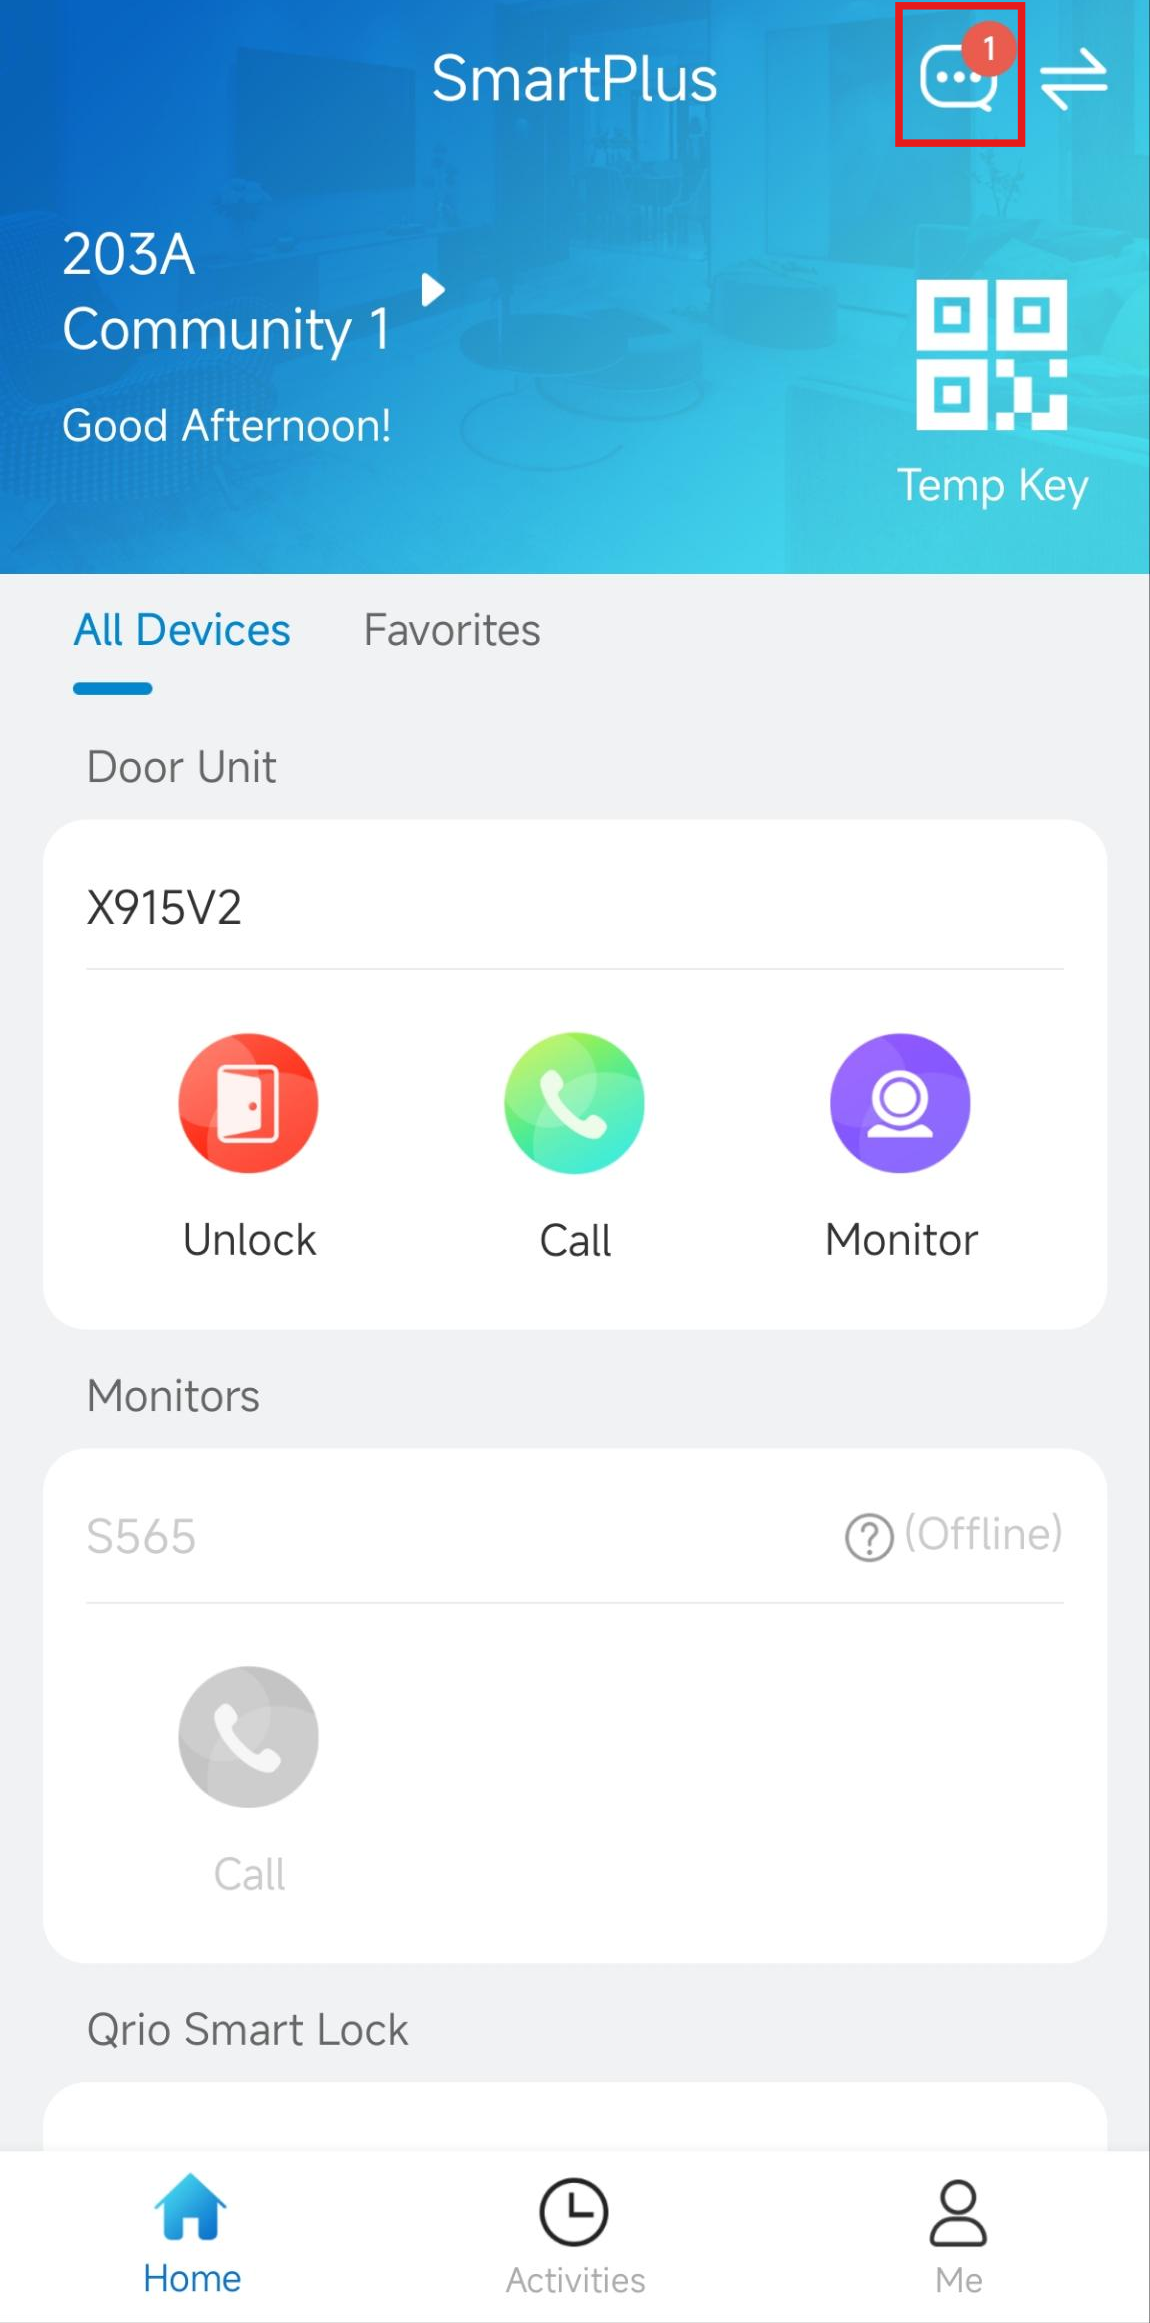
On the SmartPlus App
Tap the message icon to check the message content.
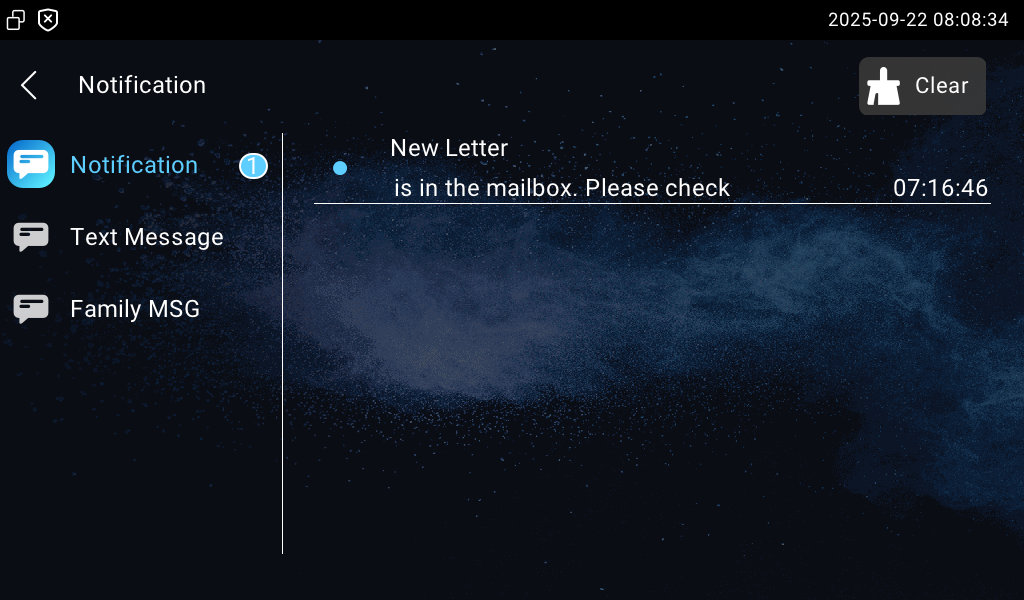
On the Indoor Monitor
Tap Message on the home screen to check the content.