Infrared LED Setting
Infrared LED is mainly designed to reinforce the light at night or in a dark environment.
On the Web
To set it up, go to the Device > Light interface.

Mode:
Auto: Turn on the infrared LED automatically based on the minimum and maximum photoresistor value.
Always On: Enable the infrared LED.
Always Off: Disable the infrared LED.
Schedule: Turn on the infrared LED based on the schedule. Specify the Start Time and End Time when this option is selected.
Threshold: The current light intensity indicated by the photo-resistor value. Click Obtain to display the value. The photoresistor values inversely relate to light intensity: higher values indicate lower light and lower values indicate higher light.
Photoresistor Setting: Set the minimum and maximum photoresistor value to automatically control the ON-OFF of the LED fill light. If the photoresistor value is less than the minimum threshold, turn off the fill light. If the photoresistor value is greater than the maximum threshold, turn on the fill light.
On the Device
Set up the infrared LED setting on the Setting > LED screen.
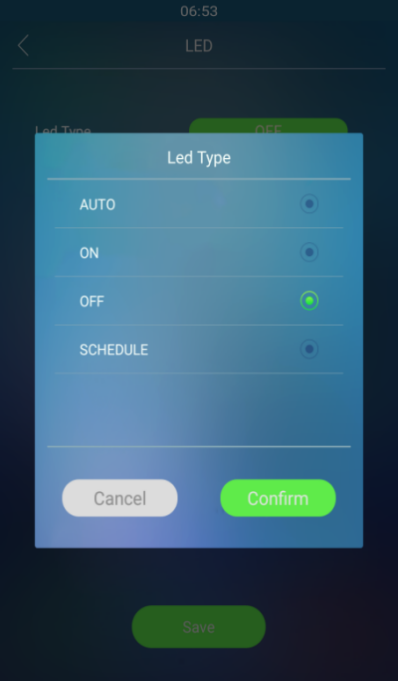
LED Type:
Auto: Turn on the infrared LED automatically based on the minimum and maximum photoresistor value.
On: Enable the infrared LED.
Off: Disable the infrared LED.
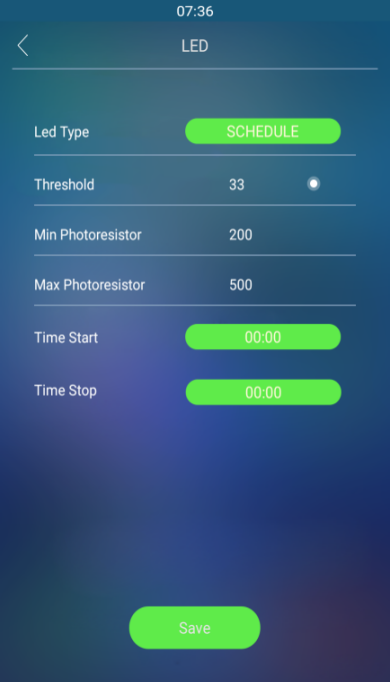
Schedule: Turn on the infrared LED based on the schedule. Specify the Start Time and End Time when this option is selected.
Threshold: The current light intensity indicated by the photo-resistor value. The higher photo-resistor values correspond conversely to the lower light intensity and vice versa. The default photo-resistor value (Threshold) is 33. You can tap the icon
 several times to obtain the actual photo-resistor value in a specific environment (the value fluctuation is about 5), and the value is the basis of configuring the minimum and maximum photo-resistor values.
Min/Max Photoresistor: Set the minimum and maximum photoresistor value to automatically control the ON-OFF of the LED fill light. The default value is 200 and 500. If the photoresistor value is less than the minimum threshold, turn off the fill light. If the photoresistor value is greater than the maximum threshold, turn on the fill light.
Card Reader LED Control
You can enable or disable the LED lighting on the card reader area. You can also set a specific time to turn on the light.
Set it up on the Device > Light > LED Control interface.

Time (H): Enter the time for the LED lighting to be valid, e.g., if the time is set from 8-0 (Start time- End time), it means the LED light will stay on during the time from 8:00 am to 12:00 pm during one day (24 hours).
Screen Backlight Brightness
You can set up the backlight brightness so that users can better see the screen in an environment with high or low light intensity.
Set it up on the Device > Light > LCD interface.

High Contrast: Enable High Contrast to enhance the visibility of icons and texts on the screen.
Backlight Mode:
Manual: Set the backlight brightness value manually.
Auto: The screen backlight brightness will be adjusted automatically.
Note
The backlight brightness has two automatic modes, Day and Night. They are determined by the photoresistor.
If the current value is between the minimum and maximum photoresistor, the device is in Day mode.
If the current value is higher than the maximum photoresistor, the device is in Night mode.
Backlight Brightness (Day): Select the brightness value from 0-255. The default value is 200. The larger the value, the brighter the screen.
Backlight Brightness Of Screen Saver (Day): Adjust the backlight for the screensaver in the daytime with the value ranging from 0-255.
Backlight Brightness (Night): Select the brightness value from 0-255. The default value is 200. The larger the value, the brighter the screen.
Backlight Brightness Of Screen Saver (Night): Adjust the backlight for the screensaver in the nighttime with the value ranging from 0-255.
LED White Light
White light LED is mainly used to reinforce the lighting for the QR code access and for the greater visibility of the visitors when seeing their images from indoors in a dark environment.
Set it up on the web Device > Light > White Light interface.

Limit Backlight Value: Set the white light value from 0-255. The default is 50.
White Light PWM Value: Set the white light PWM value from 20-100. PWM value affects the white light brightness that is set with the same white light value. For example, if the white light value remains the same, and you bring up the PWM value, you will get brighter white light. In short, the higher the PMW value is, the brighter the light is.