The device can be connected to the Akuvox lift controller for the lift control. Users can summon the lift to go down to the ground floor when they are granted access through various types of access methods on the device.
Click here to watch a demonstration video of configuring the lift control feature.
To set it up, go to the Intercom > Lift Control interface.

Lift Control List: Select the lift controller brand.
None: The integration will be disabled.
Chiyu: Integrate with the Chiyu lift controller.
KeyKing: Integrate with the KeyKing lift controller.
Akuvox EC32: Connect the device with the Akuvox EC33 lift controller.
ZKT: Integrate with the ZKTeco lift controller.
Akuvox Lift Controller
After selecting Akuvox EC32 in the Lift Control List, you need to set up relevant parameters.
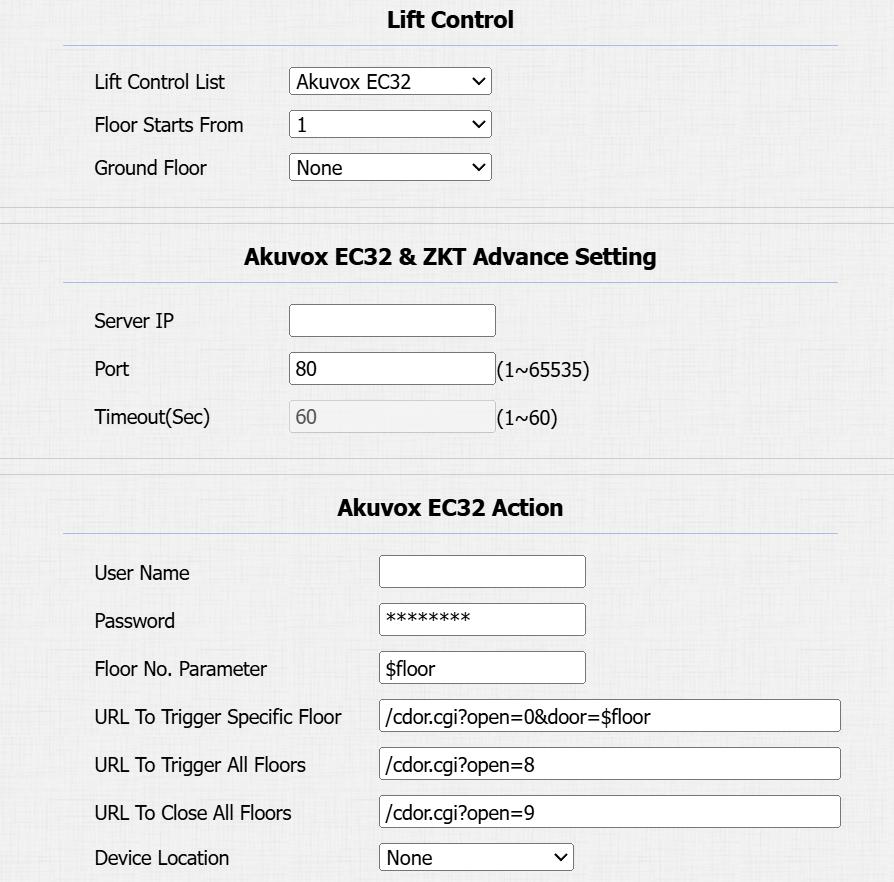
Floor Starts From: Set the floor from which the floor count starts. For example, if you select -3, then the 3rd floor in the basement will be considered as the first floor, matched with relay#1 (first floor).
Ground Floor: If there are ground floors between the -1 and 1 floors, configure this option.
Server IP: Enter the IP address of the Akuvox lift controller.
Port: Enter the port of the Akuvox lift controller.
Timeout(Sec): Decide the time limit within which users should press the lift button of their desired floors.
User Name: Enter the user name set in the lift controller.
Password: Enter the password set in the lift controller.
Floor NO. Parameter: The floor number parameter is provided by Akuvox. The default is $floor. You can define your parameter string.
URL To Trigger Specific Floor: The Akuvox lift control URL for triggering a specific floor. The URL is /cdor.cgi?open=0&door=$floor, but the string $floor at the end must be identical to the parameter string you defined.
URL To Trigger All Floors: The Akuvox URL for triggering all floors.
URL To Close All Floors: The Akuvox URL for closing all floors.
KeyKing Lift Controller
After selecting KeyKing, you need to set the KeyKing address.
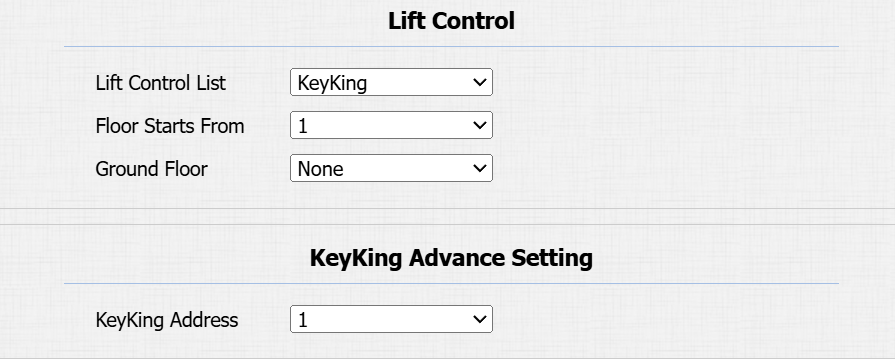
Floor Starts From: Set the floor from which the floor count starts. For example, if you select -3, then the 3rd floor in the basement will be considered as the first floor, matched with relay#1 (first floor).
Ground Floor: If there are ground floors between the -1 and 1 floors, configure this option.
KeyKing Address: Select the number from 0 to 126. The binary number converted from the address number corresponds to the dip switch on the lift board. For example, if you select 5, set the dip switch to 101000.
ZKT Lift Controller
After selecting ZKT, you need to set up relevant parameters.
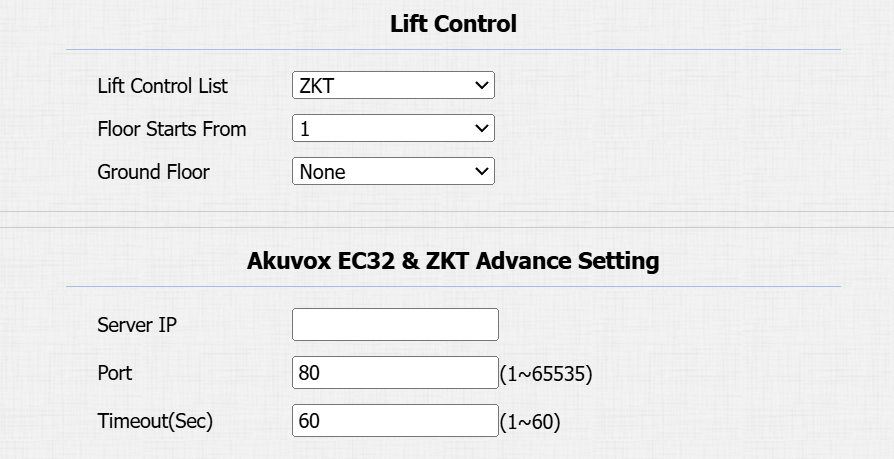
Floor Starts From: Set the floor from which the floor count starts. For example, if you select -3, then the 3rd floor in the basement will be considered as the first floor, matched with relay#1 (first floor).
Ground Floor: If there are ground floors between the -1 and 1 floors, configure this option.
Server IP: Enter the IP address of the controller server.
Port: Enter the port of the controller server.
Timeout(Sec): Decide the time limit within which users should press the lift button of their desired floors.